Frequently Asked Questions
Login
How can I log in to the portal (DreamID)?
You can log in to the portal with your DreamID. After logging in, you will have access to the tools and features to support your work.
The tasks available to you depend on the permissions assigned to your Advisor role. These permissions determine what information you can view and what actions you can perform.
Before you log in to the portal, make sure that your Advisor account is registered and you have received an email with joining instructions from DreamApply.
To log in to the portal:
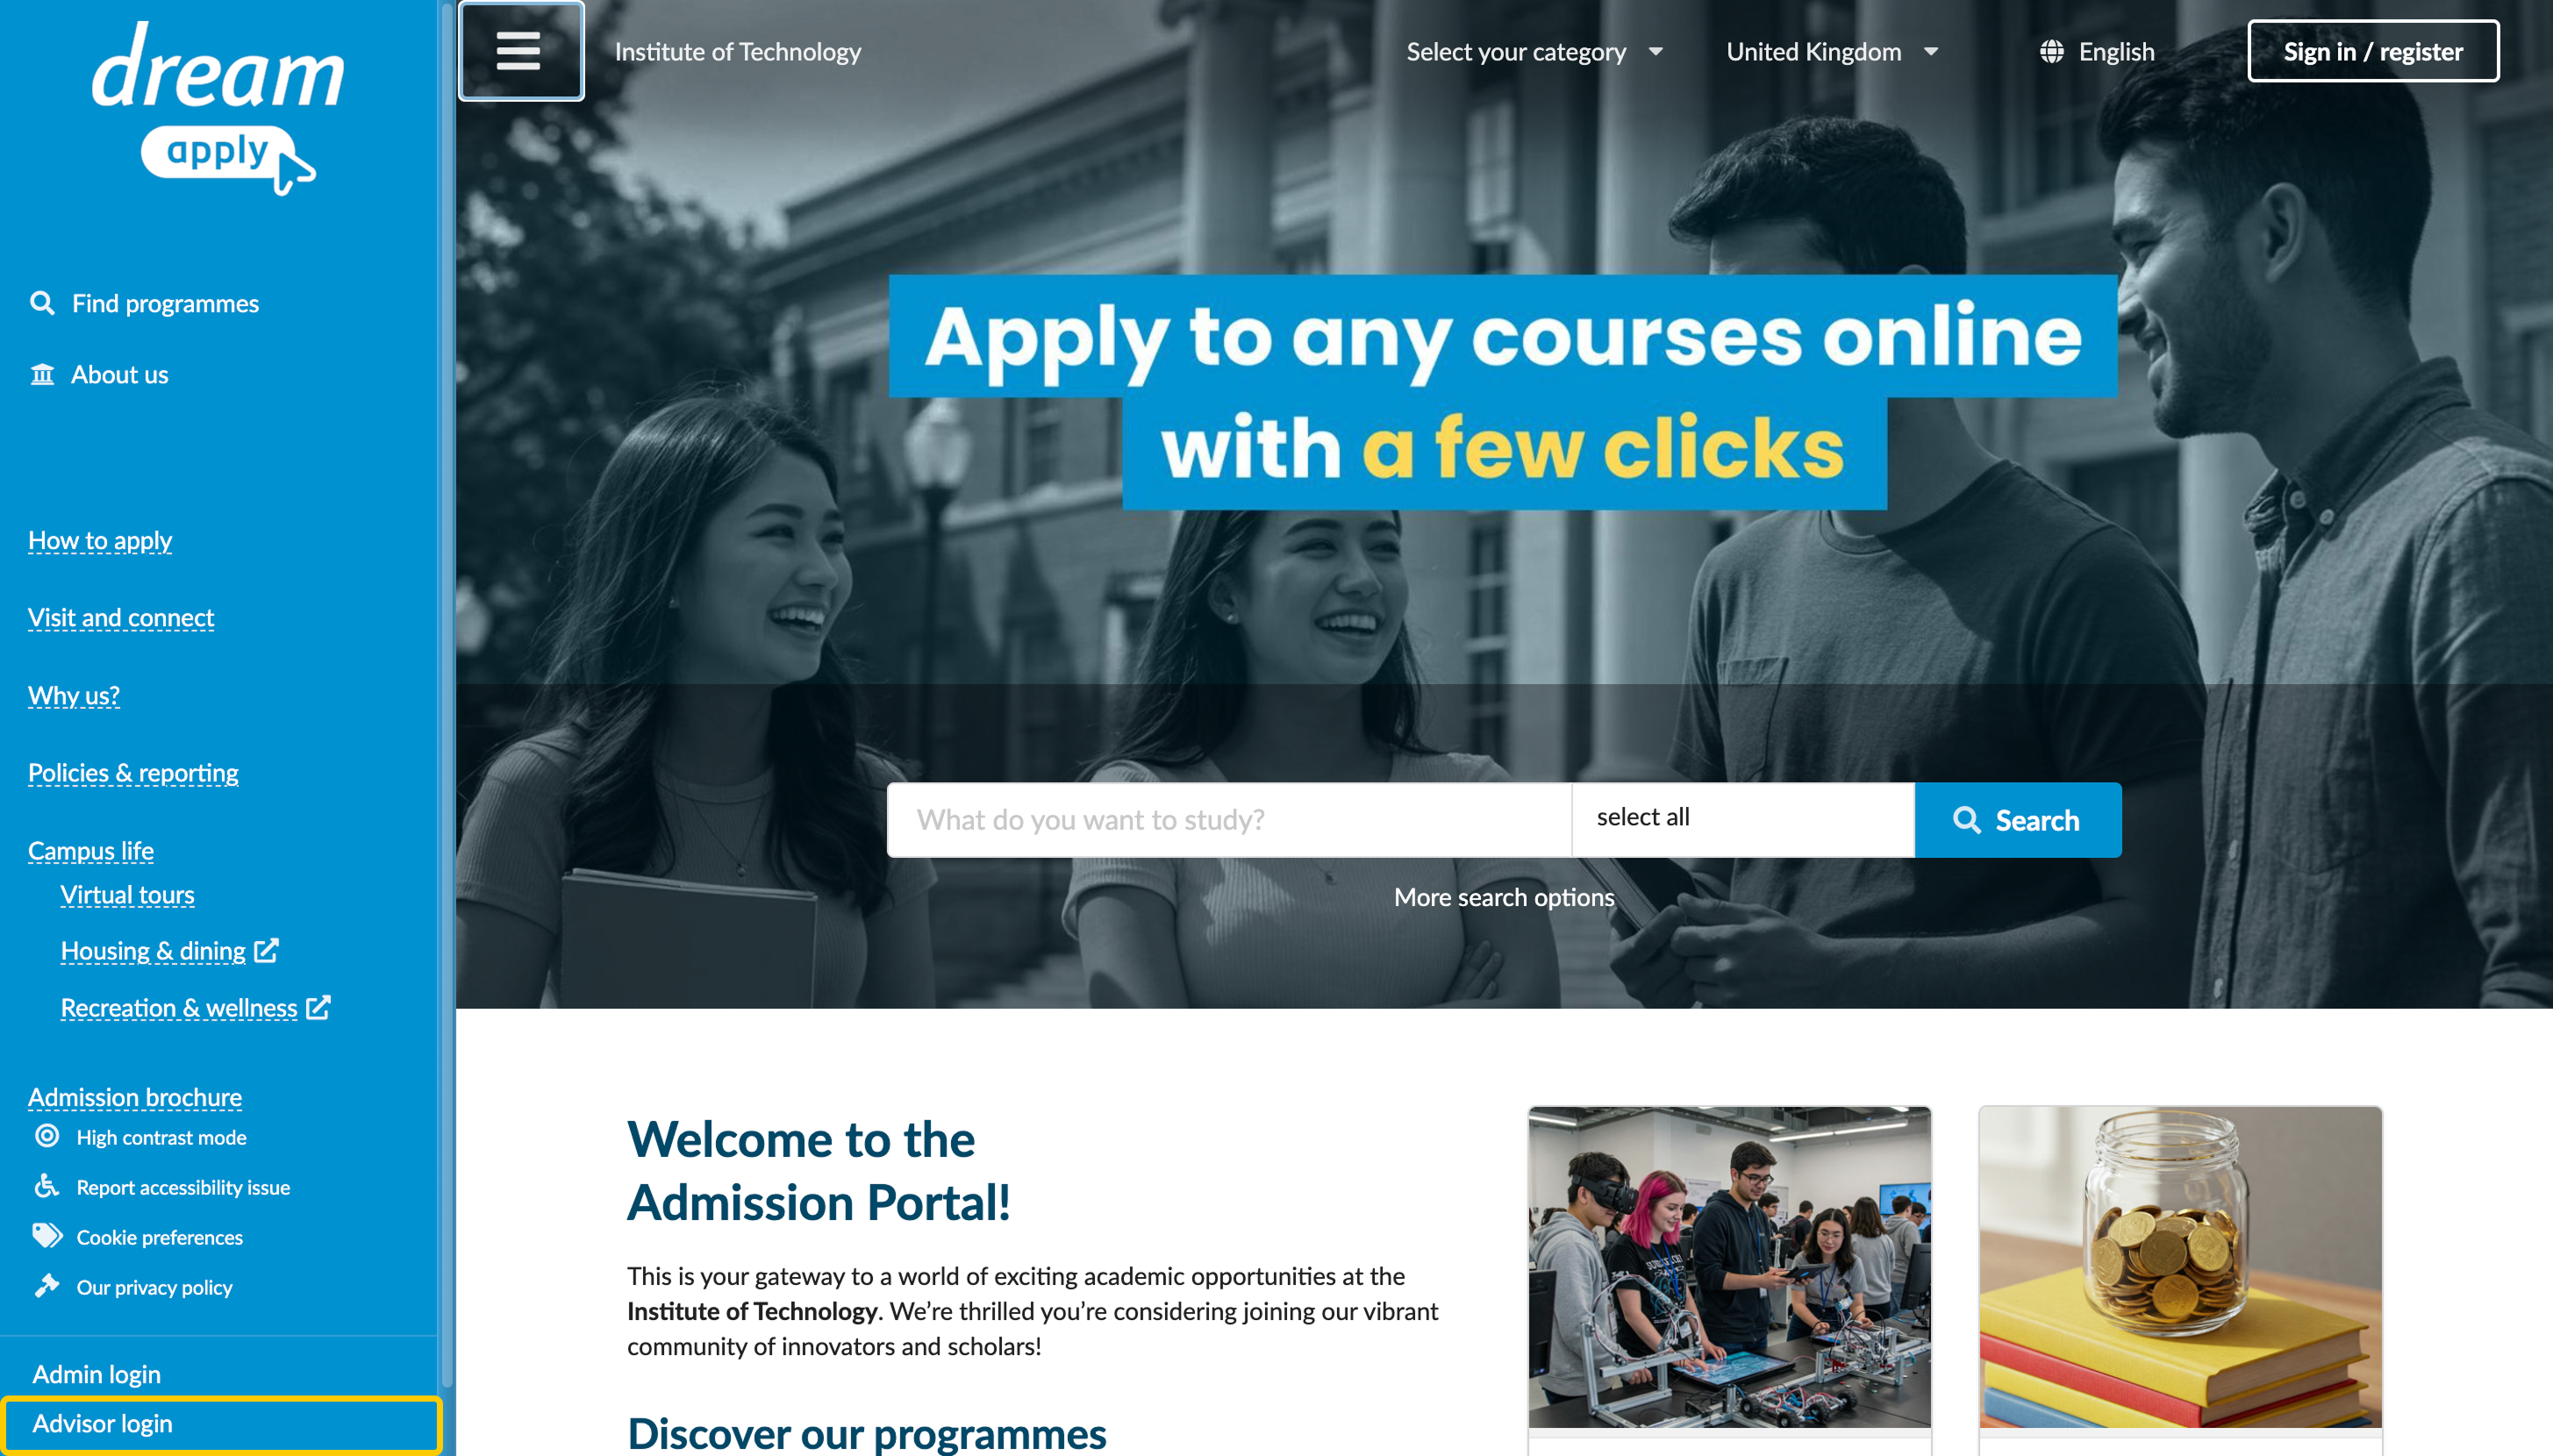
- In the bottom left corner of the portal, click Advisor login.
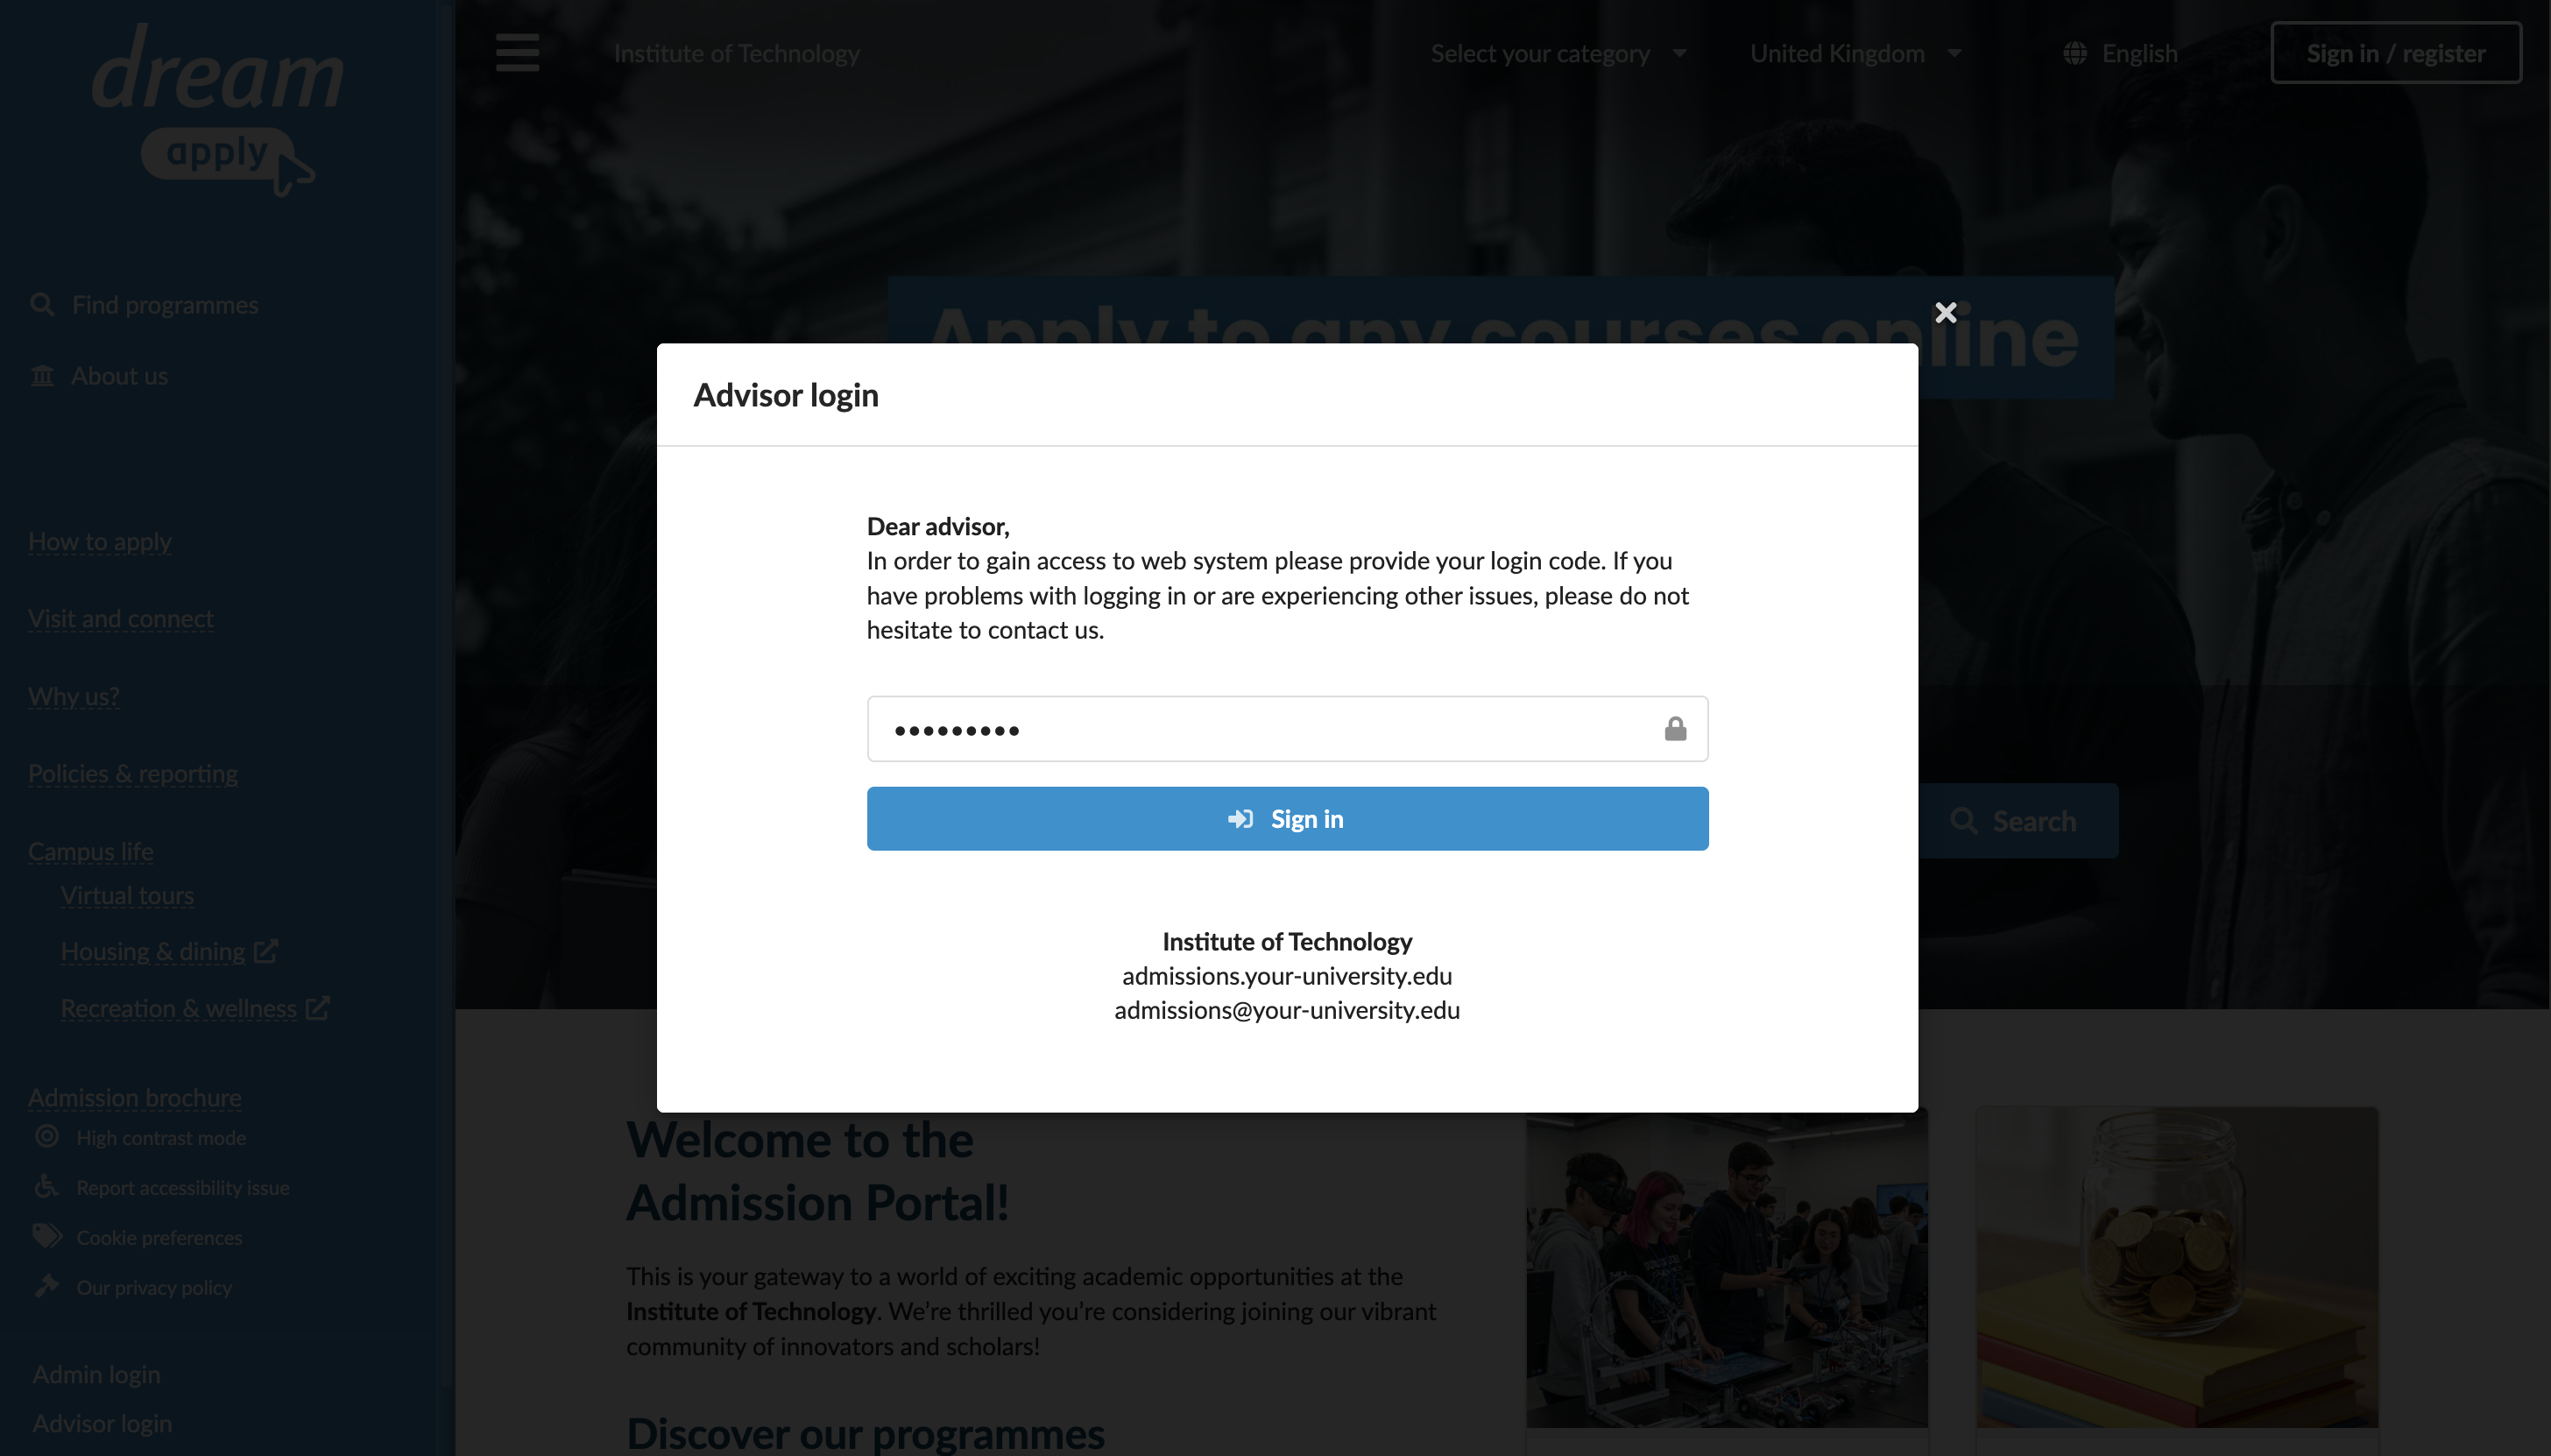
- Enter your email address and follow the instructions to finalize your account setup and gain access to the portal.
How can I log in to the portal (legacy code access)?
You can log in to the portal with your Advisor self-service code. After logging in, you will have access to the tools and features to support your work.
The tasks available to you depend on the permissions assigned to your Advisor role. These permissions determine what information you can view and what actions you can perform.
Before you log in to the portal, make sure that your Advisor account is registered and you have your Advisor self-service code.
To log in to the portal:
- In the bottom left corner of the portal, click Advisor login.
- Enter your Advisor self-service code and click Sign in.
Applicant accounts
How can I register a new applicant?
As an Advisor, you can register new applicant accounts in the portal. Use this feature to set up accounts for applicants who need assistance and cannot complete the registration themselves.
To register an applicant, your Advisor account must have the Ability to manage applications, offers, tasks permission level or the Ability to register new applicants option enabled.
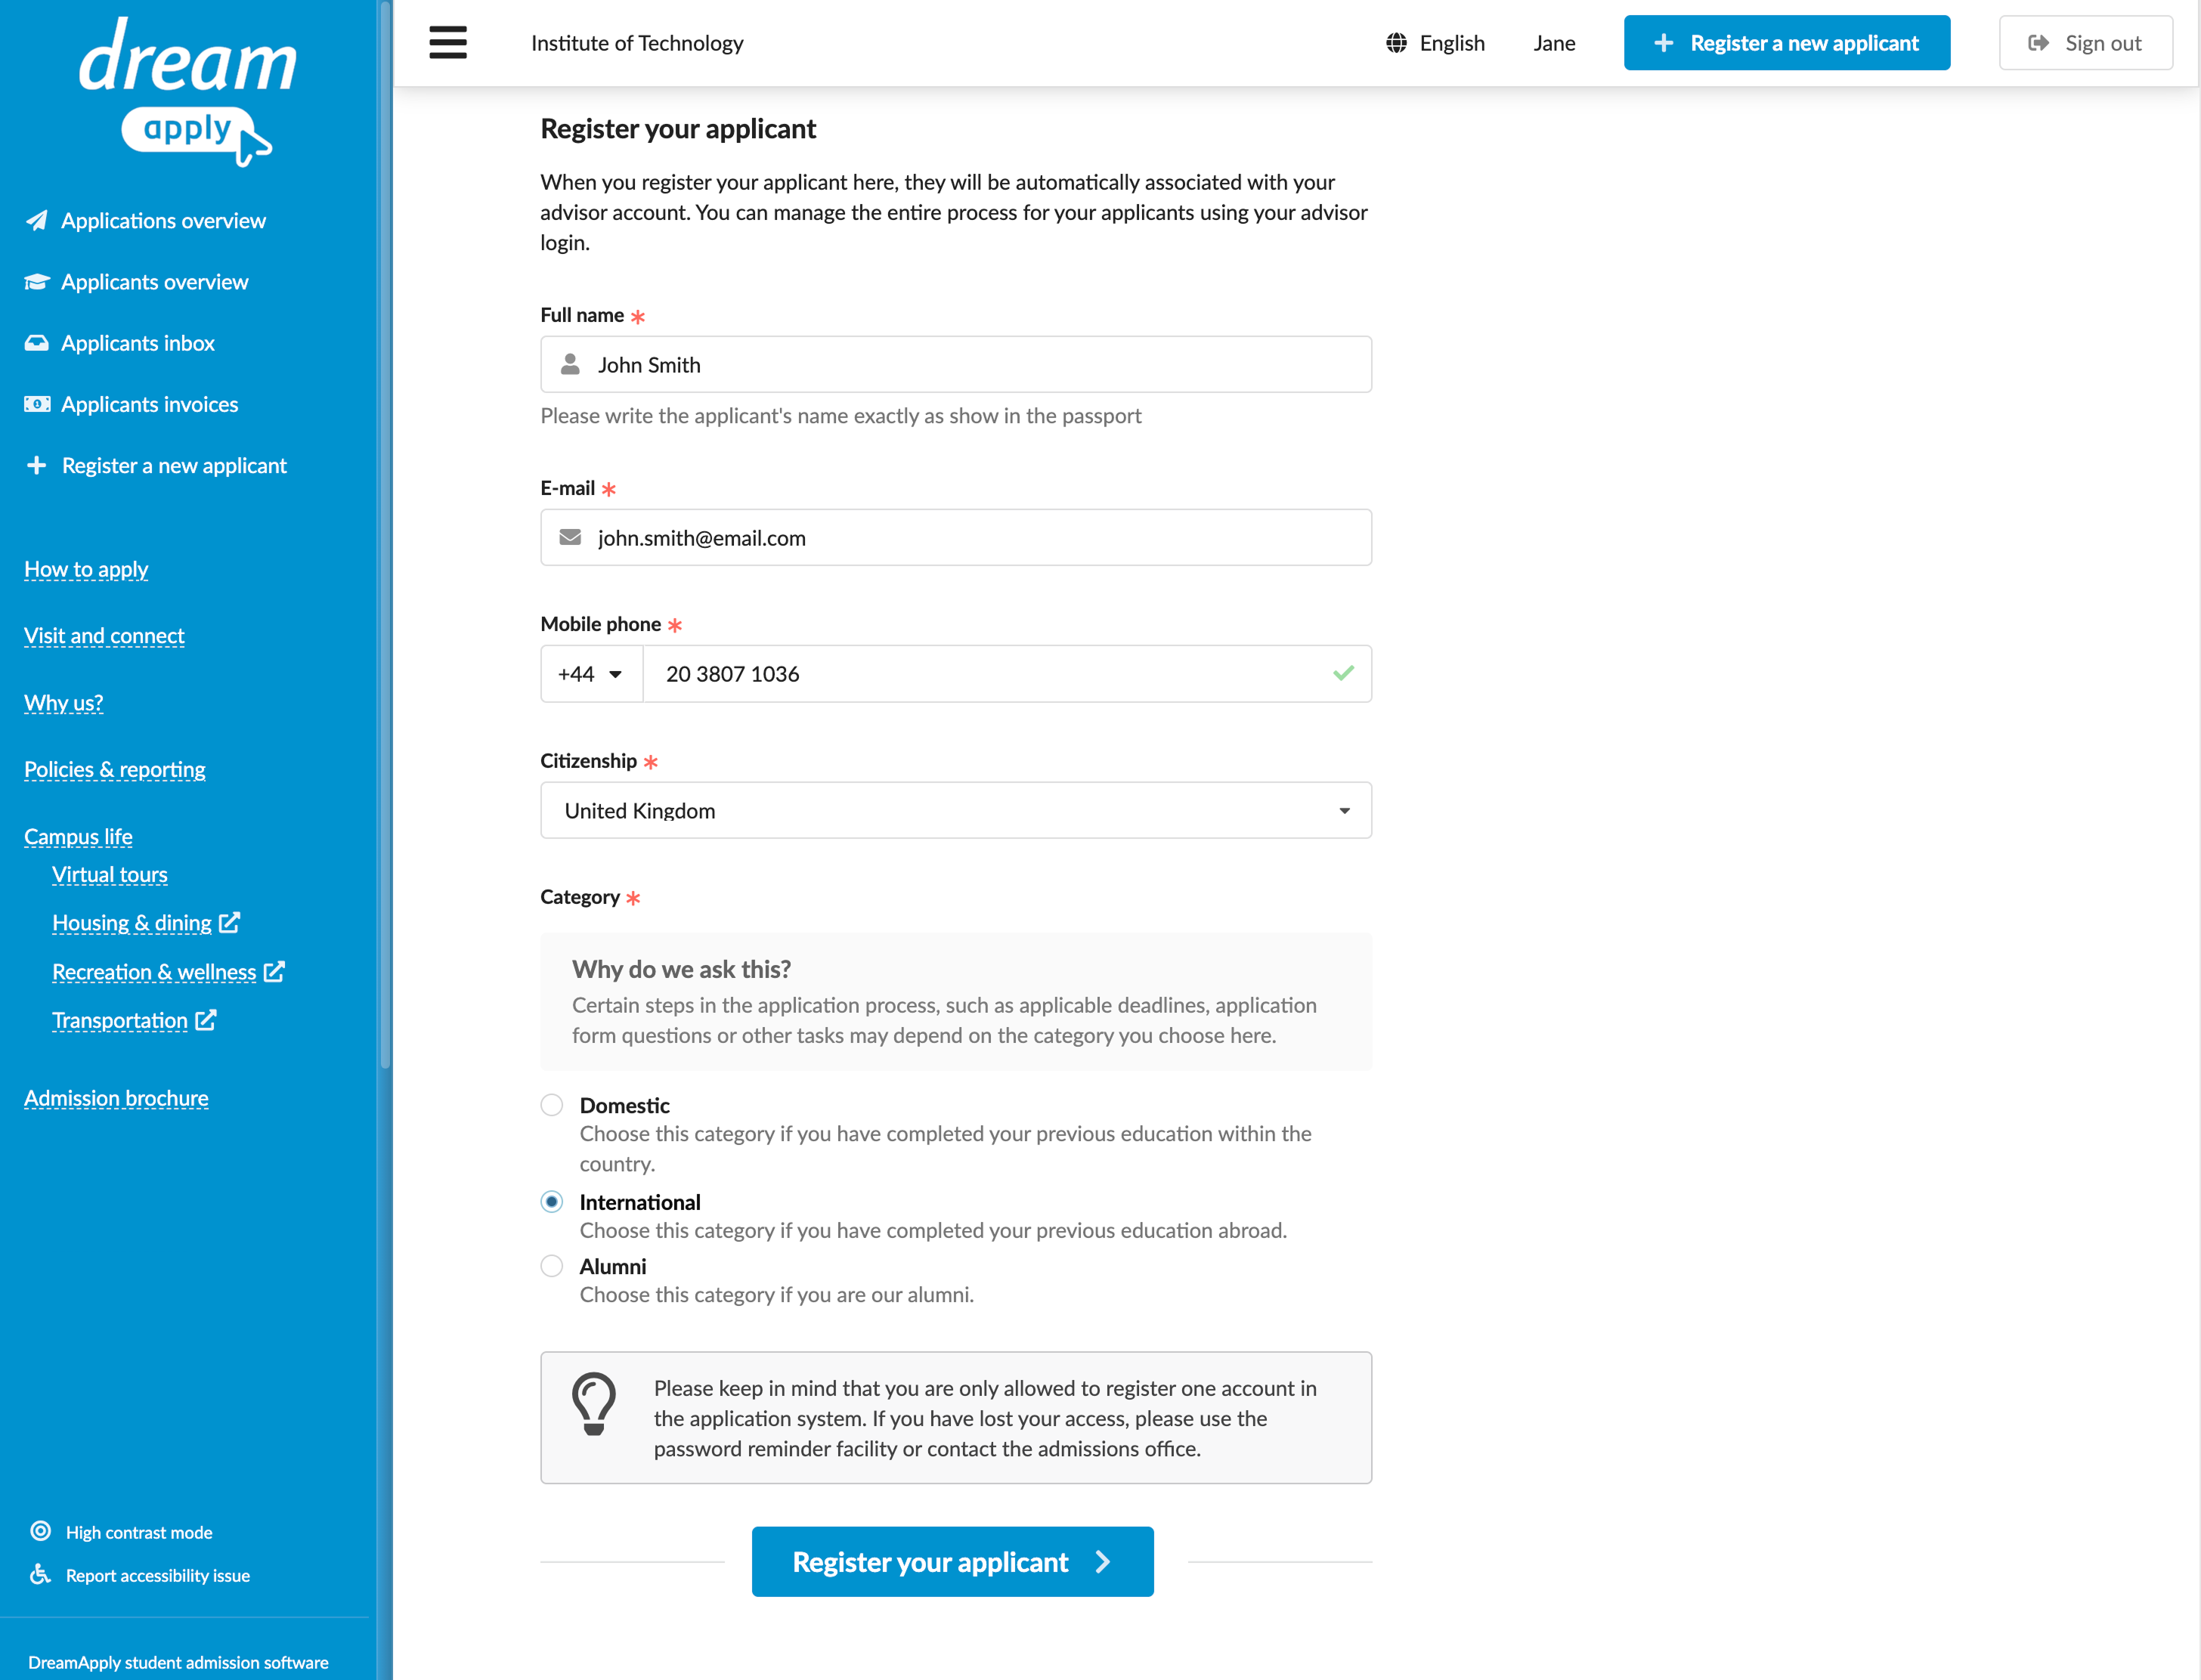
To register a new applicant:
- Log in to the portal.
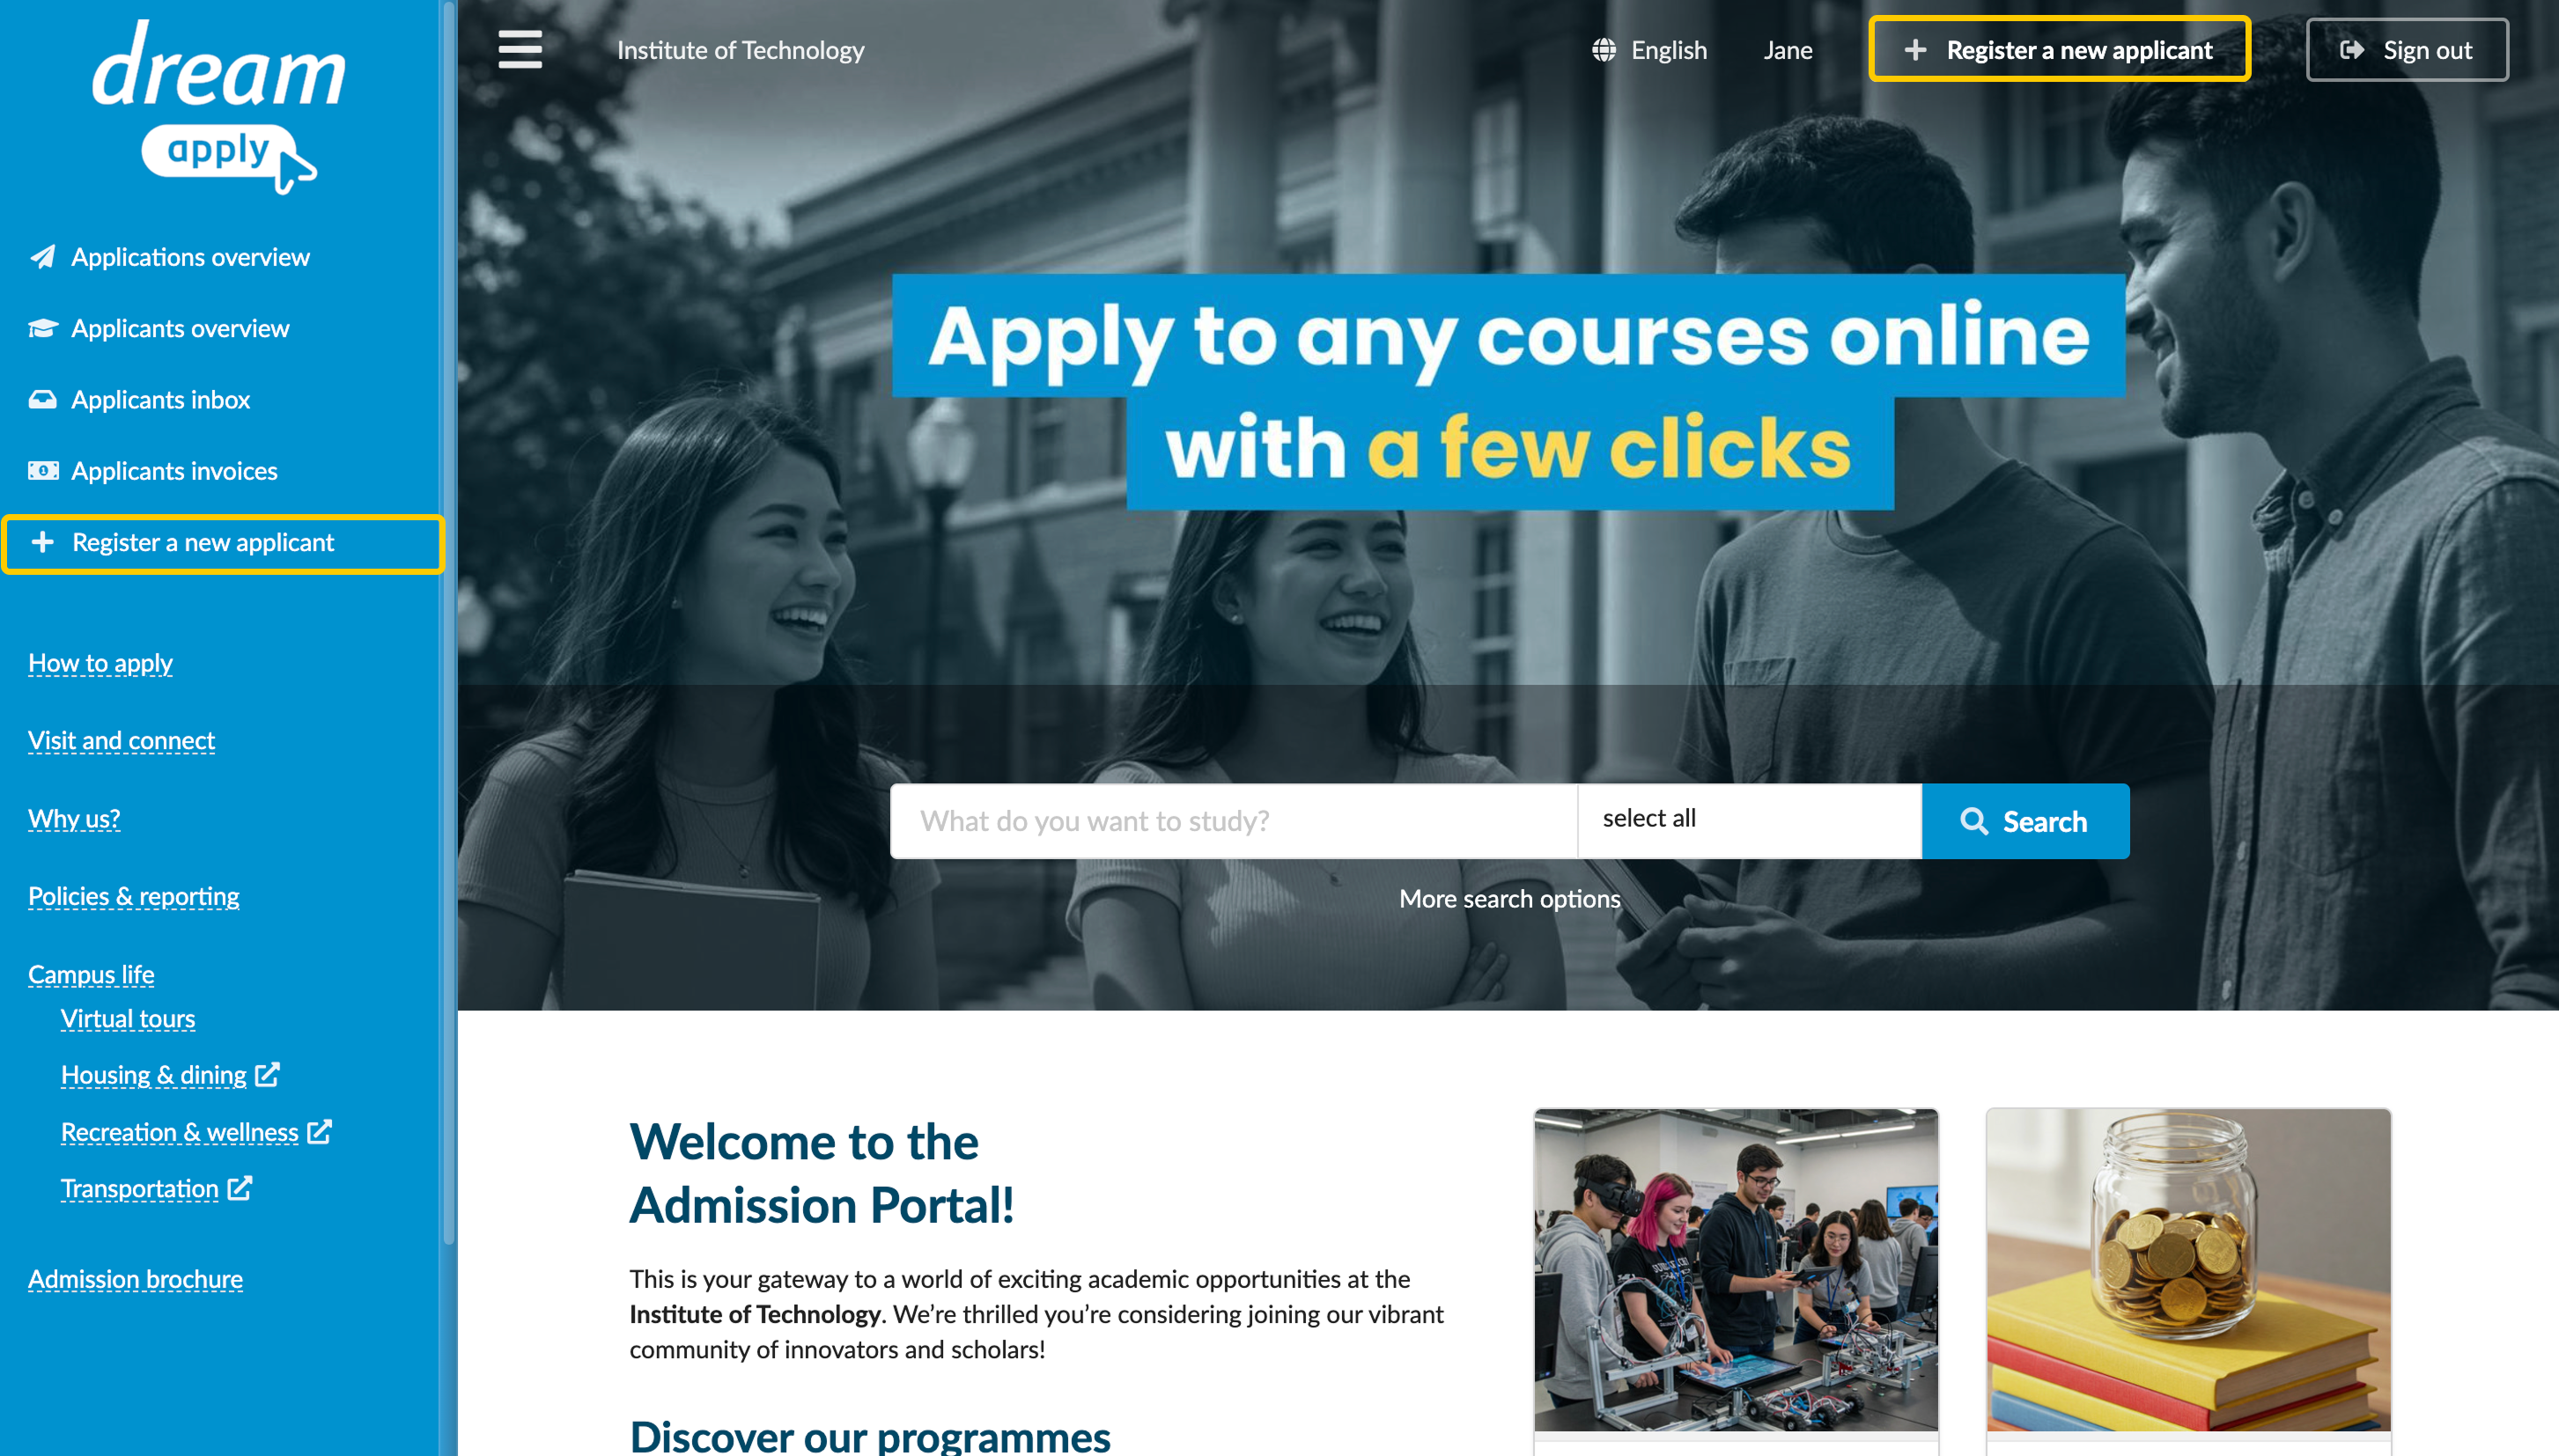
- In the left menu, click Register a new applicant. Alternatively, in the top menu, click Register a new applicant.
- Fill in the registration form. Note that the required information may vary based on your institution's requirements. At the bottom of the form, click Register your applicant.
You can now immediately start the application process or choose to apply later. For details, see Apply on behalf of an applicant.
How can I register a new applicant without an email?
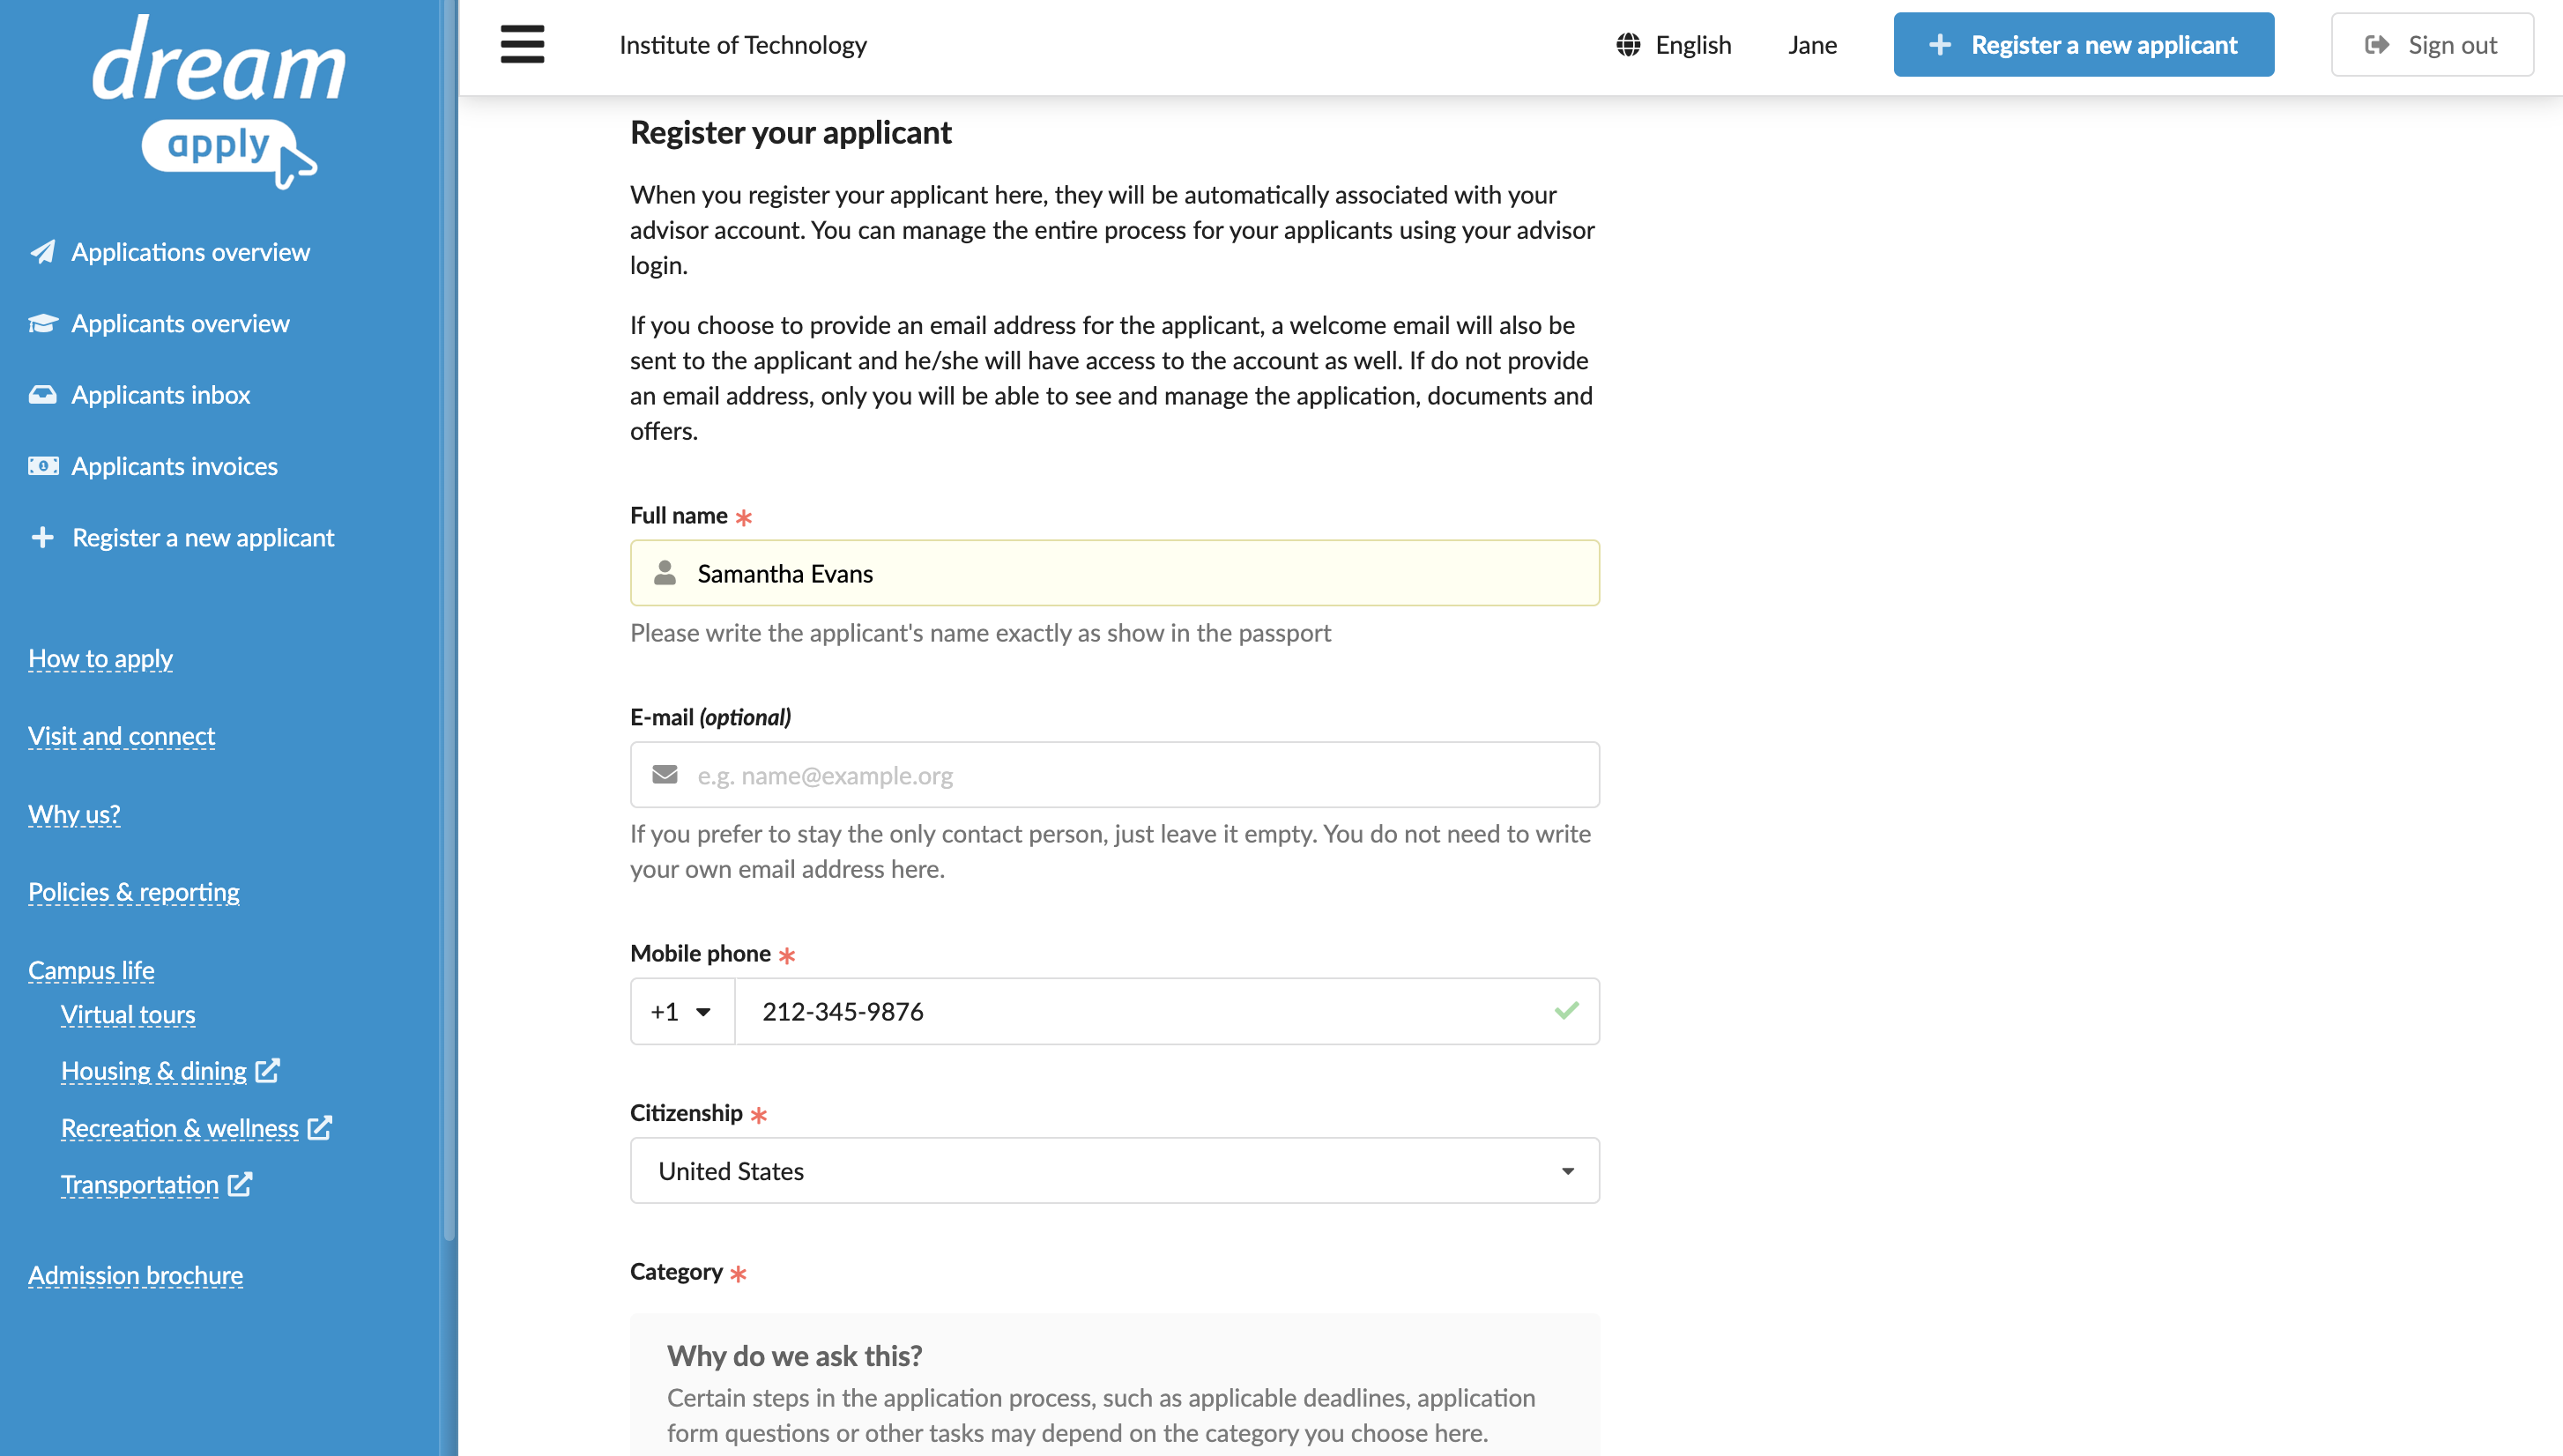
In some cases, an Advisor can create an applicant account without providing the applicant's email address. When this occurs, the Advisor remains fully responsible for managing the application. This includes applying, completing tasks, processing any payments, confirming offers and viewing messages on behalf of an applicant.
When the applicant reaches a specific stage in the admission process, the Advisor can update their account with their email address. After the email address is entered, the system sends a verification email to the applicant. The applicant can verify their email address and log in to the portal to review their application status.
To register an applicant without an email, your Advisor account must have the Ability to manage applications, offers, tasks permission level and Allowed to register applicants without an email option enabled.
To register a new applicant without an email:
- Log in to the portal.
- In the left menu, click Register a new applicant. Alternatively, in the top menu, click Register a new applicant.
- Fill in the registration form. Note that the required information may vary based on your institution's requirements. At the bottom of the form, click Register your applicant.
You can now immediately start the application process or choose to apply later. For details, see Apply on behalf of an applicant.
How can I link an applicant to my Advisor account?
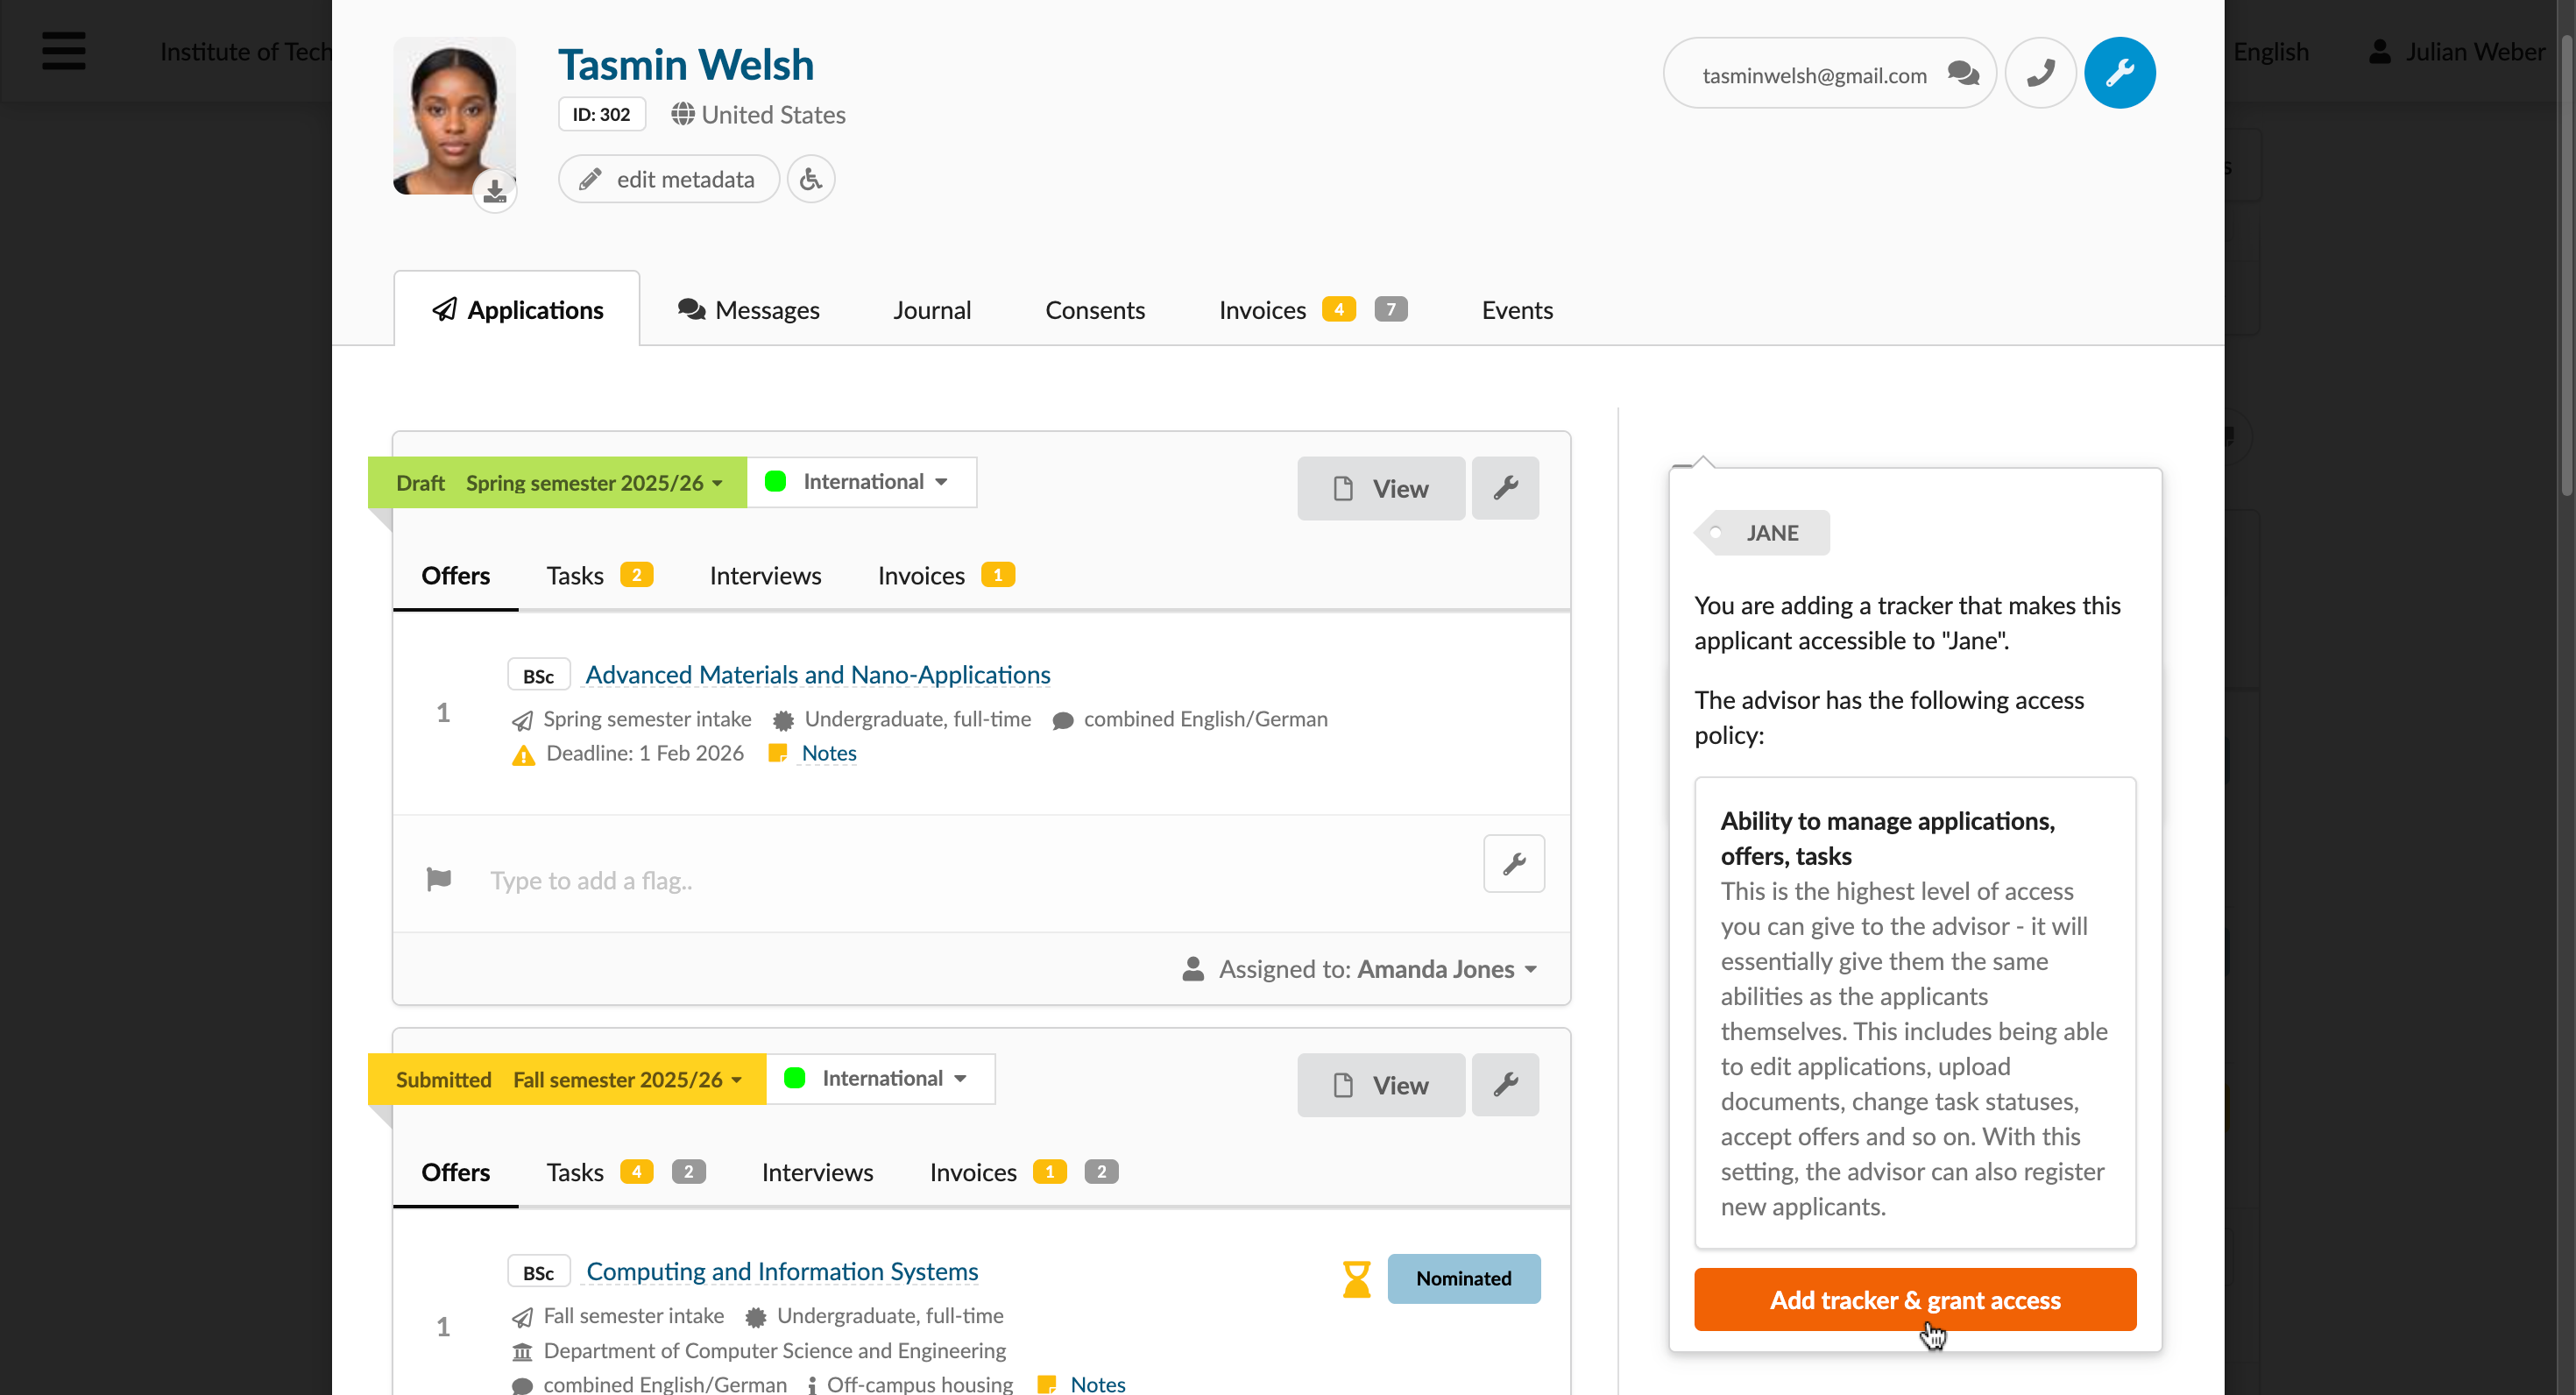
In some cases, an Advisor may need to manage an applicant account even if the applicant created it independently. To establish this connection, it is necessary to assign a tracker with the Advisor's code to the applicant. Once the connection is made, you can access and manage the applicant account and applications based on your permissions.
The tracker code for an Advisor is different from the self-service code. The tracker code links applicants to an Advisor, while the self-service code is used to log in to the portal. You can obtain your tracker code from the portal Administrator responsible for your Advisor account setup.
Advisors cannot perform this step themselves. Only an applicant or an Administrator with the corresponding permissions can assign a tracker. For details, see the following sections:
- For applicants: How can I enter a reference code?
- For Administrators: Manually assign trackers
How can I send a verification notification?
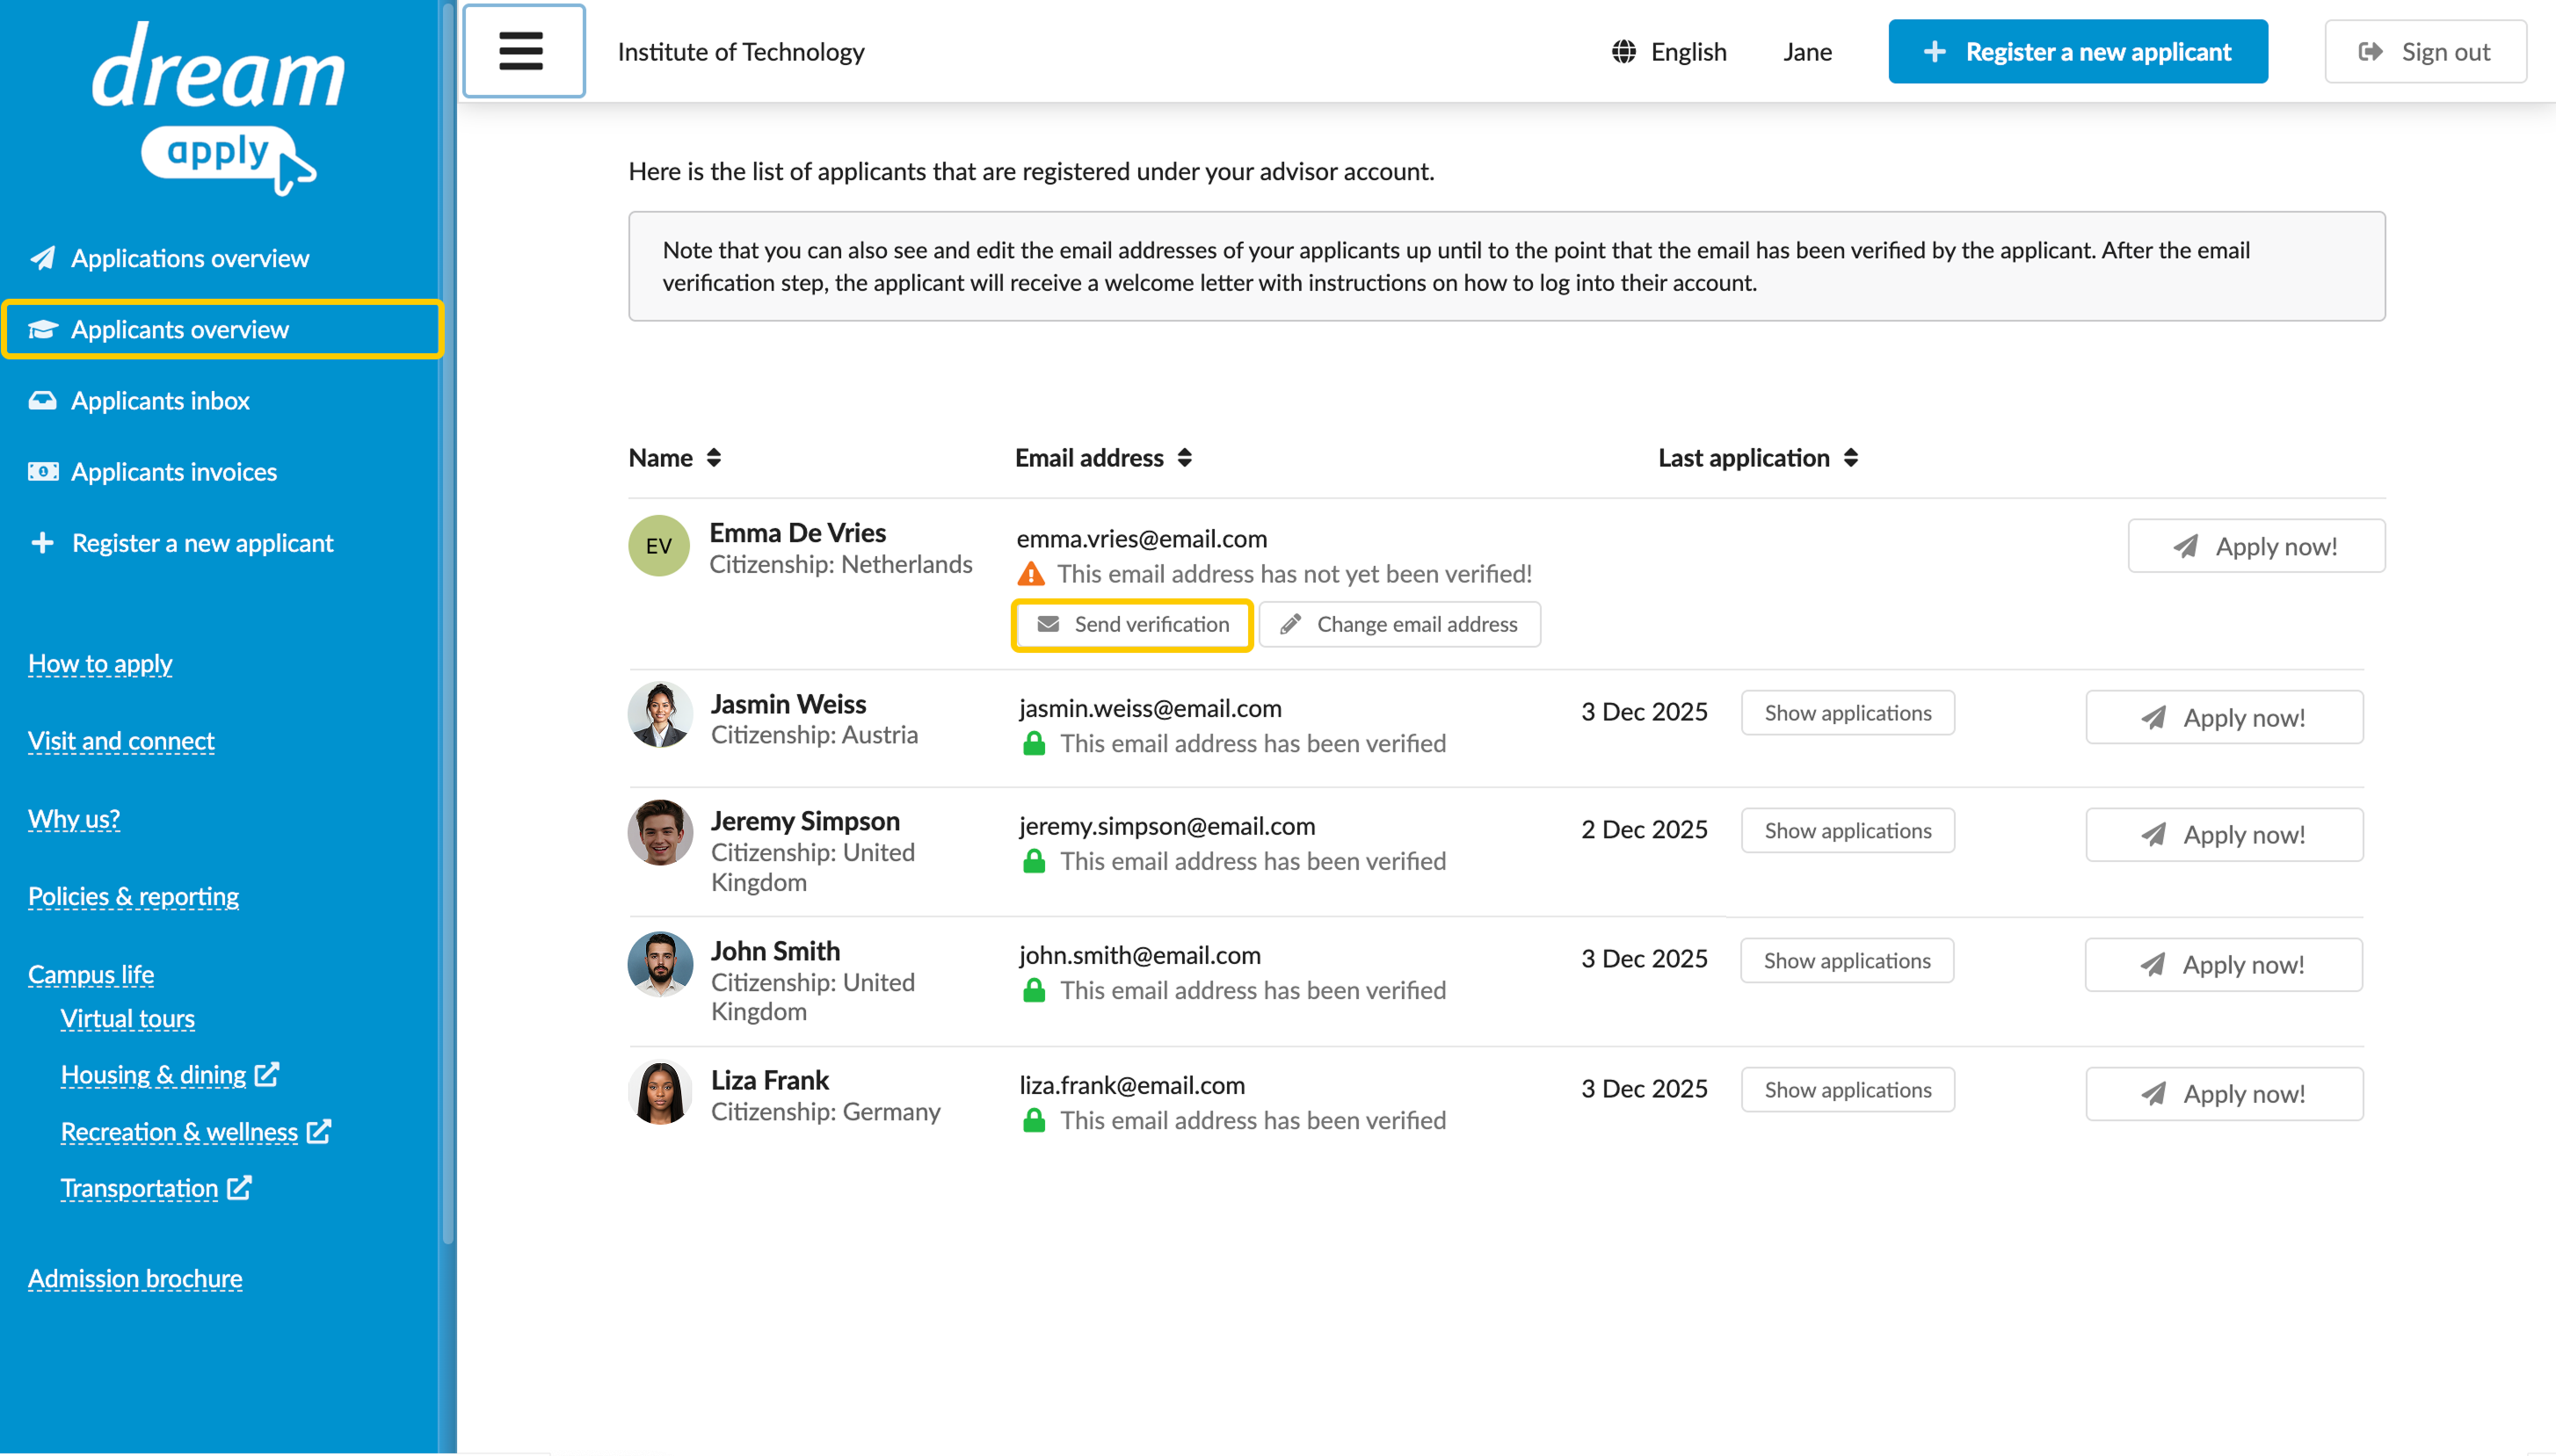
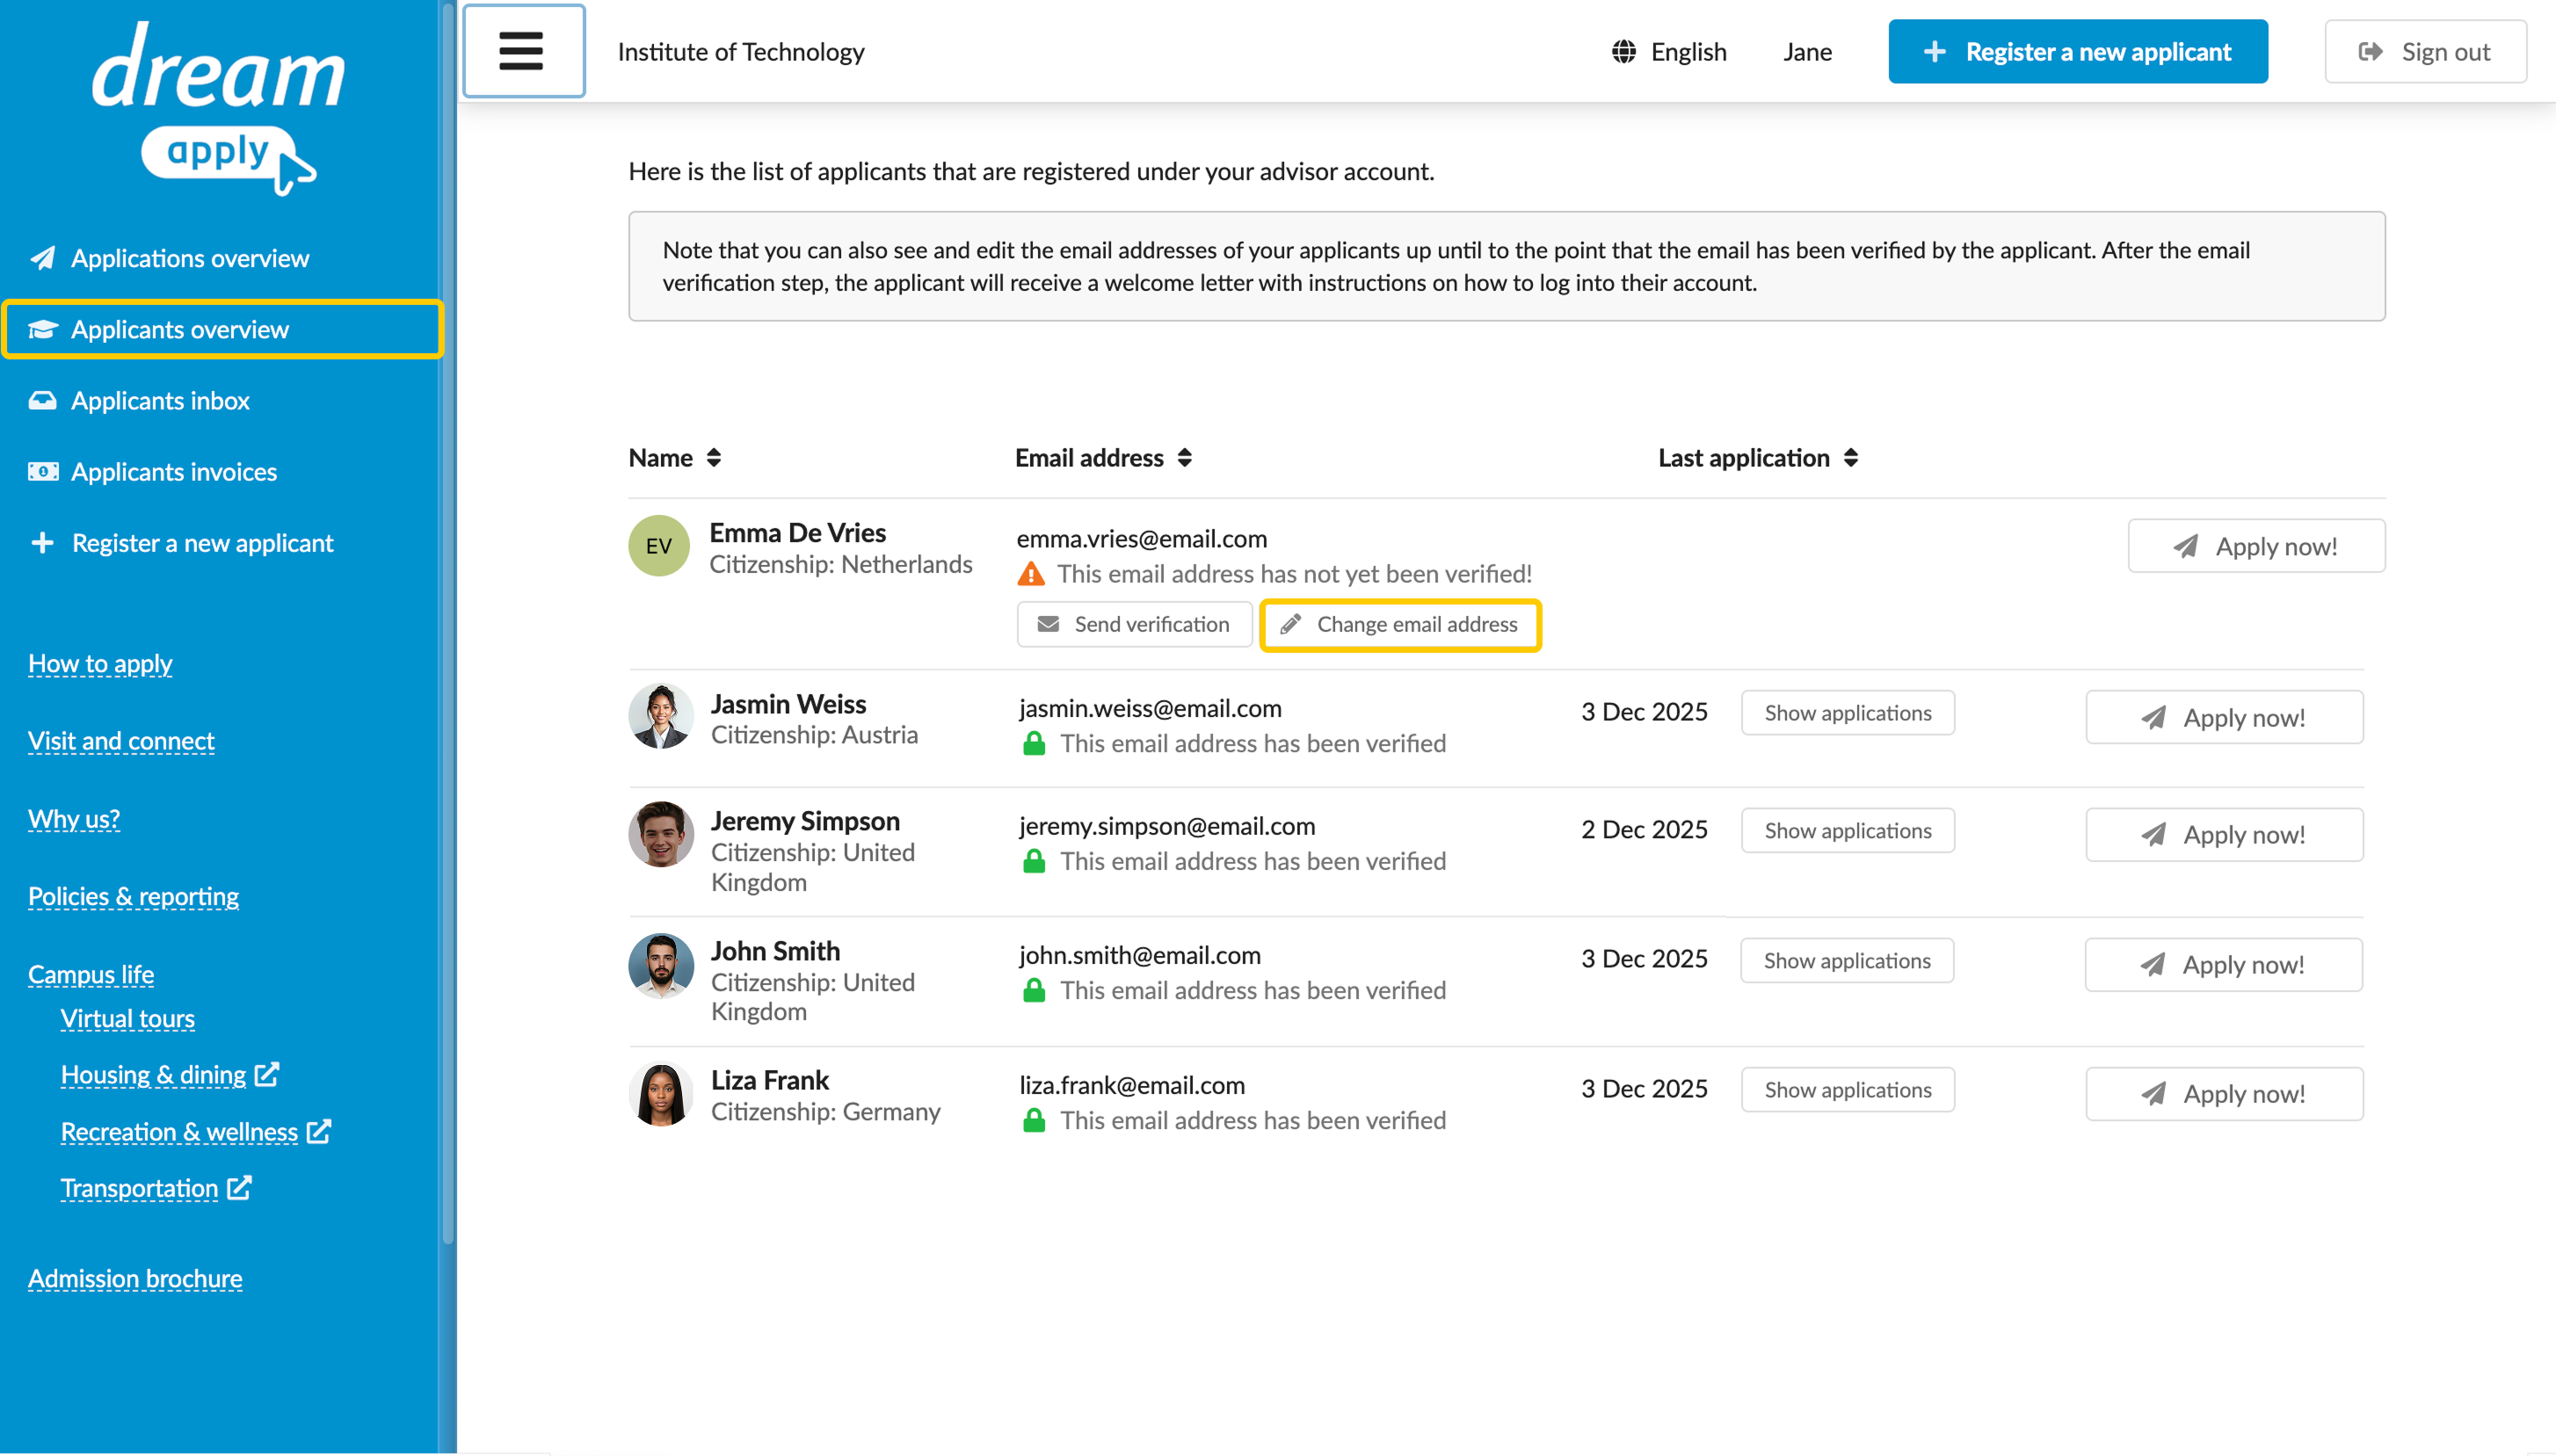
When you register an applicant account, the system sends a verification email to the applicant's email address. The applicant must complete the verification step. Otherwise, their email remains unverified and the registration process is considered incomplete.
If the applicant has not verified their email address, you can resend a verification notification as a reminder.
To manage applicant accounts, your Advisor account must have the Ability to manage applications, offers, tasks permission level.
To send a verification reminder:
- Log in to the portal.
- In the left menu, click Applicants overview.
- Below the applicant's email address, click Send verification.
How can I change an applicant's email address?
You can change an applicant's email address in the portal only if the applicant has not yet verified their current email address.
When you change the email address, the system sends a confirmation message to the new email address. Once the applicant verifies the change, the email address for the applicant account is updated in the system.
If the email address has already been verified, only the applicant can change it through the portal. For details, see How can I change my login email address? and How can I change my contact email address?
To manage applicant accounts, your Advisor account must have the Ability to manage applications, offers, tasks permission level.
To change an applicant's email address:
- Log in to the portal.
- In the left menu, click Applicants overview.
- Below the applicant's email address, click Change email address, provide a new email address and click Continue.
How can I remove an applicant account?
Advisors cannot remove applicant accounts. Applicants themselves must initiate the deletion request using the portal. Once the request is approved by a portal Administrator, the account is scheduled for removal and is permanently deleted within 24 hours.
For details, see How can I delete my account and data? and How can I delete my login record?.
Applications
How can I apply on behalf of applicants?
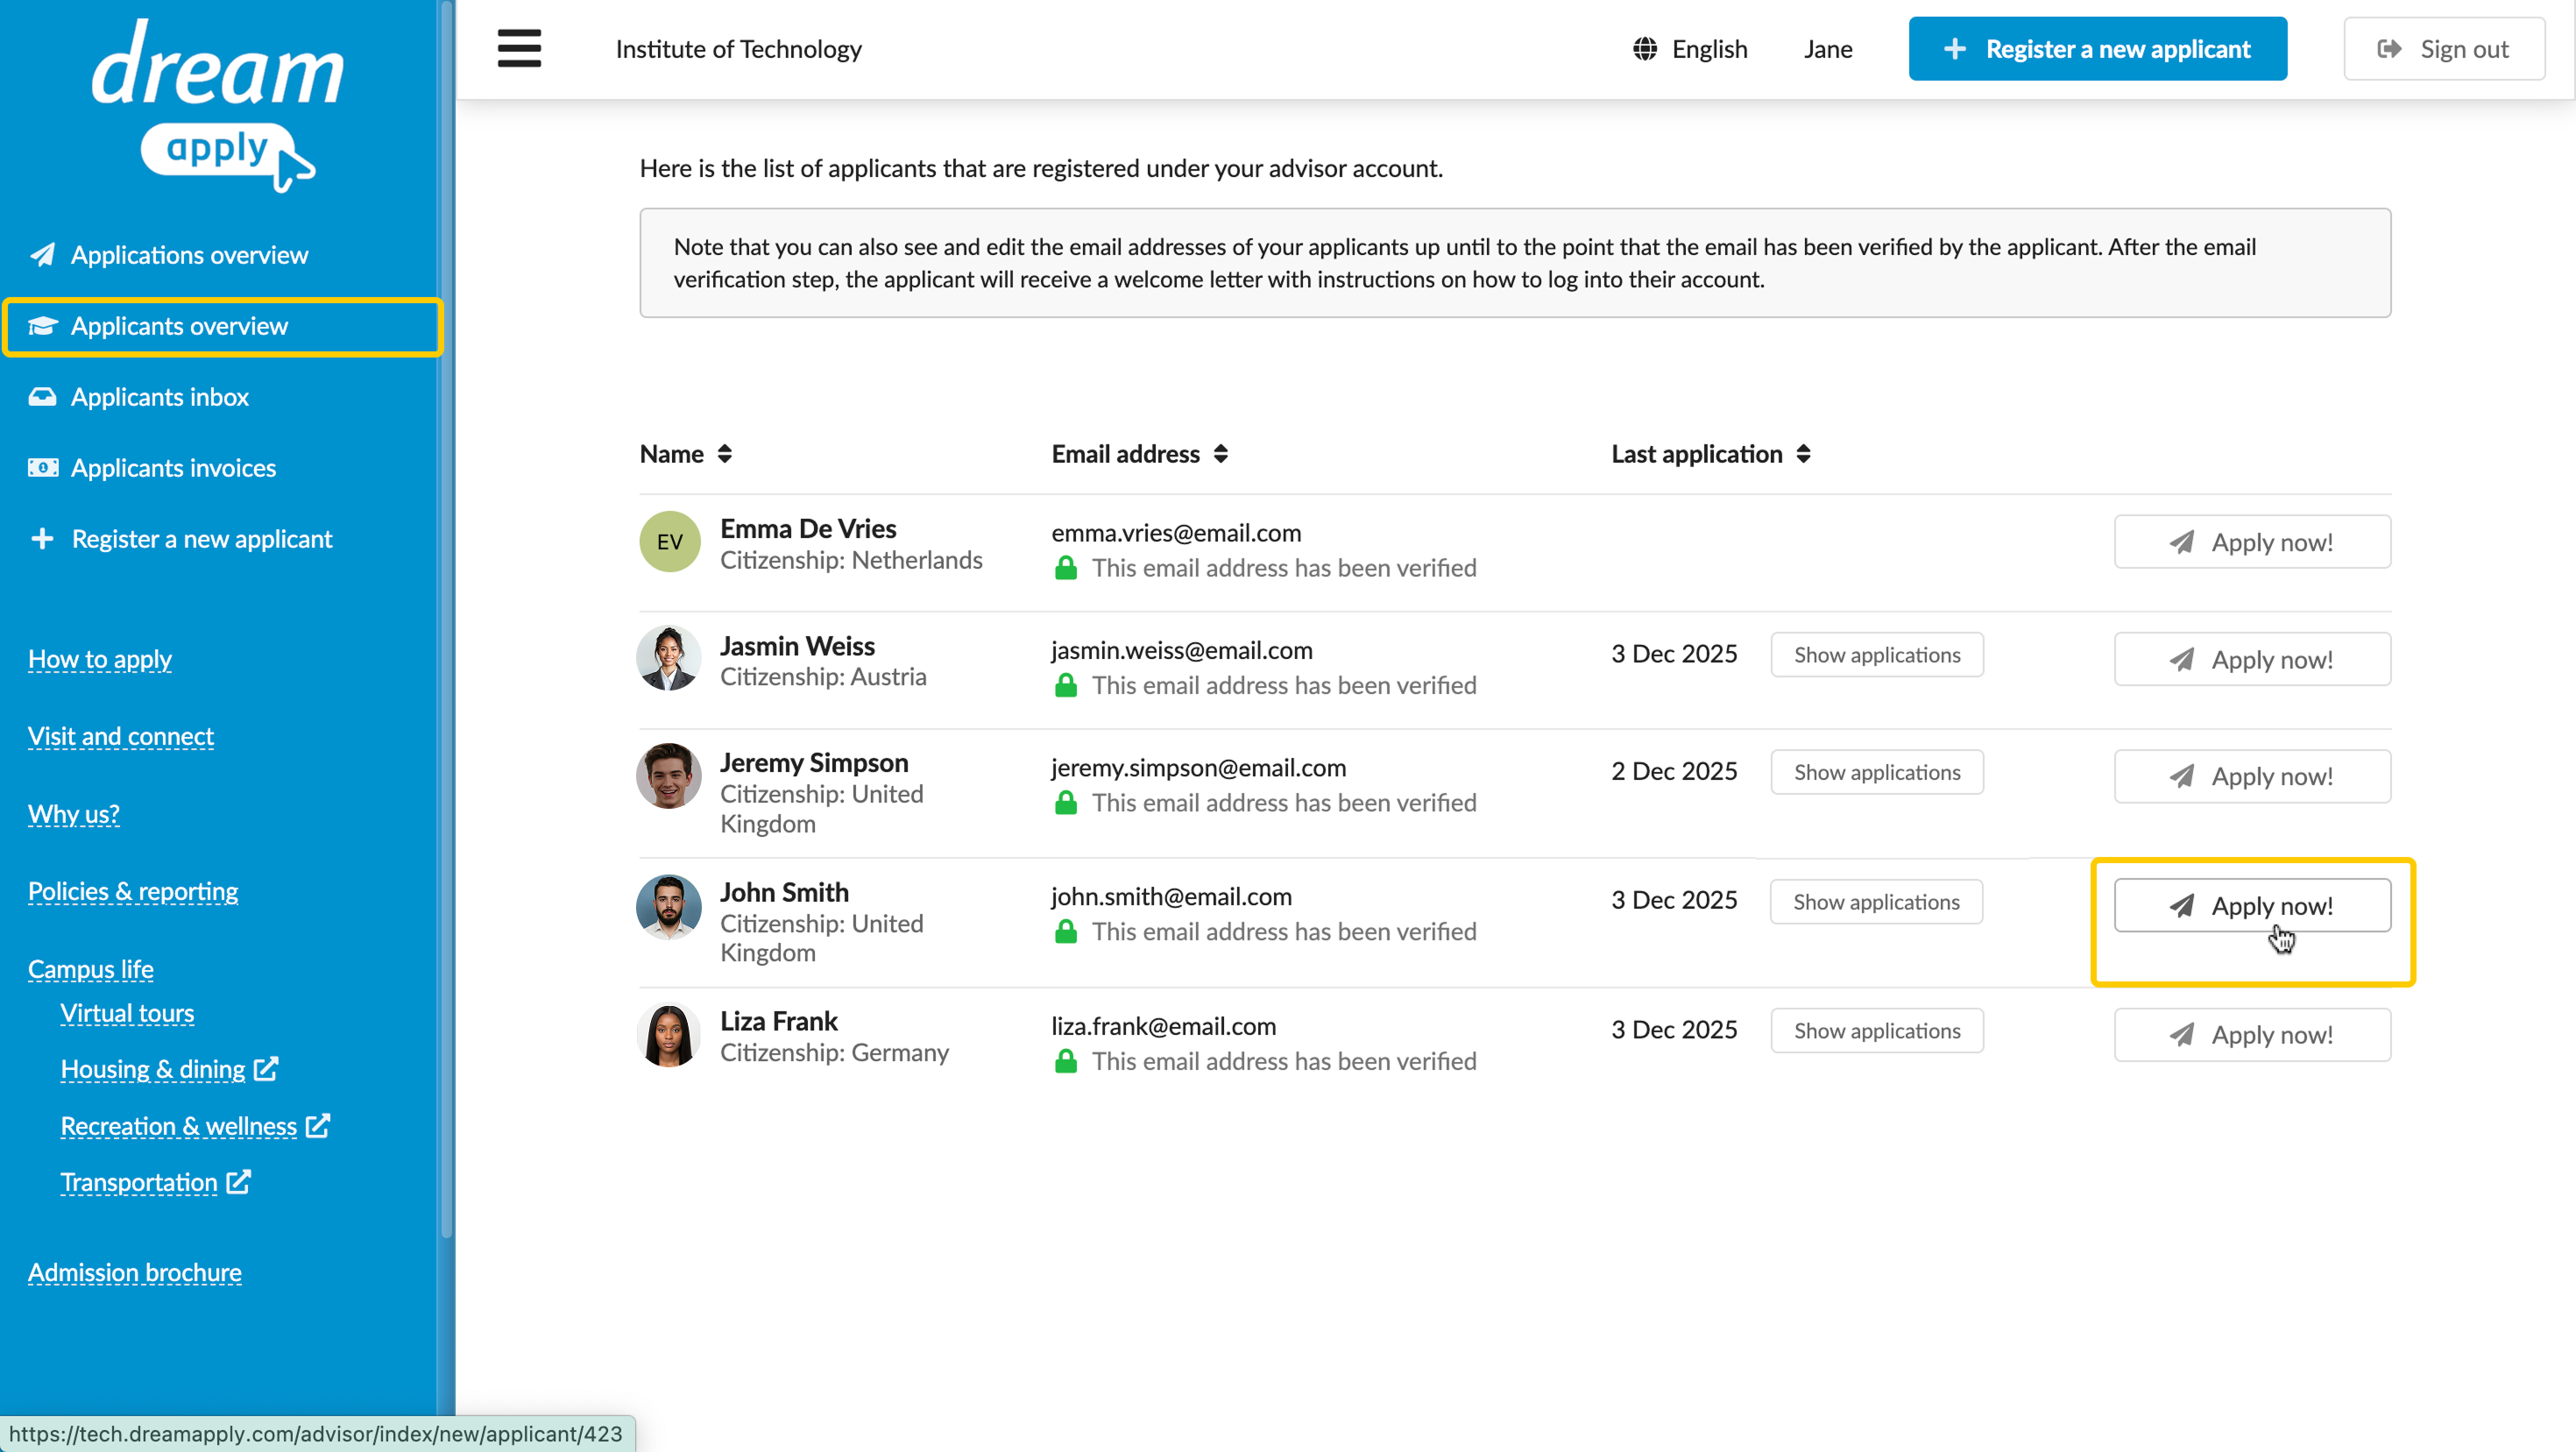
Once an applicant's account is registered, you can apply on their behalf. This feature is useful if the applicant needs help navigating the application process or cannot submit applications themselves.
To apply on behalf of applicants, your Advisor account must have the Ability to manage applications, offers, tasks permission level.
To apply on behalf of applicants:
- Log in to the portal.
- In the left menu, click Applicants overview. To the right of an applicant, click Apply now!
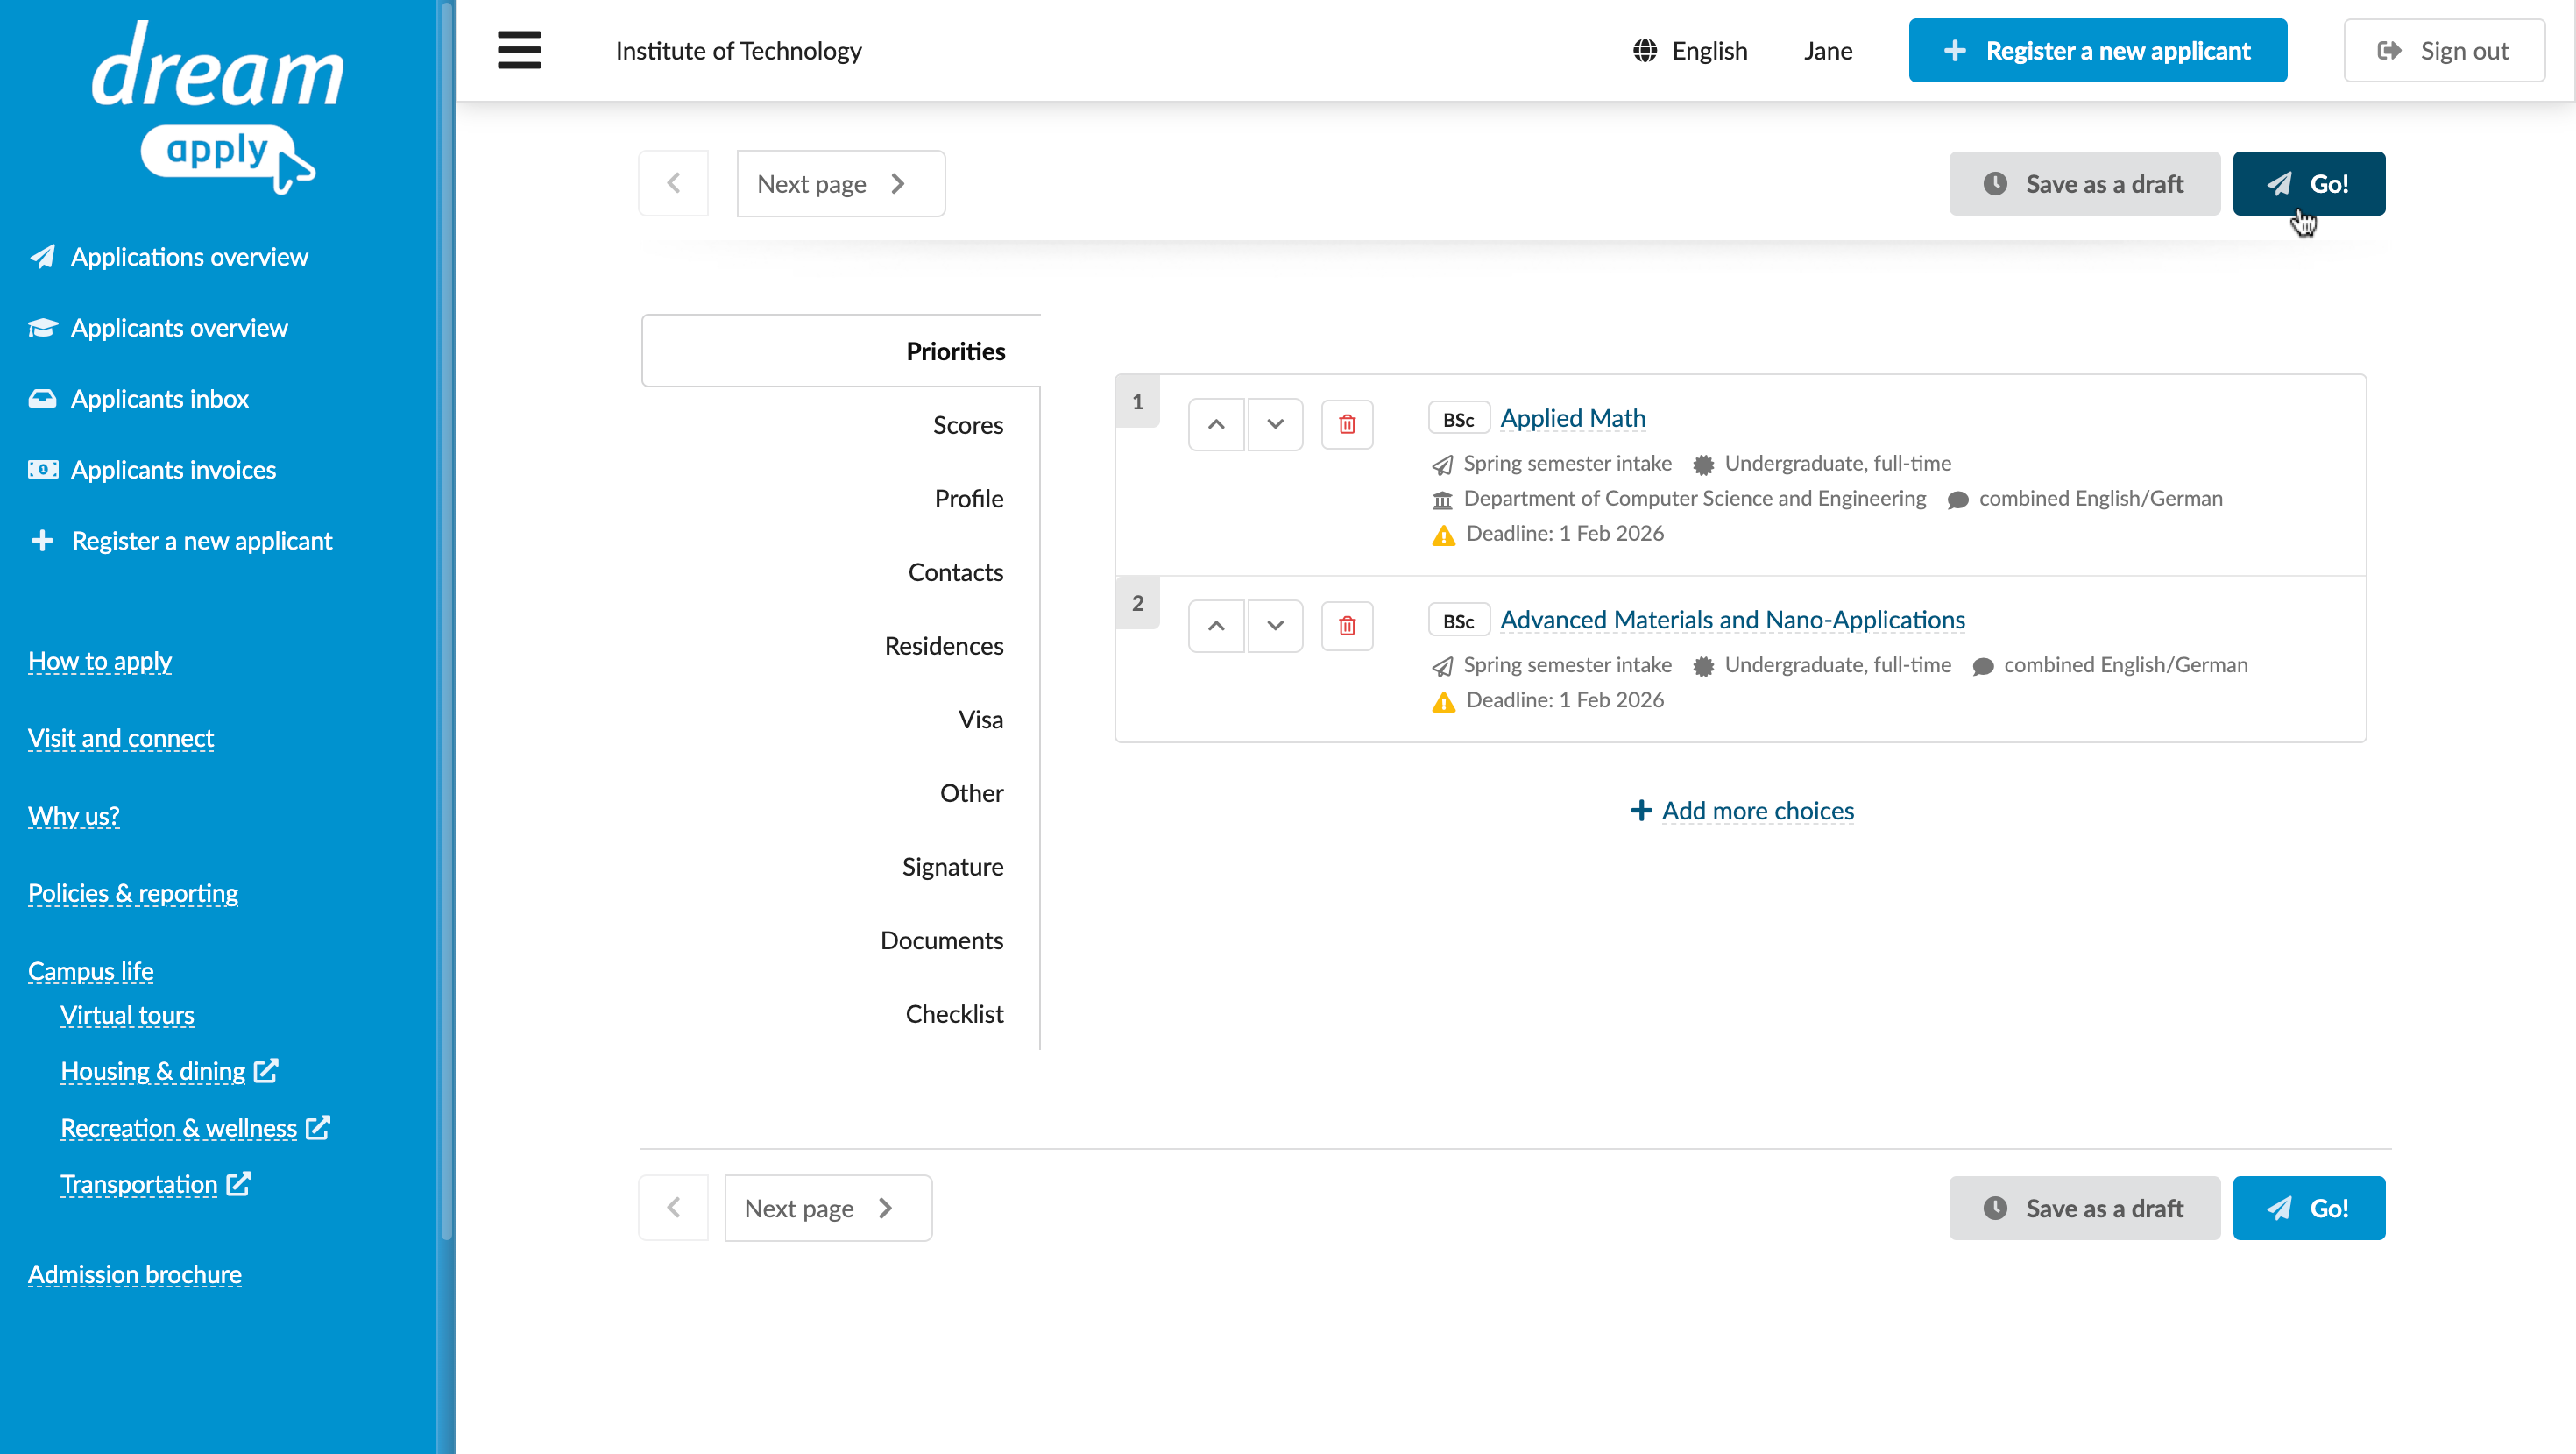
- Choose the applicant's top-priority programme. You can add more choices later, when you fill in the application form.
- Click Apply now!
- Fill in the application form and in the top right corner, click Go! to submit the application.


After submission, you can review and edit the application. For details, see How can I review and edit submitted applications?
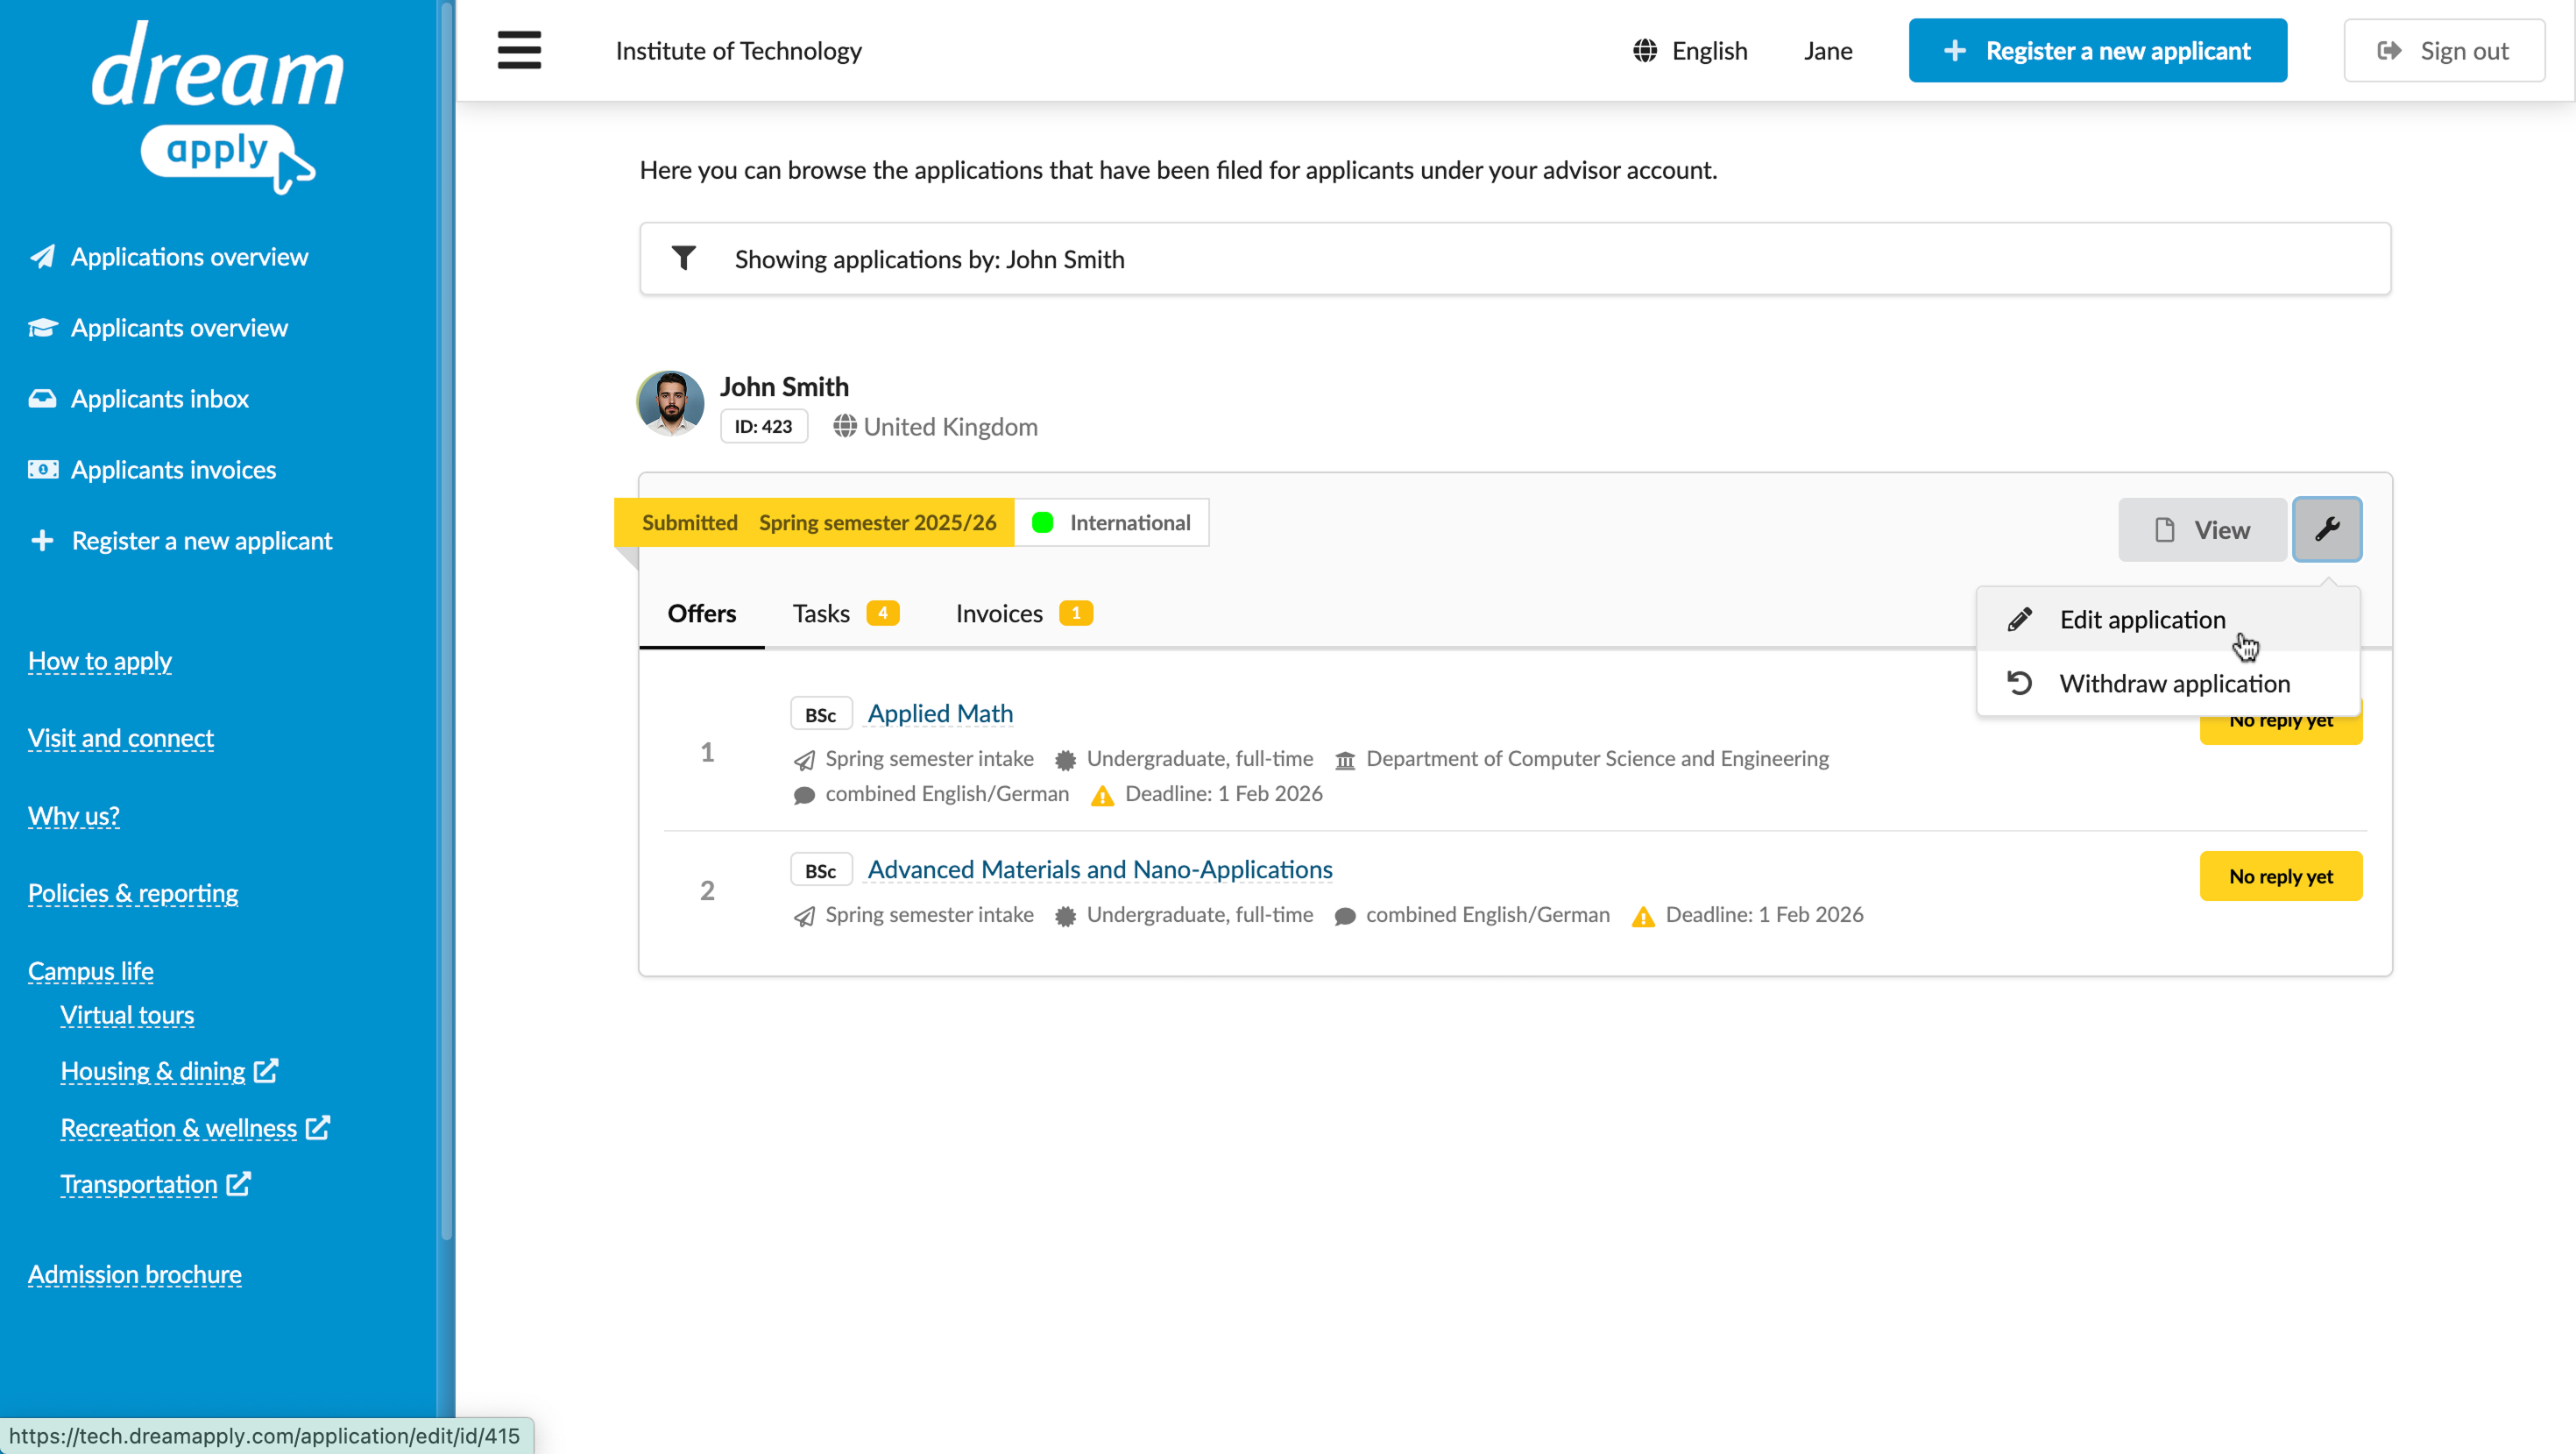
How can I review, edit and withdraw submitted applications?
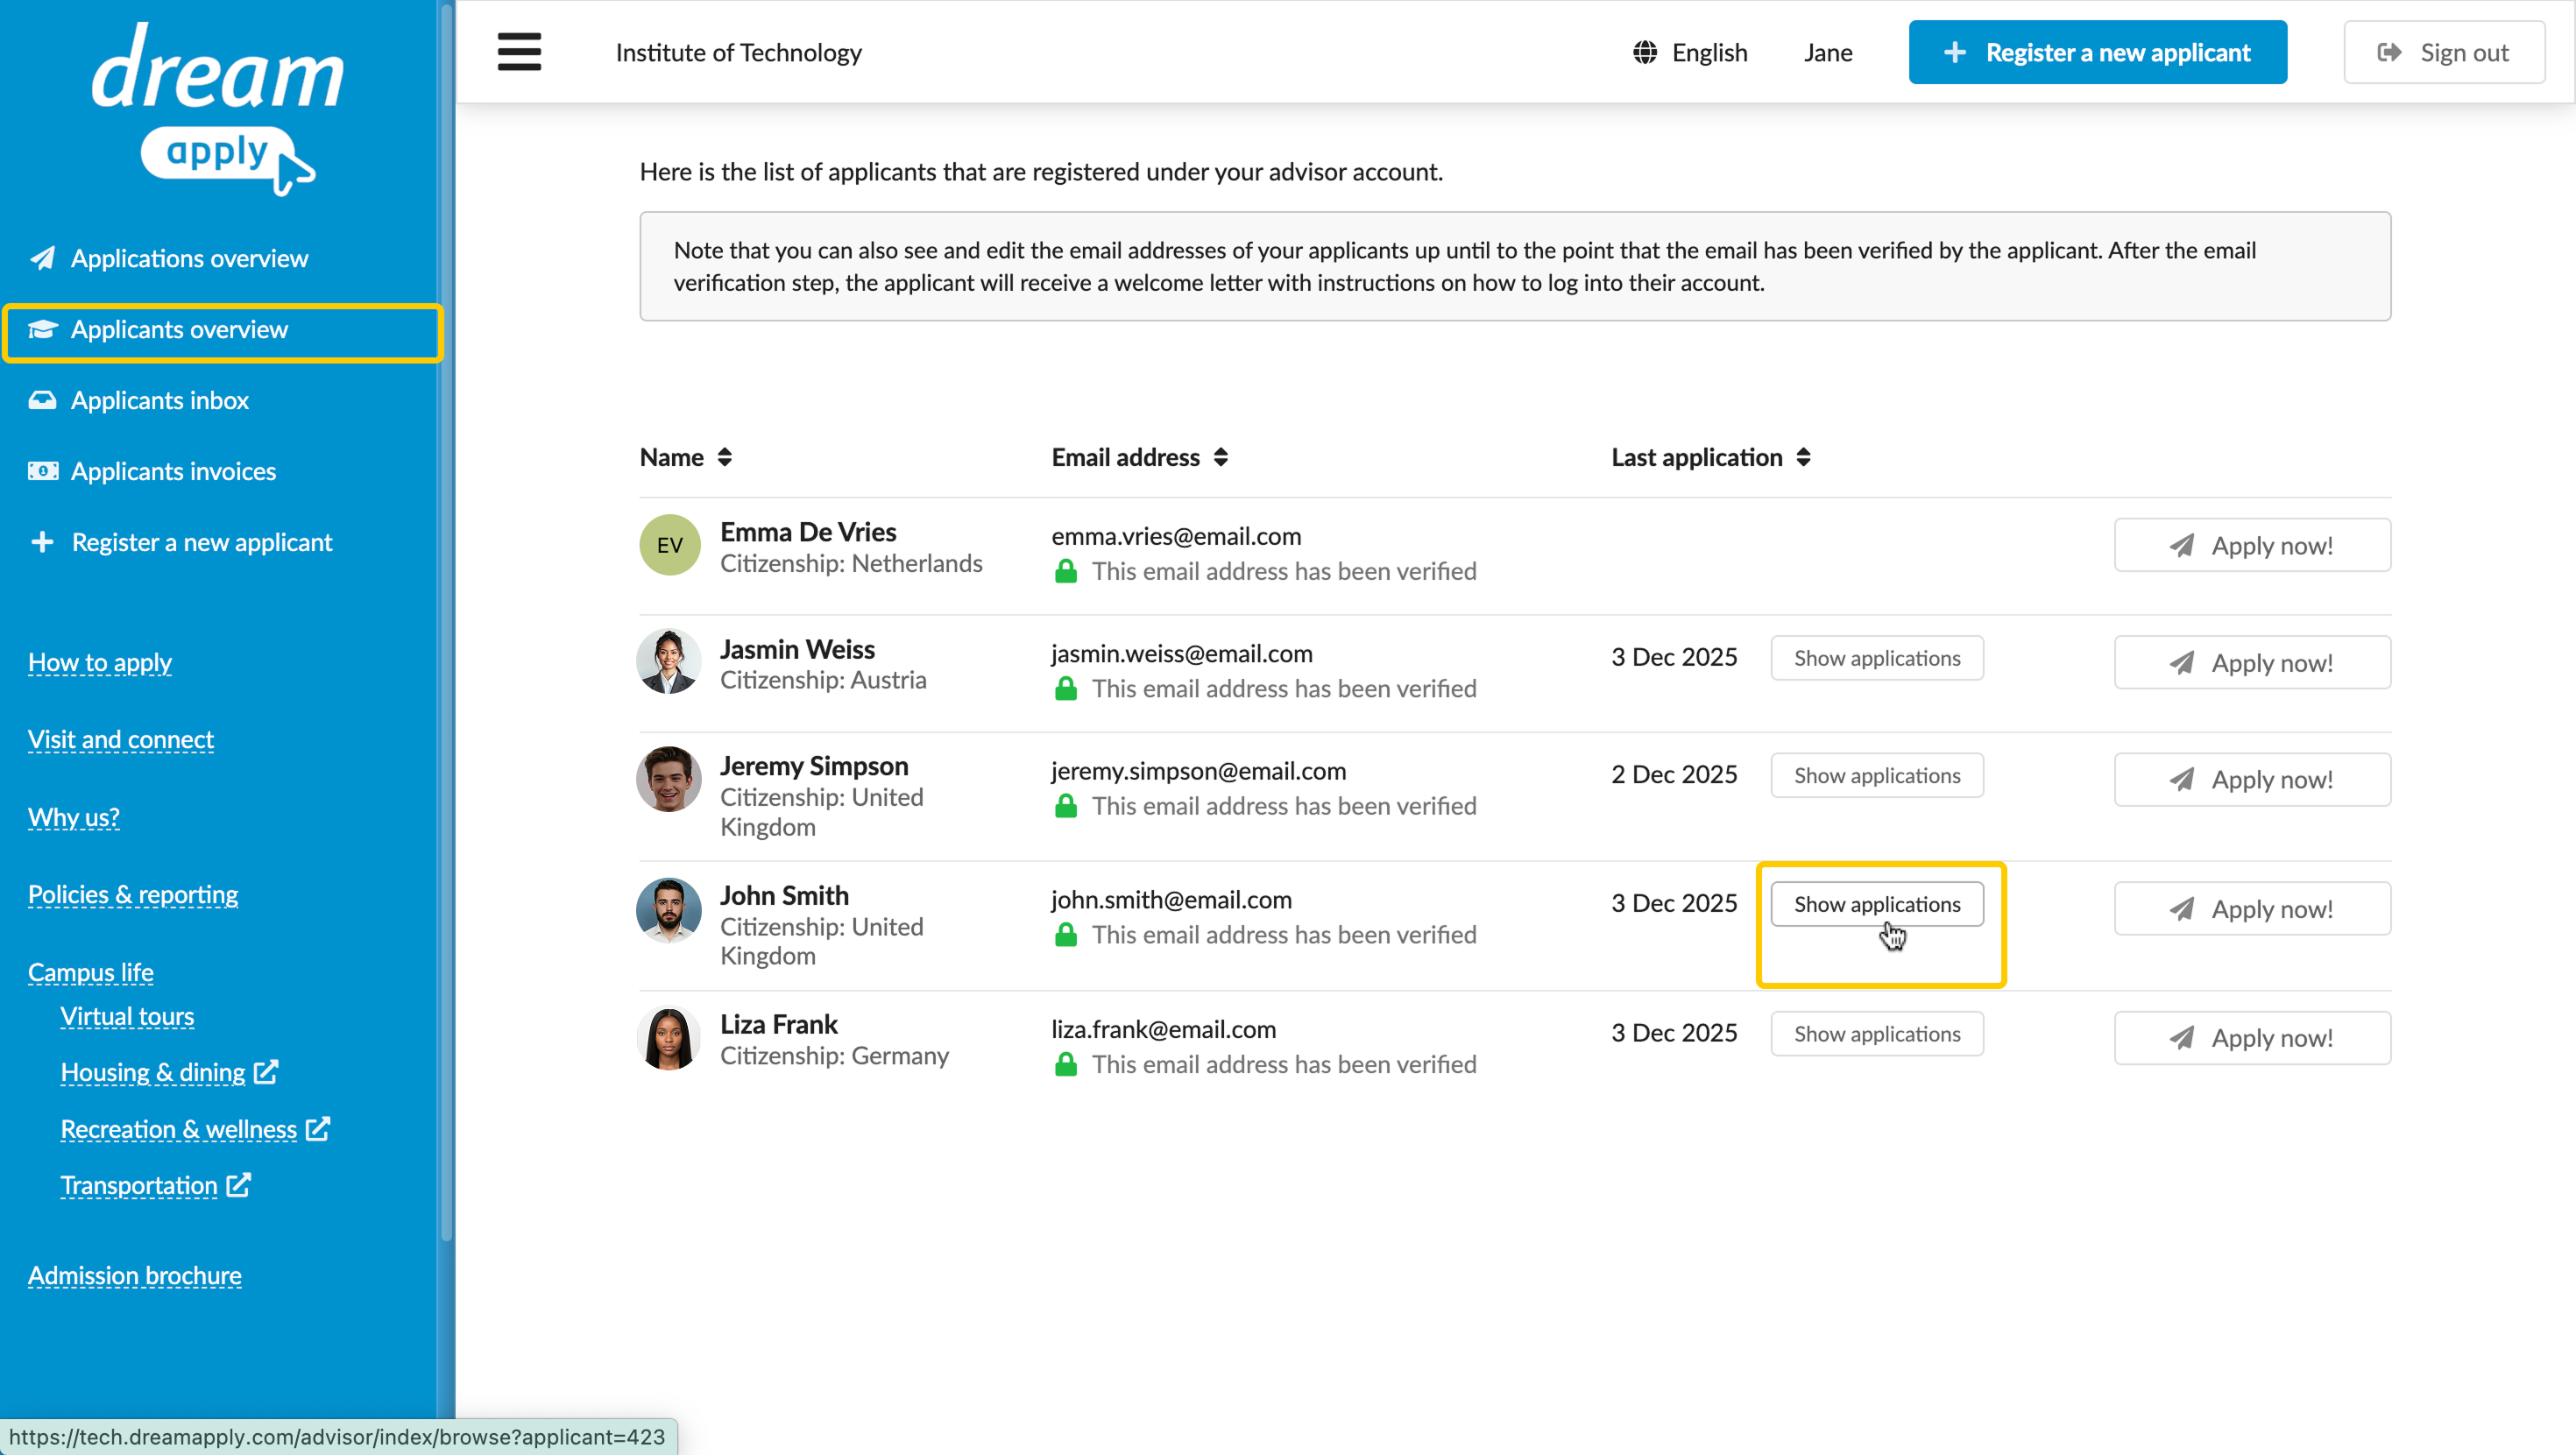
After an application is submitted, you can review its details and make updates if necessary.
To view applications, your Advisor account must have a permission level of Full read-only access to applications and higher. To edit and withdraw applications, your Advisor account must have the Ability to manage applications, offers, tasks permission level.
To view and edit applications:
- Log in to the portal.
- In the left menu, click Applicants overview. To the right of an applicant, click Show applications.
- You can perform the following actions:
- To view the application, in the top right corner, click View.
- To edit the application, in the top right corner, click the wrench icon and select Edit application.
- To withdraw the application, in the top right corner, click the wrench icon and select Withdraw application.
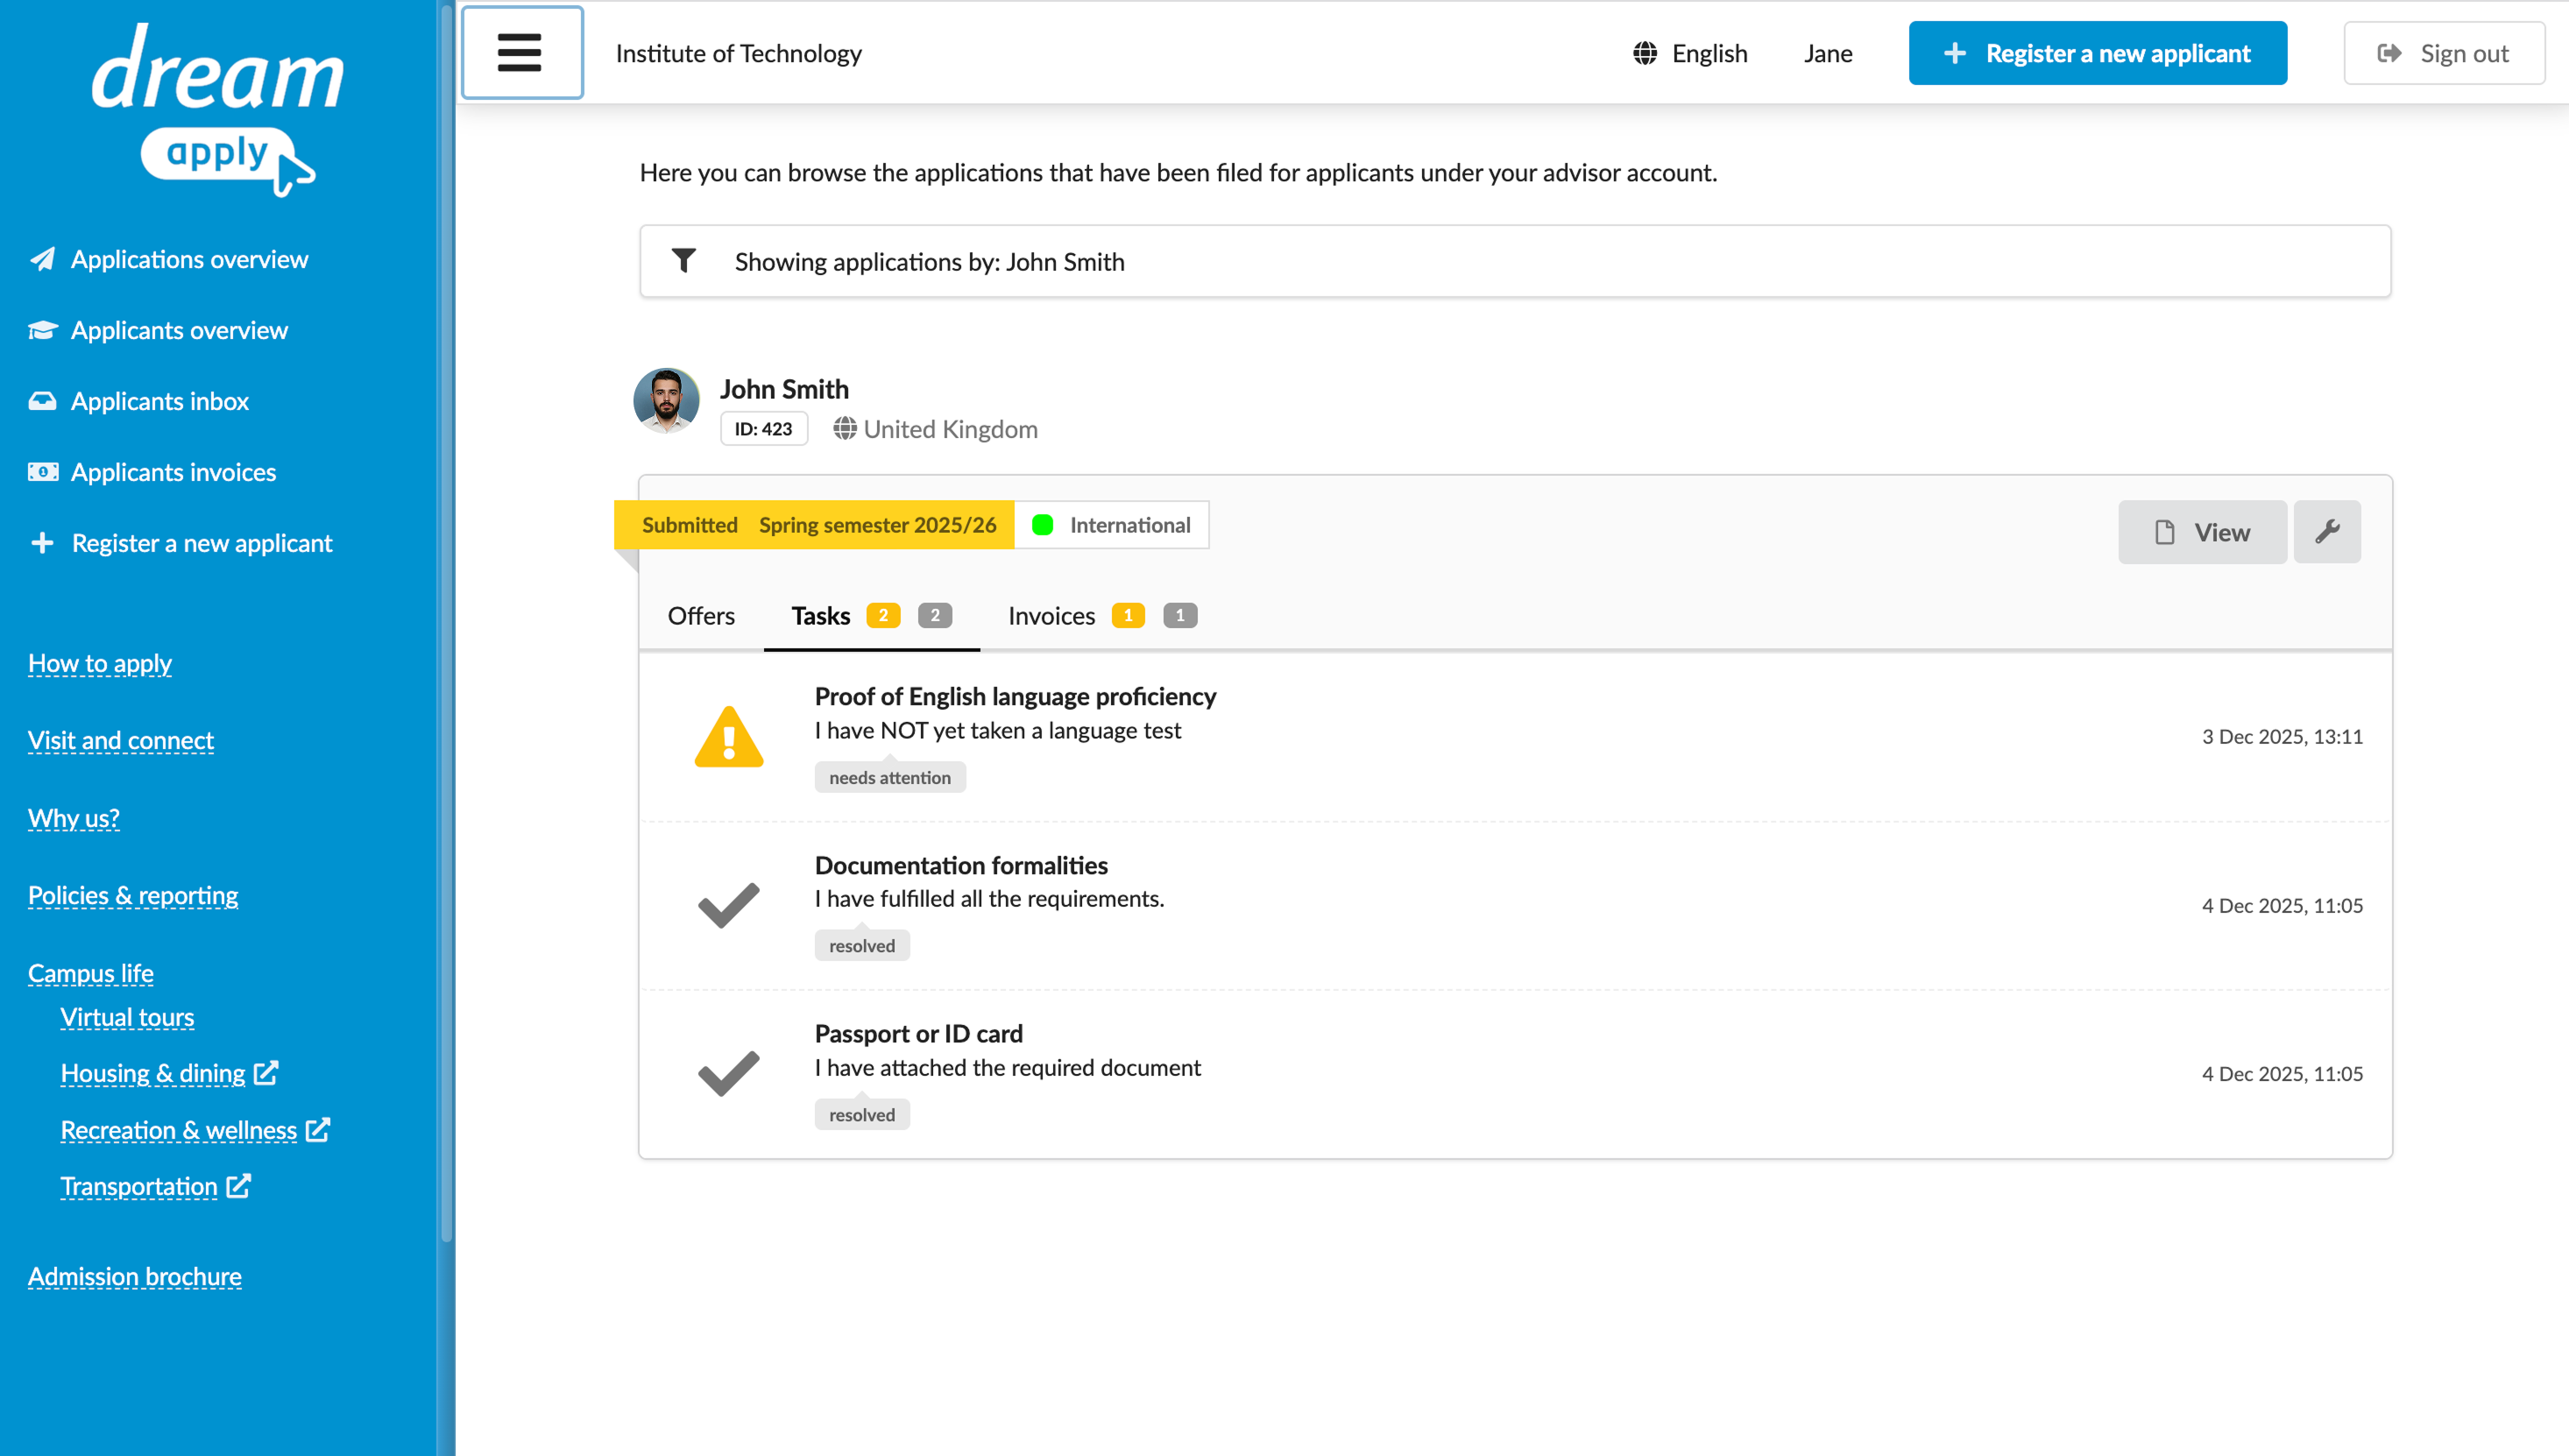
How can I complete tasks on behalf of applicants?
After an application is submitted, an applicant may receive a set of tasks to complete, such as providing additional information or uploading supporting documents. You can perform tasks on behalf of an applicant if your Advisor permissions allow it.
To complete tasks, your Advisor account must have the Ability to manage applications, offers, tasks permission level.
To complete tasks on behalf of an applicant:
- Log in to the portal.
- In the left menu, click Applicants overview. To the right of an applicant, click Show applications.
- On the application card, click the Tasks tab, click a task and fulfil its requirements.
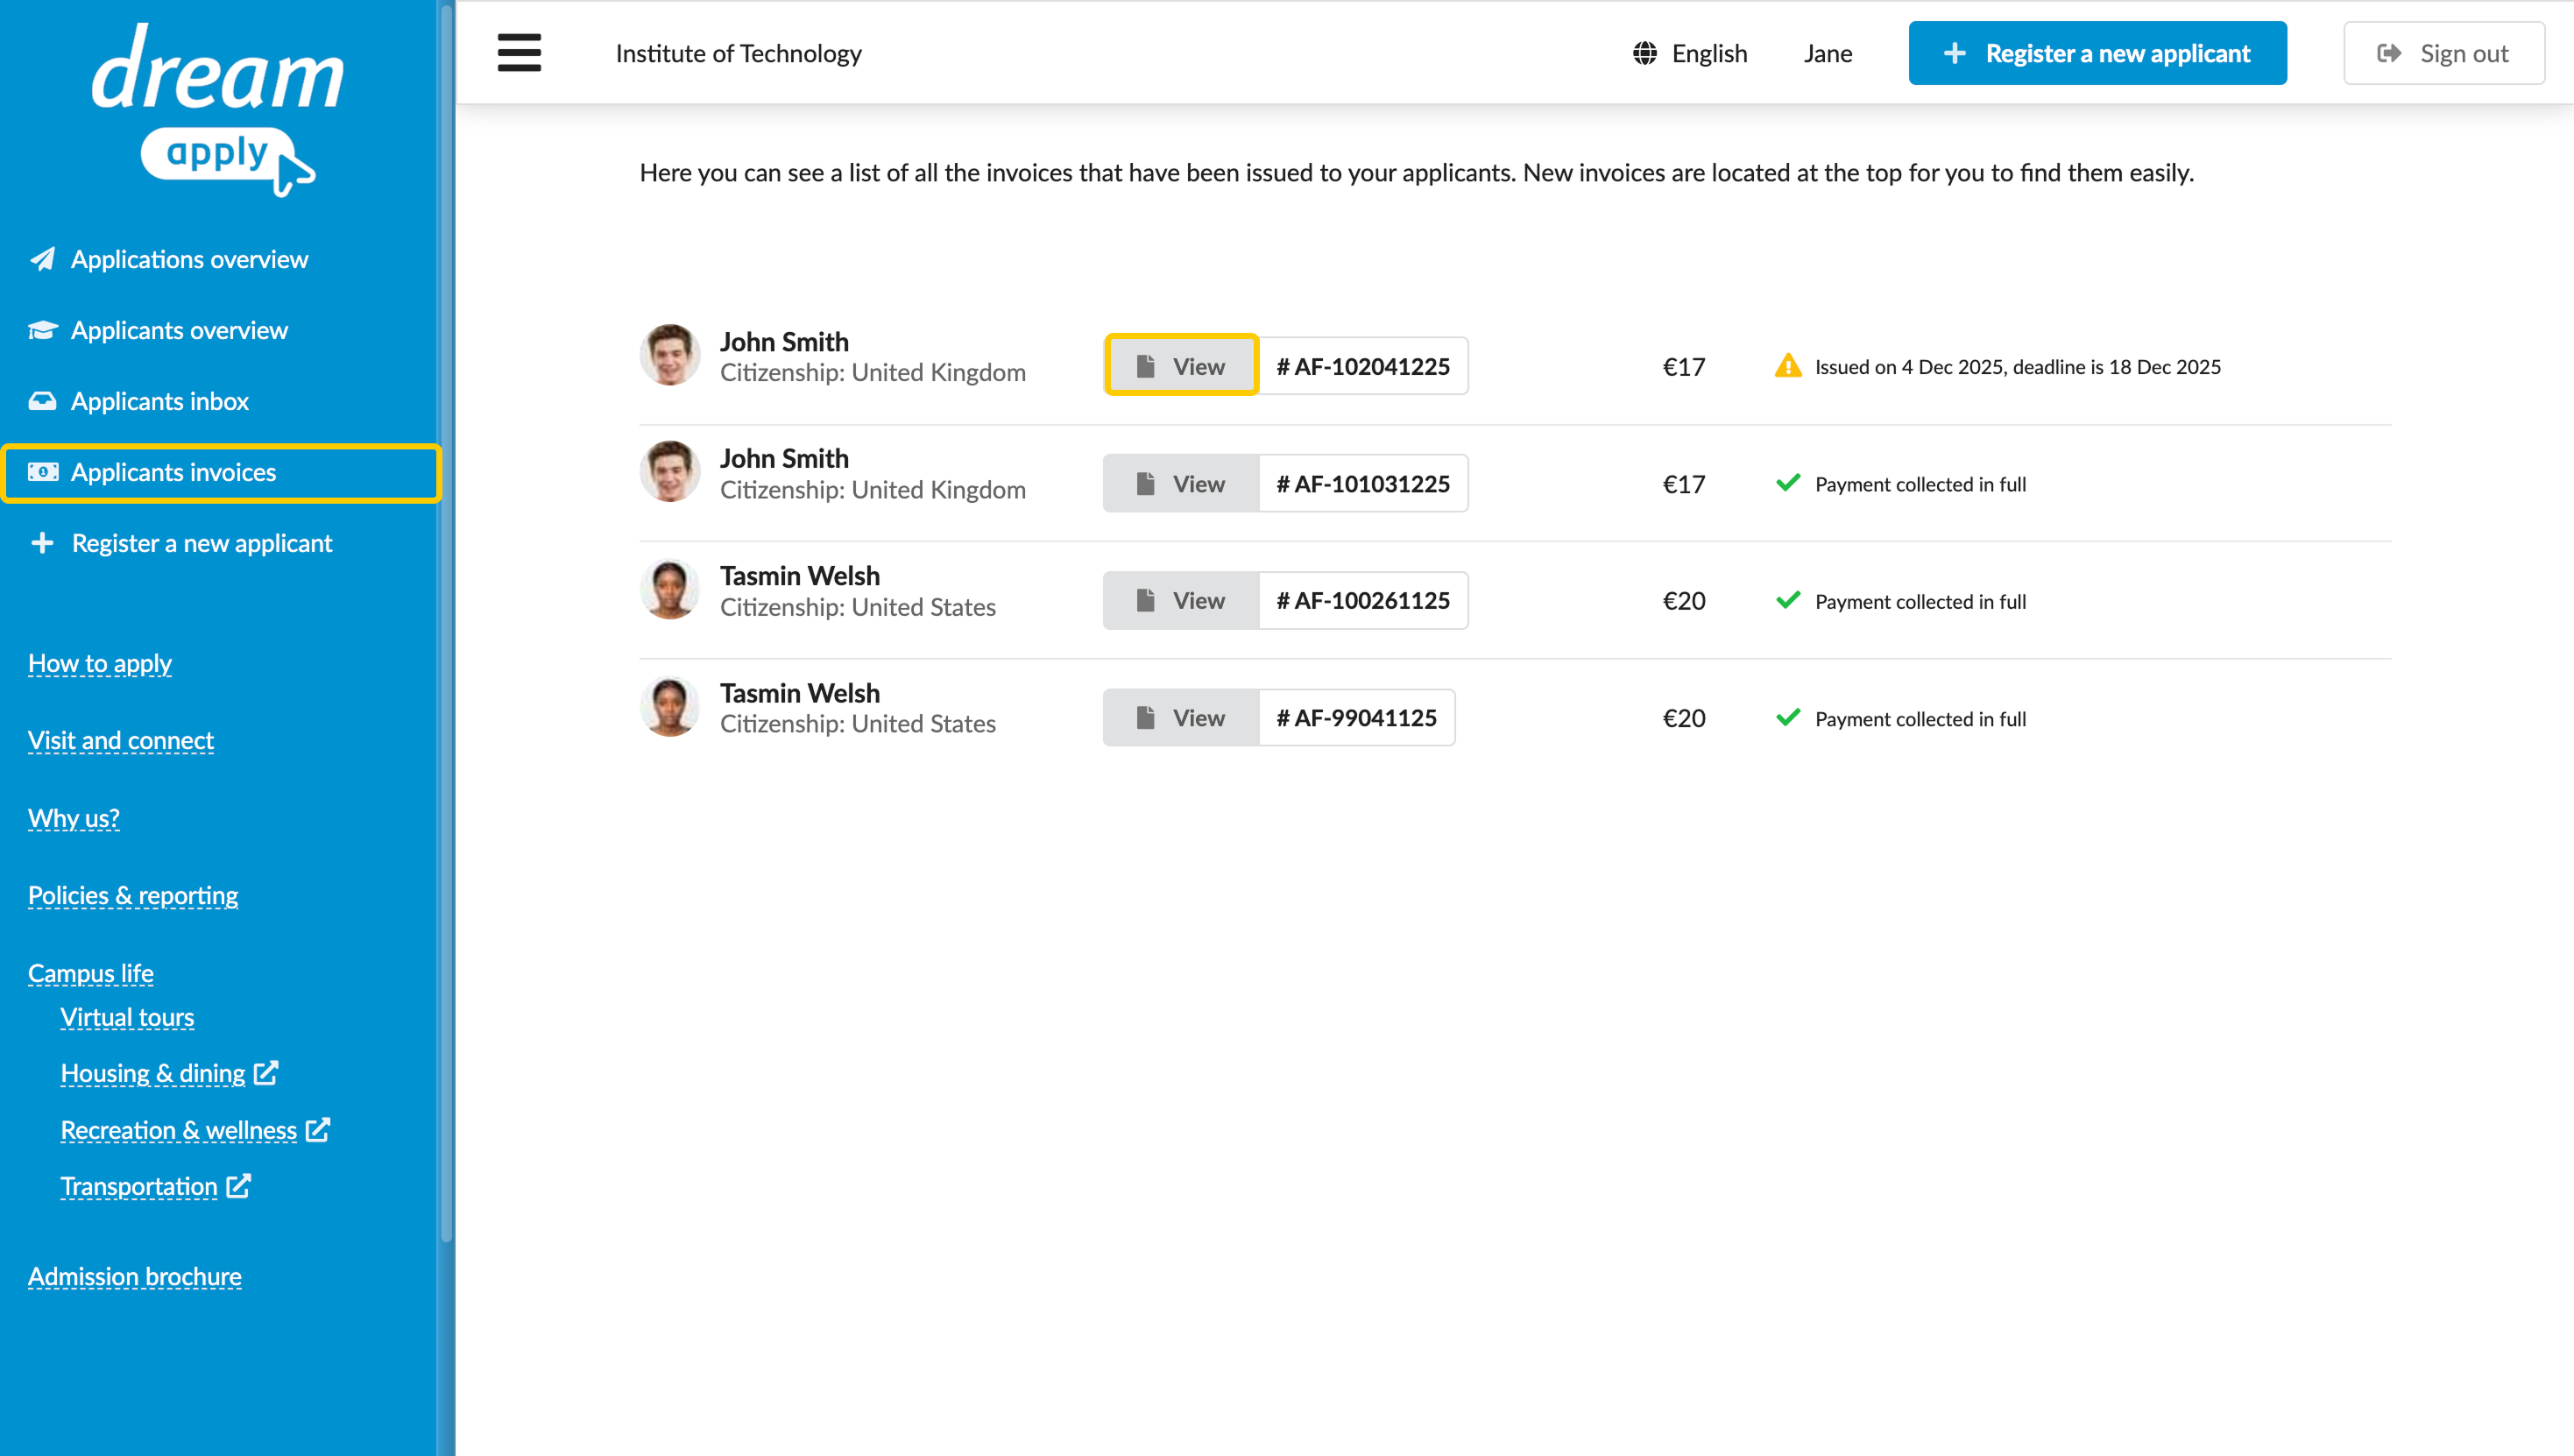
How can I perform payments on behalf of applicants?
When a payment is required, you can view and pay the applicant's invoices through the portal. After the invoice is paid, the system sends a payment confirmation to the email address provided during account registration.
To perform payments, your Advisor account must have the Ability to manage applications, offers, tasks permission level.
To pay an invoice:
- Log in to the portal.
- In the left menu, click Applicants invoices.
- Next to the invoice to pay, click View.
- Select the payment method and follow the instructions of the payment system.

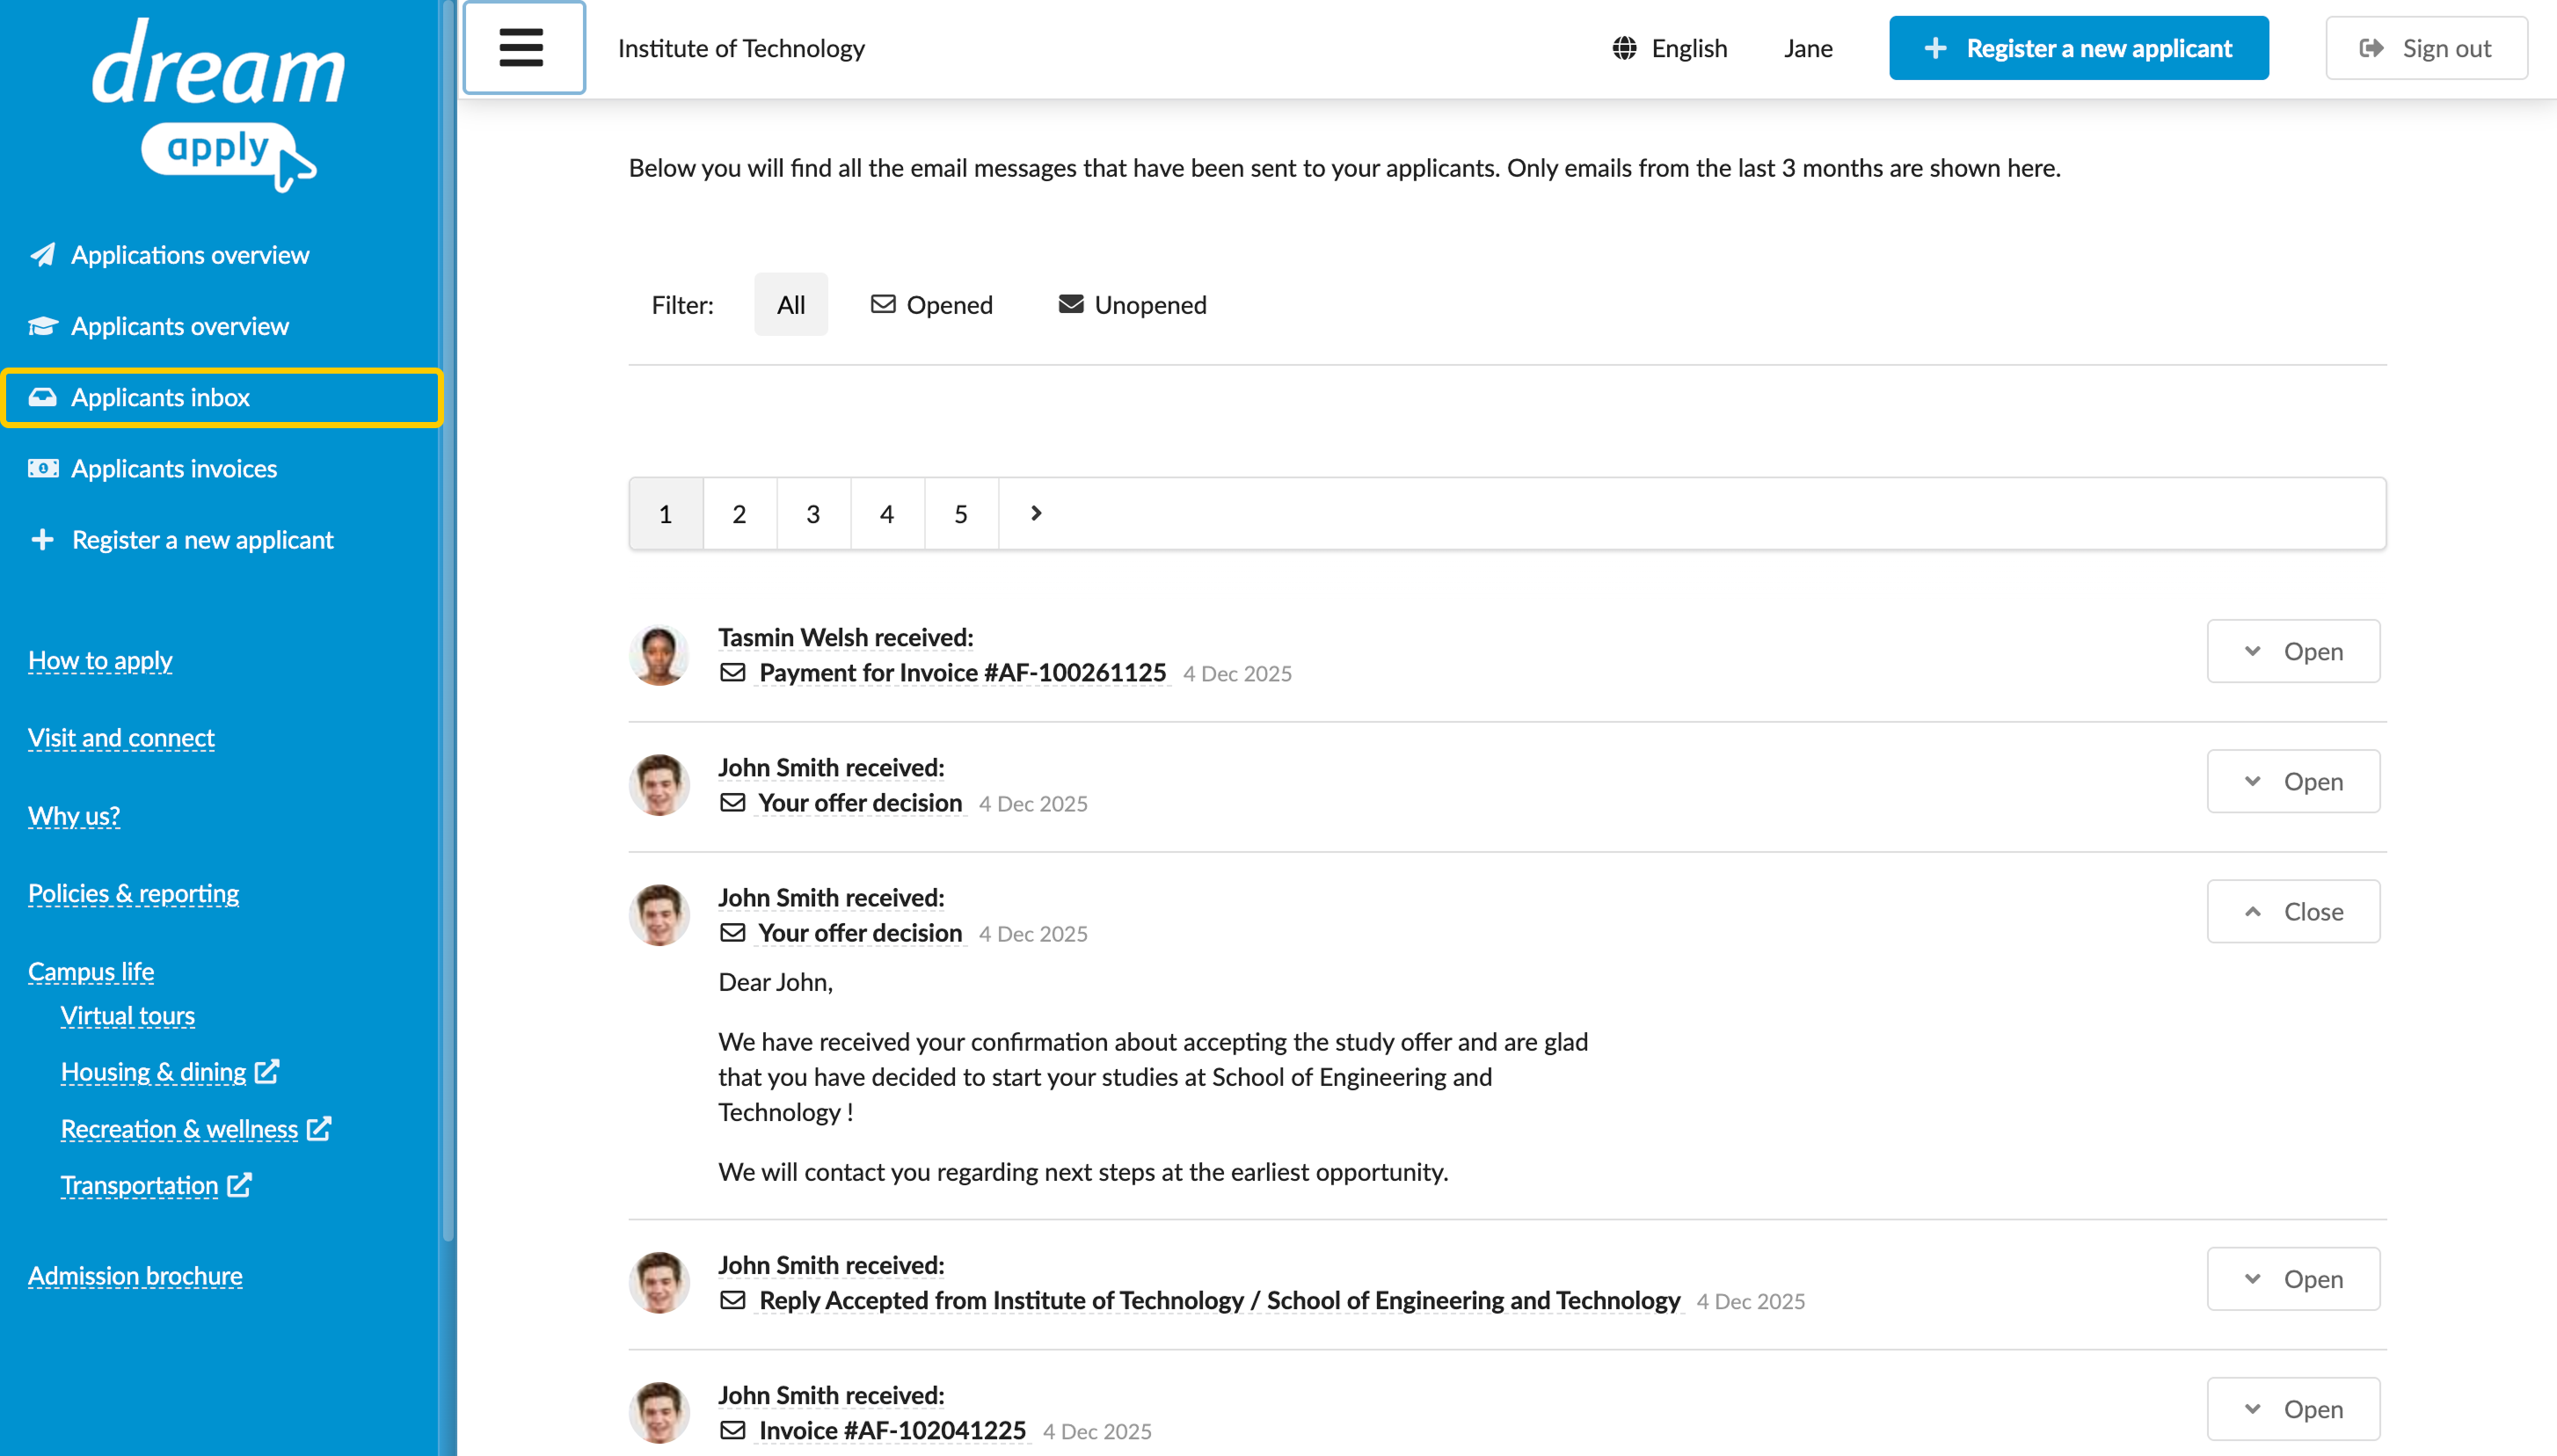
How can I view messages sent to applicants?
You can view informational and confirmation messages sent to applicants using the portal. All correspondence is also sent to the applicants' email addresses provided during account registration to ensure that they remain informed.
To view messages, your Advisor account must have the Ability to manage applications, offers, tasks permission level.
To view messages:
- Log in to the portal.
- In the left menu, click Applicants inbox. Then, click the message to view.
How can I confirm offers on behalf of applicants?
If an offer decision is made and an offer is sent to an applicant, you can review and confirm it using the portal. An offer letter is also sent to the applicant's email address provided during account registration to ensure that the applicant remains informed.
To manage offers, your Advisor account must have the Ability to manage applications, offers, tasks permission level.
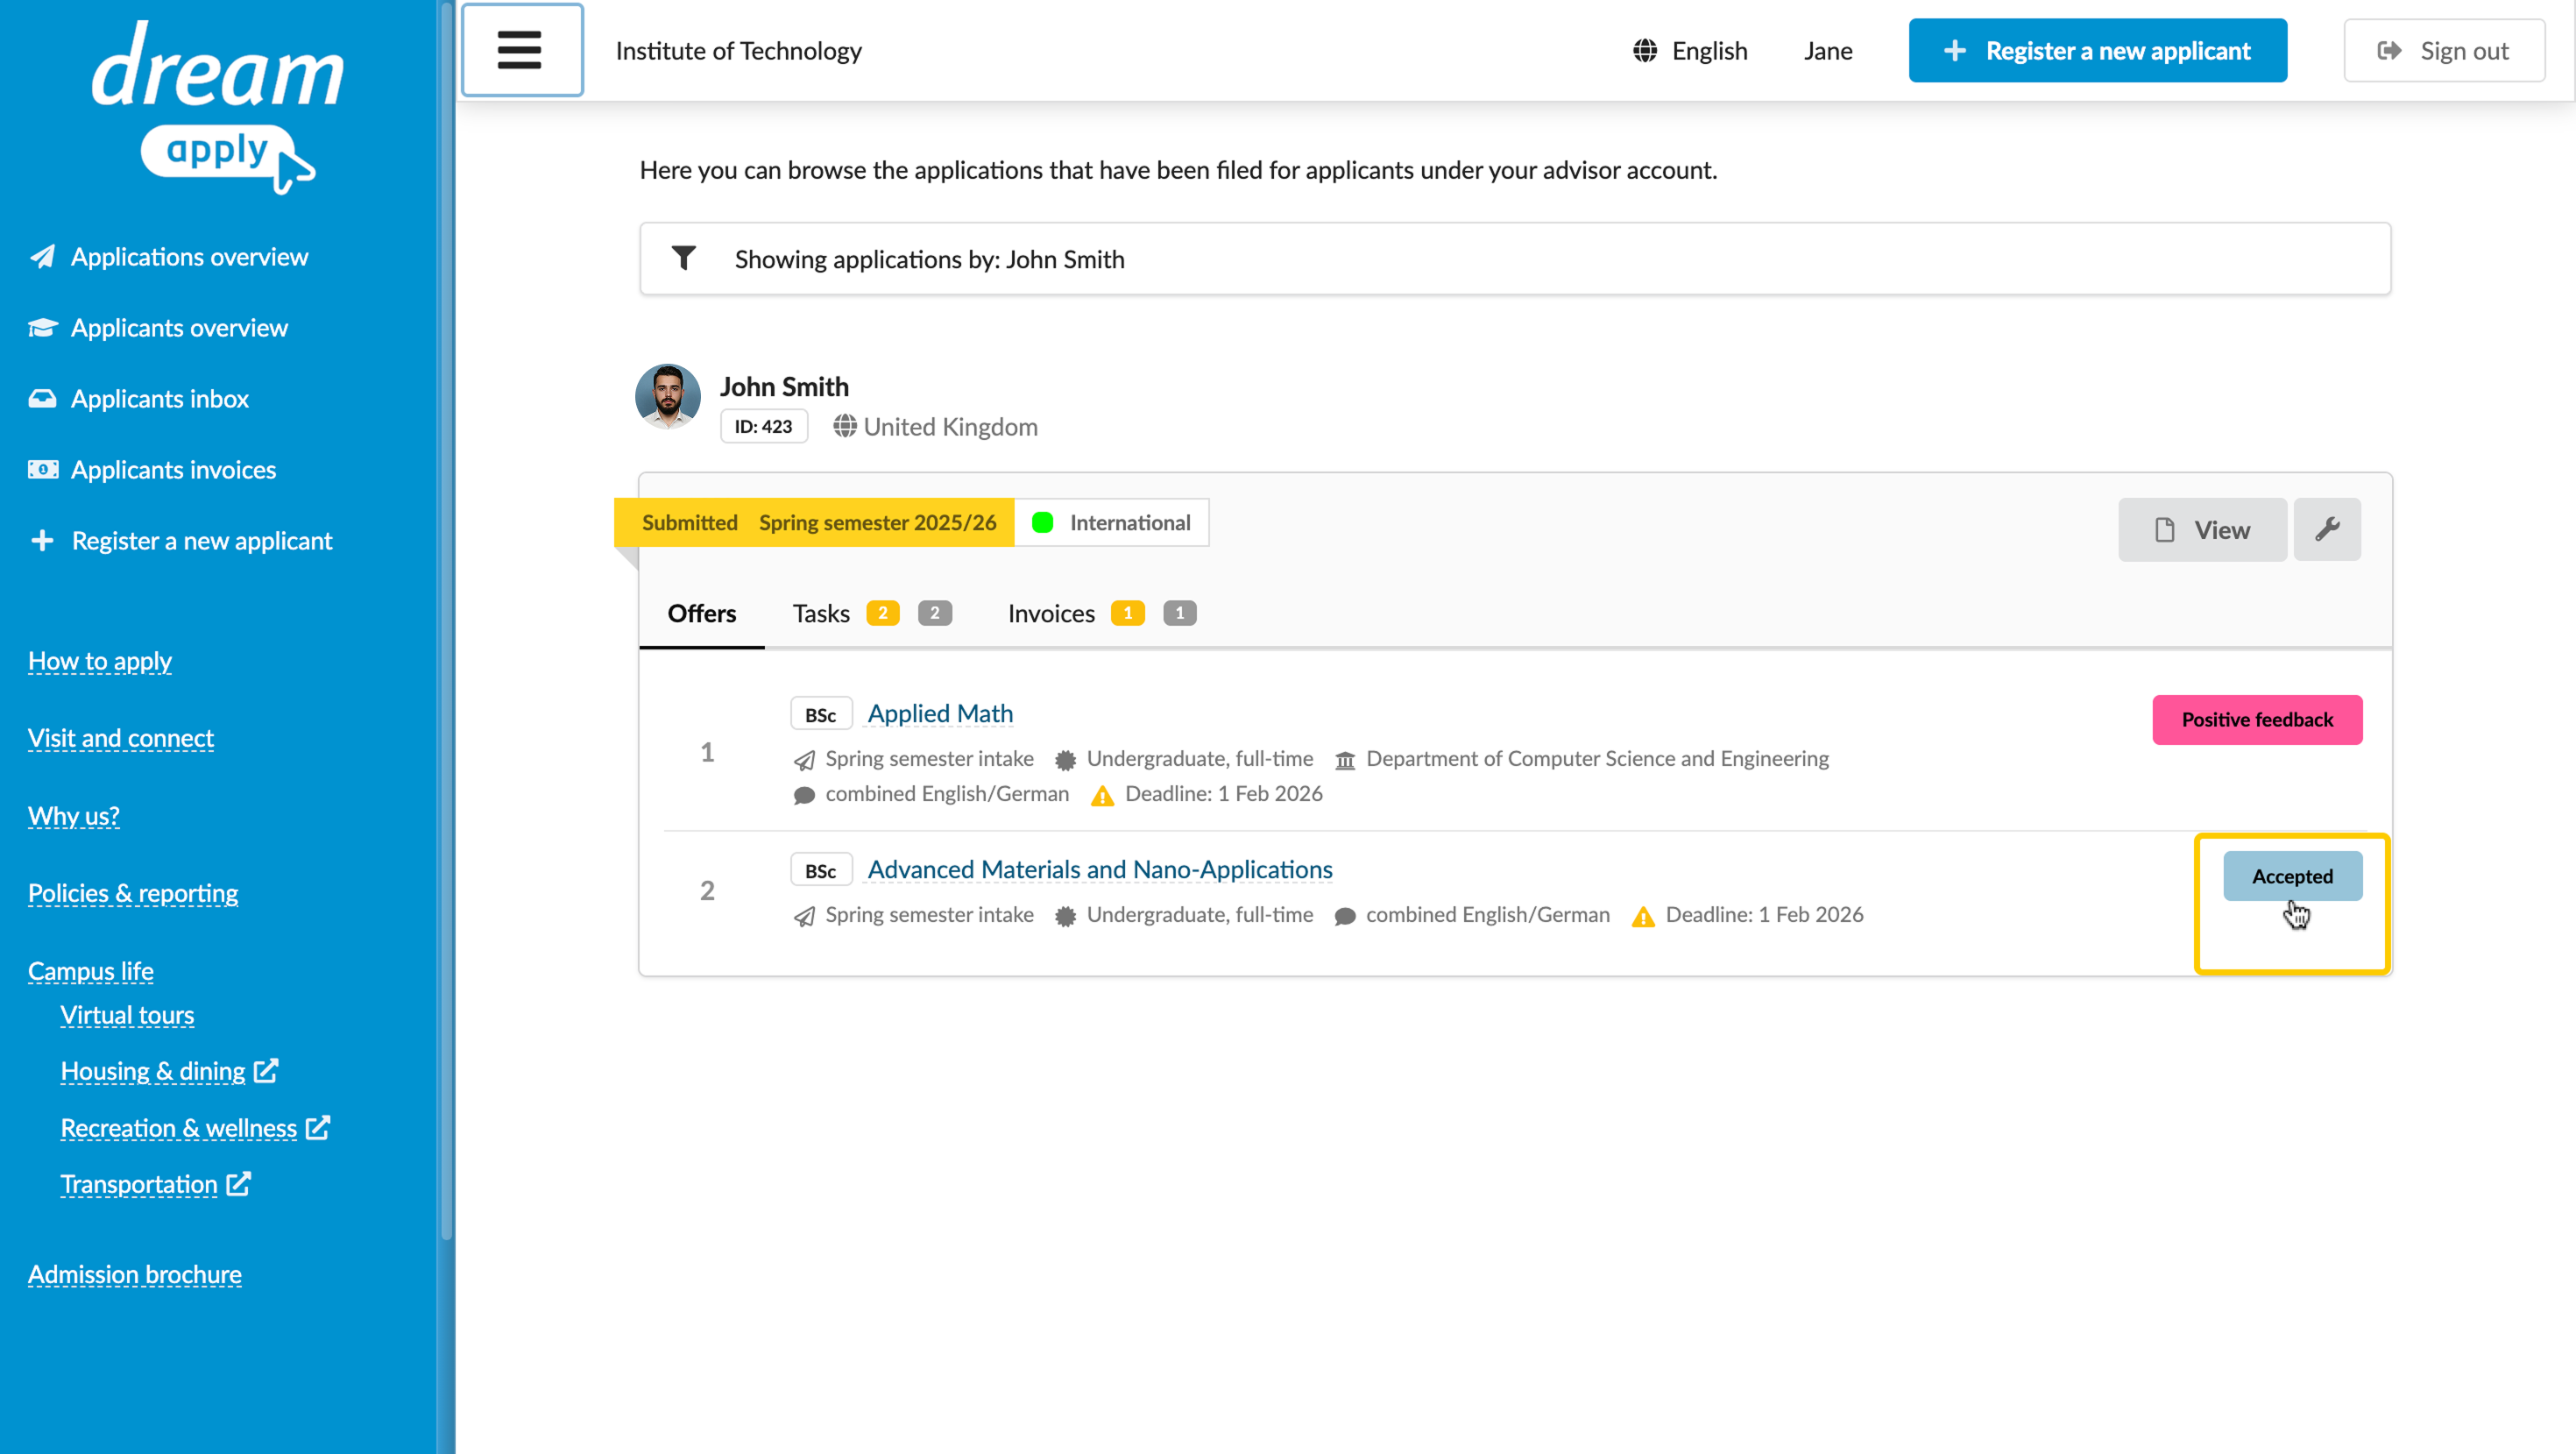
To view and respond to an offer:
- Log in to the portal.
- In the left menu, click Applicants overview. To the right of an applicant, click Show applications.
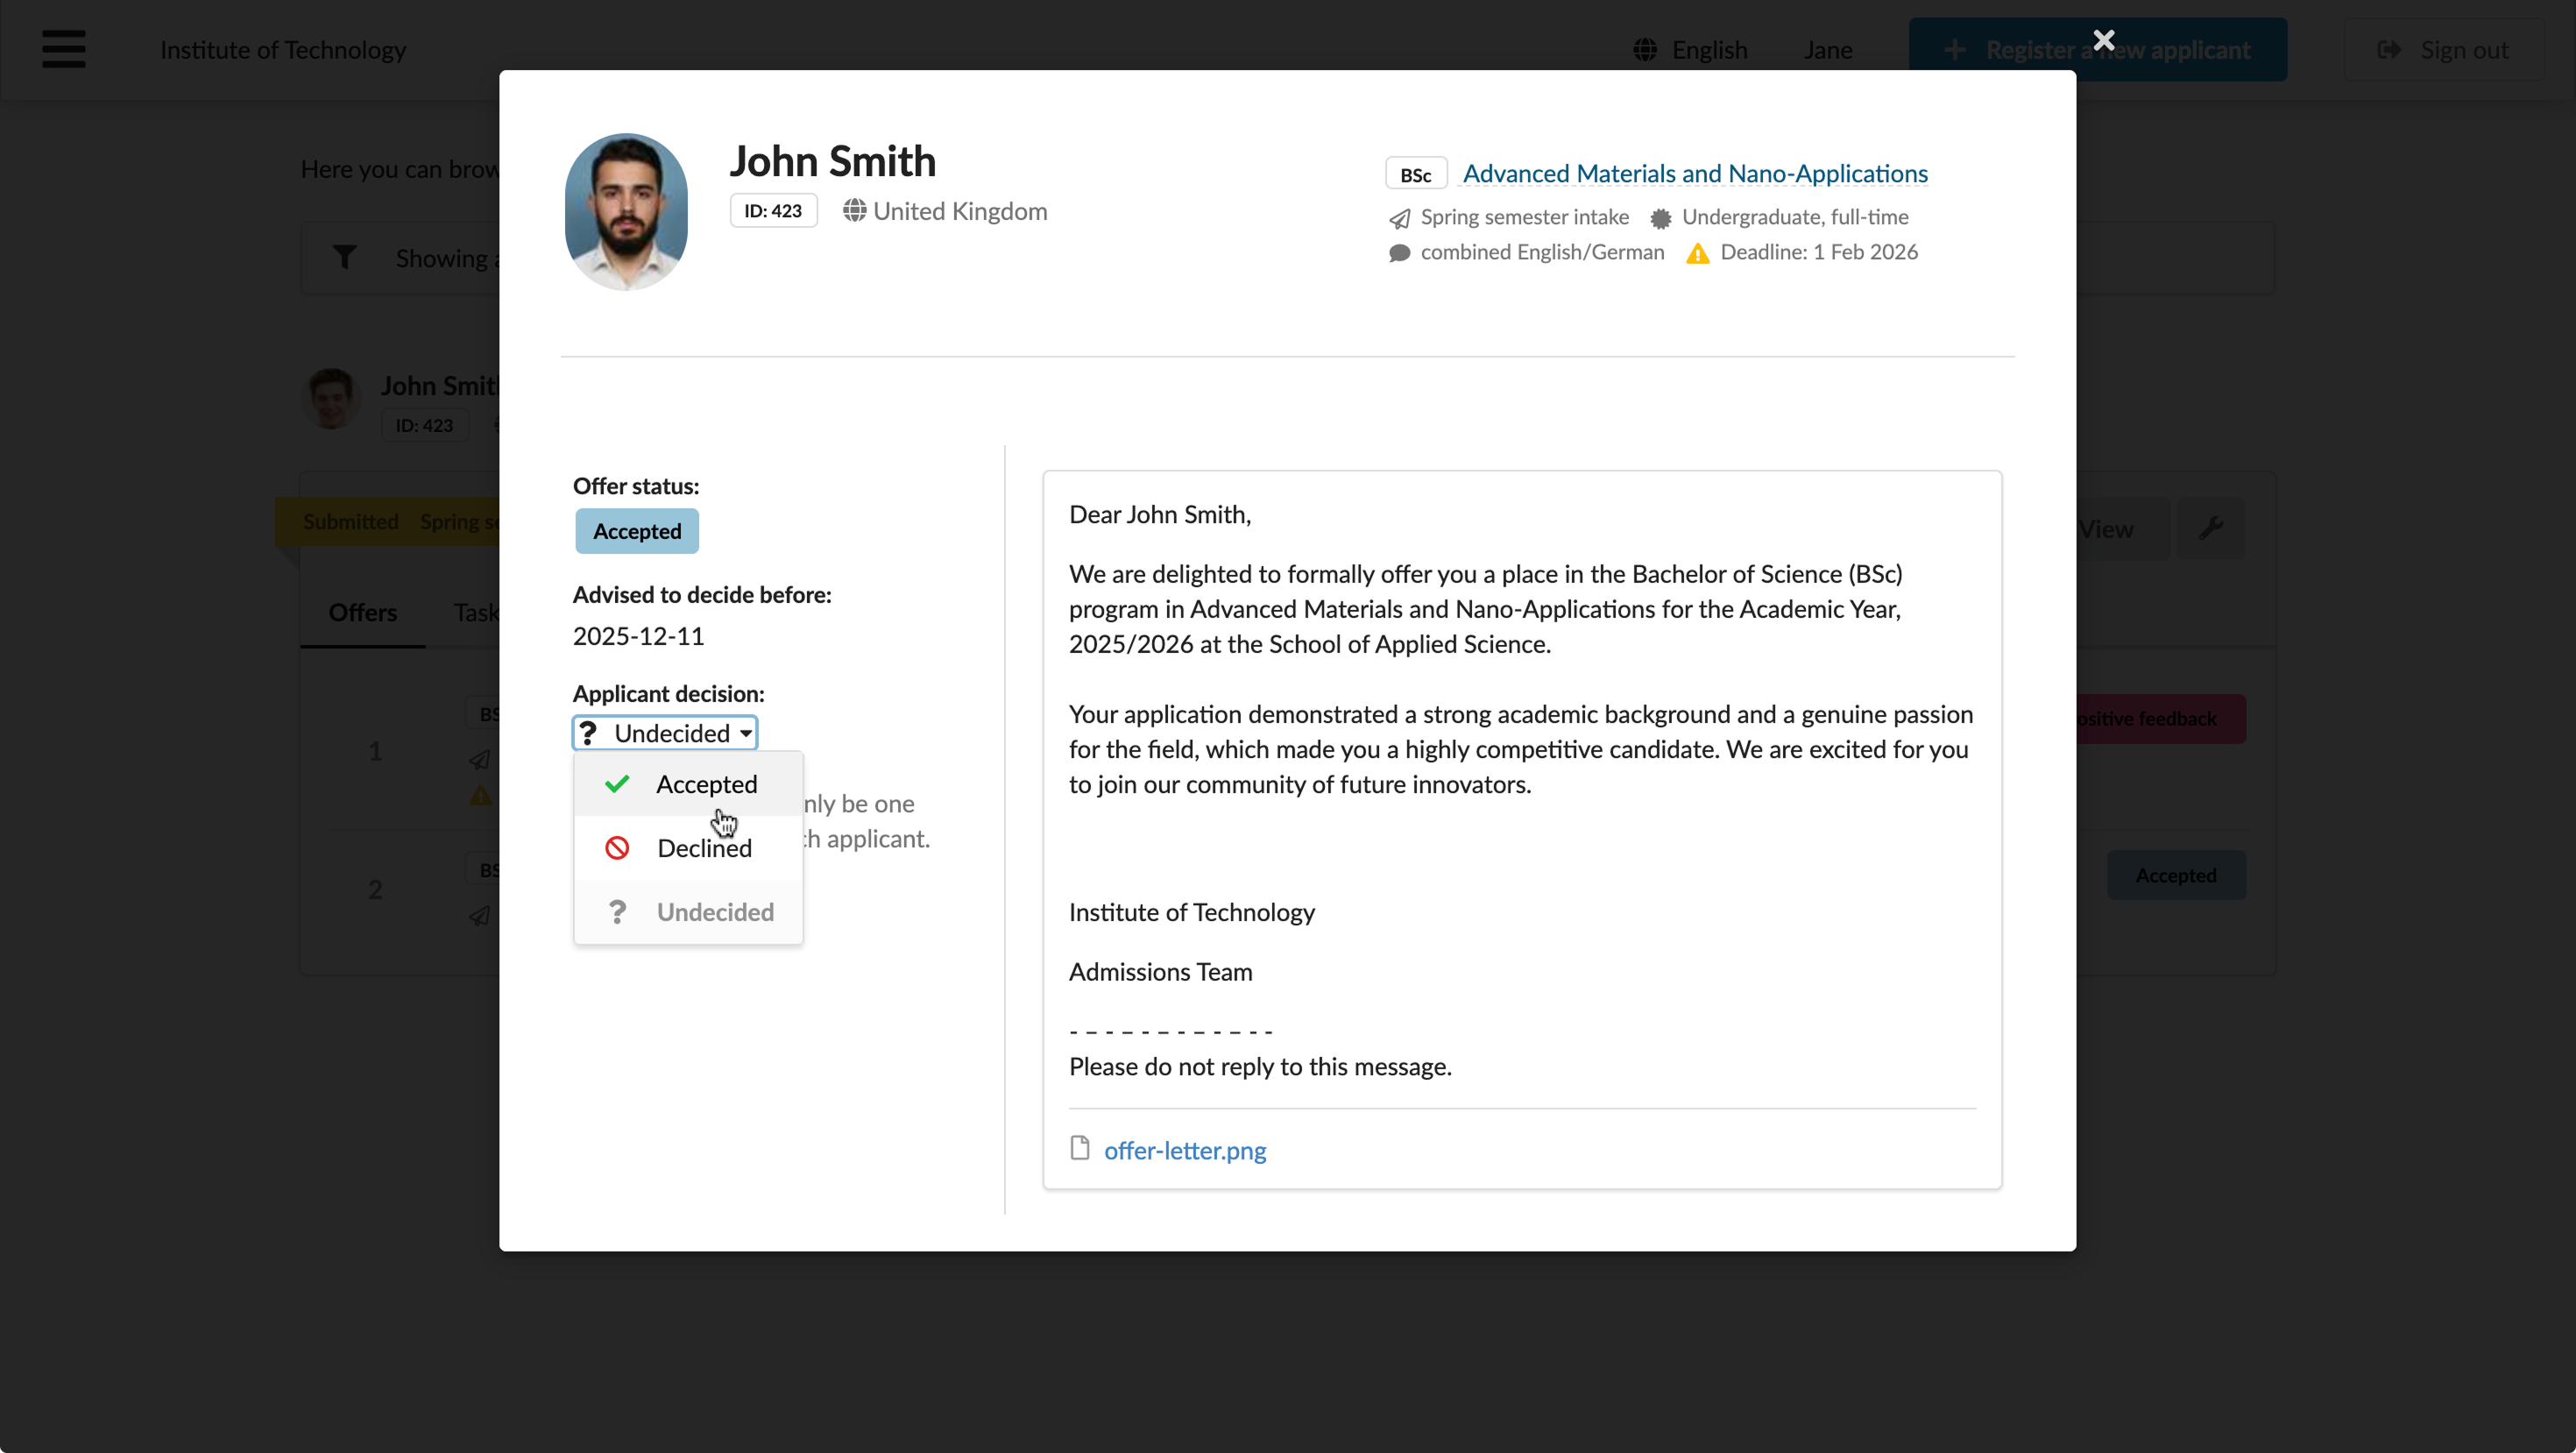
- On the application card, to the right of the priority, click the offer button.
- In the left pane, under Applicant decision, select the decision from the list.
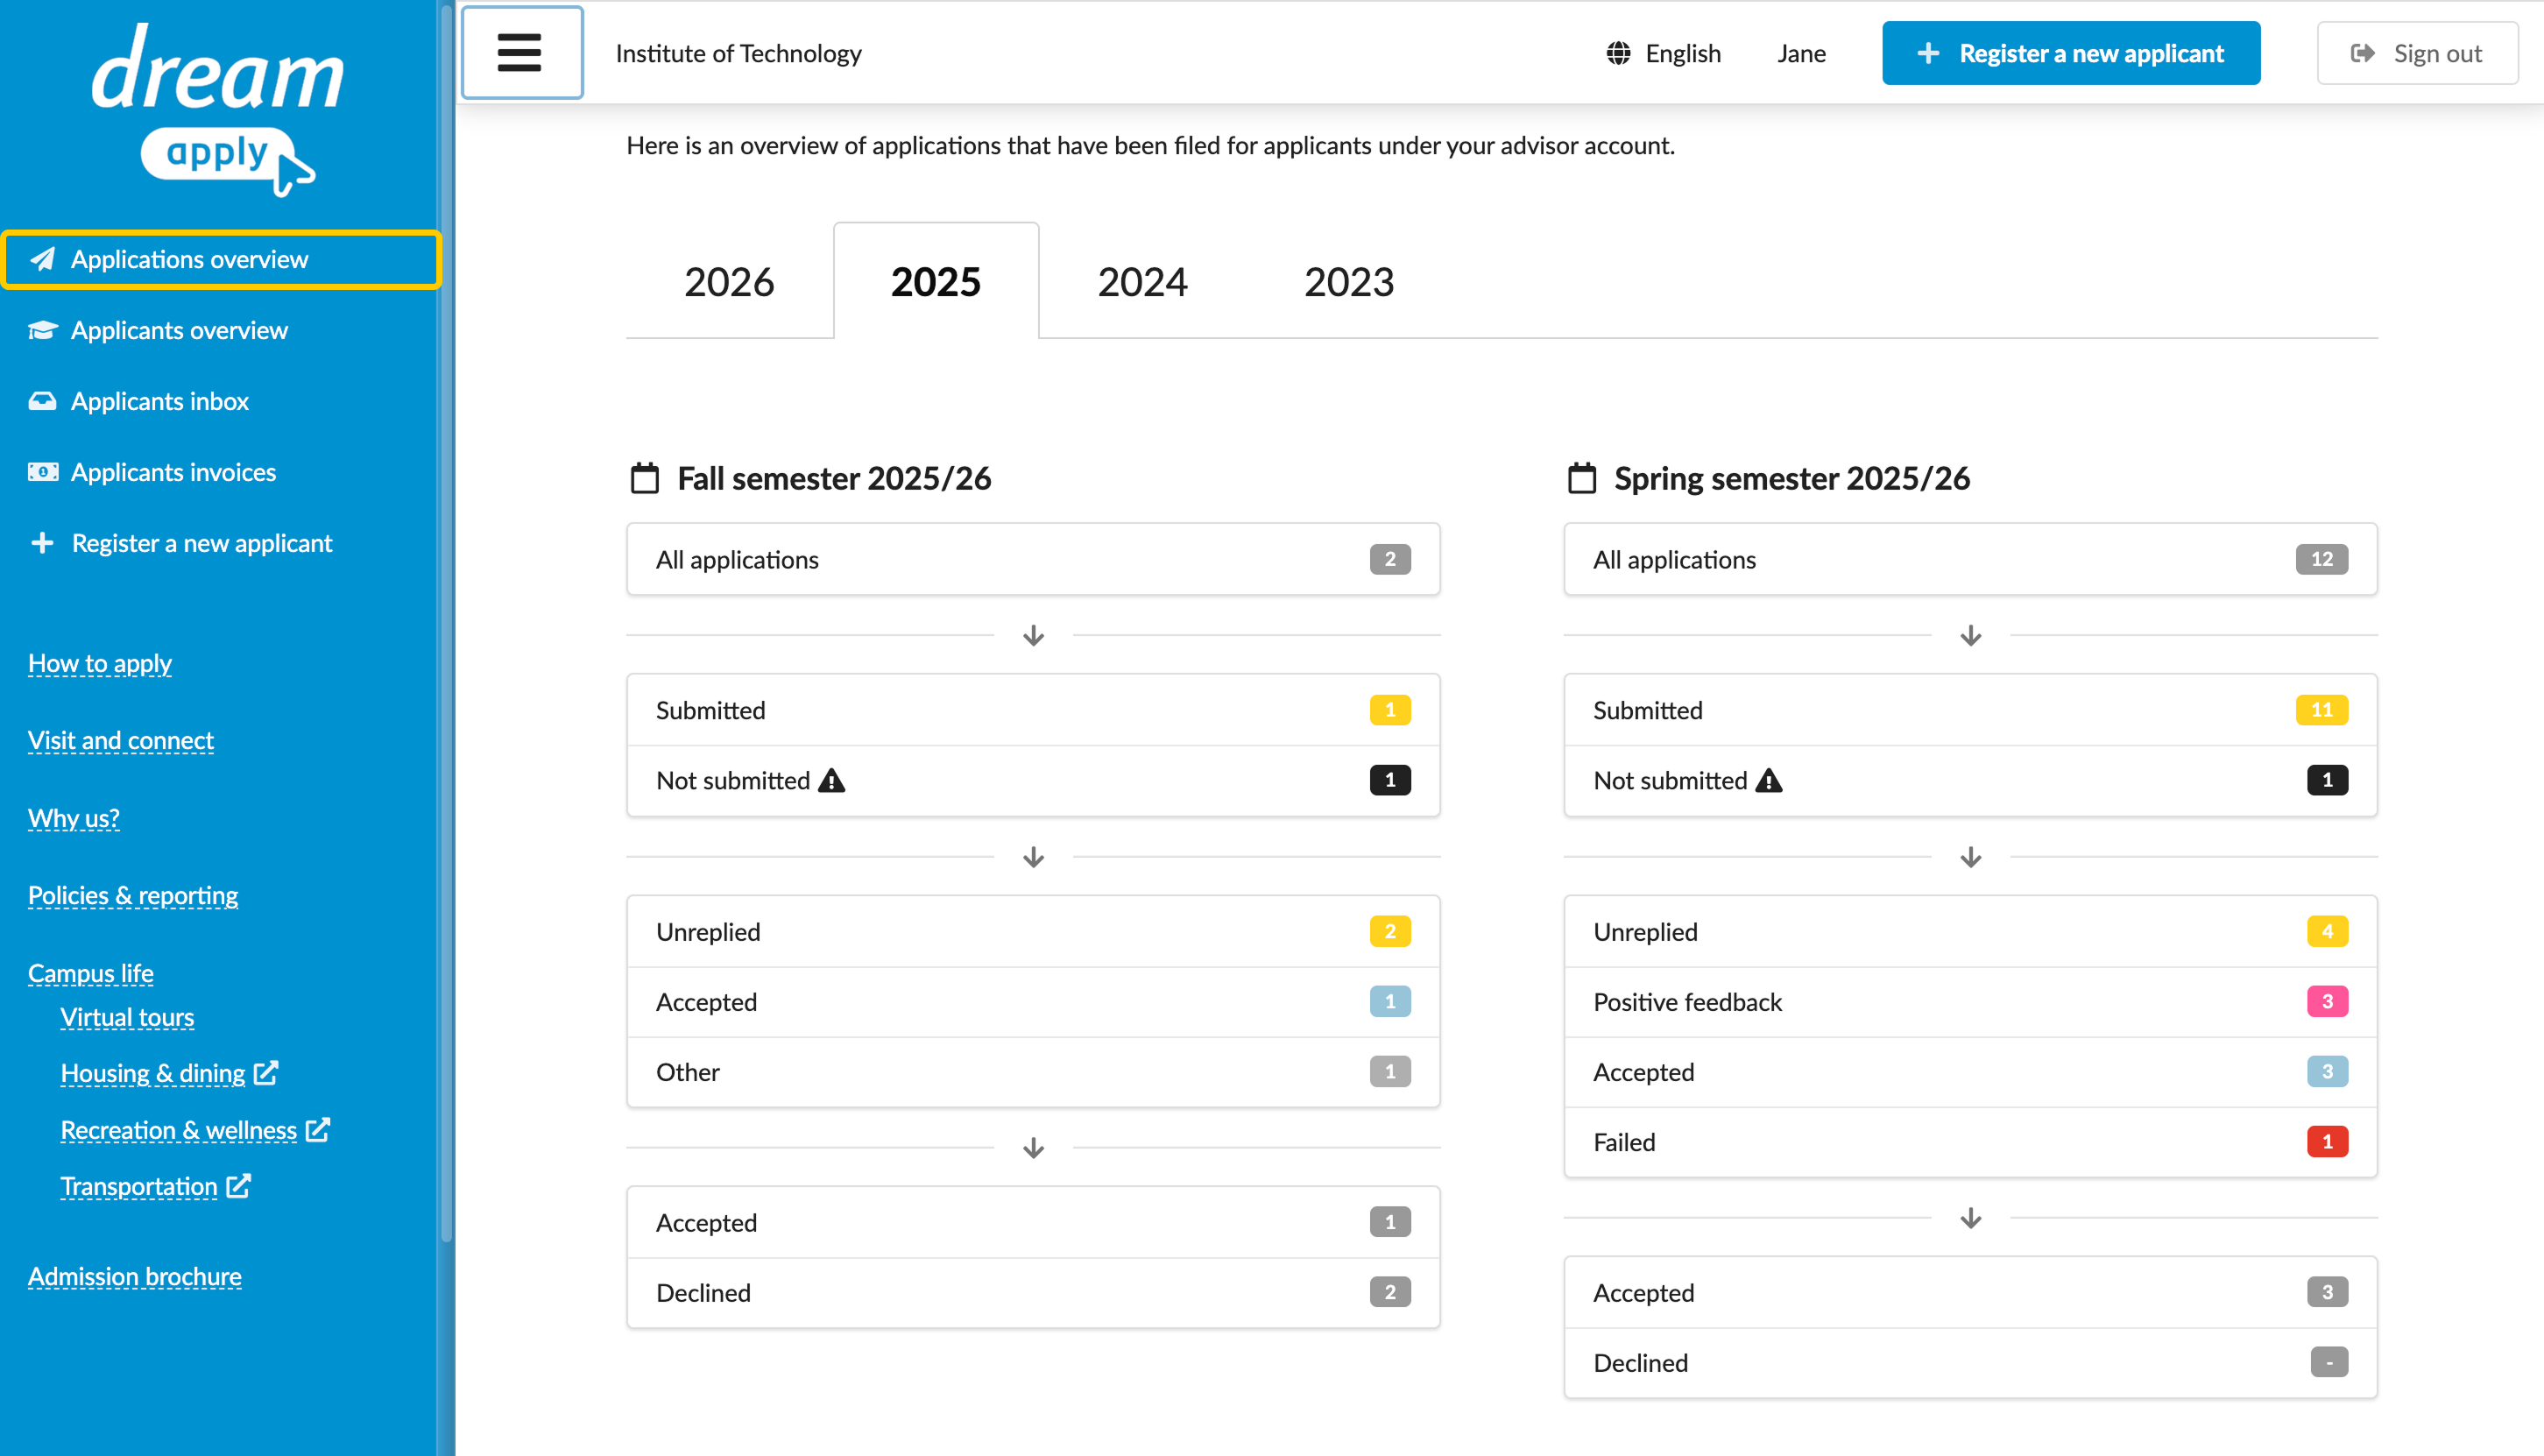
How can I view statistics?
You can view statistics related to applicant submissions and progress using the Applications overview dashboard.
To drill down into a specific group of applications, click the number icon next to it.