Set up the academic calendar
Roles
These roles reflect the default DreamApply setup.
You can define custom roles based on your
institution's needs. Learn more →:
You can define custom roles based on your
institution's needs. Learn more →
To set up an academic year in DreamApply, start by cloning the previous year. When you clone a year, DreamApply automatically increments the year by one and copies the structure of the original year.
After cloning, you can adjust the calendar to reflect your academic requirements and structure. As part of this process, you can:
Before you begin
To set up the academic calendar, your account must have the Superuser or Courses administrator role or the academic-terms permission.
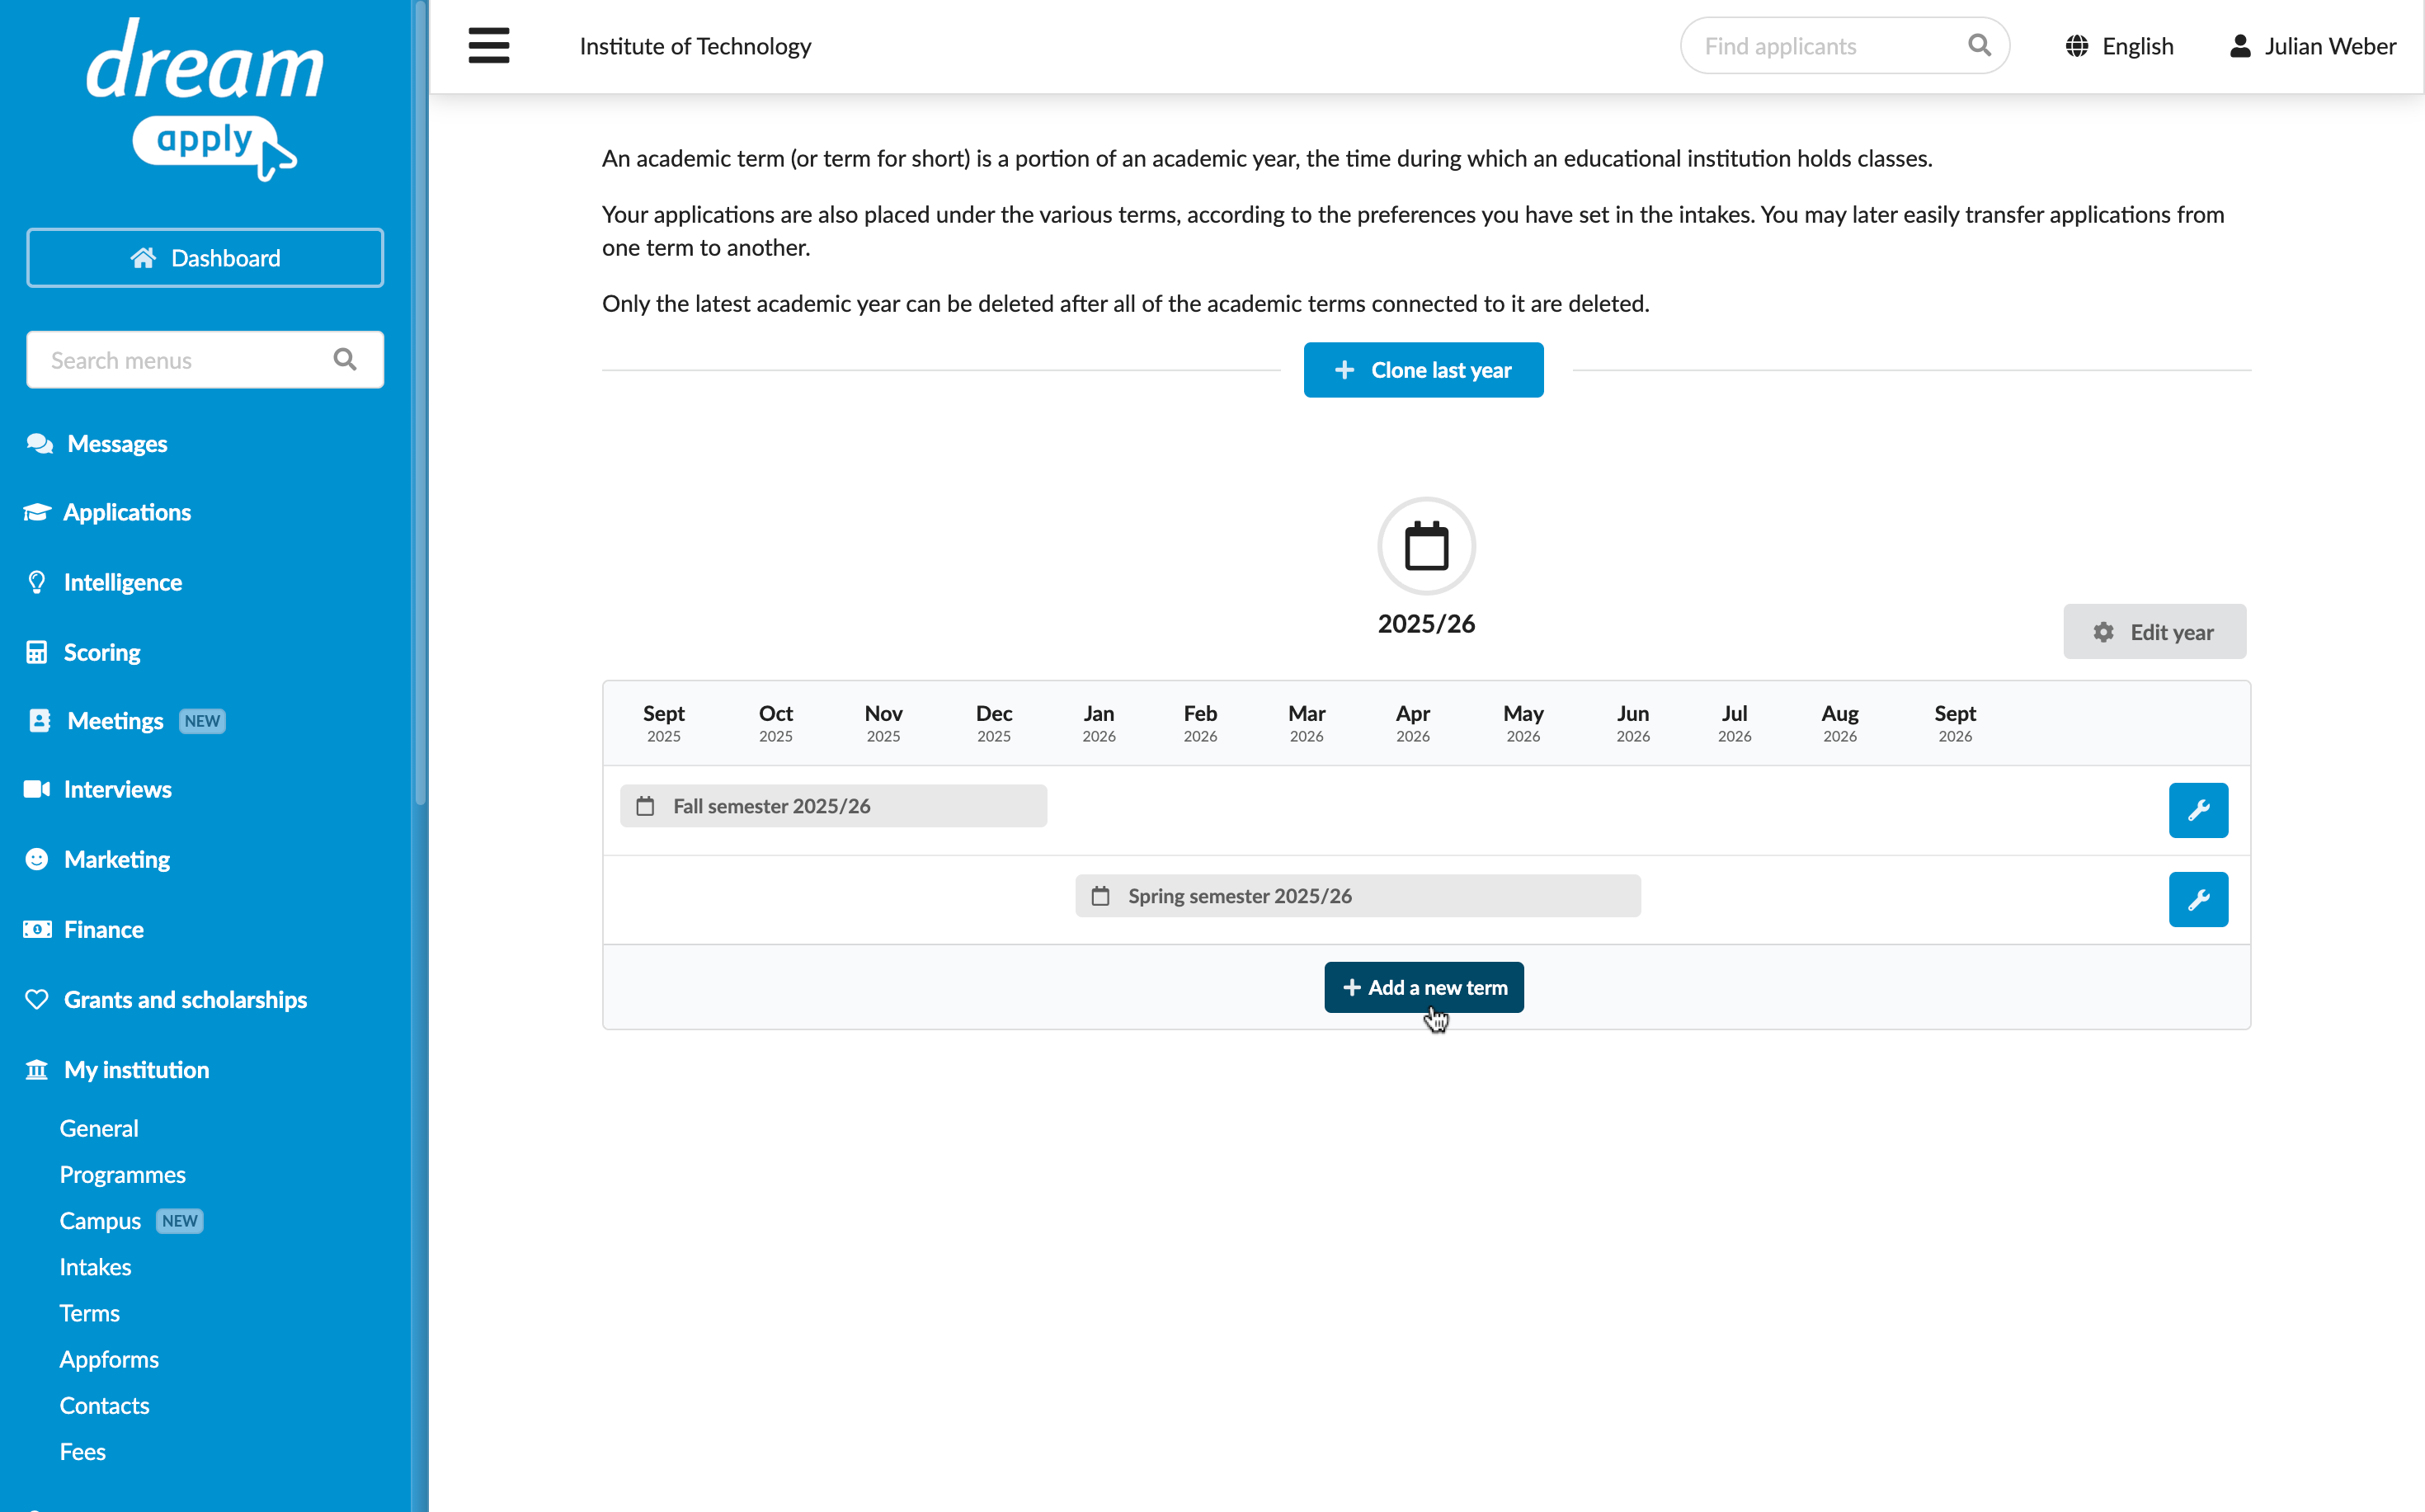
Clone an academic year
To clone an academic year:
- In the main menu, under My Institution/Institutions, select Terms.
- Click Clone last year to add a new year.
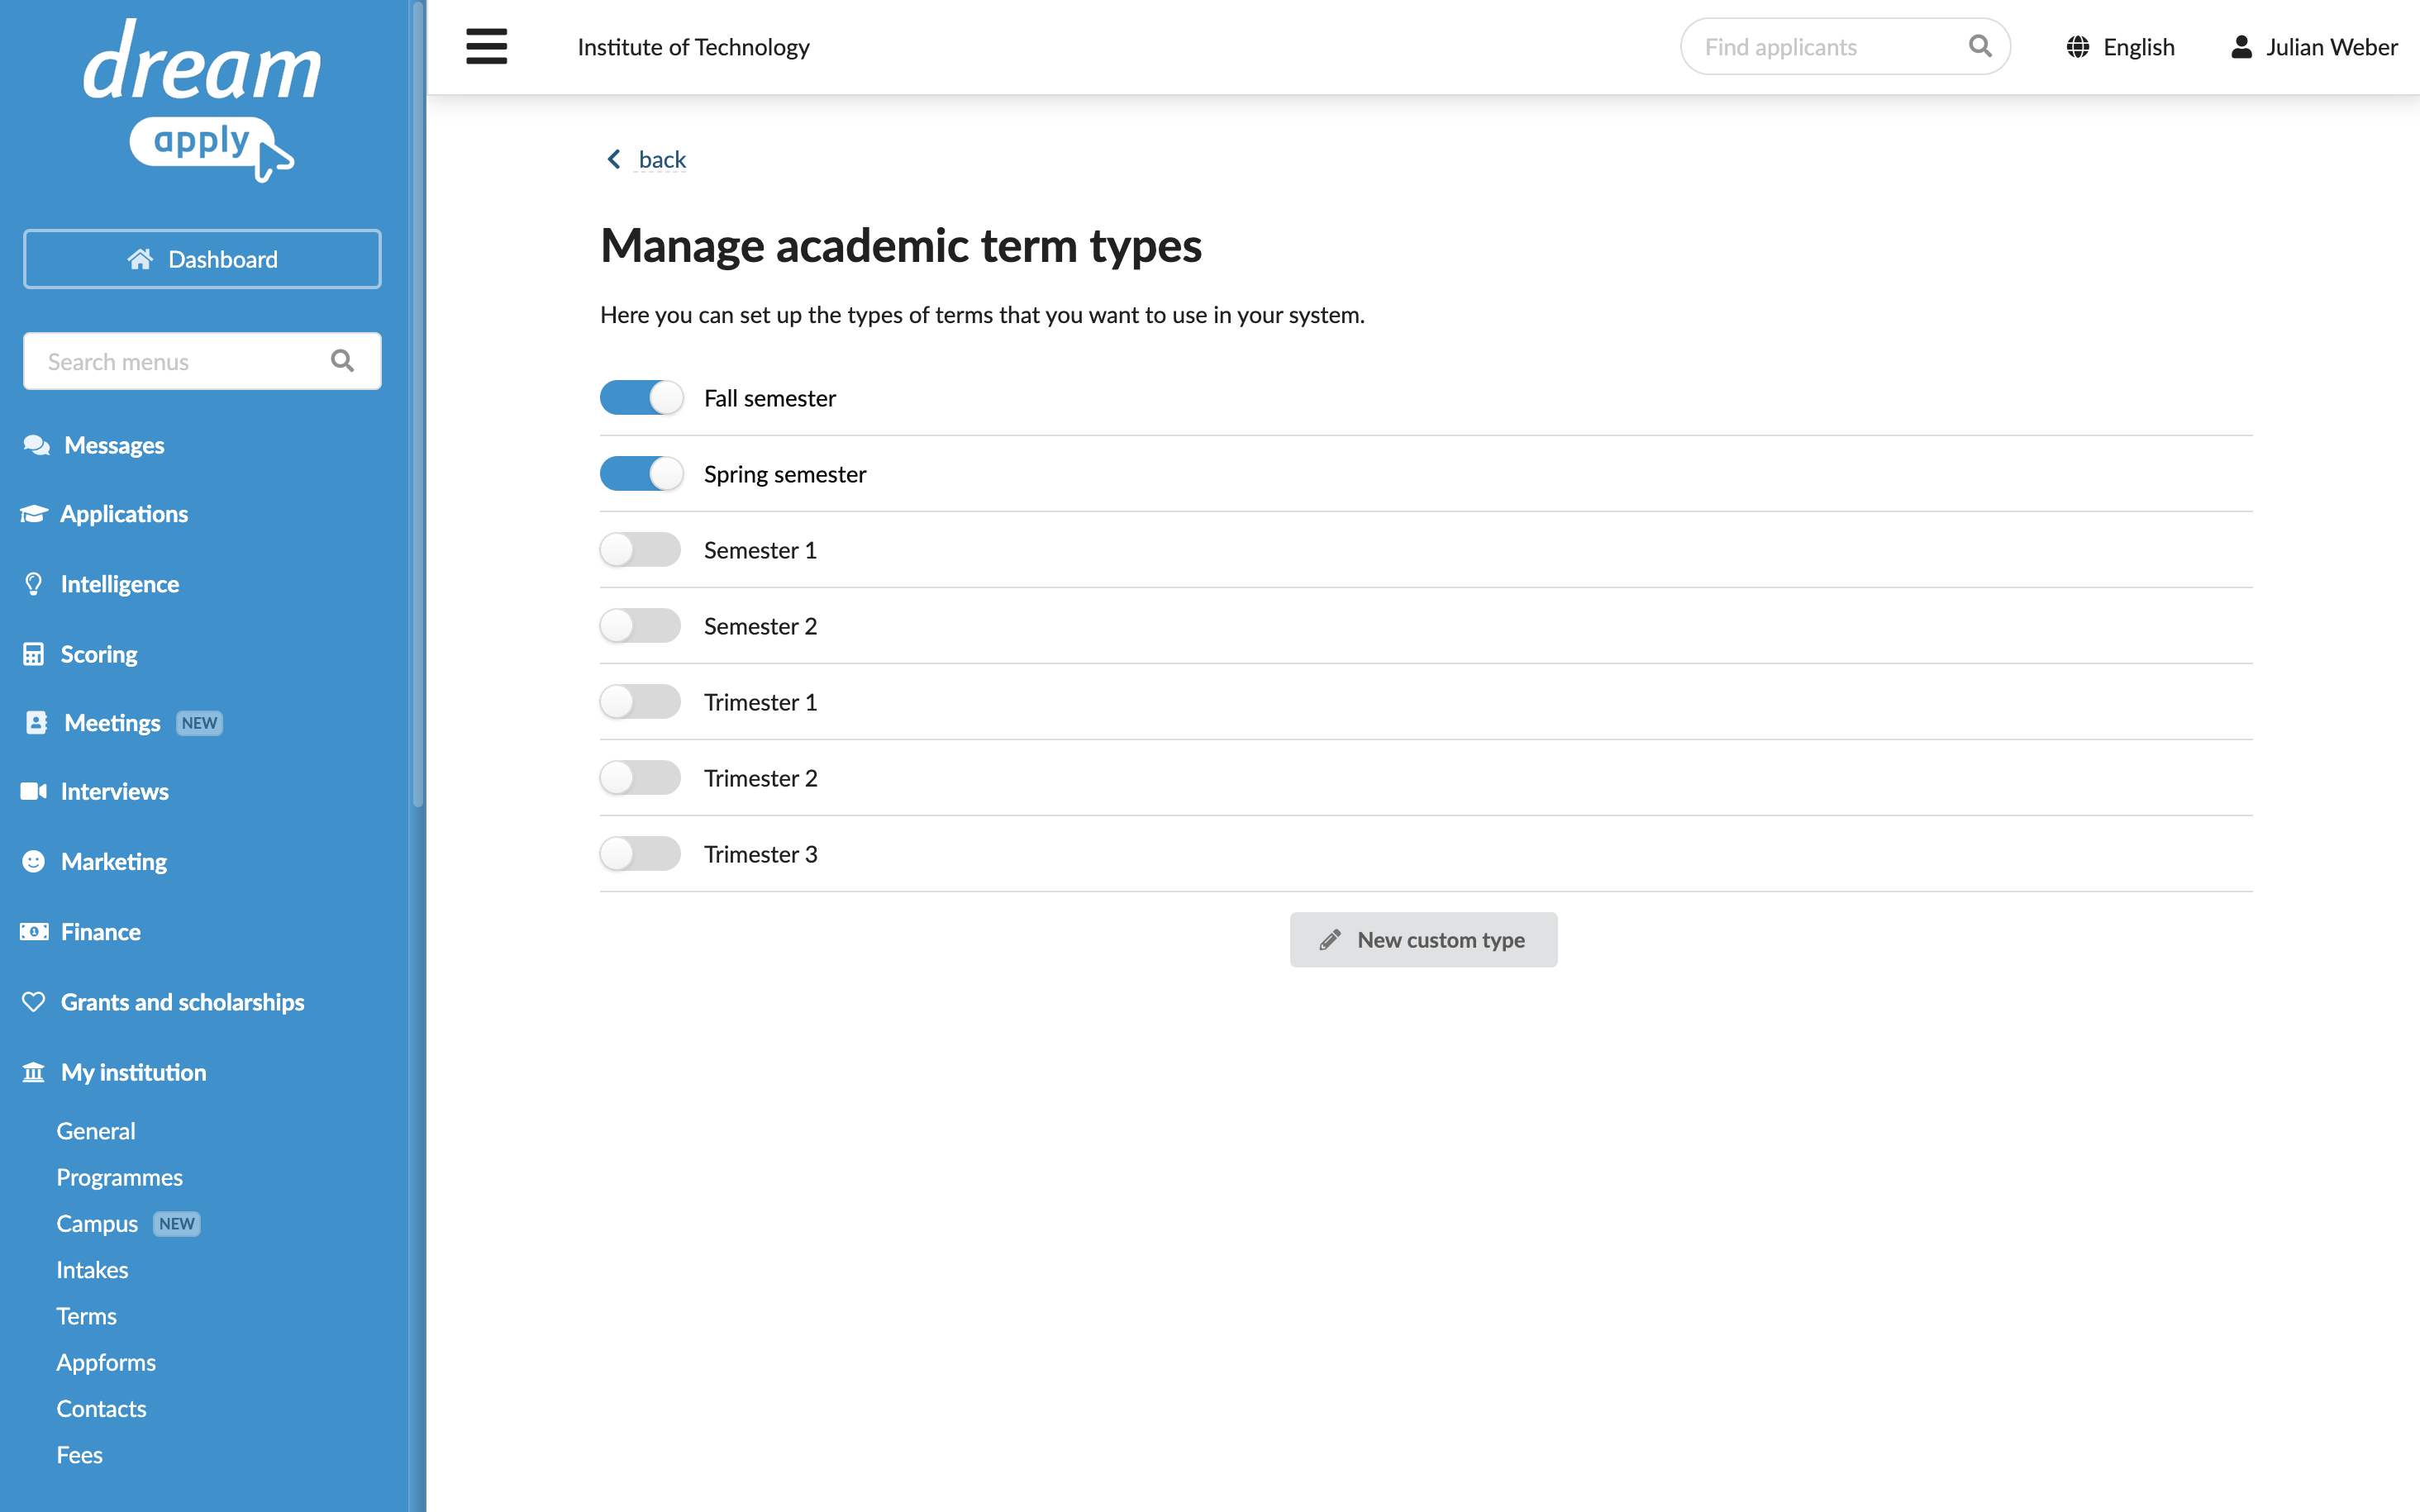
Select the term type
You can select the type of academic terms to use for the academic year or define custom types.
- In the main menu, under My Institution/Institutions, select Terms.
- At the bottom of the academic year block, click Add new term and select Manage.
- In the Manage academic term types list, enable options next to terms you want to use. If the term is not listed, at the bottom of the list, click New custom type, enter the term name and click OK.
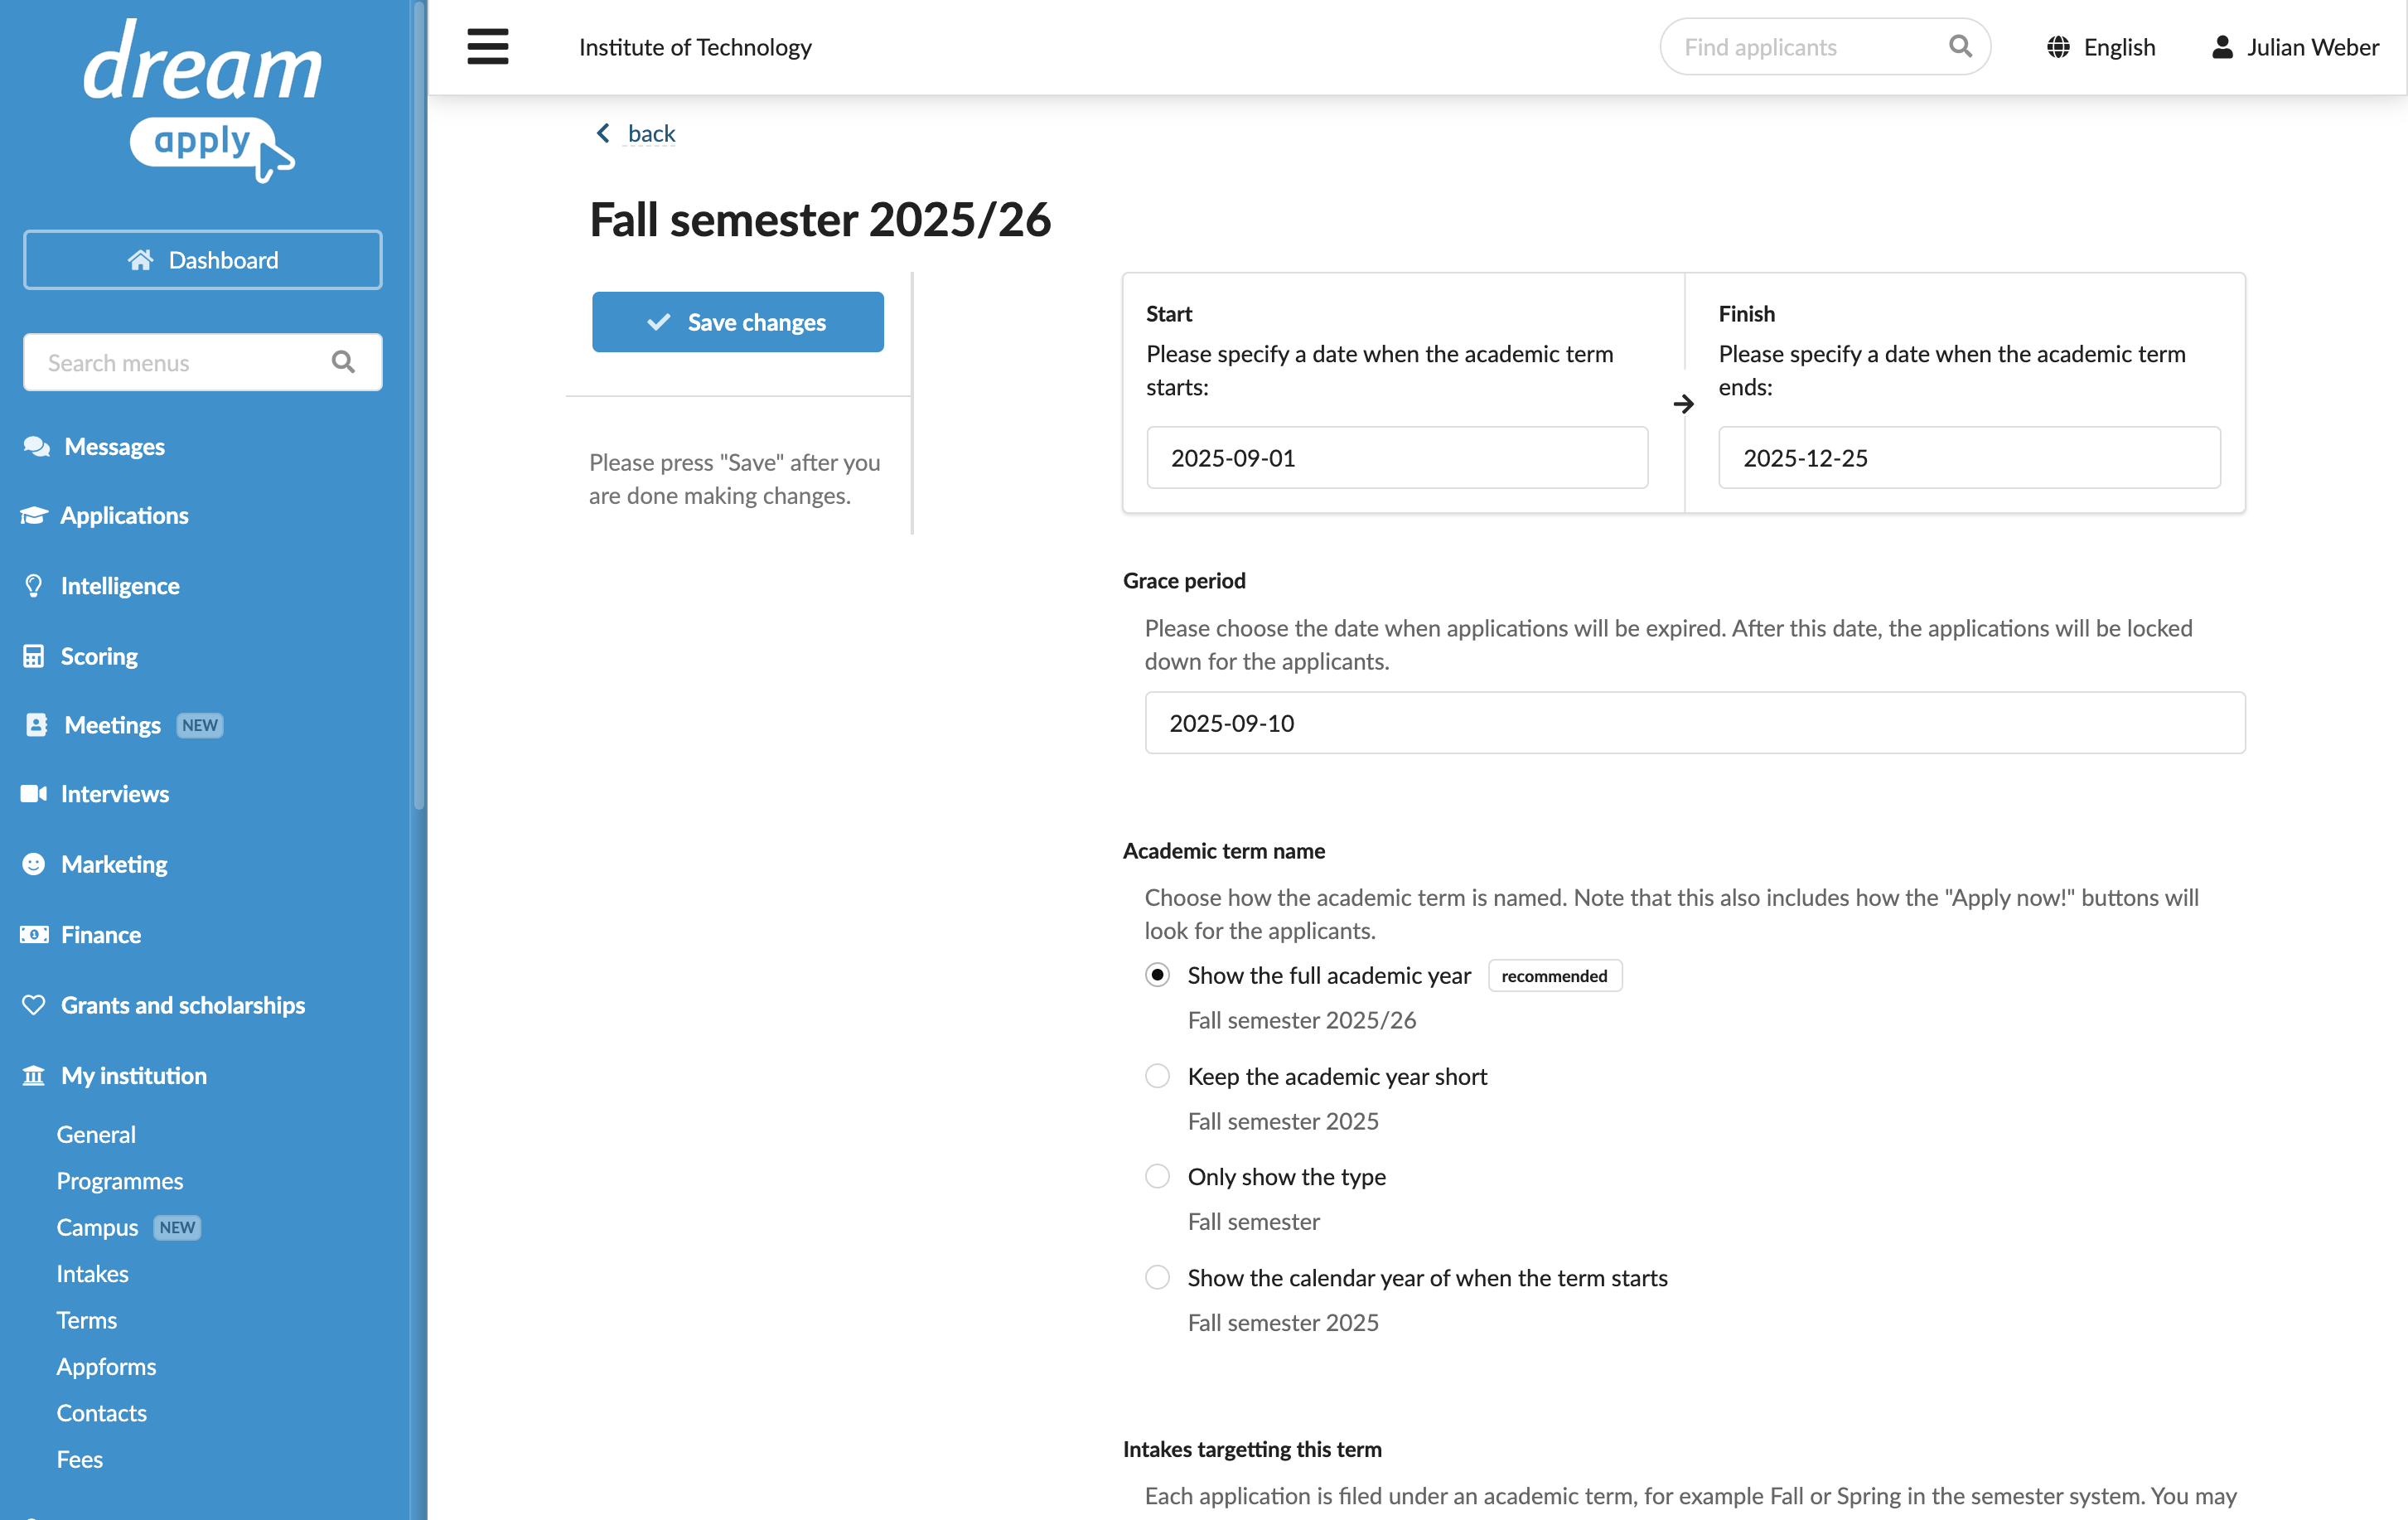
Add terms
To add terms to the academic year:
- In the main menu, under My Institution/Institutions, select Terms.
- At the bottom of the academic year block, click Add new term and select the type of term you want to add.
- Select to edit the added term.
- Specify the term details: start and end dates, grace period and the term name. This name will be displayed on the Apply now! button and will be used to identify intakes that target this term.
- At the top of the form, click Save changes.
- Repeat steps 2-5 for all terms to be added to the academic year.