Set up intakes
Roles
These roles reflect the default DreamApply setup.
You can define custom roles based on your
institution's needs. Learn more →:
You can define custom roles based on your
institution's needs. Learn more →
To define admission paths for applicants, you need to set up intakes in DreamApply. An intake defines the timeline, structure and key stages of the application process.
DreamApply lets you set up multiple intakes to accommodate different applicant categories. As a result, each category can have its clear and custom application track to follow.
You do not need to clone or create new intakes each year. Configure them to be reusable and give them neutral names that do not reference a specific year. This reduces annual setup work, as you only need to update the intake deadlines when a new cycle begins.
Reusing intakes prevents clutter, streamlines the use of intake filters and keeps the system maintainable over time. For details, see Update intake deadlines.
Before you begin
To set up intakes, your account must have the Superuser or Courses administrator role or the intakes permission.
Add intakes
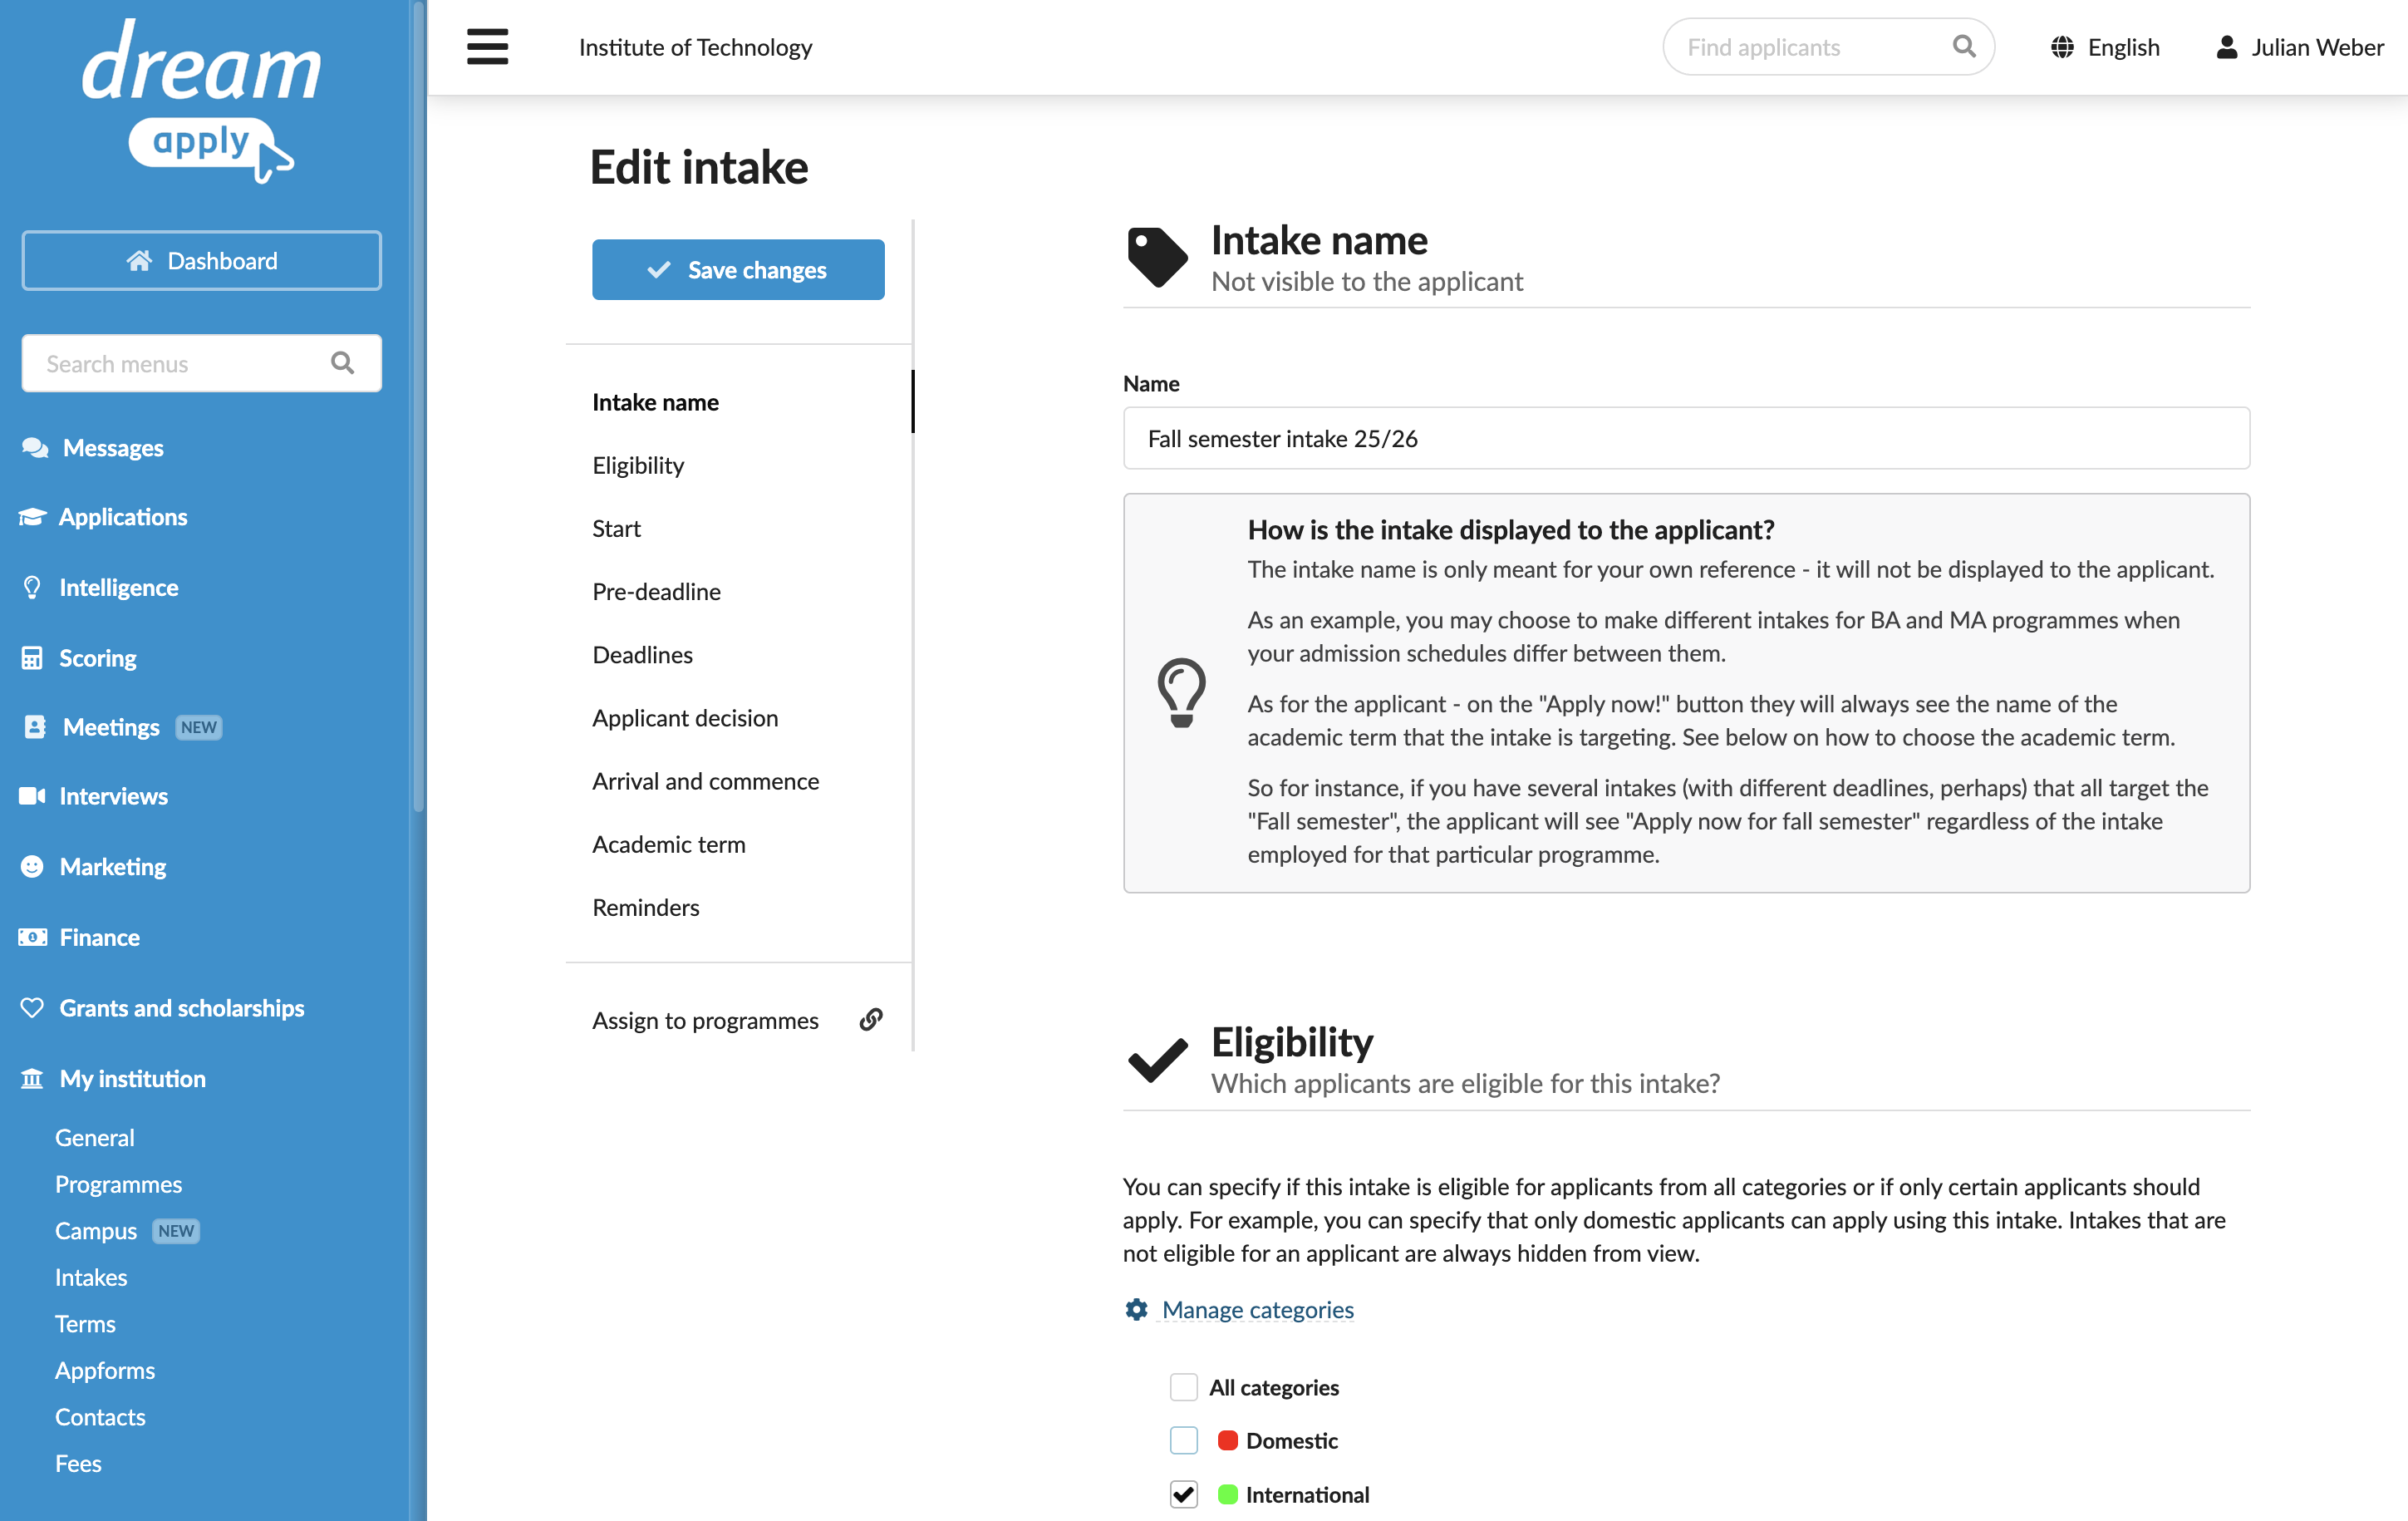
To add an intake:
In the main menu, under My Institution/Institutions, select Intakes.
In the intakes list, click Add a new intake.
In the Name section, specify the intake name. This name will be used for internal reference only and will not be displayed to applicants. Applicants will only see the academic term that an intake targets.
In the Eligibility section, select check boxes next to those applicant categories to whom the intake must apply.
In the Start section, specify the date when the application process must be open.
In the Pre-deadline section, add a pre-deadline for the intake if needed. The pre-deadline date and comments are displayed in the DreamApply portal below the Apply now! button.
In the Deadlines section, click Add a deadline and set up deadlines for applicants from different regions. To prohibit applicants from a specific region submitting applications, enable the Do not allow to apply option.
In the Applicant decision section, specify the deadline for the applicant’s decision on receiving an offer. This date will be used as a default decision date. Administrators can override this date with a custom one for individual offers.
In the Arrival and commence section, specify the dates when an applicant is expected to arrive on campus and the commence date of studies.
To display the commence date, select the Show studies commence date to applicants check box. The commence date is displayed in the DreamApply portal below the Apply now! button.
In the Academic term section, select the target academic term for the intake.
In the Reminders section, edit email templates to remind applicants about important events and milestones.
At the top of the form, click Save changes.
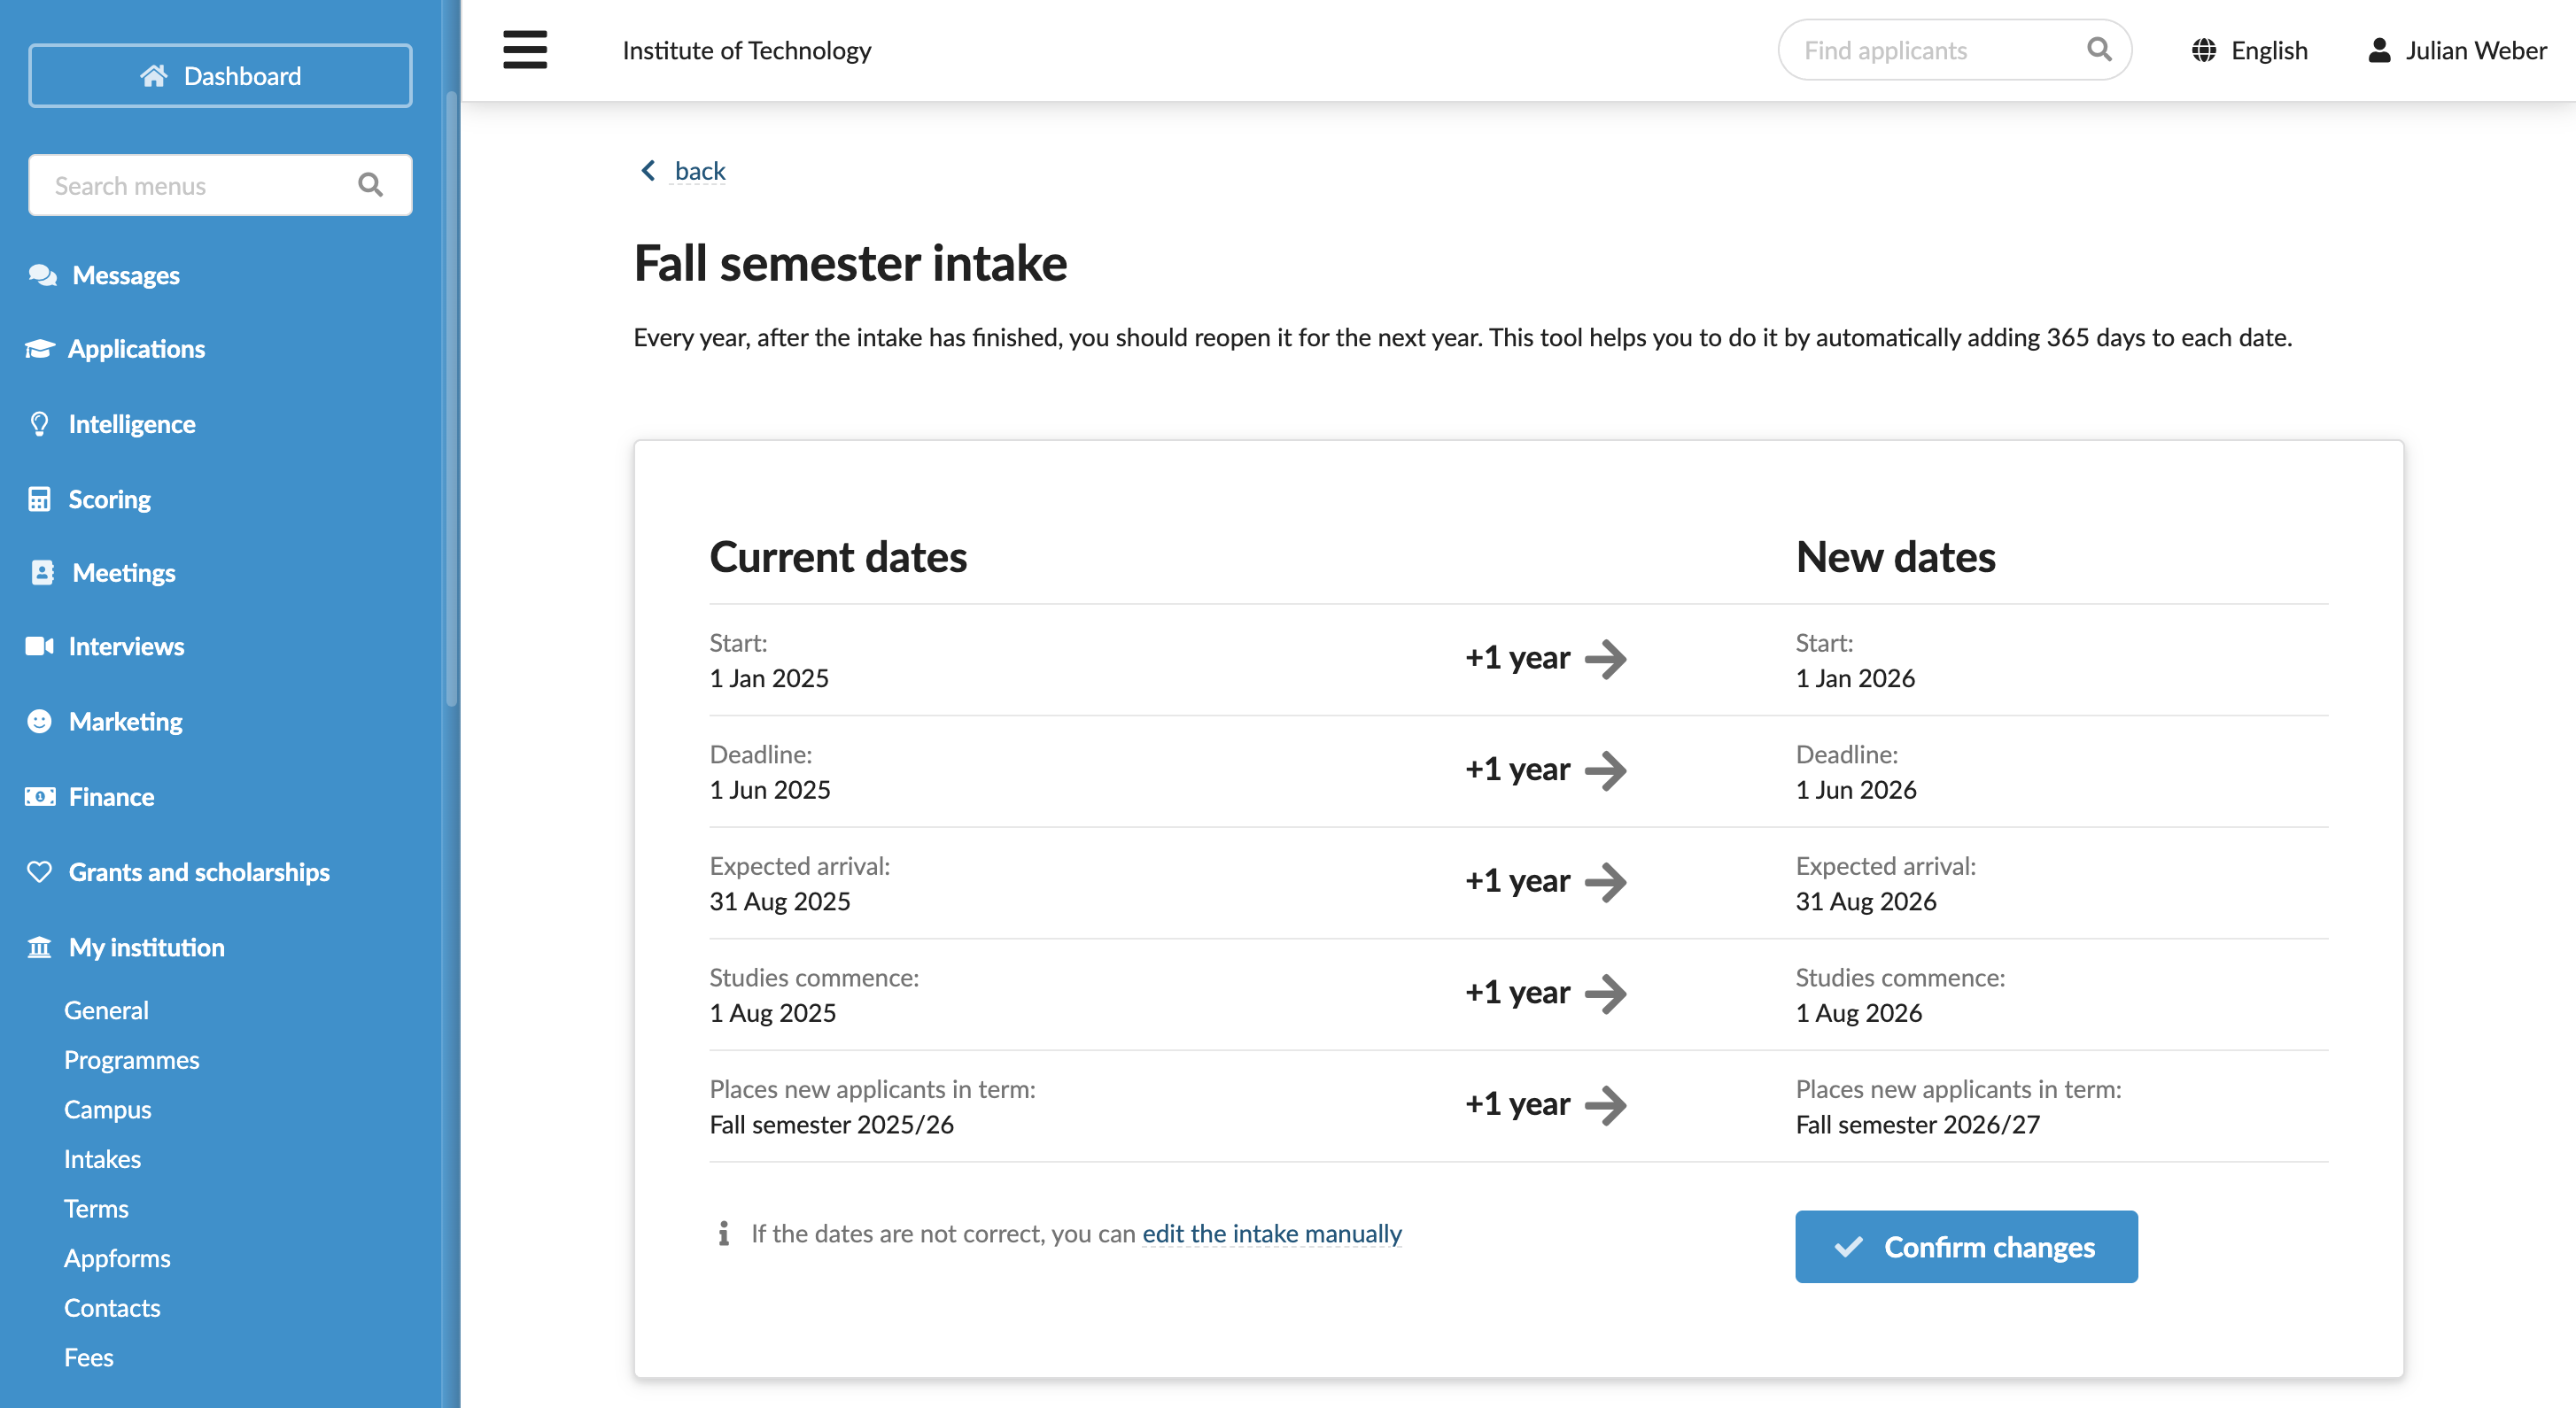
Update intake deadlines
DreamApply makes it easy to update intake deadlines for the next admission cycle. When all deadlines have passed (including the studies commence date), DreamApply displays the Reuse button next to the intake. Click Reuse to see a list of deadlines moved forward to match the upcoming cycle. You can review the updates and confirm them or edit the deadlines manually.