Create programme-specific appforms
Roles
These roles reflect the default DreamApply setup.
You can define custom roles based on your
institution's needs. Learn more →:
You can define custom roles based on your
institution's needs. Learn more →
To set up a standard set of sections and fields that applicants must complete, you need to create one or more programme-specific appforms and link them to programmes.
DreamApply comes with a set of predefined appform sections. Each section includes data entry fields that you can activate and display to applicants. If a suitable question is not available, you can add your own data entry fields. If some section or data entry field is not required, you can exclude it.
In addition to predefined sections, you can create custom sections with your own data entry fields. DreamApply allows you to add:
- Single-entry sections: Contain fields that applicants complete only once
- Sections with repeating blocks: Allow applicants to add multiple entries within the same section, such as education history or work experience
In DreamApply, appforms can vary based on the applicant’s citizenship or category. For example, you can choose to display additional sections, such as visa and residency details, to international applicants.
Before you begin
- To manage appforms, your account must have the
SuperuserorCourses administratorrole or theappformspermission. - To manage extra fields, your account must have the
SuperuserorCourses administratorrole or theappforms-extraspermission.
Add appforms
To add a new programme-specific appform:
In the main menu, under Institutions/My Institution, select Appforms.
At the bottom of the appform list, click Add a new appform and select to create a citizenship-based or category-based appform.
Specify the appform name. This name will be used for internal reference only and will not be displayed to applicants.
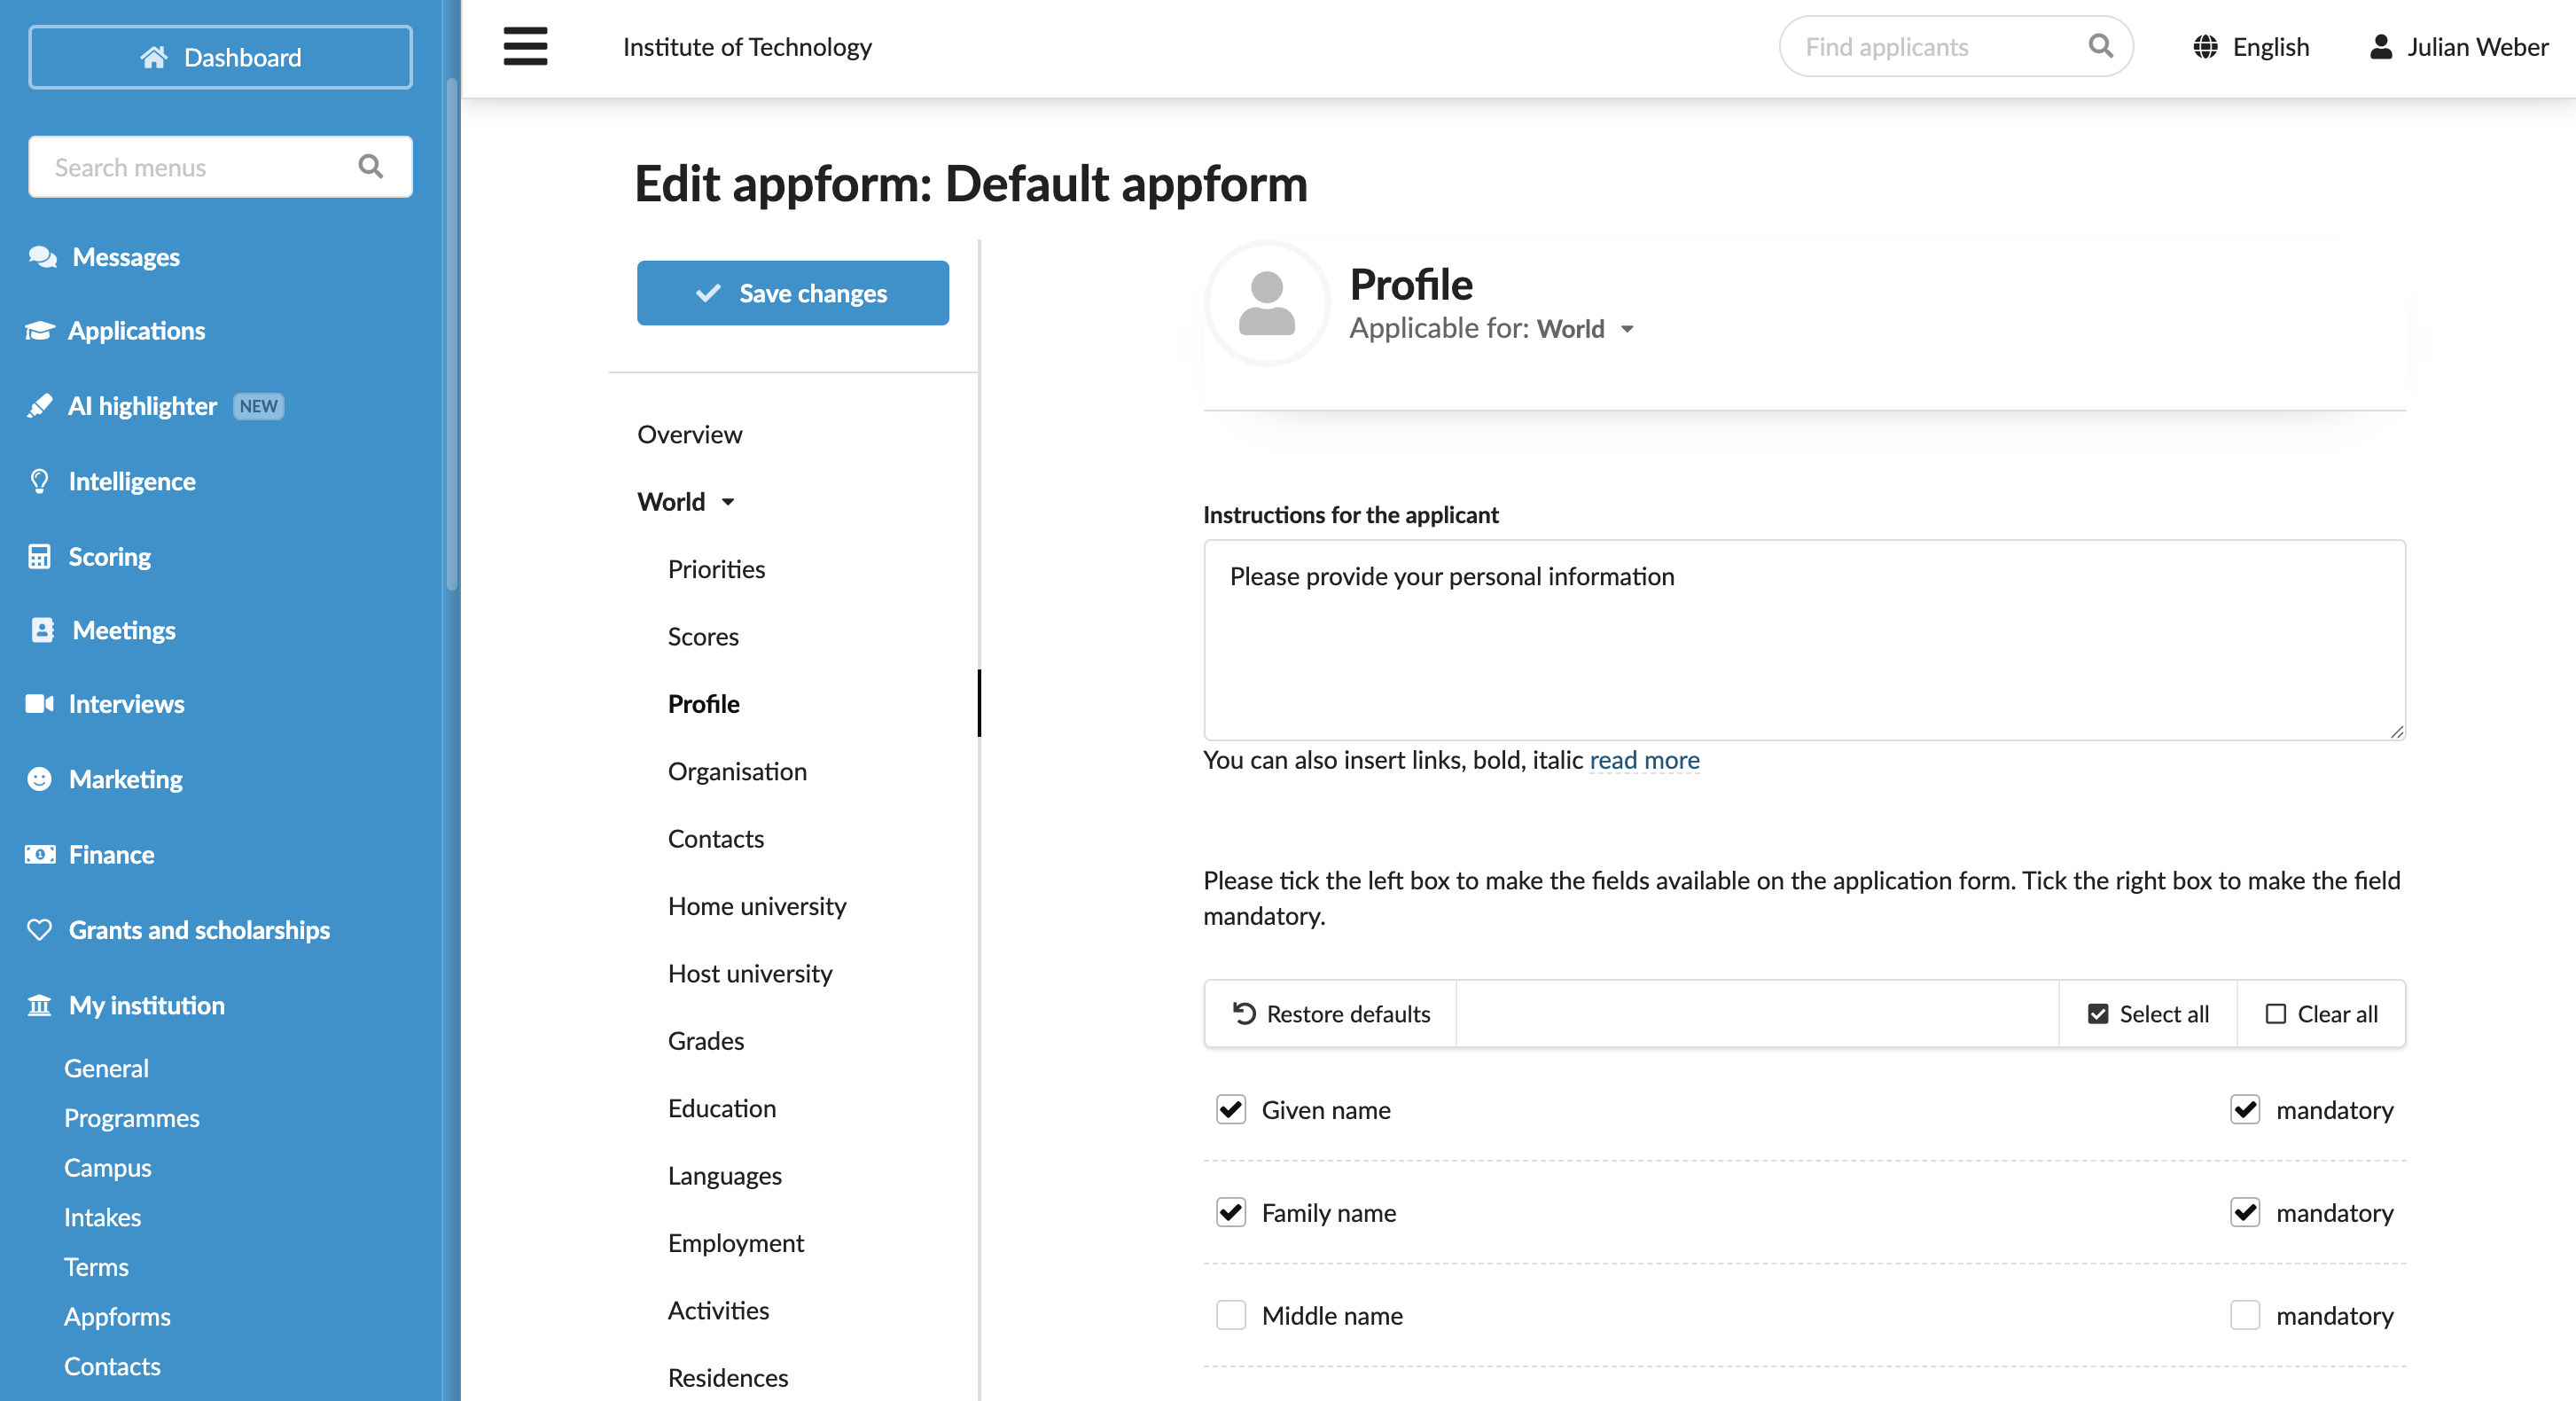
At the top of the left menu, select a citizenship or category for which the appform is configured.
Use the left menu to switch between the appform sections and customize them. In each section, select check boxes next to data entry fields that you want to display to applicants. You can use the Manage classificators option to add values to data entry fields and add extra fields to sections if needed.
To exclude the entire section from the appform, clear check boxes next to all data entry fields in the section.
Repeat step 4-5 for all citizenships or categories. To compare a list of data entry fields across different citizenships or categories, at the top of the form, click Compare territories/Compare across categories.
At the top of the form, click Save changes.
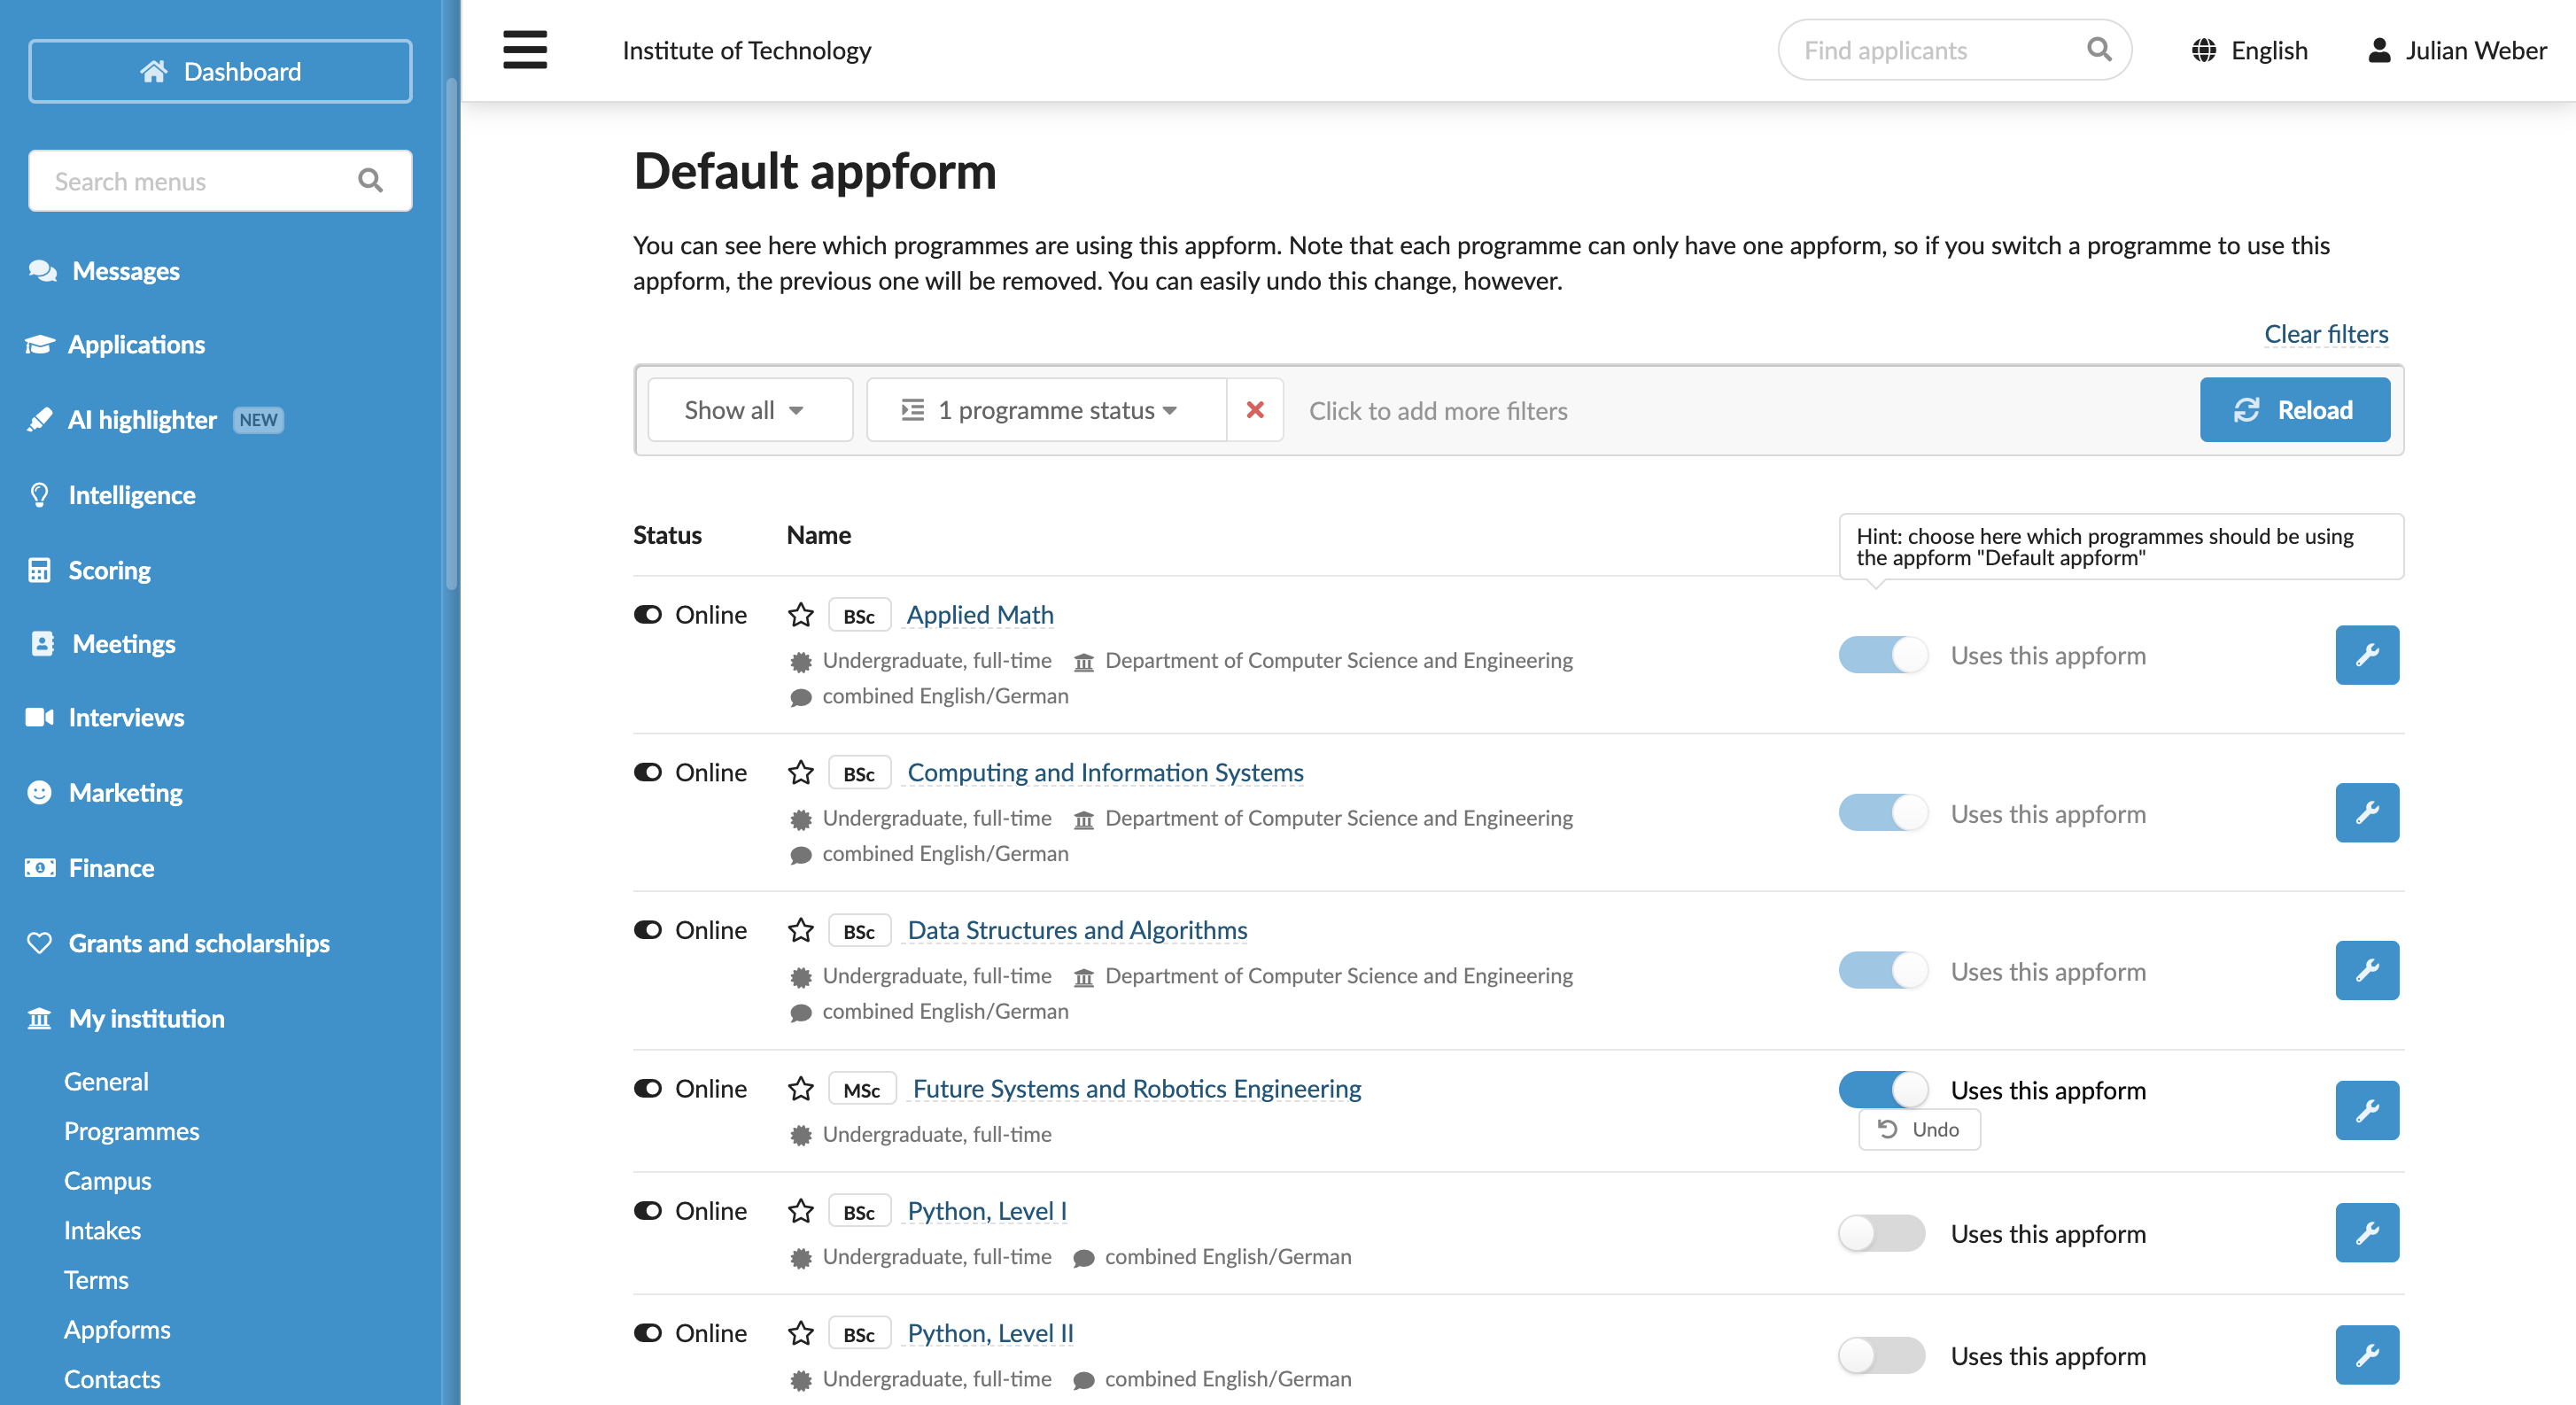
Link appforms to programmes
Each programme in the catalog can be linked to a single programme-specific appform.
- In the main menu, under Institutions/My Institution, select Appforms.
- To the right of the appform, click Assign to programmes and select to which programmes the appform must be linked.
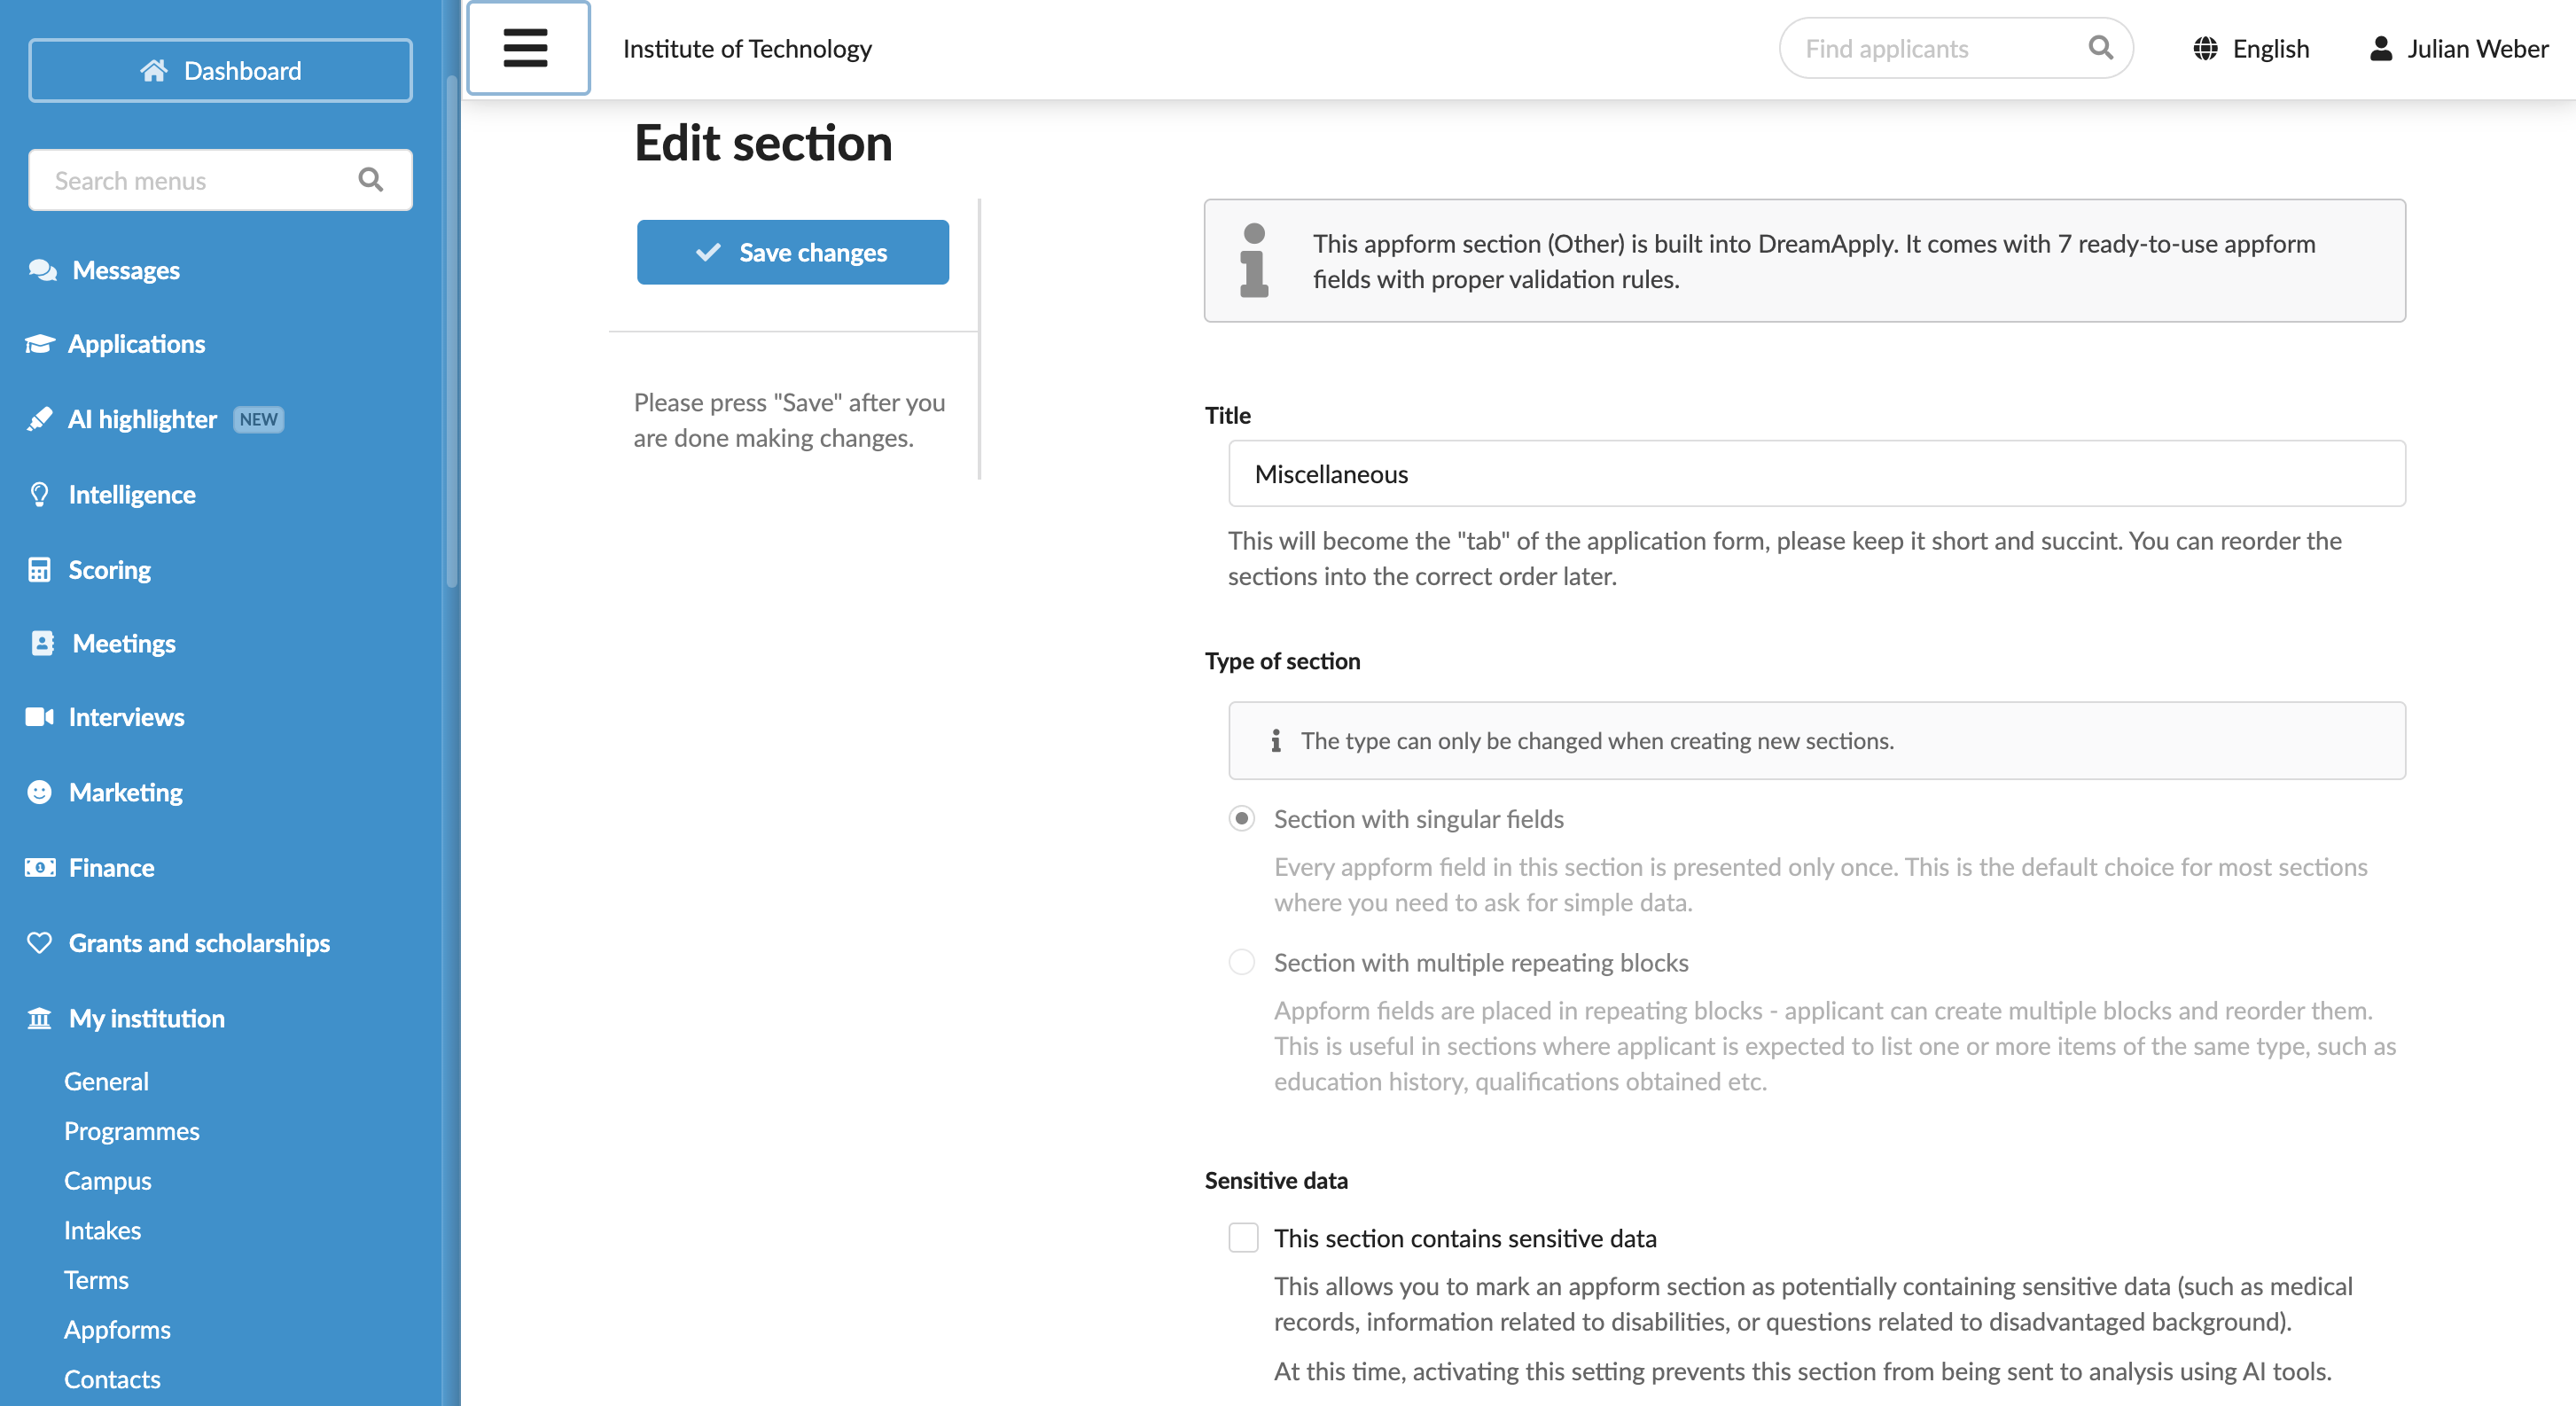
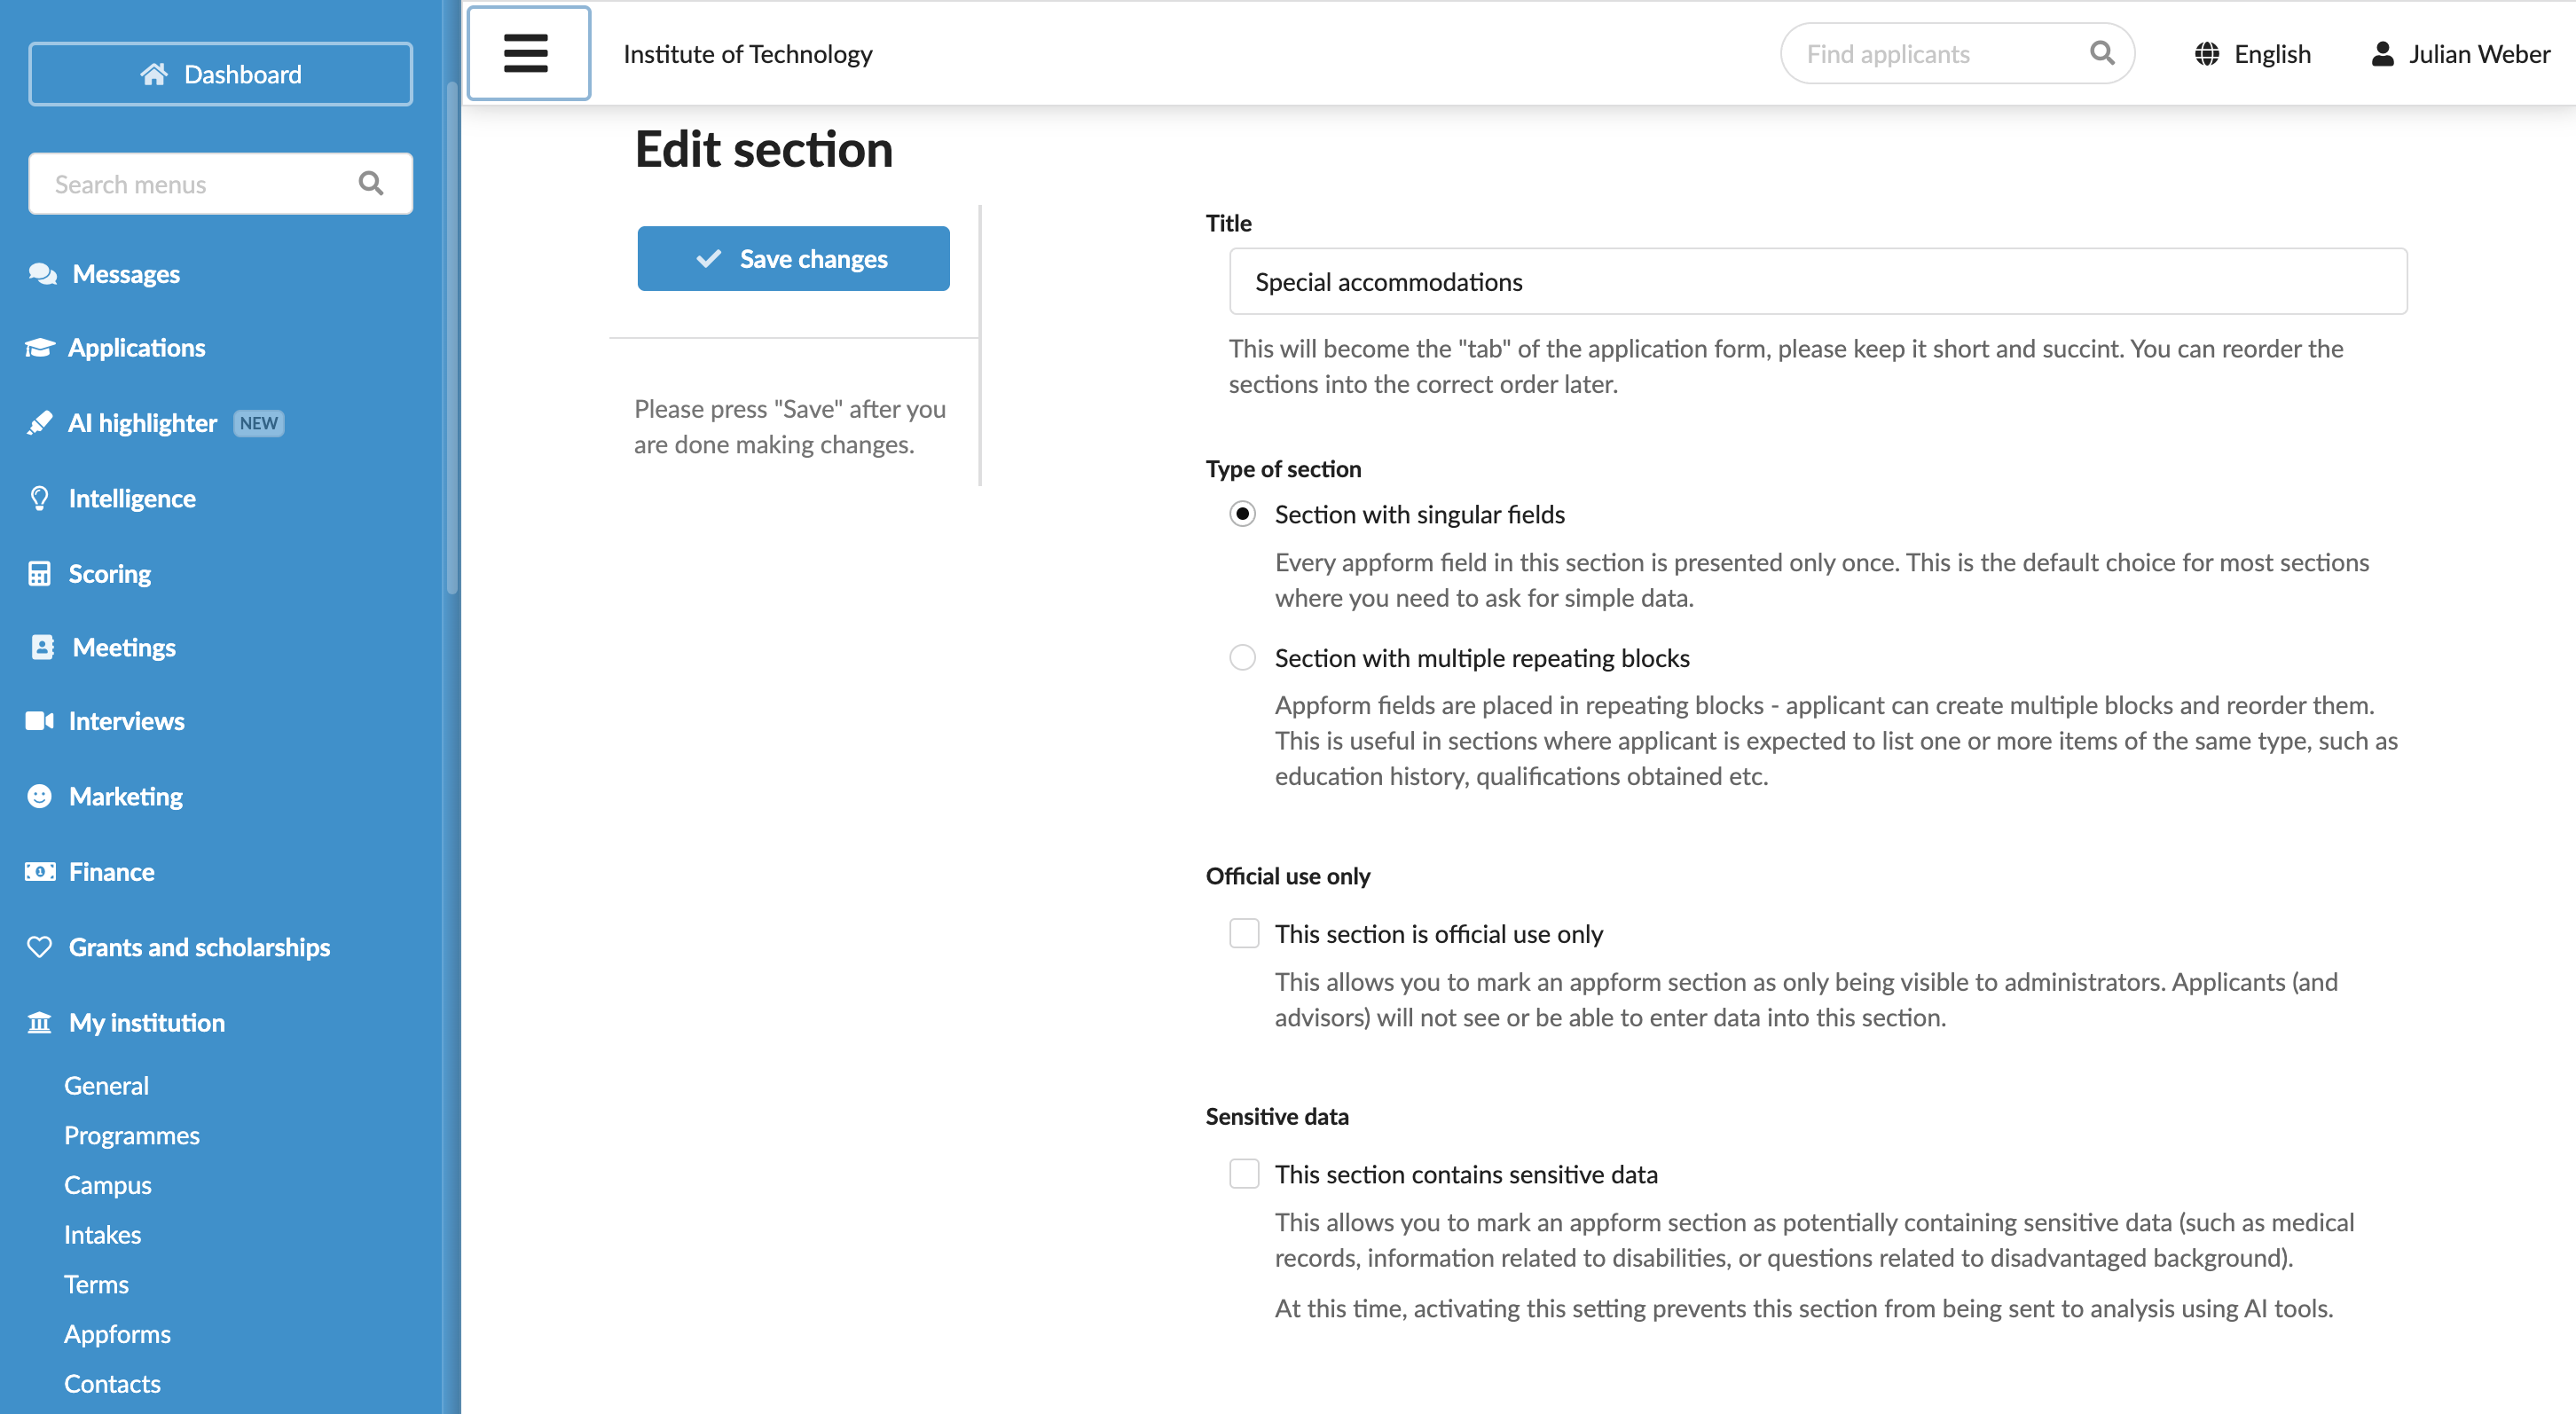
Create custom sections
To create a custom appform section:
In the main menu, under Institutions/My Institution, select Appforms.
At the top of the appform list, click Manage appform sections.
At the bottom of the form, click New section.
Specify the section title and select to create a single-entry section or a section with repeating blocks.
To use the appform section for collecting administrative records, select the This section is official use only check box. For details, see Set up official use sections.
To exclude appform sections from AI processing, select the This section contains sensitive data check box. For details, see Exclude data from AI analysis.
At the top of the form, click Save changes.
At the top of the appform list, click Manage extra fields.
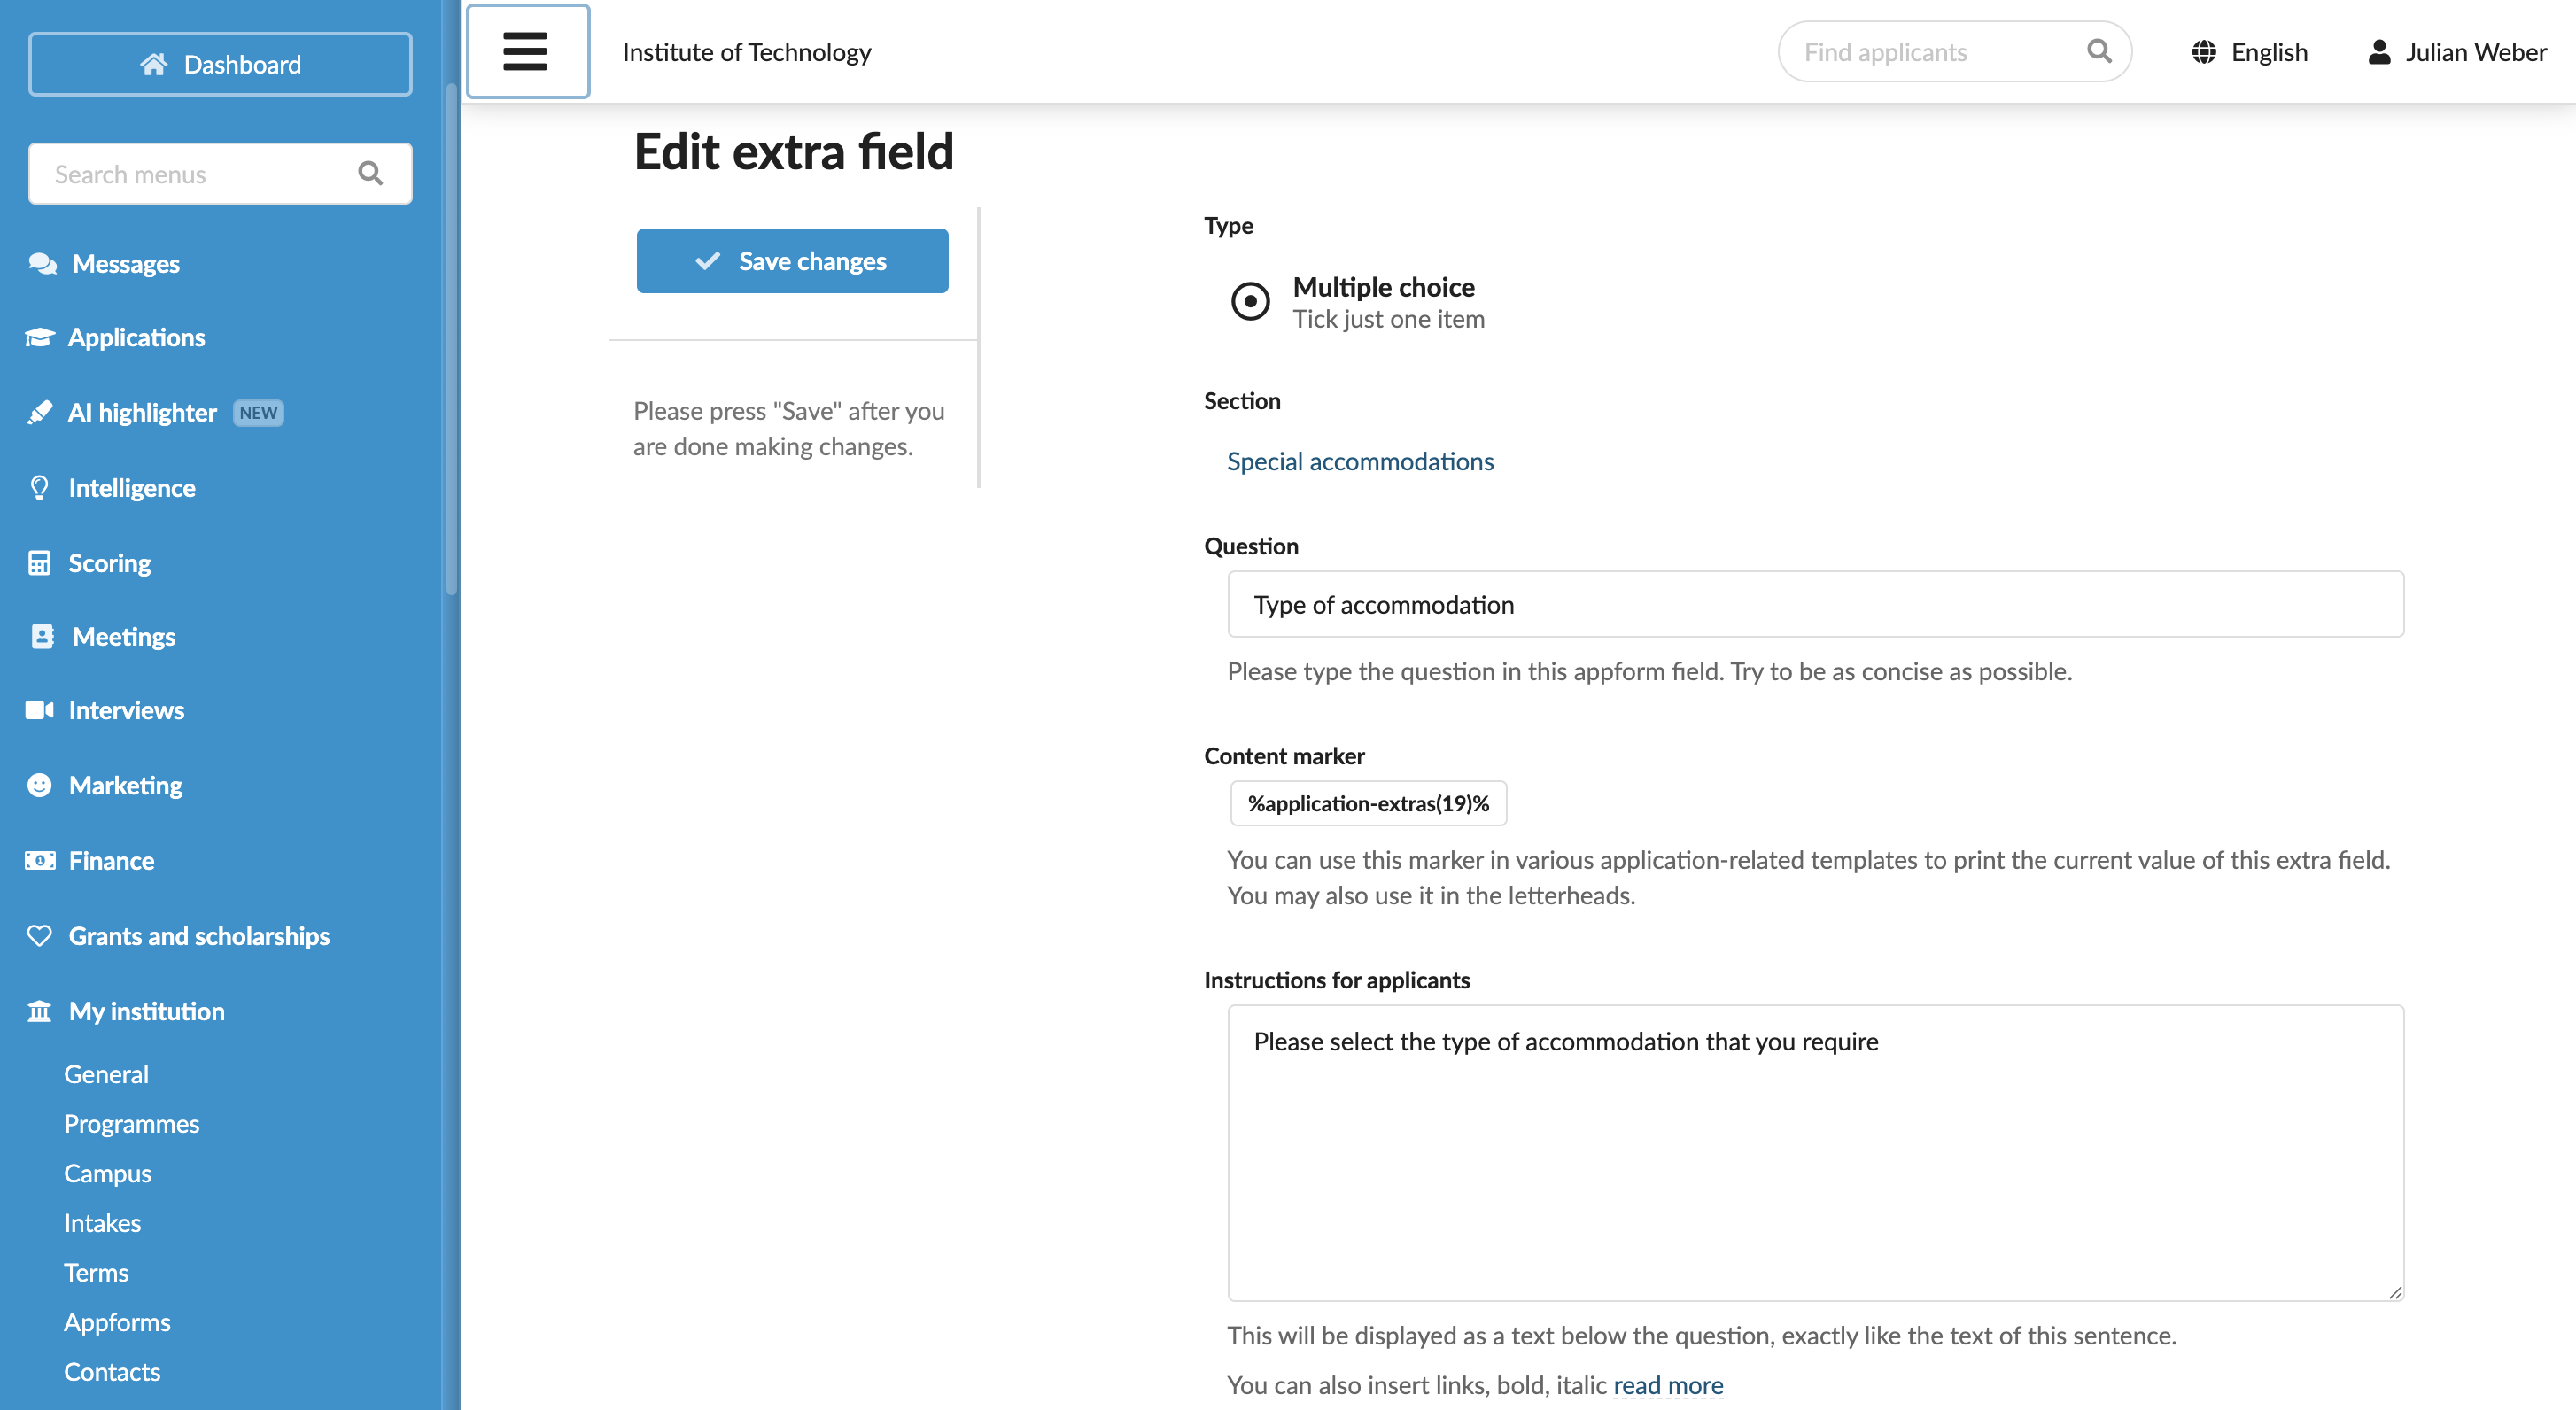
Under the created section, click Add new extra field and select the field type.
Configure the field label, description and values as needed.
Repeat steps 9-10 for all fields you want to place onto the section.
At the top of the form, click Save changes.
For each extra field, DreamApply automatically generates a content marker and displays it in the Content marker section. You can use these markers to insert captured values into system outputs such as offer letters.
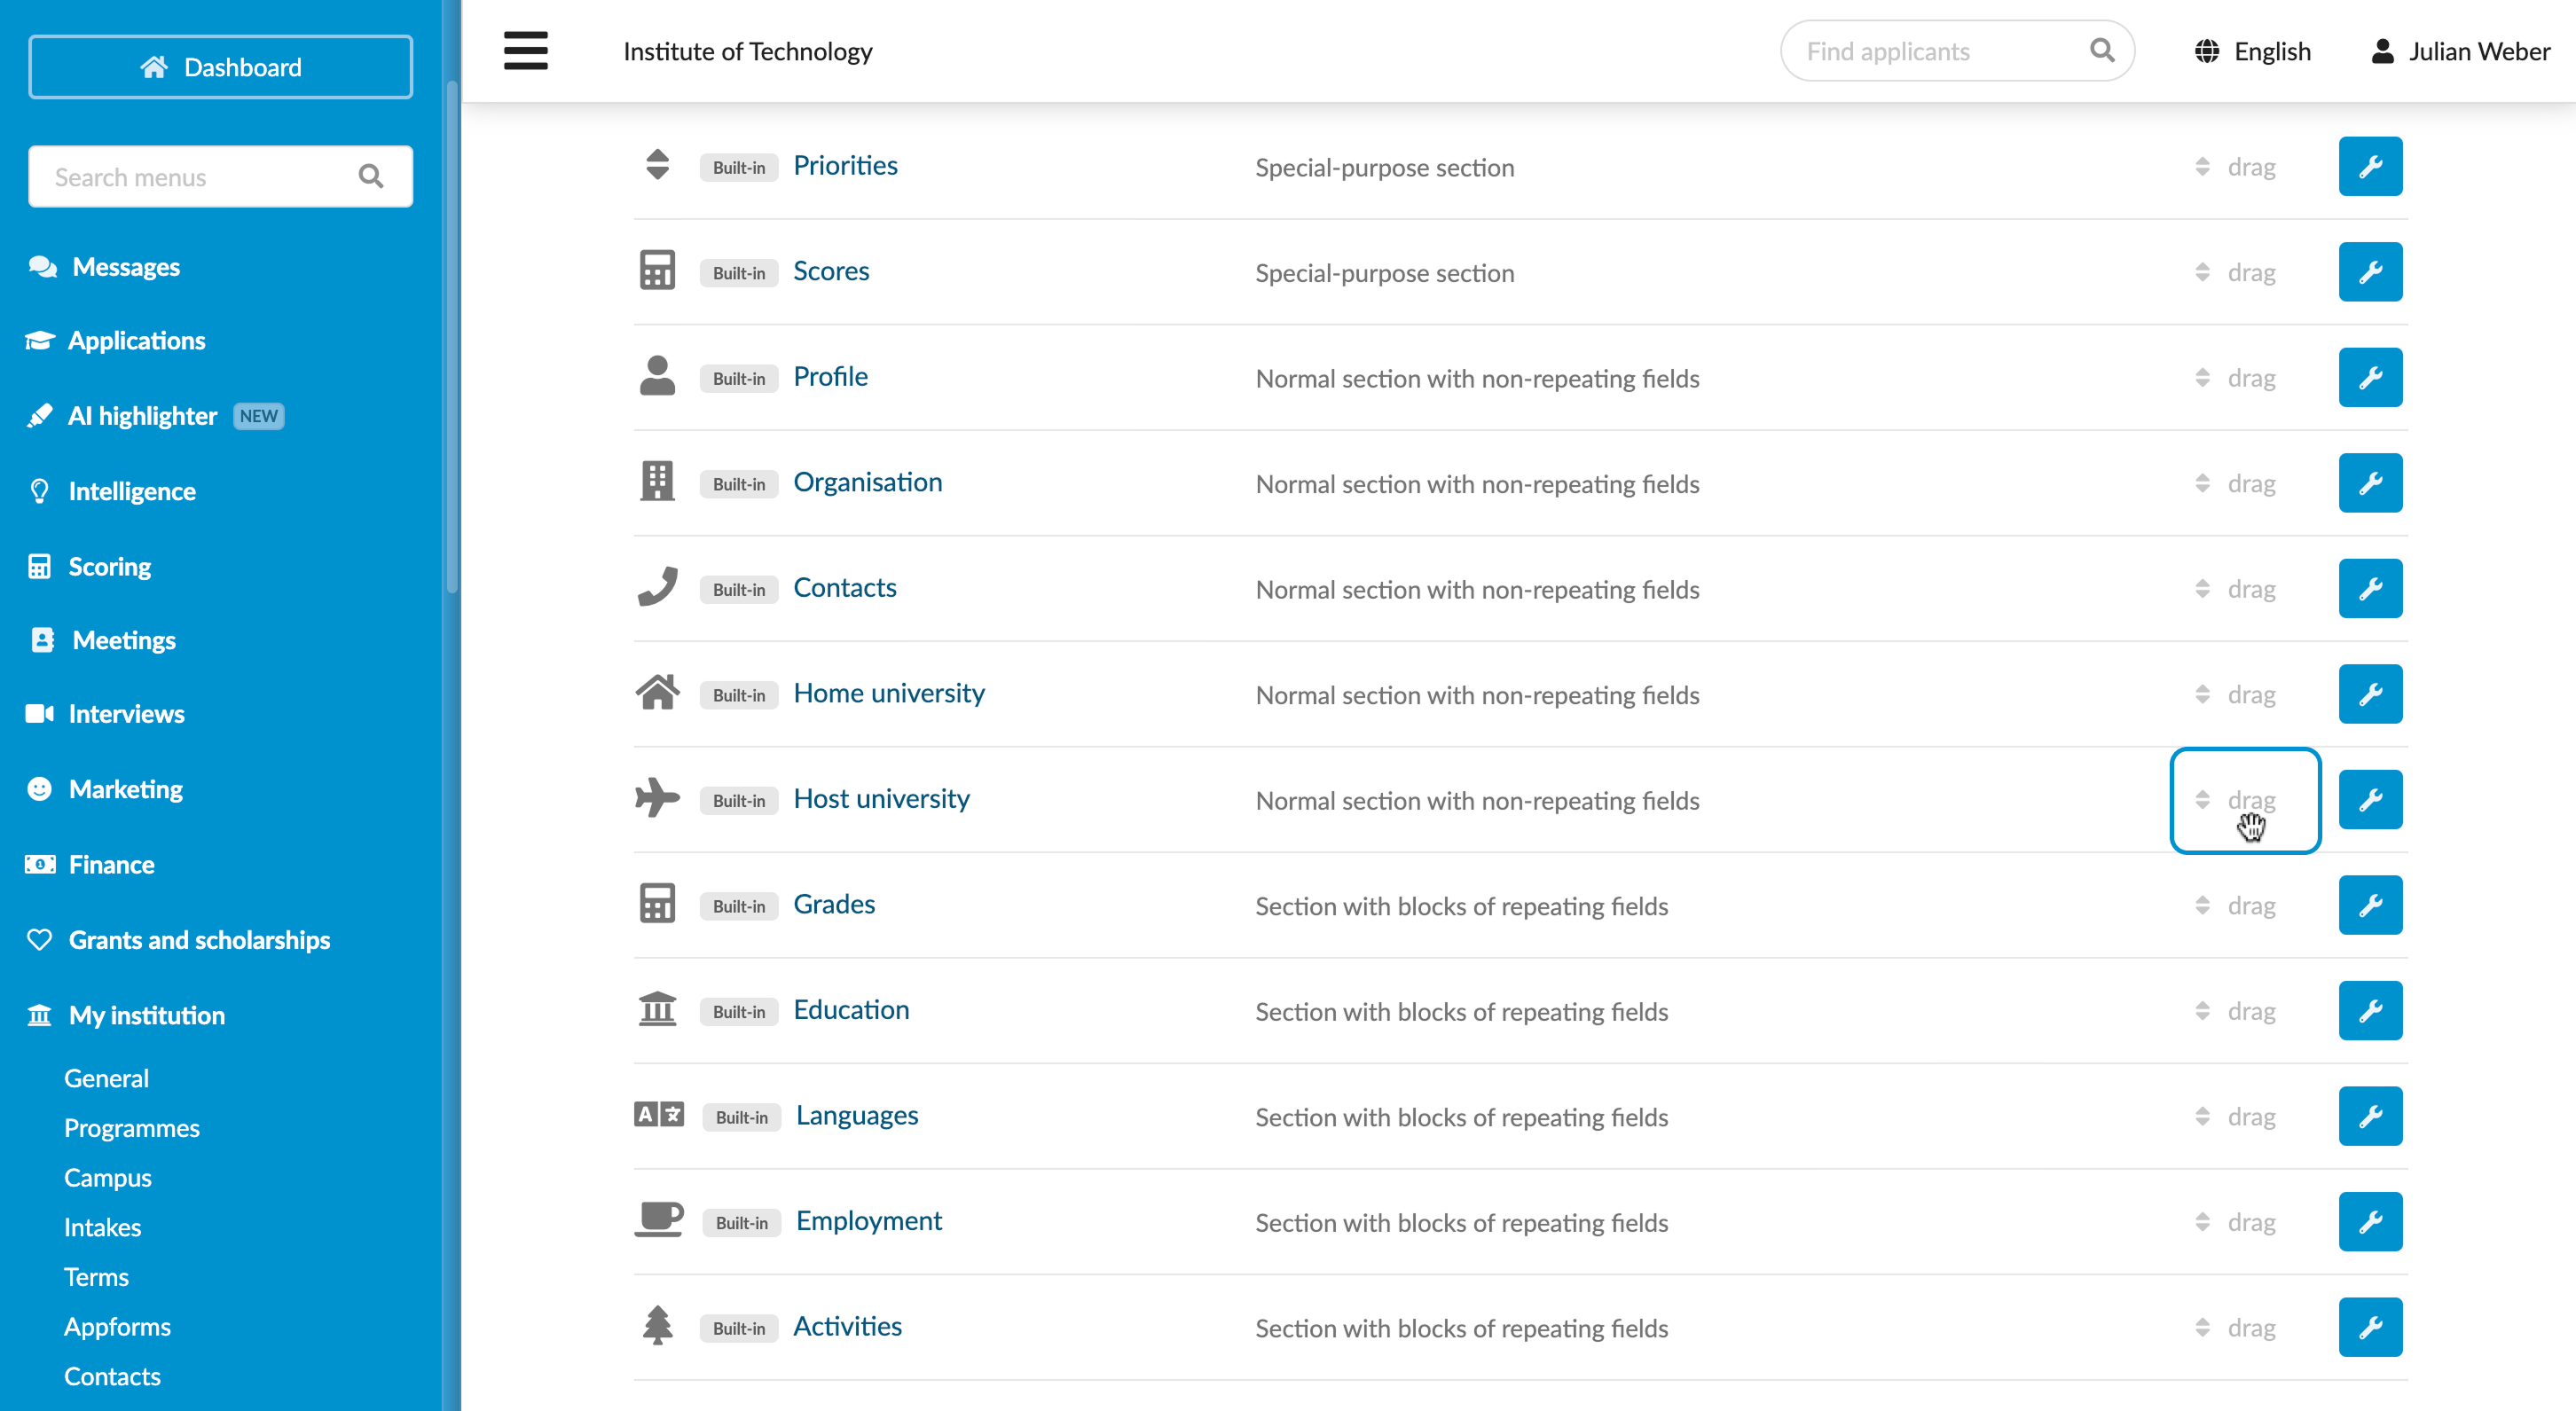
Change the section order
You can change the order in which sections appear in appforms. The new section order will apply to all existing and future appforms you create.
To specify the section order:
- In the main menu, under Institution/My Institutions, select Appforms.
- At the top of the appform list, click Manage appform sections.
- Click and hold the drag column for the section and move up or down in the list.
Change section titles
You can change titles of predefined appform sections. This change will apply to all existing and future appforms you create.
- In the main menu, under Institutions/My Institution, select Appforms.
- At the top of the appform list, click Manage appform sections.
- Select the section whose title you want to change and specify a new value in the Title field.
- At the top of the form, click Save changes.