Statistics
Roles
These roles reflect the default DreamApply setup.
You can define custom roles based on your
institution's needs. Learn more →:
You can define custom roles based on your
institution's needs. Learn more →
To gain insights into the admission process using structured data, you can use the Statistics view in DreamApply. This view allows you to explore statistics using predefined data segments, apply filters and compare data across different segments.
To access application statistics, in the main menu, under Applications, select Statistics.
Before you begin
To view application statistics, your account must have the Superuser, Admissions administrator, Academic supervisor, Academic consultant, Marketing administrator or Accountant role or the applications-view permission.
Explore statistics
Application statistics is organized into several high-level categories:
- Applicants
- Applications
- Offers
- Programmes
Each category contains detailed data segments.
- To zoom into a specific subset of application data, click the necessary data segment. To analyze particular trends within a data segment, you can additionally apply filters at the top of the view.
- To view statistics in the Browse view, click the folder icon to the right of the data set.

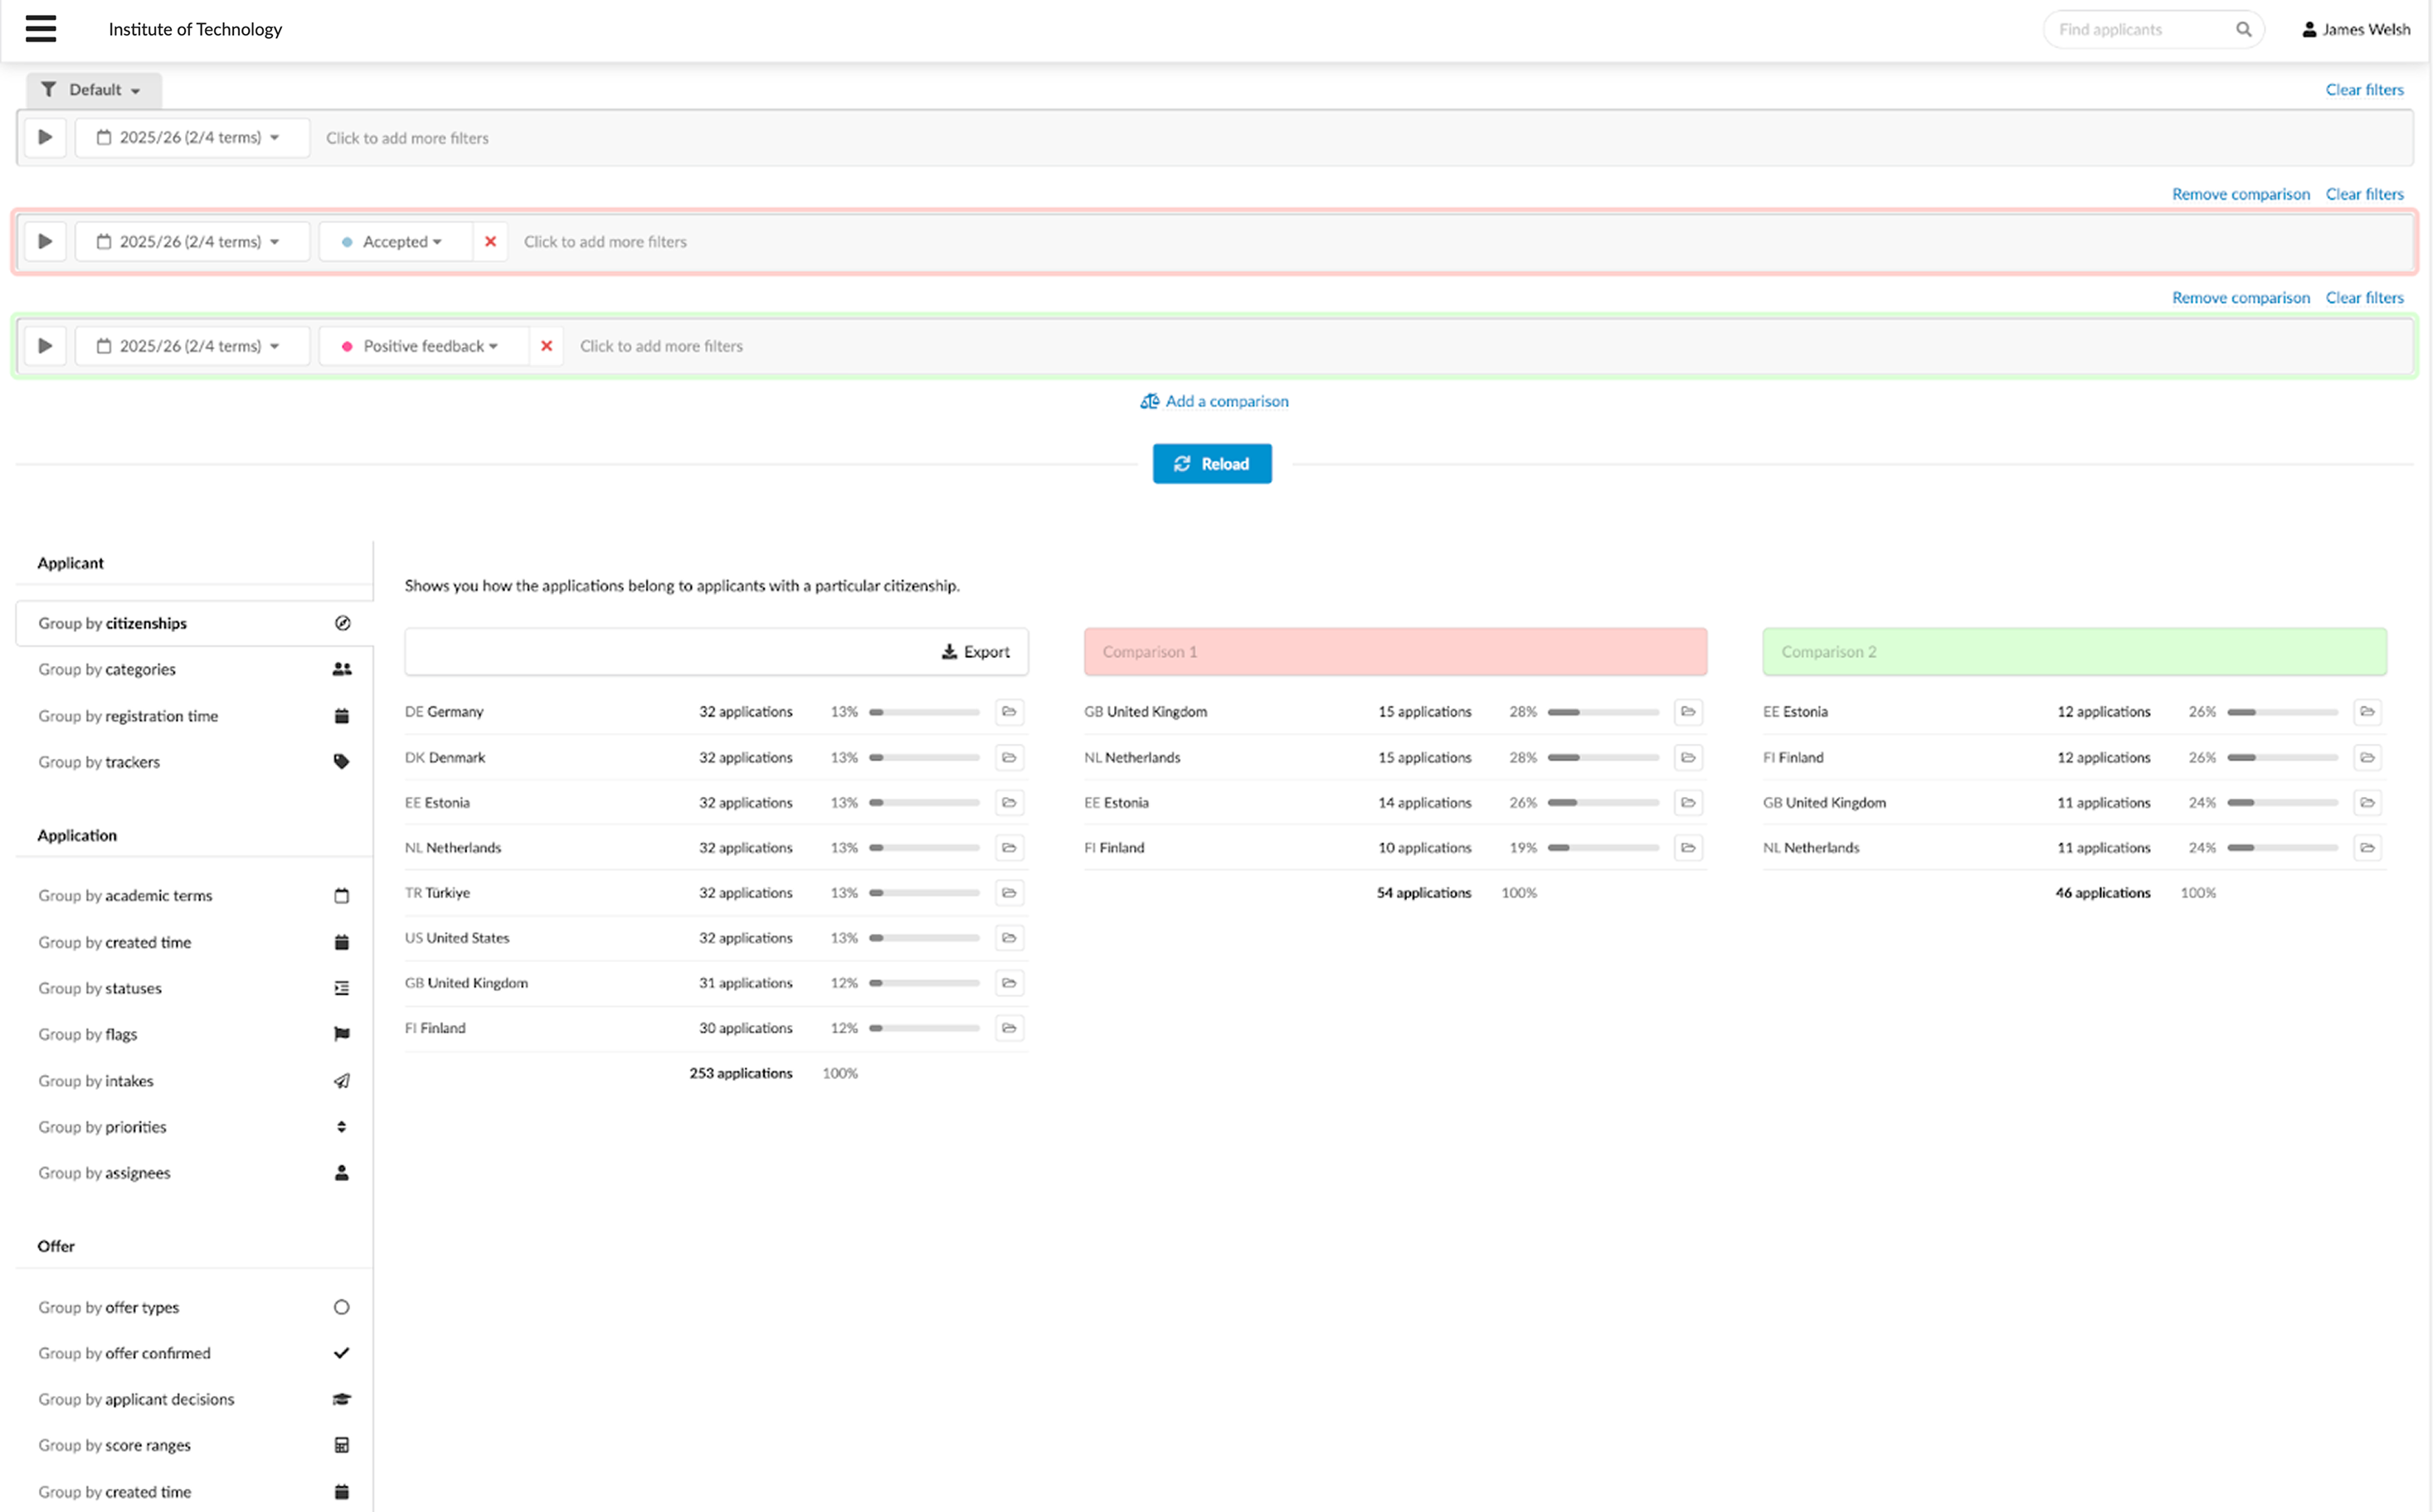
Compare data sets
You can set up multiple comparison filters to view and analyze different sets of application data side-by-side. DreamApply displays the results for each selected data set in parallel, making it easy to identify differences and similarities.
To create a comparative view:
- Select the necessary data segment and use filters at the top to define your primary data set.
- Click Add a comparison and set up one or more additional filters to compare the primary data set with others.
- To the left of every filter, click the run icon and select the type of records you want to display: all applications, active or inactive applications.
Export statistics
You can export application statistics to external files for further analysis, sharing or reporting. To do it, click Export at the top of the data segment and select the file format — Excel or CSV.