Create tables
Roles
These roles reflect the default DreamApply setup.
You can define custom roles based on your
institution's needs. Learn more →:
You can define custom roles based on your
institution's needs. Learn more →
You can create tables in DreamApply to explore and share specific segments of application data.
Column types
To build a table, select the columns you want to display based on your reporting needs. DreamApply offers the following types of columns to help you organize information:
- Metadata columns: Display core system data such as Applicant, Application, Assignees, Created date or Submitted date. Use these fields as the foundation for your table views to track and manage application information.
- Data columns: Show application-related data such as offer details, profile and contact information.
- Custom columns: Editable columns that support manual data entry. Custom columns can be used to capture notes, labels or additional information, without affecting the system application data.
Row structure
Depending on the columns you select, DreamApply supports two row structures:
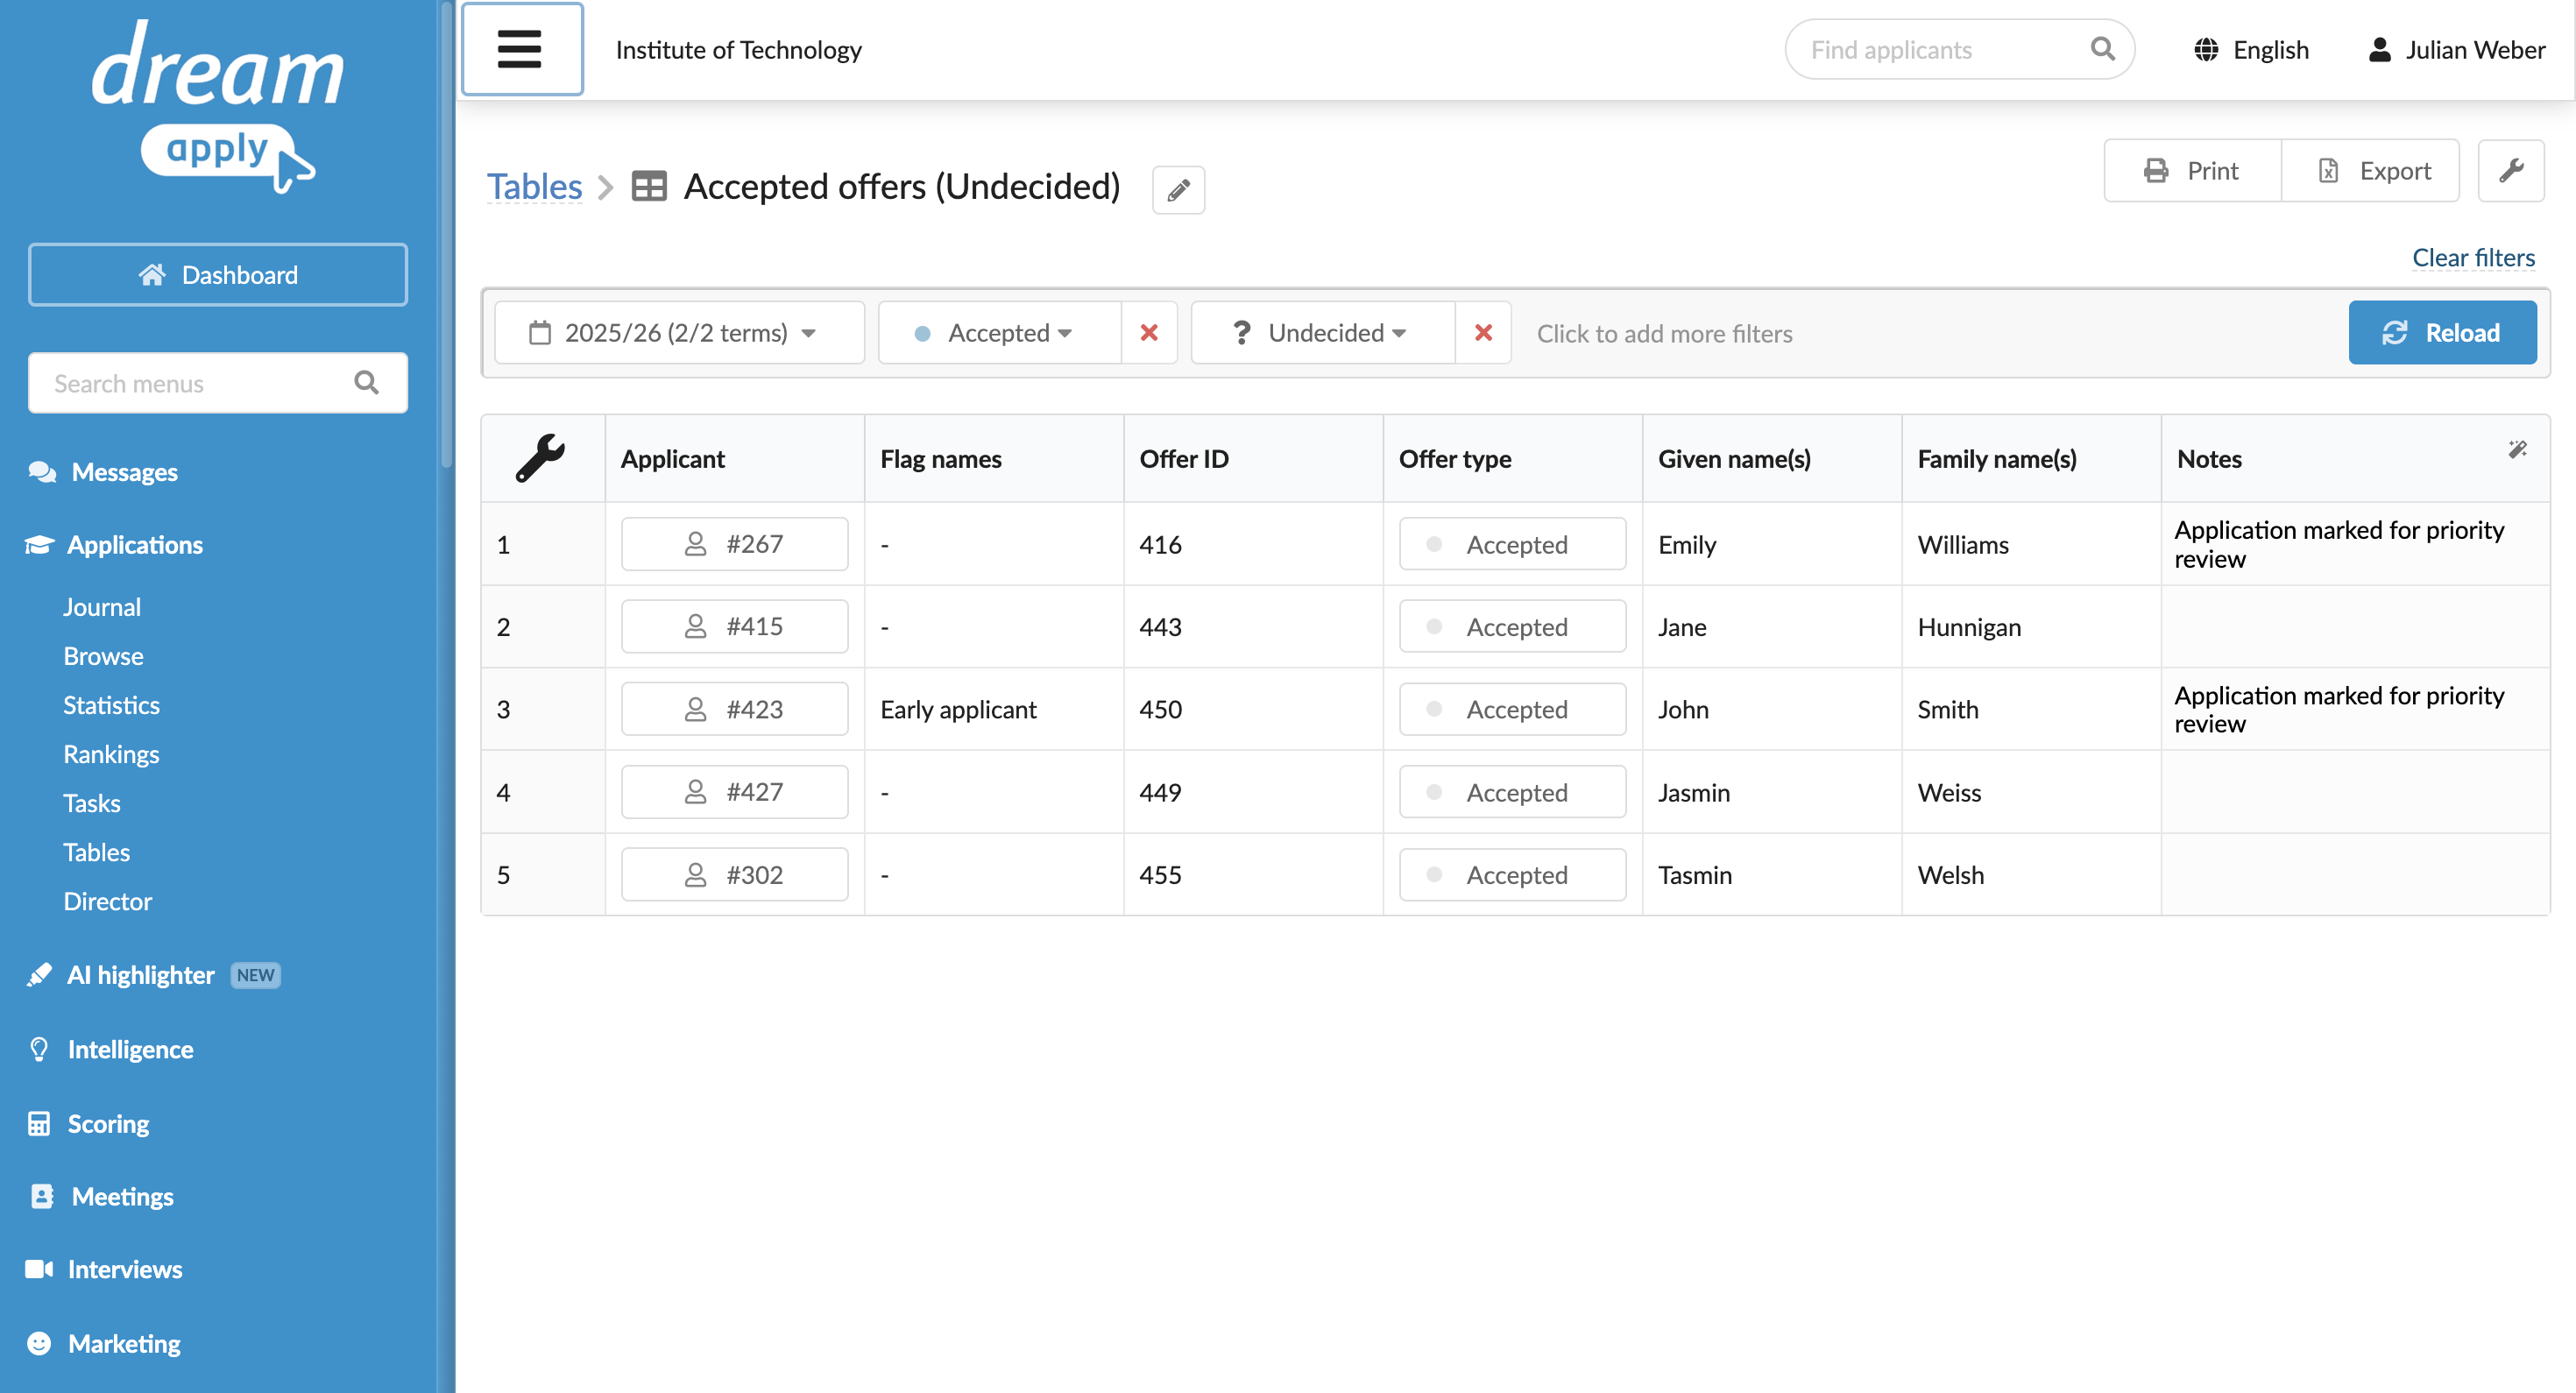
Application rows: Each row represents a single application identified by the application ID. Use this structure to display applicant- and application-related columns such as contact details, category and registration date.
Offer rows: Each row represents a separate offer within the application identified by the offer ID. Use this structure to display offer-related columns such as offer type, priority and reason.
Before you begin
To create tables, your account must have the Superuser, Admissions administrator or Academic supervisor role or the applications-view permission.
Add tables
To add a table:
- In the main menu, under Applications, select Tables.
- At the bottom of the table list, click New tableview, specify the table name and select who must have access to the table.
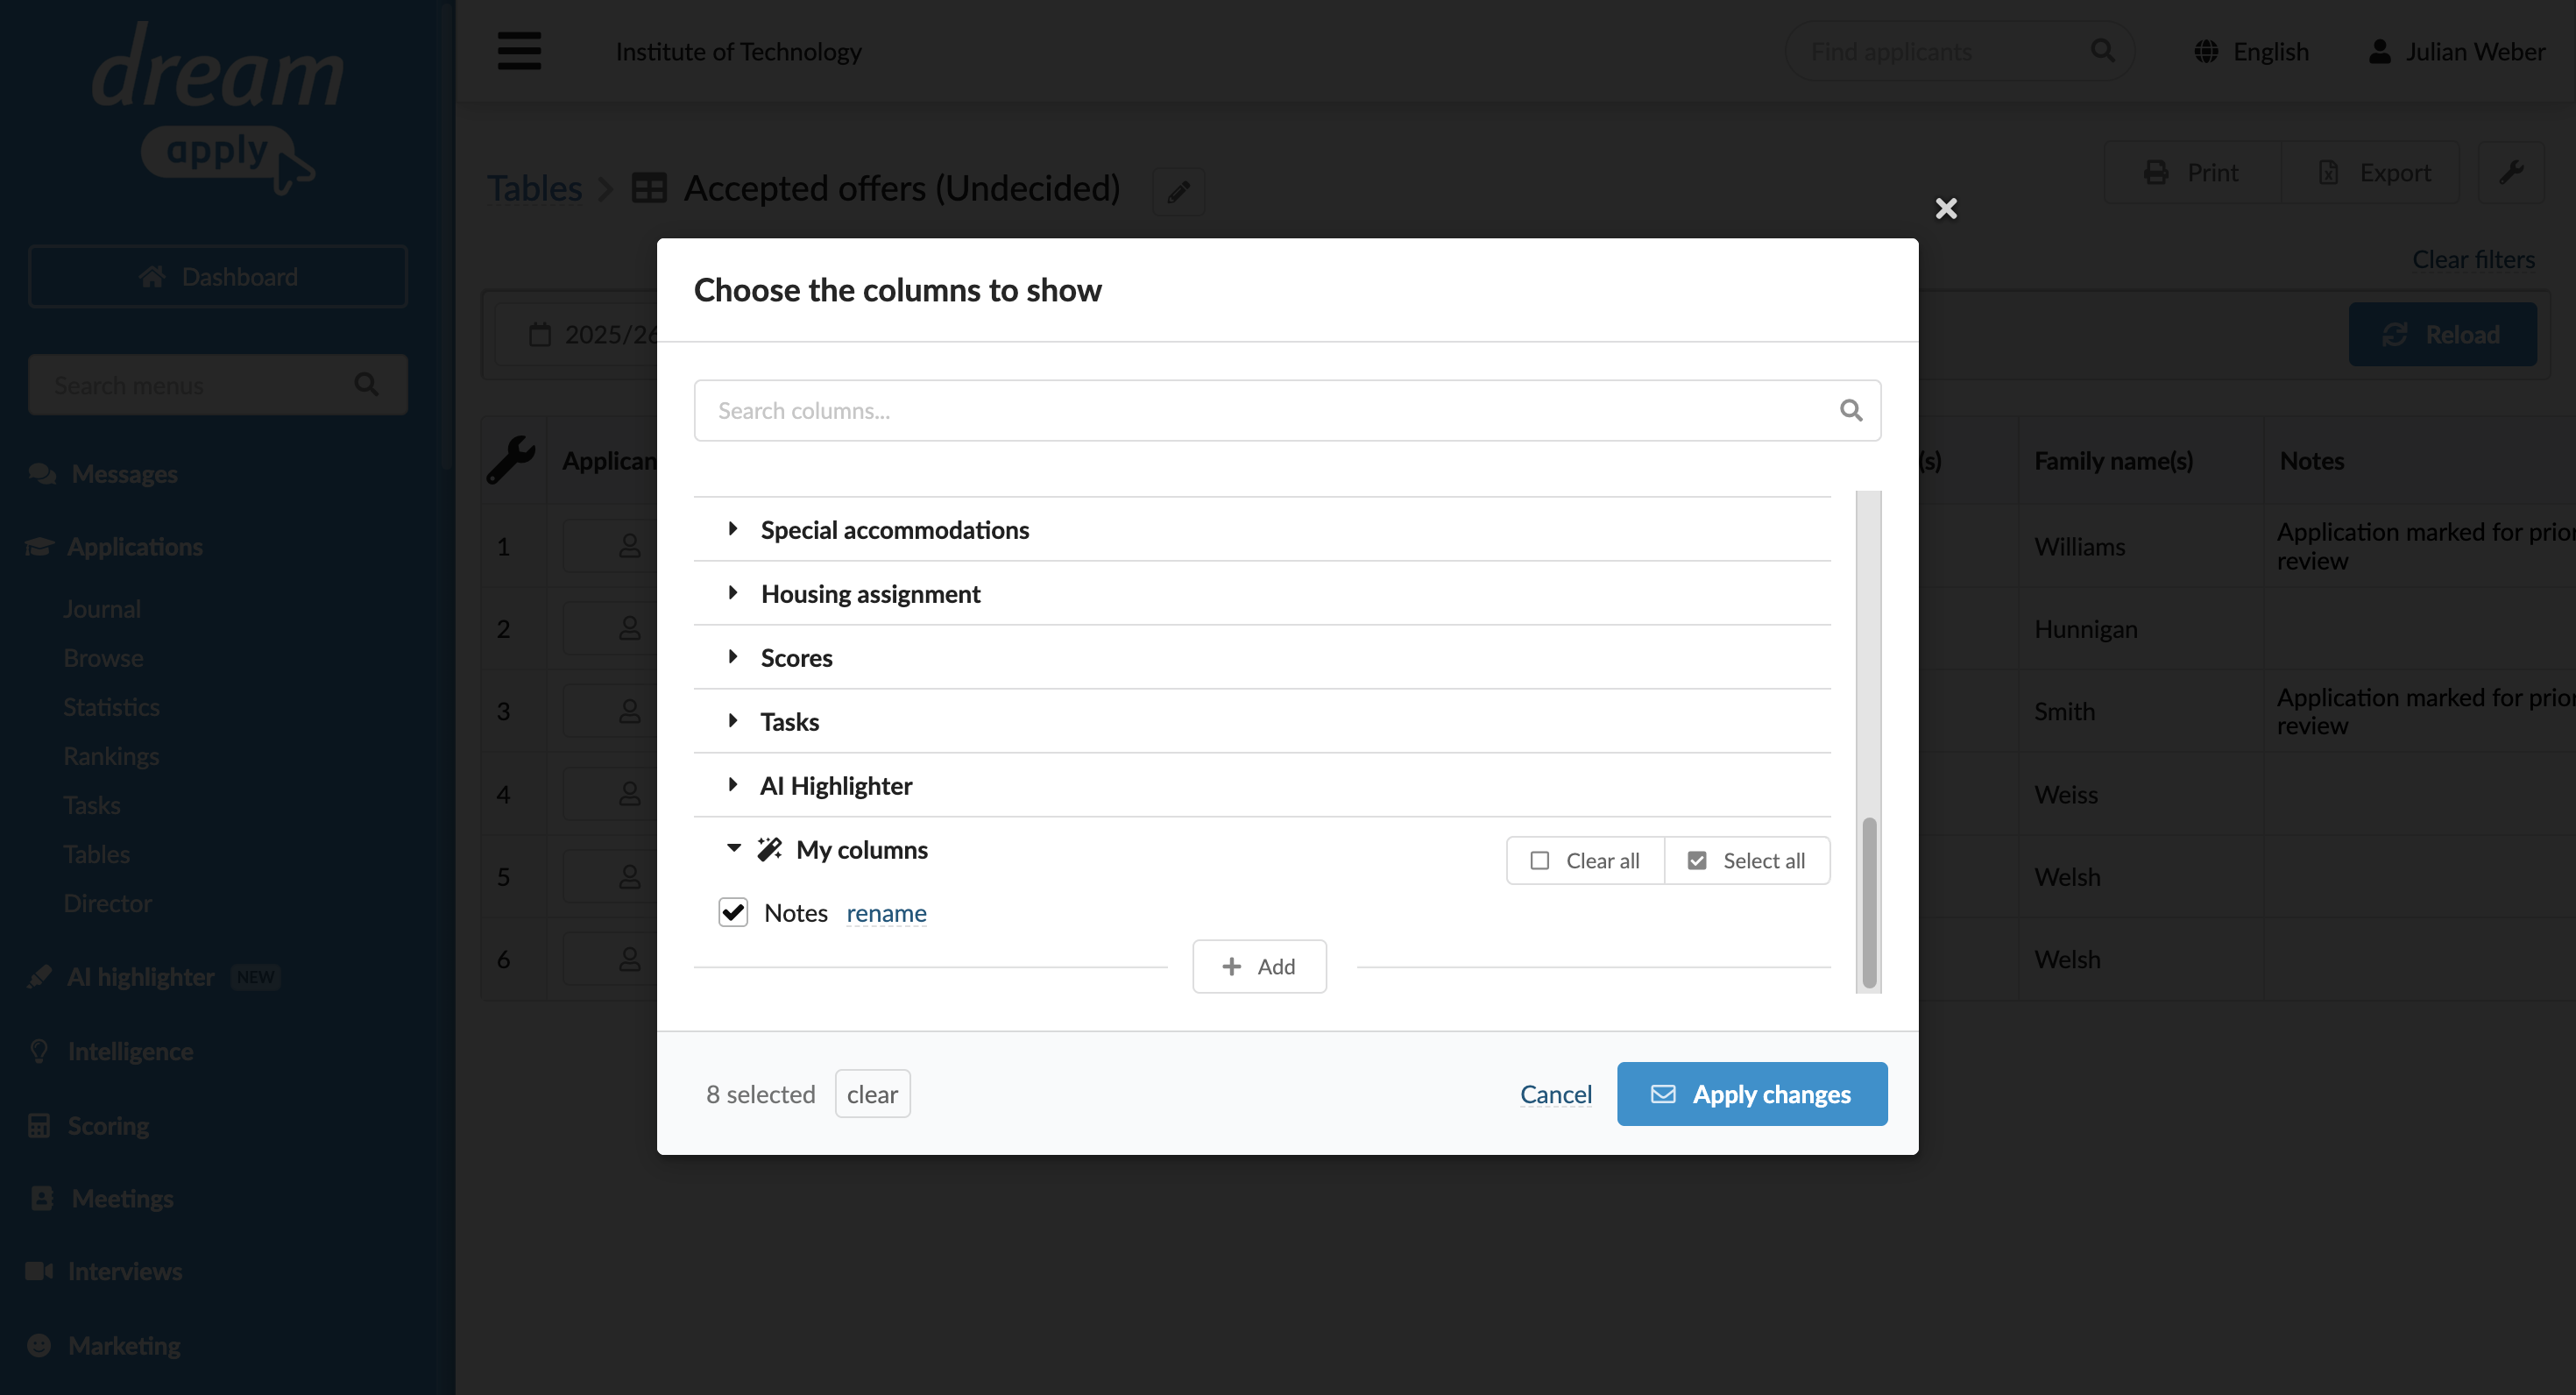
- In the top left corner of the table, click the wrench icon and select columns to display. Alternatively, in the top right corner, click the wrench icon and select Choose columns.
- In the top right corner, click the wrench icon and select Cell formatting to choose the data format for cells with date, country and language values.
- Use filters at the top to refine the list of records in the table.
Add custom columns
You can add editable columns to tables. These columns may hold custom data such as notes, labels or additional information.
To add a custom column to a table:
- In the main menu, under Applications, select Tables.
- In the table list, create a new table or select to edit an existing one.
- In the top left corner of the table, click the wrench icon.
- At the bottom of the column list, click Add and define the name of an editable column to display in the table. The column name will be displayed under the My columns section.
- At the bottom of the list, click Apply changes.