Share tables
Roles
These roles reflect the default DreamApply setup.
You can define custom roles based on your
institution's needs. Learn more →:
You can define custom roles based on your
institution's needs. Learn more →
You can create tables for personal use or share them with others for teamwork, reviews or collaborative analysis.
Depending on who requires access, you can share tables in the following ways:
- Private use: A table is only visible to an Administrator who created it.
- Shared with Administrators: A table is shared with all Administrators or specific Administrators.
- Shared via a share link: A table is shared via a share link generated in DreamApply and sent to a recipient. The recipient can open the table and view it without creating an account in the system.
Before you begin
To share tables, your account must have the Superuser, Admissions administrator or Academic supervisor role or the applications-view permission.
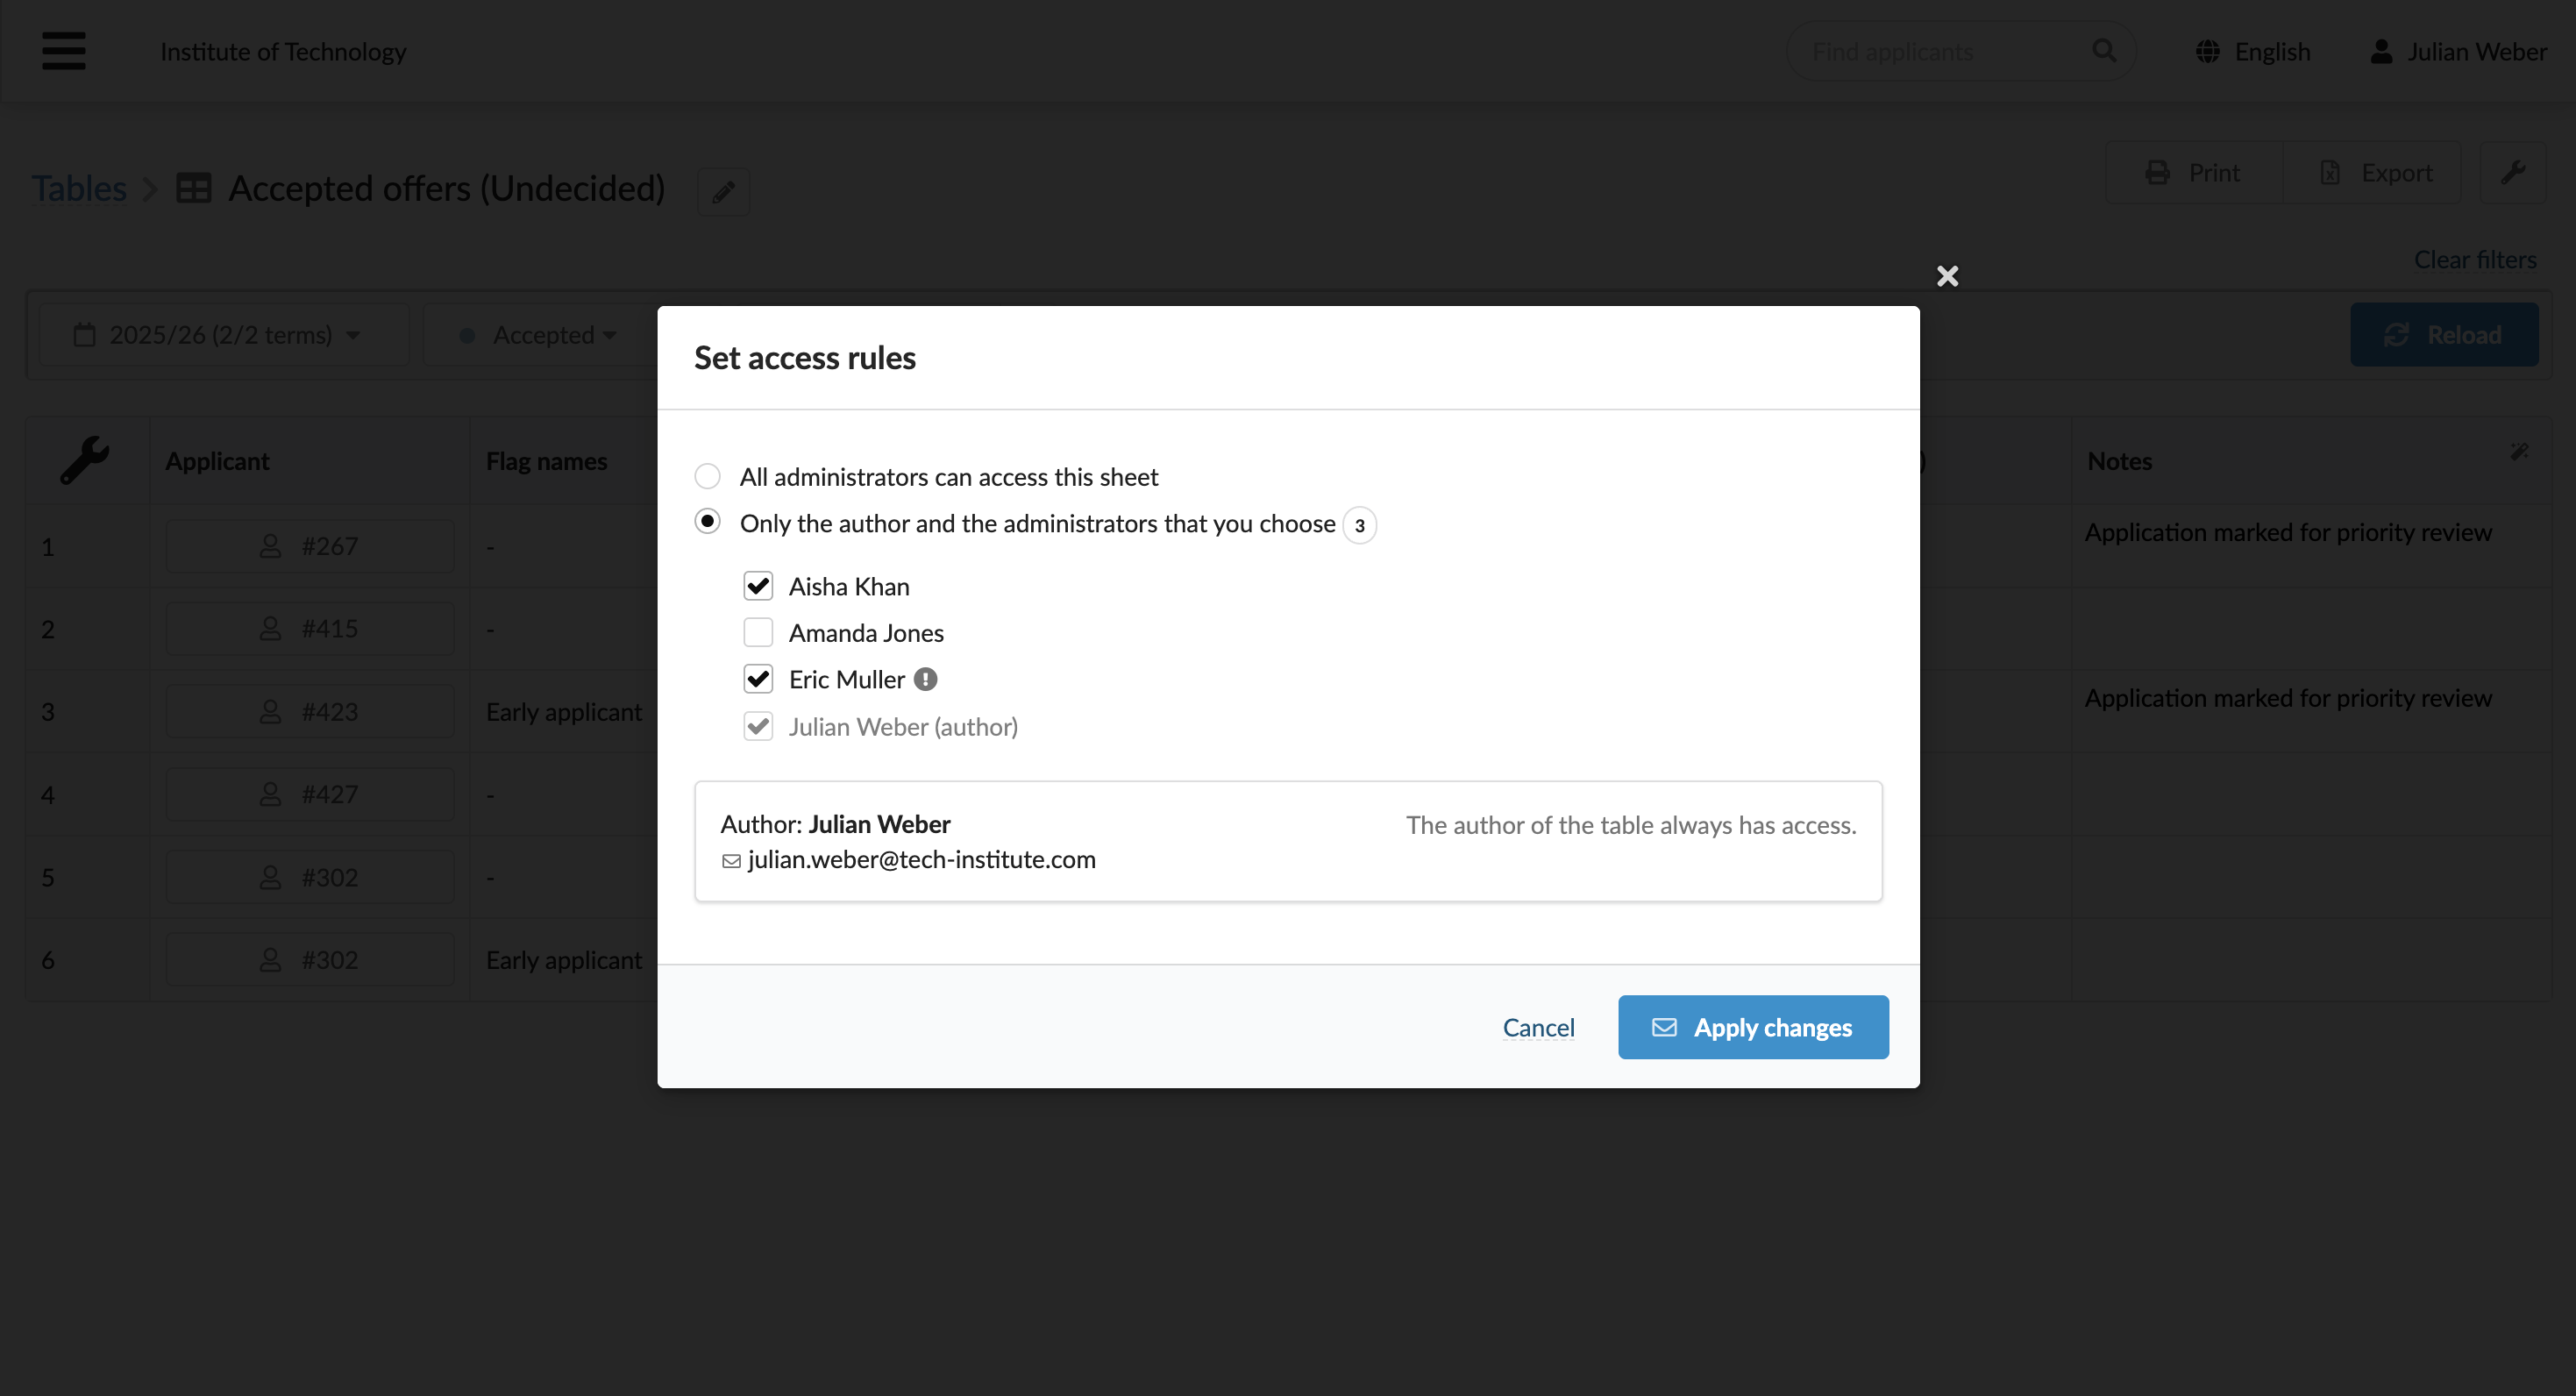
Share tables with Administrators
To share a table with Administrators:
- In the main menu, under Applications, select Tables.
- Open the table to share.
- In the top right corner, click the wrench icon and select Access rules.
- Select the Administrators whom you want to grant access to the table and click Apply changes.
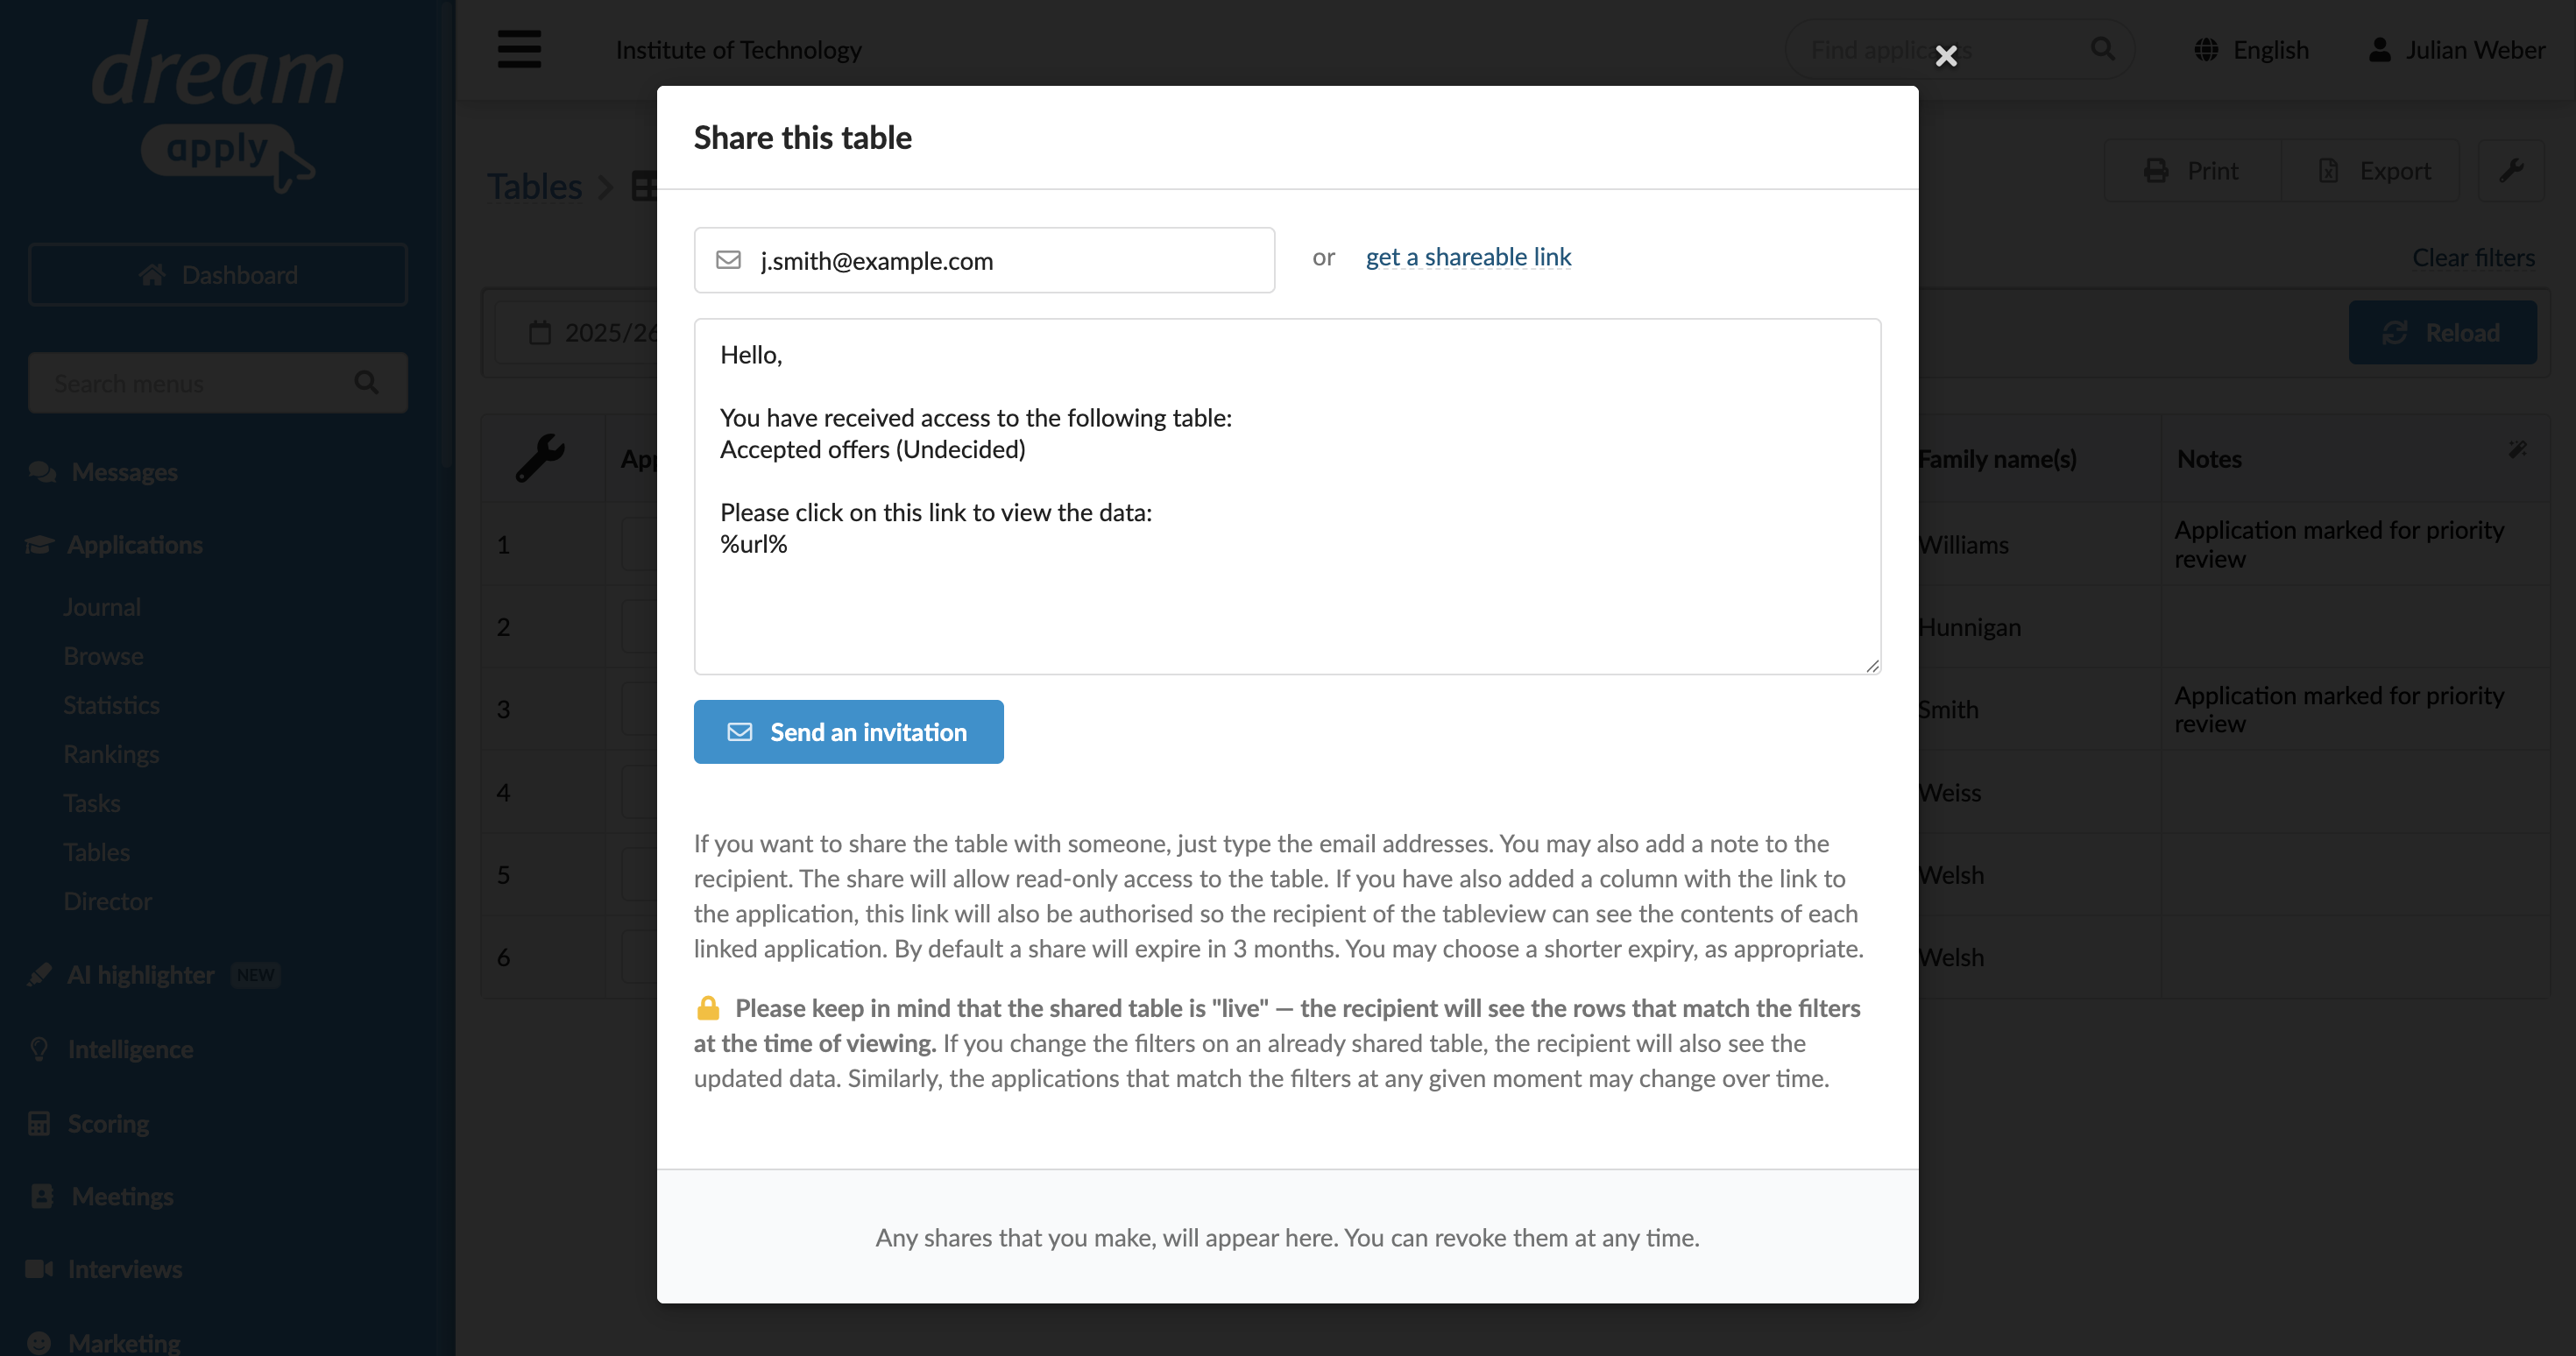
Share tables using share links
To share a table using a share link:
- In the main menu, under Applications, select Tables.
- Open the table to share.
- In the top right corner, click the wrench icon and select Share.
- Enter an email to which a link to the table must be sent and click Send email or get a sharable link to the table.
To revoke access to a table shared with a share link, use the Shares view. For details, see Share-based access.