Understanding application data
DreamApply uses different types of resources to organize, display and manage application data. To interact with this data through both the DreamApply UI and its API, it is important to understand these resources and how they relate to each other.
Applicants
When a user account is registered in the system, DreamApply creates an applicant record and assigns a unique applicant ID to it. There are several ways user accounts can be registered:
- By the user: Applicants can sign up and register themselves directly through the DreamApply portal.
- By Advisors: Advisors can register users on their behalf.
- Through import: User accounts can be created by importing data from external files, using the DreamApply API, or through integrations with third-party systems.
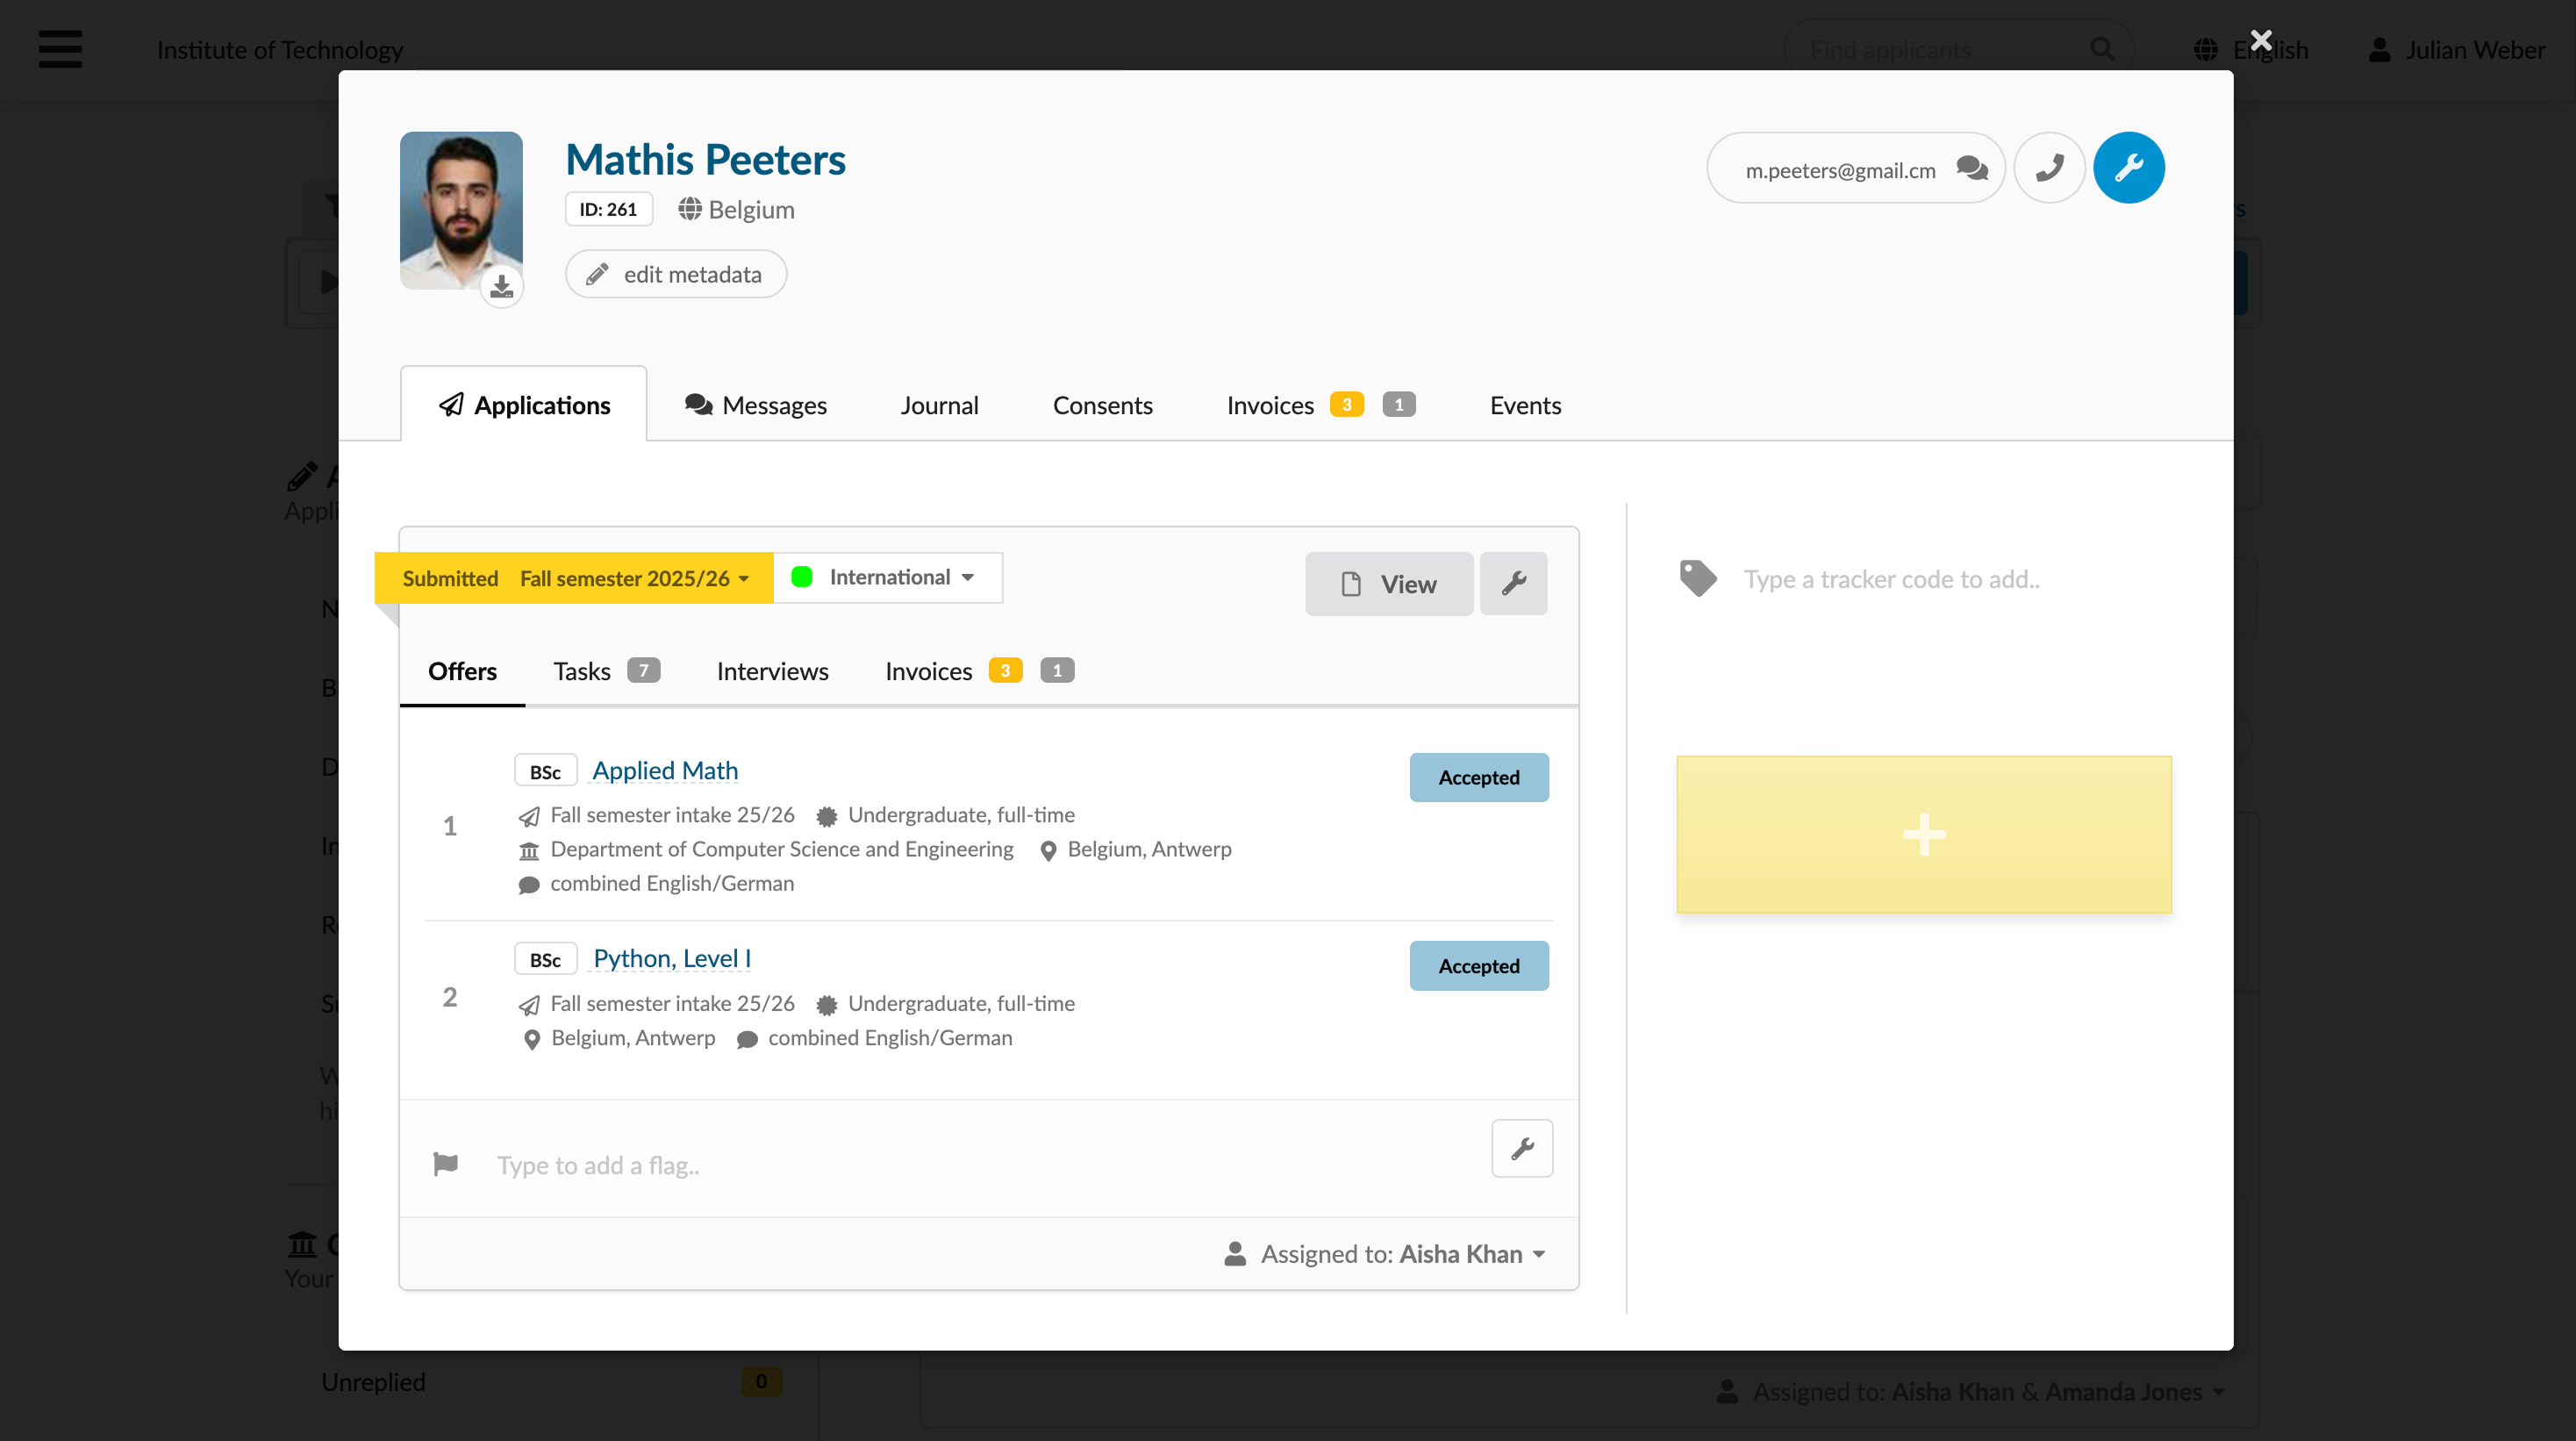
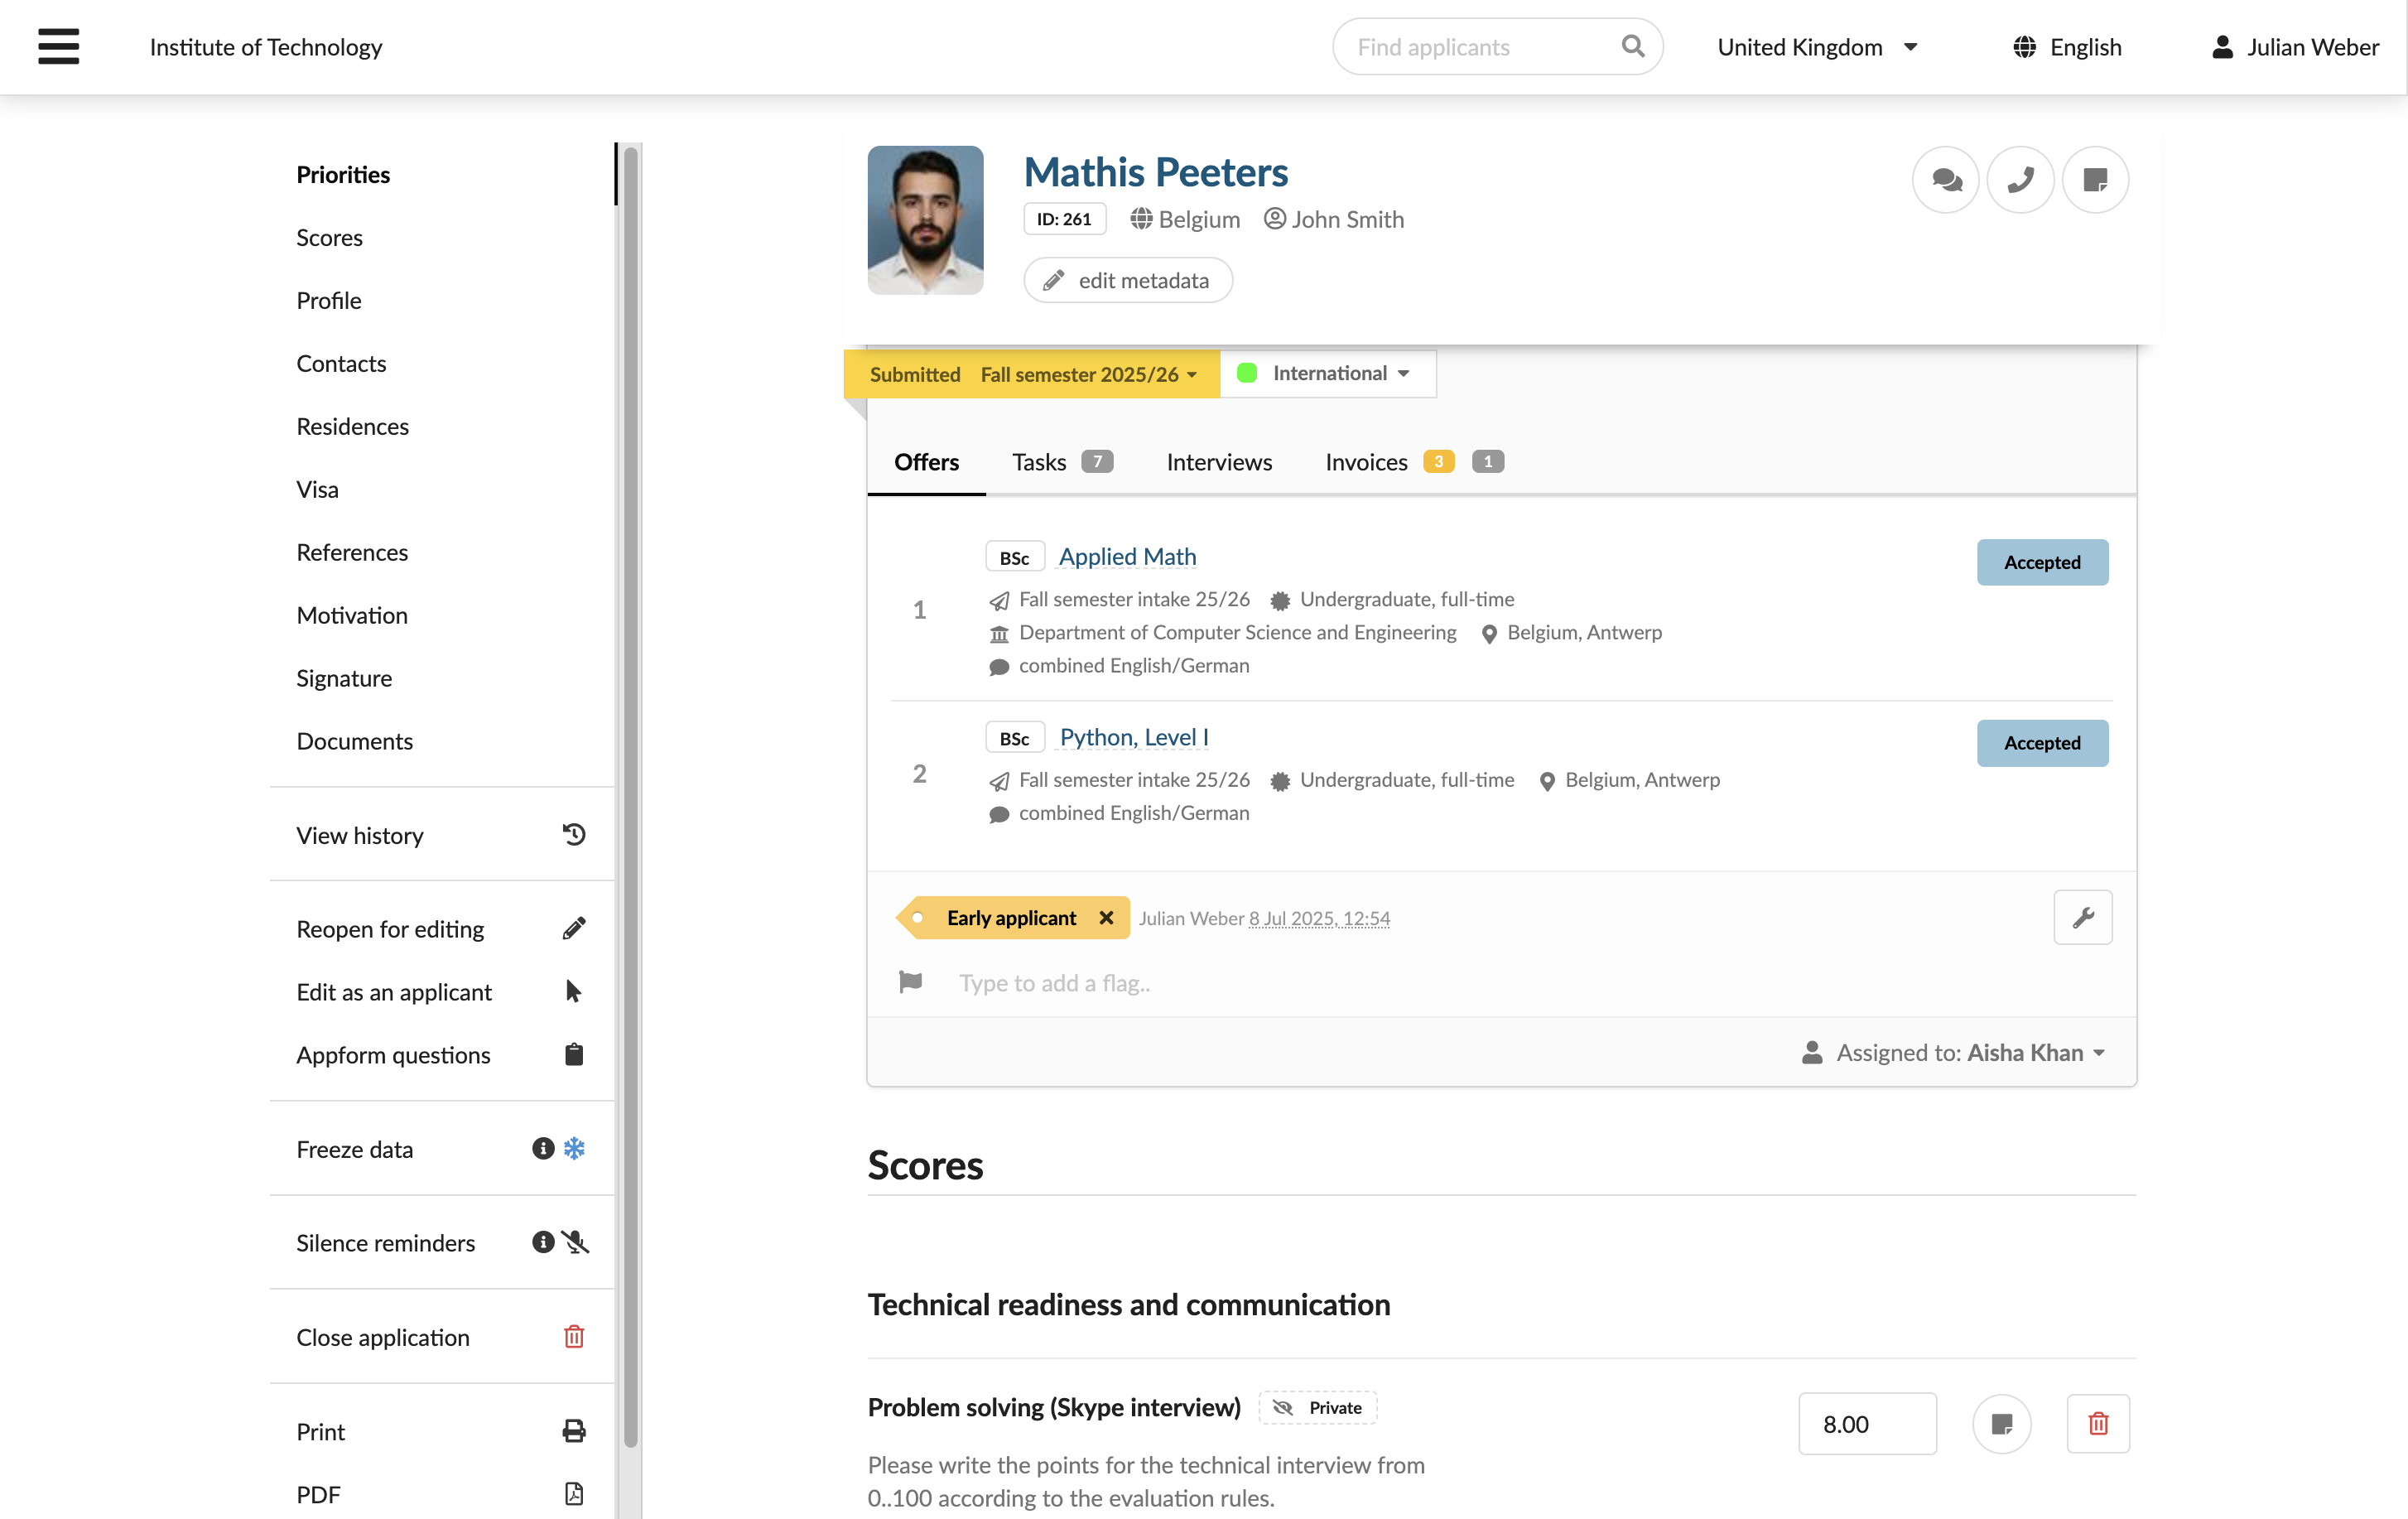
You can access applicant records through applicant cards. To open the card, click an applicant’s name in the system. The applicant card serves as a central hub: it displays the applicant ID, profile data and contact information and provides quick access to related resources and tasks.
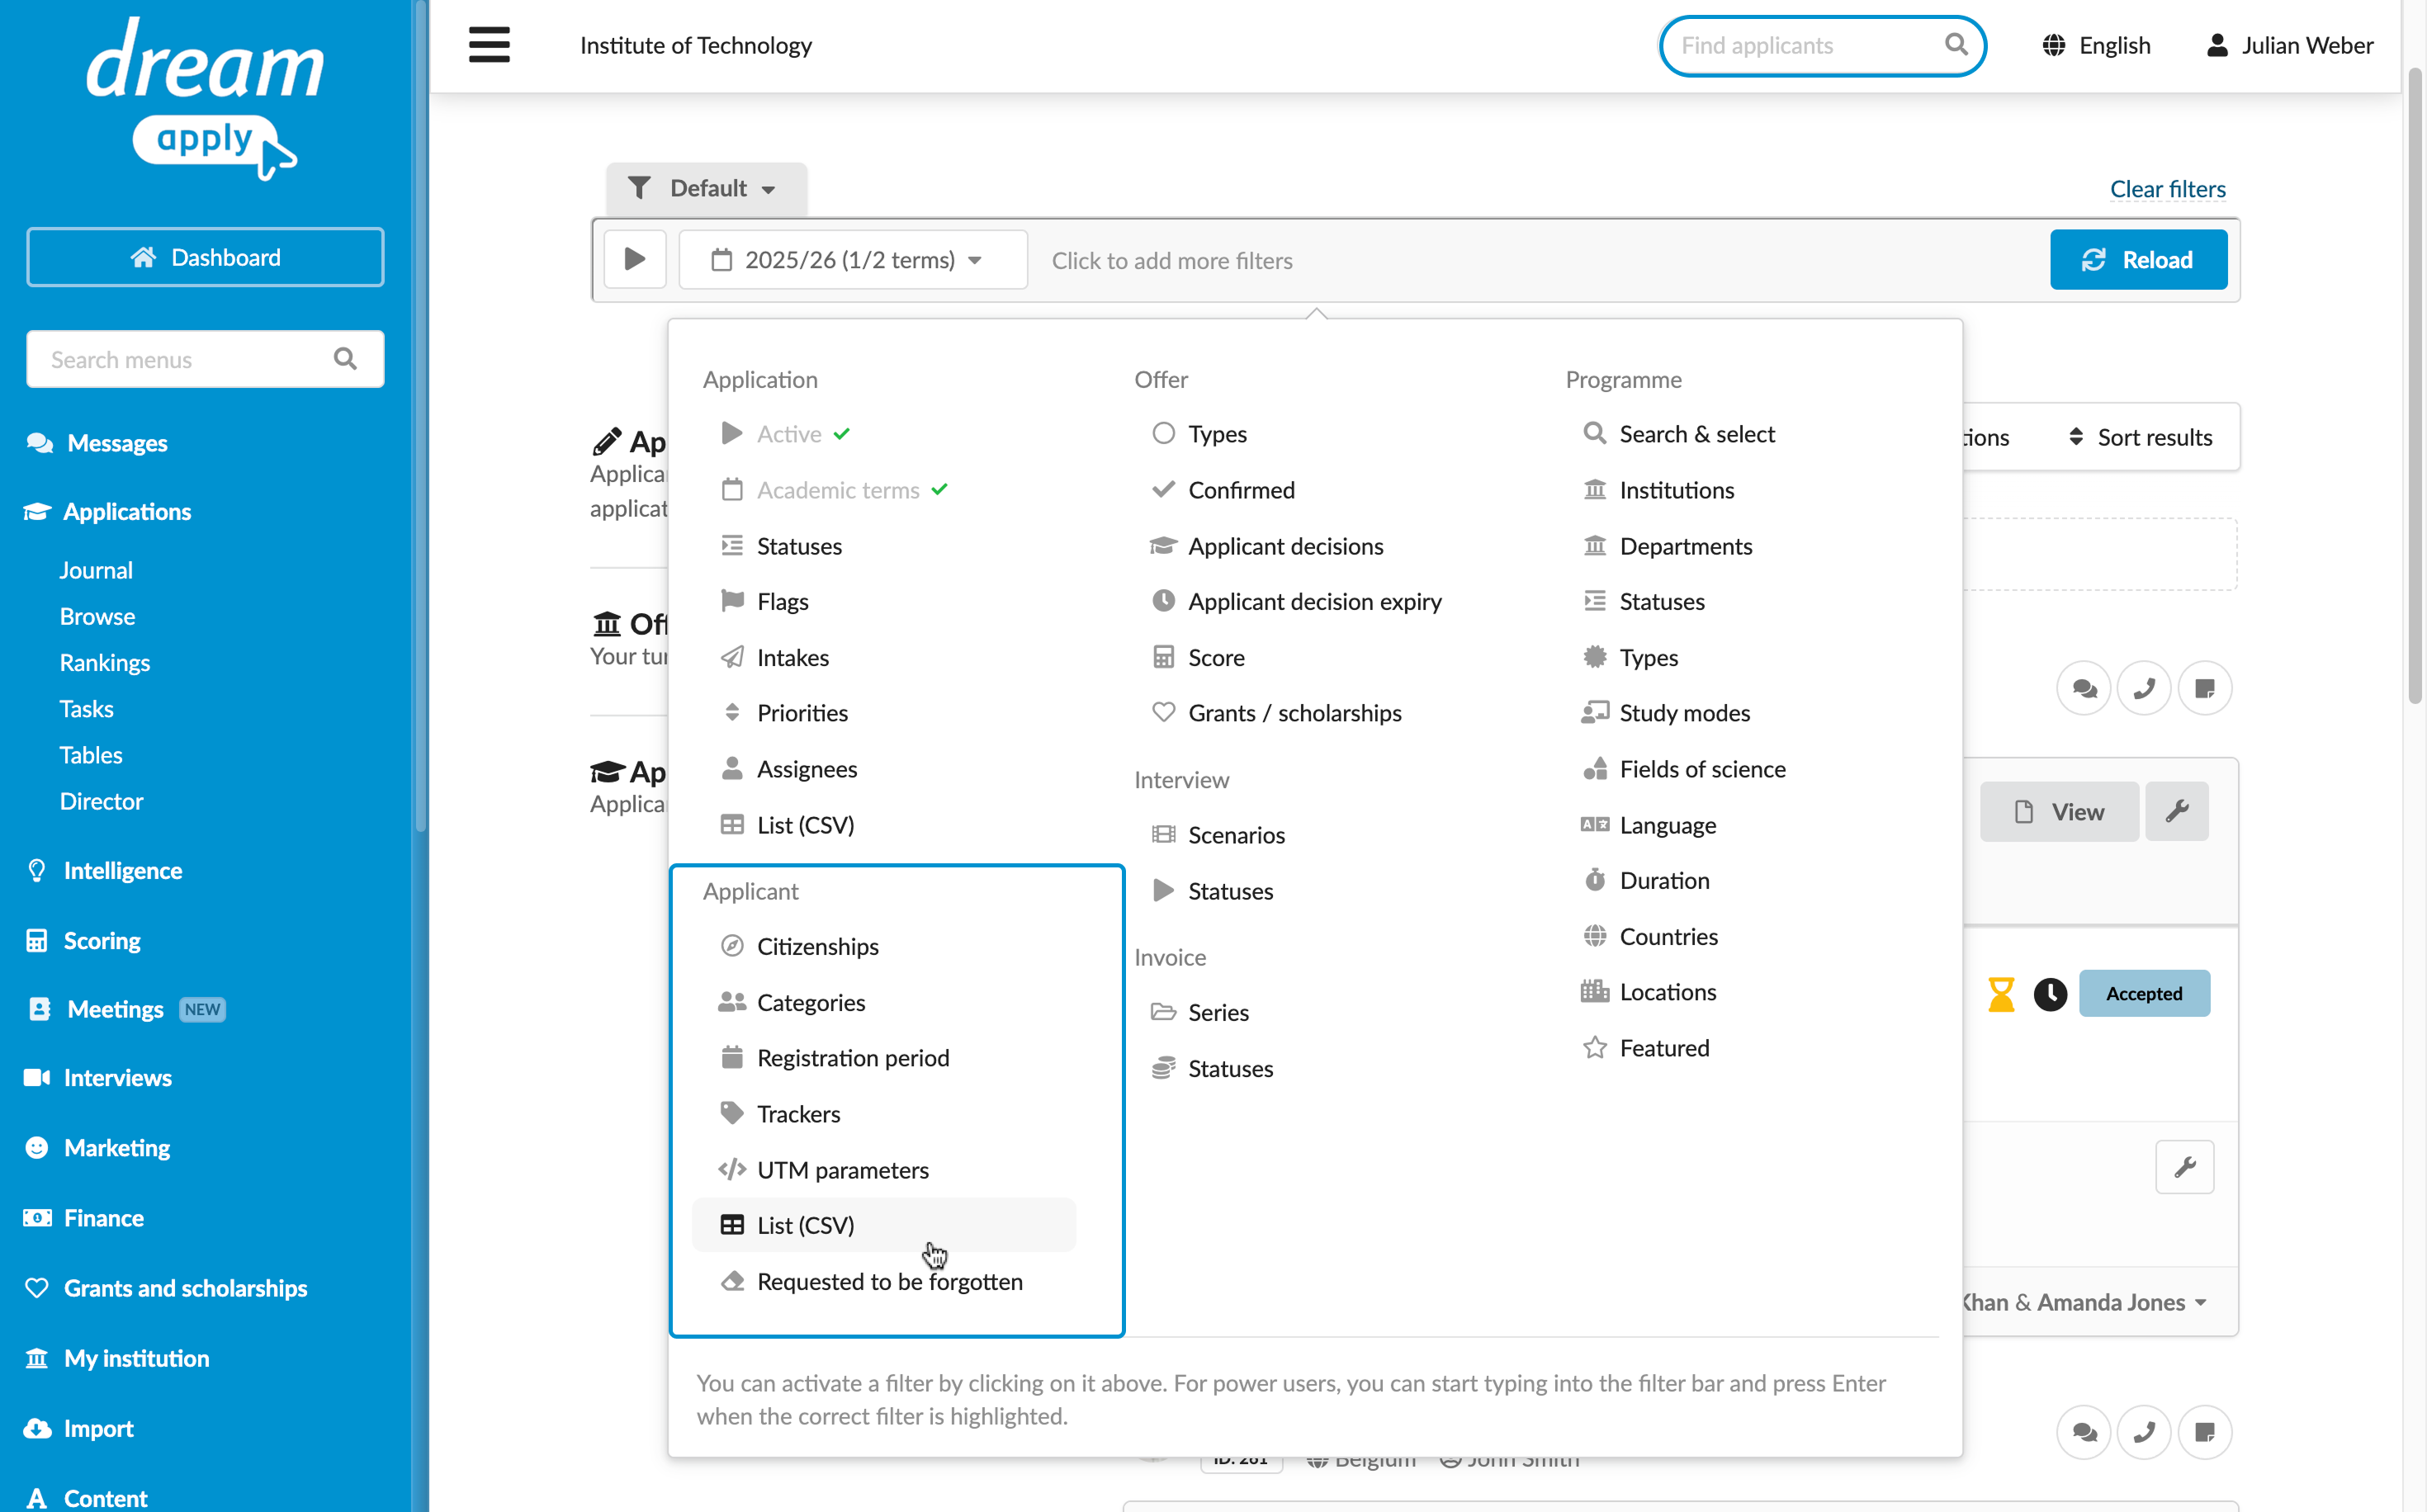
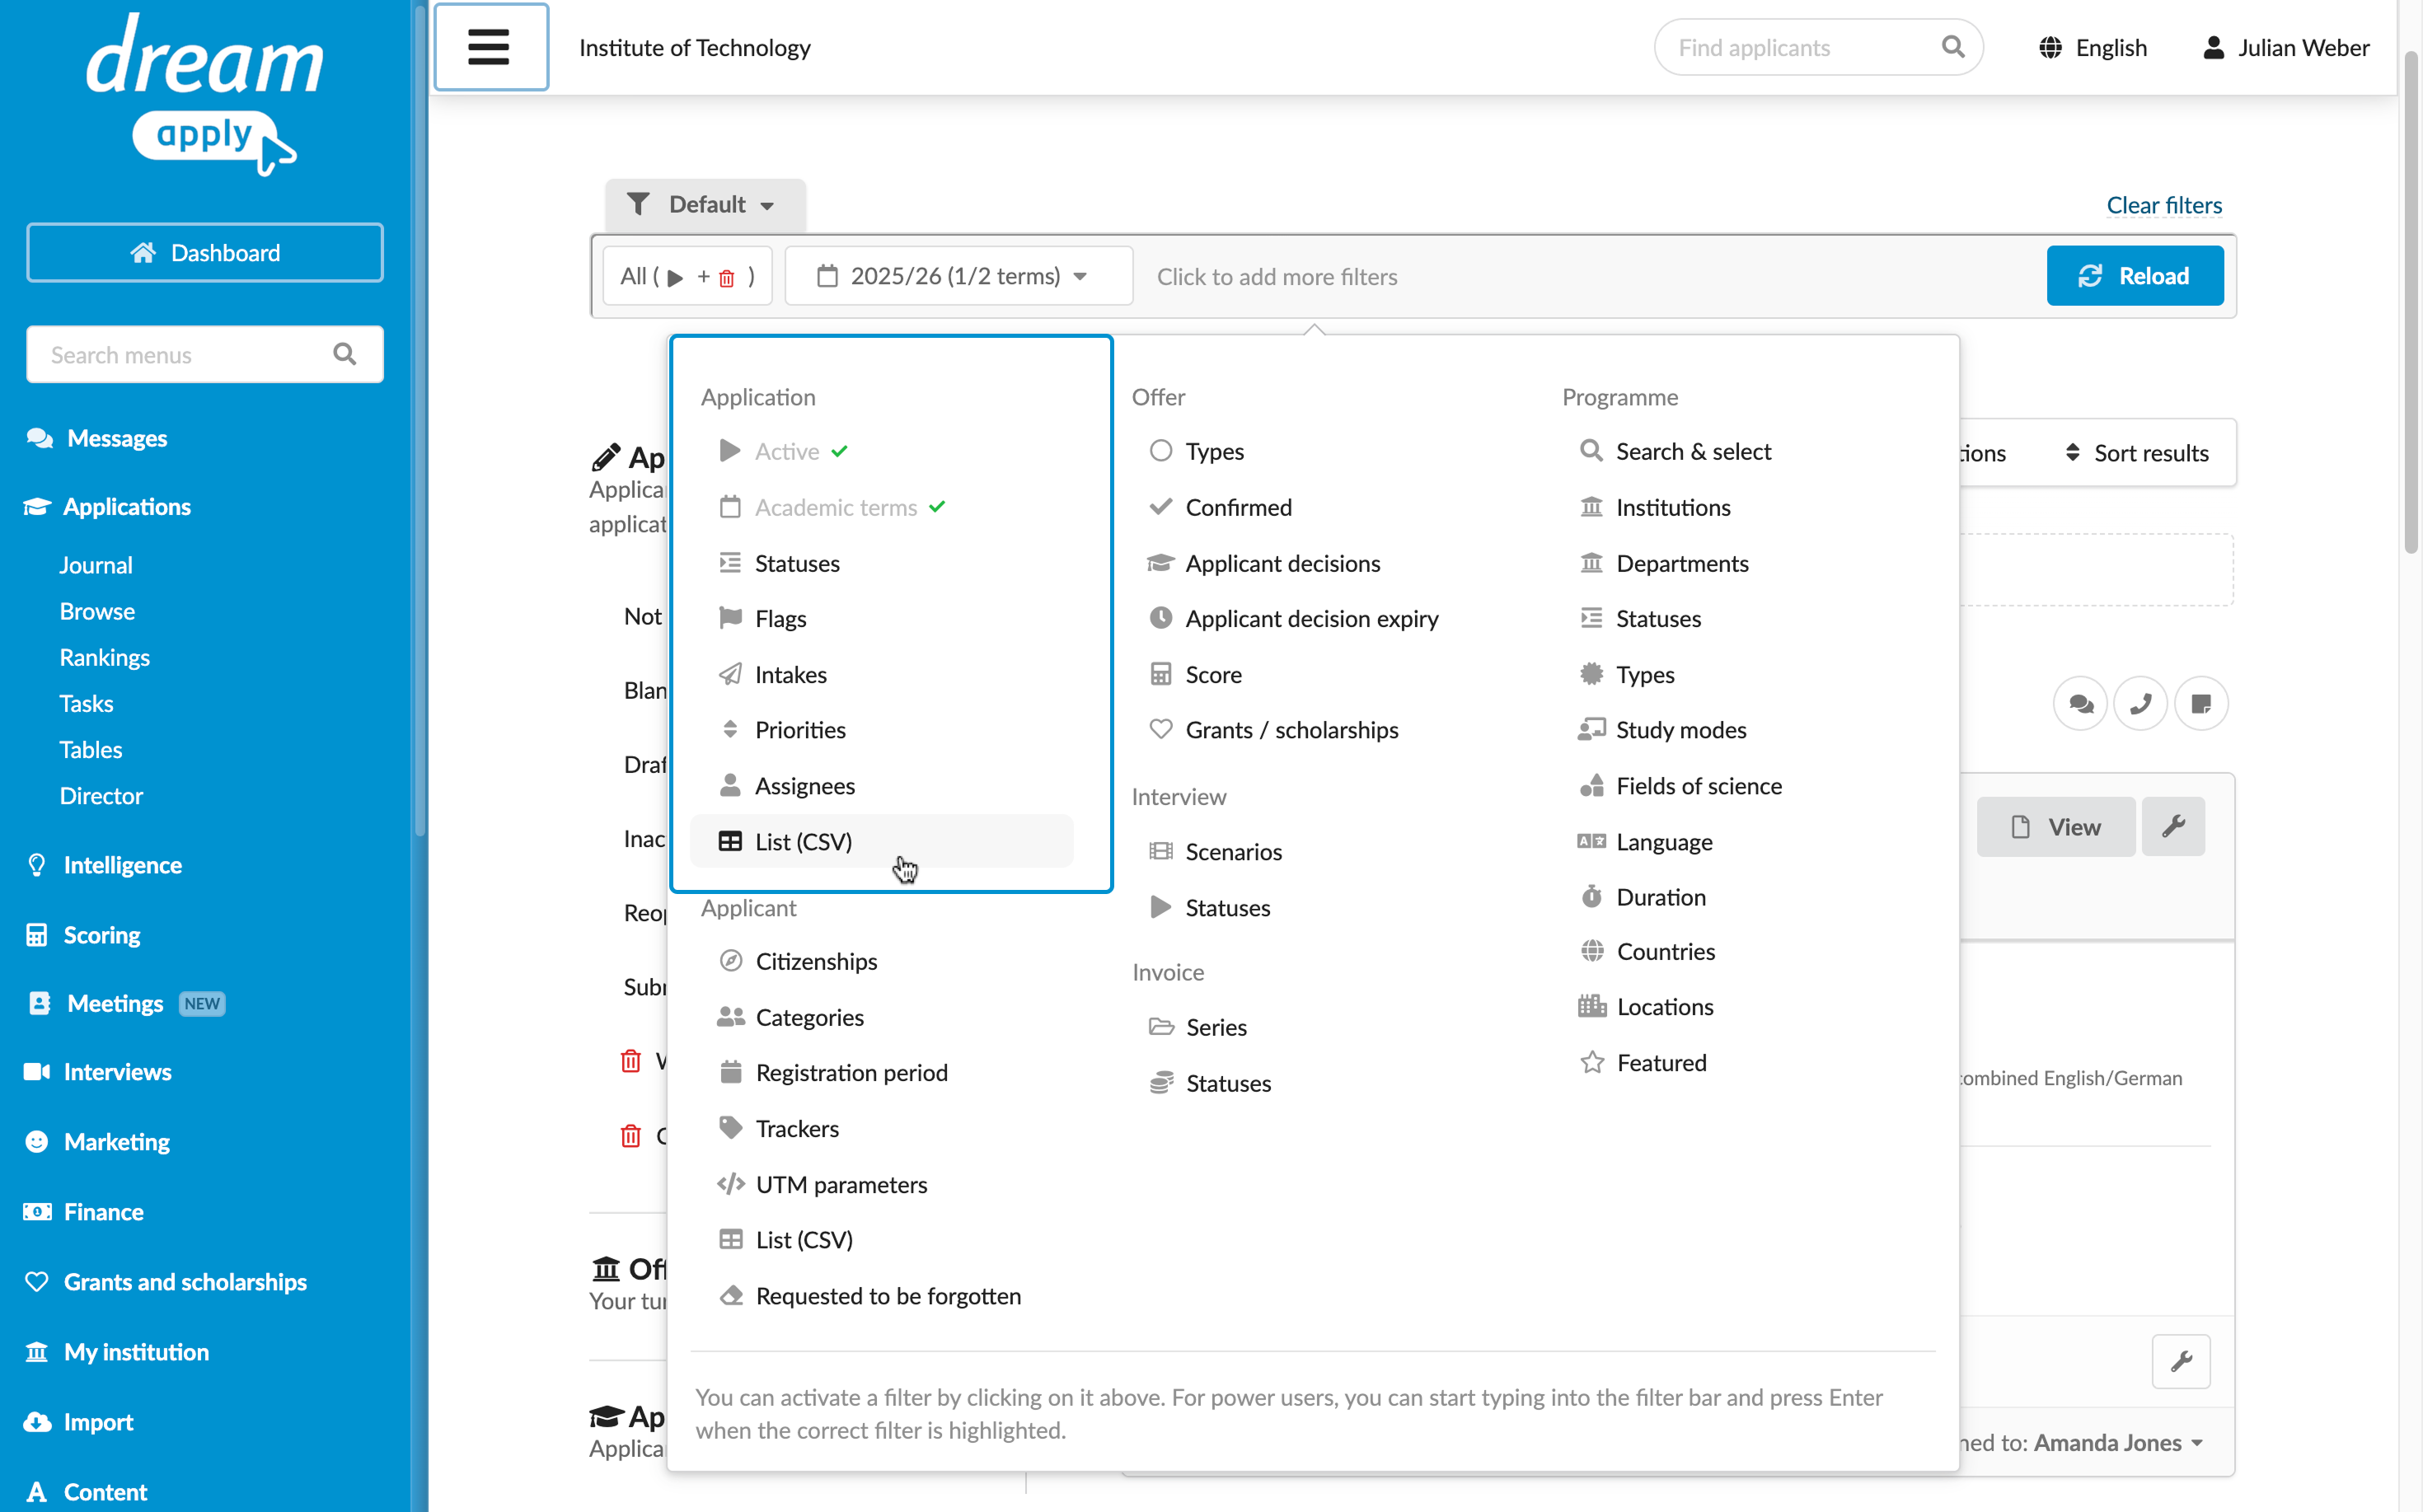
To find data related to specific applicants, use filters under the Applicant category.
To find applicant records, use the Find applicants search field at the top of the DreamApply portal. DreamApply allows searching by applicant’s name or ID. Additionally, to search using known IDs, you can use the Applicant > List (CVS) filter.
Applications
An application is a key resource in DreamApply. It serves as a container that holds related sub-resources and information, including application data, priorities, offers, tasks, invoices, interviews and files.
An application is created when an applicant or someone acting on their behalf clicks the Apply now! button in the DreamApply portal. DreamApply assigns a unique ID to each created application and links it to the corresponding applicant.
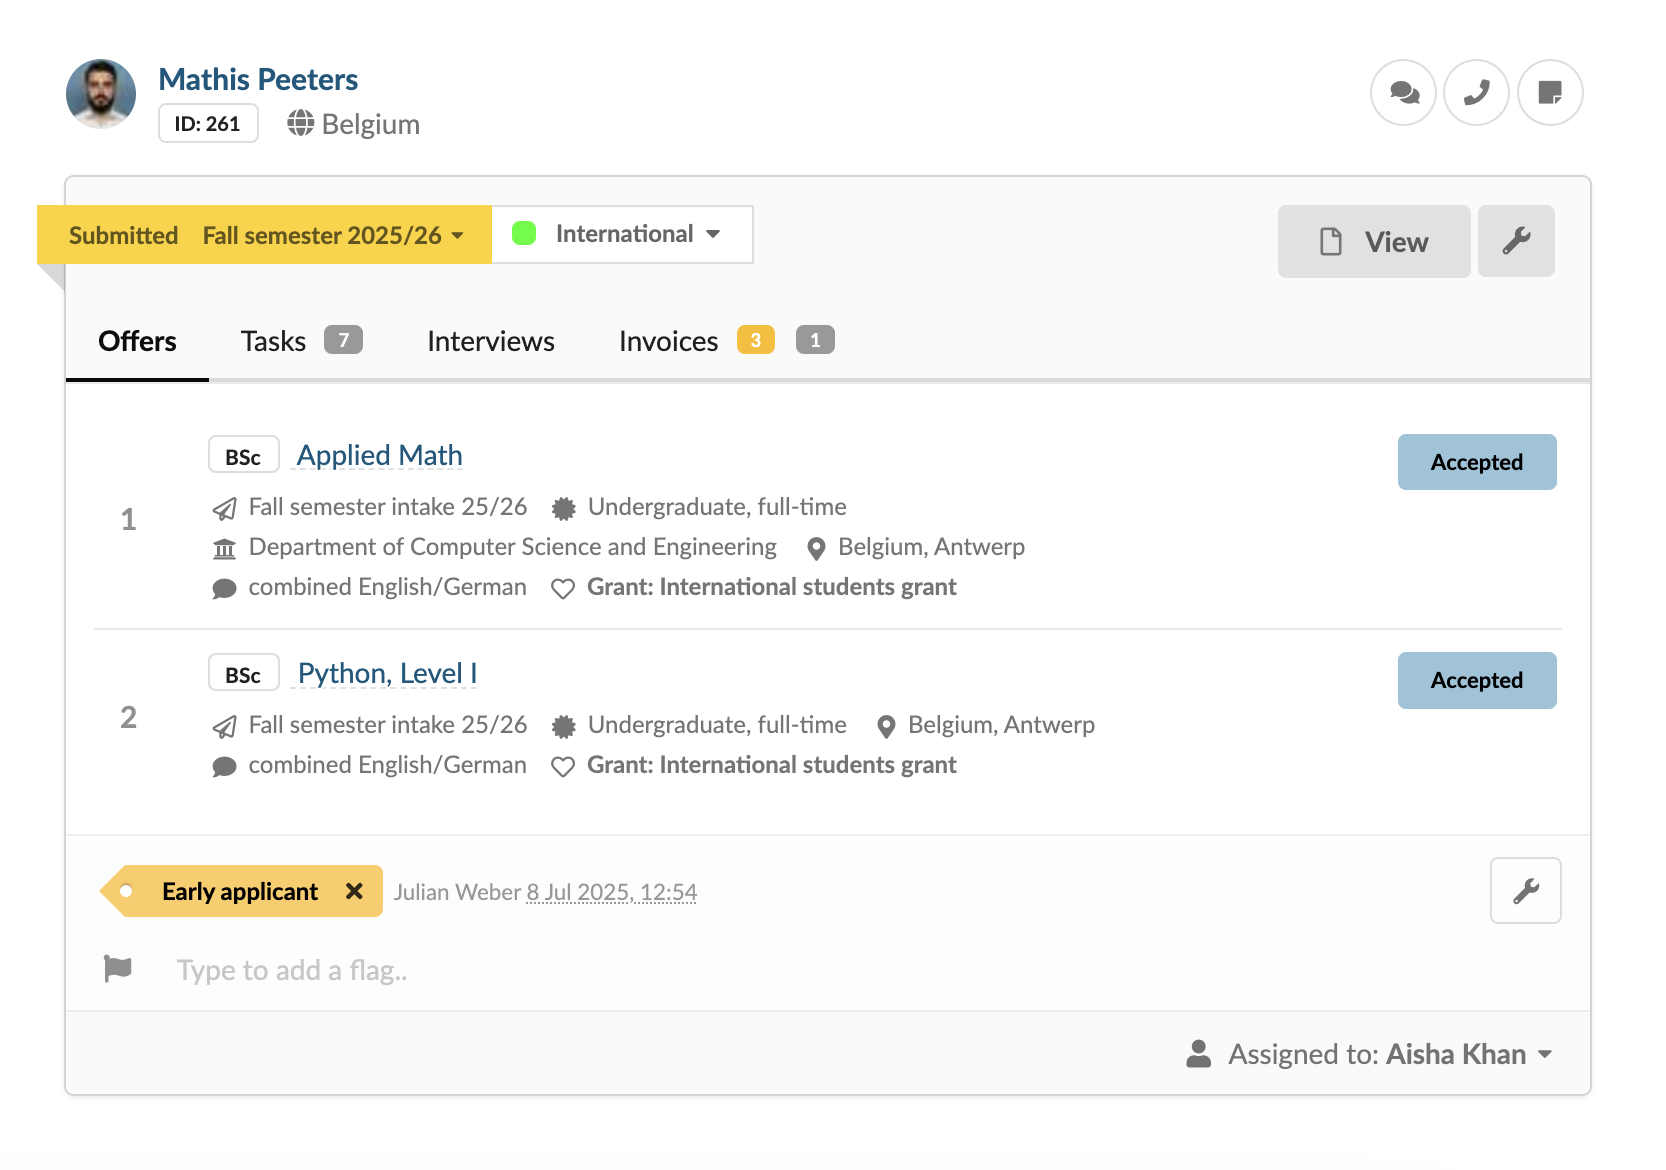
You can access application data through application cards. These cards offer a quick summary of key application details and provide access to immediate actions.
To open the full application record, click the View button on the card. From there, you can review all application information and access any application-related tasks.
To find application-related data, use filters under the Application category. To search using known application IDs, use the Application > List (CVS) filter.
Application statuses
An application status reflects the progression of an application through the admission process. Statuses are used to track the application state and can trigger automated actions or notifications.
In DreamApply, applications can have the following statuses:
Blank: An applicant has clicked the Apply now! button but has not yet entered any data. This status represents that the application process has begun, but no content is added.
Draft: An applicant has partially completed the application and selected Save as a draft. This status allows the applicant to save their progress and return to the application later.
Inactive: An application has not been edited for a specific period (15 days). DreamApply automatically assigns this status to indicate the application is stalled or abandoned.
Reopened: An authorized user — applicant, Advisor or Administrator — has returned a submitted application to an editable state. Re-opening an application allows authorized users to make corrections, updates or add information after the initial submission.
Submitted: An applicant has completed all requirements and formally finalized the application. This status locks the application to prevent further edits and begins the institutional review process.
Withdrawn: An applicant has voluntarily removed a submitted application from consideration. This action indicates that the applicant no longer wishes to proceed with admission.
Closed: An institution has formally finalized the application. This status indicates the end of the application’s lifecycle. The process is complete, and no further actions will be taken, regardless of the admission decision.
Offers
When an applicant adds programmes to their application, DreamApply saves the selected programmes as priorities. At the time of application submission, it creates a separate offer for each priority, assigns a unique offer ID to it and links the offer to the corresponding priority. If an application is not yet submitted, offers are not created, even if programmes are added to the application.
You can access offer data through offer cards. To open the offer card, click the offer type button on the application card next to the corresponding priority.
For more details about offers, see Offer basics.

Working with application data
DreamApply provides several views to work with application data. Each view is designed to support a specific use case.
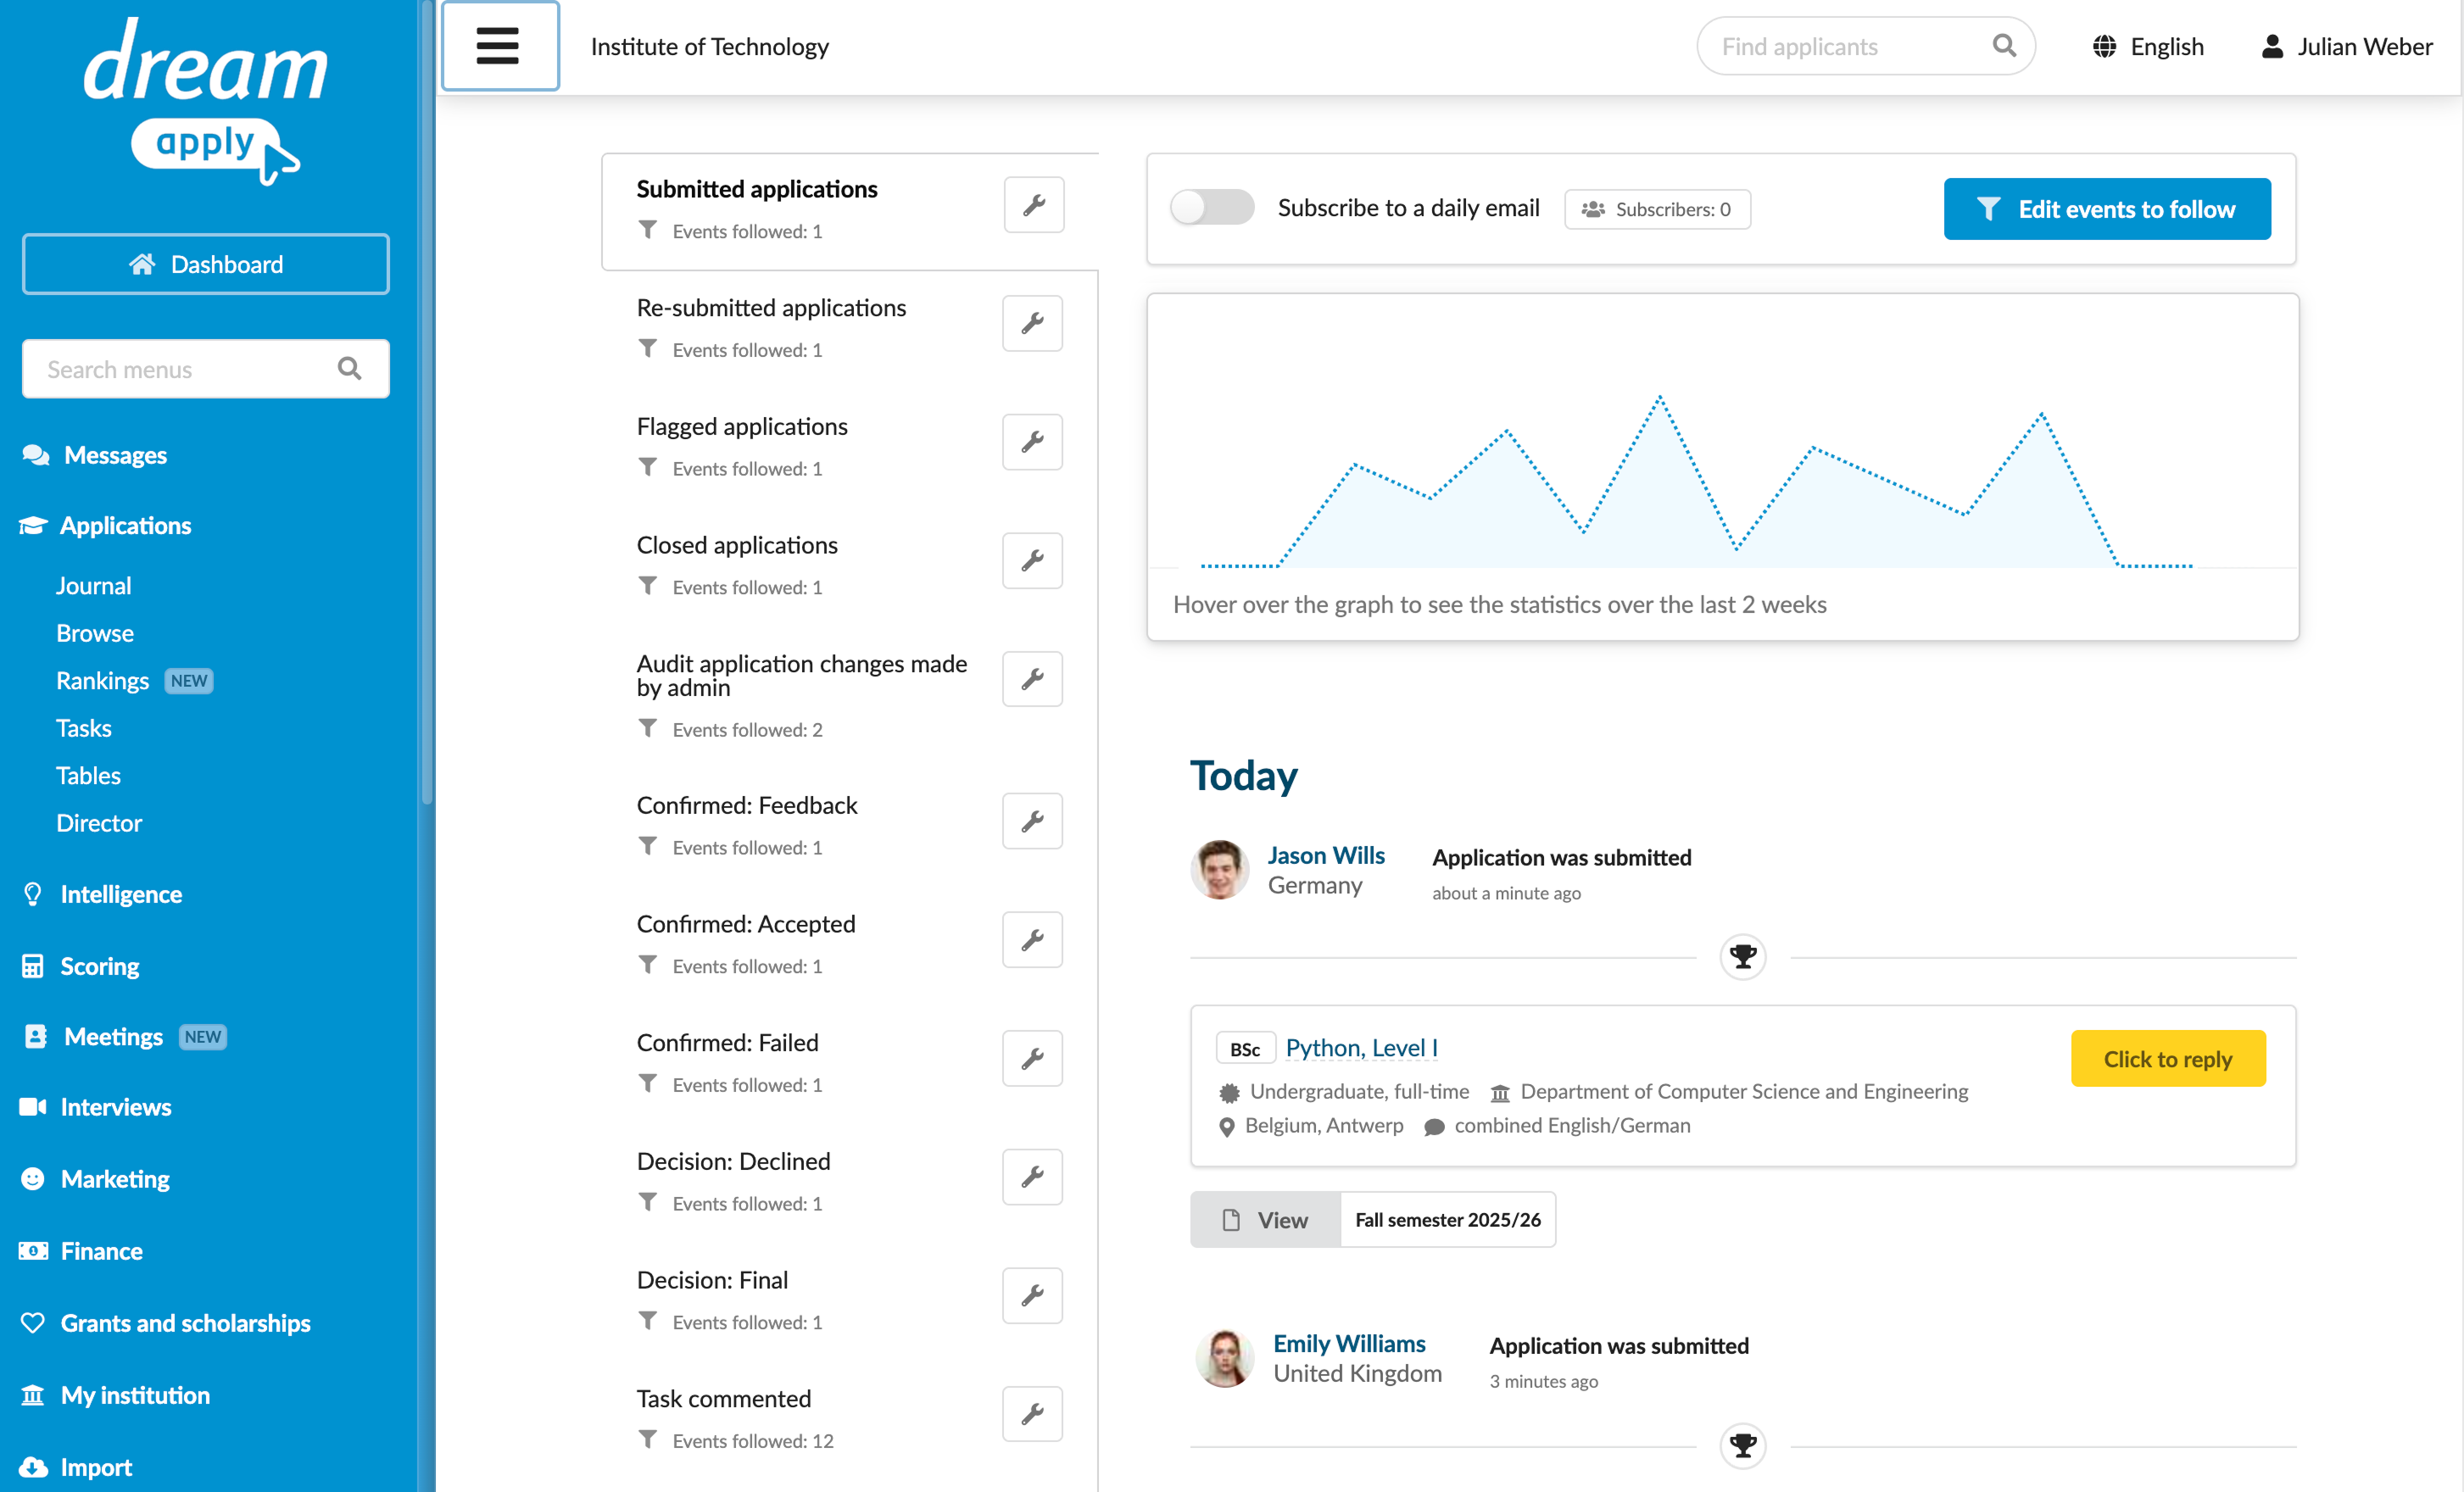
- Journal: This view focuses on tracking application-related events in DreamApply. Administrators can use it to monitor changes, subscribe to receive summaries of updates and integrate event tracking with external systems using webhooks.
- Browse: This is the main workspace for admission team members involved in reviewing applications. It presents comprehensive application data organized into cards and includes filtering and sorting tools to streamline the review process.
- Rankings: This view displays offers ranked according to the evaluation criteria set up in DreamApply.
- Tasks: This section is dedicated to working with tasks that have been assigned to and completed by applicants.
- Tables: This view allows Administrators to organize data into spreadsheets, which can then be shared and exported for teamwork and offline review.
- Statistics: Here, you can drill down into application data and compare different data sets for analysis.
- Director: This view allows you to assign applications to specific members of the admission team for review.