Customize the portal identity and branding
Roles
These roles reflect the default DreamApply setup.
You can define custom roles based on your
institution's needs. Learn more →:
You can define custom roles based on your
institution's needs. Learn more →
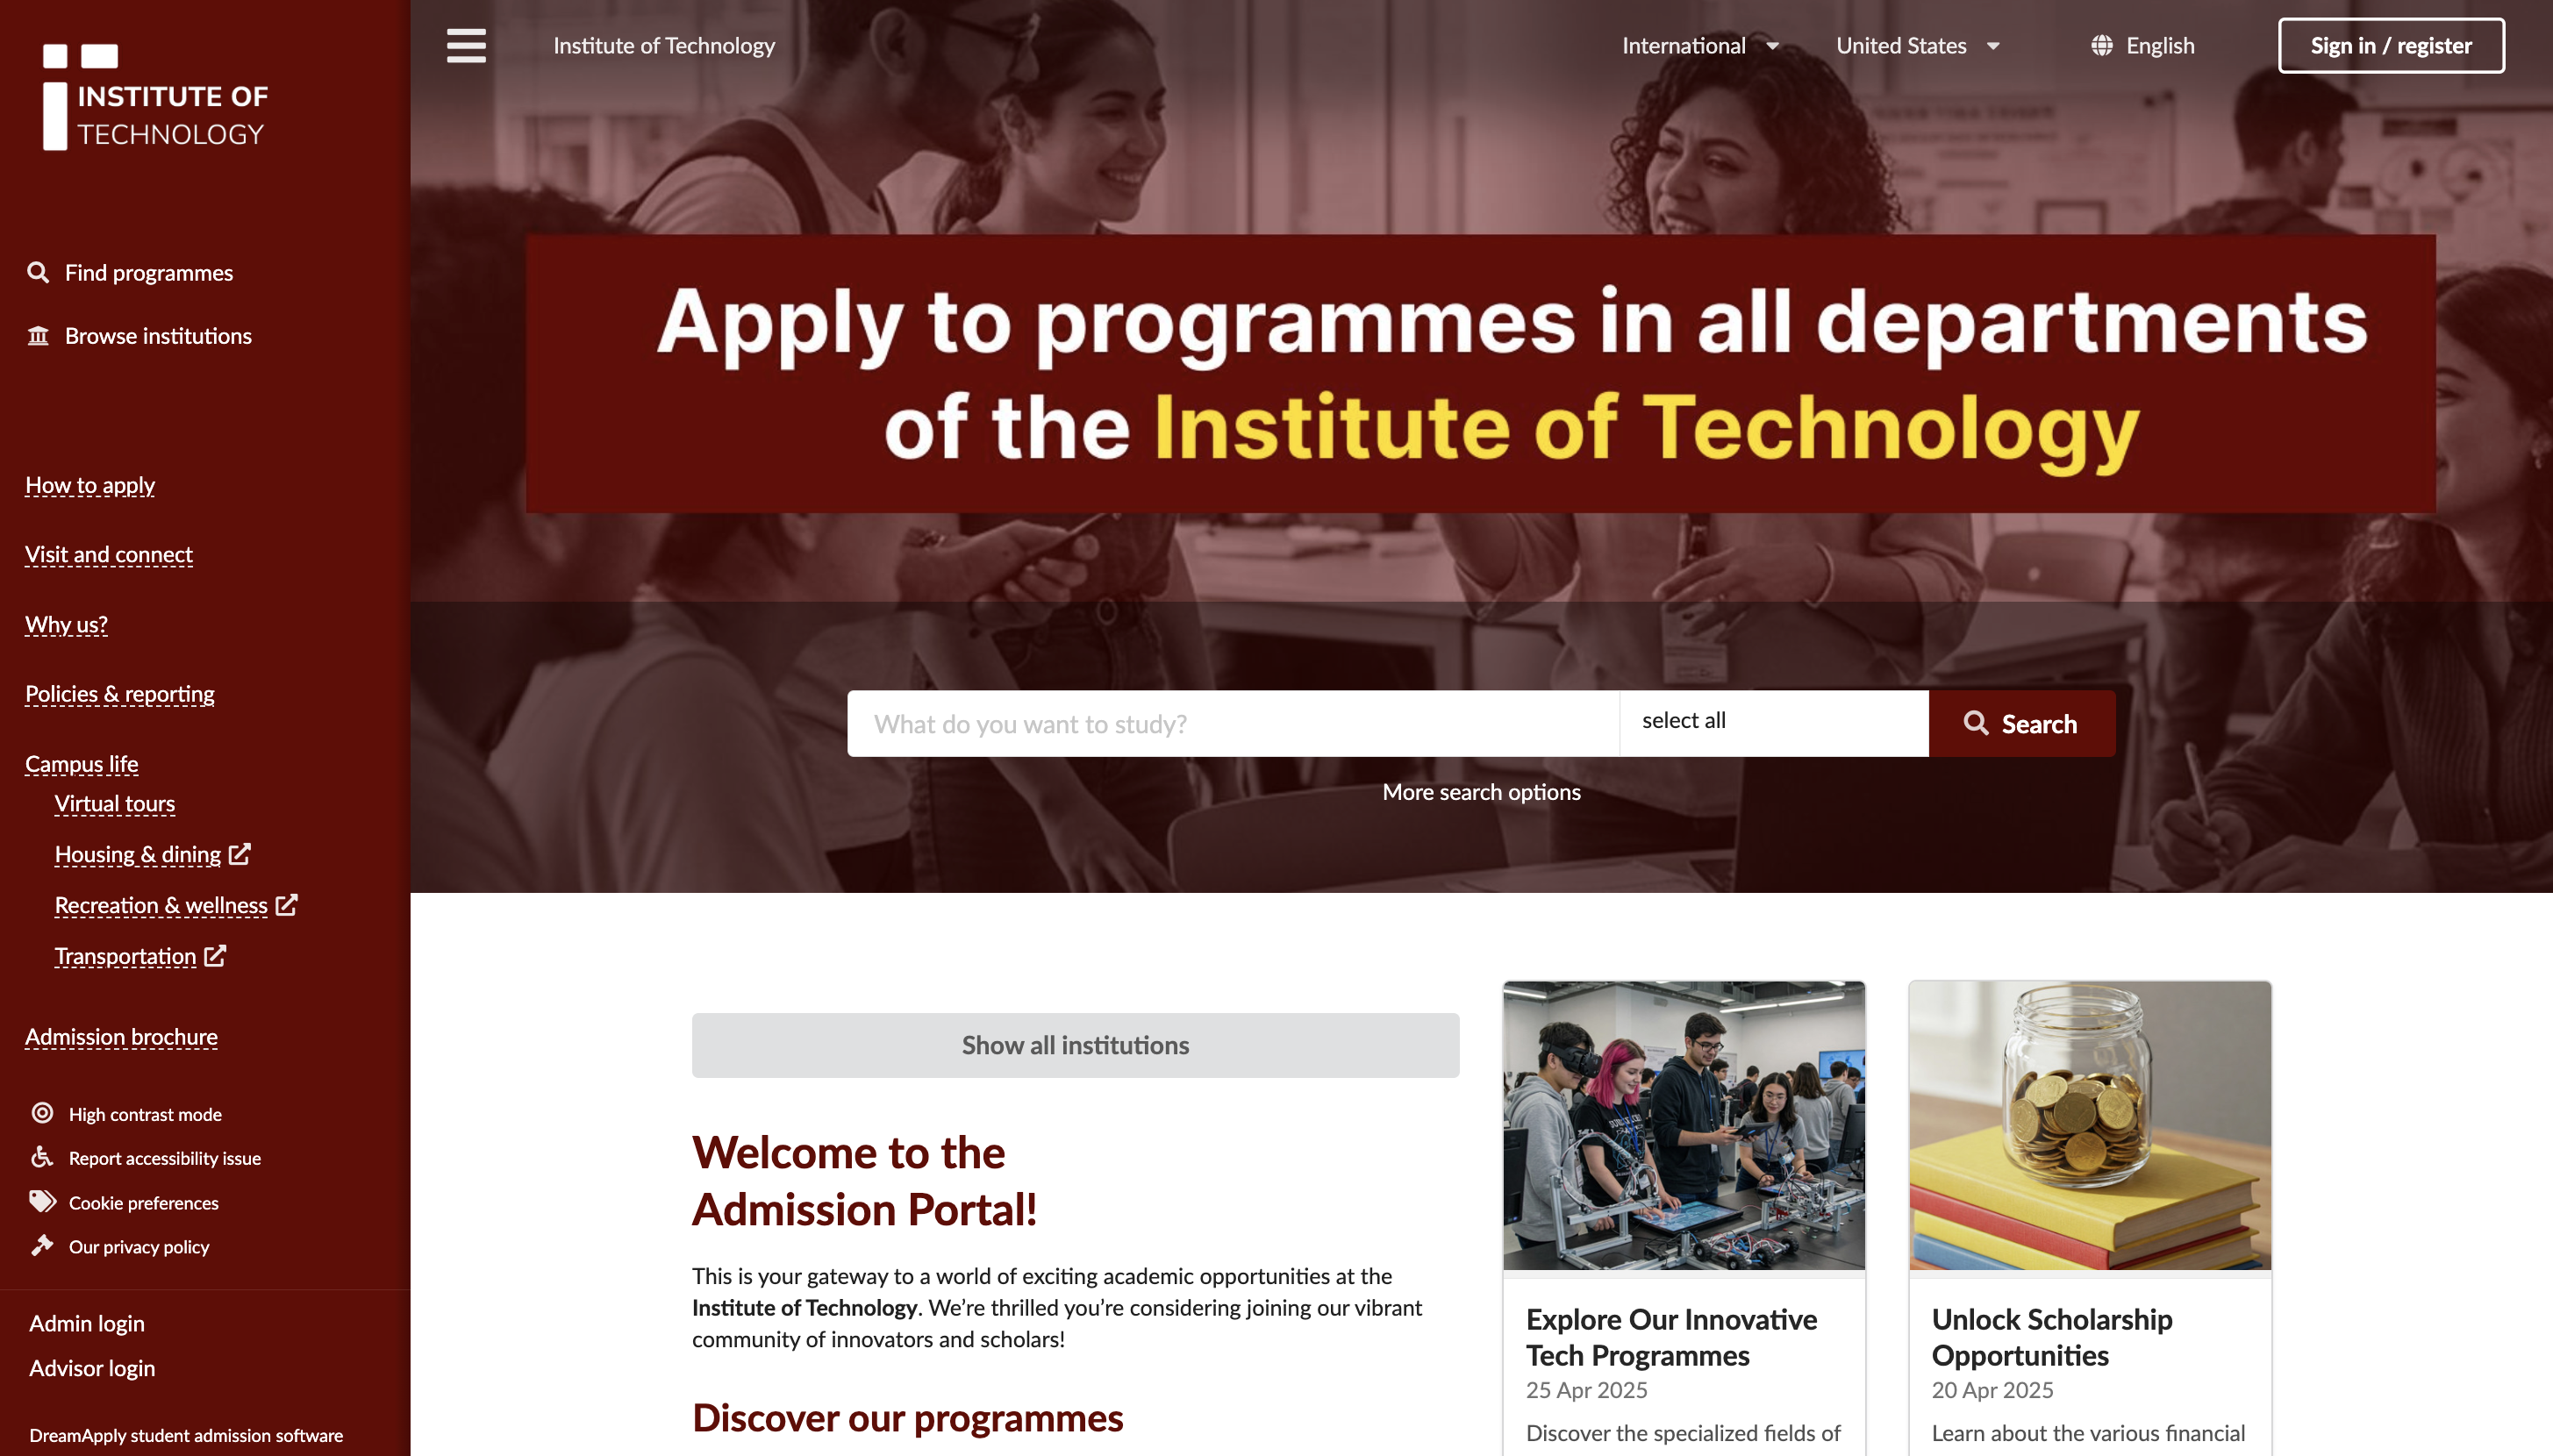
You can customize the main aspects of your portal identity — its name and domain — and personalize the look and feel to align with your organization’s brand.
Identity and branding settings are configured at the instance level. They apply to the Administrator, applicant and advisor portals. In the multi-institution setup, these settings affect all institutions and their respective portals.
Before you begin
To customize the portal identity and branding settings, your account must have the Superuser role or the instance permission.
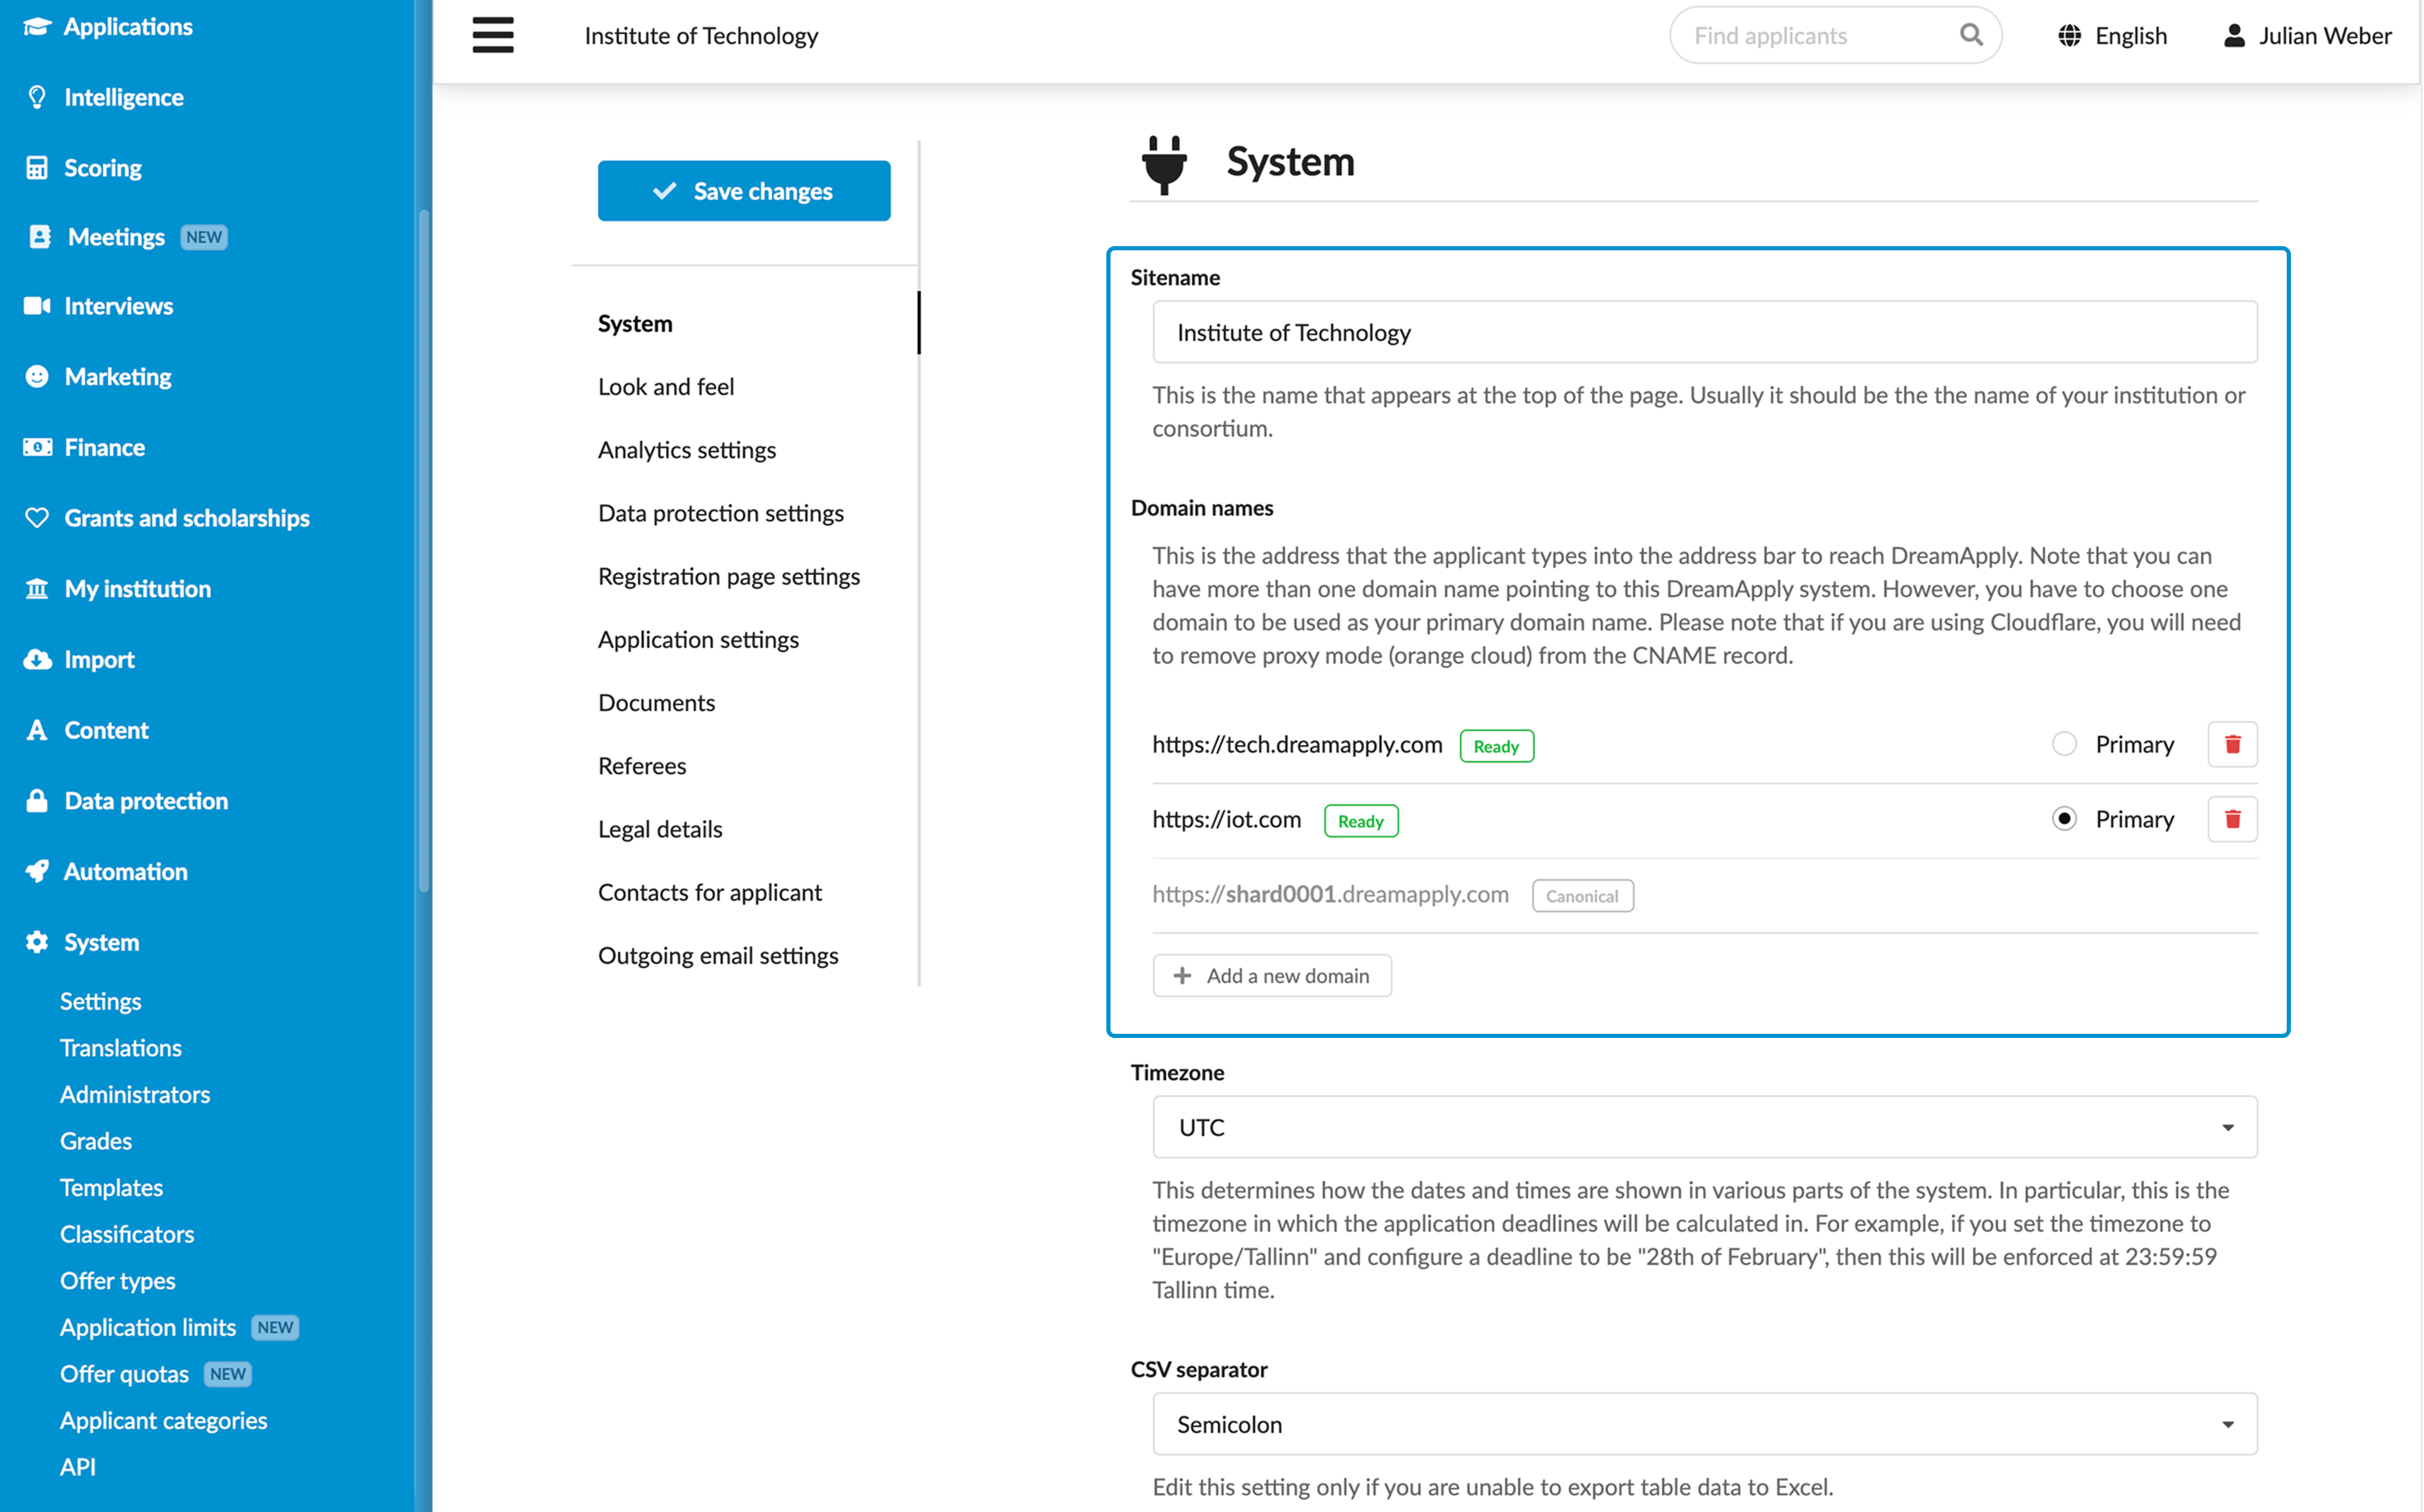
Customize the portal domain and name
DreamApply assigns two URLs to your instance:
- Shard URL: A URL based on the shard name, for example,
https://shard001.dreamapply.com. This URL is locked to the instance and cannot be modified. - Custom URL: A URL based on the instance name defined during deployment.
You can edit the portal name and configure your domain using the following options:
- DreamApply domain: Use the
dreamapply.comdomain and define a custom prefix for your portal. - Custom domain: Use your own domain. To ensure proper routing and access, you must set up a CNAME record in your DNS settings that points to the instance shard domain.
You can set up multiple domains for your portal to differentiate your brand and help applicants easily find the portal.
To change the portal name and domain:
- In the main menu, under System, select Settings.
- In the System section, update the Sitename and Domain names for the portal.
- At the top of the form, click Save changes.
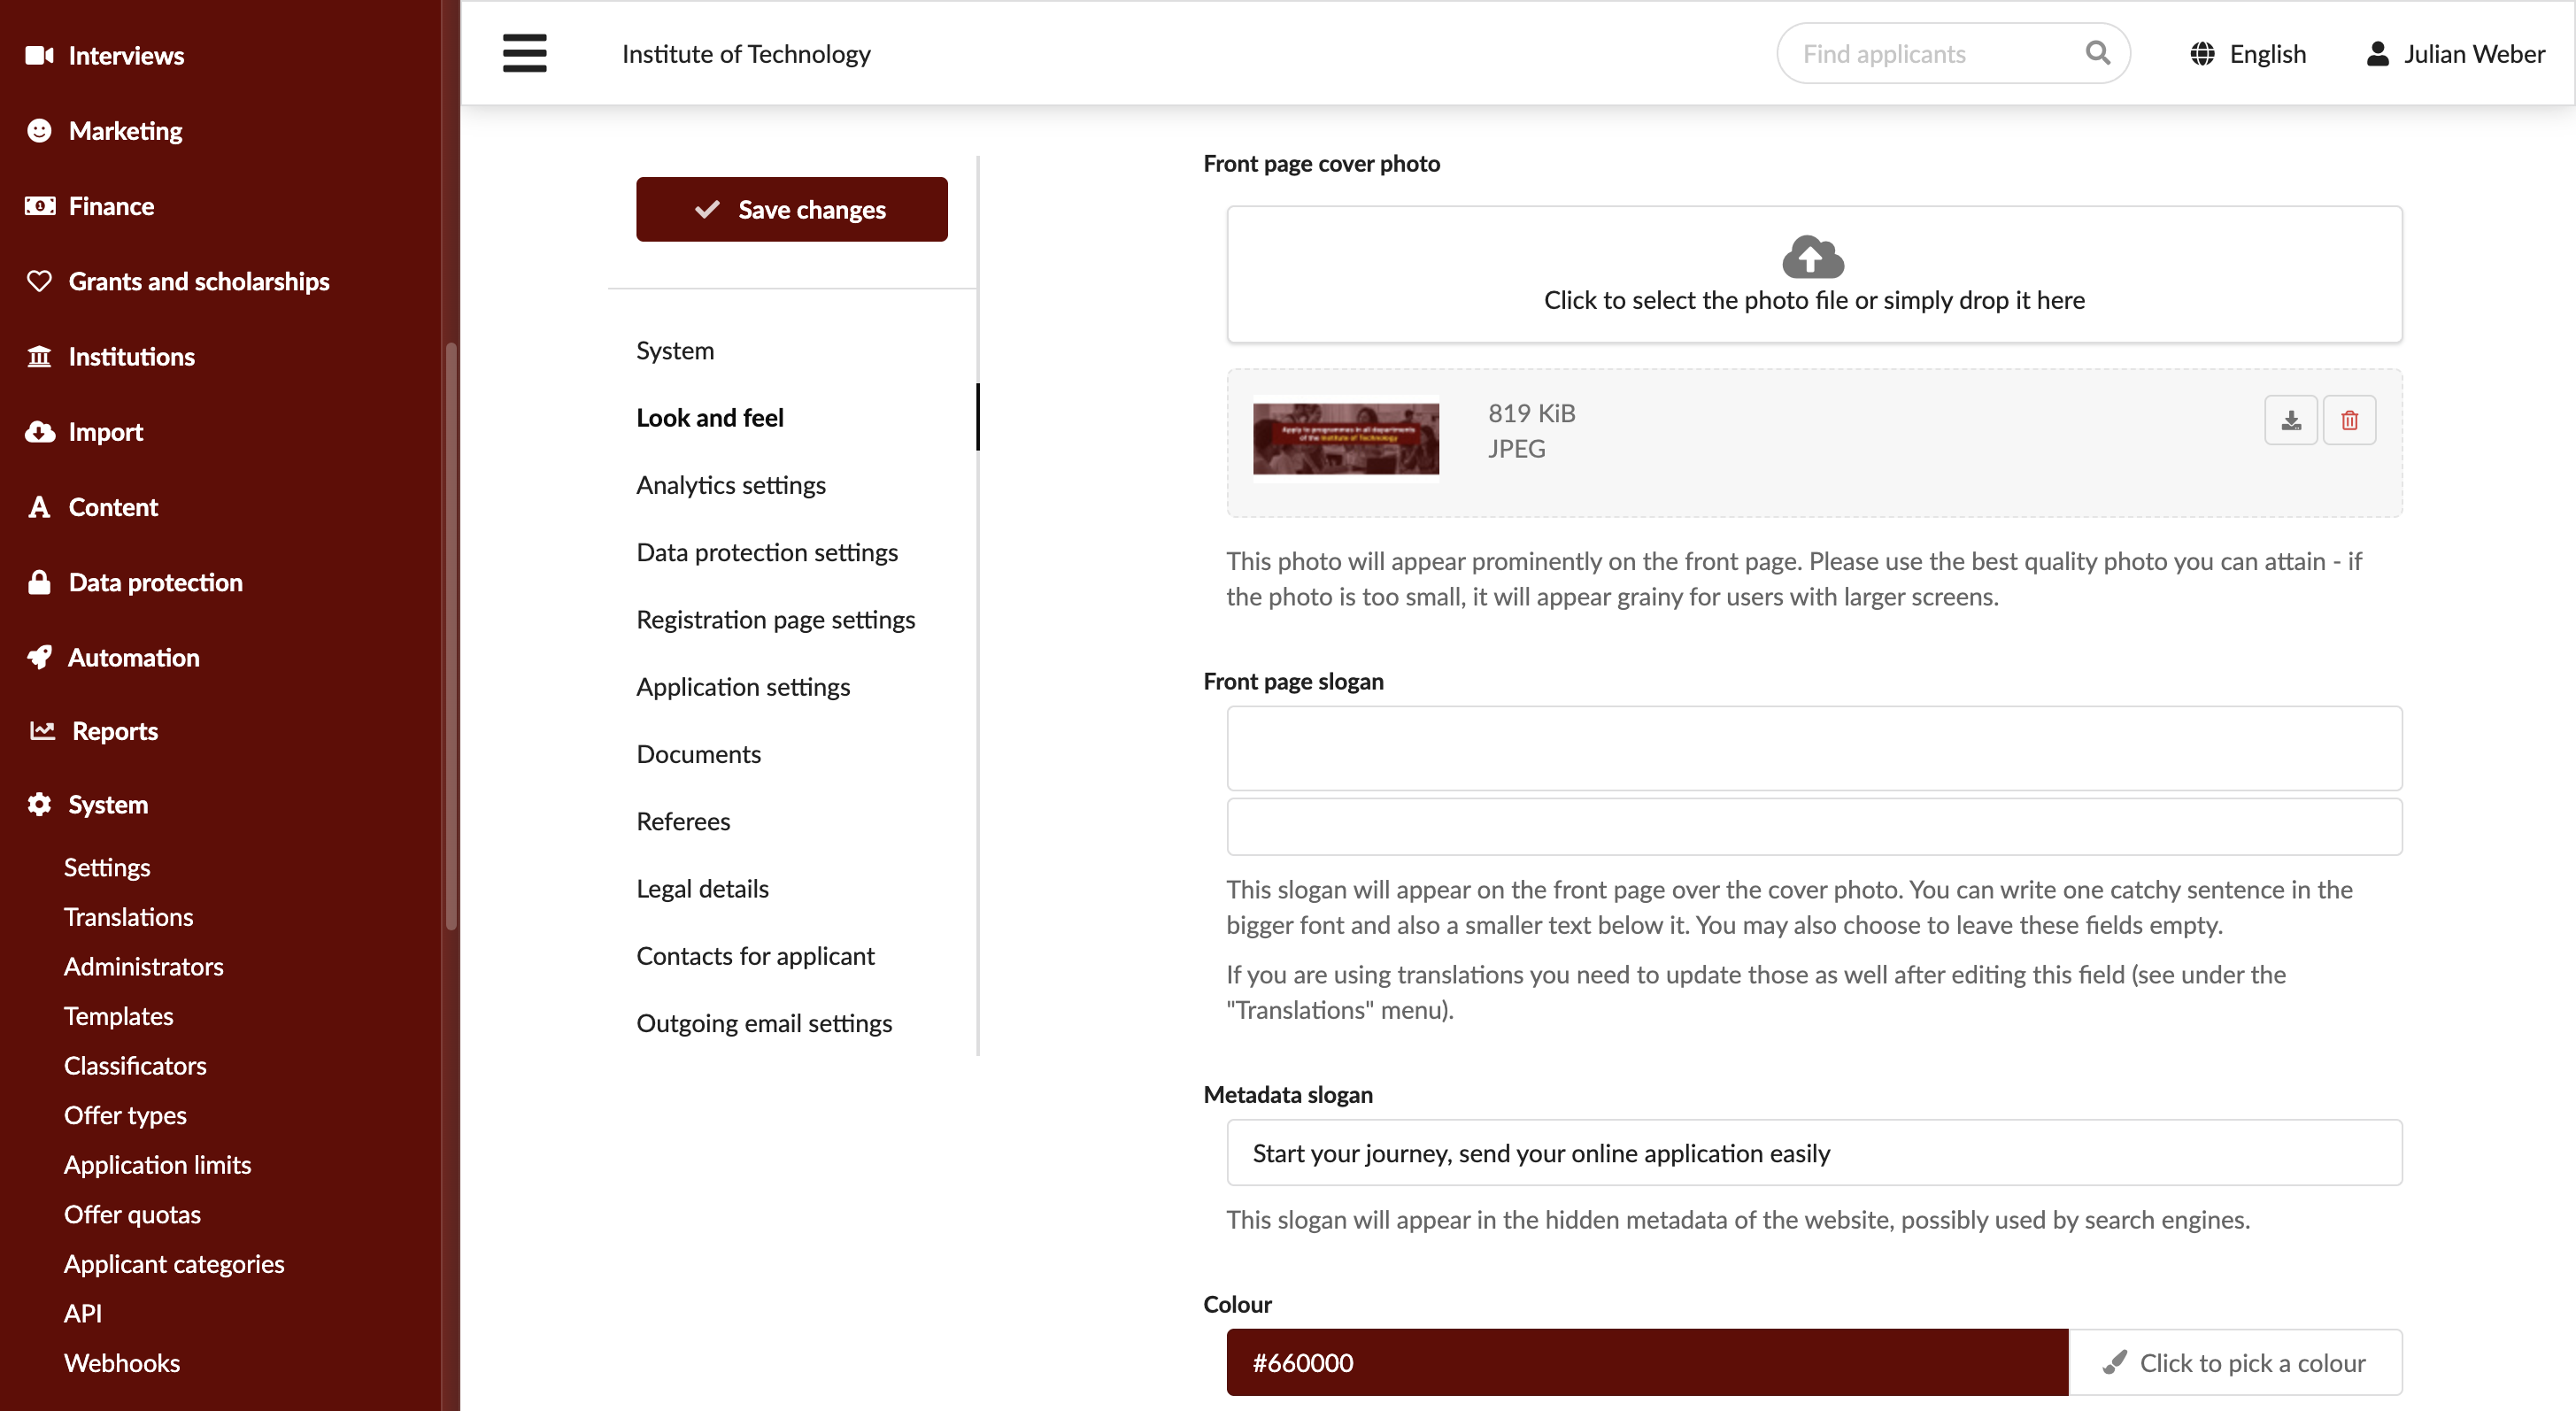
Customize the portal branding
When you select a color palette for the portal, you define the primary and accent colors.
Primary color is applied to major UI elements, such as the main menu and buttons, establishing the overall look and feel.
Accent color is used to create visual interest and draw attention to specific UI elements such as links.
DreamApply automatically generates a set of color variations based on the primary color. These generated colors are used for elements that require emphasis, such as subheadings or highlighted menu items.
When setting up the portal colors, keep in mind the following recommendations:
Contrast: DreamApply checks color contrast and displays a warning if your chosen colors do not meet WCAG 2.2 contrast requirements. According to WCAG, the minimum contrast ratio is 4.5:1 for normal text and 3:1 for large text. For example,
#D10000on a white background achieves a 5.65:1 contrast ratio, which meets the requirements.You can manually verify contrast using external tools such WebAIM contrast checker.
Light color adjustment: Very light colors (like white or light gray, up to 150 brightness) have very low saturation in the HSV model. When saturation is near zero, the hue becomes undefined, preventing DreamApply from generating meaningful, distinguishable color variations.
To resolve this, DreamApply automatically adjusts the saturation to 100% and lowers the value to 40% for such colors. As a result, the system can generate colors that meet contrast and visibility requirements.
If the automatically generated colors do not align with your existing brand colors, you can manually customize them. Open your original brand color in any color picker, set the model to HSV and then set the saturation level (S) to 1. This will keep the original shade of your brand color while making the color accessible. For example, for a light purple like
#F6D3FFsetting saturation to 1 produces an accessible version of the same shade,#CC00FF.
To customize the portal color palette and branding:
In the main menu, under System, select Settings.
In the Look and Feel section, upload the necessary images, update slogans and button labels and select the color palette for your portal. For a clean and visually appealing look and feel, use PNG images with transparency for logos.
At the top of the form, click Save changes.
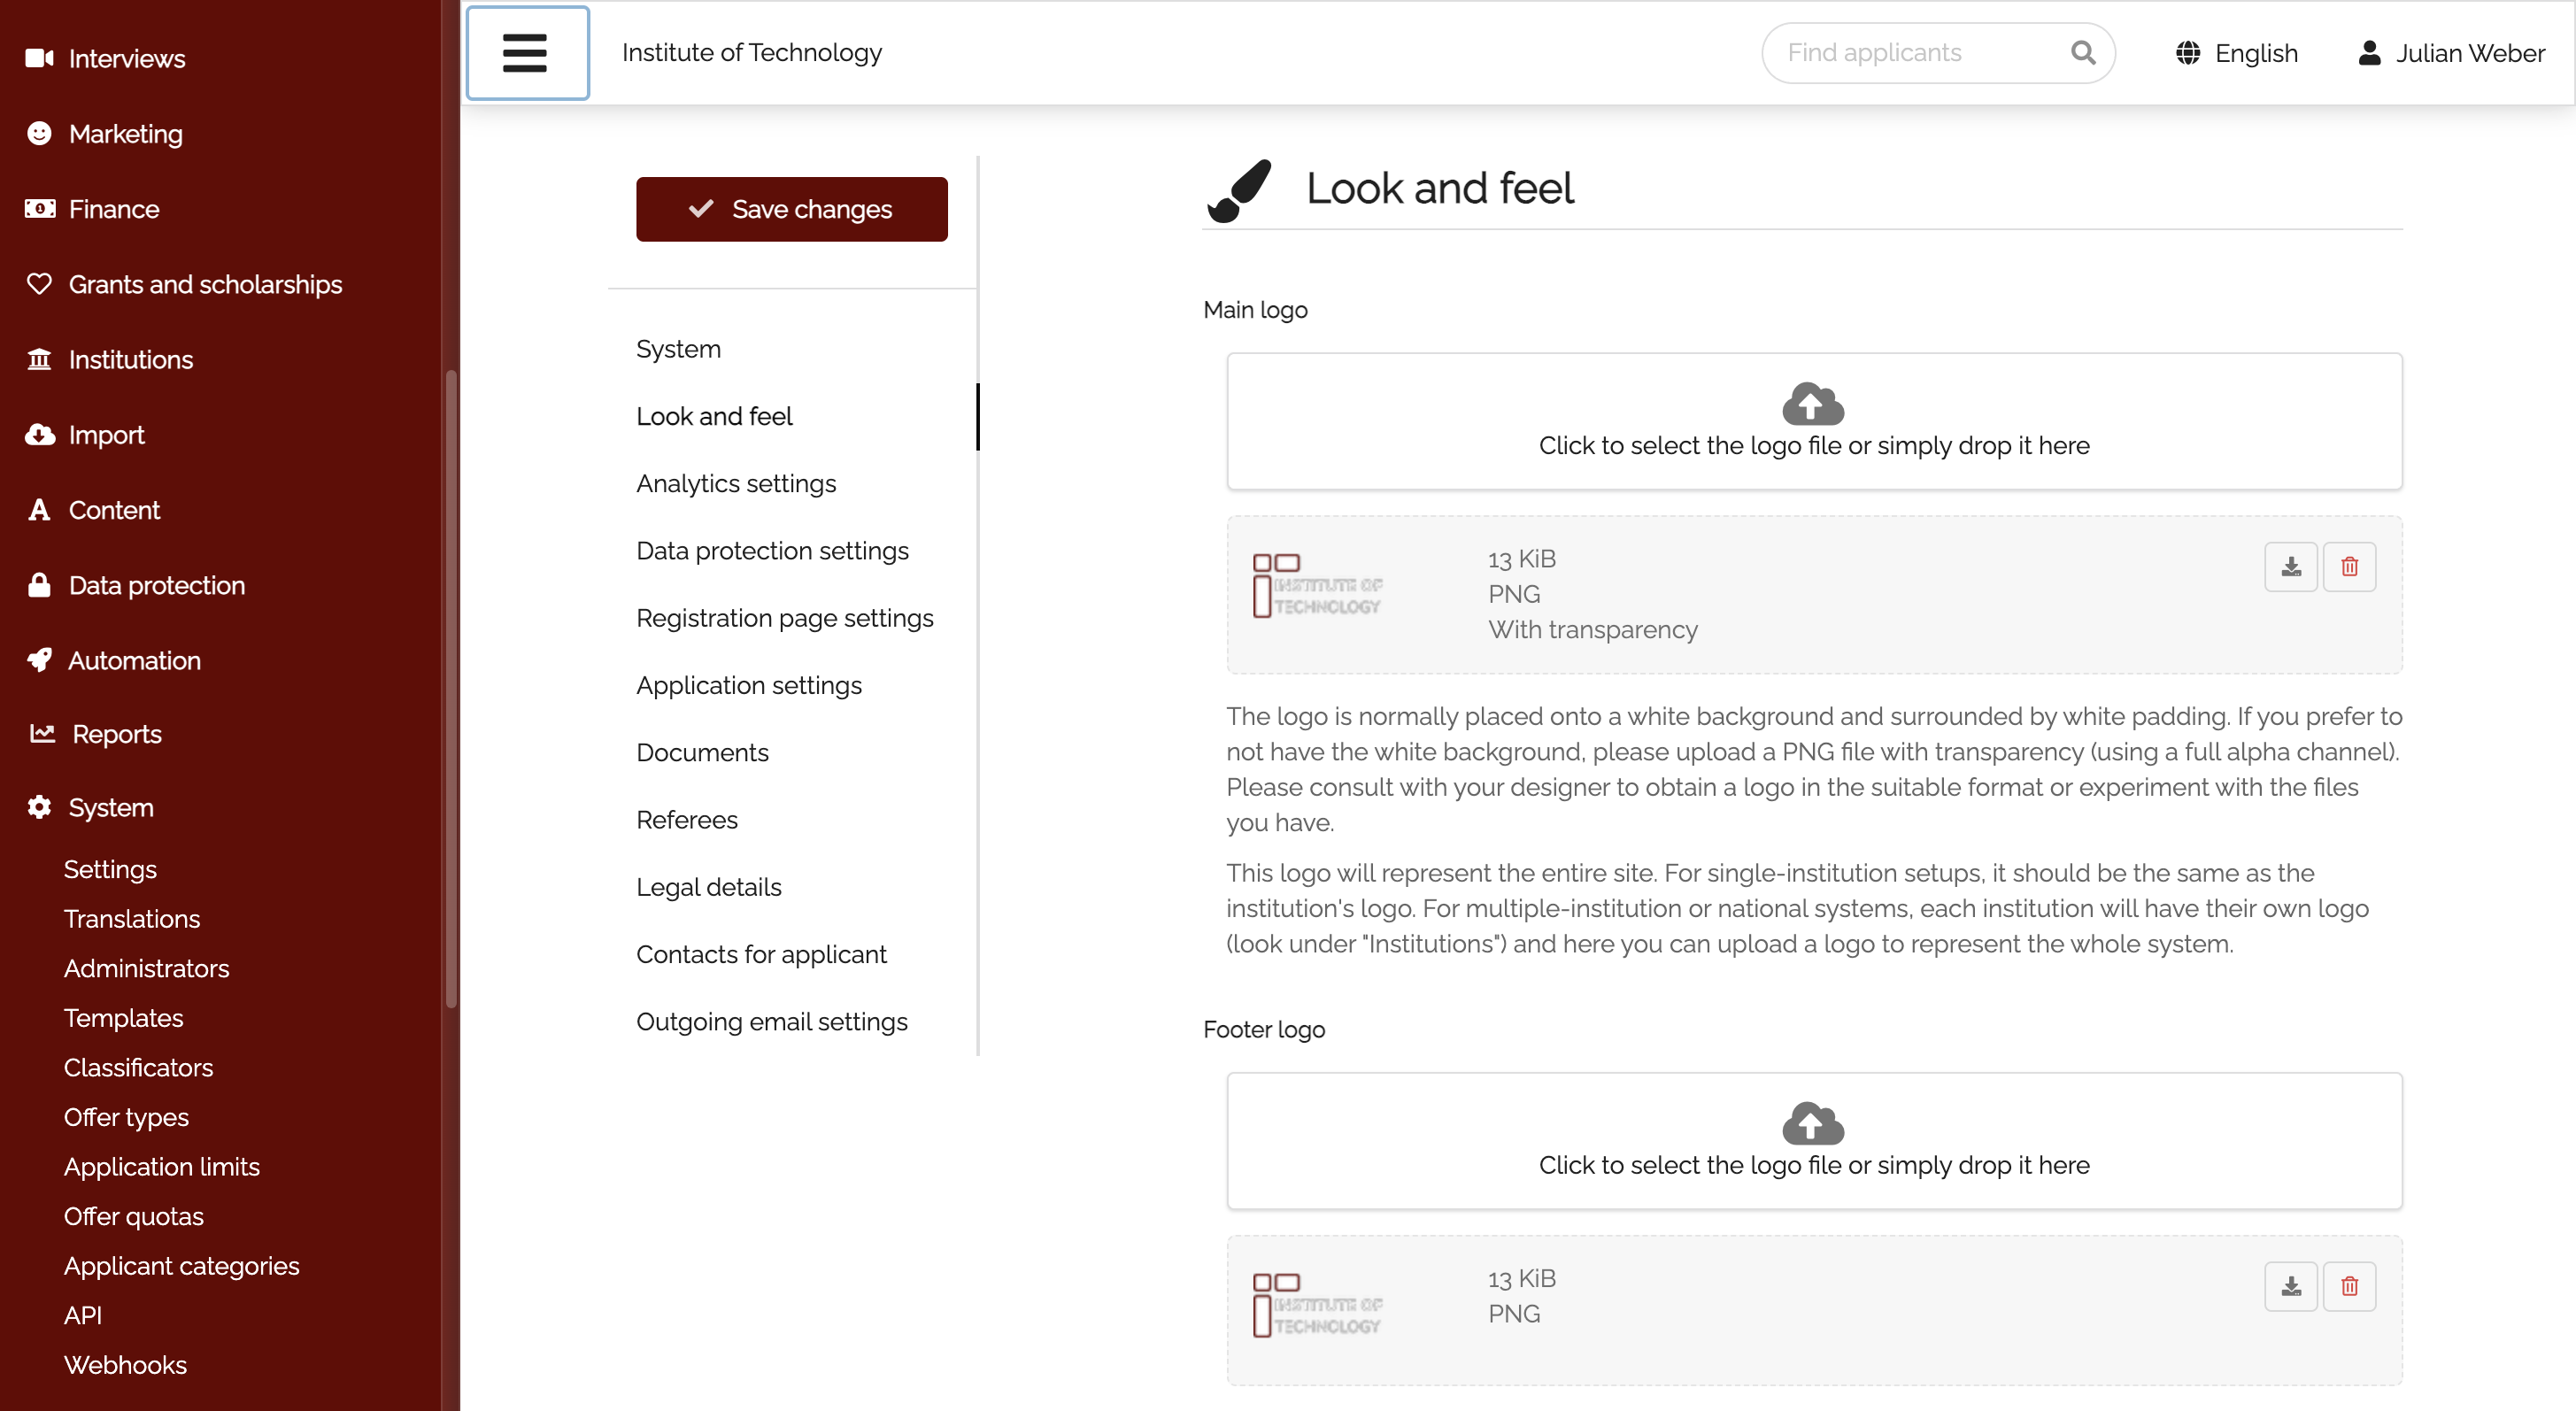

The slogan and tagline on the main banner are optional. You can remove these text elements and upload a banner image only, if preferred.
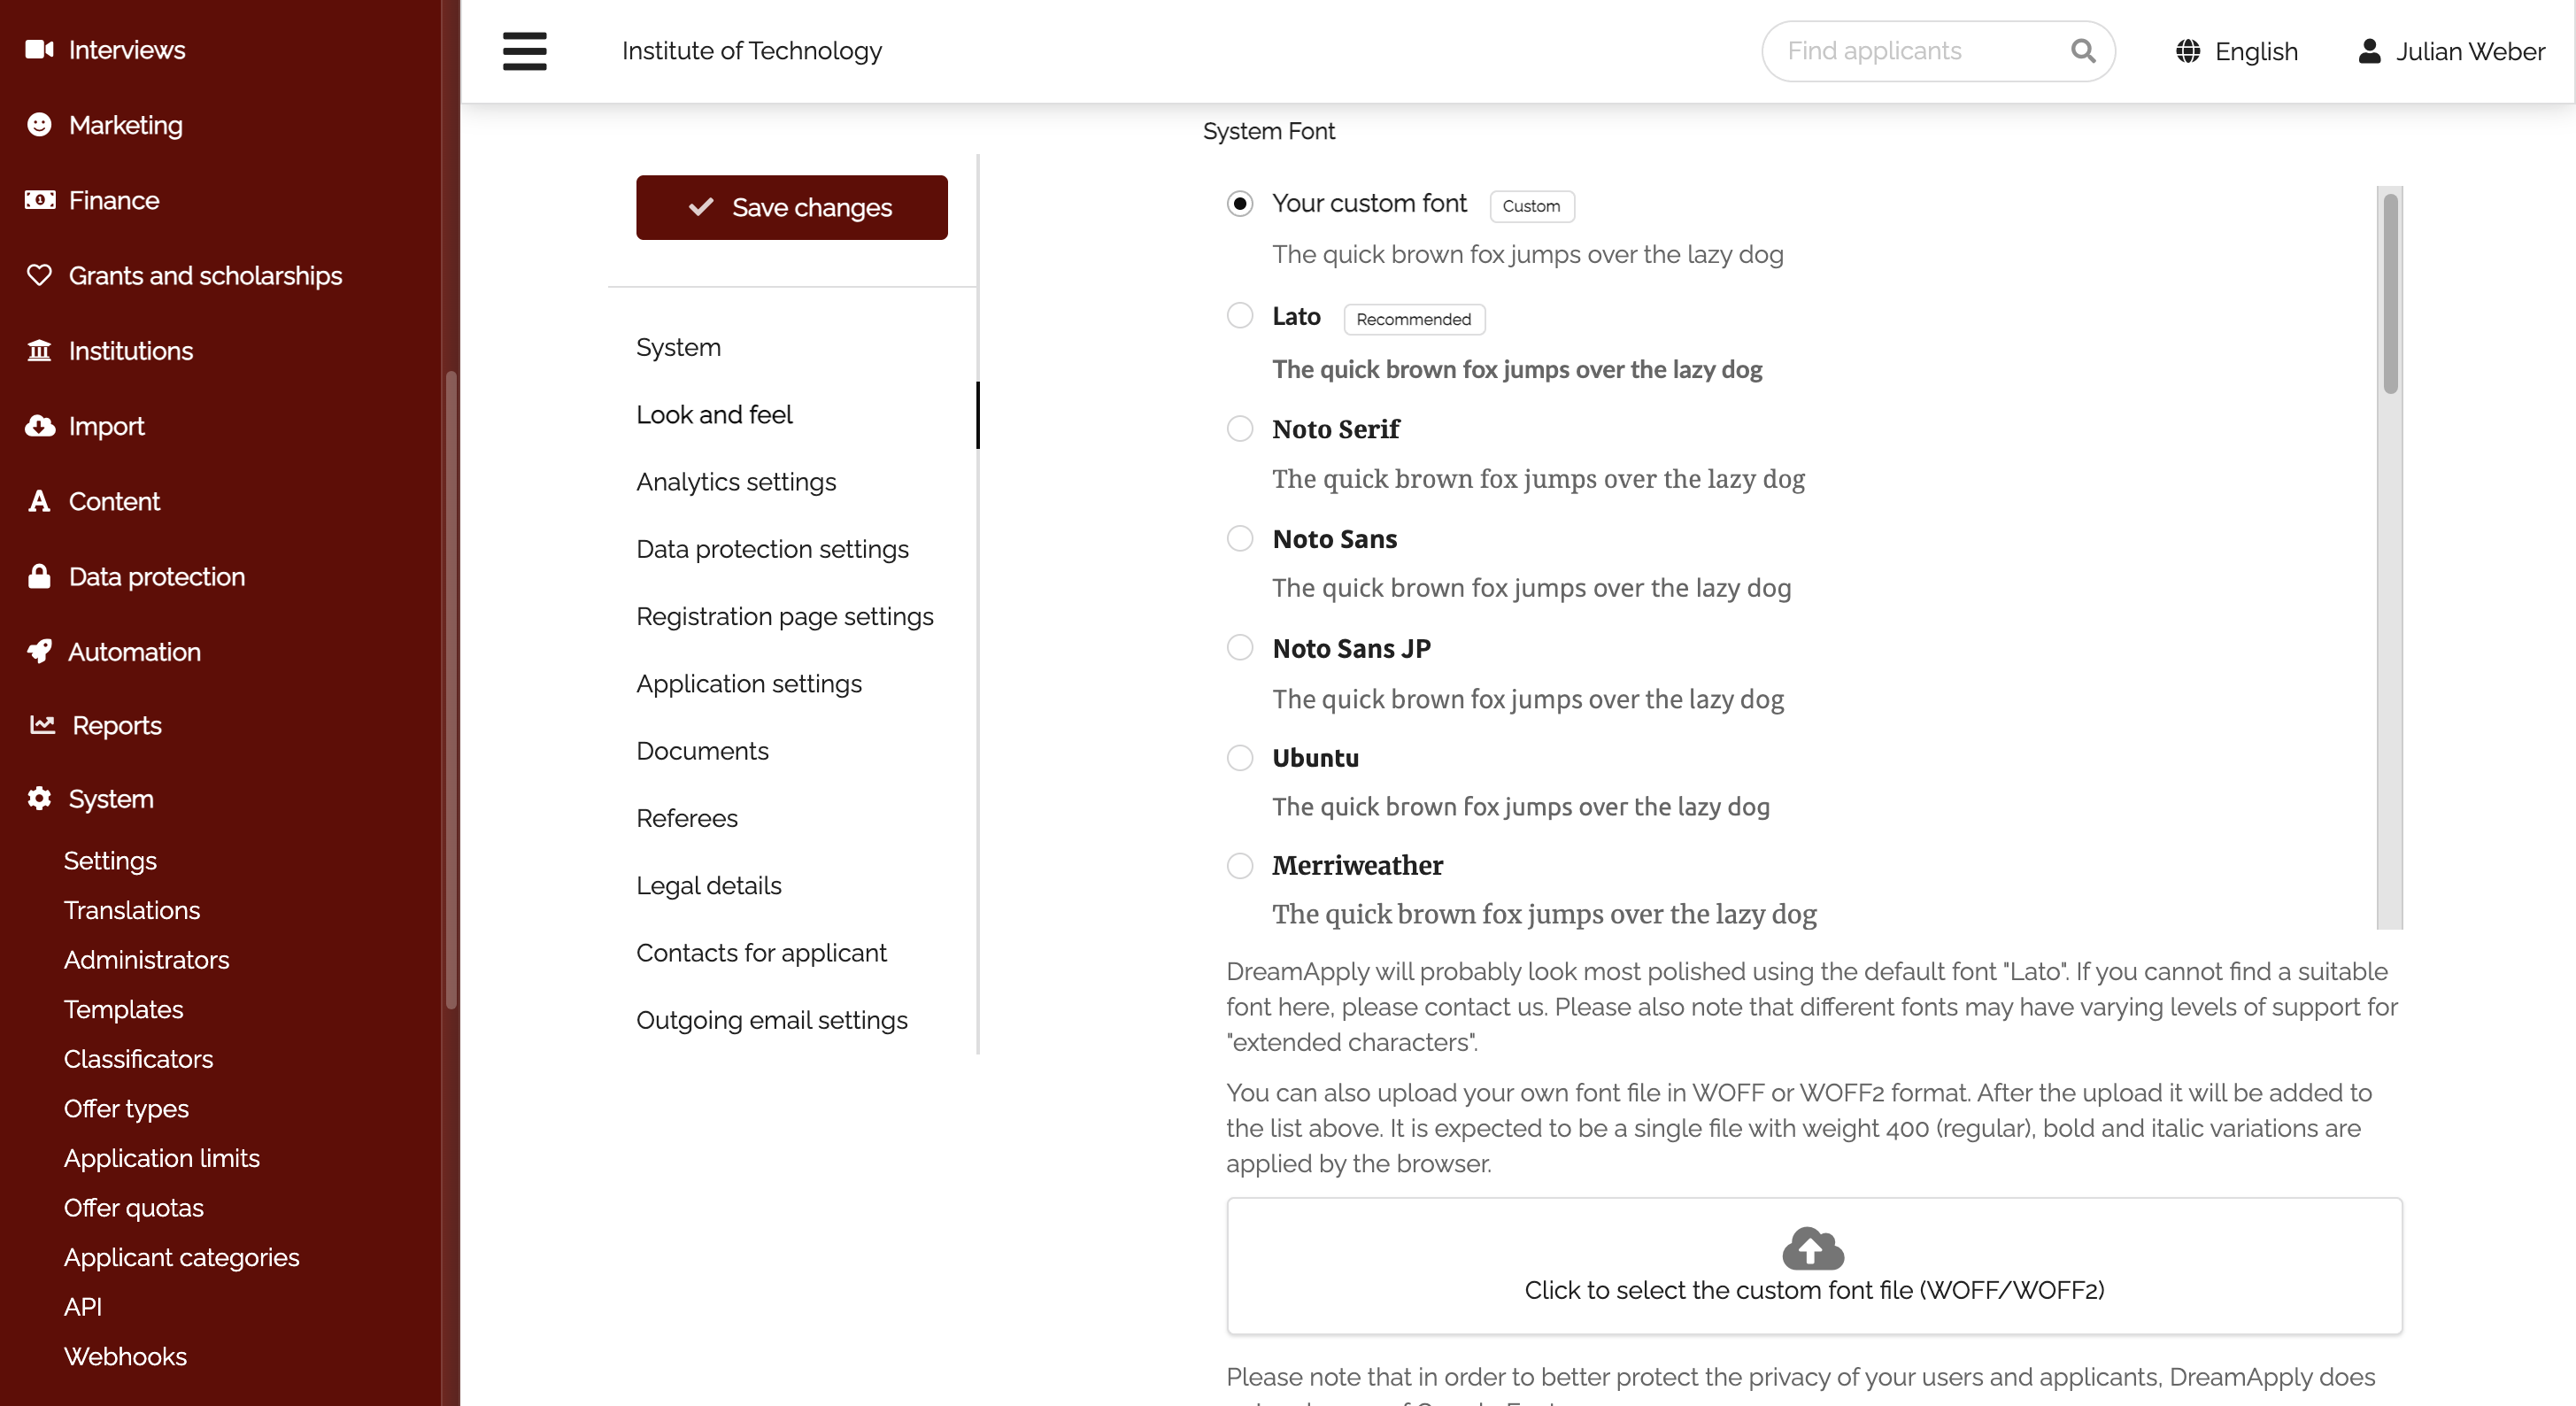
Use custom fonts
You can use custom fonts for your portal. DreamApply lets you choose from a predefined set of fonts or upload your own font files to achieve a unique look.
DreamApply supports font files in the WOFF and WOFF2 formats due to their efficient compression and wide browser support. For privacy and securing reasons, Google fonts are not supported.
To set a custom font:
- In the main menu, under System, select Settings.
- In the Look and Feel section, under System Font, select the font you want to use or upload a desired font.
- Once uploaded, a custom font is added to the top of the font list. Select it and at the top of the form, click Save changes.