Manage access to meetings
Roles
These roles reflect the default DreamApply setup.
You can define custom roles based on your
institution's needs. Learn more →:
You can define custom roles based on your
institution's needs. Learn more →
To let Administrators efficiently schedule meetings and events, you must assign roles and permissions to them.
Administrators require the Content administrator role to view and schedule meetings. We recommend that you grant this role to all Administrators responsible for meetings and events. This approach ensures comprehensive access to all required tasks and resources and reduces complexity.
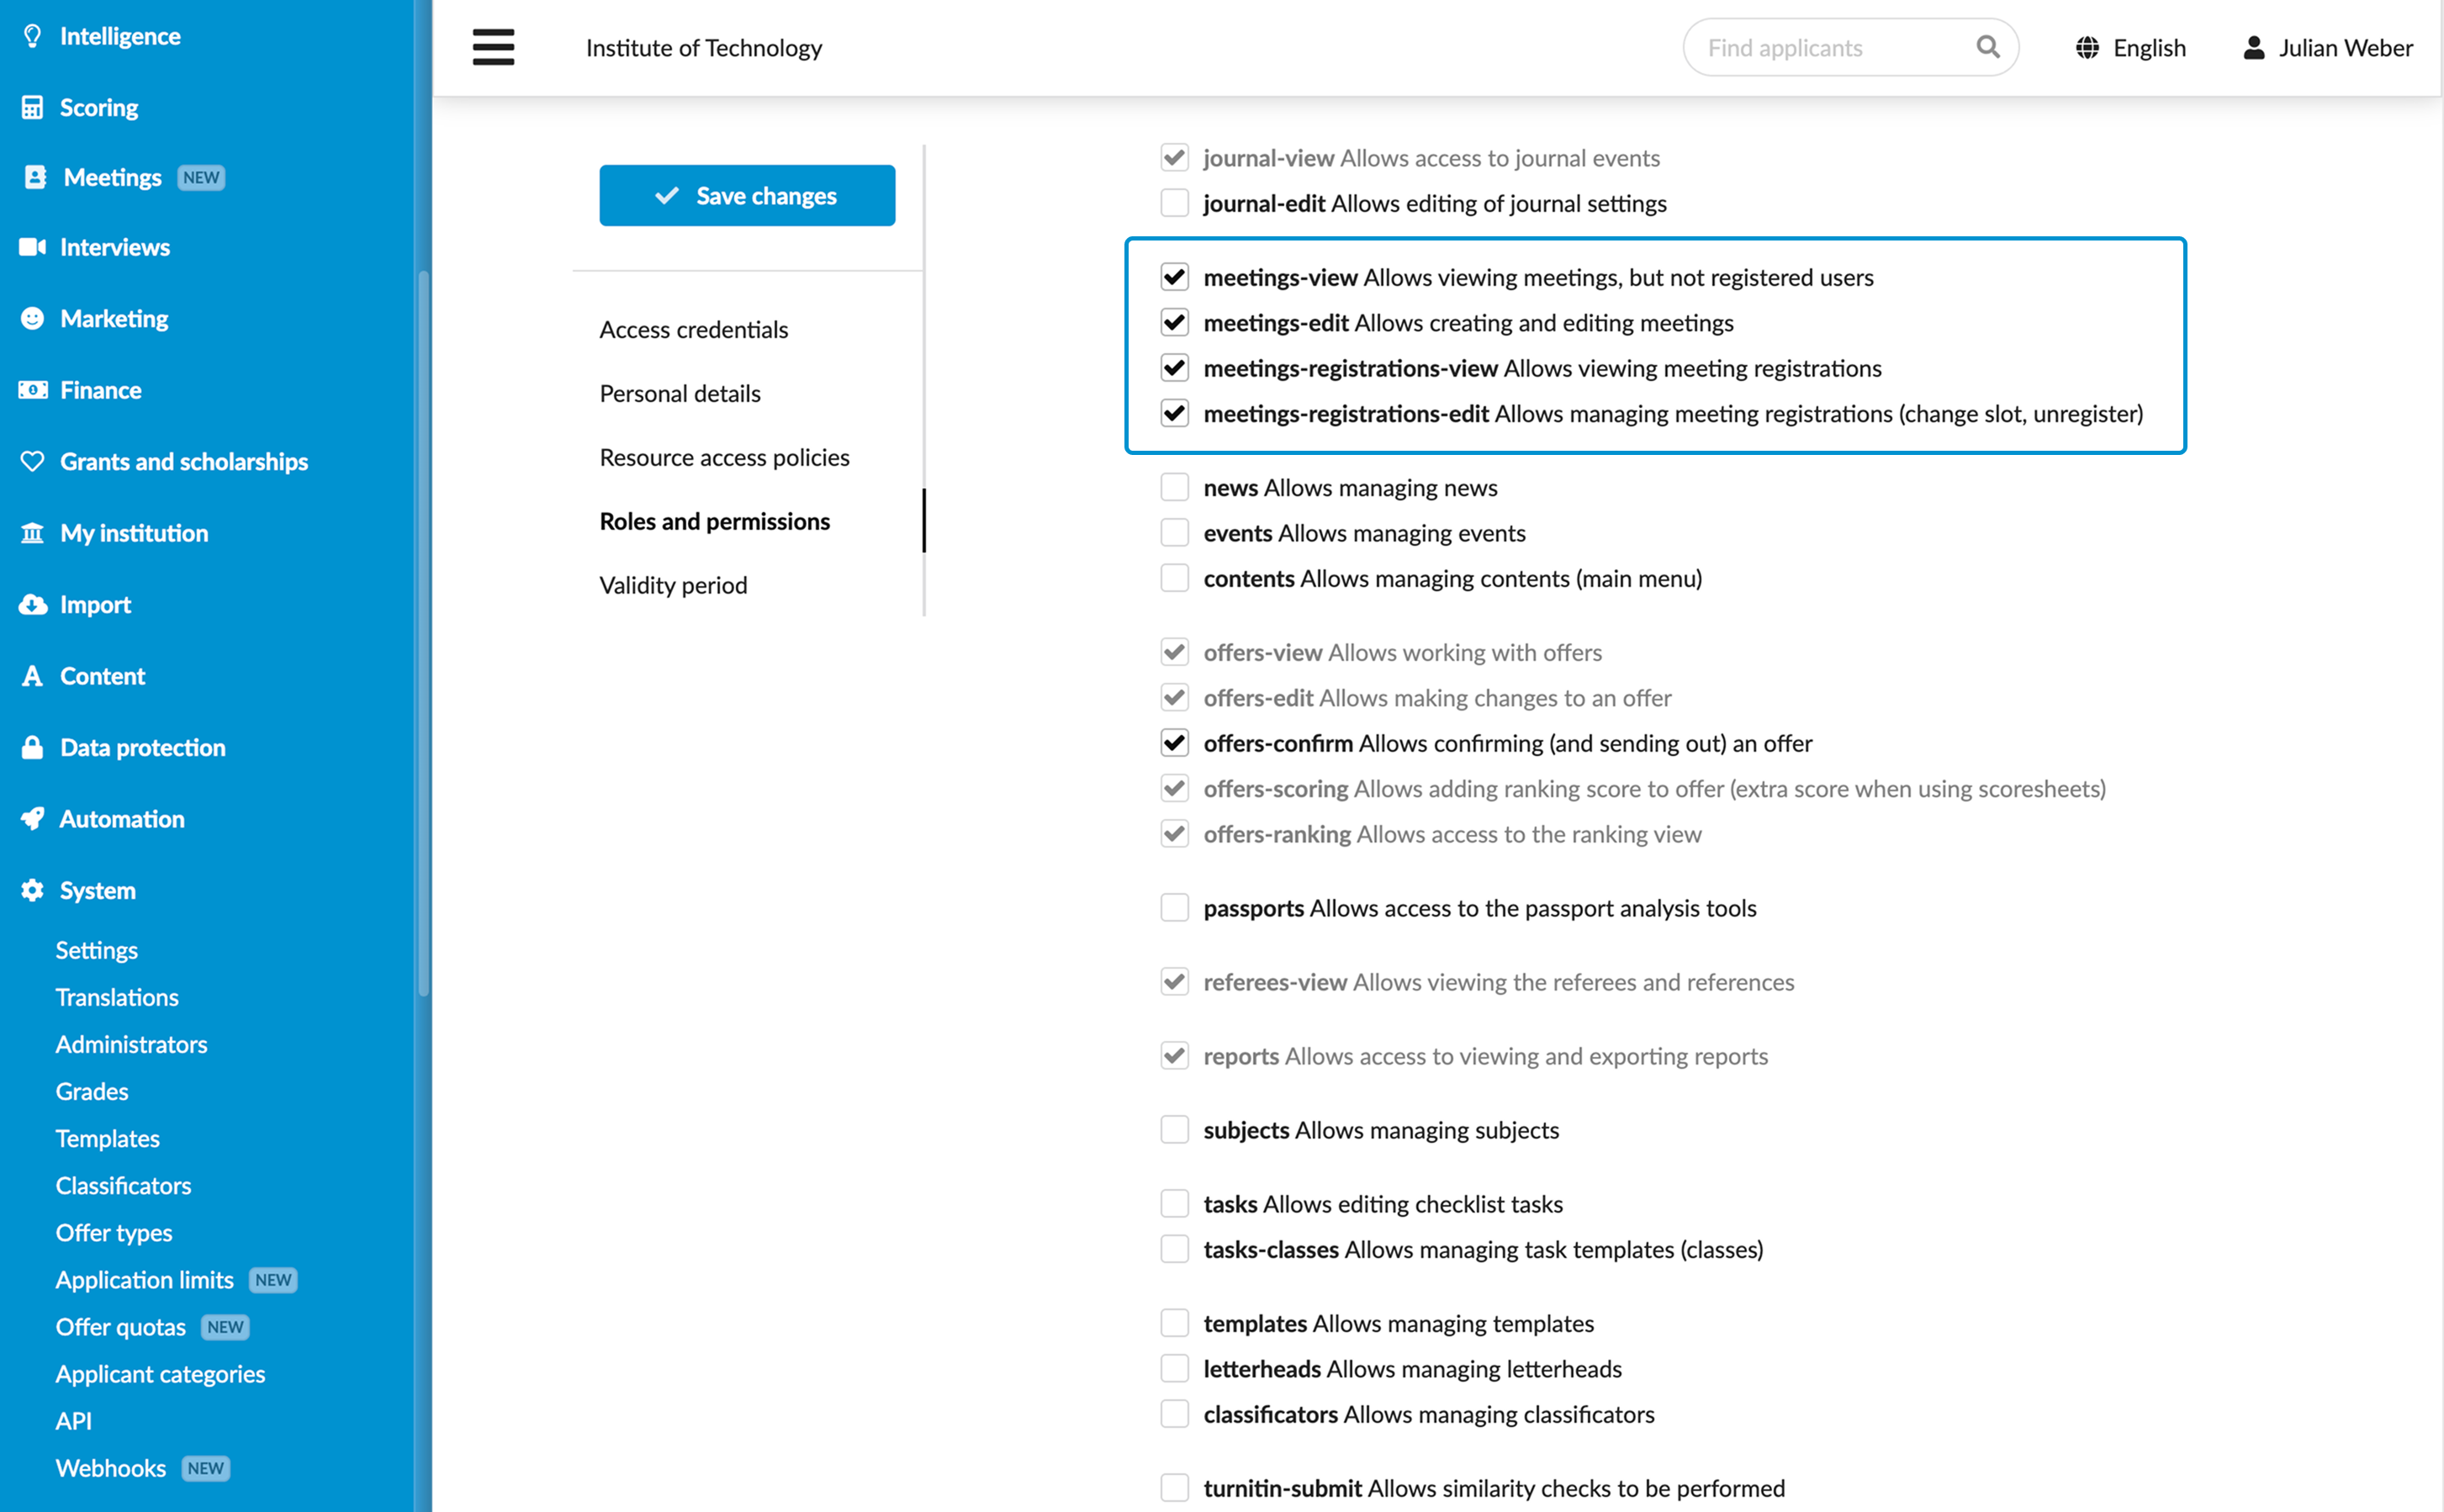
To assign additional meeting tasks to Administrators, you can use the following permissions:
campus: Allows Administrators to set up and manage buildings and rooms for meetingsmeetings-edit: Allows Administrators to create, edit and delete meetingsmeetings-view: Allows Administrators to access the Meetings view in DreamApply, view meeting schedules and their detailsmeetings-registrations-view: Allows Administrators to view a list of registered participantsmeetings-registrations-edit: Allows Administrators to edit participant registrations: change time slots, delete registrations
Superusers have all meetings permissions enabled by default.
All admins that had the previous events permission will automatically receive the new meetings-view and meetings-edit permissions. The same goes for all Administrator roles; they will be updated accordingly.
Before you begin
To manage access to meetings, your account must have the Superuser role or the administrators permission.
Assign roles and permissions
To assign roles and permissions to Administrators:
- In the main menu, under System, select Administrators.
- Create a new Administrator account or select to edit an existing account.
- In the Roles and permissions section, choose the role that must be granted to the Administrator.
- If necessary, select the Add additional permissions check box and choose the permissions that must be granted to the Administrator.
- At the top of the form, click Save changes.
You can grant permissions individually or create new roles with required permissions and assign them to Administrators. For details, see Create Administrator roles.