Schedule meetings
Roles
These roles reflect the default DreamApply setup.
You can define custom roles based on your
institution's needs. Learn more →:
You can define custom roles based on your
institution's needs. Learn more →
DreamApply allows scheduling both onsite and virtual meetings to meet the needs of your institution and participants.
- For onsite meetings, you can select a room with the appropriate space and facilities from the configured locations.
- For virtual meetings, you can create a meeting without a location and provide joining instructions in the meeting description. These instructions can direct participants to popular conferencing tools like Google Meet, Microsoft Teams, WebEx or Zoom, allowing them to join with a click.
You can schedule meetings with different registration requirements:
- Open meetings: These meetings do not require registration. They are displayed in the Meetings view, and participants can join by visiting the listed meeting location or following the instructions provided.
- Simple registration meetings: Visitors must log in and click Register to sign up.
- Scheduled slot meetings: These meetings include time-allocated slots. Participants can choose a slot themselves or let the system assign an available slot.
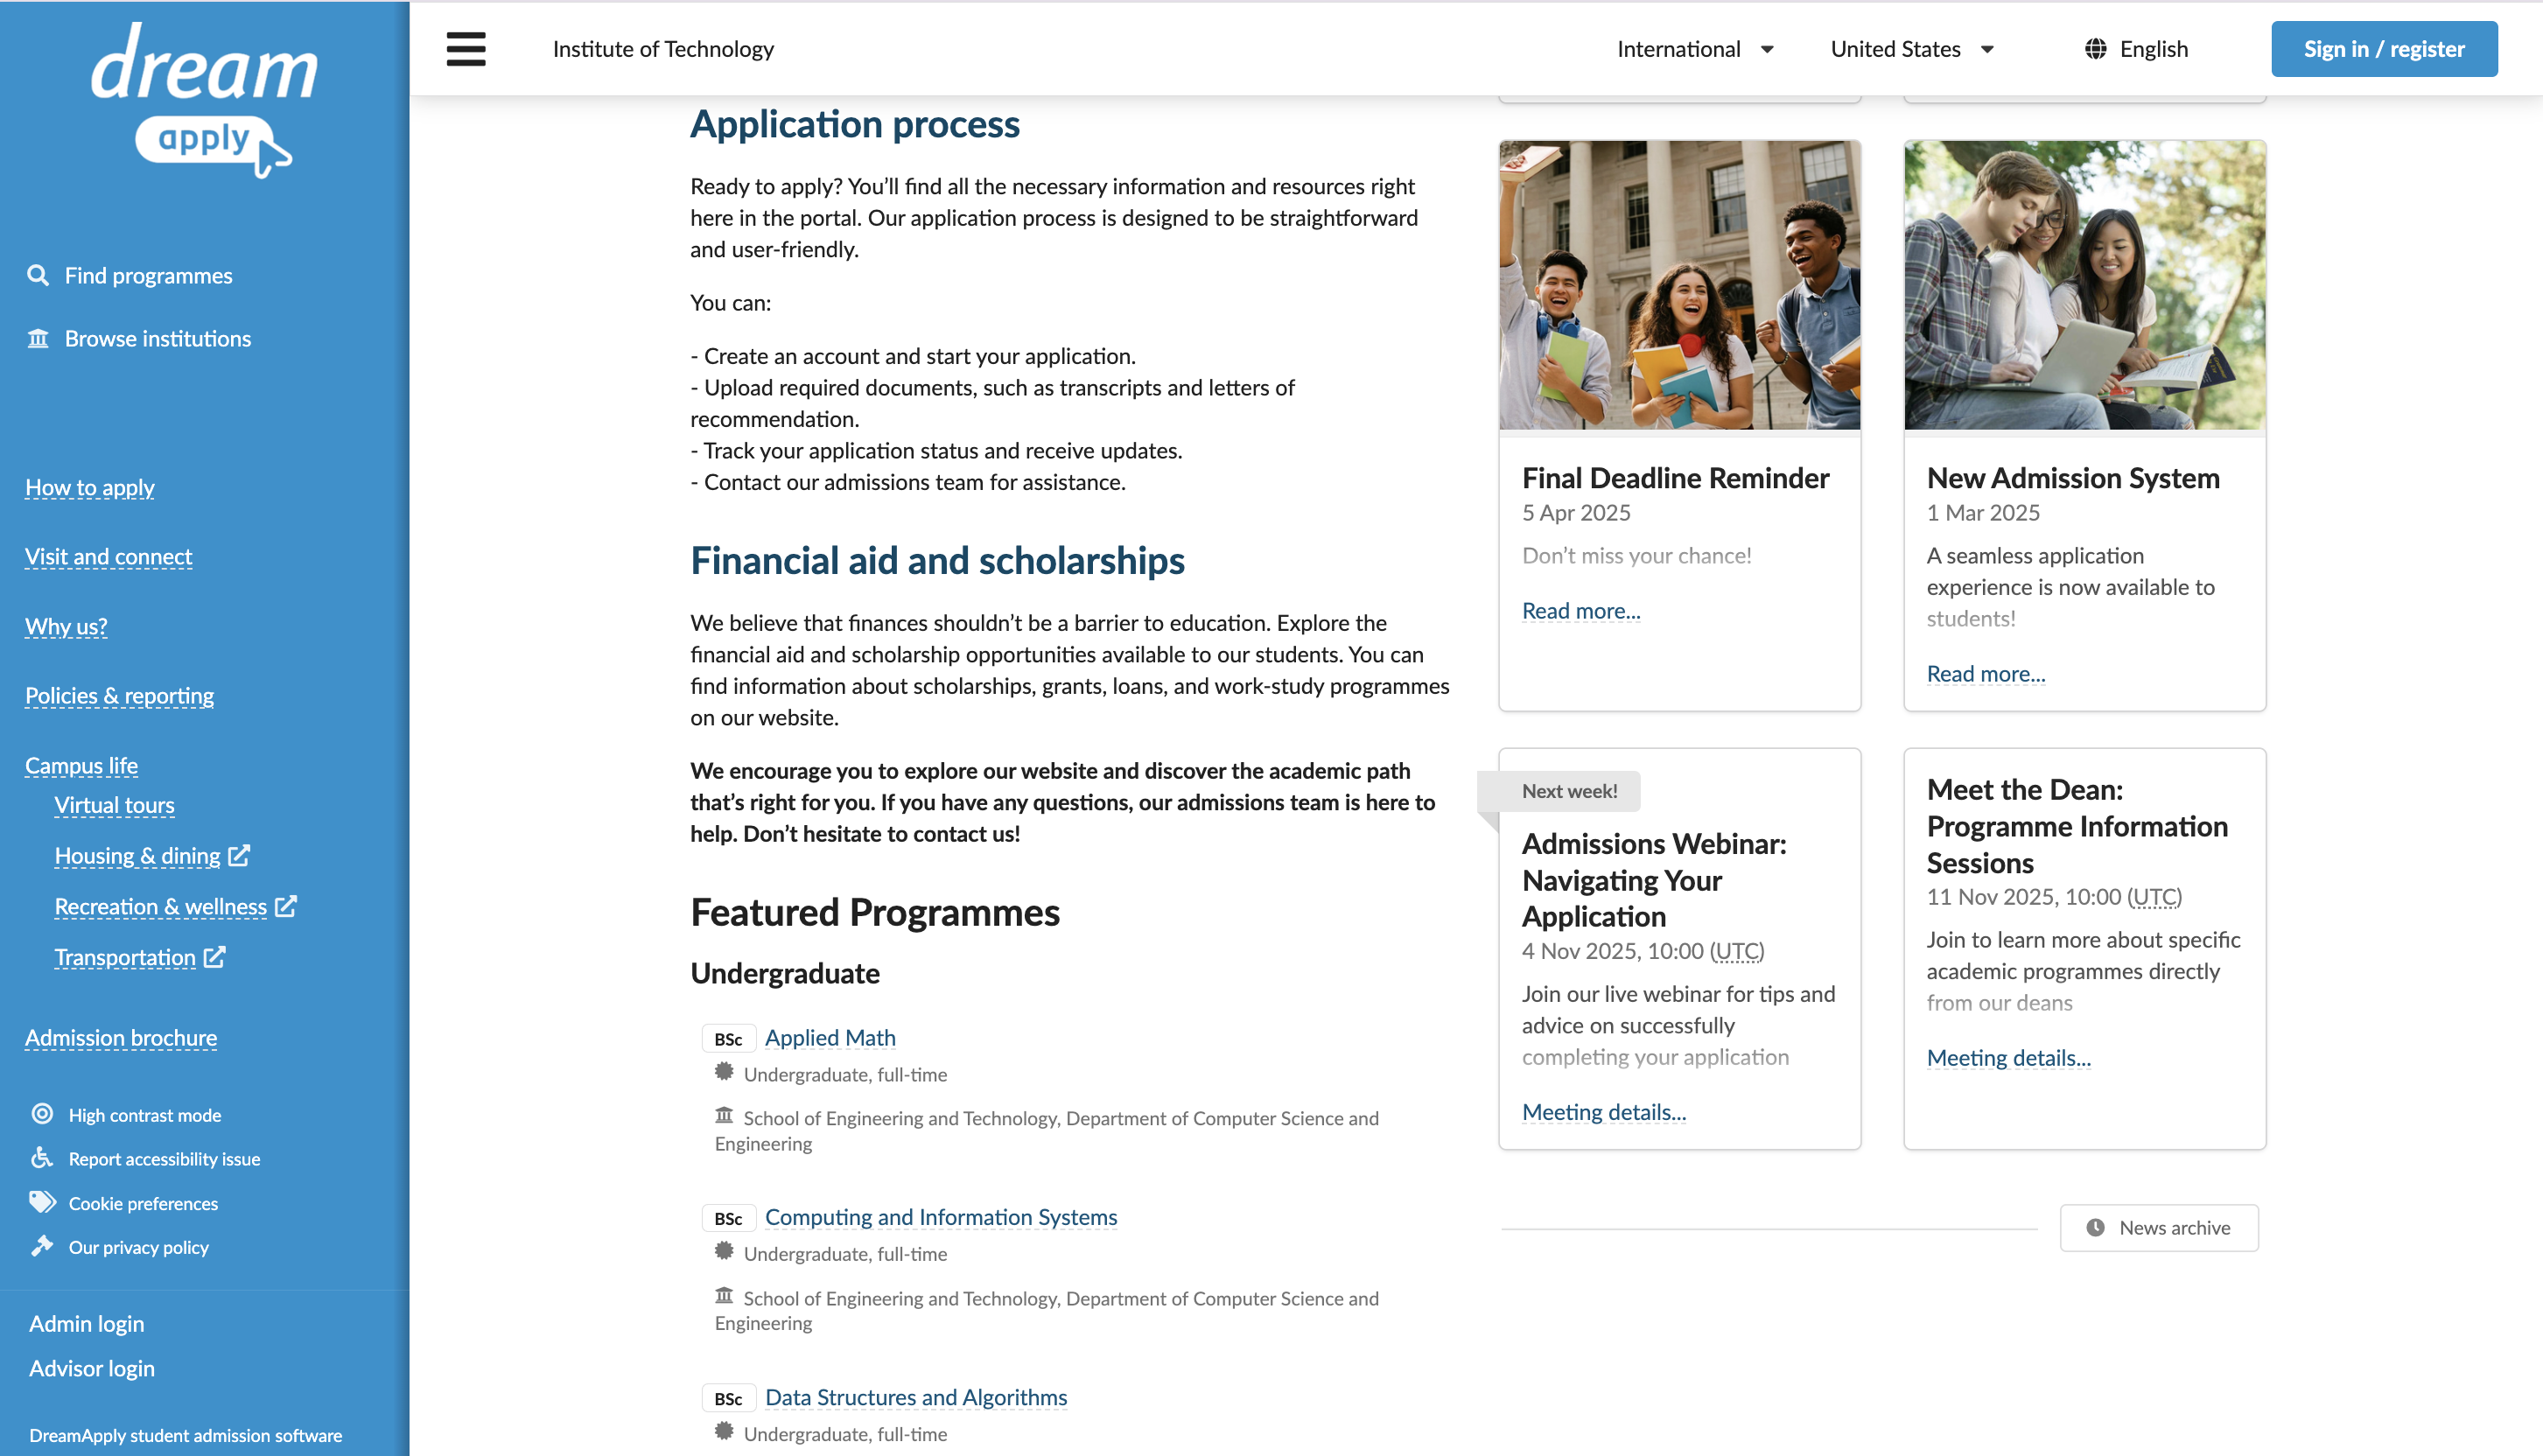
DreamApply keeps applicants informed about upcoming events by announcing scheduled public meetings in the News pane on the front page of the Applicant portal. Full meeting details are available in the Meetings view.
Before you begin
- To schedule meetings, your account must have the
SuperuserorContent administratorrole or themeetings-editandmeetings-viewpermissions. - To subscribe to journal events, your account must have the
SuperuserorAdmissions administratorrole or thejournal-viewandjournal-editpermissions.
Add a meeting to the calendar
To add a meeting:
- In the main menu, select Meetings.
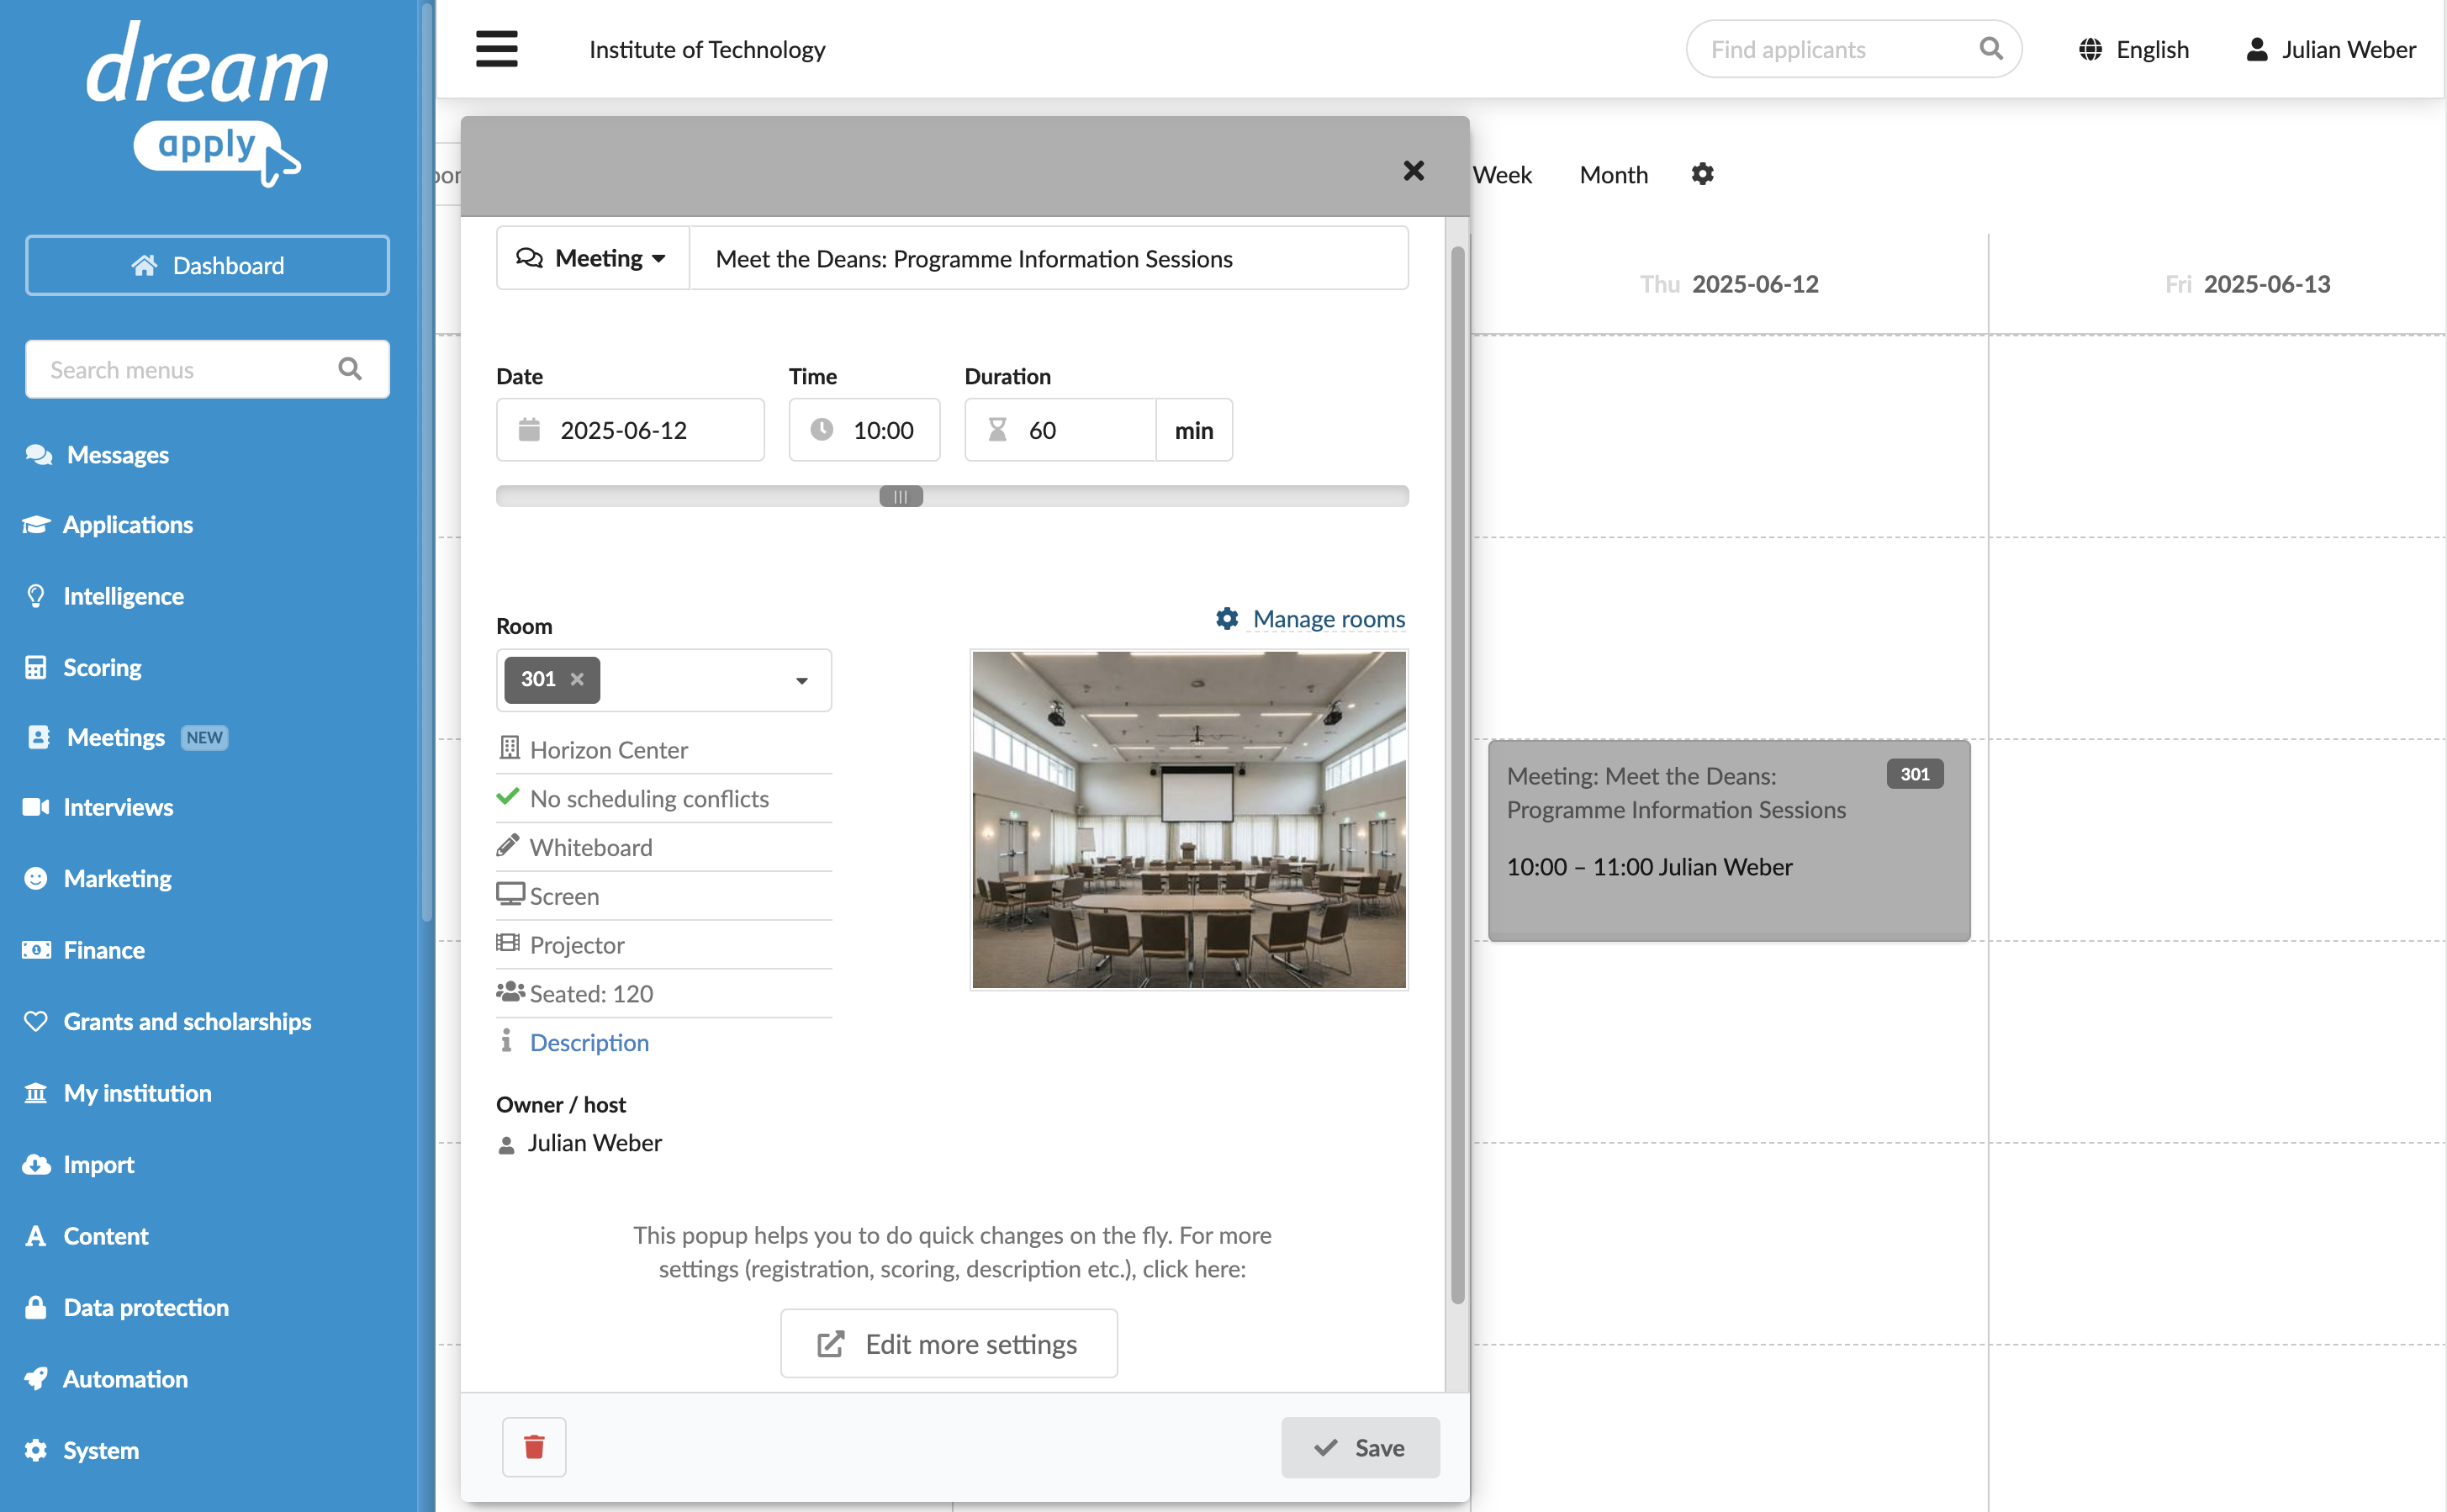
- Click an empty time slot in the calendar and drag down to create a new meeting.
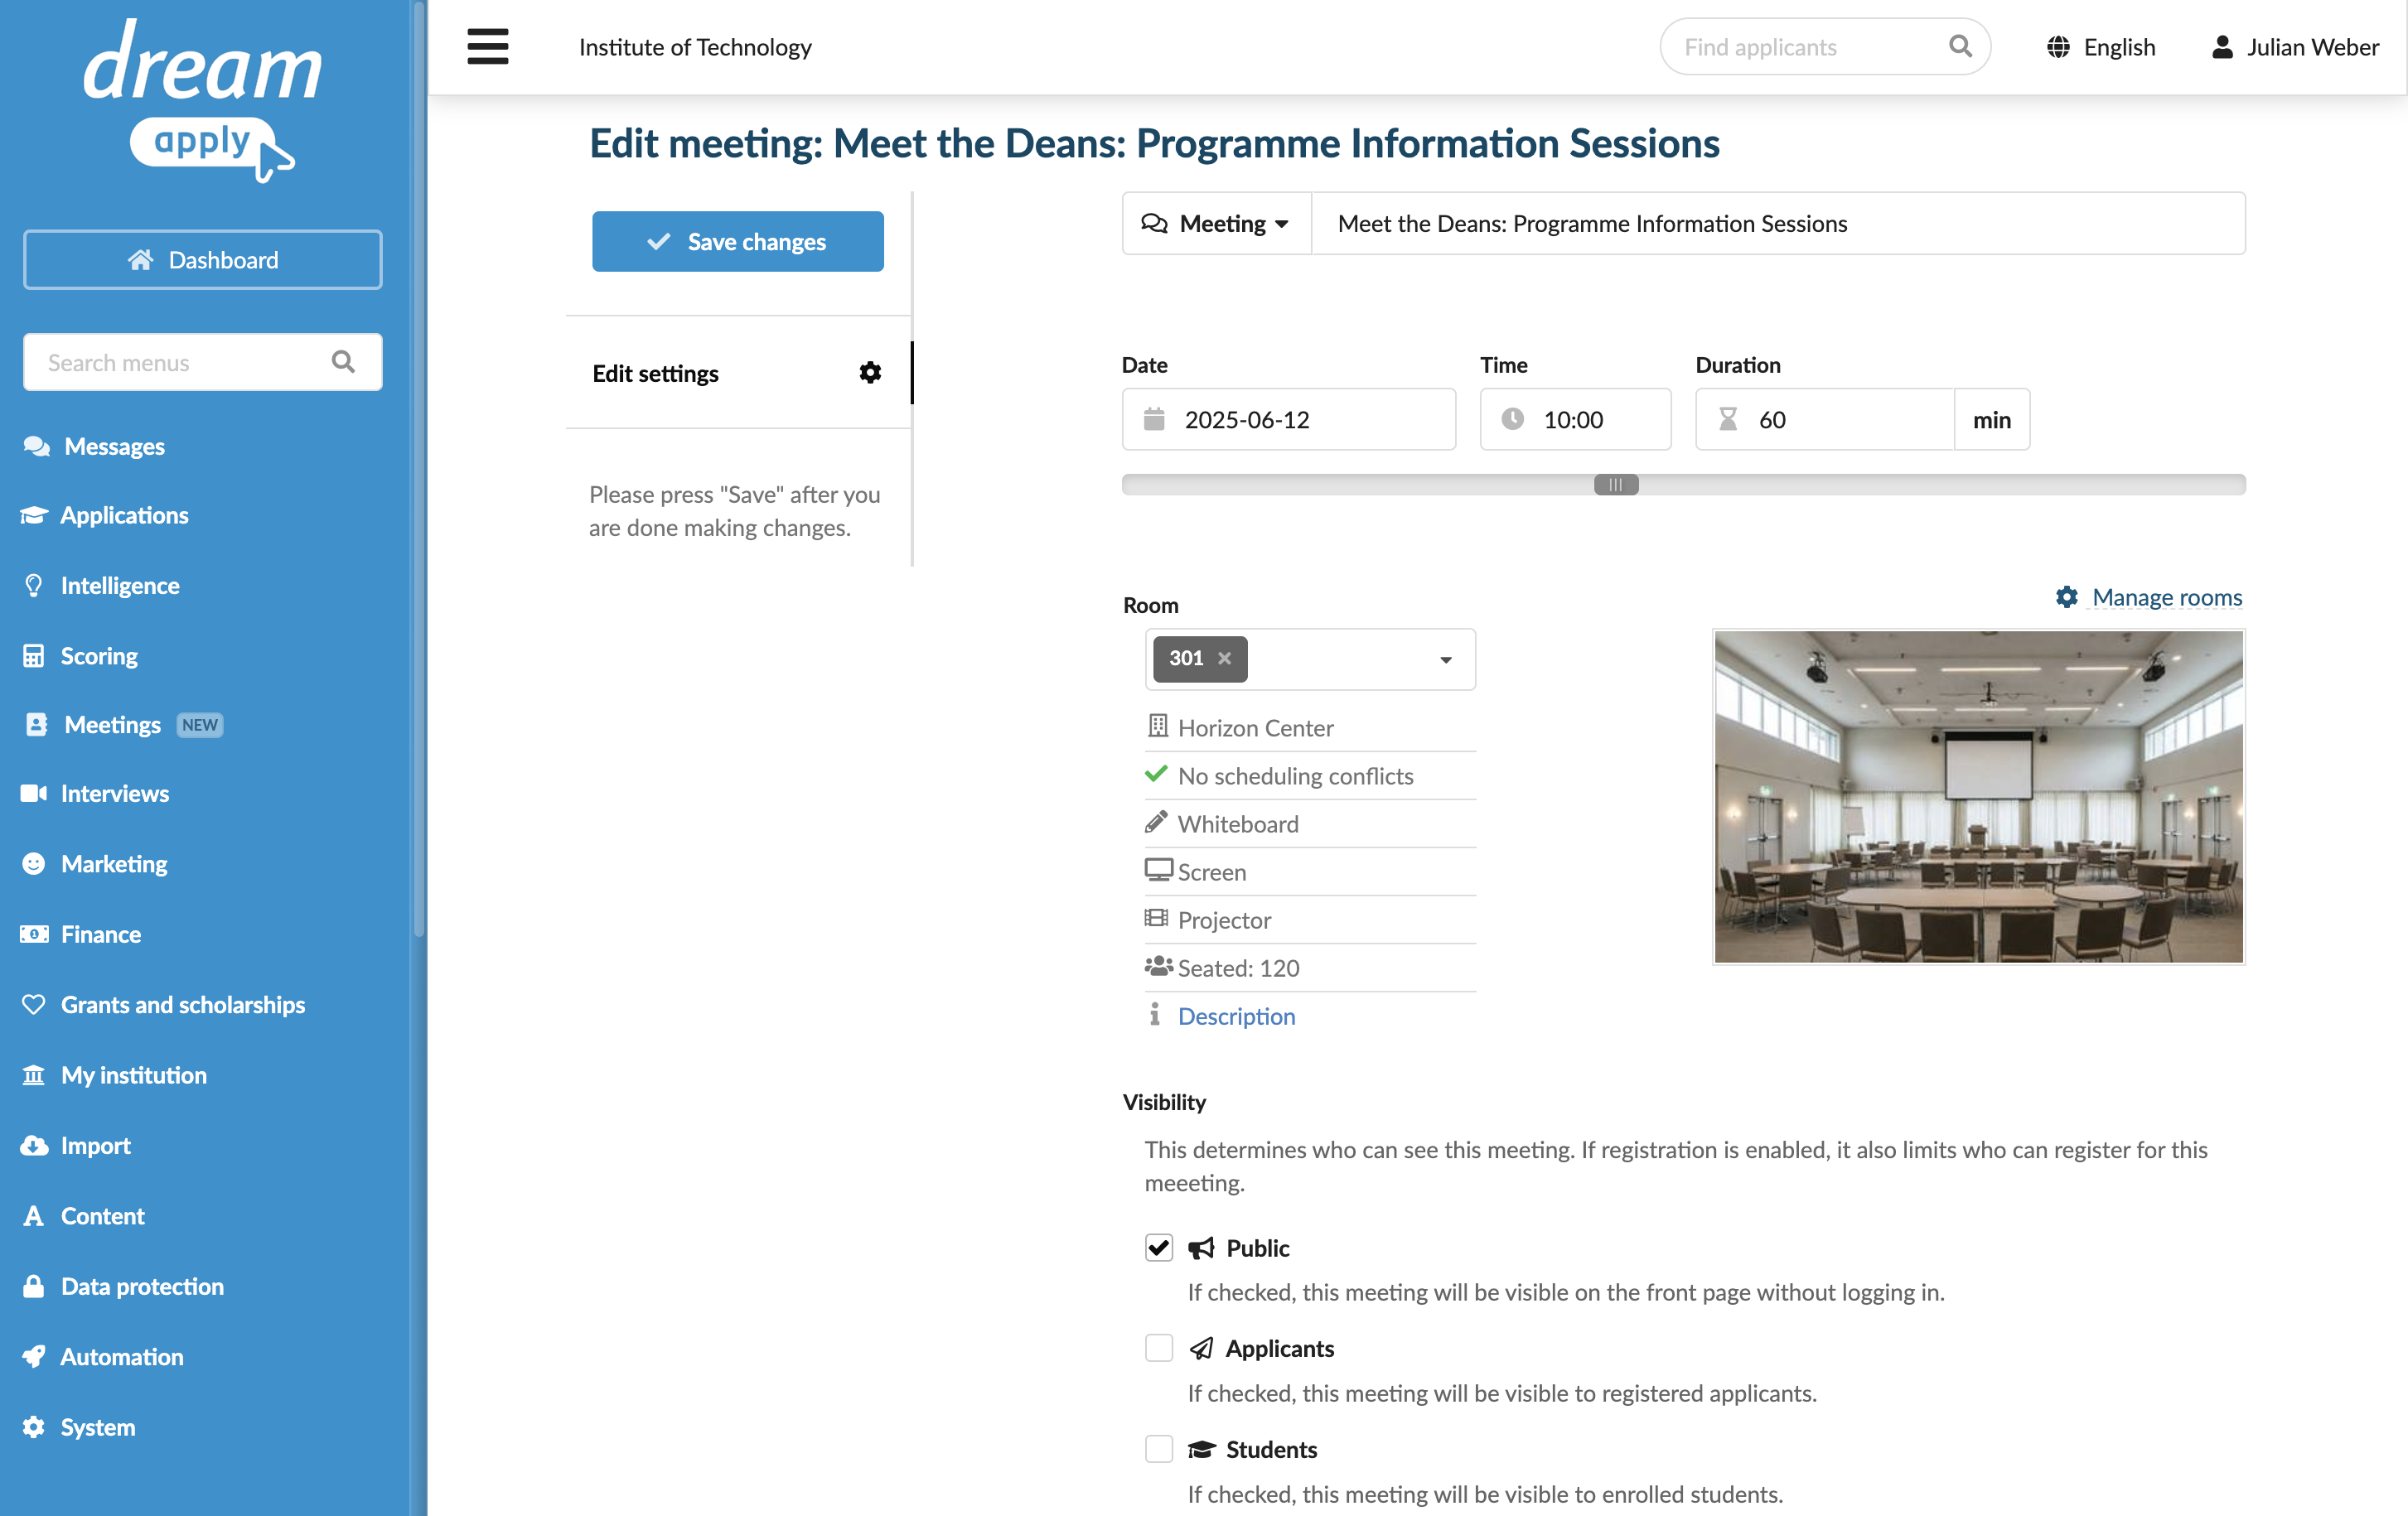
- In the meeting popup, click Edit more settings.
- Specify the meeting details: meeting type, name and description, duration, room to be used, visibility and registration settings. In the Description field, use the Textile markup to structure and format the text.
- At the top of the form, click Save changes.
When you schedule or reschedule a meeting with a location, DreamApply automatically identifies scheduling conflicts. To review room occupancy and find the best meeting time, in the Room section, click Manage rooms, select the desired room and click Occupancy on the left.
Deleting a meeting
You can delete a meeting if it is no longer needed. Deleting a meeting removes it from the calendar and makes it unavailable to participants.
To delete a meeting:
- In the main menu, select Meetings.
- In the calendar, click the meeting to open its preview and in the bottom right corner, click the Delete icon.
Use the Journal events
DreamApply records the following meeting management events in the journal:
- Meeting was registered to
- Meeting was unregistered from
- Meeting registration time slot has changed
To track these events, subscribe to them using the Meetings event groups.