Set up meeting locations
Roles
These roles reflect the default DreamApply setup.
You can define custom roles based on your
institution's needs. Learn more →:
You can define custom roles based on your
institution's needs. Learn more →
To make sure meetings are well-organized and fully equipped, you should configure meeting locations in DreamApply. DreamApply allows you to set up and manage the following location types:
- Buildings: Institution spaces, complexes or centers where multiple meetings can be hosted simultaneously
- Rooms: Individual locations within a building tailored to a specific meeting size and format
Adding a location to a meeting is optional. You can skip this step for virtual meetings or if you prefer to include all details in the meeting description.
Before you begin
To set up meeting locations, your account must have the Superuser role or the campus permission.
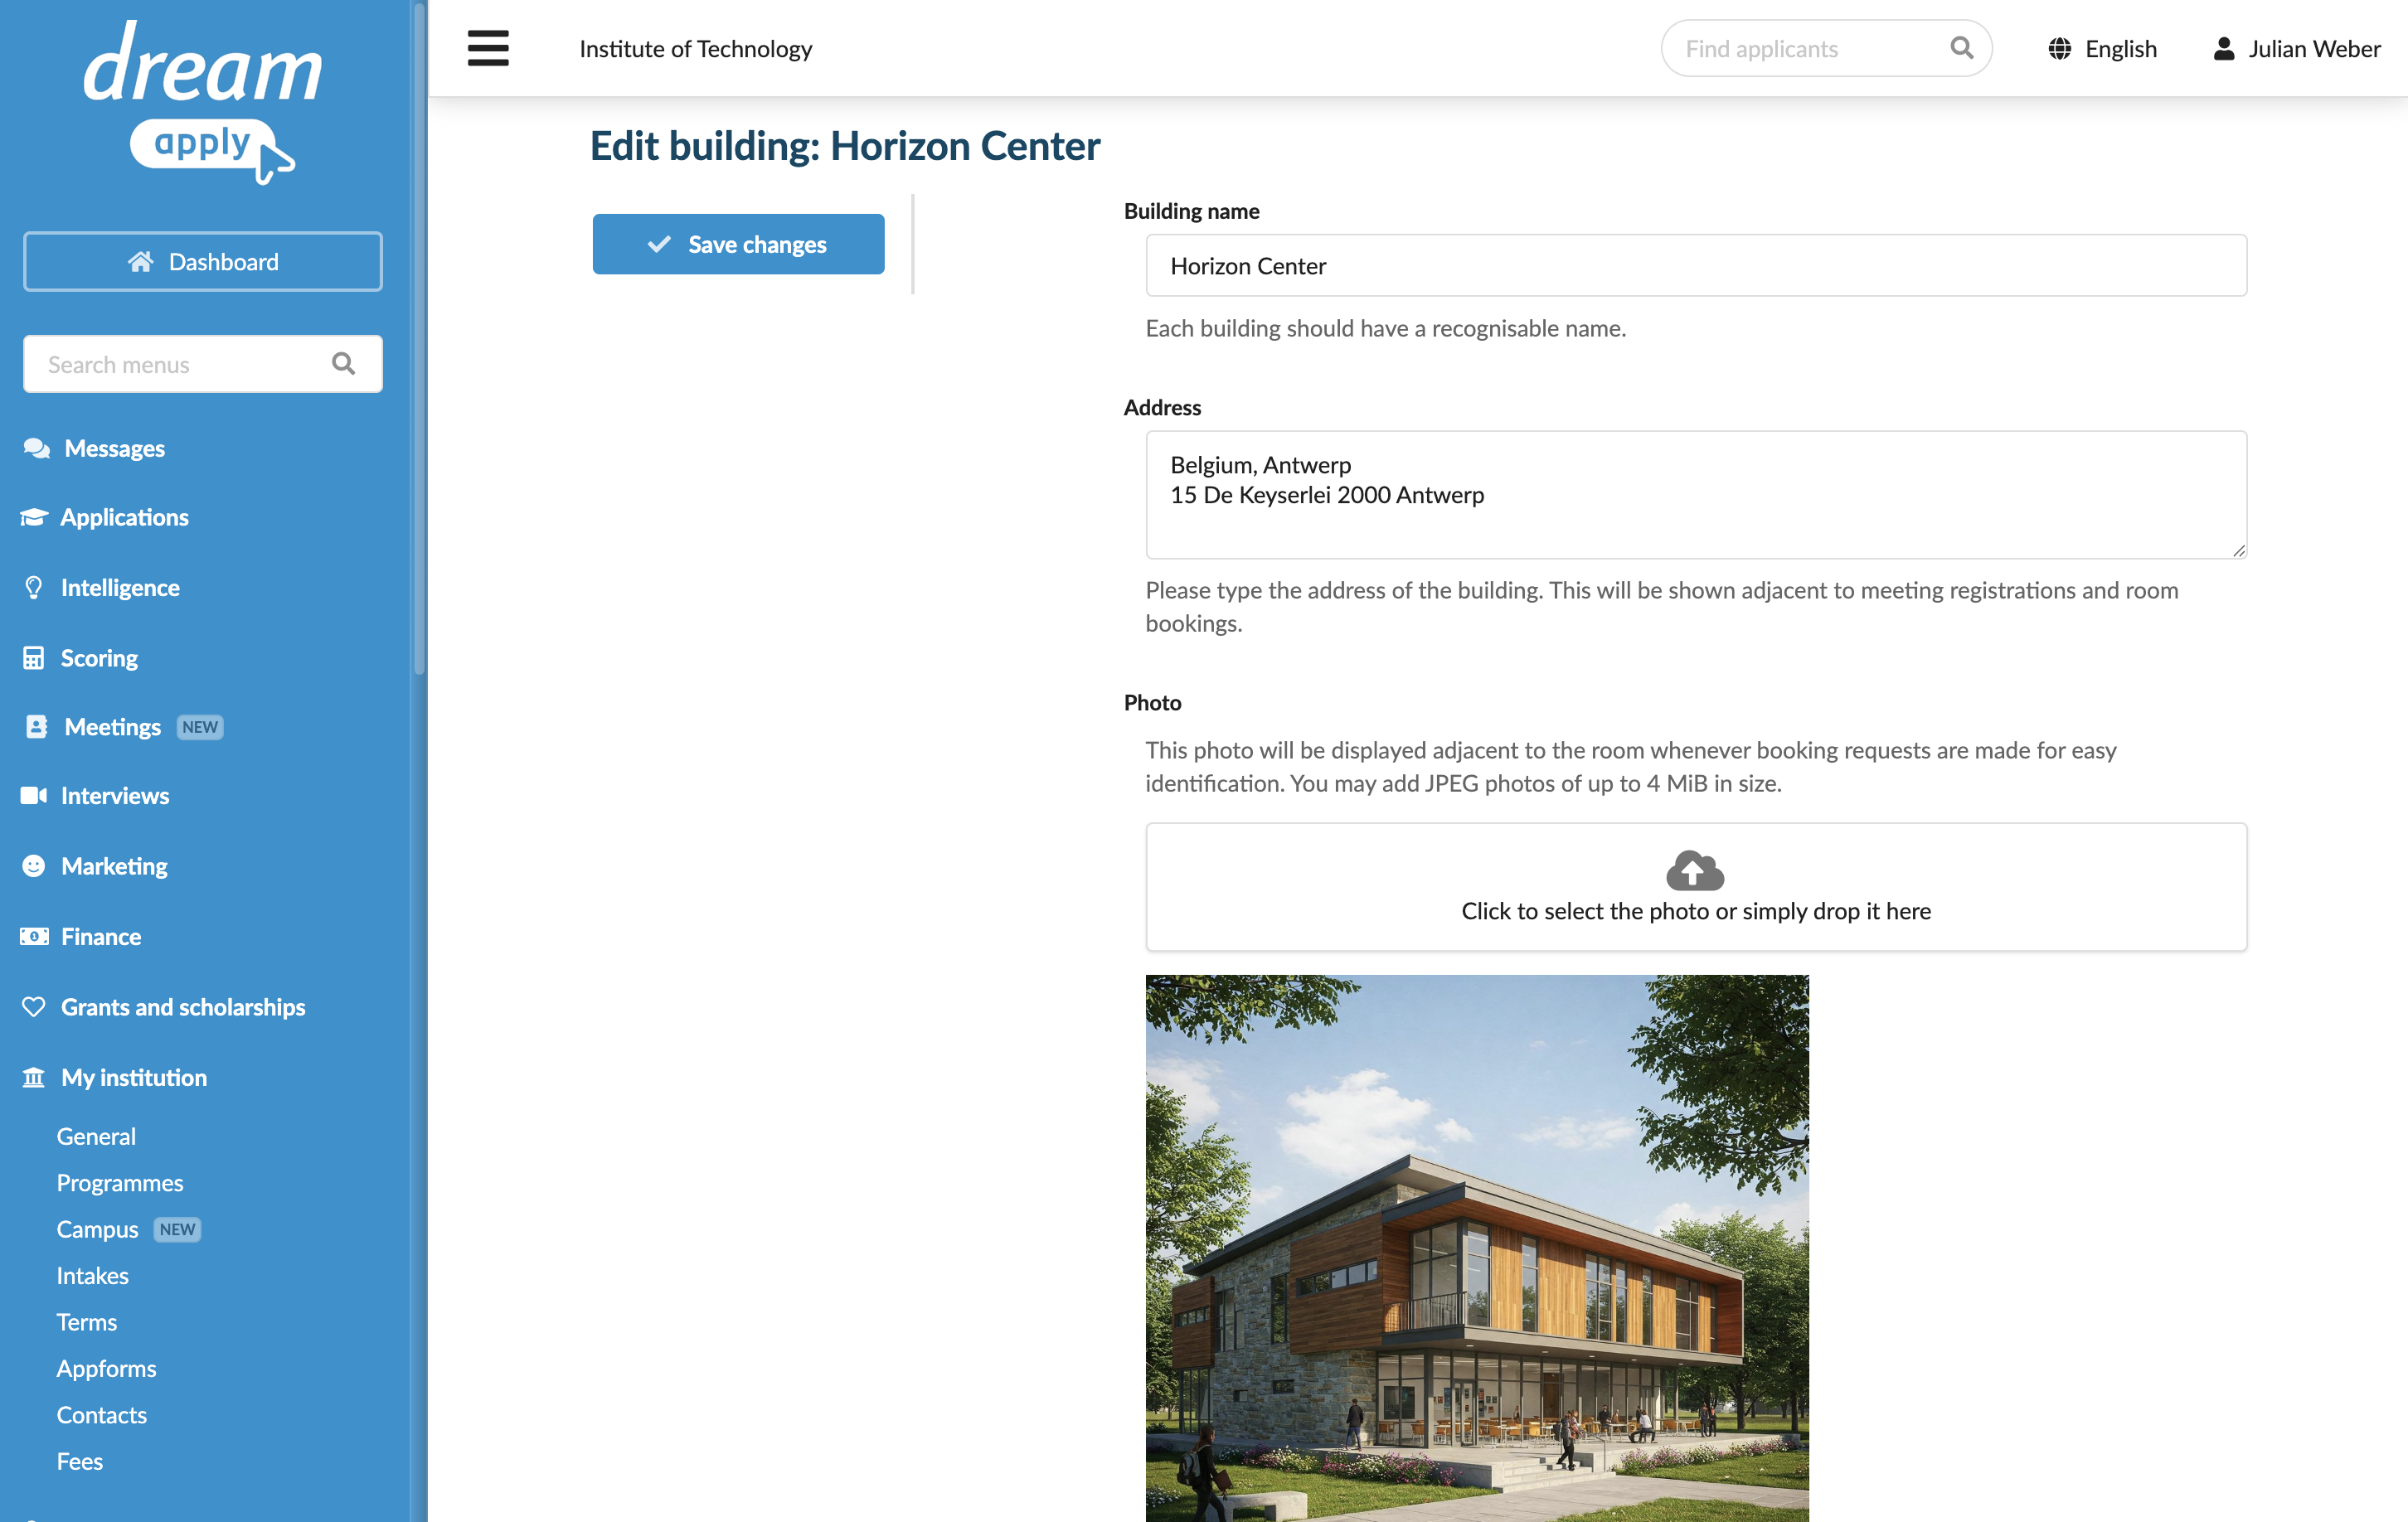
Set up buildings
To add institution buildings:
- In the main menu, under Institutions/My institution, select Campus.
- Click to expand the buildings list and select New building.
- Specify the building name, address and add a photo.
- At the top of the form, click Save changes.
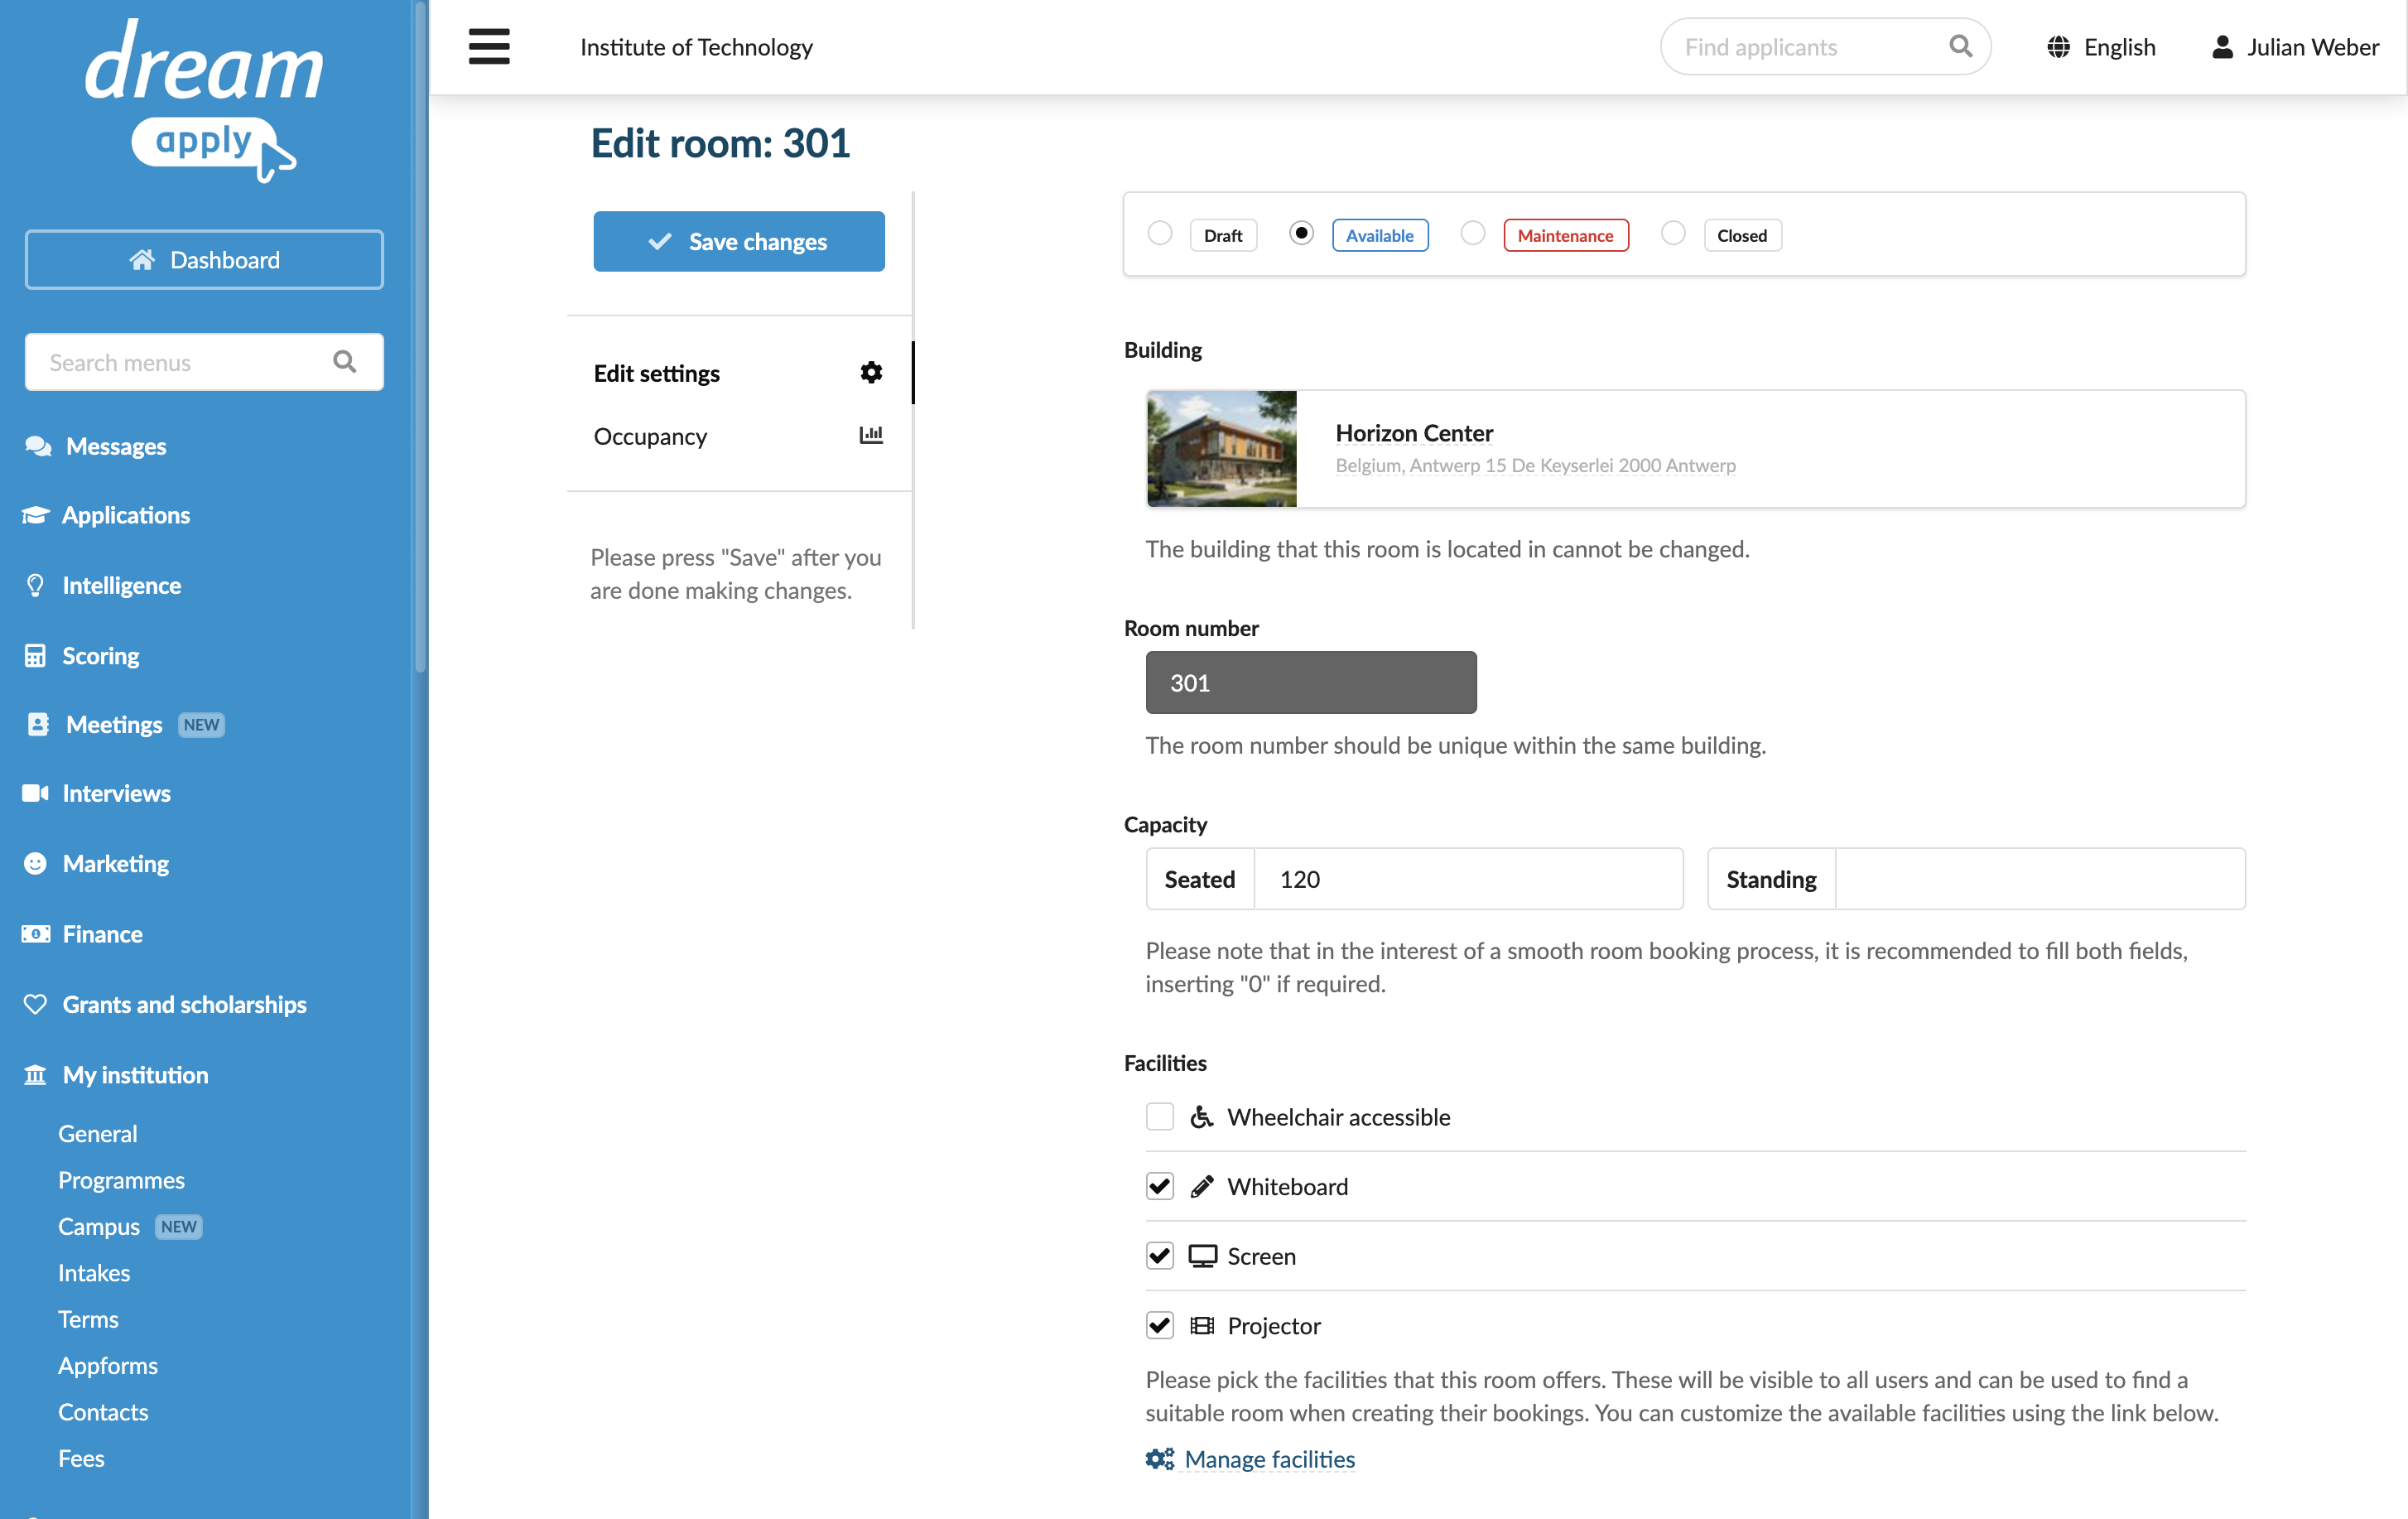
Set up rooms
Each building in DreamApply typically accommodates several meeting rooms. When configuring rooms, make sure the room description and settings are accurate and complete. When scheduling new meetings, Administrators will rely on these settings to ensure the right facilities and resources are available.
- In the main menu, under Institutions/My institution, select Campus.
- From the buildings list, select the building in which the room is located.
- At the bottom of the rooms list, click New room and configure the room settings such as name, description, photo, capacity and available facilities.
- At the top of the form, set the room status and click Save changes.