Manage fees
Roles
These roles reflect the default DreamApply setup.
You can define custom roles based on your
institution's needs. Learn more →:
You can define custom roles based on your
institution's needs. Learn more →
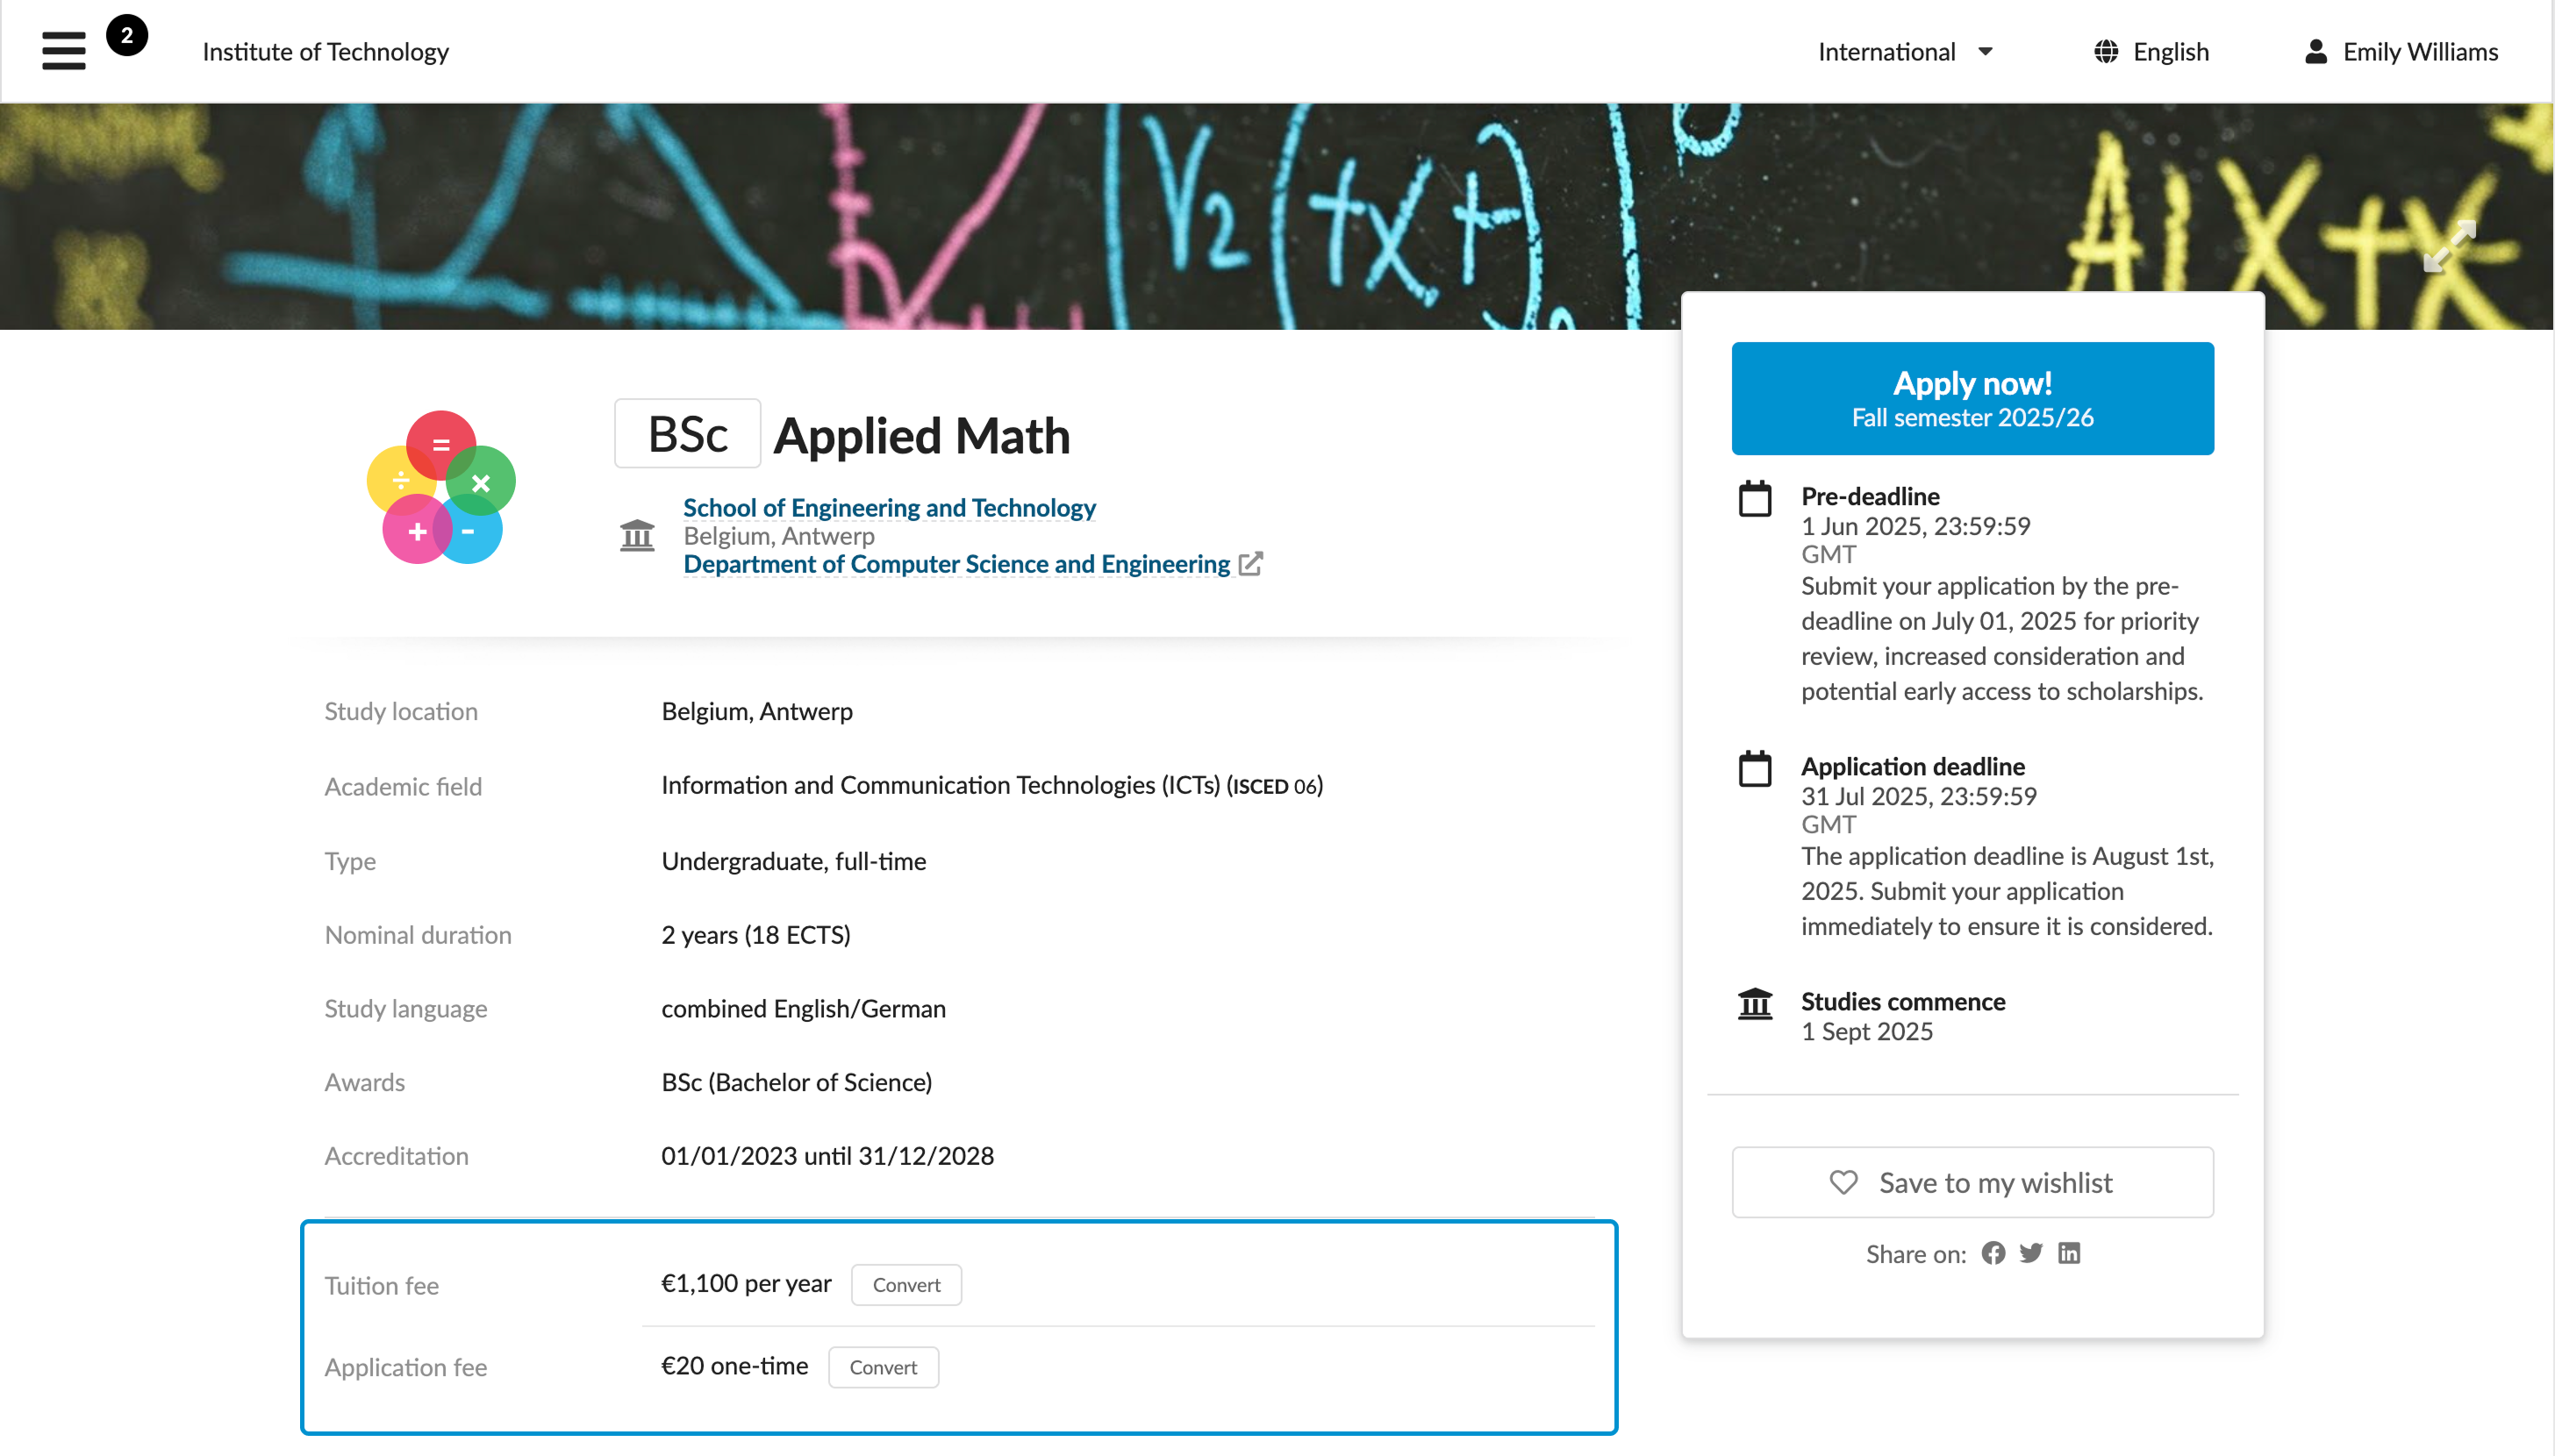
In DreamApply, fees represent charges linked to specific programmes. You can set up various types of fees, define their amounts and geographical variations.
To define which fee must be applied, DreamApply uses the territory hierarchy. It checks for a fee starting from the most specific territory and moves up to more general levels. For example:
- If a specific fee is set for a country, that fee will be applied for applicants whose citizenship is set to that country.
- If no fee is set for a country, the system checks the region to which the country belongs.
- If no regional fee is found, the system applies the global (World) fee.
You can mark a fee as visible or hidden. All visible fees for a programme are displayed in the fees section on the programme description page.
Before you begin
To manage fees, your account must have the Superuser or Accountant role or the accounting-view and accounting-edit permissions.
Create fees
To create a new fee:
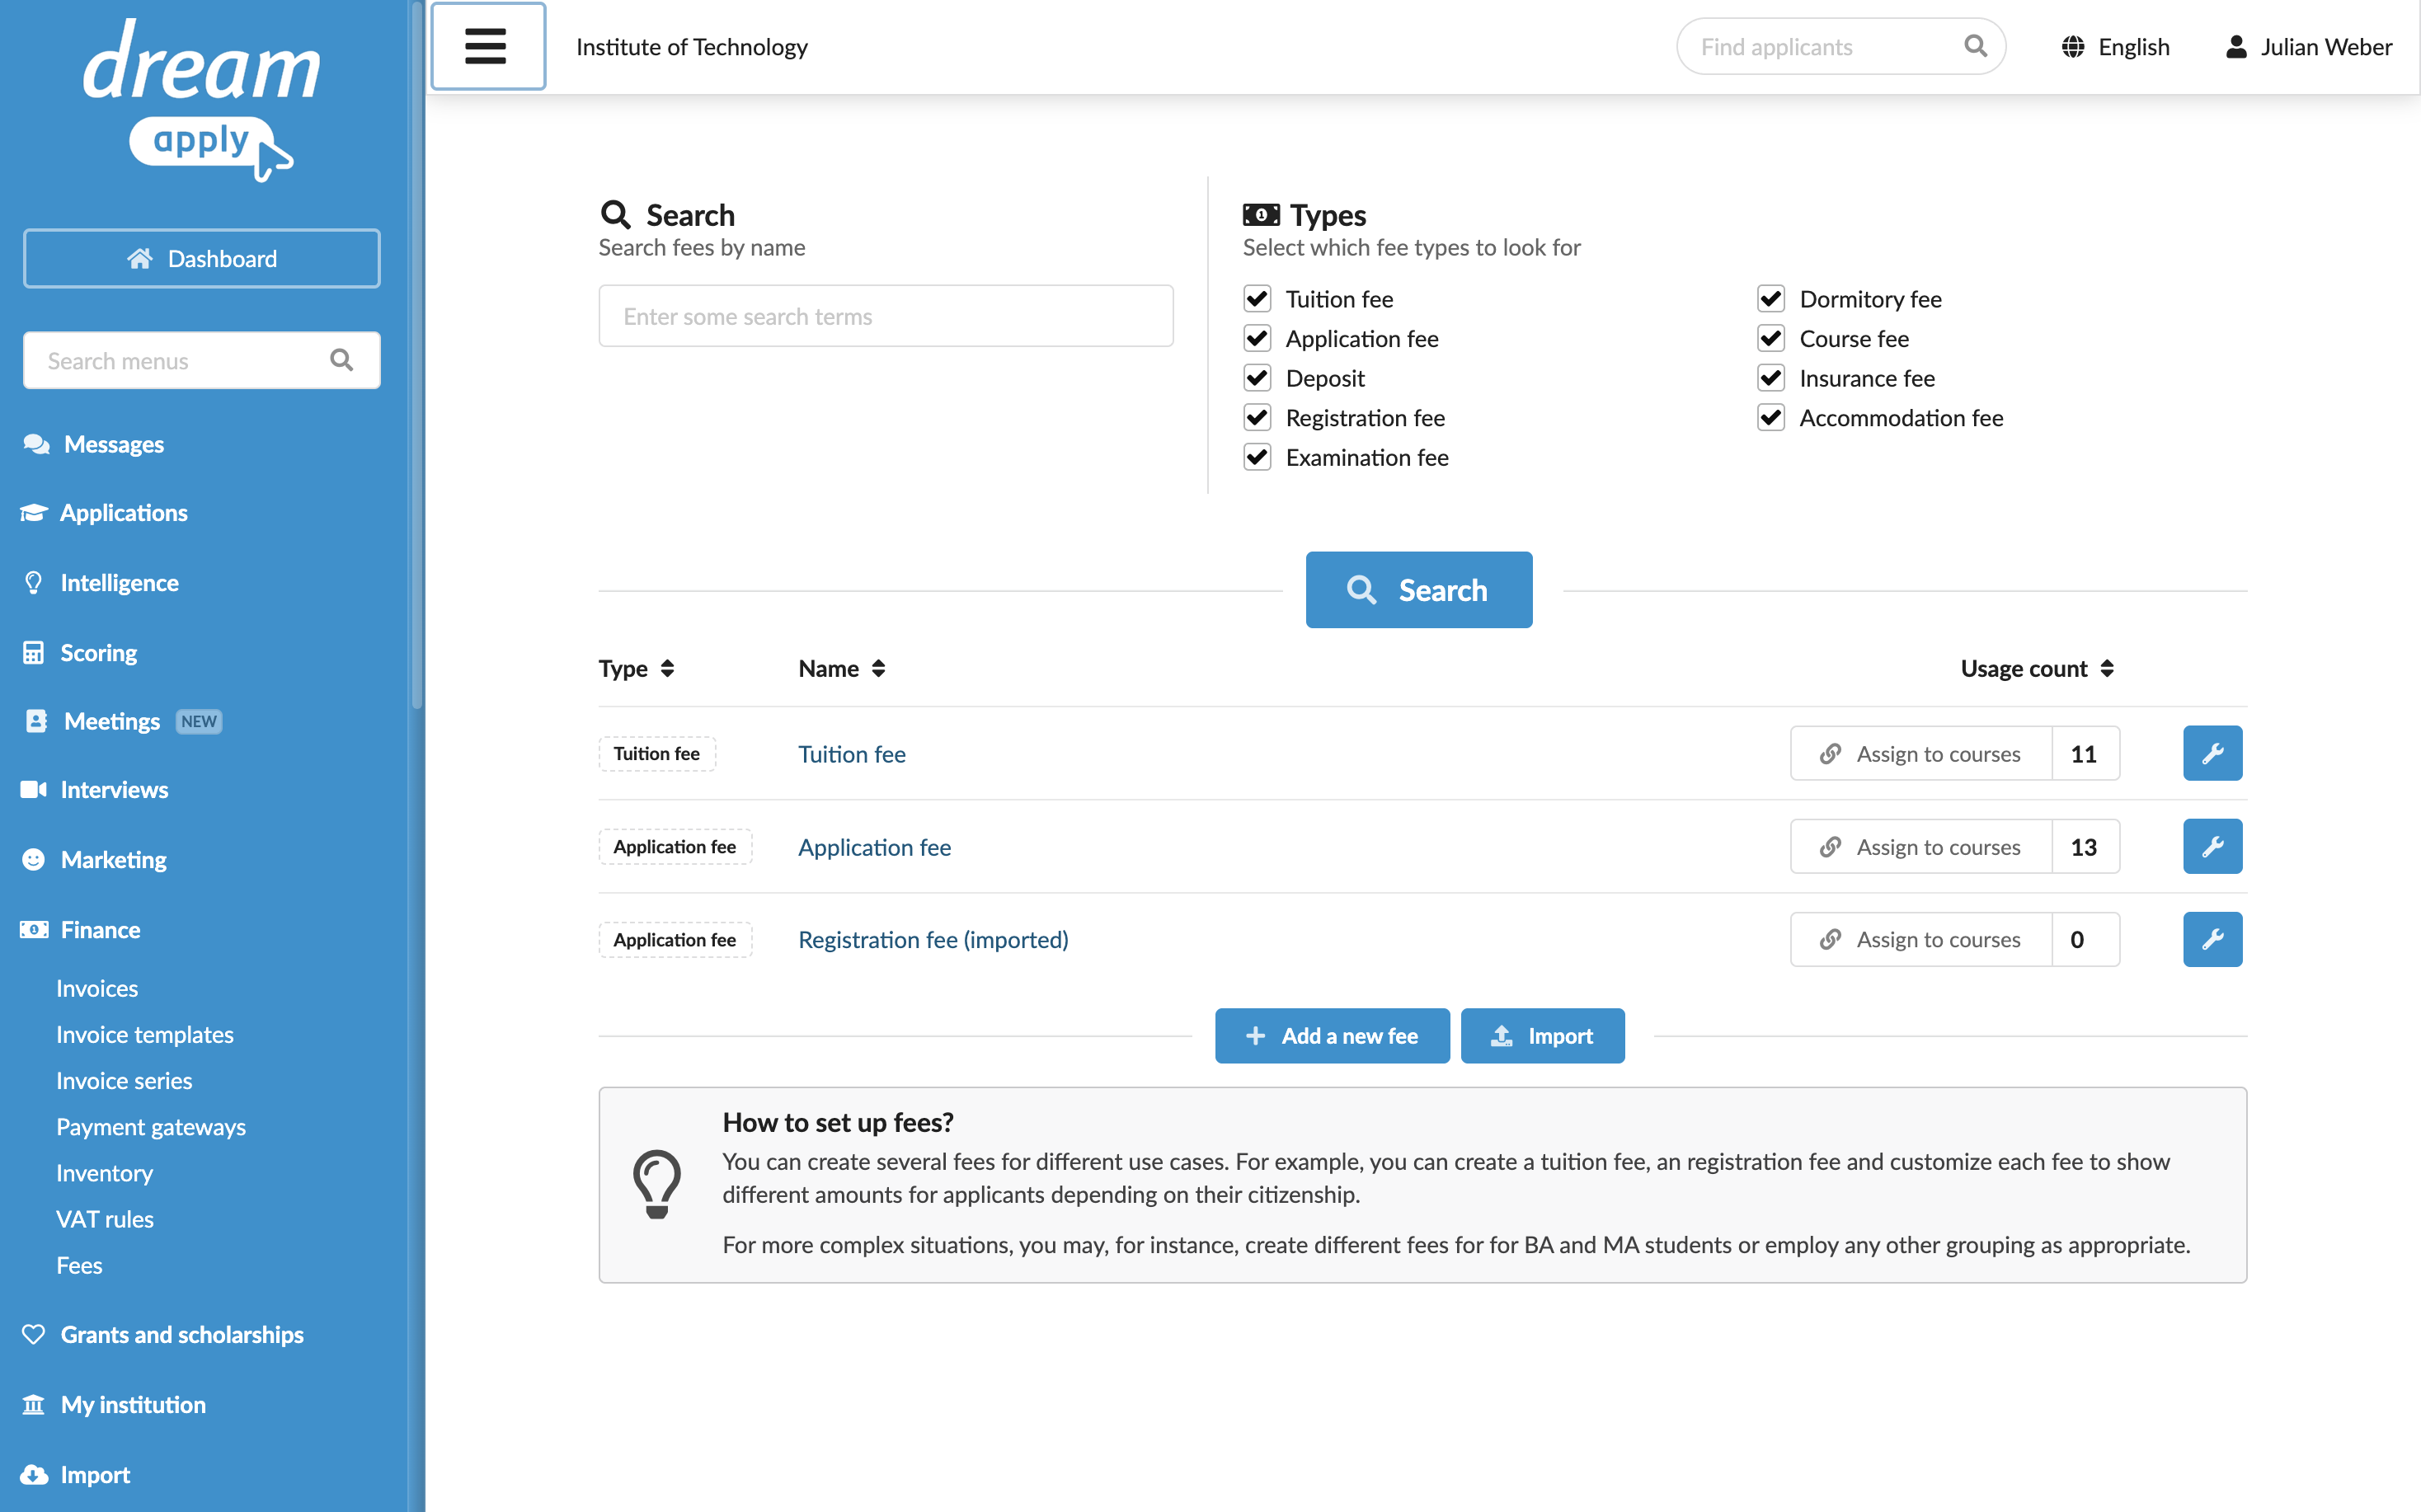
- In the main menu, under Finance, select Fees.
- At the bottom of the fee list, click Add a new fee.
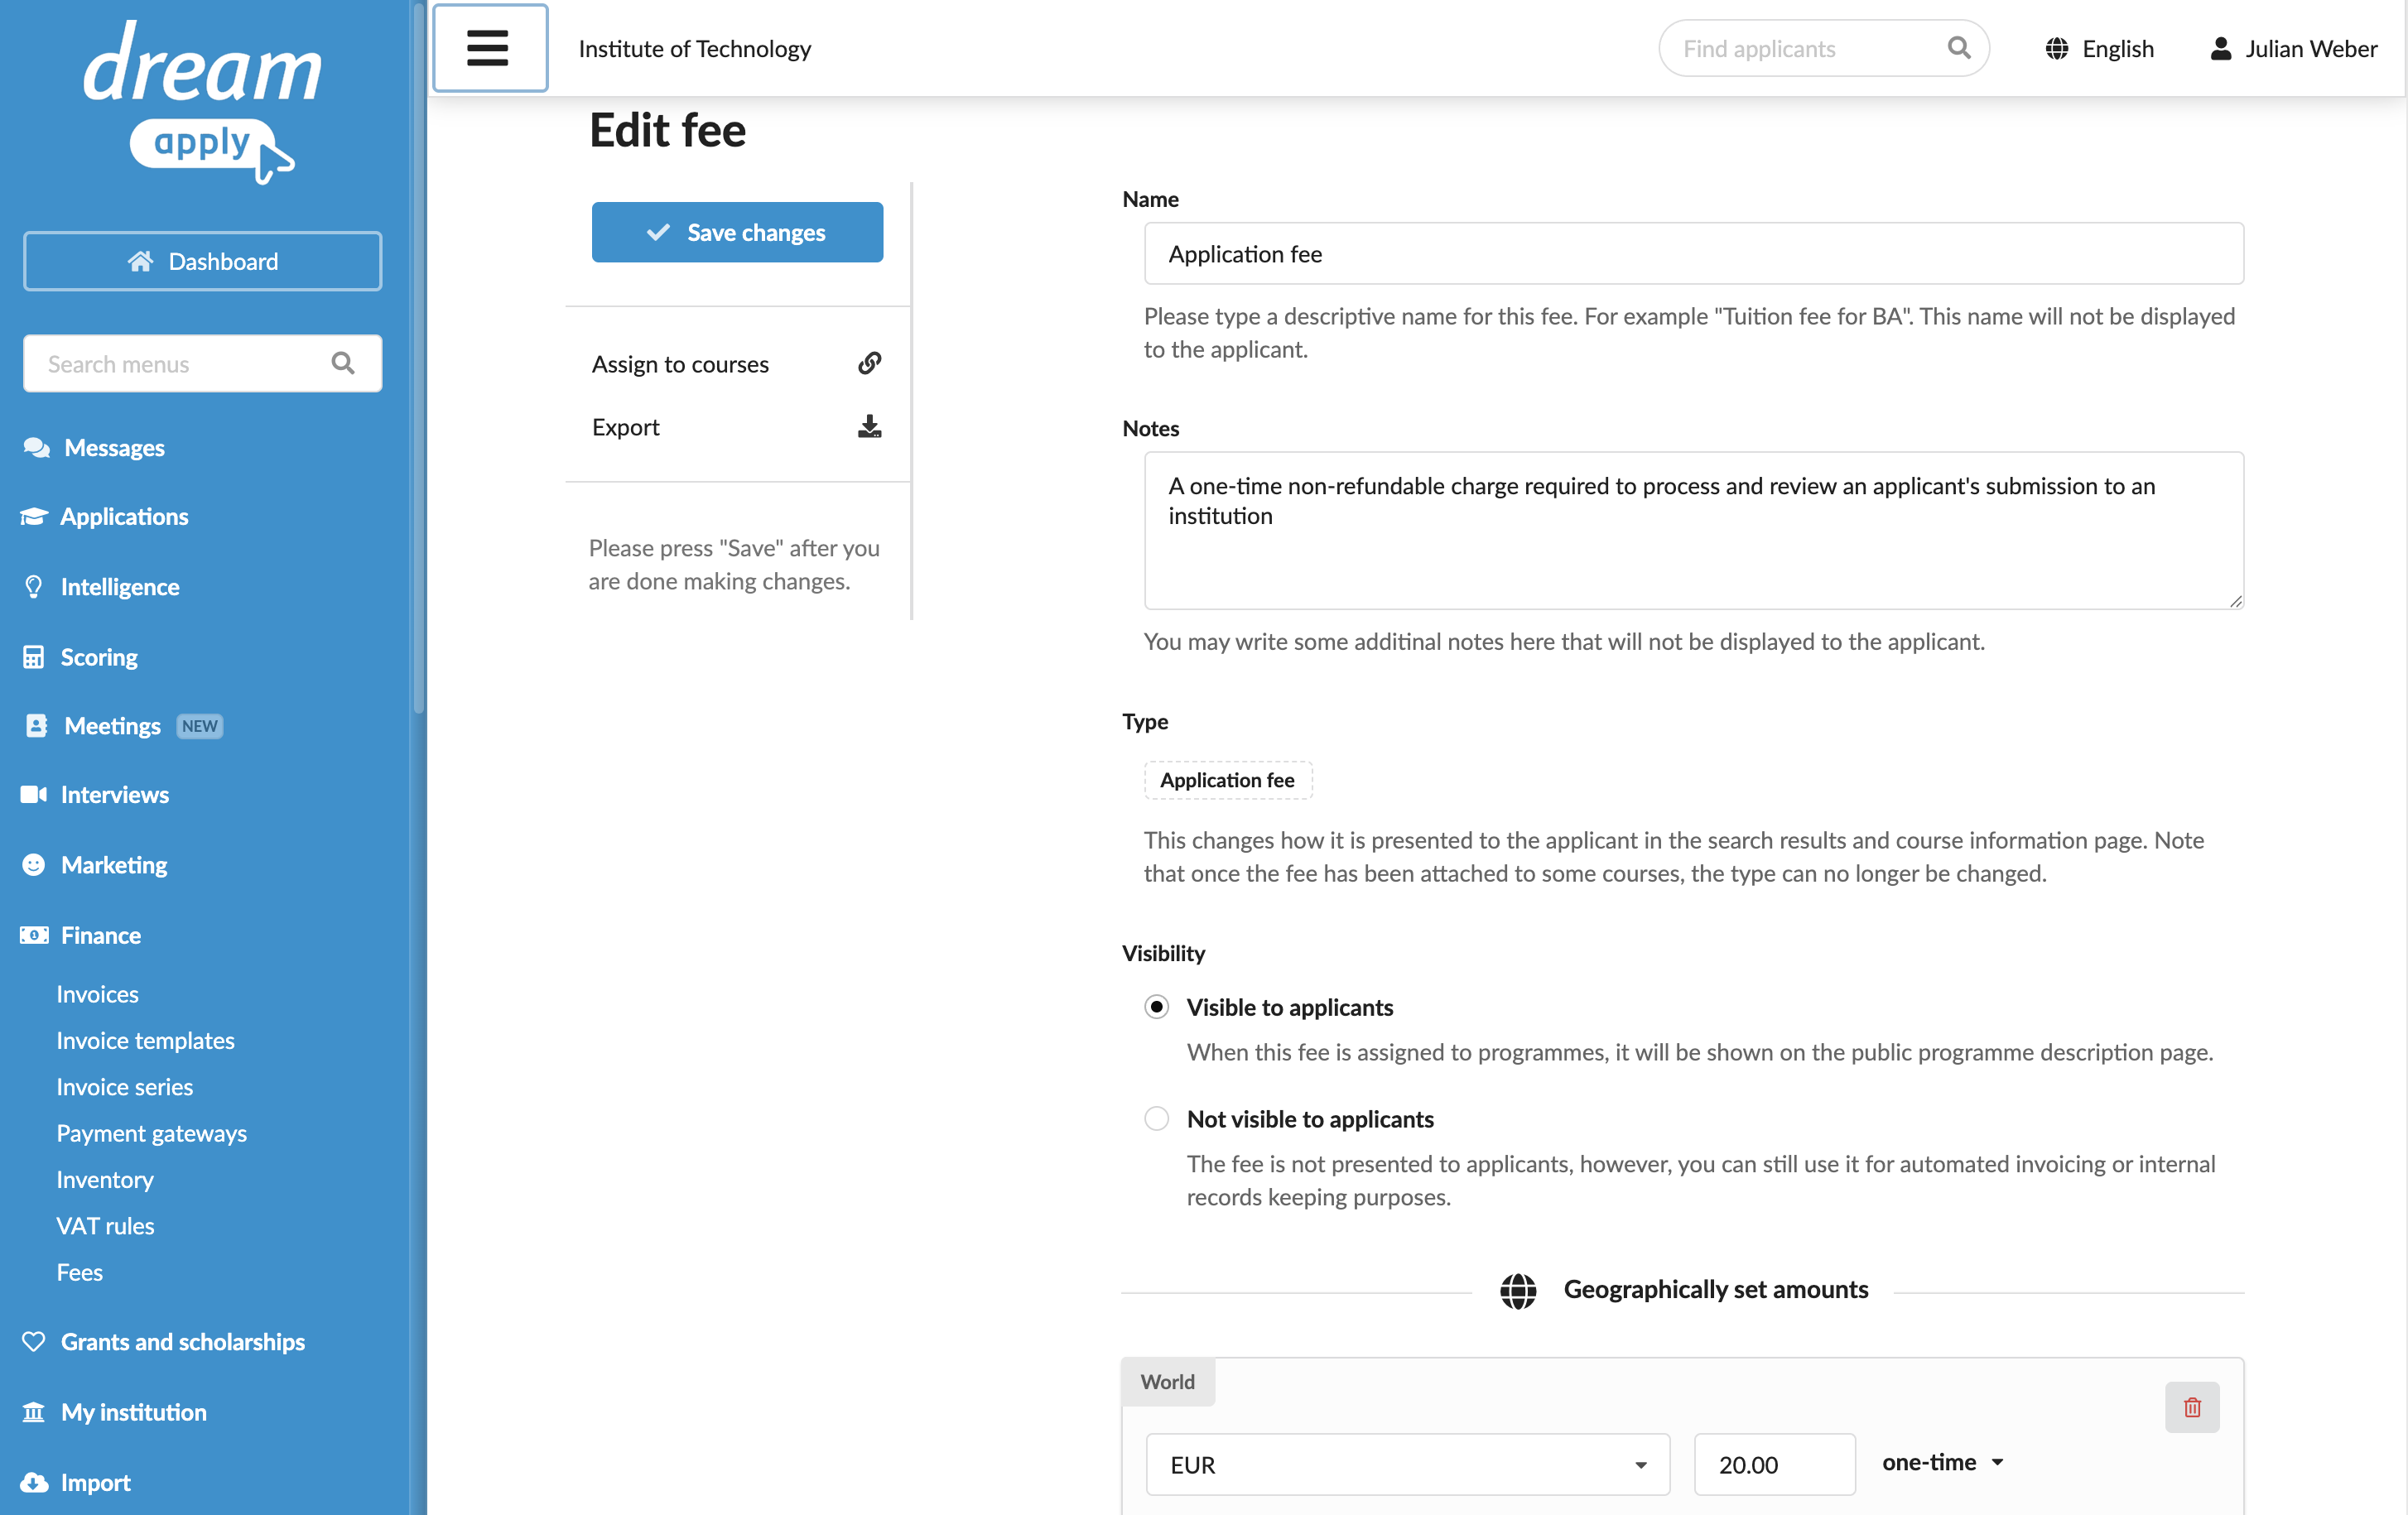
- In the Name and Notes field, specify the fee name and description. These values will be used for internal reference only and will not be displayed to applicants. Applicants can only see the fee type and amount.
- Specify the fee type and visibility settings.
- Specify the fee amount for different regions.
- In the Automated invoicing section, specify if DreamApply must automatically generate an invoice when a specific event triggers.
Import fees
To streamline fee setup, you can use the export and import functions. This option can be helpful if you already have a fee with basic settings and want to replicate it for other fees without starting from scratch each time.
To meet the system requirements, you should first export a JSON file with sample fee settings. This guarantees that the JSON file structure and fields are correct. After export, you can edit the file as needed and import it back. A JSON file must contain data for one fee only, so you need to create a separate file for each fee you want to import.
To import fee data:
- In the main menu, under Finance, select Fees.
- Set up a sample fee with basic settings as described above.
- In the left menu, click Export.
- Edit the exported JSON file as needed.
- At the bottom of the fee list, click Import and select the file to be imported.
Fee file structure
A fee in the JSON file is described with the following data:
| Key | Description | Required/Optional |
|---|---|---|
name | A fee name. | Optional |
type | A fee type. Possible values: Appfee, Tuition, Deposit, Registration, Examination, Dormitory, Course, Insurance, Accommodation. | Required |
notes | A fee description and other details. | Optional |
amounts | An object describing different amounts for the fee. The amounts object contains one or more child objects, each representing a fee for a specific region. | Required |
| Country code | Child objects in amount are identified with two-letter country codes, for example, US. See a full list of codes here. The world region is identified with 001. | Required |
qualifier | A value reserved for system use. | Optional |
currency | The currency code for the amount, for example, EUR. See a full list of codes here. | Required |
amount | The fee value. | Required |
basis | The fee basis. Possible values: One-time, Course, Month, Credit, Semester, Year, Credit hour. | Optional |
info | A description of the amount set for a specific region. | Optional |
kind | A value reserved for system use. | Optional |
version | A value reserved for system use. | Optional |