Specify institution details
Roles
These roles reflect the default DreamApply setup.
You can define custom roles based on your
institution's needs. Learn more →:
You can define custom roles based on your
institution's needs. Learn more →
When setting up institutions in DreamApply, you need to provide detailed information about your organization. Make sure the data you specify is comprehensive and accurate, as it will be used in:
- DreamApply portal for applicants
- Documents provided to applicants
- Reports
Before you begin
To edit institution details, your account must have the Superuser role or the institutions permission.
Provide general information
You need to provide key information that defines your institution. If your organization operates in the multi-institution setup mode, make sure you enter accurate information for each institution within your organization.
To specify institution details:
In the main menu, under My Institution, select General and click Edit to the right of the institution name.
For a multi-institution setup, in the main menu, under Institutions, select Institutions, click the edit icon to the right of the institution name and select Edit institution.
Provide information about your institution such as name, address, identification codes, contact details and organizational structure.
At the top of the form, click Save changes.
- If a street name is common and may refer to multiple locations, enter the full address with the city for precise geocoding.
- If multiple institutions share the same address, in the Geographical location section, slightly adjust the map marker to make the location of each institution distinct and easily viewable in the DreamApply portal.

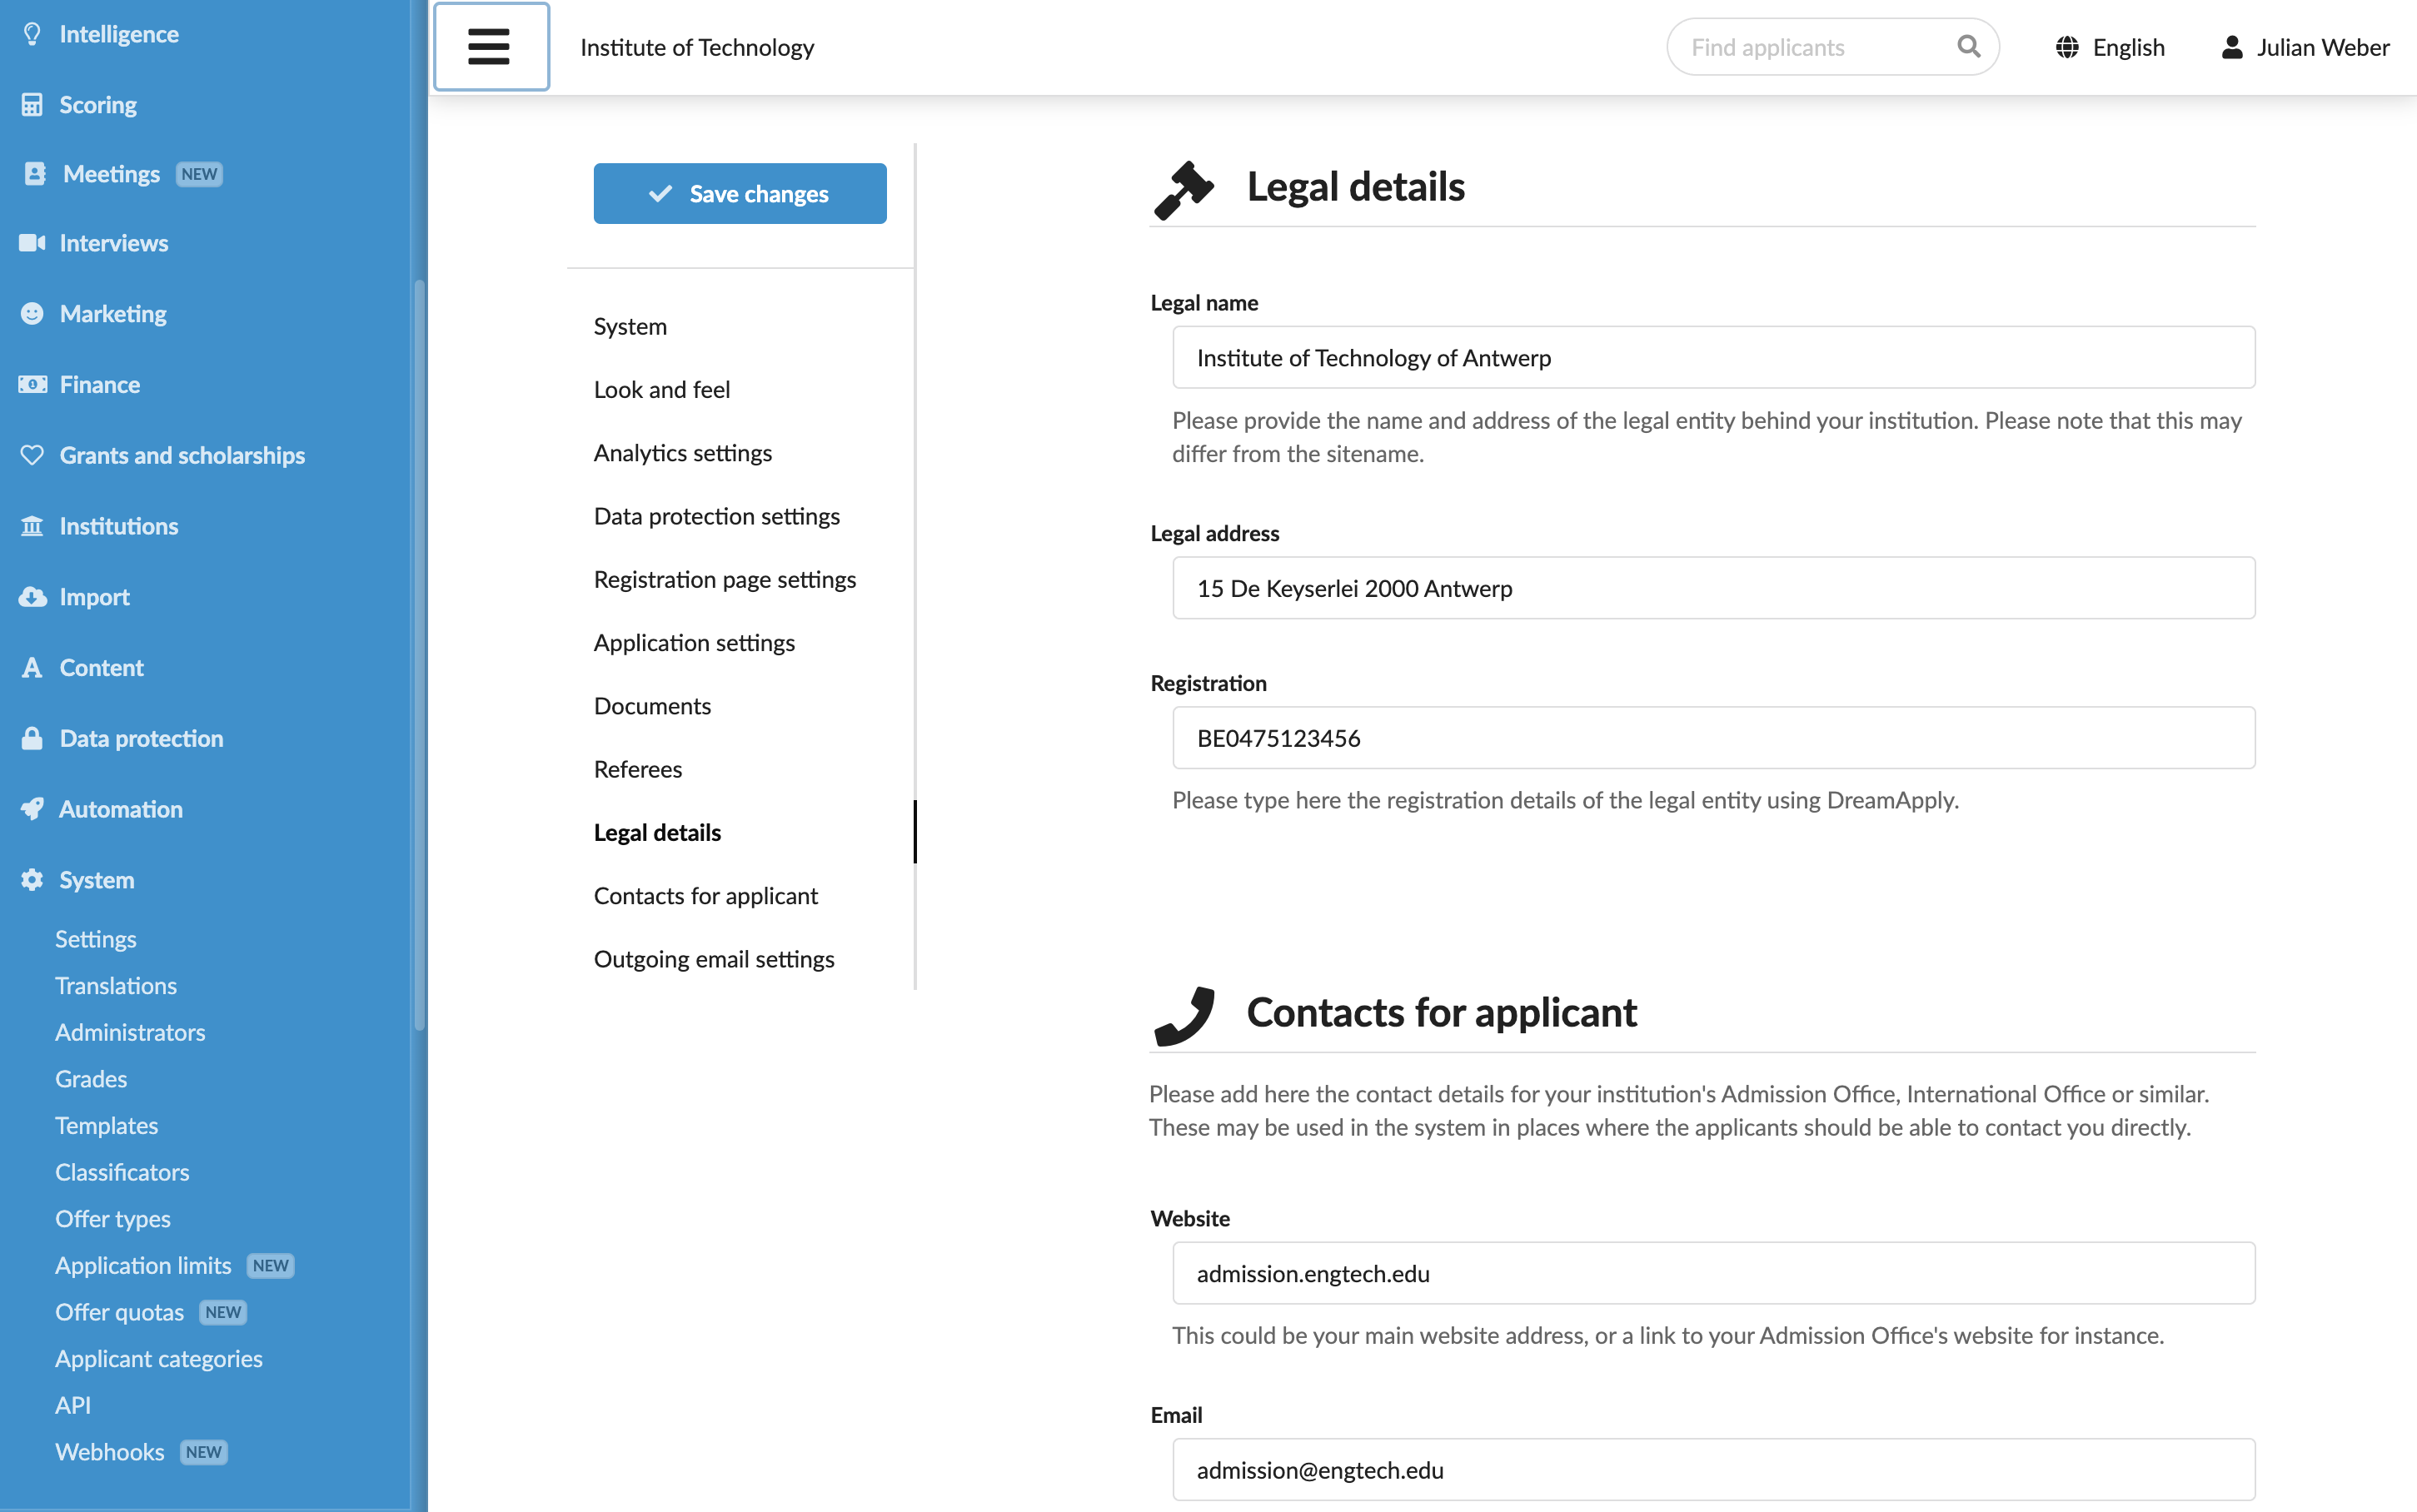
Provide legal entity and contact details
You need to provide correct legal and contact information to accurately represent your organization in all communications and documents provided to applicants.
Legal entity and contact information is defined at the instance level. In a multi-institution setup, use the main campus or equivalent details as a reference for all institutions in the structure.
To specify legal entity and contact details:
- In the main menu, under System, select Settings.
- In the Legal details and Contacts for applicants sections, specify the details for your organization.
- At the top of the form, click Save changes.