Track application events
Roles
These roles reflect the default DreamApply setup.
You can define custom roles based on your
institution's needs. Learn more →:
You can define custom roles based on your
institution's needs. Learn more →
Assume you want to track the number of created, submitted and withdrawn applications in Google Analytics. You want to leverage the information about events pushed to the data layer by DreamApply.
To do this, we will integrate DreamApply with Google Tag Manager, set up a tag to capture these events and present them as a report in Google Analytics.
Before you begin
- Make sure your Administrator account in DreamApply has the
Superuserrole. - Make sure you have an account and container in Google Tag Manager. For details, see Create an account and container in the Google documentation.
- Make sure you have an account and a data stream in Google Analytics. For details, see Add a data stream in the Google documentation.
Step 1. Integrate with Google Tag Manager
First, we need to connect DreamApply to Google Tag Manager.
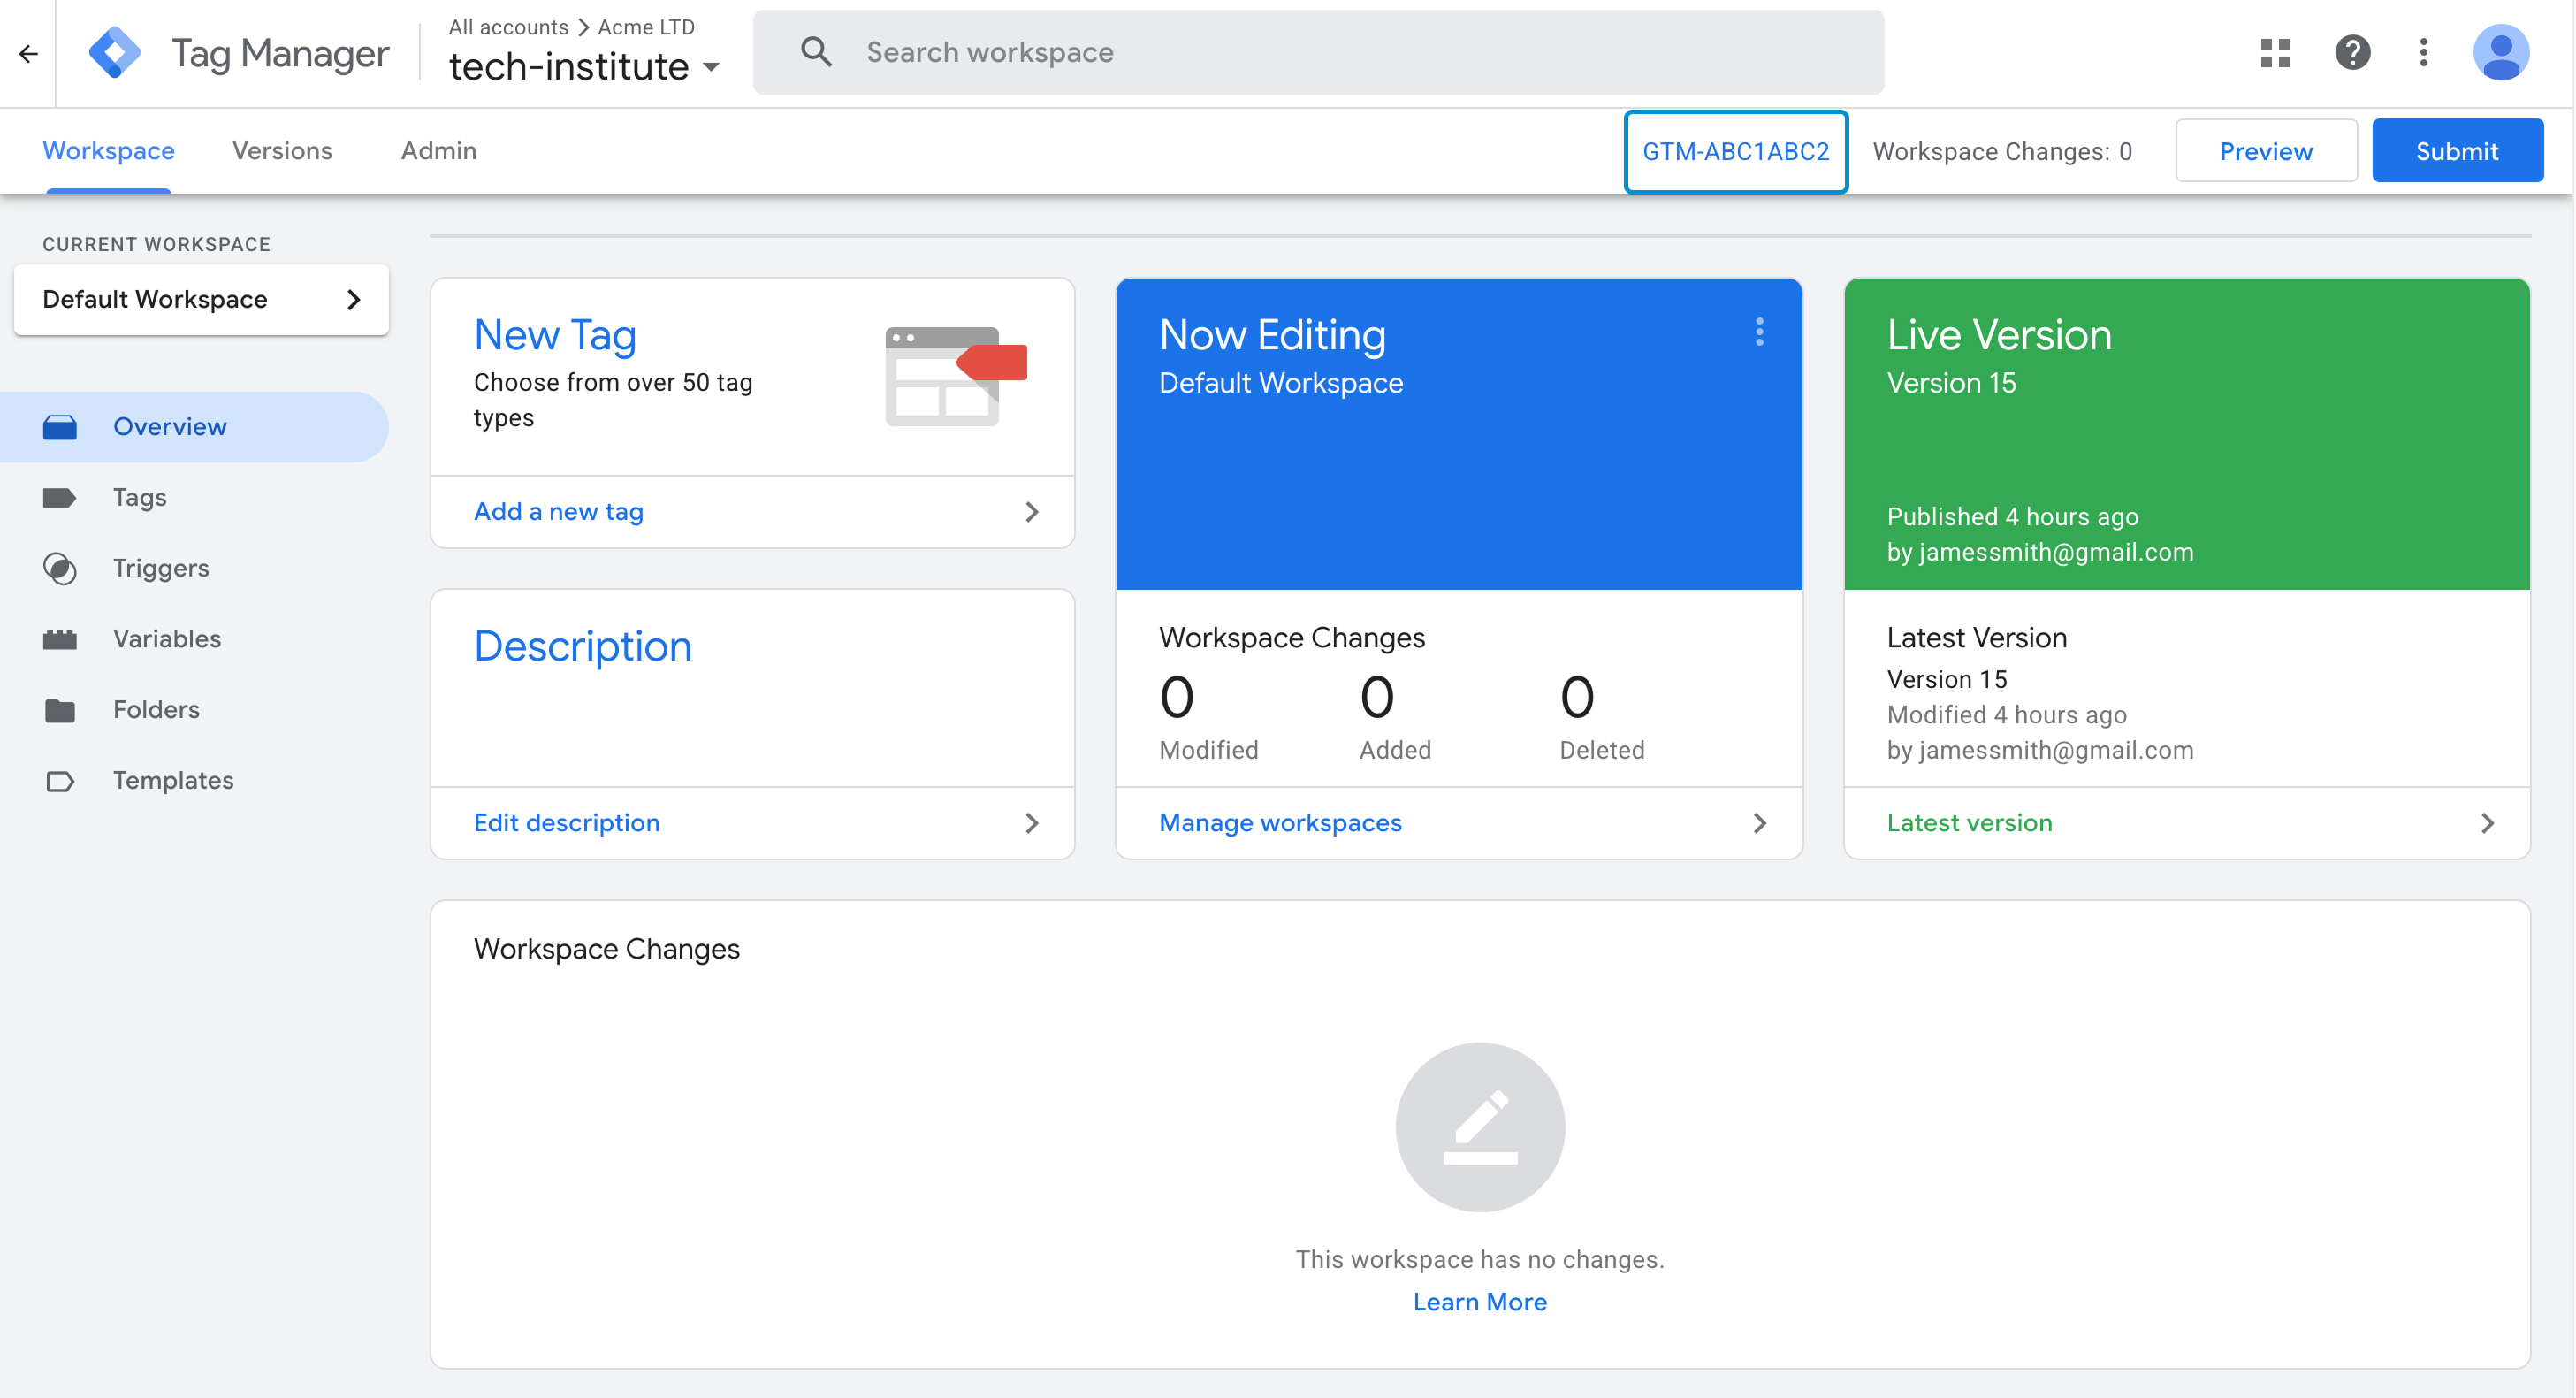
In Google Tag Manager, open your container.
At the top of the page, copy the container ID.
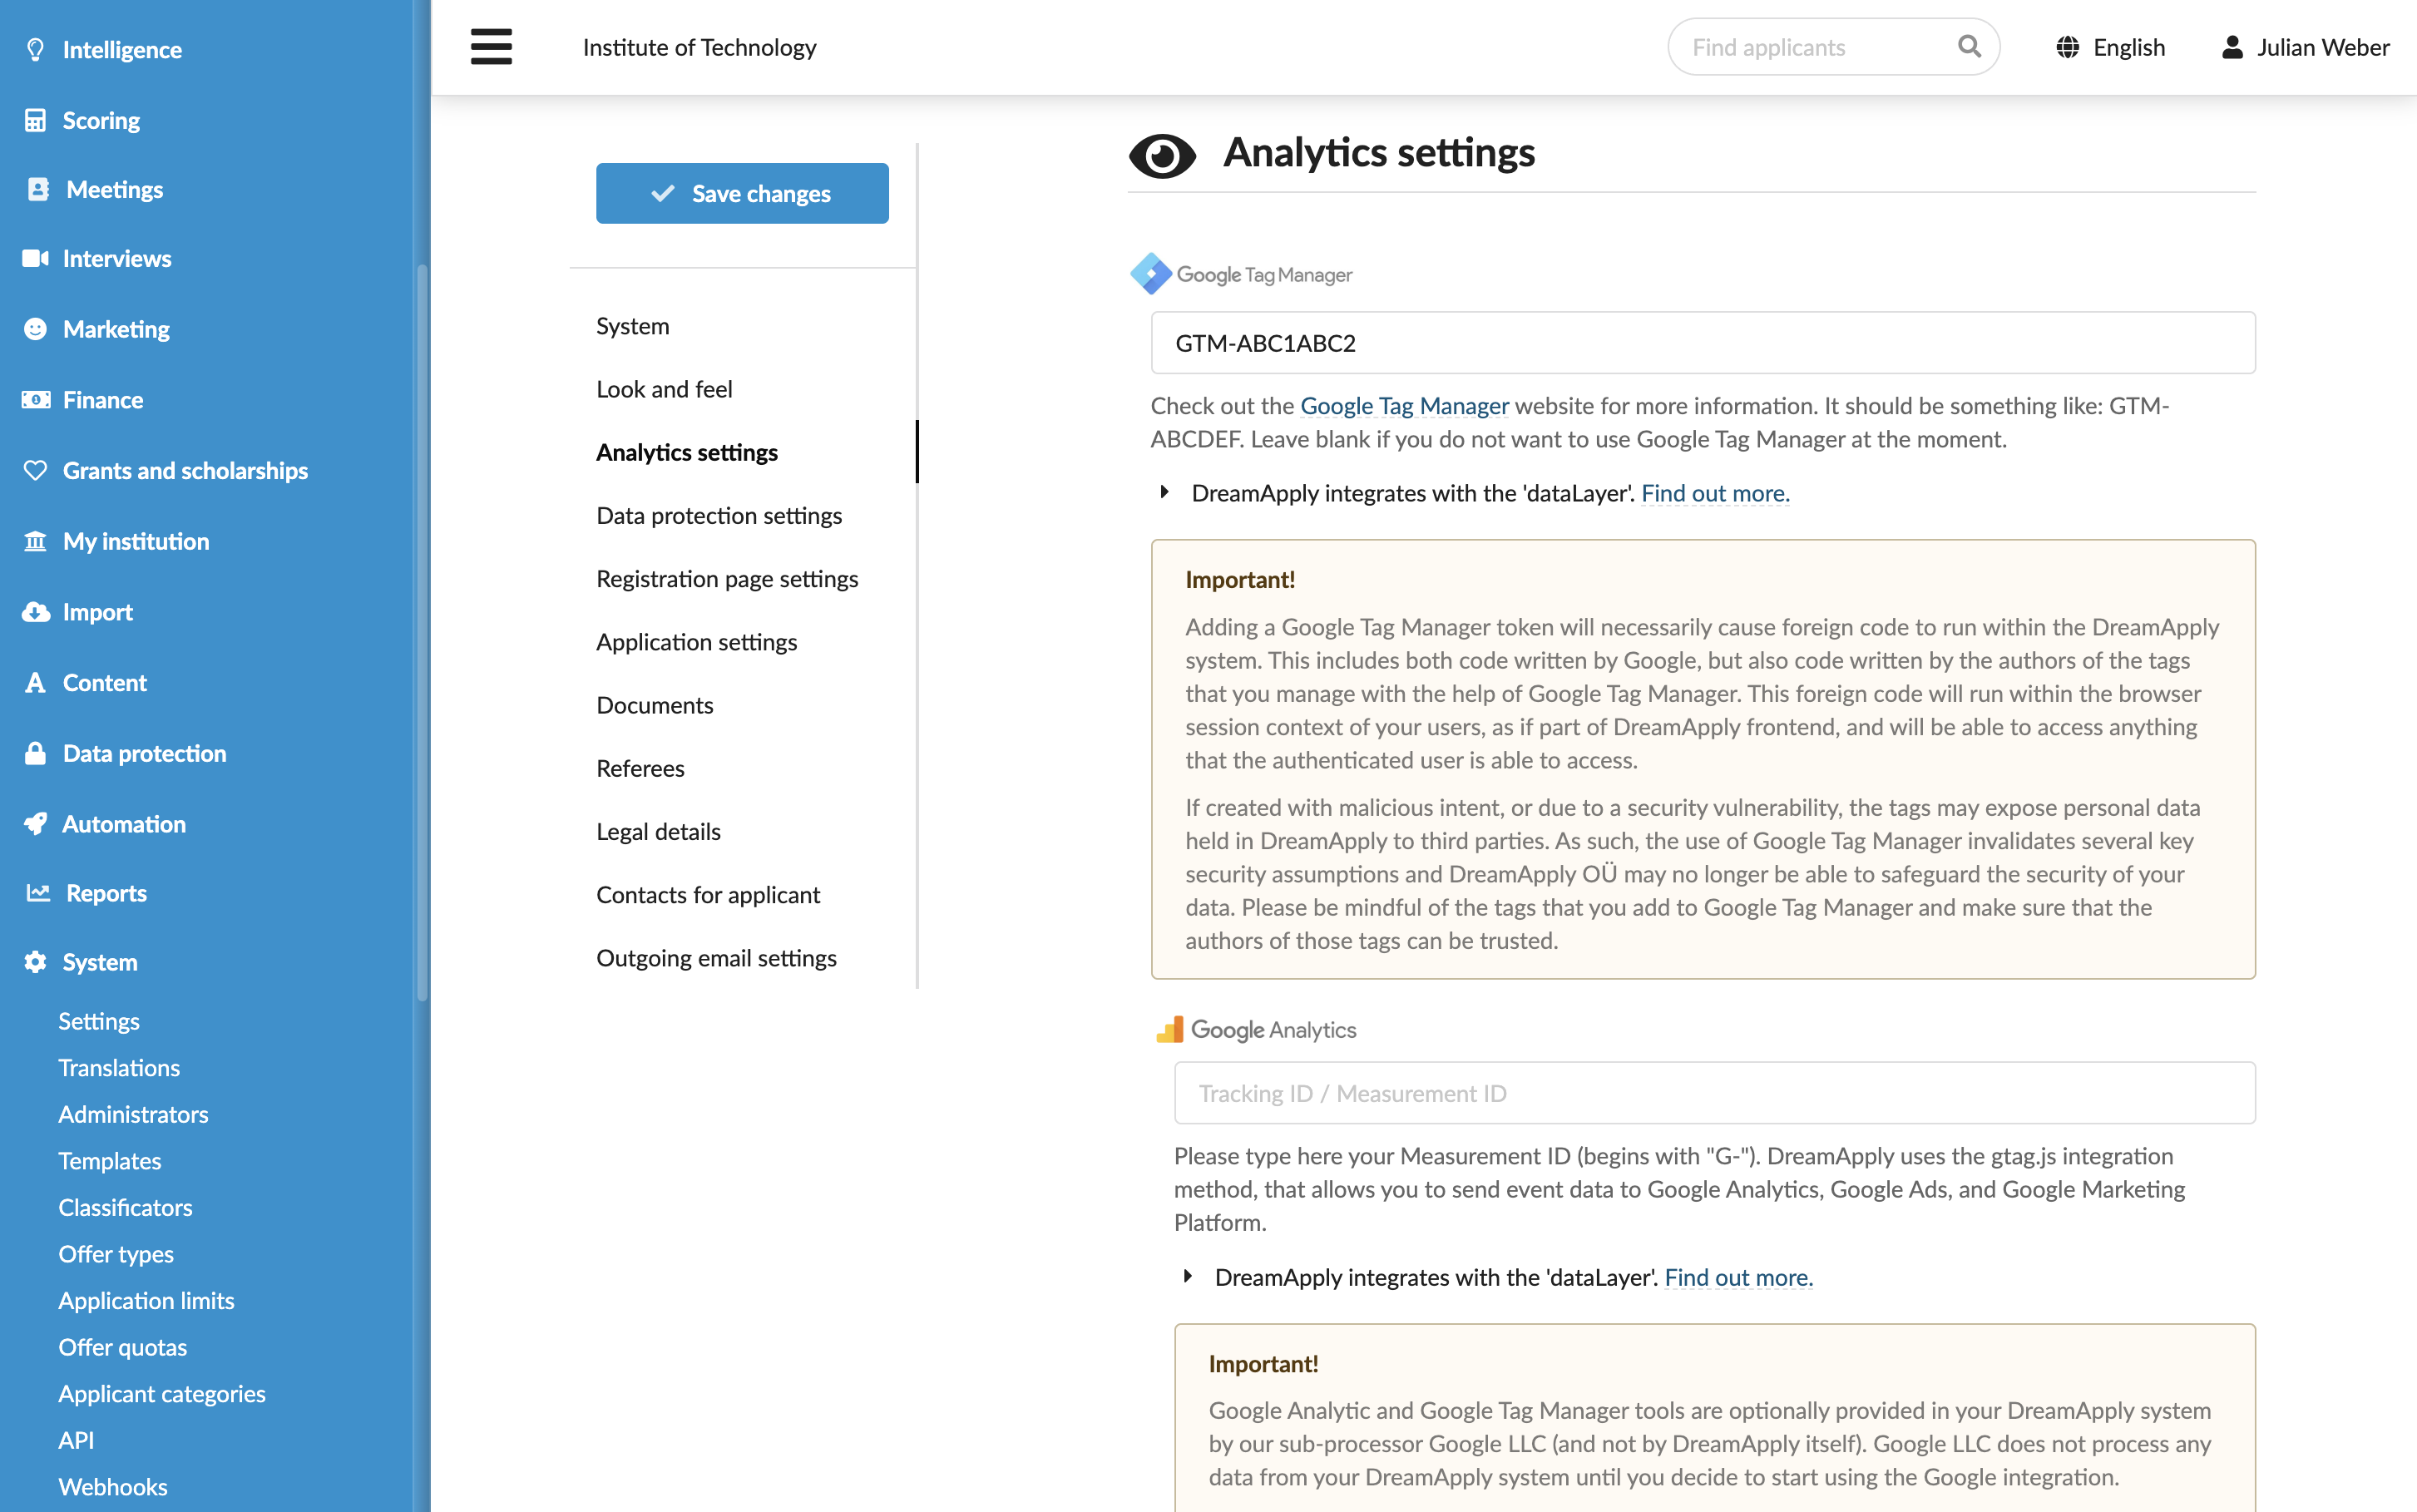
In DreamApply, in the main menu, under System, select Settings.
In the Analytics settings section, under Google Tag Manager, specify the ID for your container.
At the top of the form, click Save changes.
Step 2. Create a data layer variable
Google Tag Manager does not automatically detect variables in the data layer. We need to define custom variables for each value we want to access from the data layer.
Let’s assume we want to create a report that will show created, submitted and withdrawn applications for each academic term. To do this, we will create a variable that will capture the academic_term_ID value from the event.
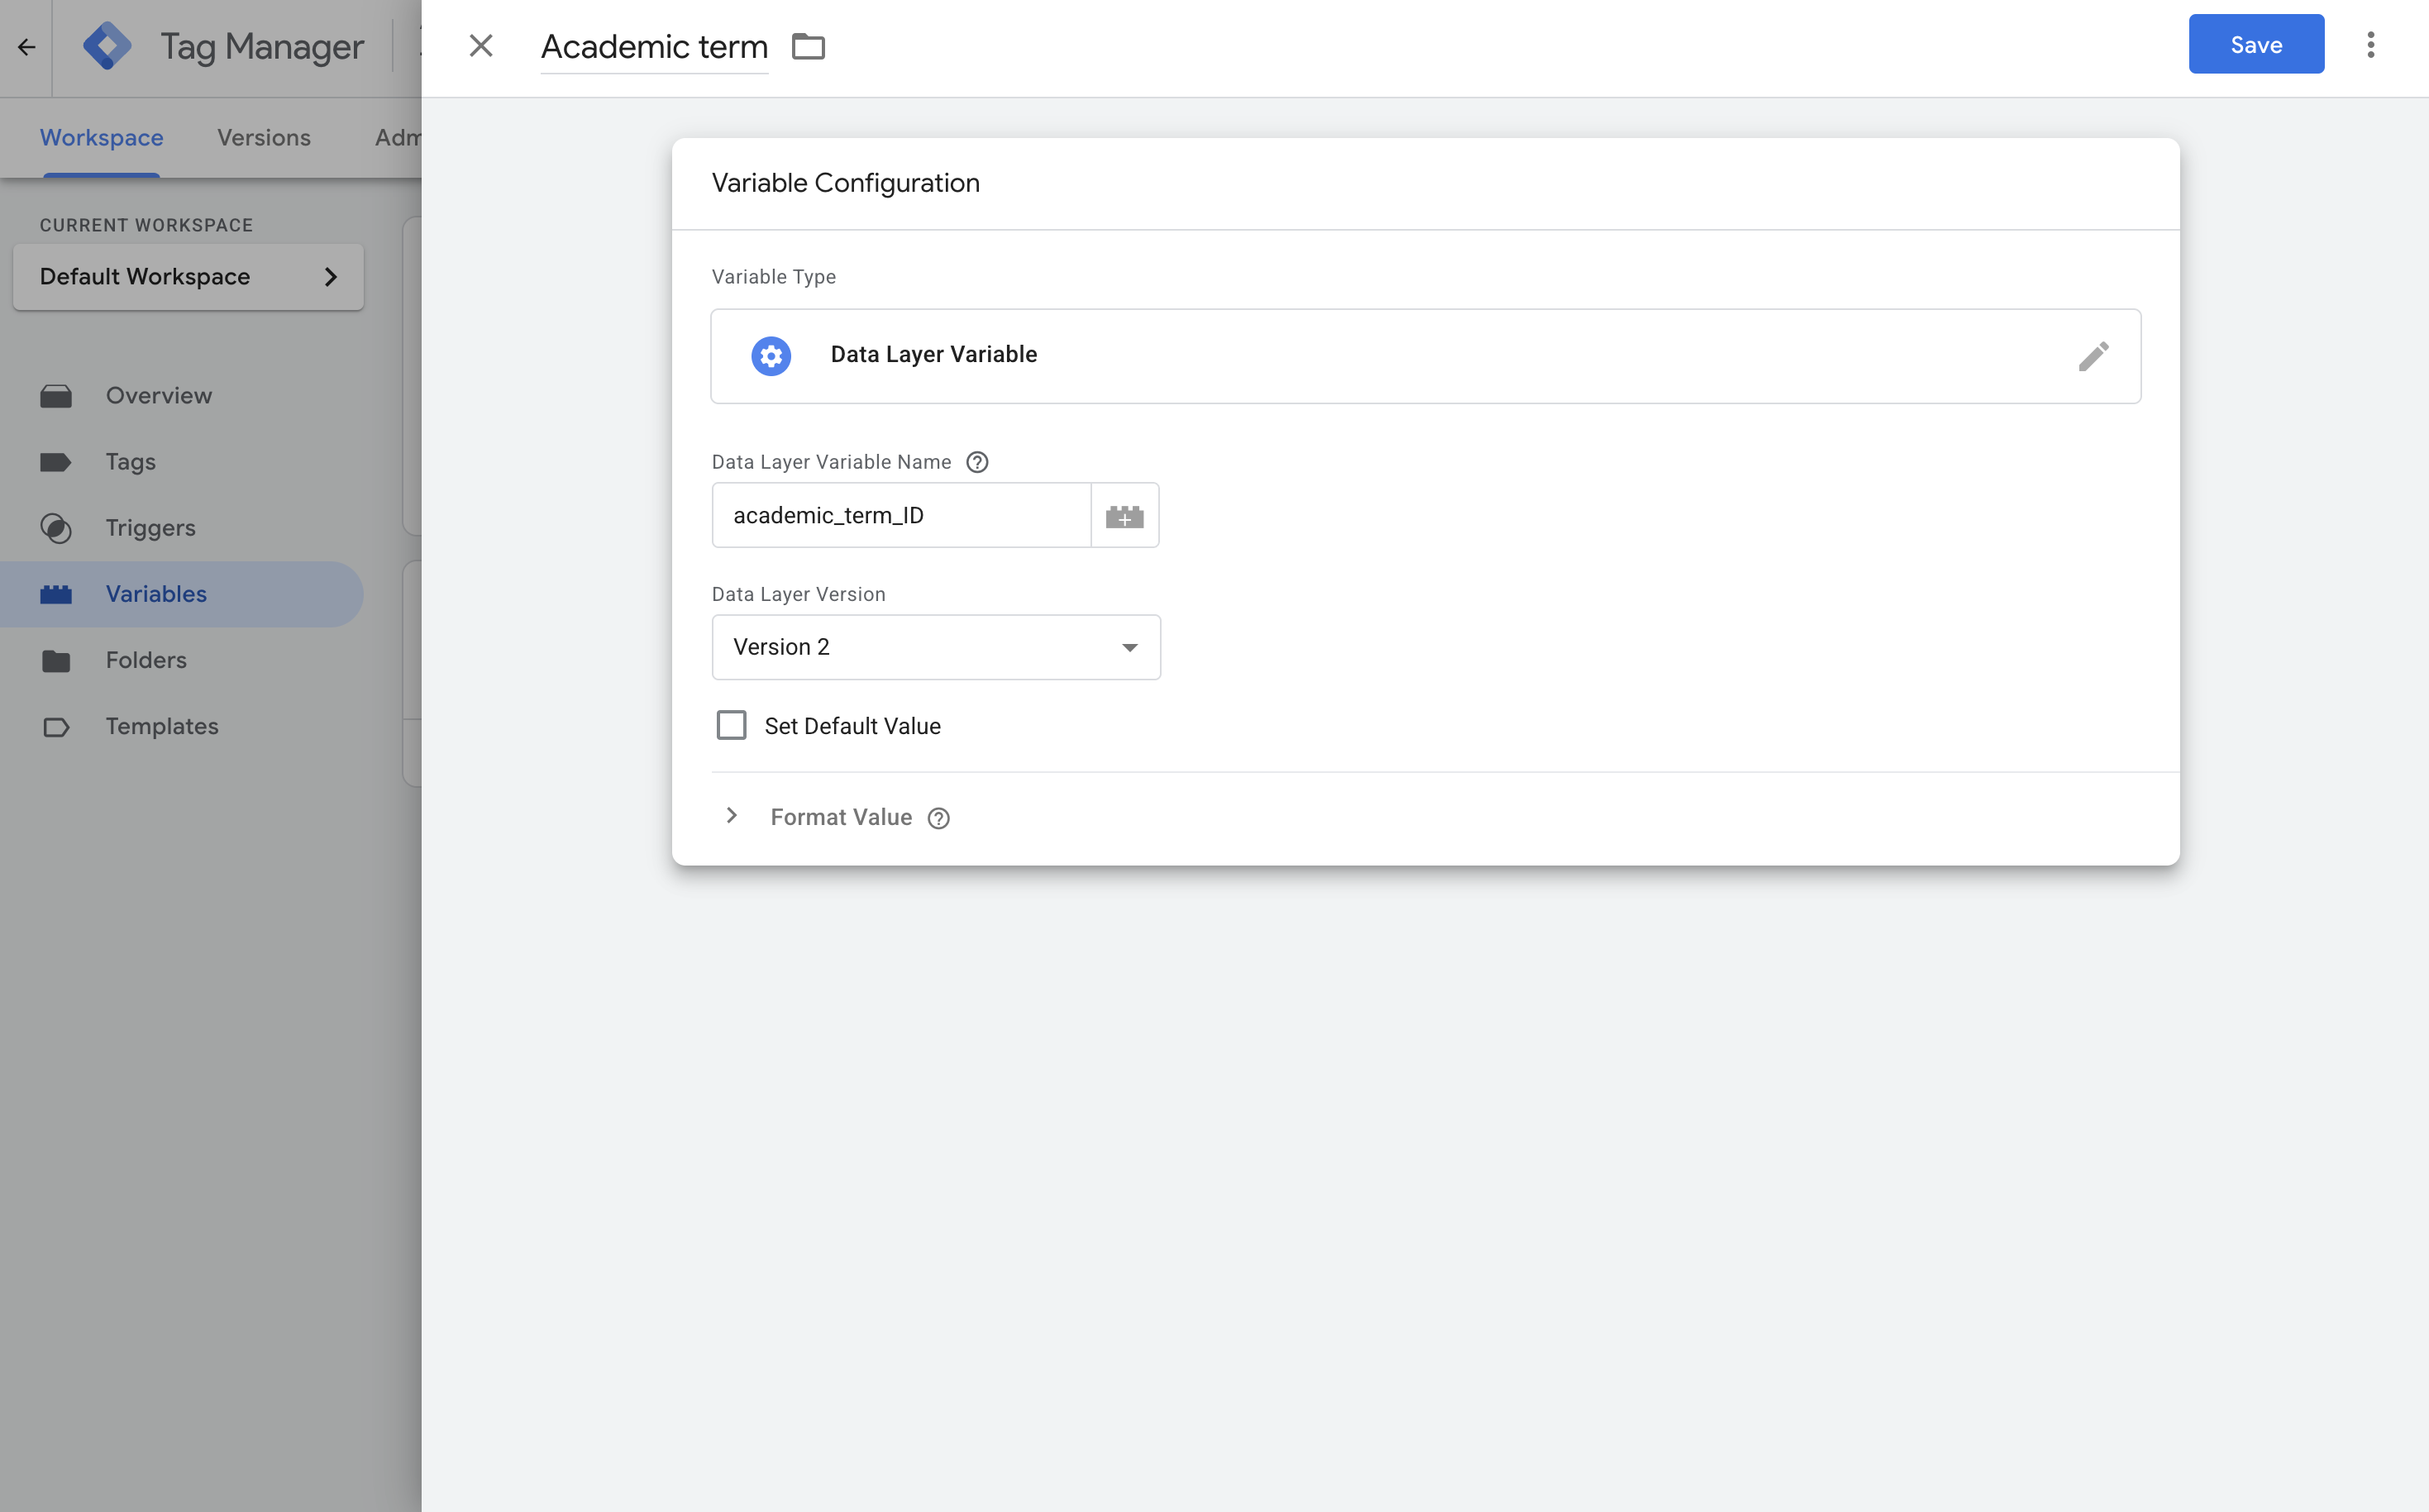
In Google Tag Manager, go to Variables.
Under User-Defined Variables, click New and create a variable with the following settings:
- Variable name: Academic term
- Variable type: Data Layer Variable
- Data Layer Variable Name:
academic_term_ID(must coincide with key name passed by DreamApply)
In the top right corner, click Save.
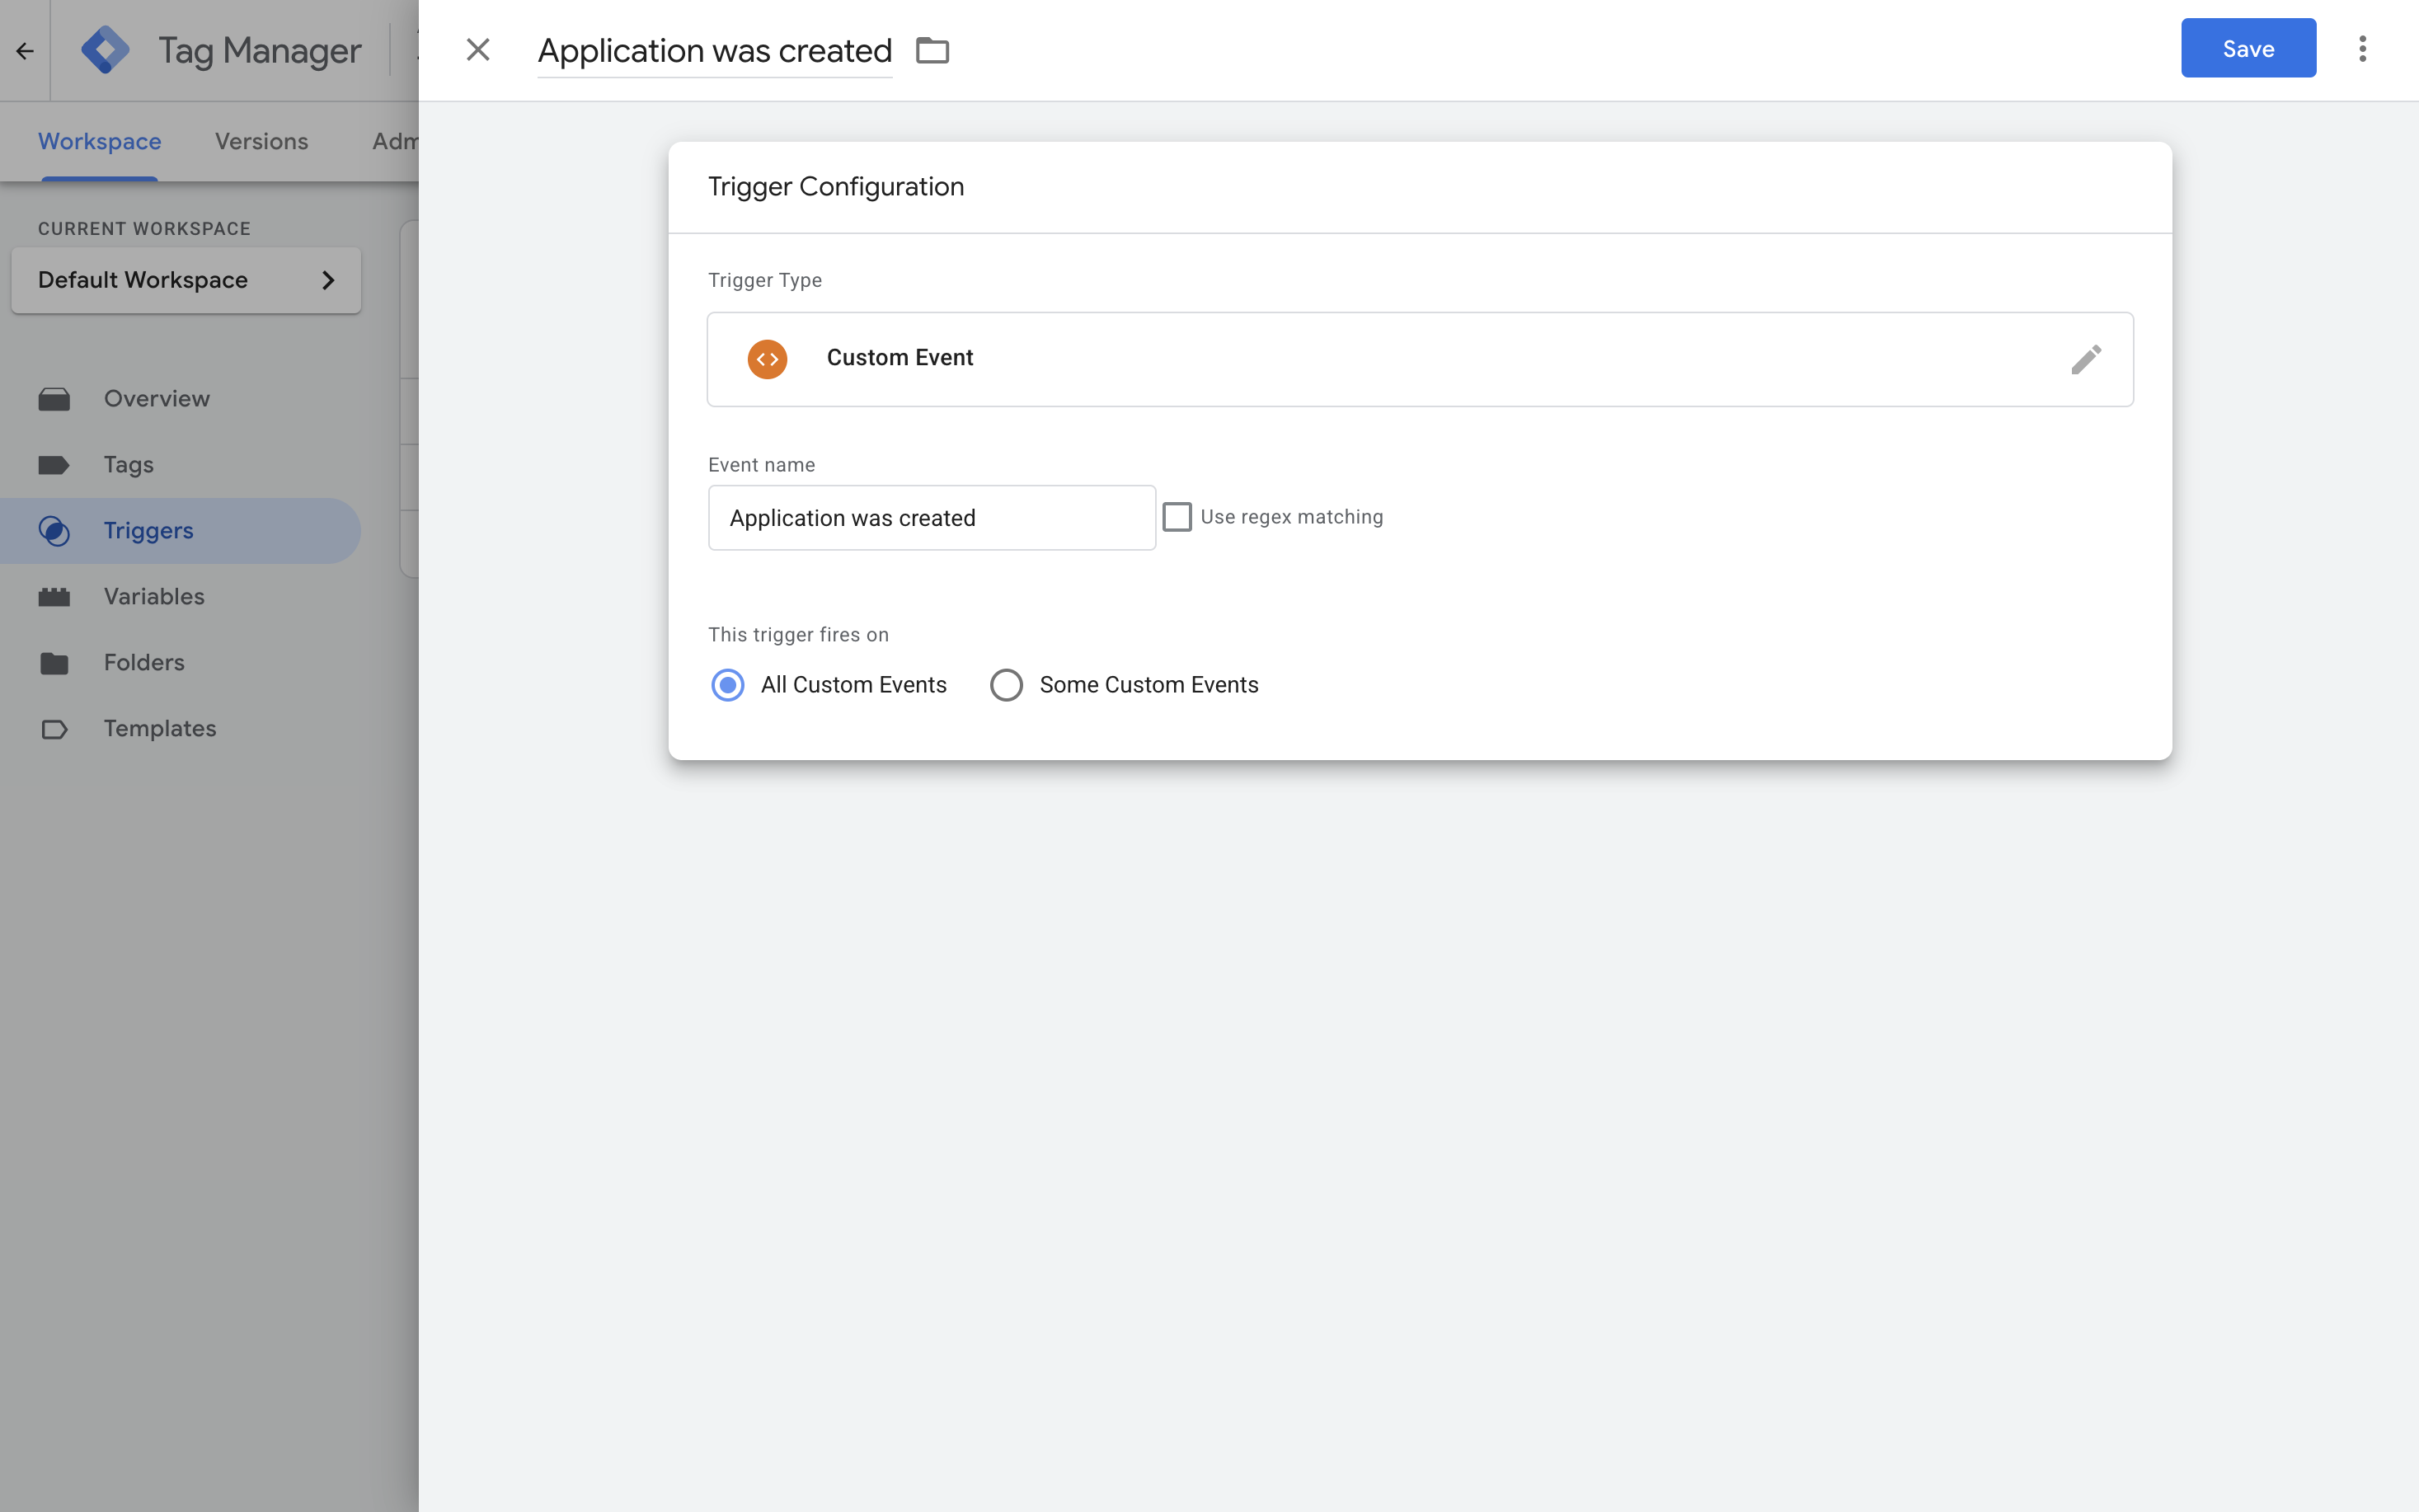
Step 3. Create custom triggers for application events
For each application event, we need to create a custom trigger. These triggers will fire tags when the matching events appear in the data layer.
For each event, do the following:
In Google Tag Manager, go to Triggers.
Click New and create a trigger with the following settings:
- Trigger name:
Application was created(must coincide with event name passed by DreamApply) - Trigger type: Custom Event
- Trigger fires on: All Custom Events
- Trigger name:
In the top right corner, click Save.
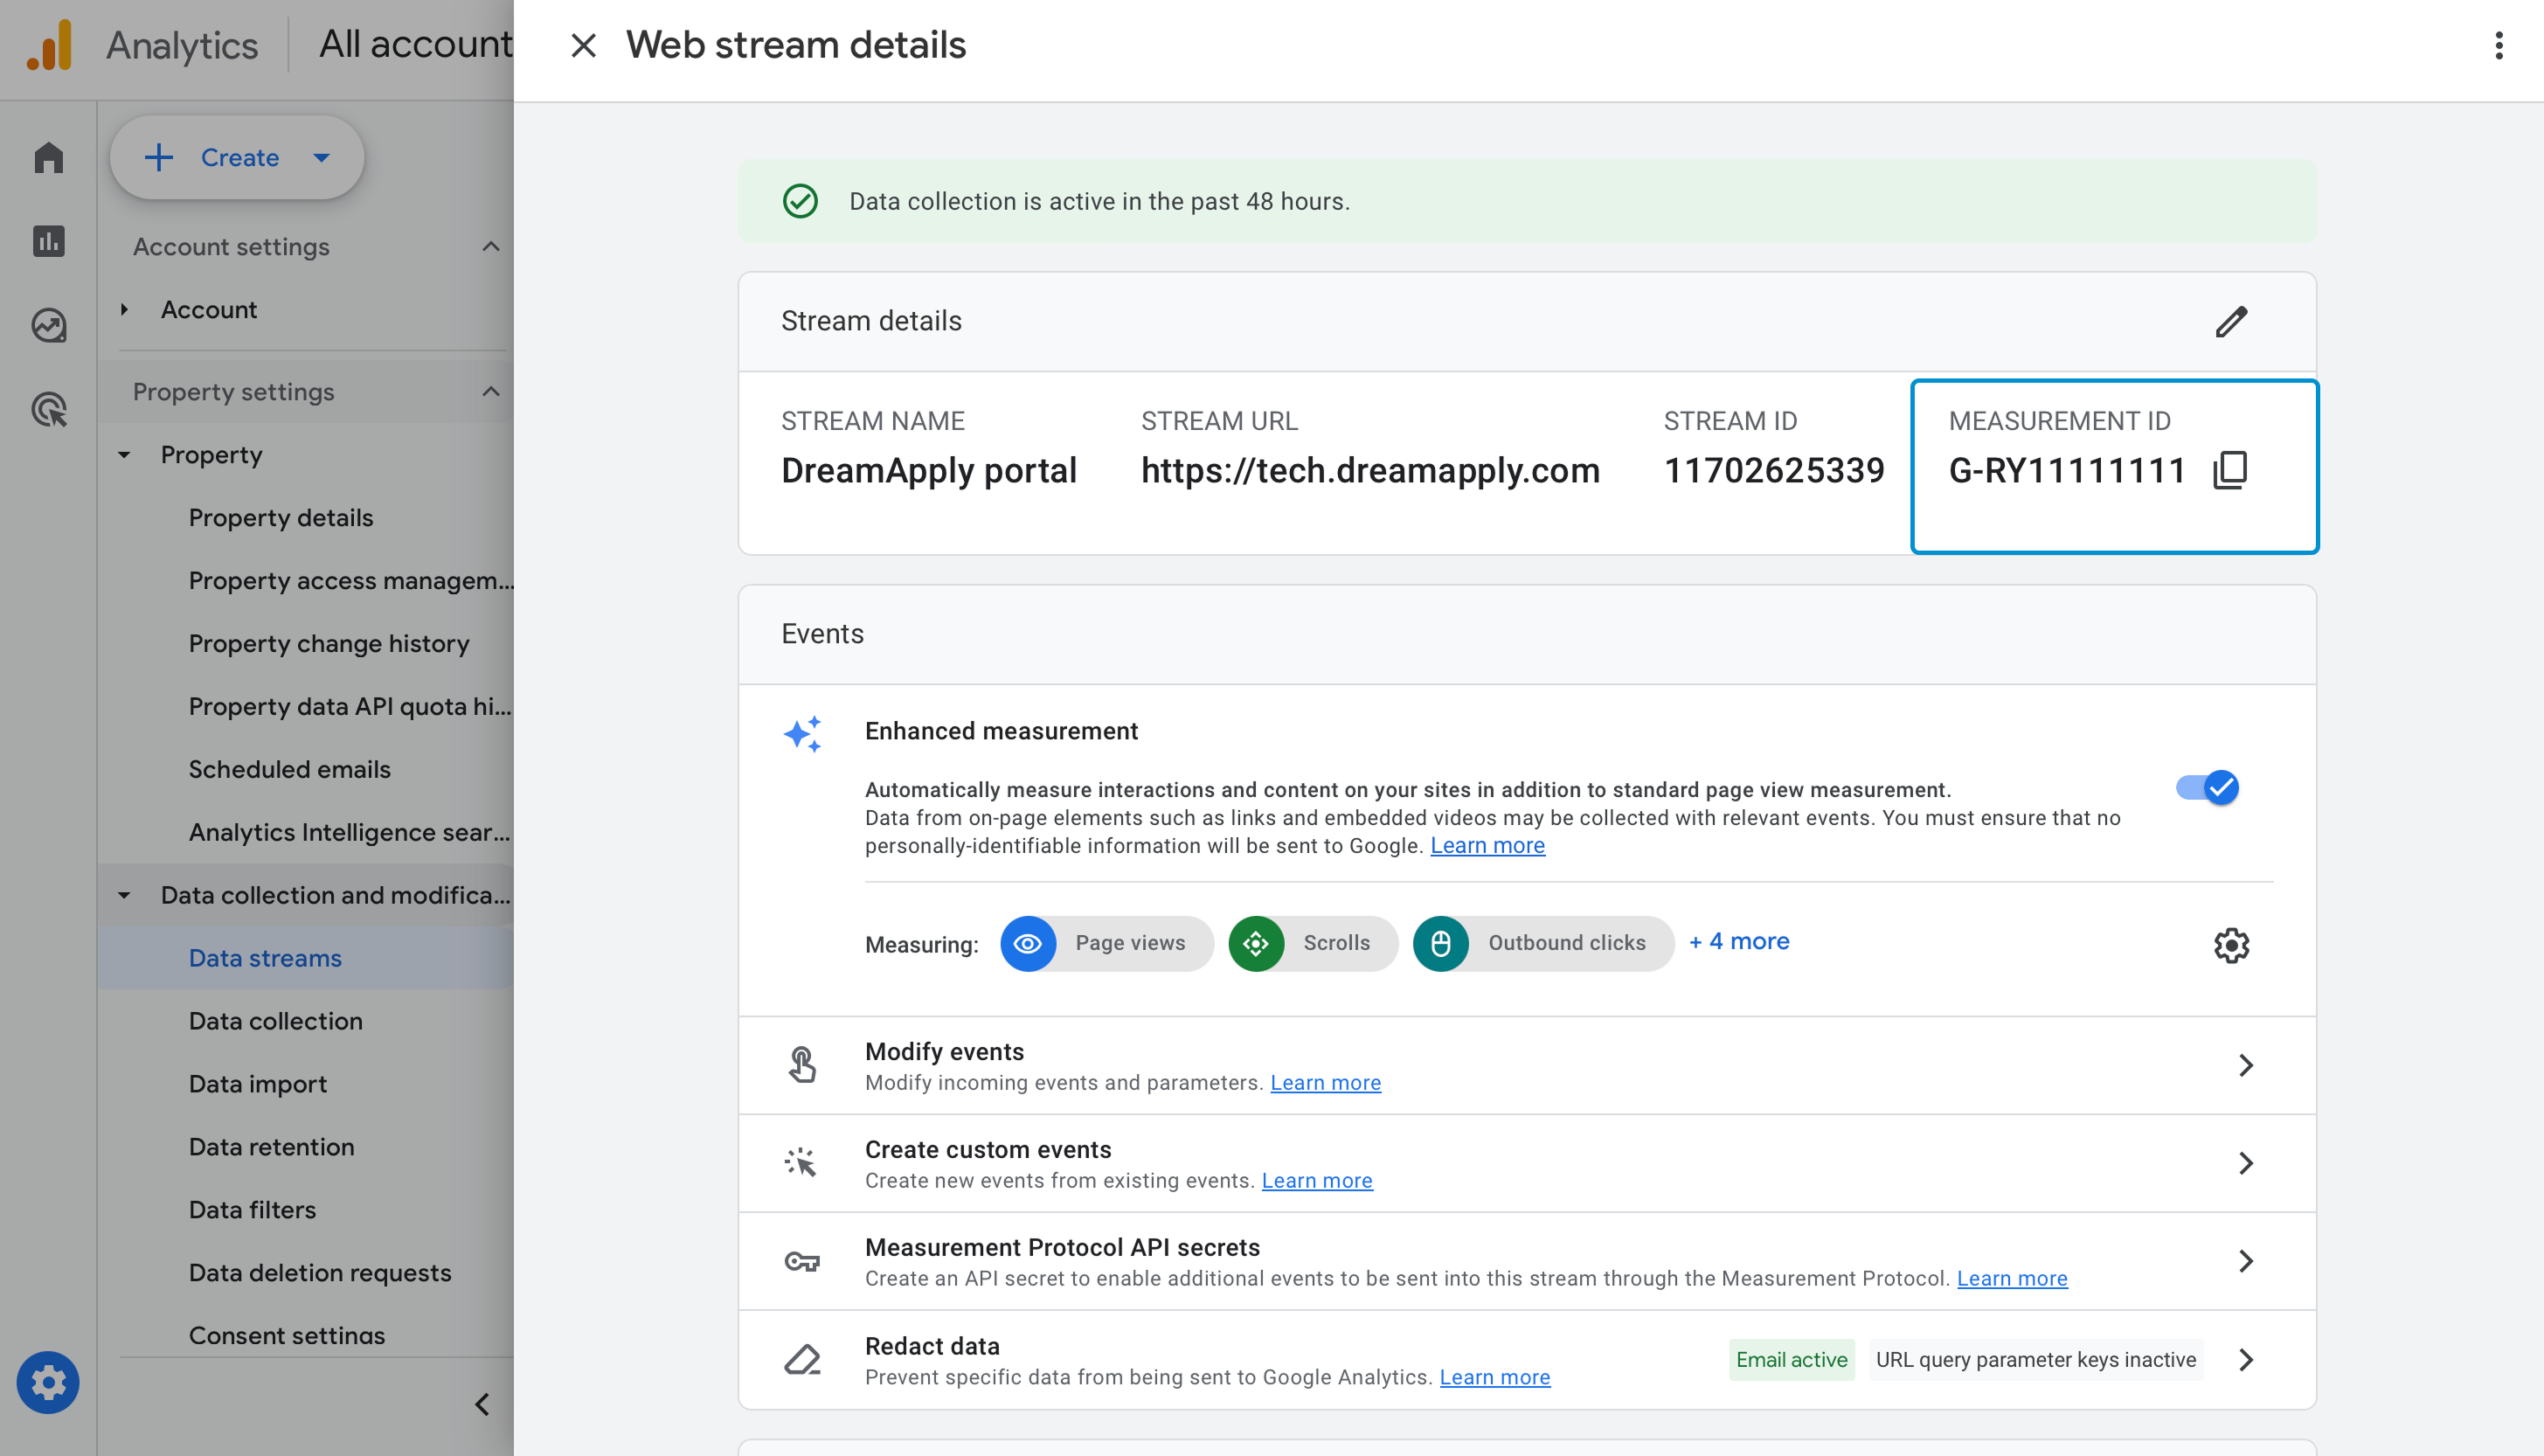
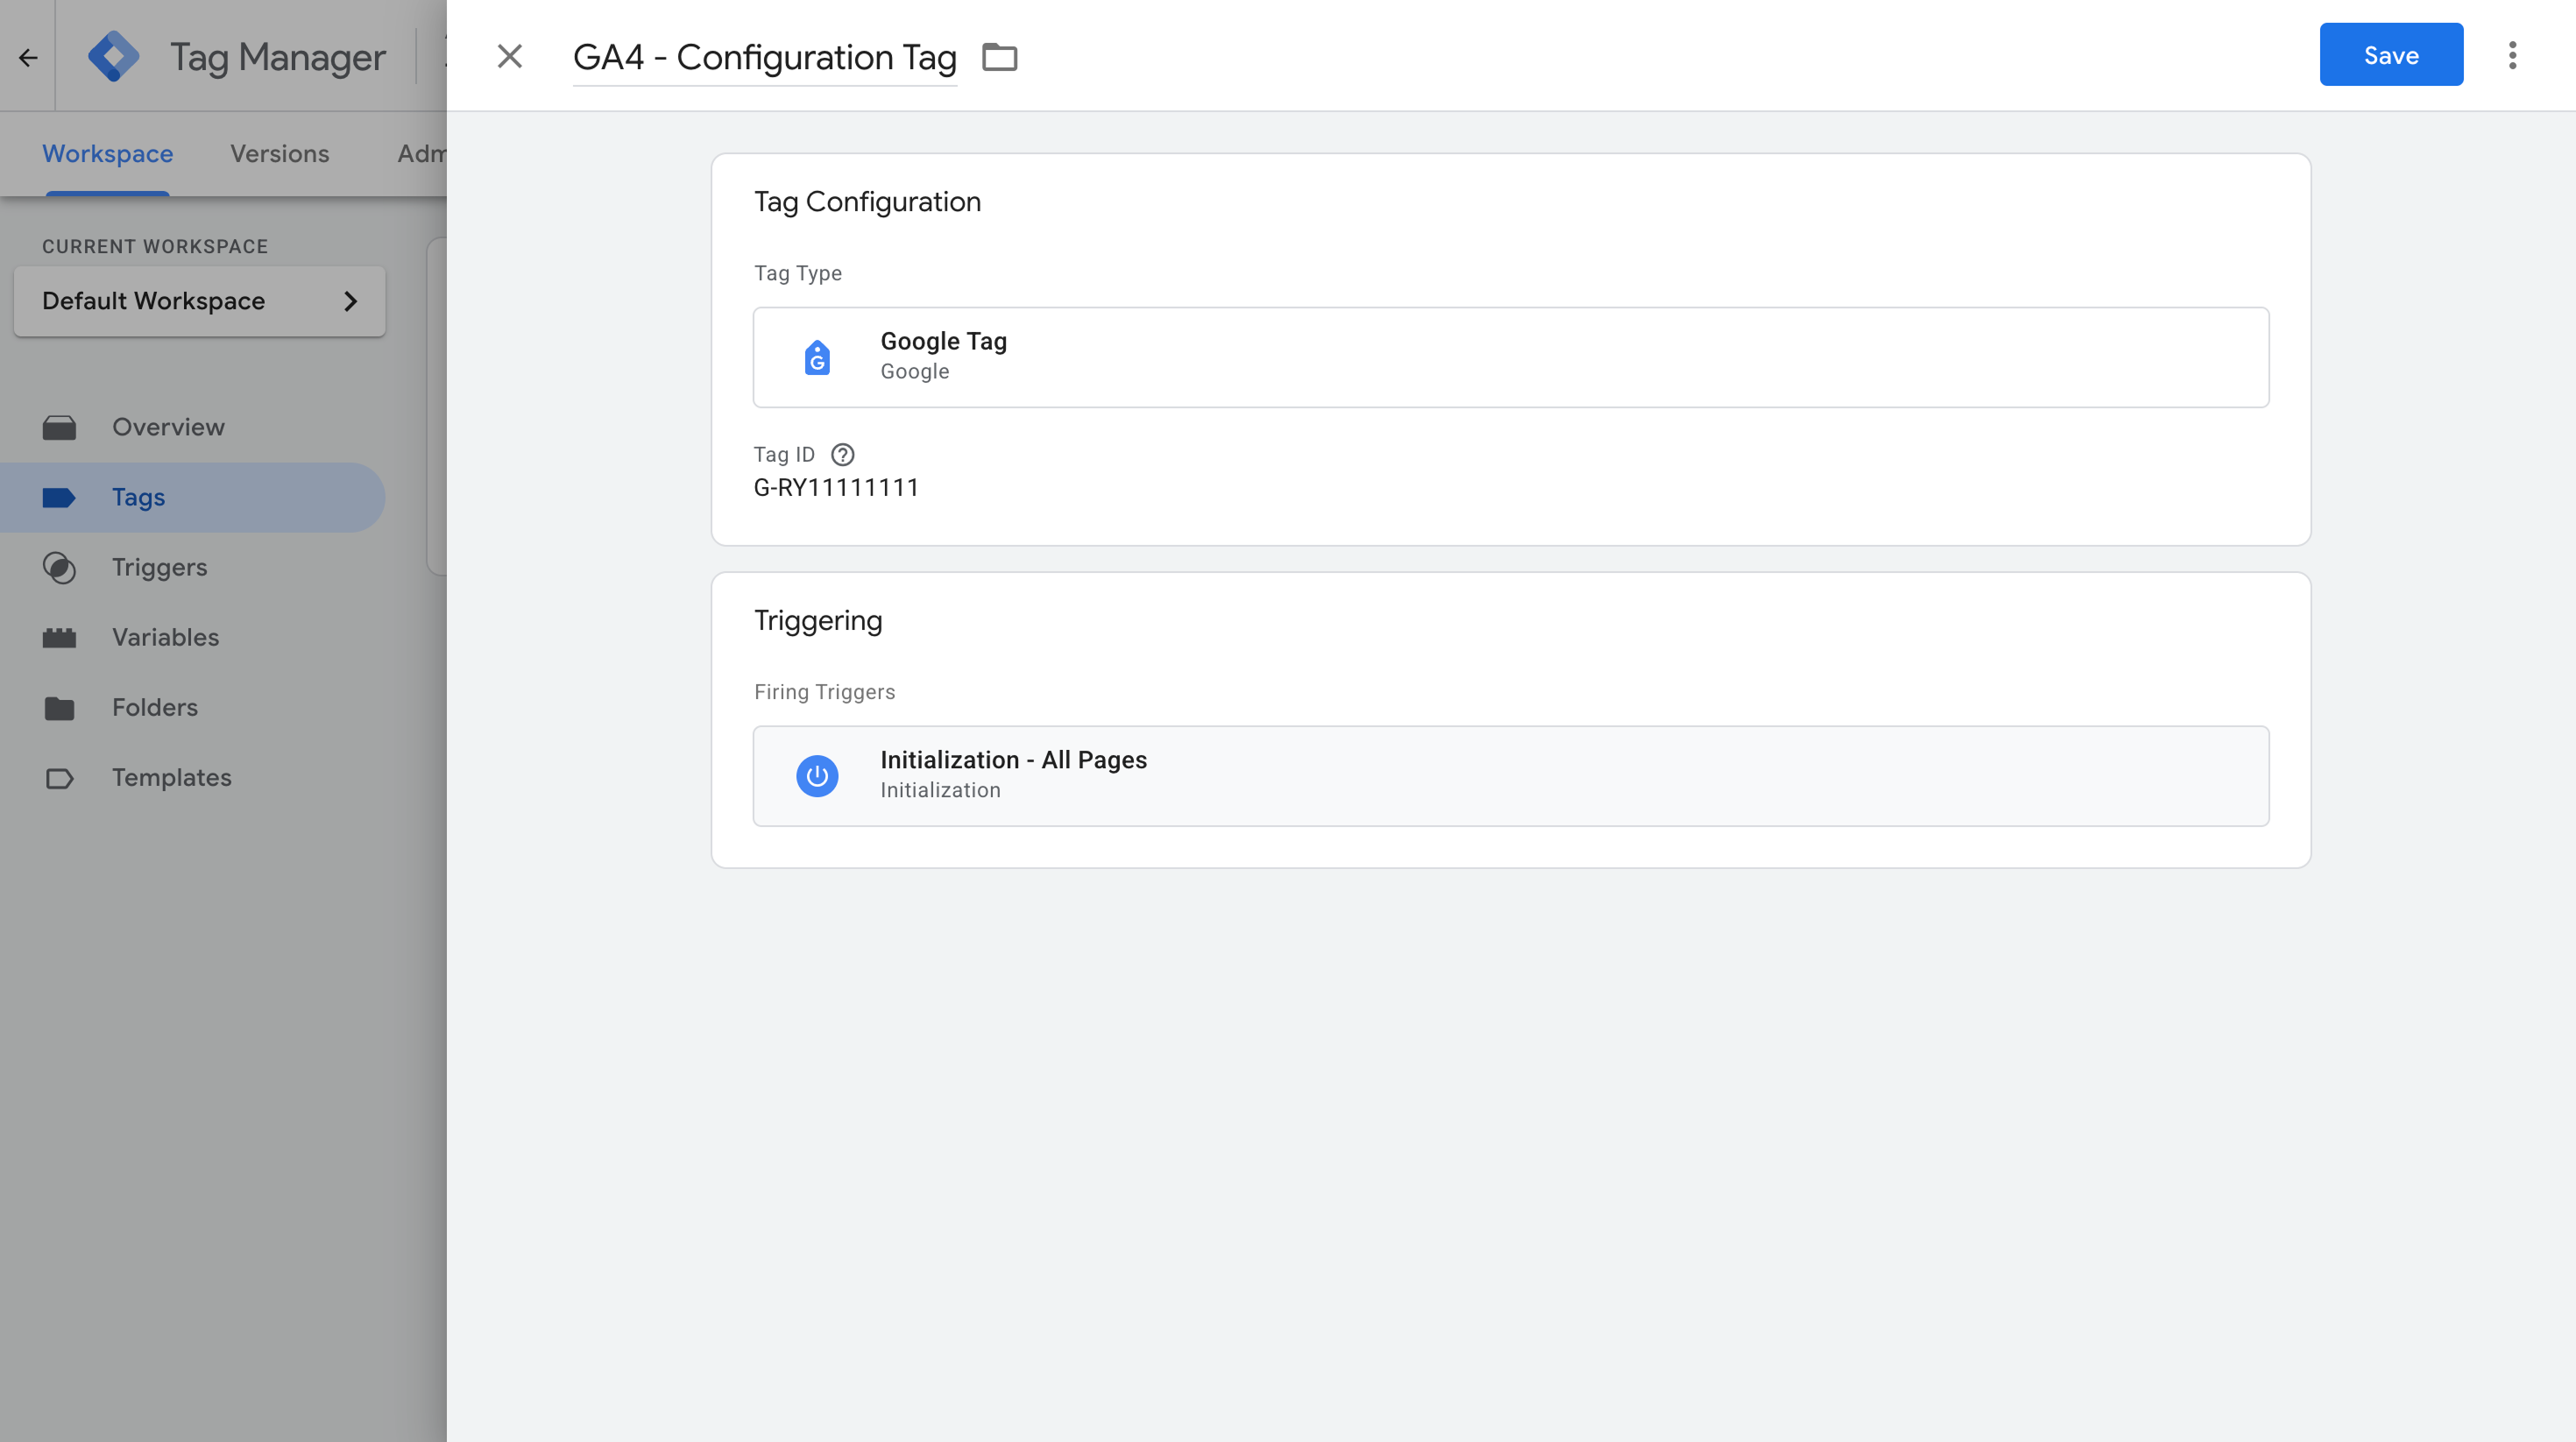
Step 4. Set up the GA4 configuration tag
We need to connect Google Tag Manager to a GA4 property. This step is required to send the reporting data from Google Tag Manager to Google Analytics.
In Google Analytics, locate and copy the Measurement ID for your data stream. For details, see Measurement ID in the Google documentation.
In Google Tag Manager, go to Tags.
Click New and create a tag with the following settings:
- Tag name: GA4 - Configuration
- Tag type: Google Analytics > Google Tag (Load the Google tag associated with your Google Analytics stream)
- Tag ID: The Measurement ID of your data stream in Google Analytics
- Triggering: Initialization - All Pages
In the top right corner, click Save.
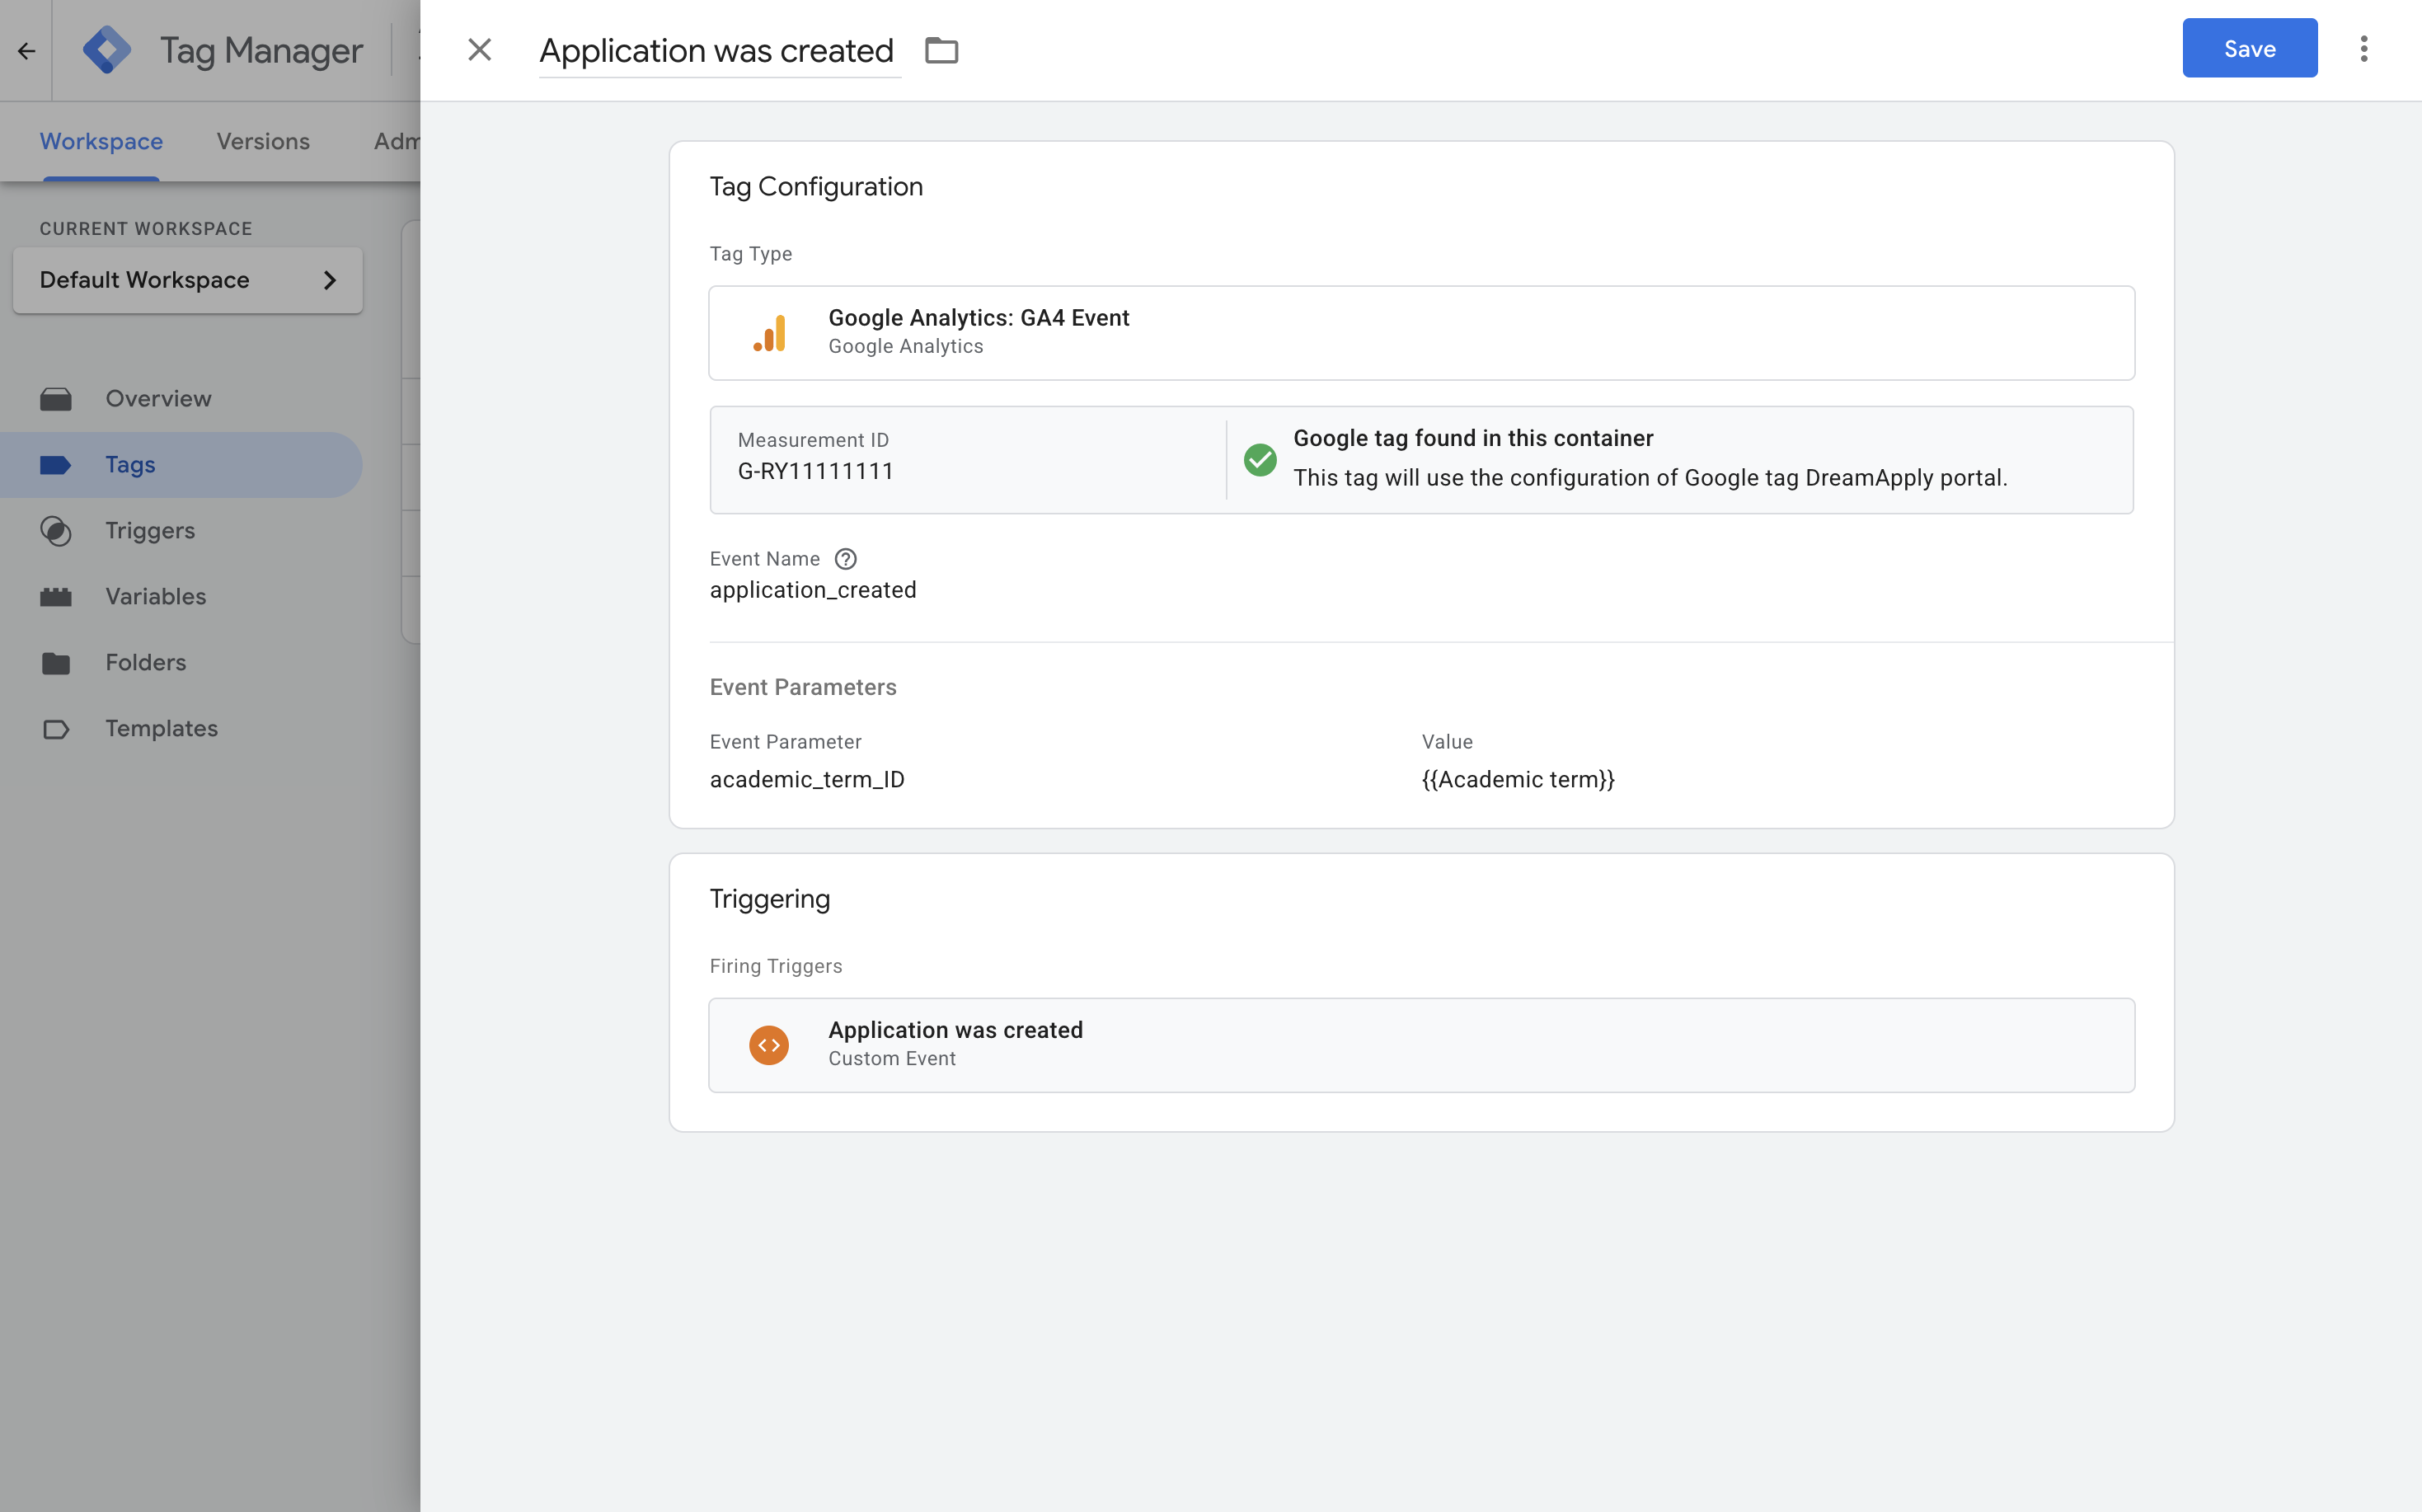
Step 5. Create a GA4 event tag
For each application event, we need to set up a GA4 event tag and pass the necessary parameters to it. These GA4 tags will fire on application events and send information about these events to Google Analytics.
For each event, do the following:
In Google Tag Manager, go to Tags.
Click New and create a tag with the following settings:
- Tag name: Application was created
- Tag type: Google Analytics > GA4 Event
- Measurement ID: The Measurement ID of your data stream in Google Analytics
- Event name:
application_created - Event parameters:
academic_term_ID-{{Academic term}} - Triggering:
Application was createdtrigger created in step 3
In the top right corner, click Save.
Step 6. Publish the GTM container
Once the tags are set up, we can publish the GTM container. In Google Tag Manager, click Submit, provide a version name and description and click Publish.
Step 7. Test and analyze event data
Now, we can test the setup and verify the event data is collected correctly.
- Open the DreamApply portal in a new browser window using Incognito mode.
- Log in as an applicant and perform several actions on applications: create, submit and withdraw them.
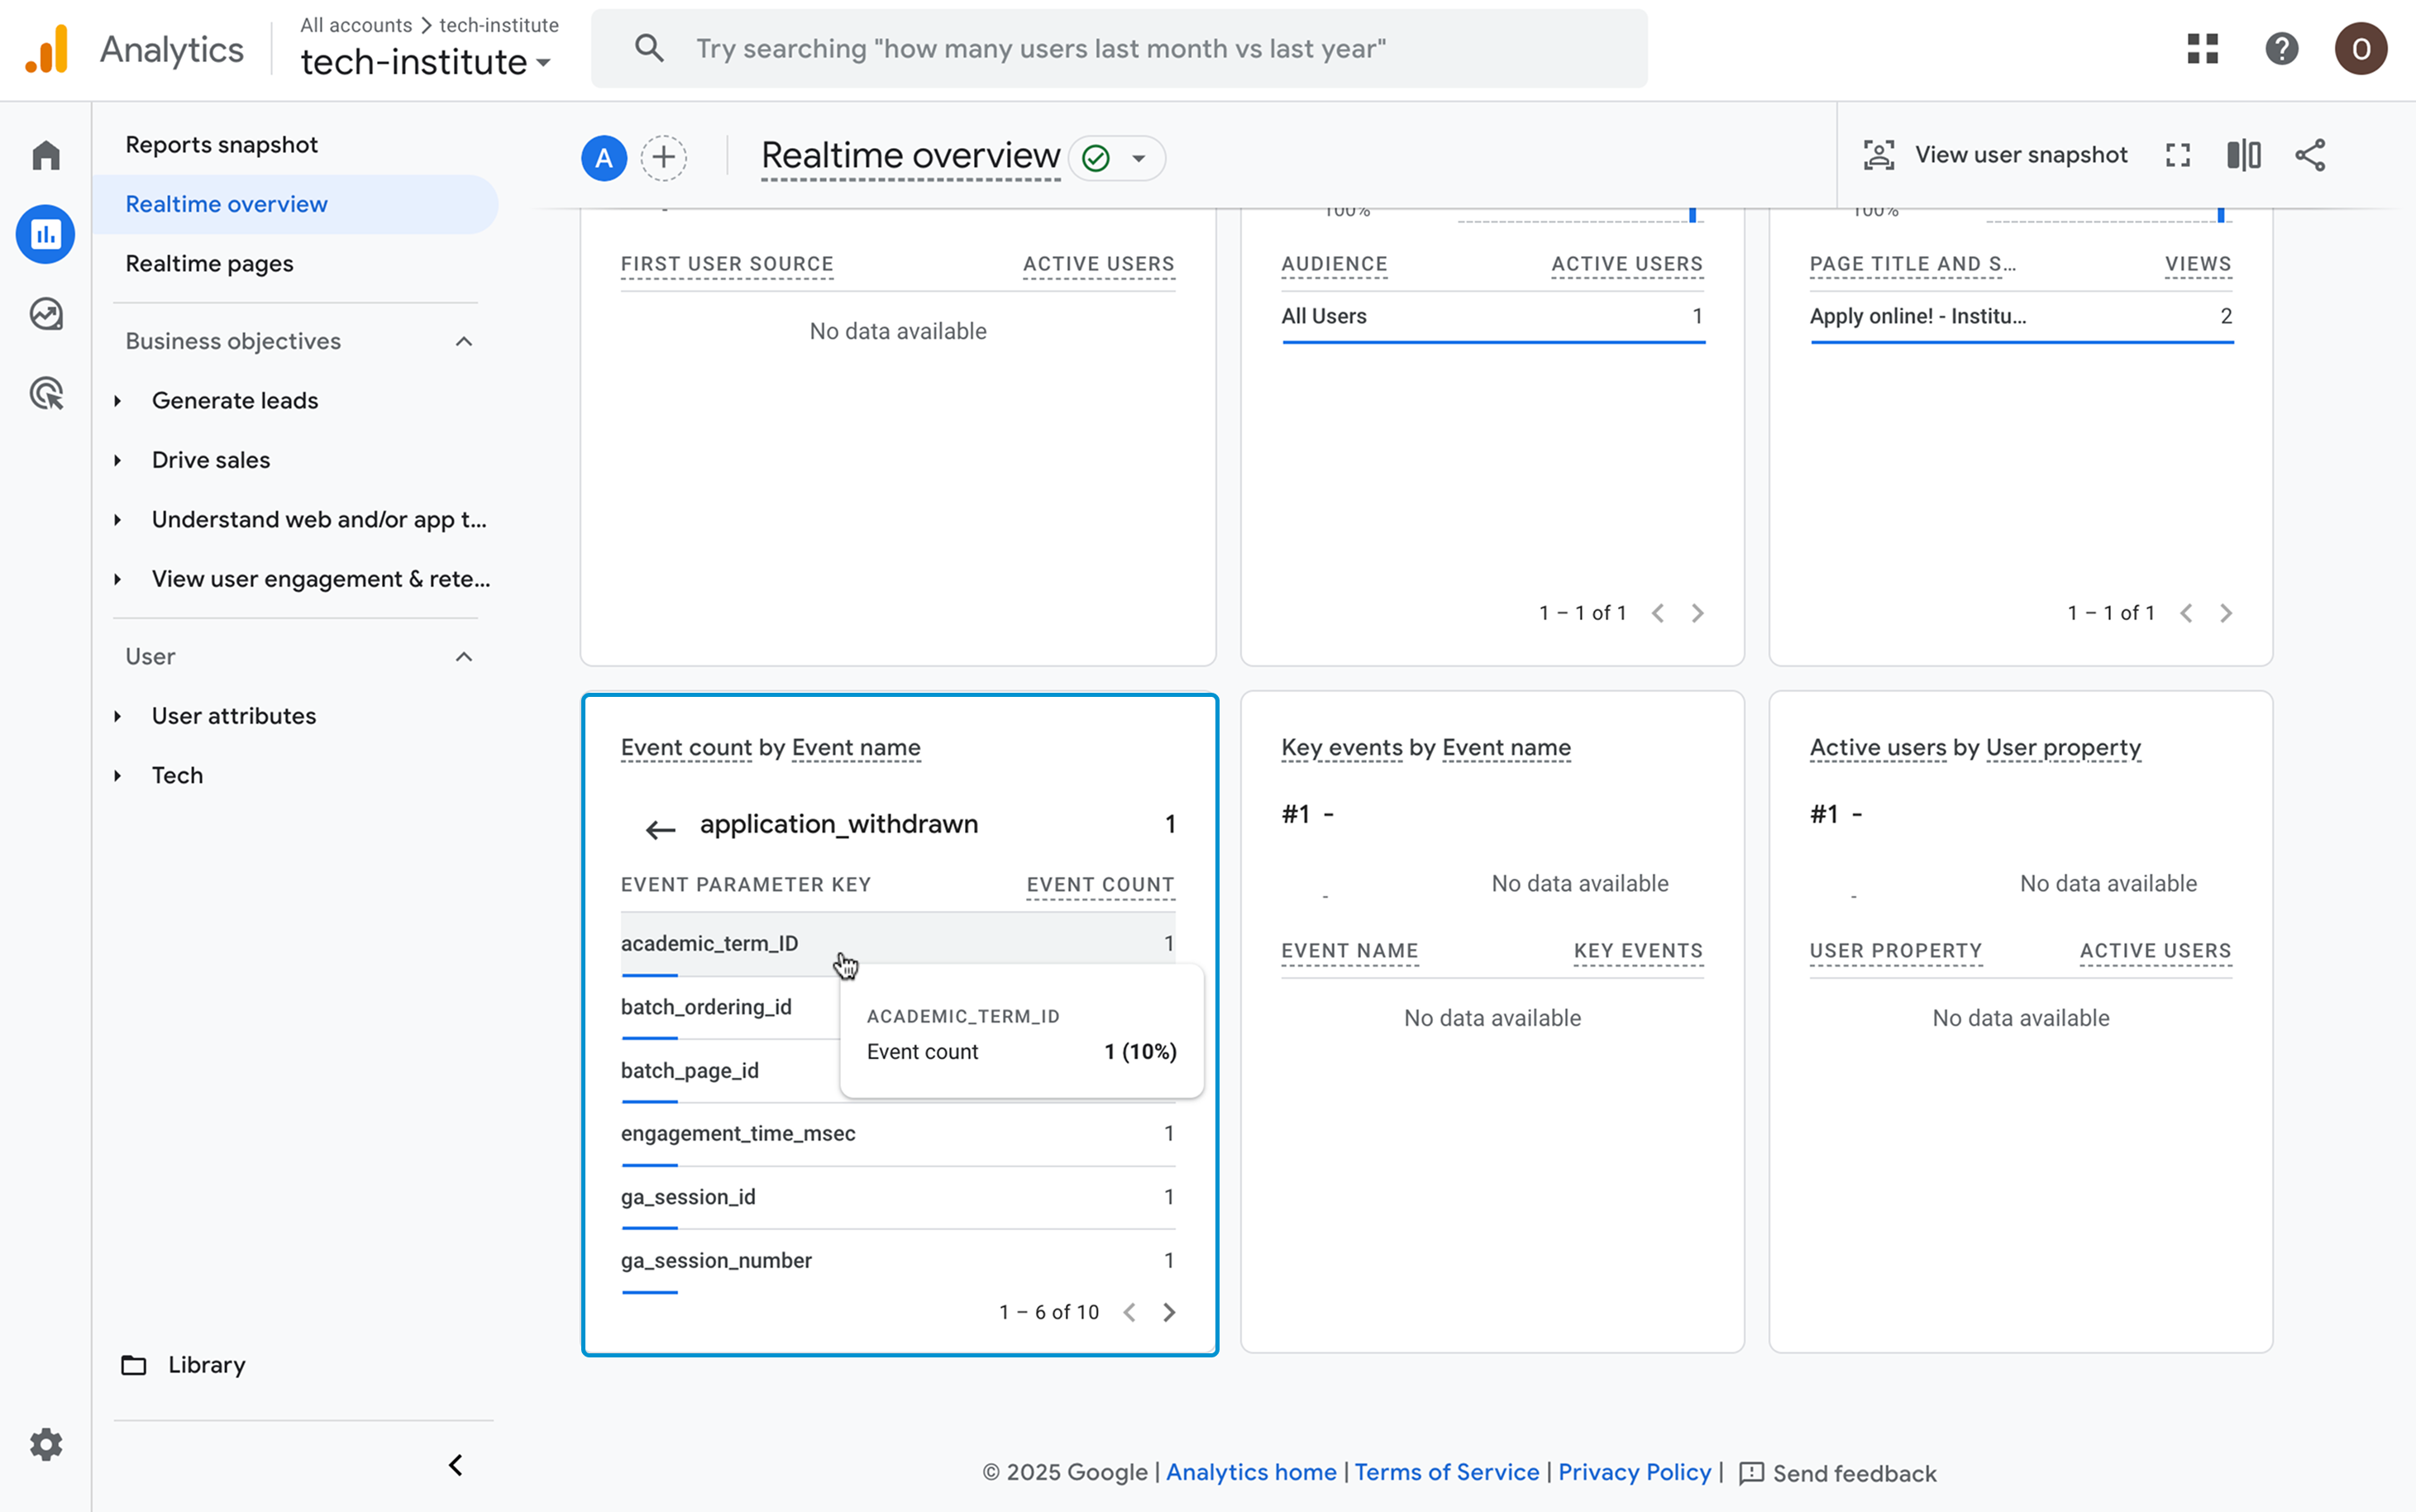
- In Google Analytics, open Realtime overview and check the Event count widget.
- Look for the events named
application_created,application_submitted,application_withdrawn. Click it to drill down into the event parameters.
Step 8. Create a custom report
To analyze long-term data, we can set up a custom report in Google Analytics. The report will show a list of application events grouped by academic term.
Realtime reports in Google Analytics are available immediately. Standard reports and custom definitions may take up to 24-48 hours to begin displaying data after initial setup. For details, see Data freshness in the Google documentation.
First, we need to register academic_term_ID as a custom definition in Google Analytics. This will allow us to use the academic term as a data dimension in the report.
In Google Analytics, in the bottom left corner, go to Admin.
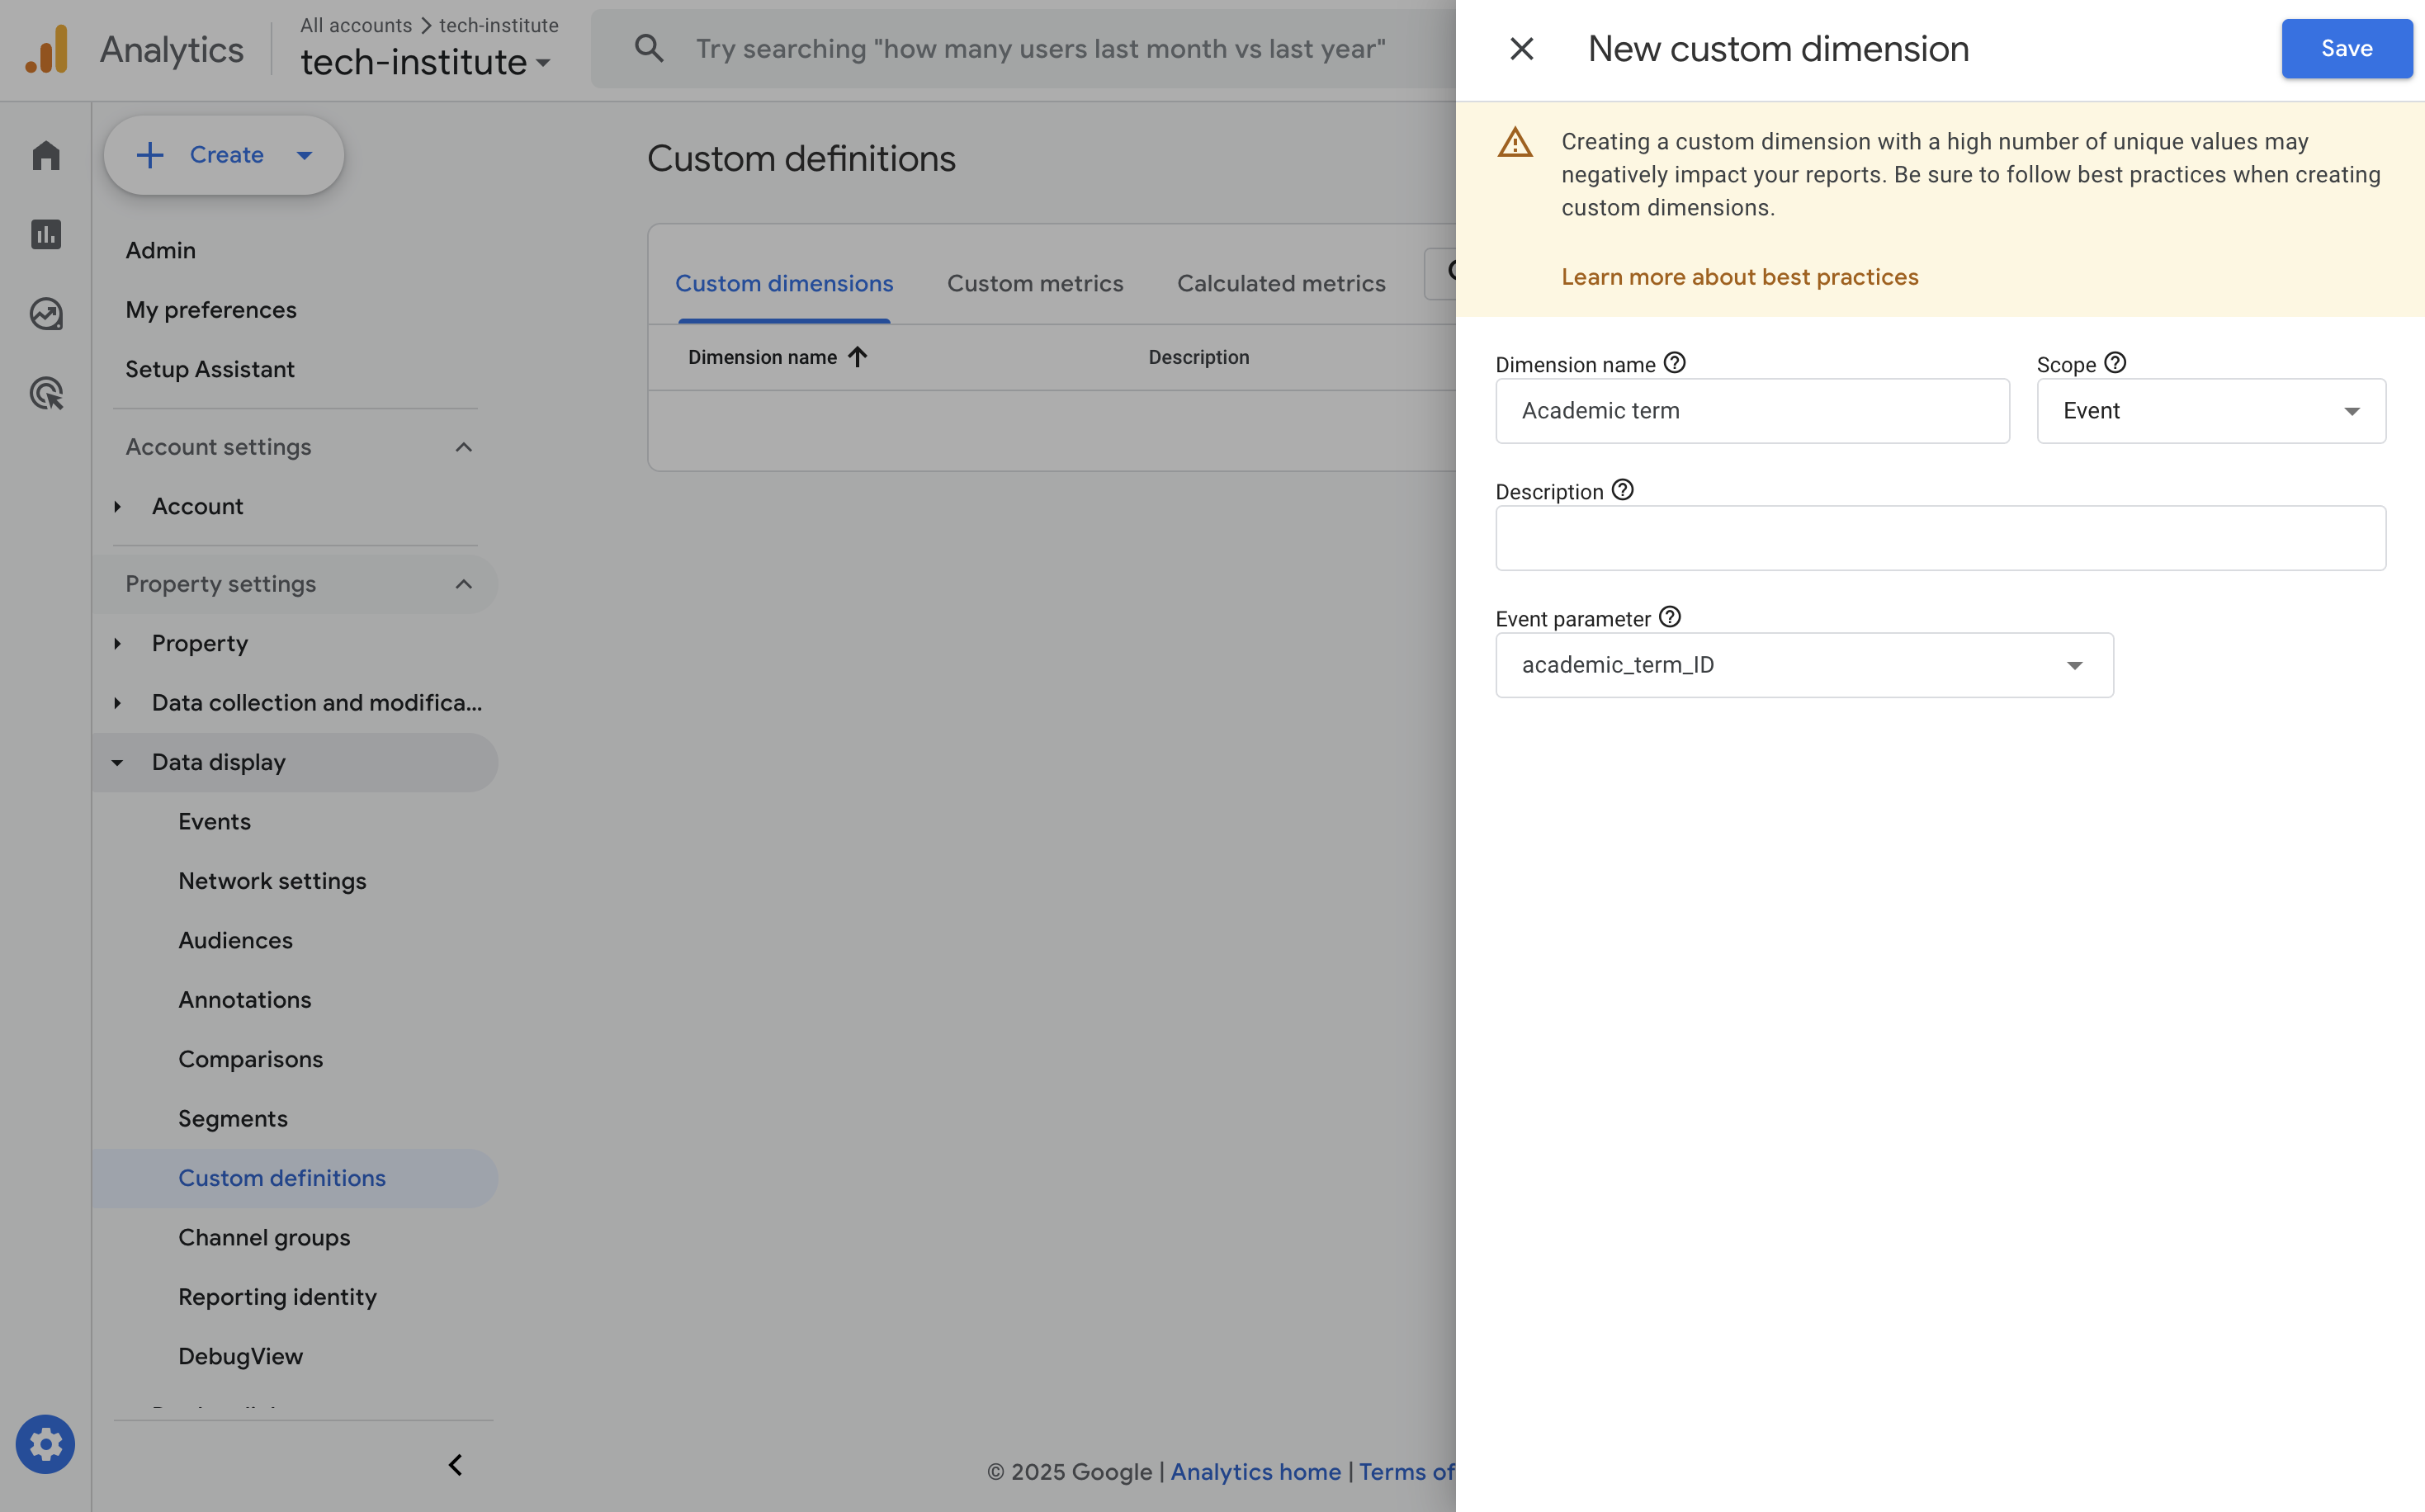
Under Data display, select Custom definitions and create a dimension with the following settings:
- Dimension name: Academic term
- Scope: Event
- Event parameter:
academic_term_ID(must coincide with the data layer variable name set in step 2)
In the top right corner, click Save.
Next, we can create a report in Google Analytics.
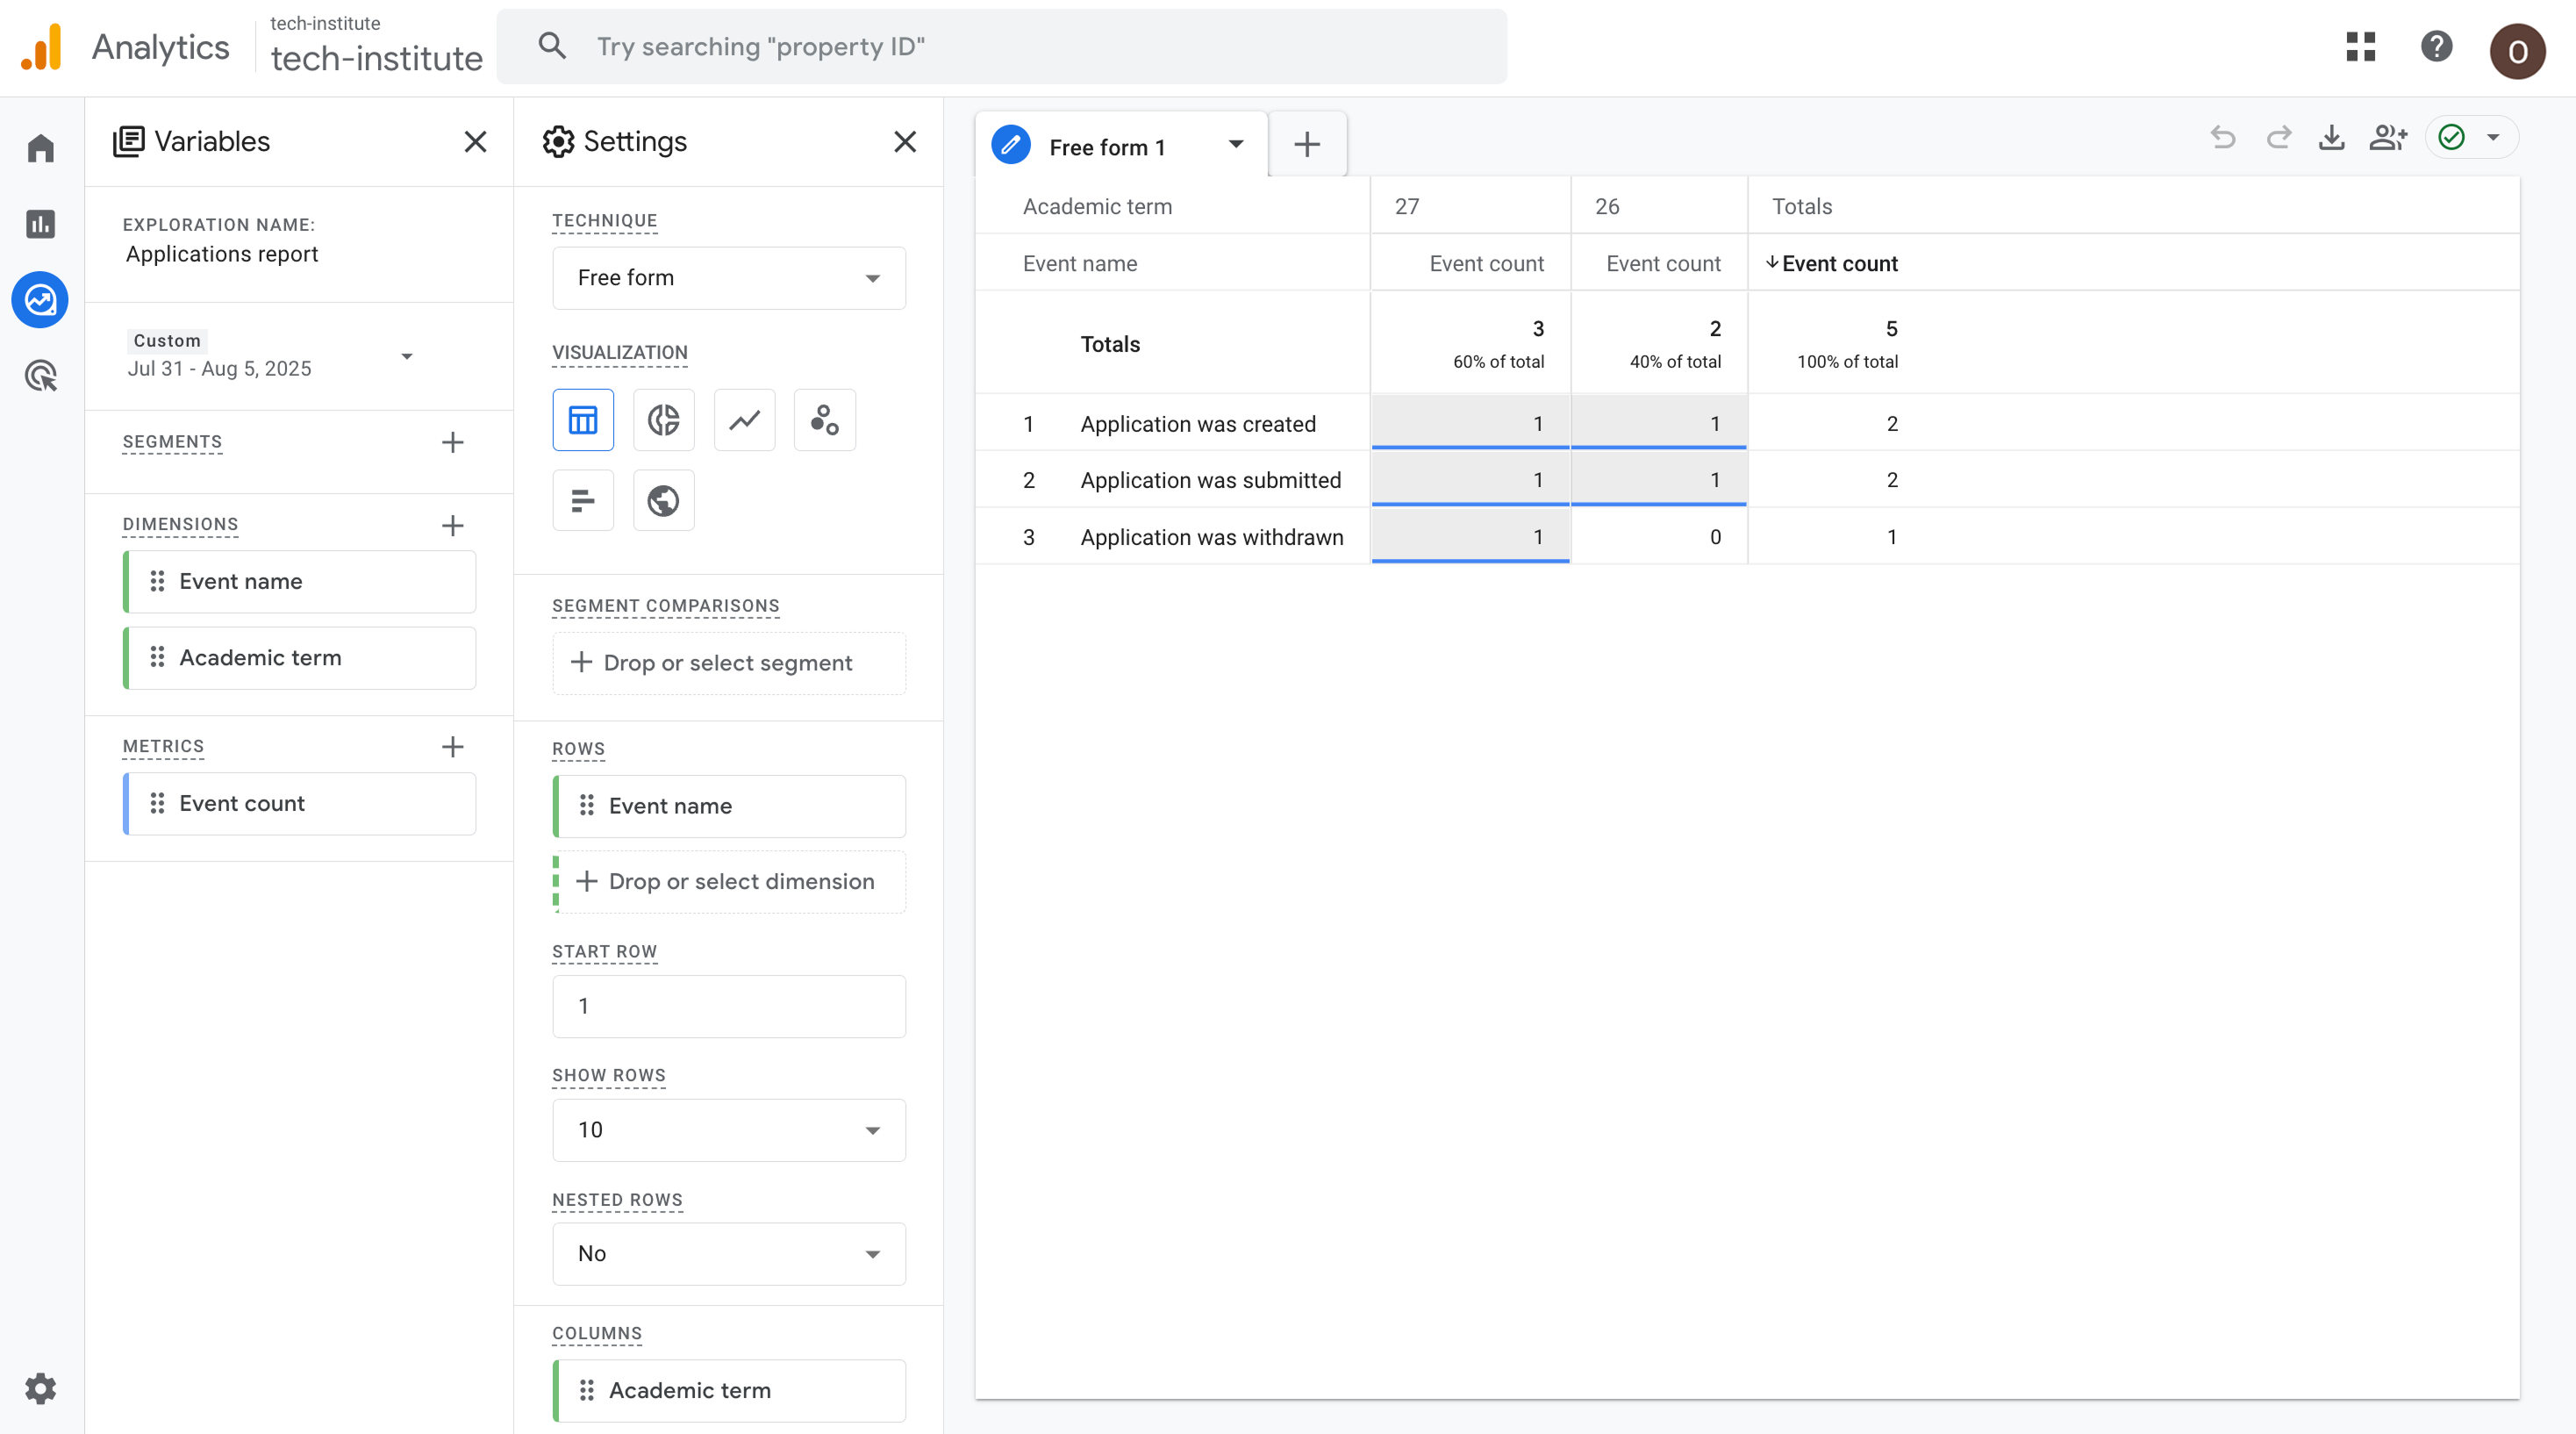
In Google Analytics, go to Explore and select Blank.
In the left pane, under Variables > Dimensions, add:
- Event name
- Academic term
Under Metrics, add Event count.
In the Settings tab (middle section), add:
- Rows: Event name
- Columns: Academic term
- Filters: Event name contains
Application - Values: Event count