How to set up Matomo tags
Roles
These roles reflect the default DreamApply setup.
You can define custom roles based on your
institution's needs. Learn more →:
You can define custom roles based on your
institution's needs. Learn more →
Follow this example to learn how to use Matomo Tag Manager with DreamApply to implement tracking scenarios.
Example
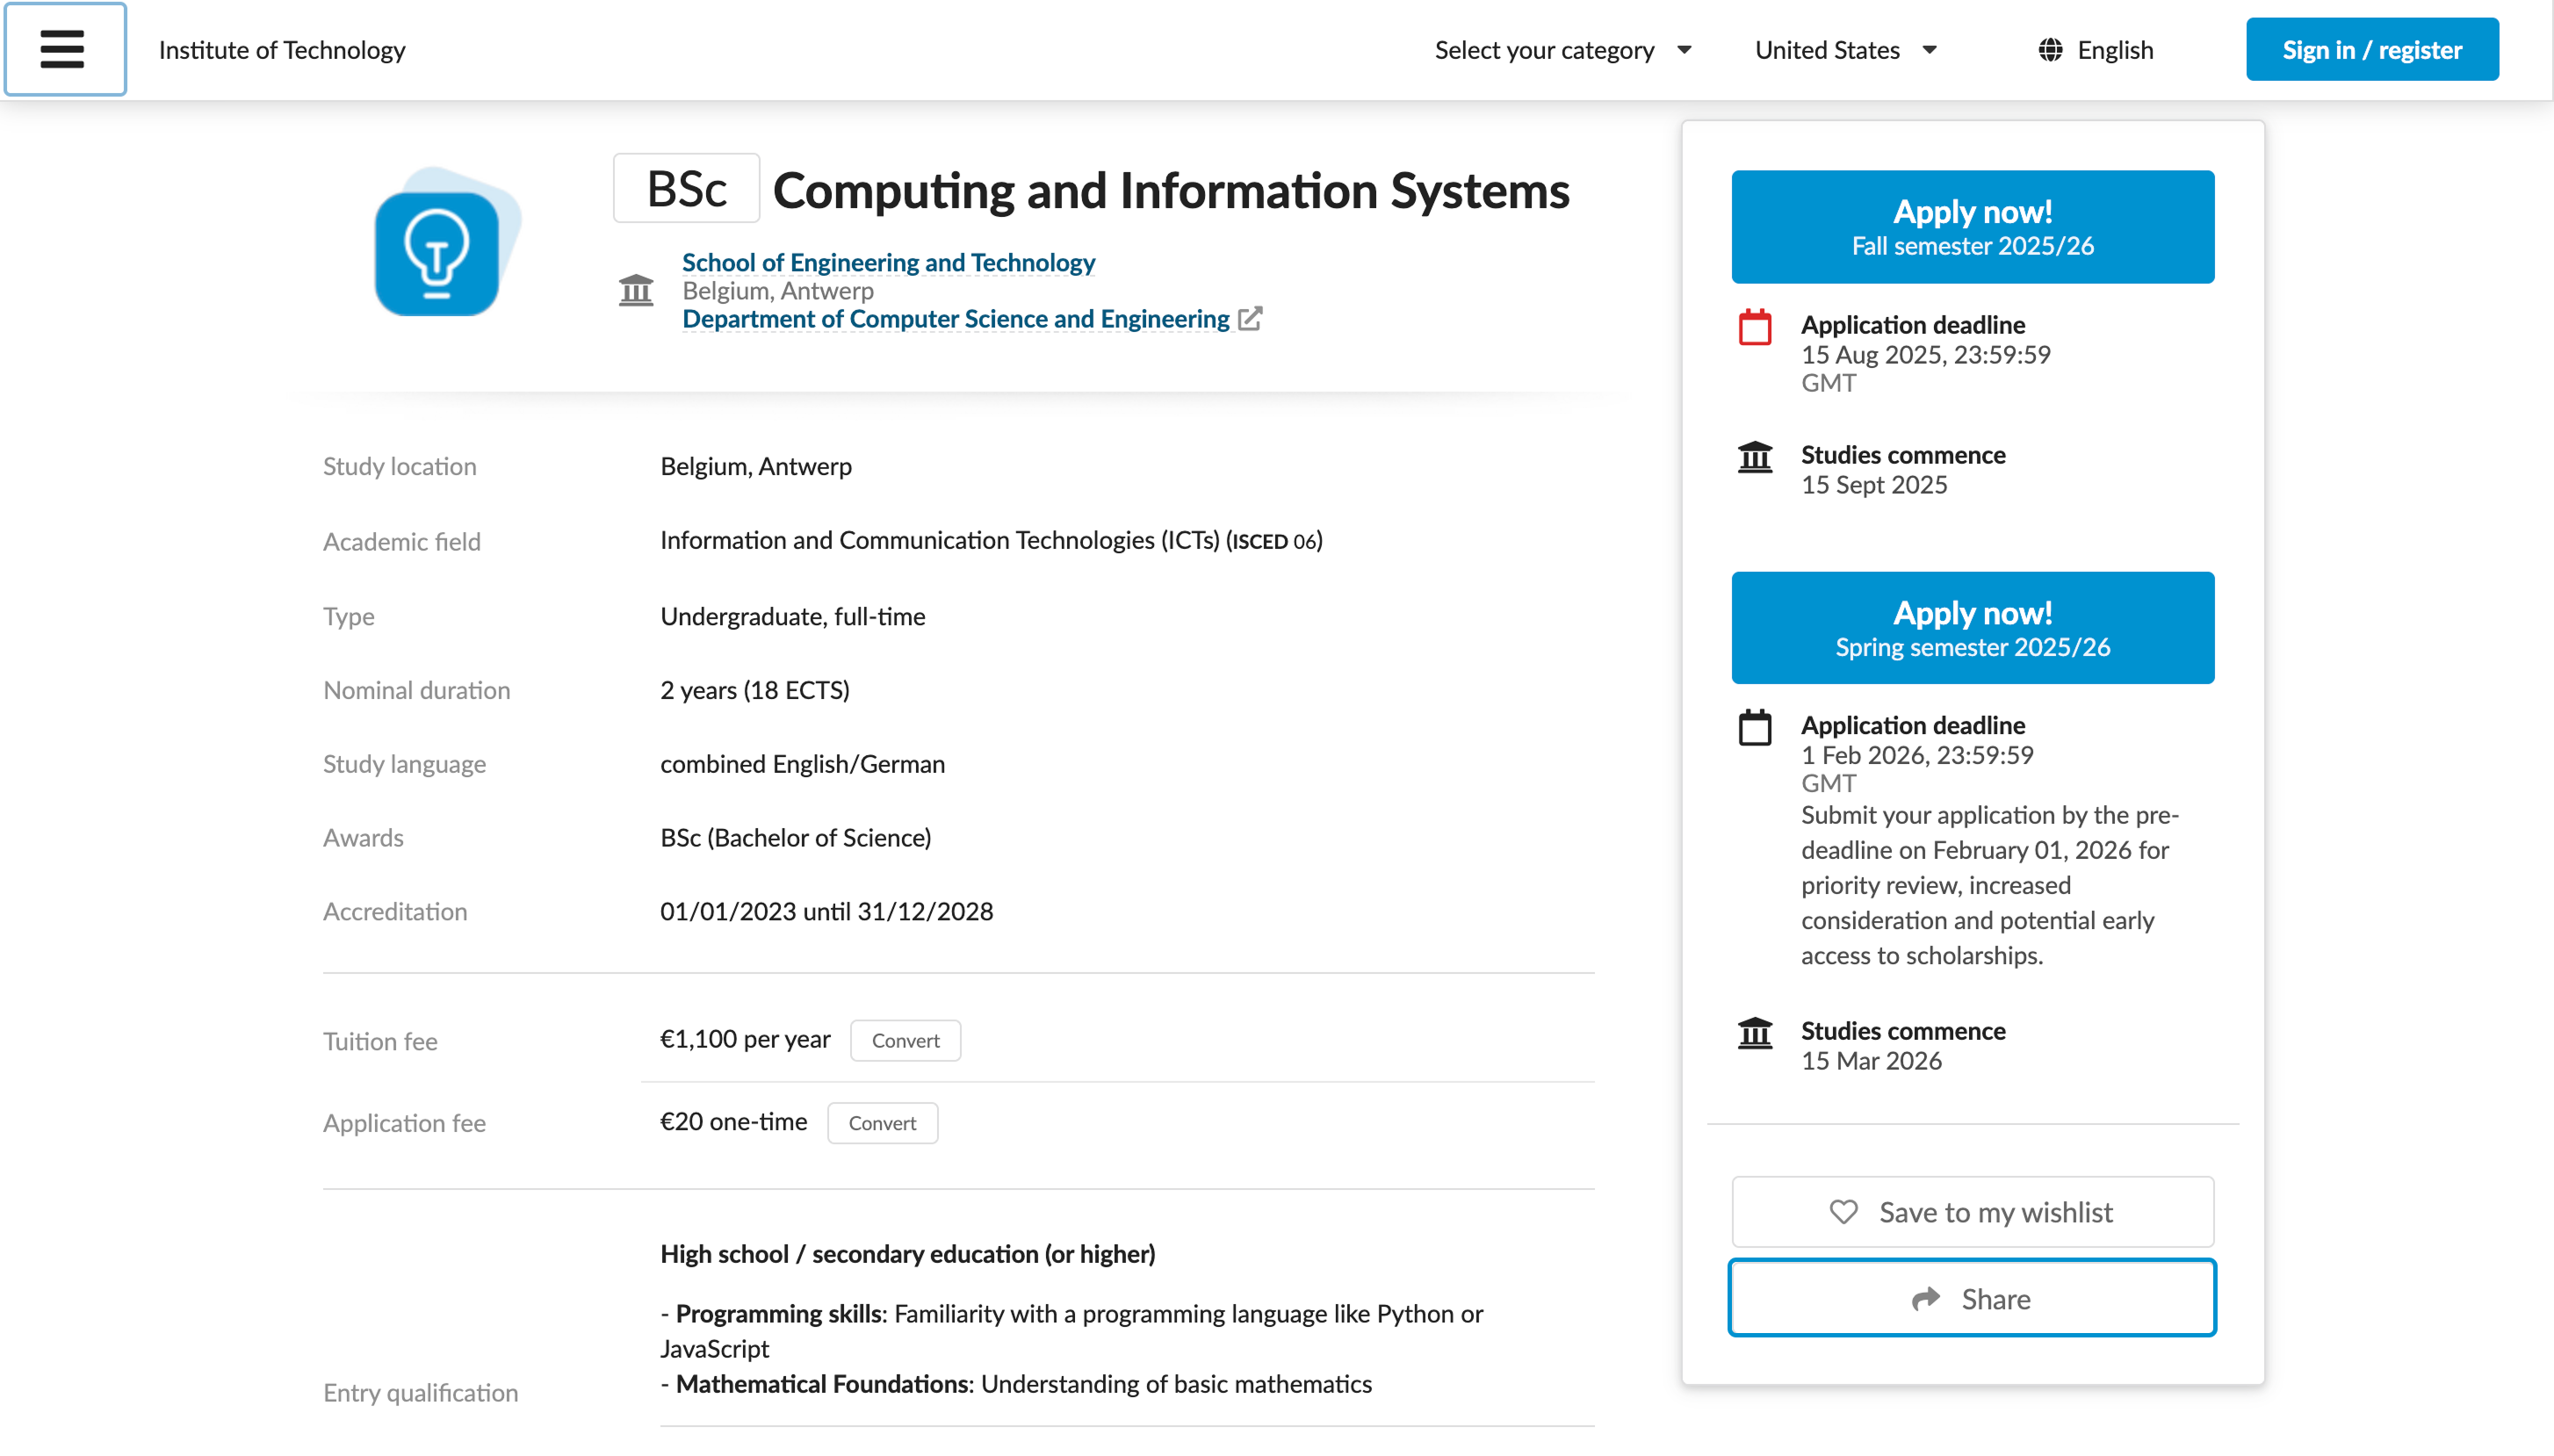
Each programme description page in DreamApply has the Share button that allows applicants to share the page link. Assume you want to track how many users click this button and on which programme pages these clicks occur.
To do this, we will integrate DreamApply with Matomo Tag Manager, set up a tag to capture this data and send it to Matomo Analytics for reporting.
Before you begin
- Make sure your account has the
Superuserrole. - Make sure you have set up a Matomo instance in the cloud or on-premise.
- Make sure you have configured a tag container in Matomo Tag Manager. For details, see the Matomo documentation.
Step 1. Integrate with Matomo Tag Manager
First, we need to connect to Matomo Tag Manager in DreamApply.
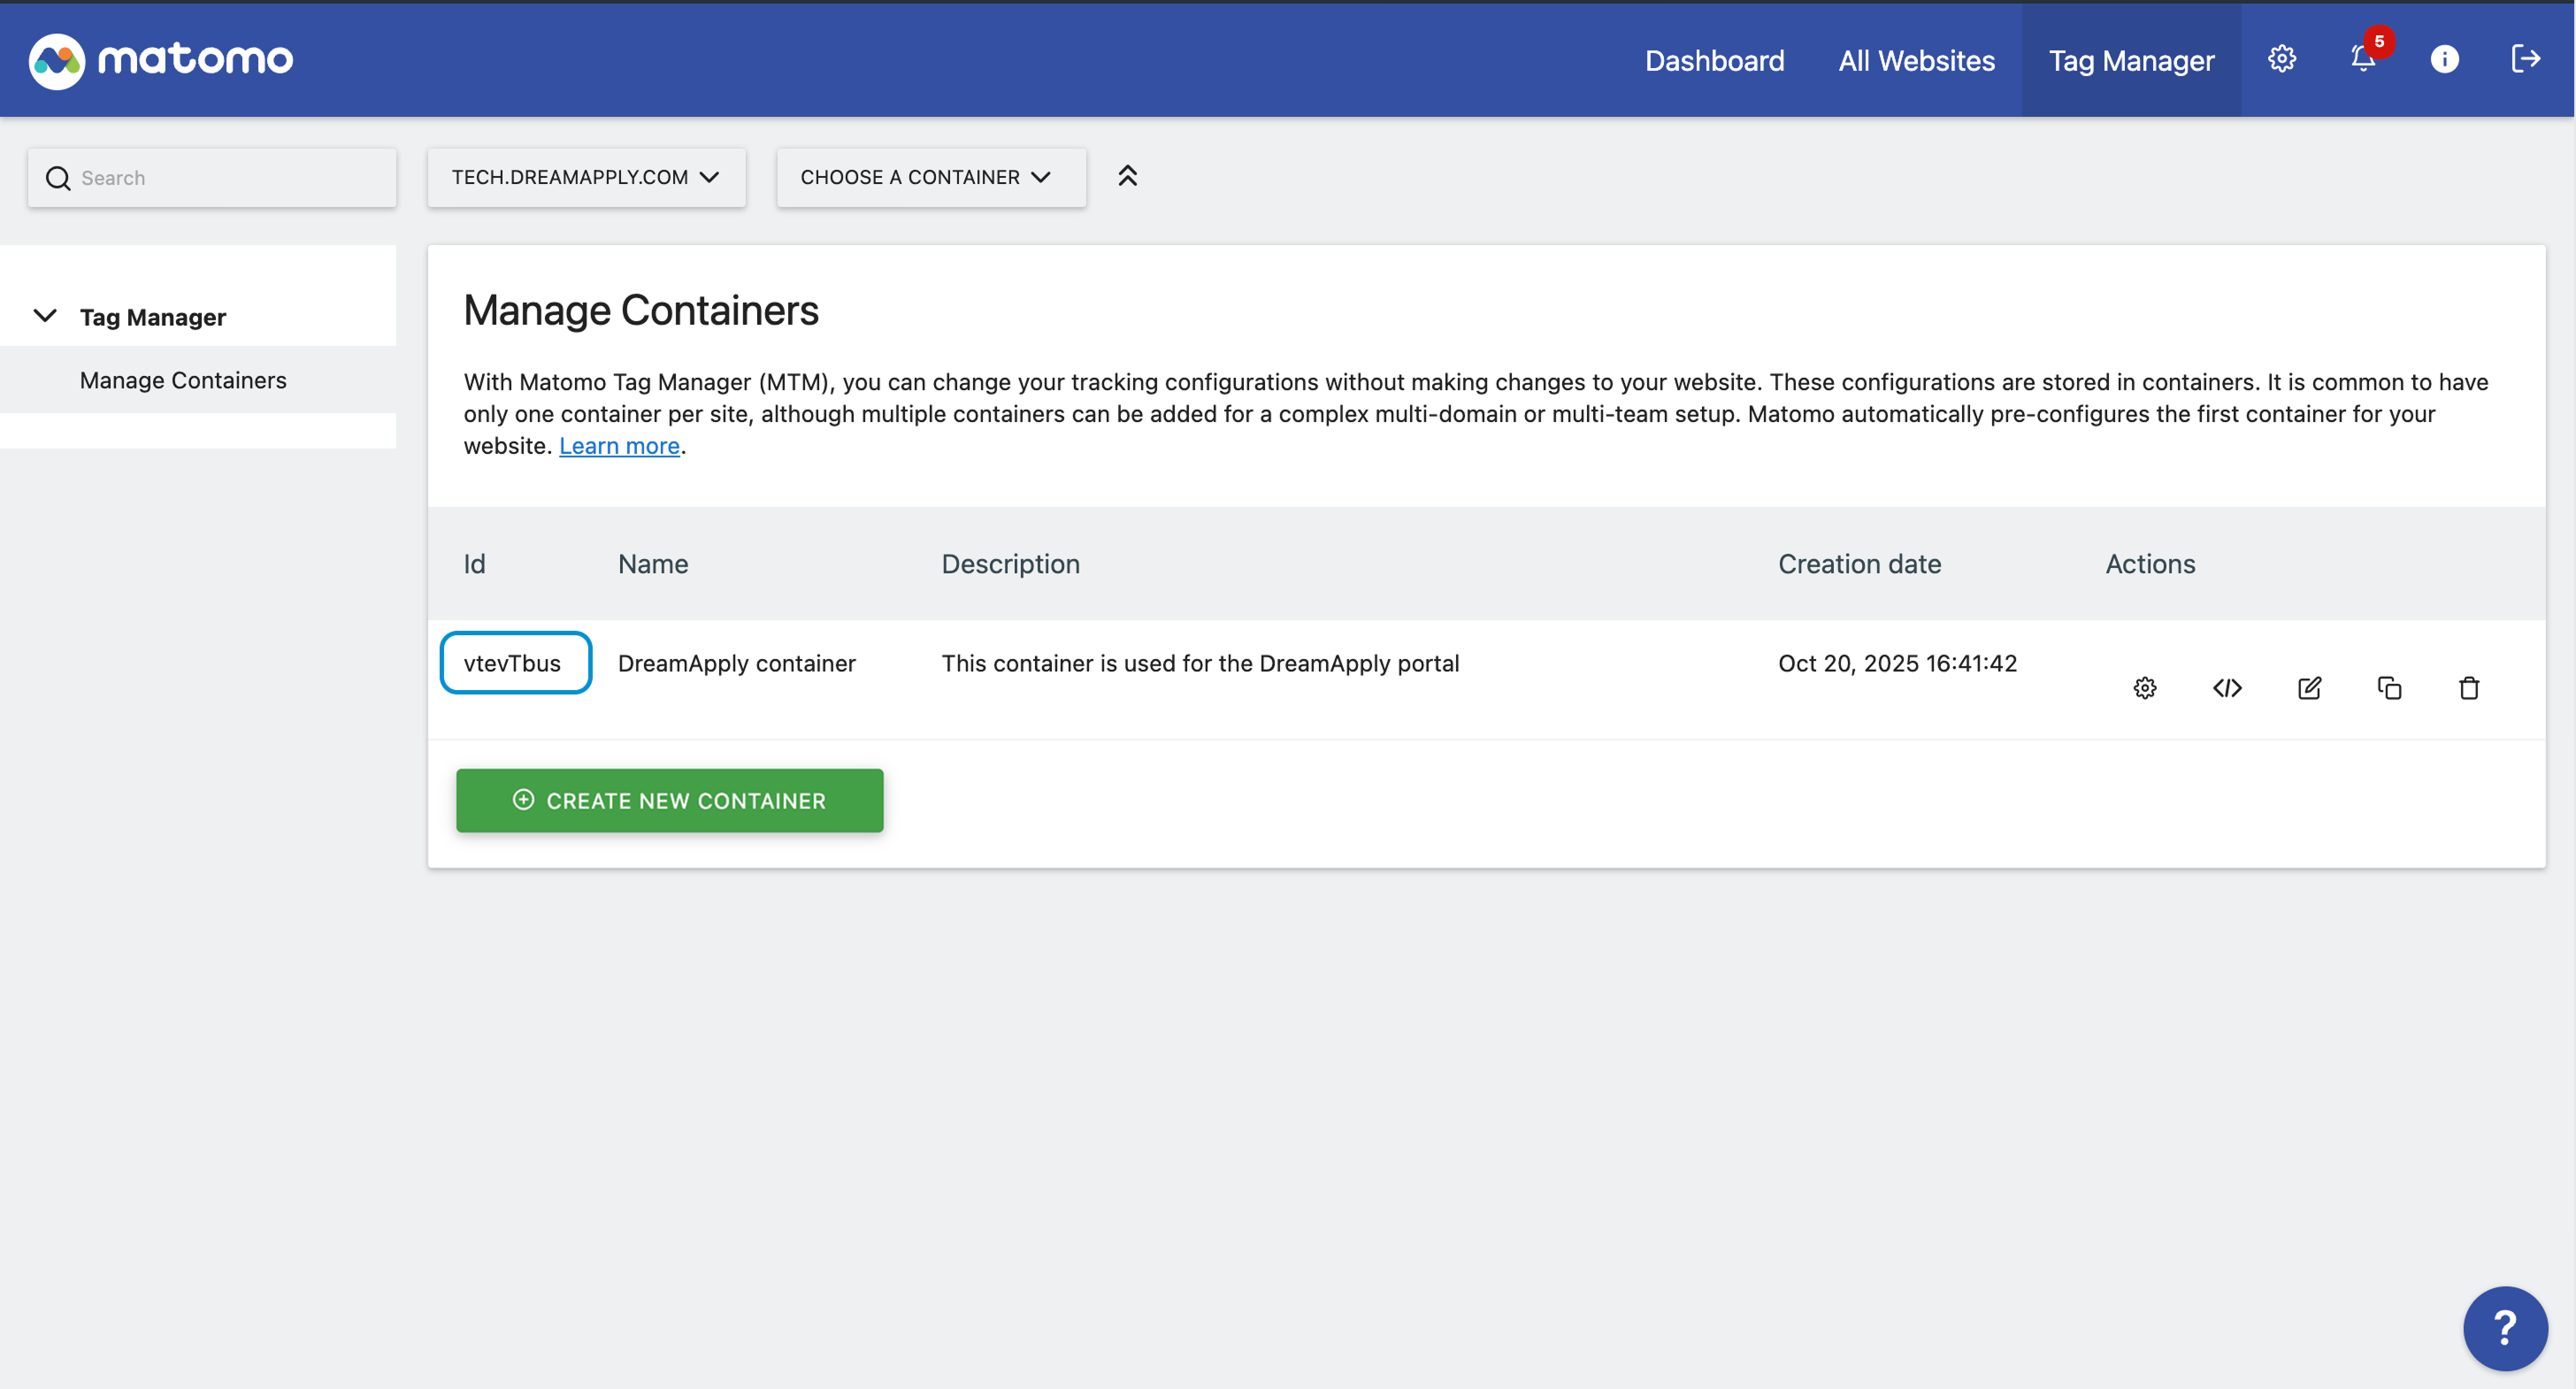
At the top of the Matomo portal, click Tag Manager.
In the left menu, under Tag Manager, click Manage Containers.
Select to create a new tag container or use an existing one. Make note of and copy the container ID.
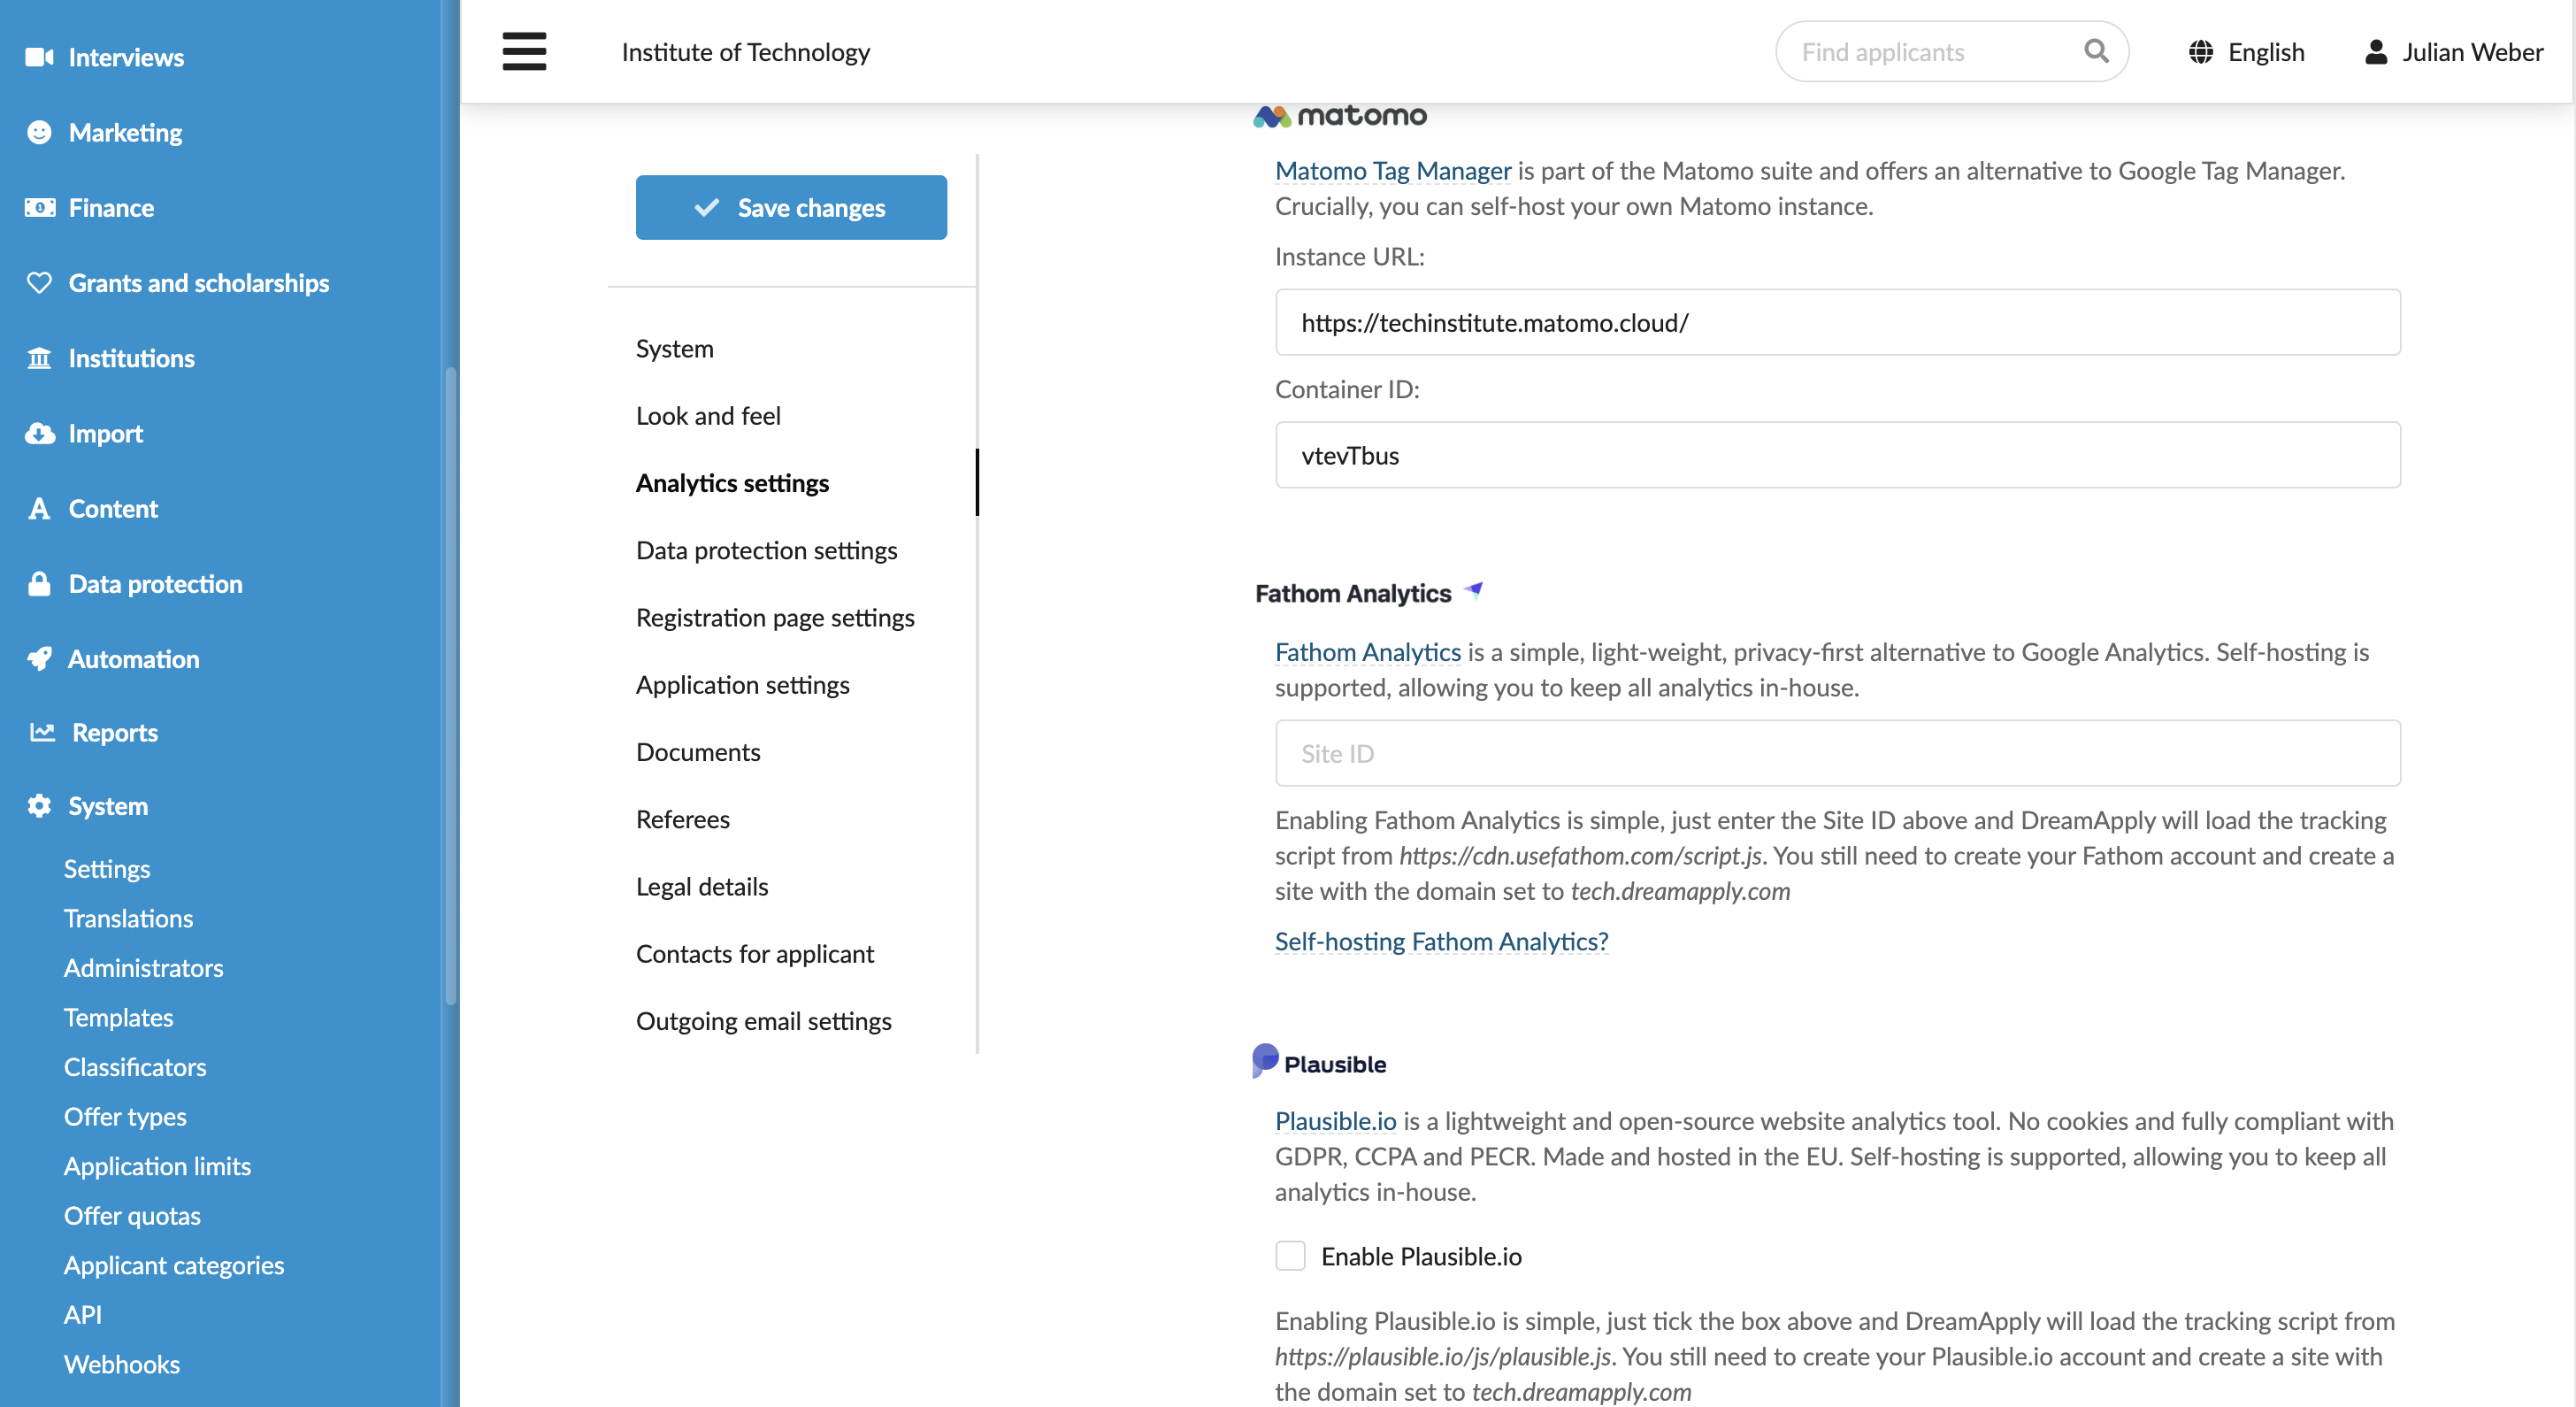
In DreamApply, in the main menu, under System, select Settings.
In the Analytics settings section, under Matomo Tag Manager, specify the Matomo instance URL and ID of the tag container.
At the top of the form, click Save changes.
Step 2. Enable built-in variables
Next, we need to enable built-in variables in Matomo Tag Manager. These variables are required to pass information about the click event and page path from the programme description page.
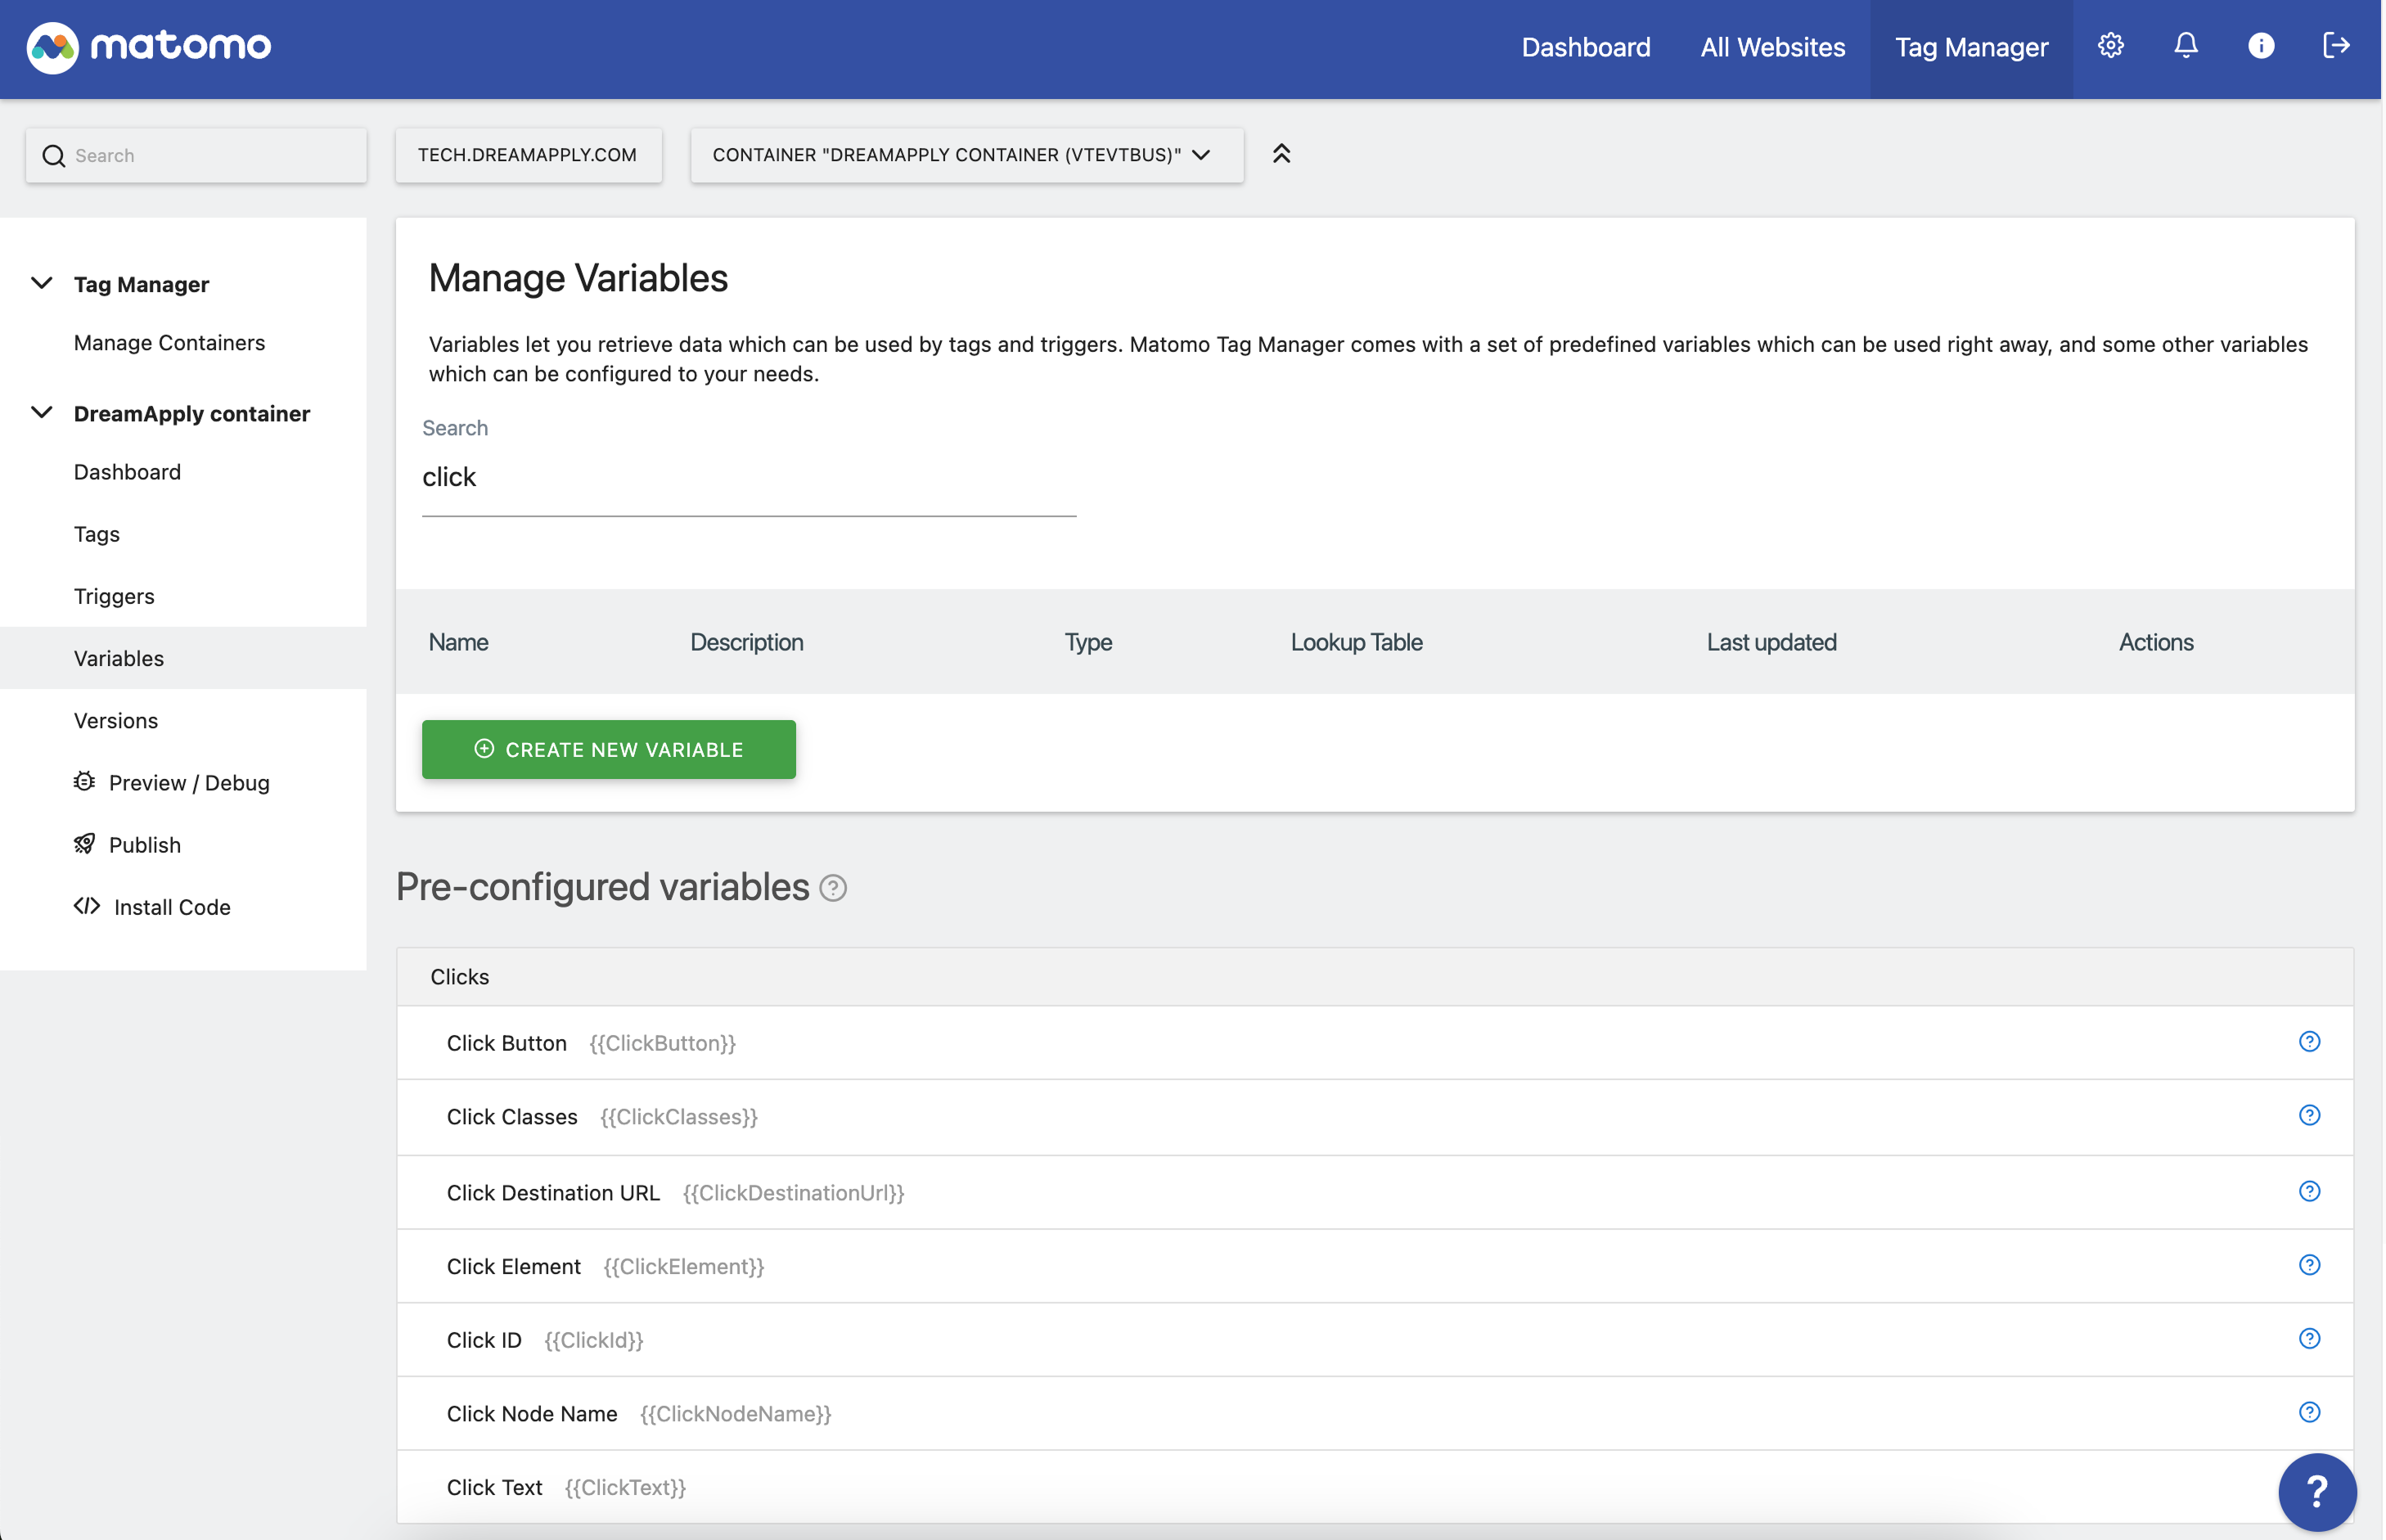
- In the left menu of Matomo Tag Manager, click Variables.
- Make sure the
{{ClickText}}and{{PageTitle}}variables are enabled.
Step 3. Create a click trigger
We need to create a click trigger in Matomo Tag Manager. The trigger tells Matomo Tag Manager to fire a tag when a user clicks the Share button on the programme description page.
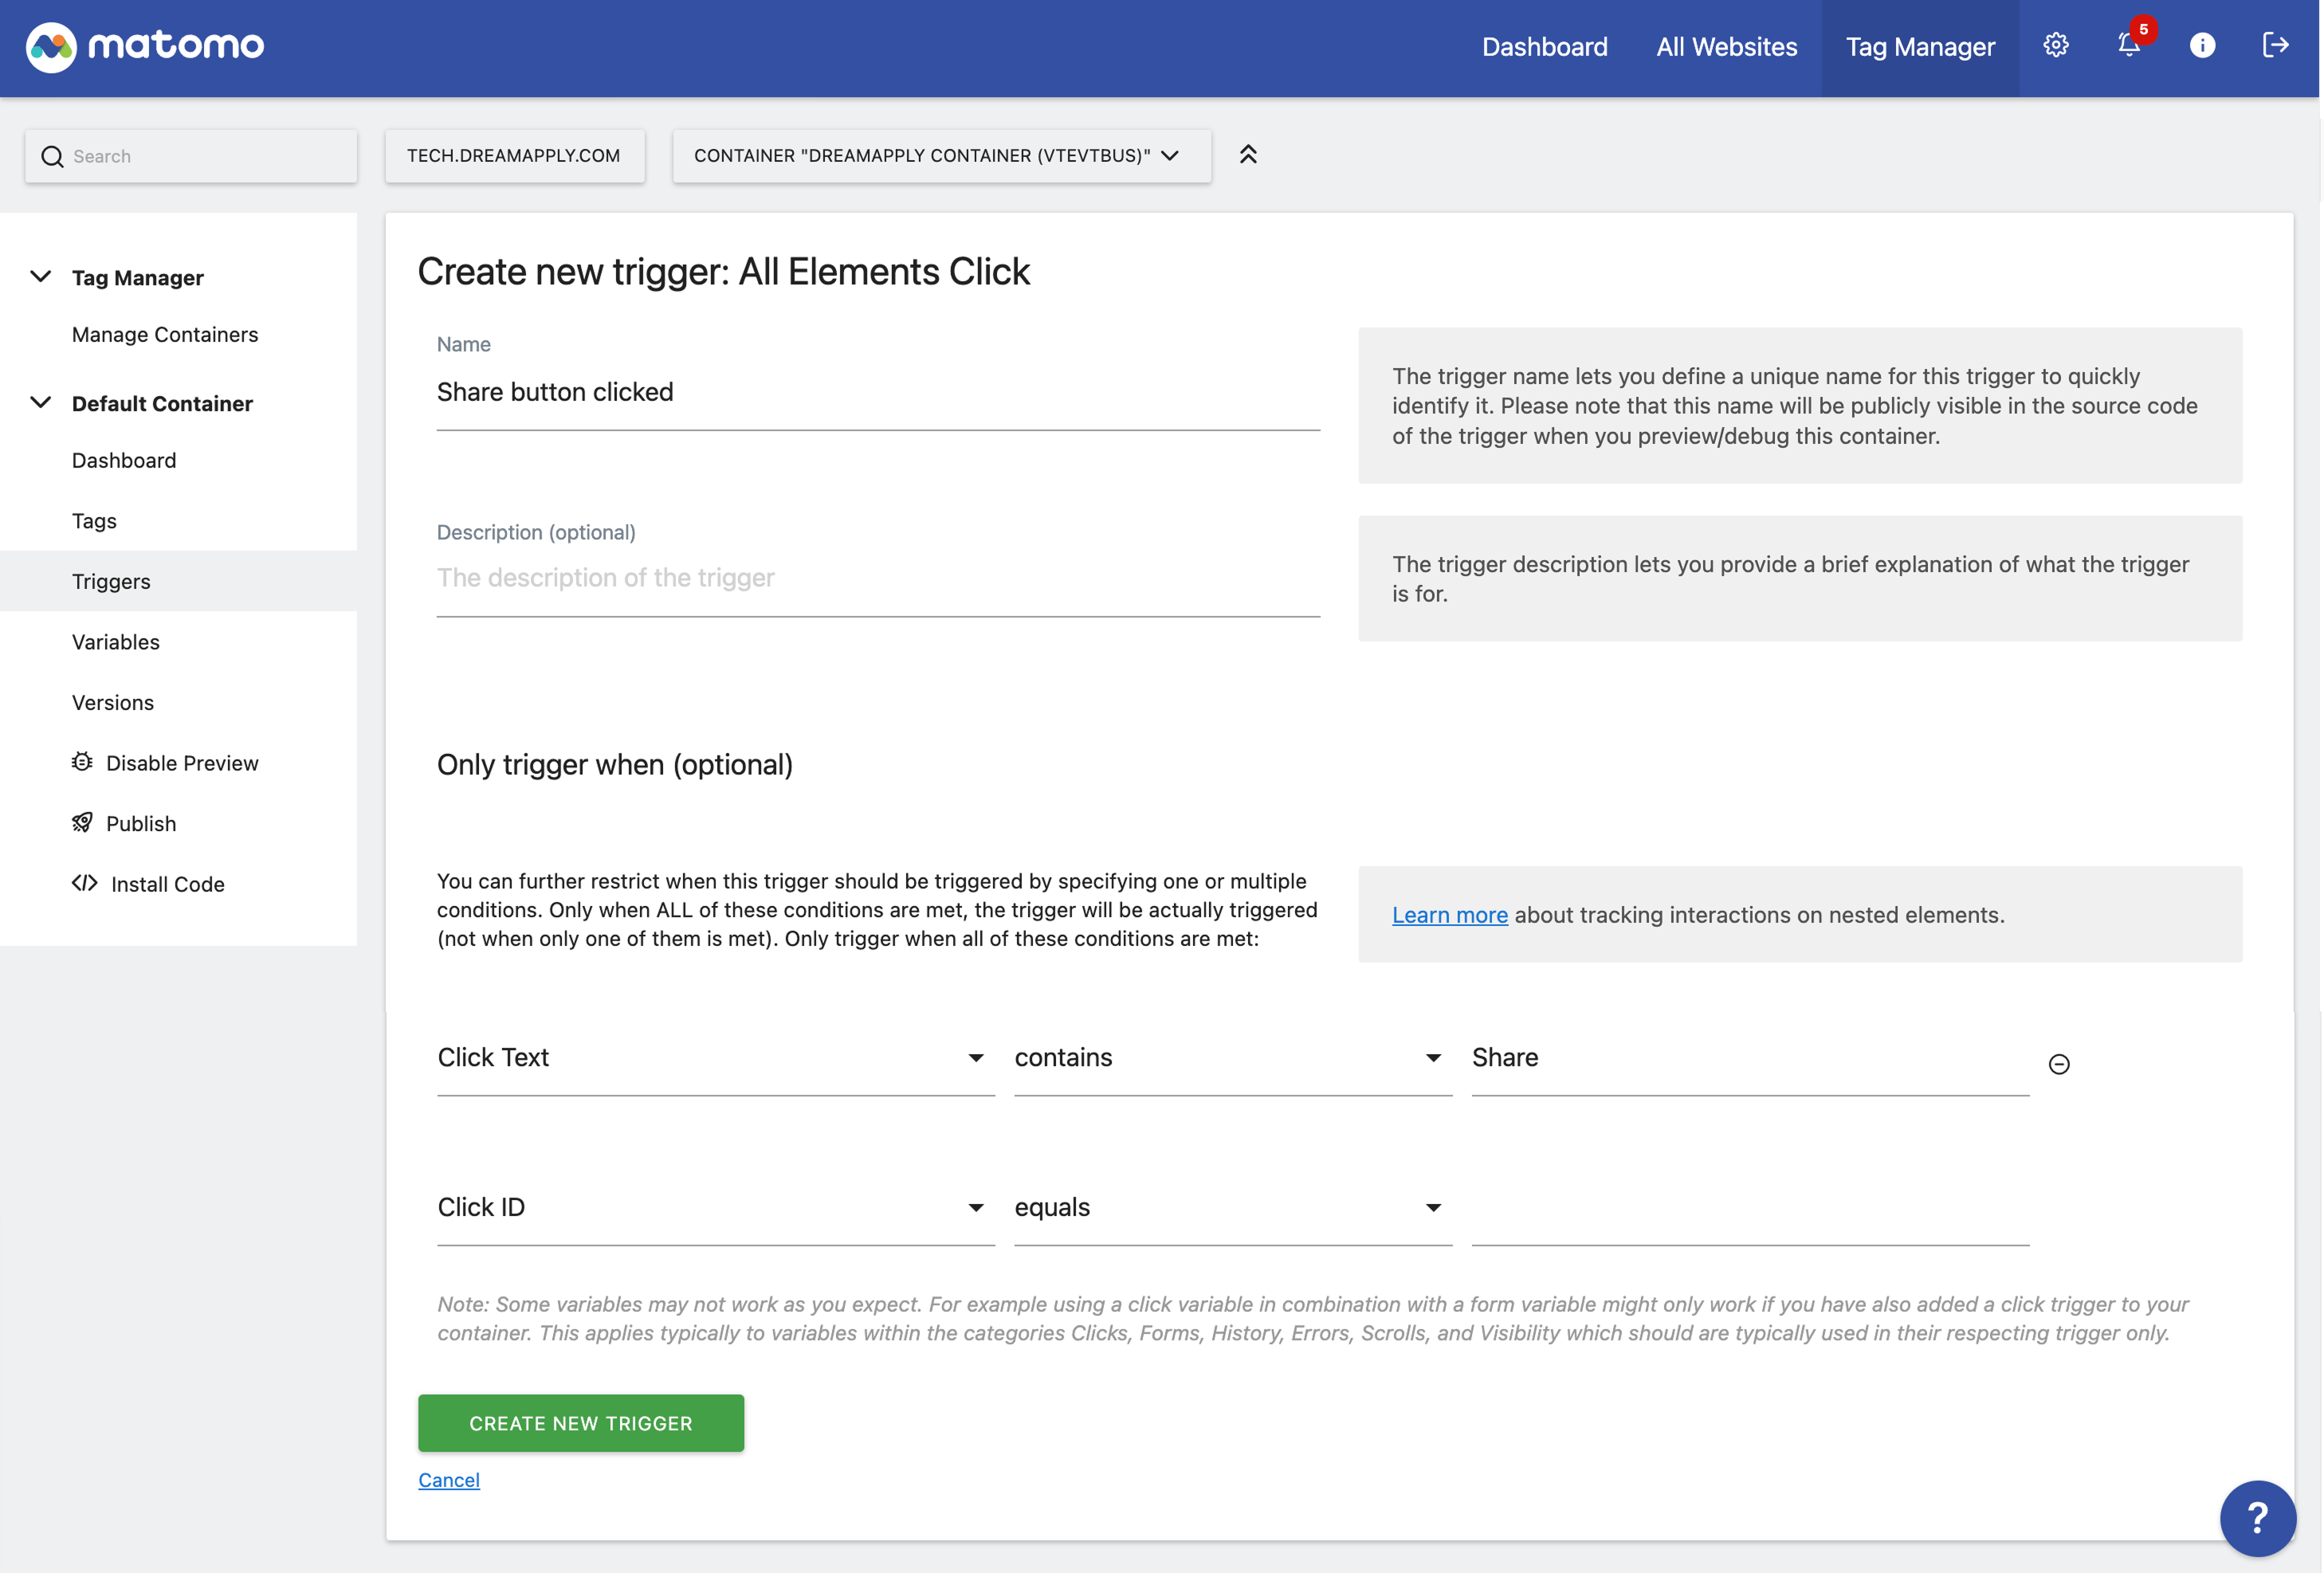
In the left menu of Matomo Tag Manager, click Triggers.
At the bottom of the trigger list, click Create new trigger and configure a trigger with the following settings:
- Trigger type:
All Elements Click - Name:
Share button clicked - Only trigger when (optional):
Click TextcontainsShare
- Trigger type:
At the bottom of the page, click Create new trigger.
Step 4. Create a Matomo tag
We need to create a Matomo tag that will fire when a user clicks the Share button and send information about the click event to Matomo Analytics.
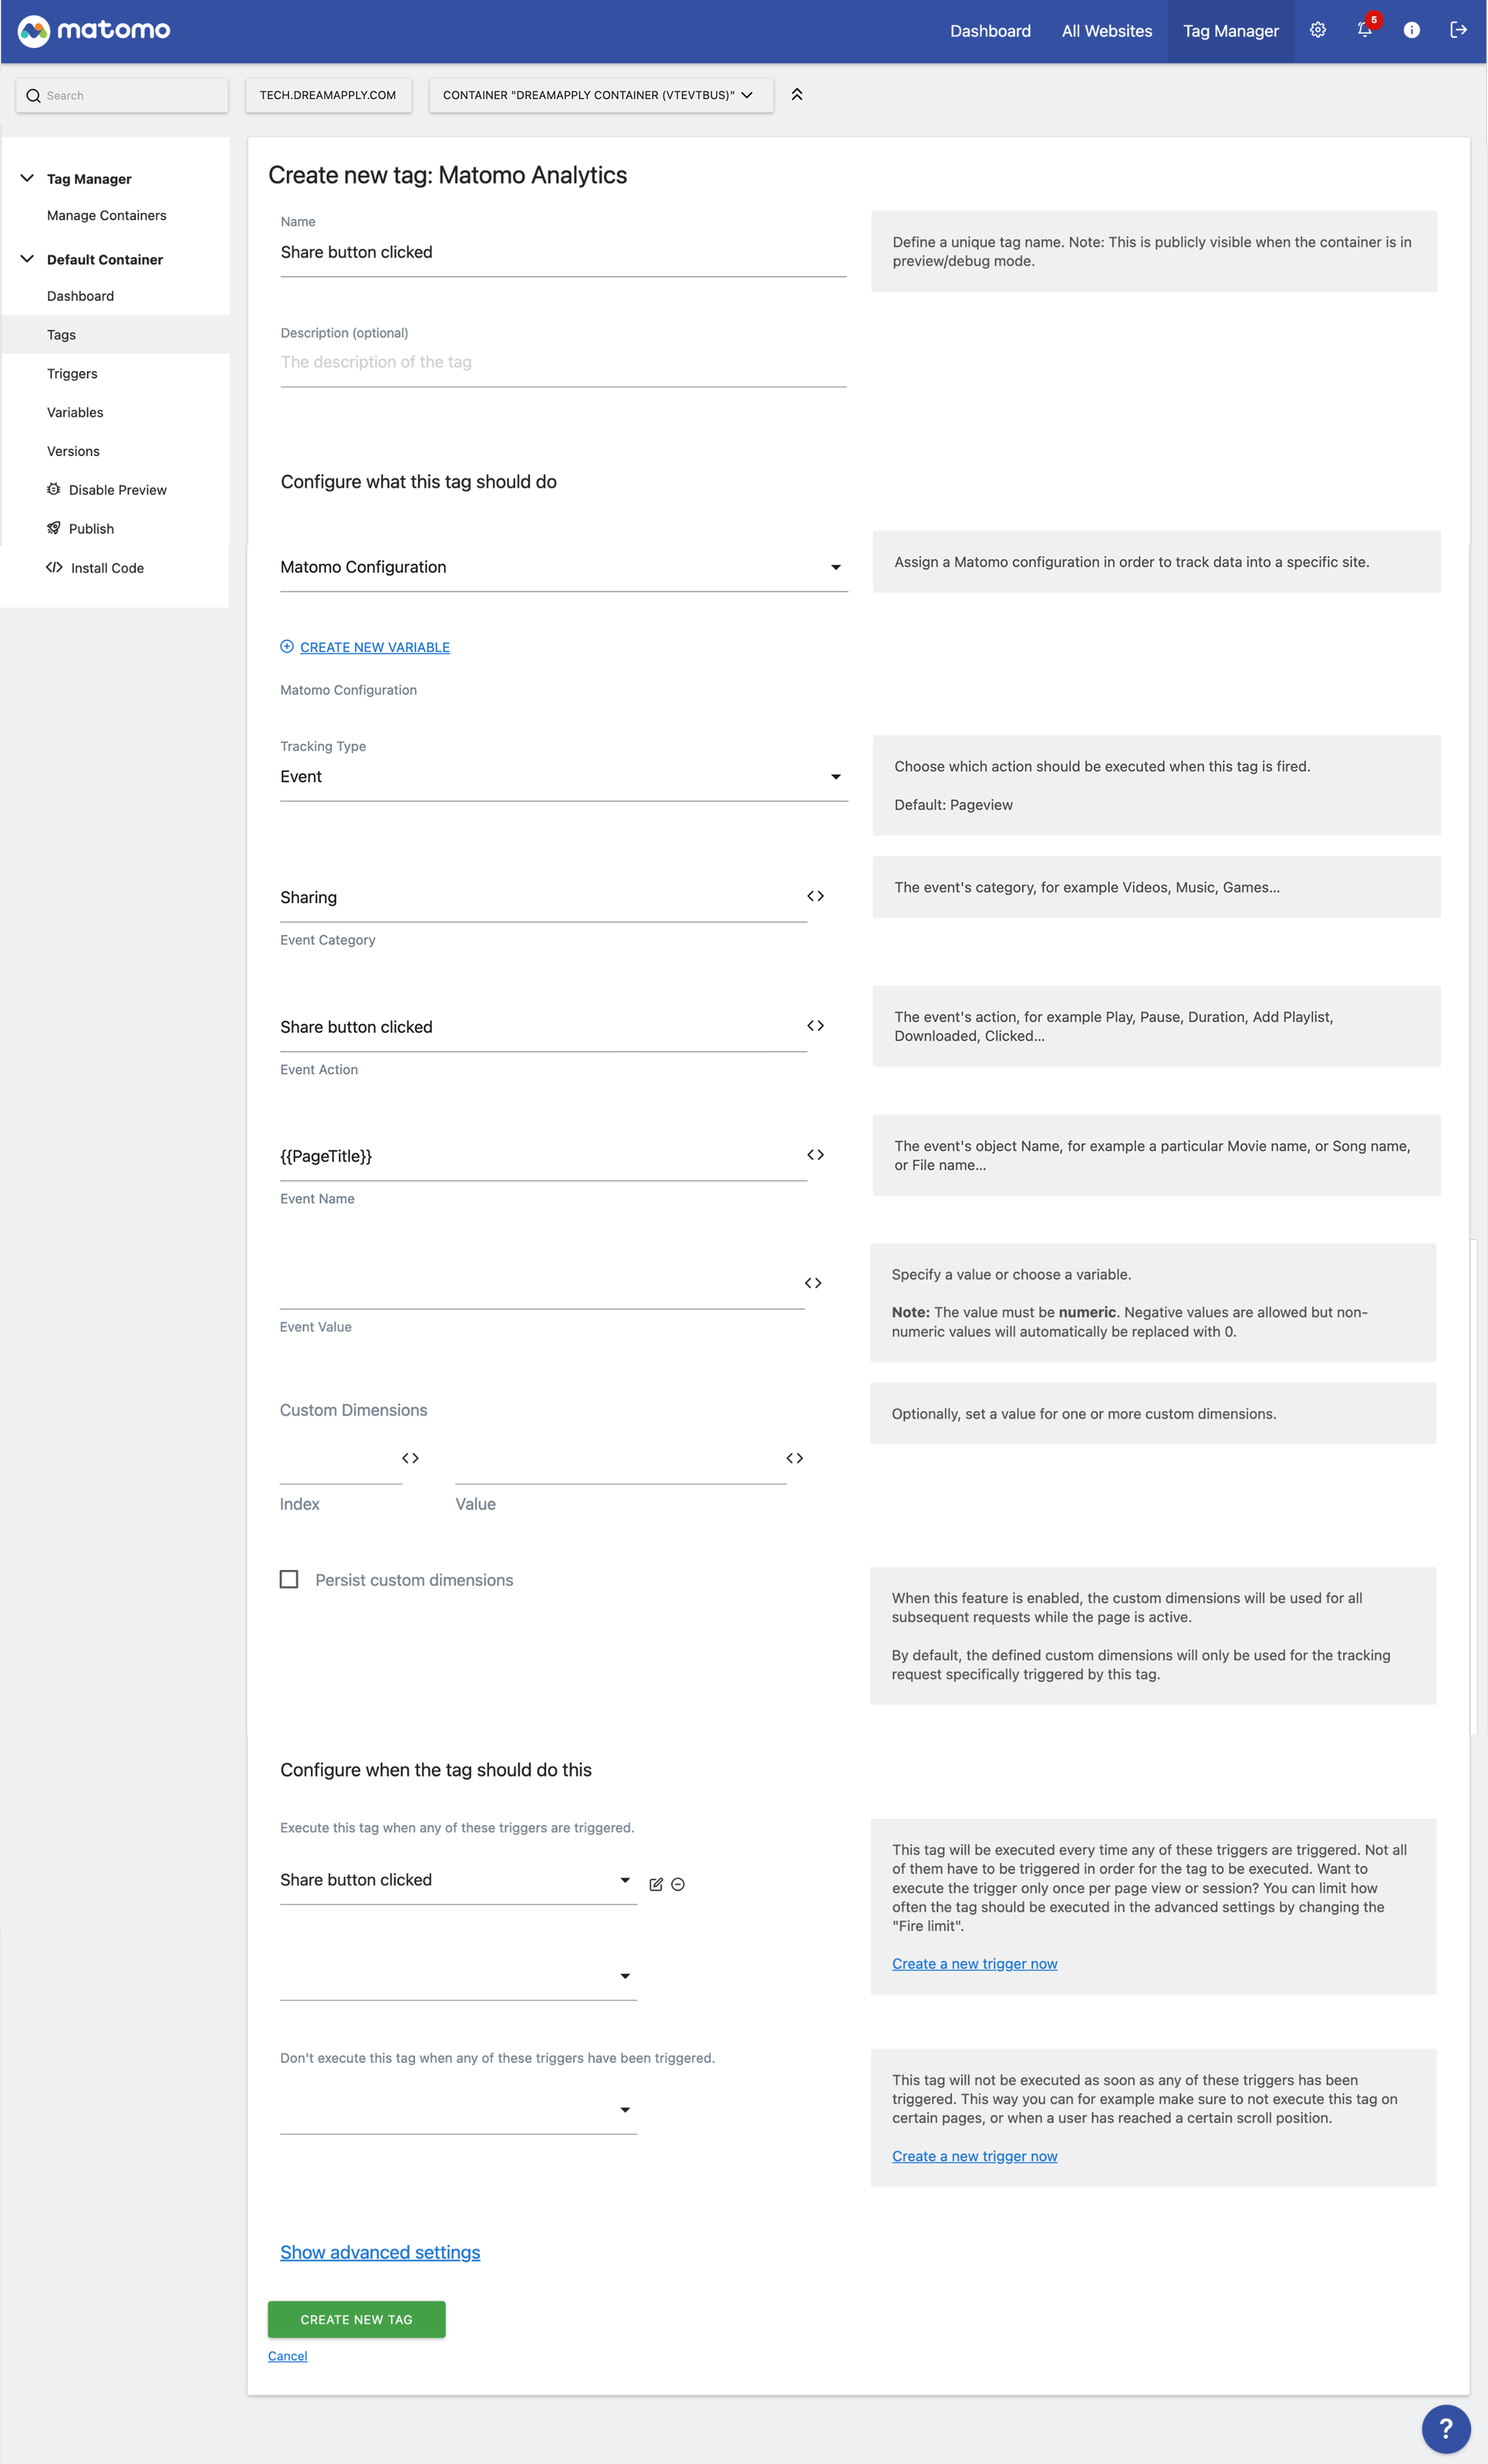
In the left menu of Matomo Tag Manager, click Tags.
At the bottom of the tag list, click Create new tag and configure a tag with the following settings:
- Tag type:
Matomo Analytics - Name:
Share button clicked - Configure what this tag should do:
Matomo Configuration(default value) - Tracking Type:
Event - Event Category:
Sharing - Event Action:
Share button clicked - Event Name:
{{PageTitle}} - Configure when the tag should do this:
Share button clickedtrigger created in step 3
- Tag type:
At the bottom of the page, click Create new tag.
Step 5. Publish the Matomo container
Once the tag is set up, we can publish the Matomo container. In the left menu of Matomo Tag Manager, click Publish, provide a version name and description and click Create new version and publish release.
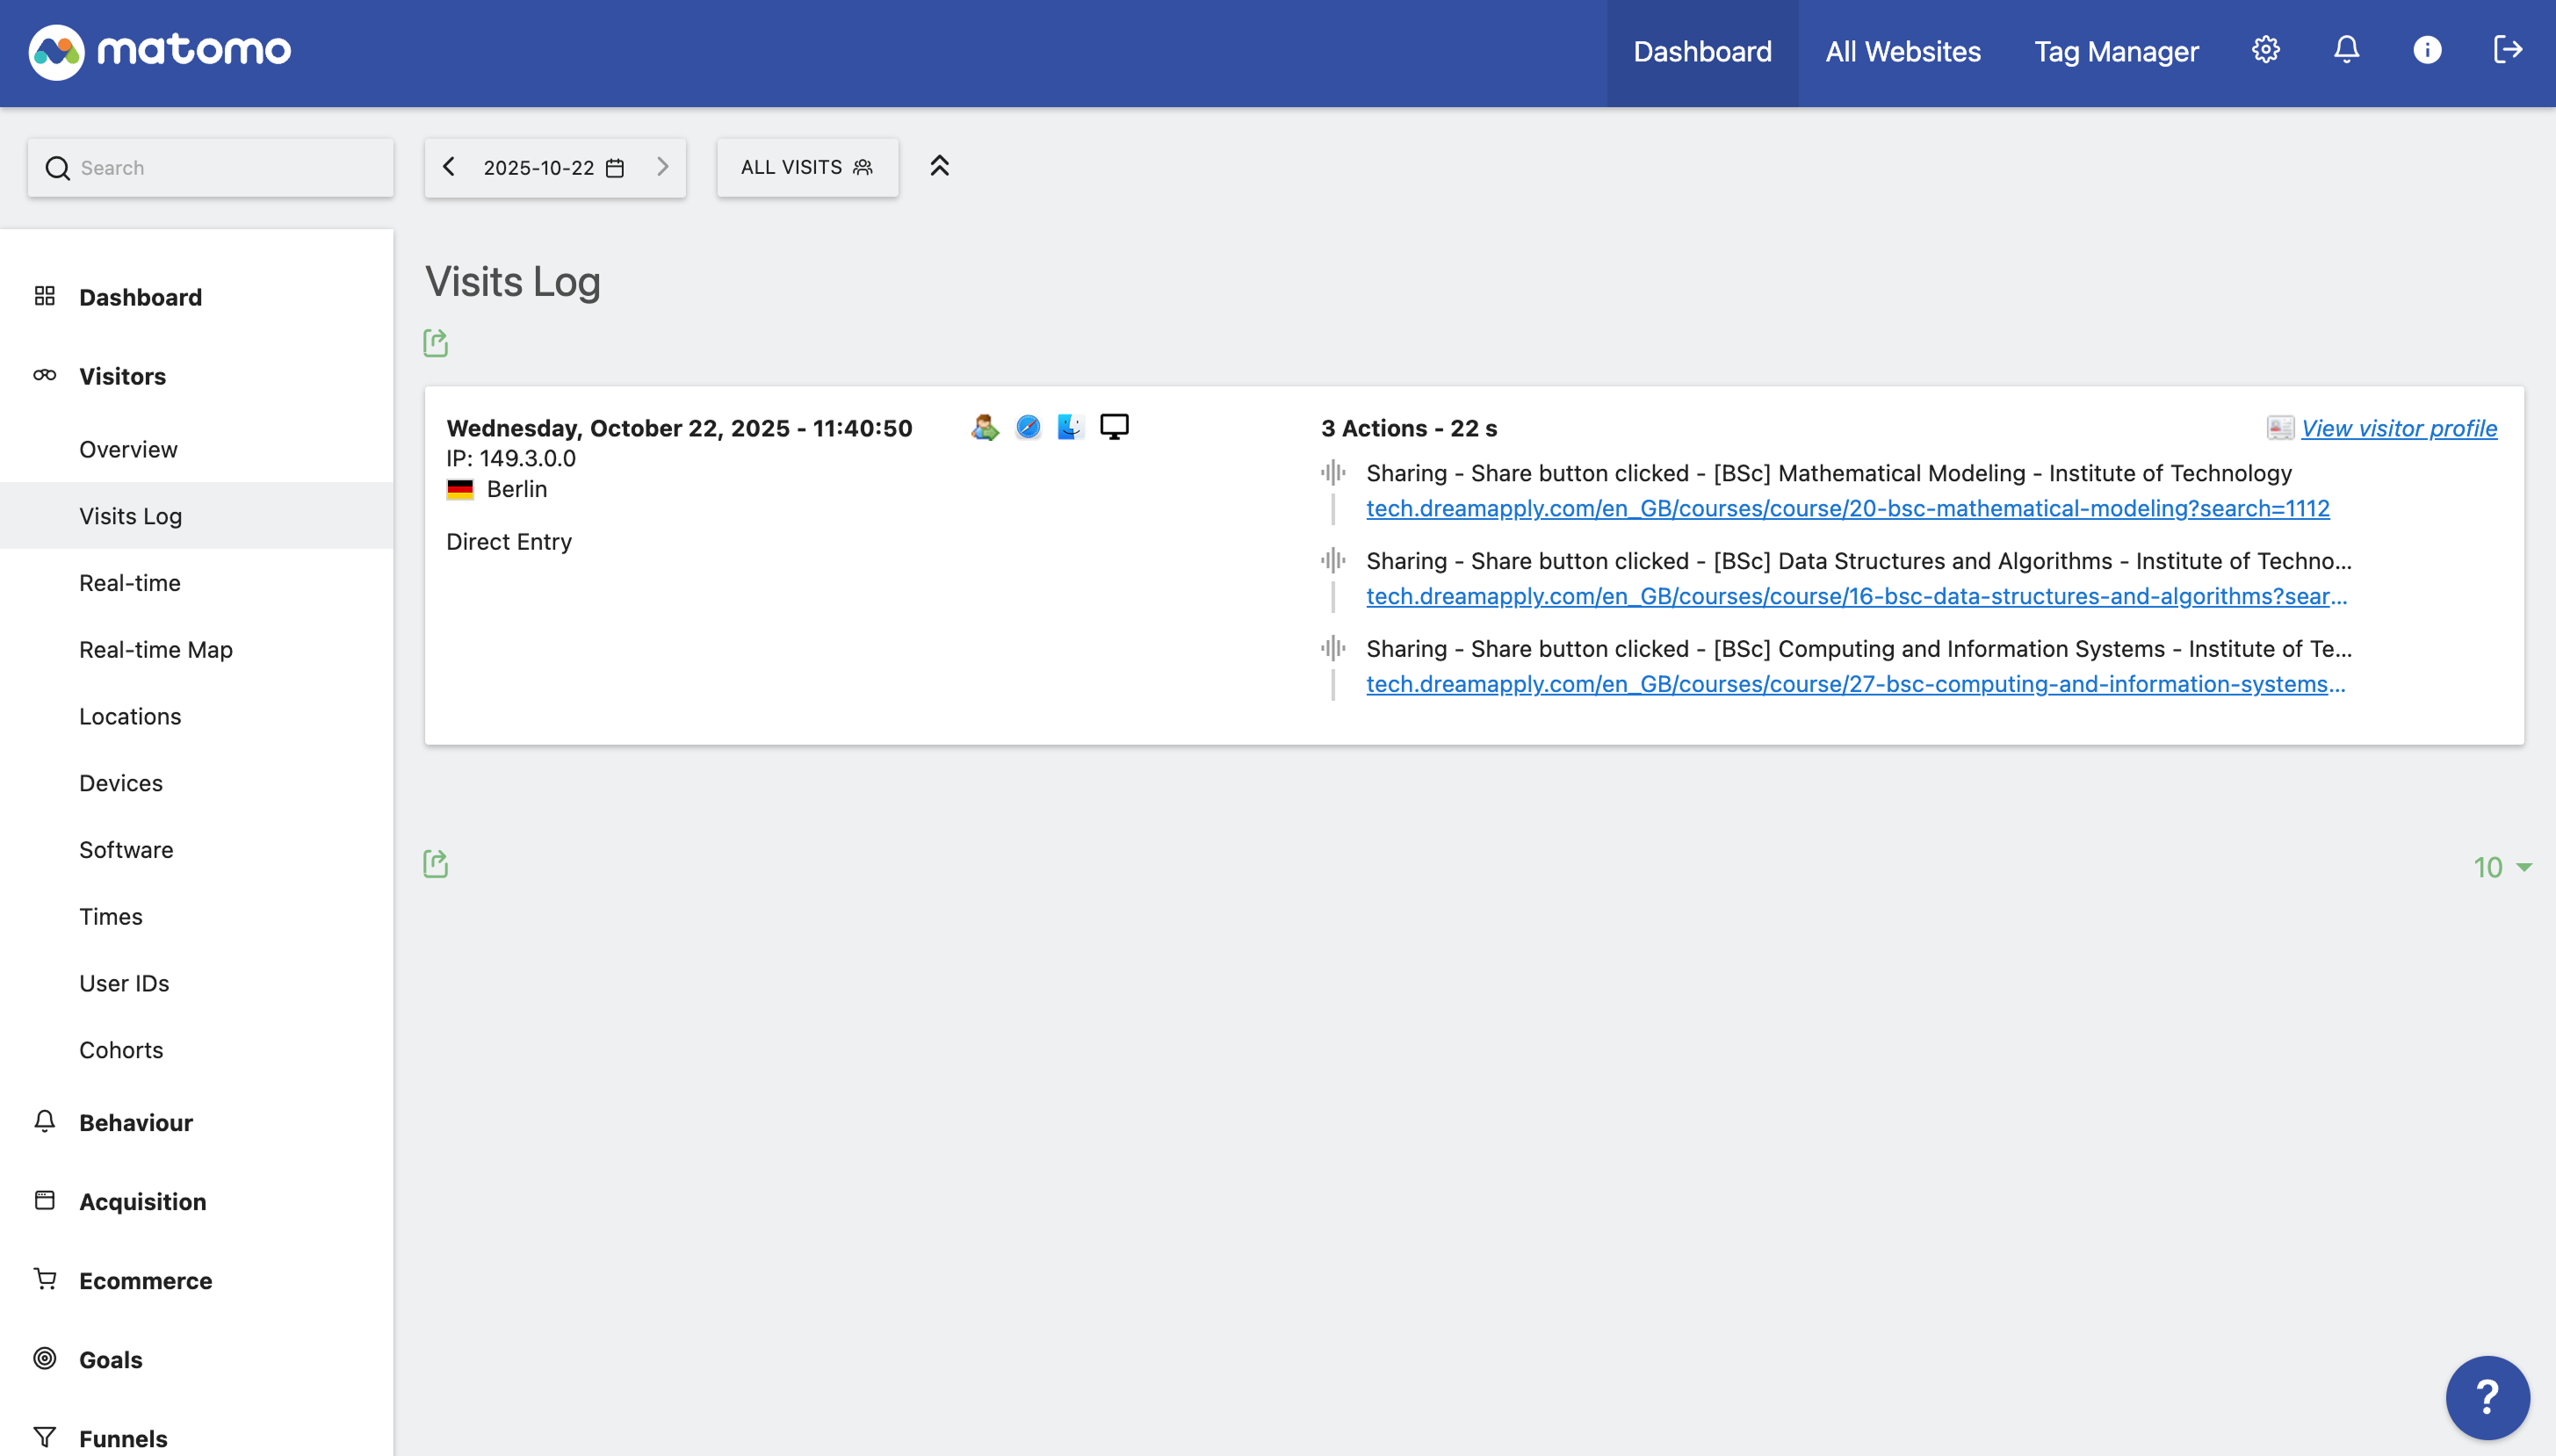
Step 6. Test and analyze the Share button clicks
Now, we can test the setup and verify the data is collected correctly.
- Open the DreamApply portal in a new browser window using Incognito mode.
- Open different programme description pages and click the Share button.
- In the left menu of the Matomo Analytics portal, go to Visitors > Visits Log.
Realtime reports in Matomo Analytics are available immediately. Standard reports may take up to 24-48 hours to begin displaying data after initial setup.