Integrate with ESSE3
Roles
These roles reflect the default DreamApply setup.
You can define custom roles based on your
institution's needs. Learn more →:
You can define custom roles based on your
institution's needs. Learn more →
To enable data transfer between DreamApply and ESSE3, perform the following tasks:
- Request the ESSE3 add-on
- Map programme data
- Indicate documents to be transferred
- Implement data retrieval
- Customize the welcome email template
Request the ESSE add-on
The ESSE3 integration functionality is available as an add-on provided at no charge. To activate the add-on and properly set up your DreamApply instance, contact the DreamApply team.
Provide the following information to the DreamApply team:
The ESSE3 instance hostname.
Credentials of the account to interact with the ESSE3 API: username and password. The account must have sufficient permissions to send
PUTrequests to the ESSE3 activation endpoint:/e3rest/api/anagrafica-service-v2/activation-url.Allow the following IP addresses for incoming connections to Esse3:
35.181.22.13015.236.194.165185.39.10.121185.39.10.122185.39.10.123
You can either allow these IP addresses one by one or allow the entire A record of
eu3-prod.out.dreamapply.net(if supported by the firewall system in use).
To get a list of outgoing IP addresses, run the following command:
dig eu3-prod.out.dreamapply.net AResolve-DnsName -Name eu3-prod.out.dreamapply.net -Type AAs part of integration setup, the DreamApply team performs the following tasks:
- Activates the ESSE3 add-on
- Enables the monitoring report
- Adds the welcome email template
- Specifies account credentials to communicate with the ESSE3 instance
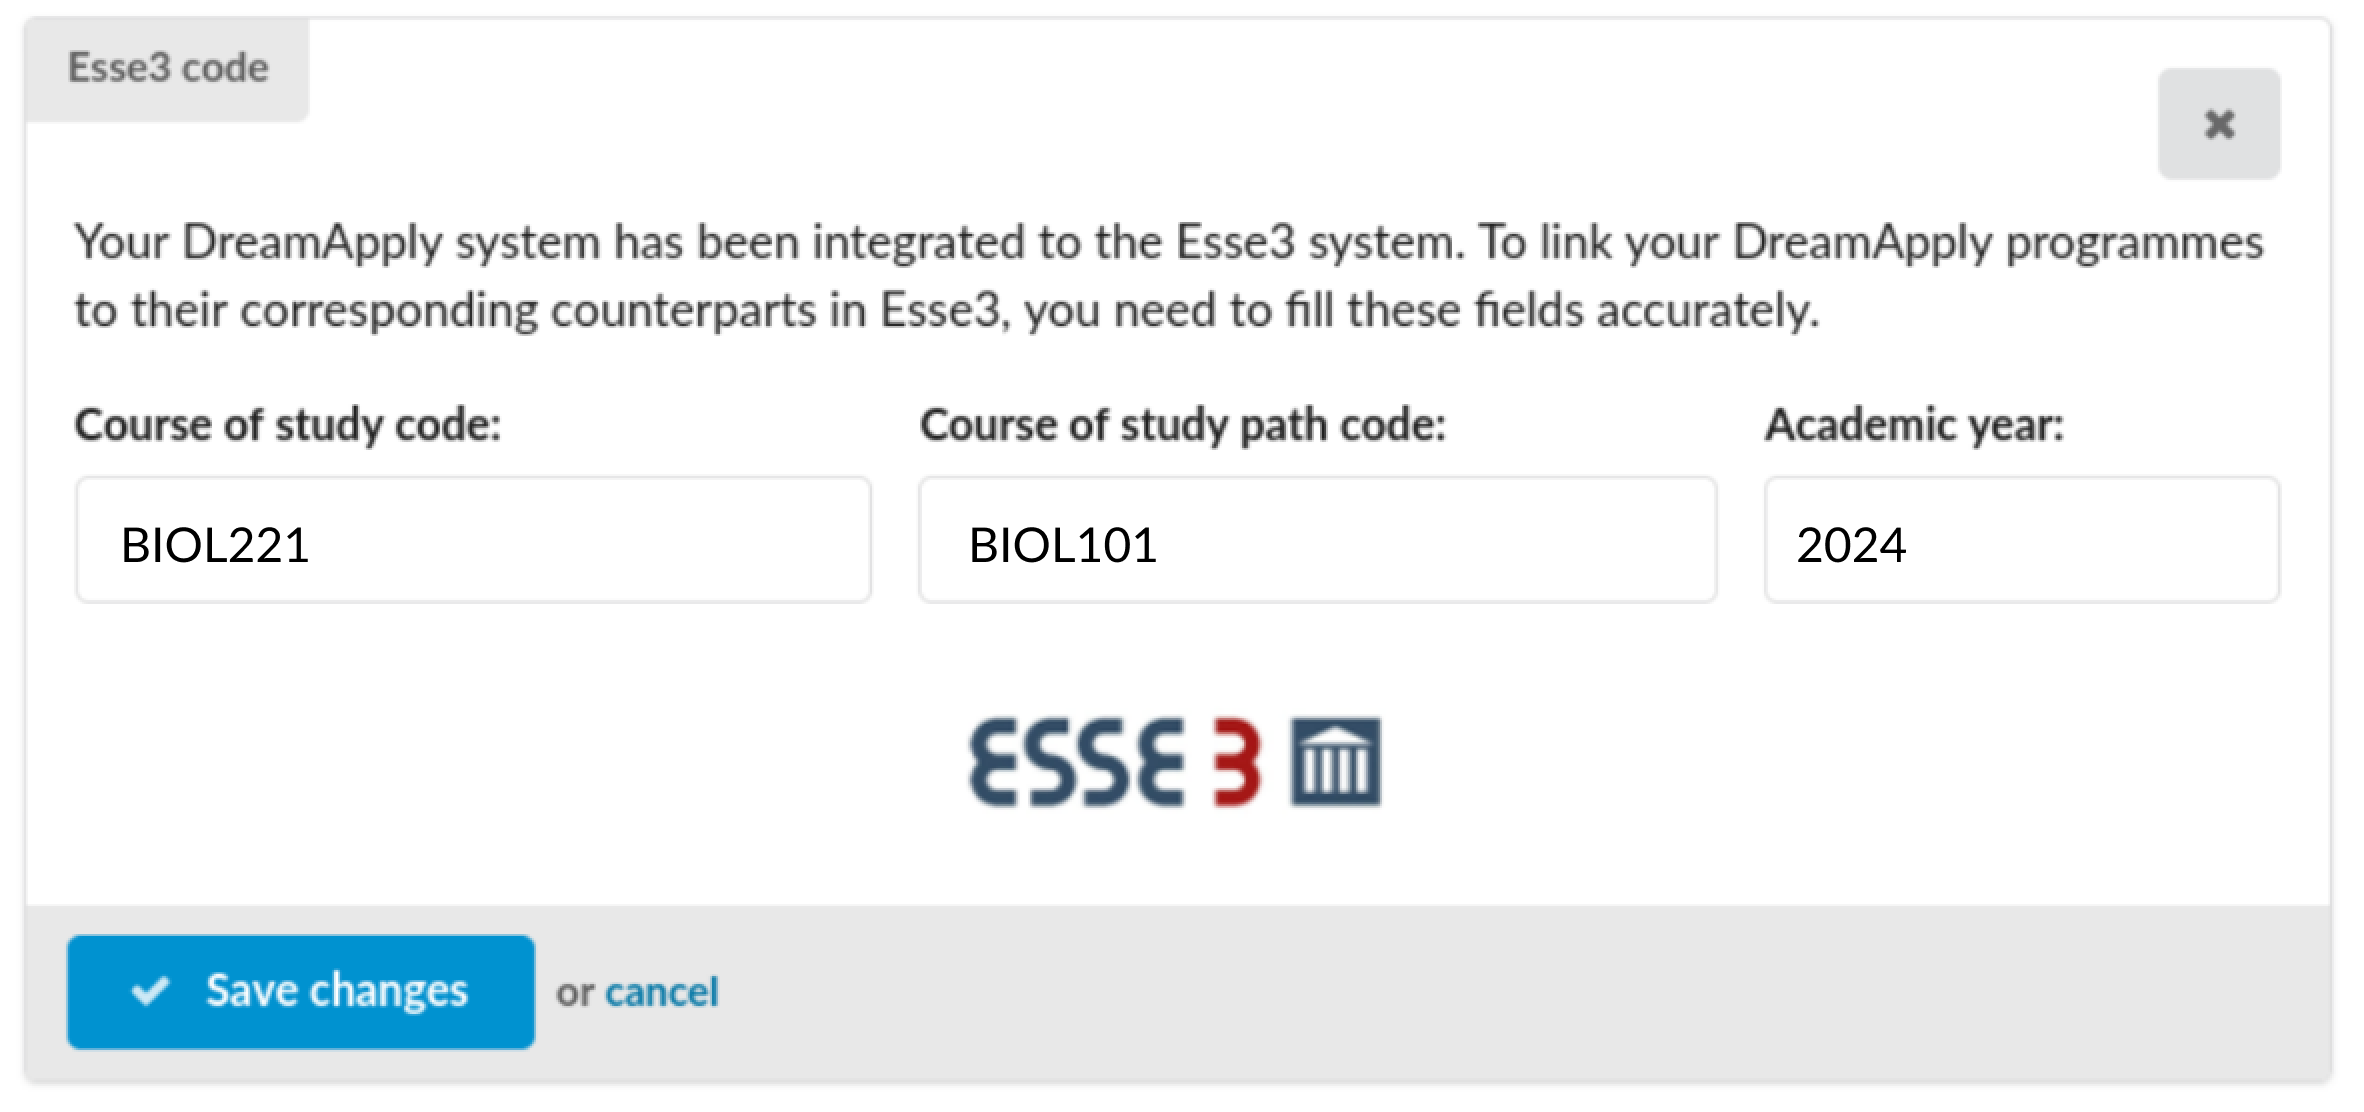
Map programme data
As part of the integration process, an institution must uniquely identify programmes added to the programme catalog in DreamApply and map them to corresponding programmes in ESSE3.
To map programmes accurately, work closely with Cineca as they have a thorough understanding of how your programme data is organized in ESSE3.
- In the main menu, under My Institution, select Programmes.
- To the right of the programme name, click the edit icon and select Edit details.
- In the Esse3 code section, specify the following details:
- In the Programme of study code field, specify the code for the programme in ESSE3.
- In the Programme of study path code field, specify the code for the study path associated with the programme.
- In the Academic year field, specify the academic year for the programme.
- At the bottom of the form, click Save.
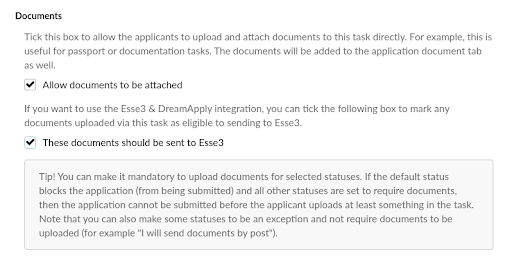
Indicate documents to be transferred
You can create tasks in DreamApply that require applicants to upload documents during the application process. ESSE3 can retrieve these documents along with other application data.
When transferring task documents to ESSE3, mind the following:
- Task configuration: To send documents from a task, you must enable the These documents should be sent to Esse3 option in it. DreamApply does not send documents from tasks that have this option disabled.
- Upload source: DreamApply retrieves and sends only the documents that applicants upload through tasks. It does not send documents uploaded to the application itself through the Documents section on the application edit page.
- Upload date: There are no restrictions on the upload date. DreamApply includes all documents previously uploaded to the task in the transfer.
- File format: DreamApply sends documents in their original upload format. Any system-generated previews, such as page previews for PDF documents, are skipped.
To specify which task documents transfer to ESSE3, review and update your task template settings:
In the main menu, under Automation, select Task templates.
To the right of the task name, click the edit icon and select Edit details.
In the Documents section, select the These documents should be sent to Esse3 check box to ensure documents are transferred to ESSE3.
This field is only available after the ESSE3 add-on is activated.
At the top of the form, click Save change.
Implement data retrieval
In DreamApply and ESSE3 integration, data retrieval is entirely managed on the client side. An institution must work closely with Cineca to arrange export of data from DreamApply. In particular, the institution and Cineca must identify and implement the data retrieval logic based on their specific requirements, including:
- Polling schedule: when and how frequently data must be retrieved
- Data fetching: the specific data points to be extracted (application data and documents)
DreamApply provides the DreamApply API for data retrieval. To authenticate and interact with the DreamApply API, it is required to issue an API key for ESSE3 with appropriate permissions. Please work with Cineca to ascertain the minimum required permissions.
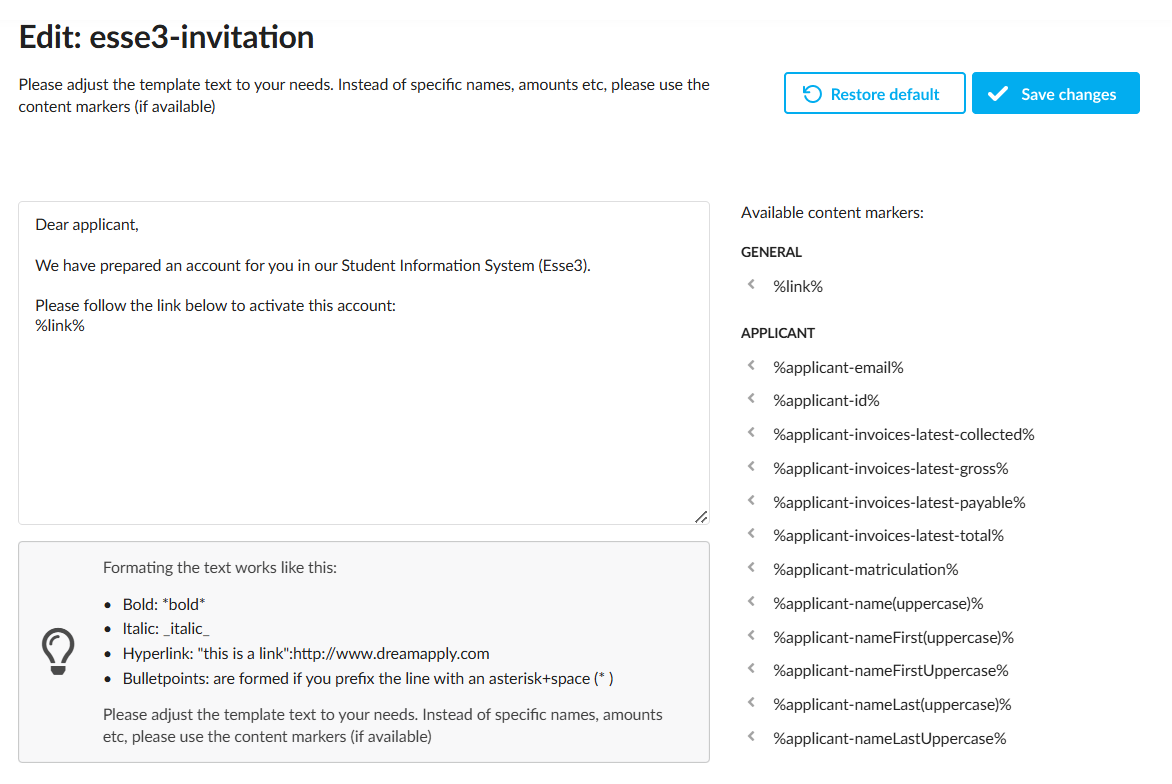
Customize the welcome email template
DreamApply invites applicants to register in ESSE3 by sending an email with an activation link. By default, the email looks like this:
Dear applicant,
We have prepared for you an account in the Student Information System (ESSE3).
Please follow the link below to activate the account.
%link%
To create a personalized message for applicants, you can customize the email template.
- In the main menu, under System, select Templates.
- To the right of the esse3-invitation template, click the edit icon and select Edit details.
- Update the email message. If necessary, you can use variables to create personalized messages. To do this, click Insert a marker and select a variable to be added.
- At the top of the form, click Save changes.