Integrate with Microsoft Dynamics 365
DreamApply utilizes the Microsoft Dynamics 365 Customer Engagement Web API to integrate with Microsoft Dynamics 365.
During the import process, it pulls the following data:
- First name
- Last name
- Email address
- Phone number and other available fields
You can map each lead field to the corresponding fields in the applicant records in DreamApply.
To import lead data to DreamApply, perform the following tasks:
- Create an app registration in Microsoft Entra ID
- Create an application user
- Configure integration settings
Before you begin
To integrate with DreamApply, your account must have the Superuser role or the integrations permission.
Create an app registration in Microsoft Entra ID
To enable the integration with DreamApply, you must create a new app registration in Microsoft Entra ID (formerly Azure Active Directory).
In Microsoft Entra ID, go to Manage > App registrations.
At the top of the page, click New registration.
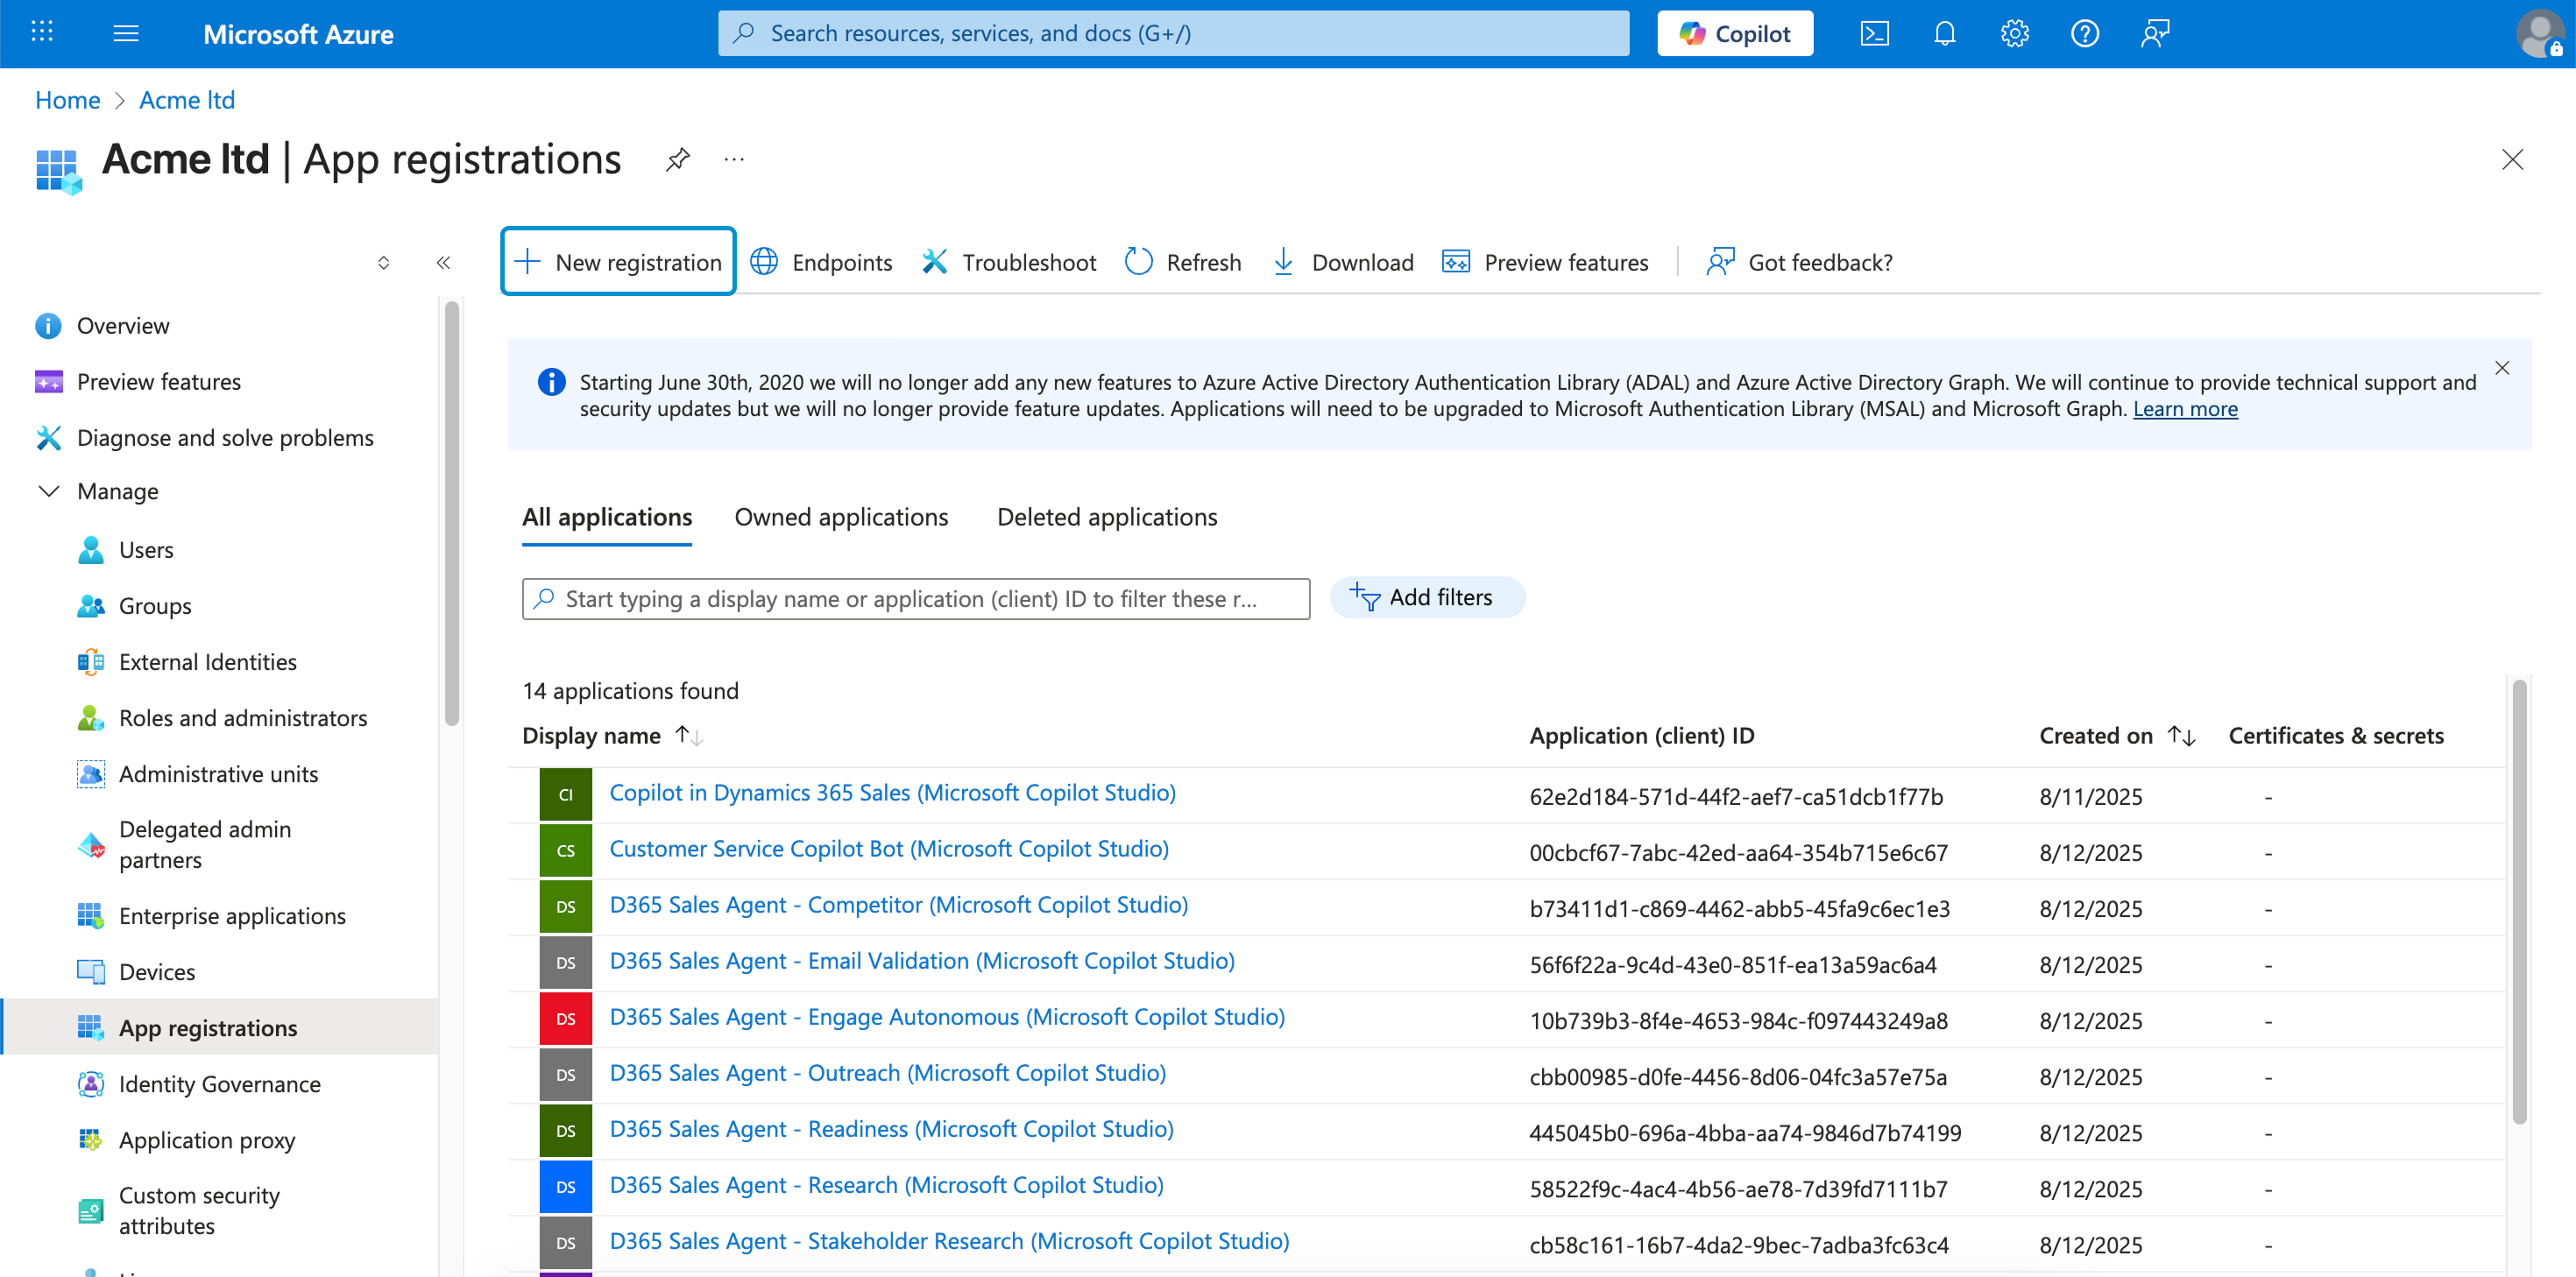
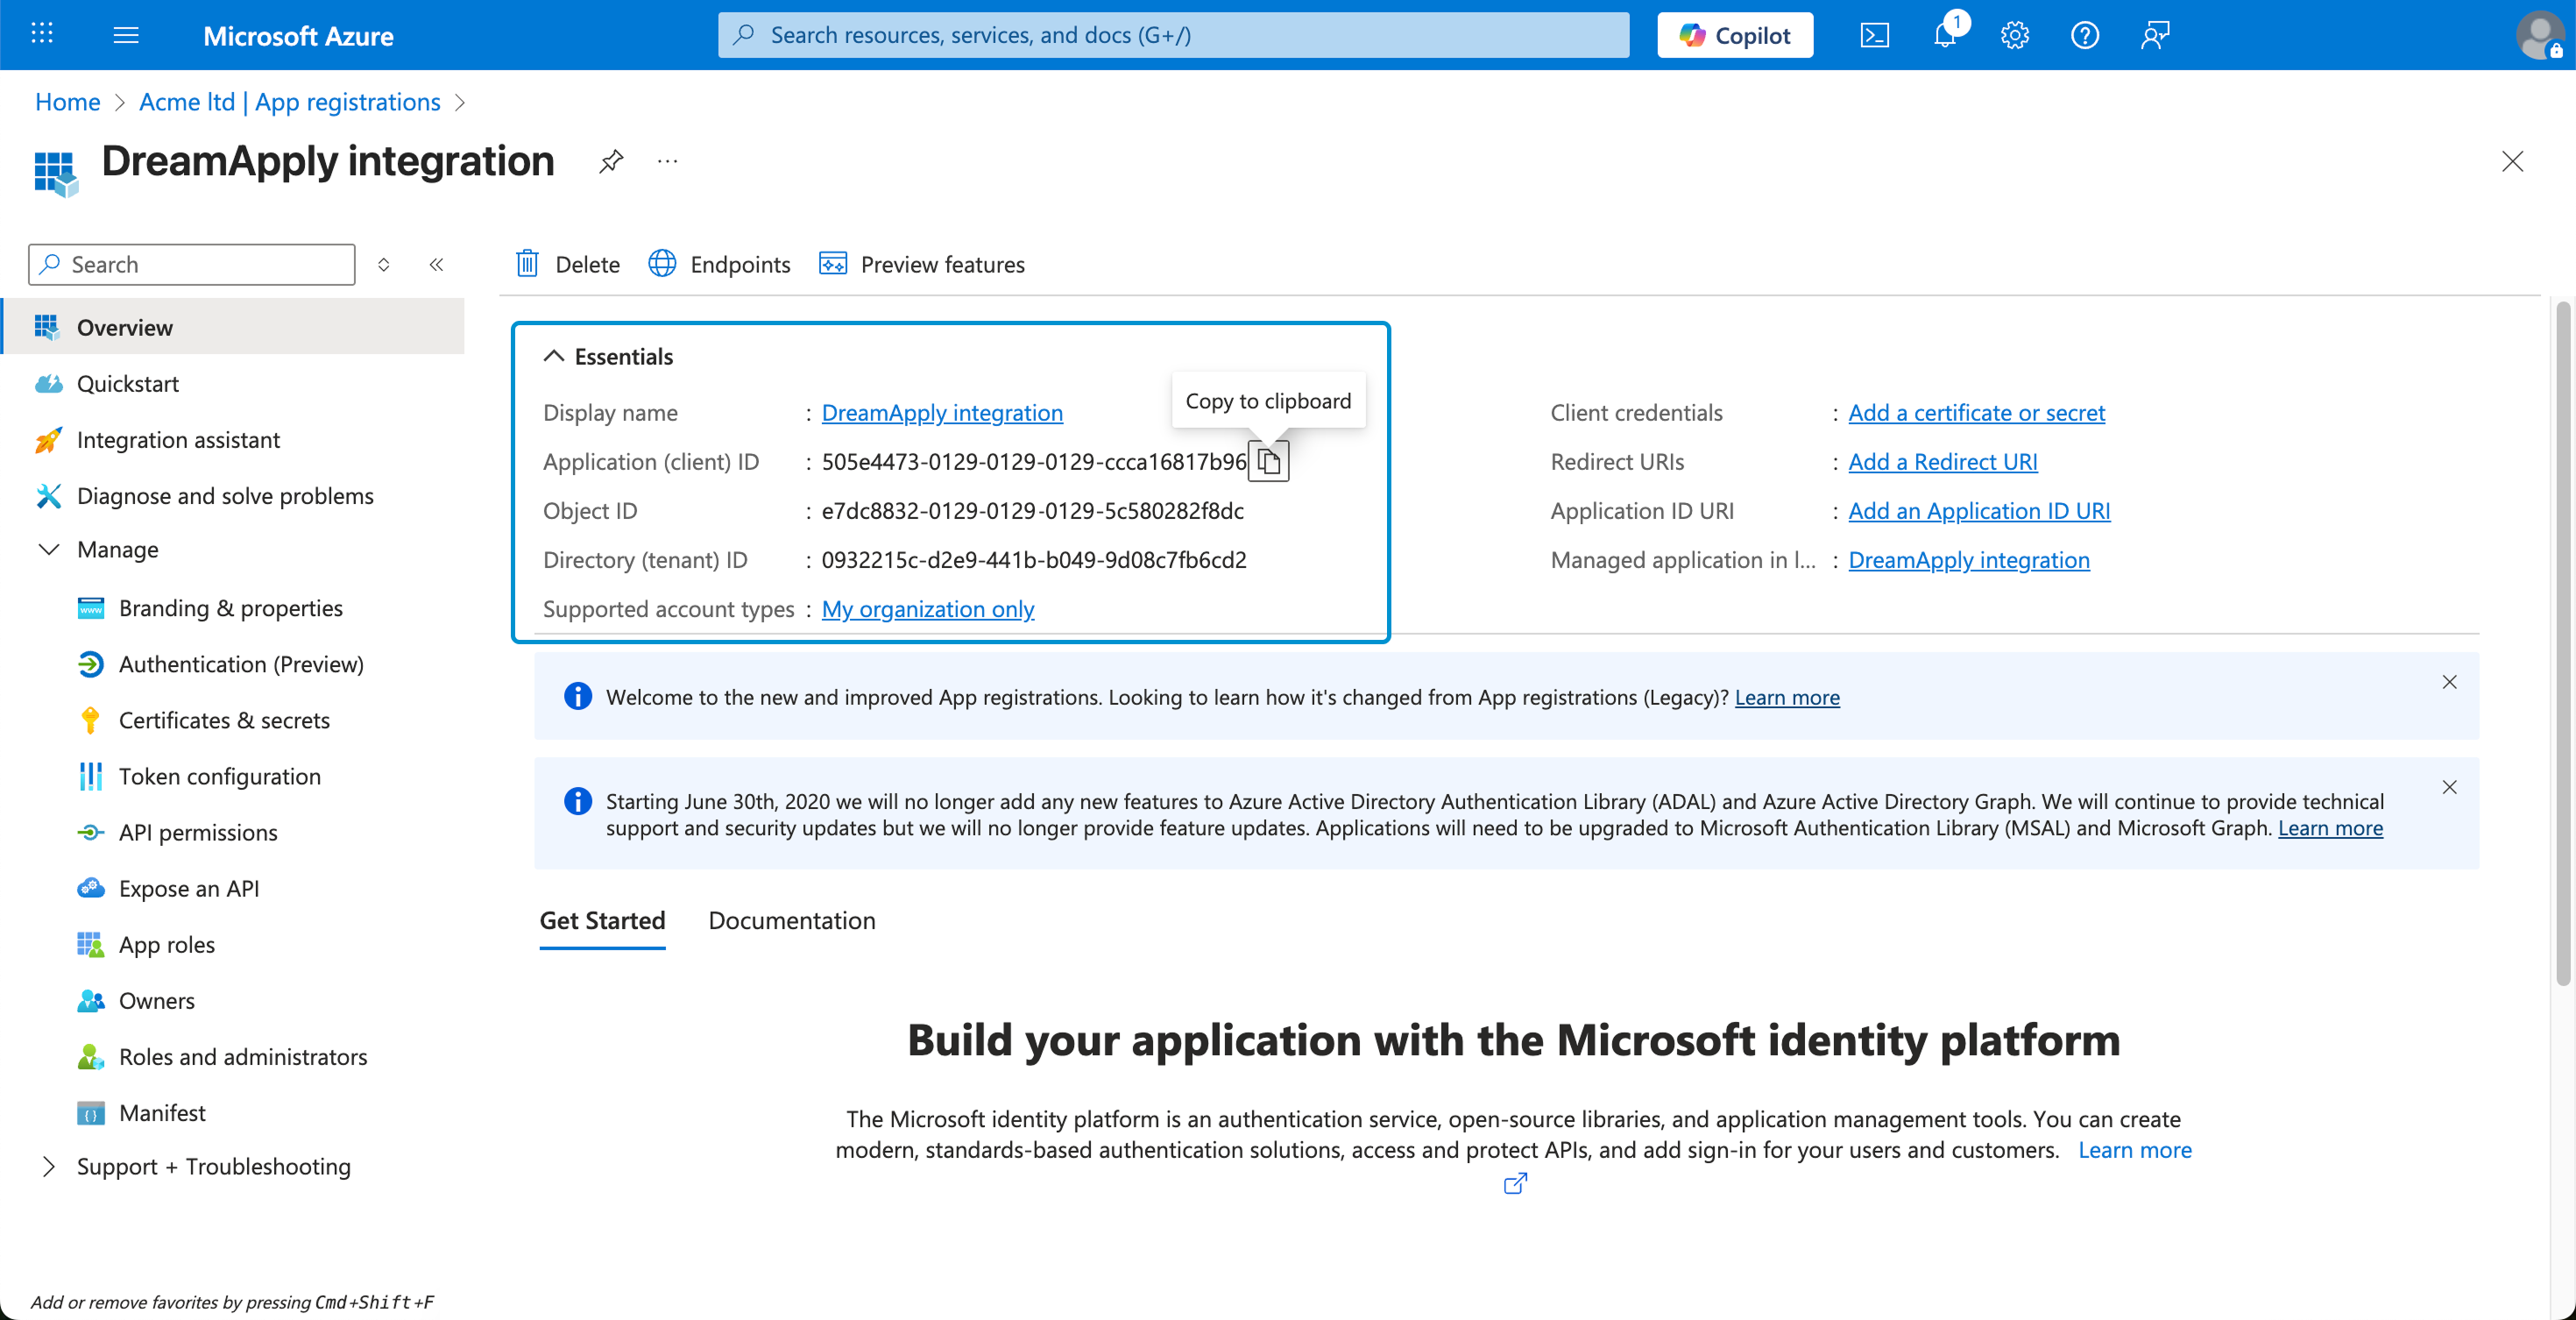
In the Name field, specify the registration name and click Register.

On the displayed page, make note of and copy the Application (client) ID.
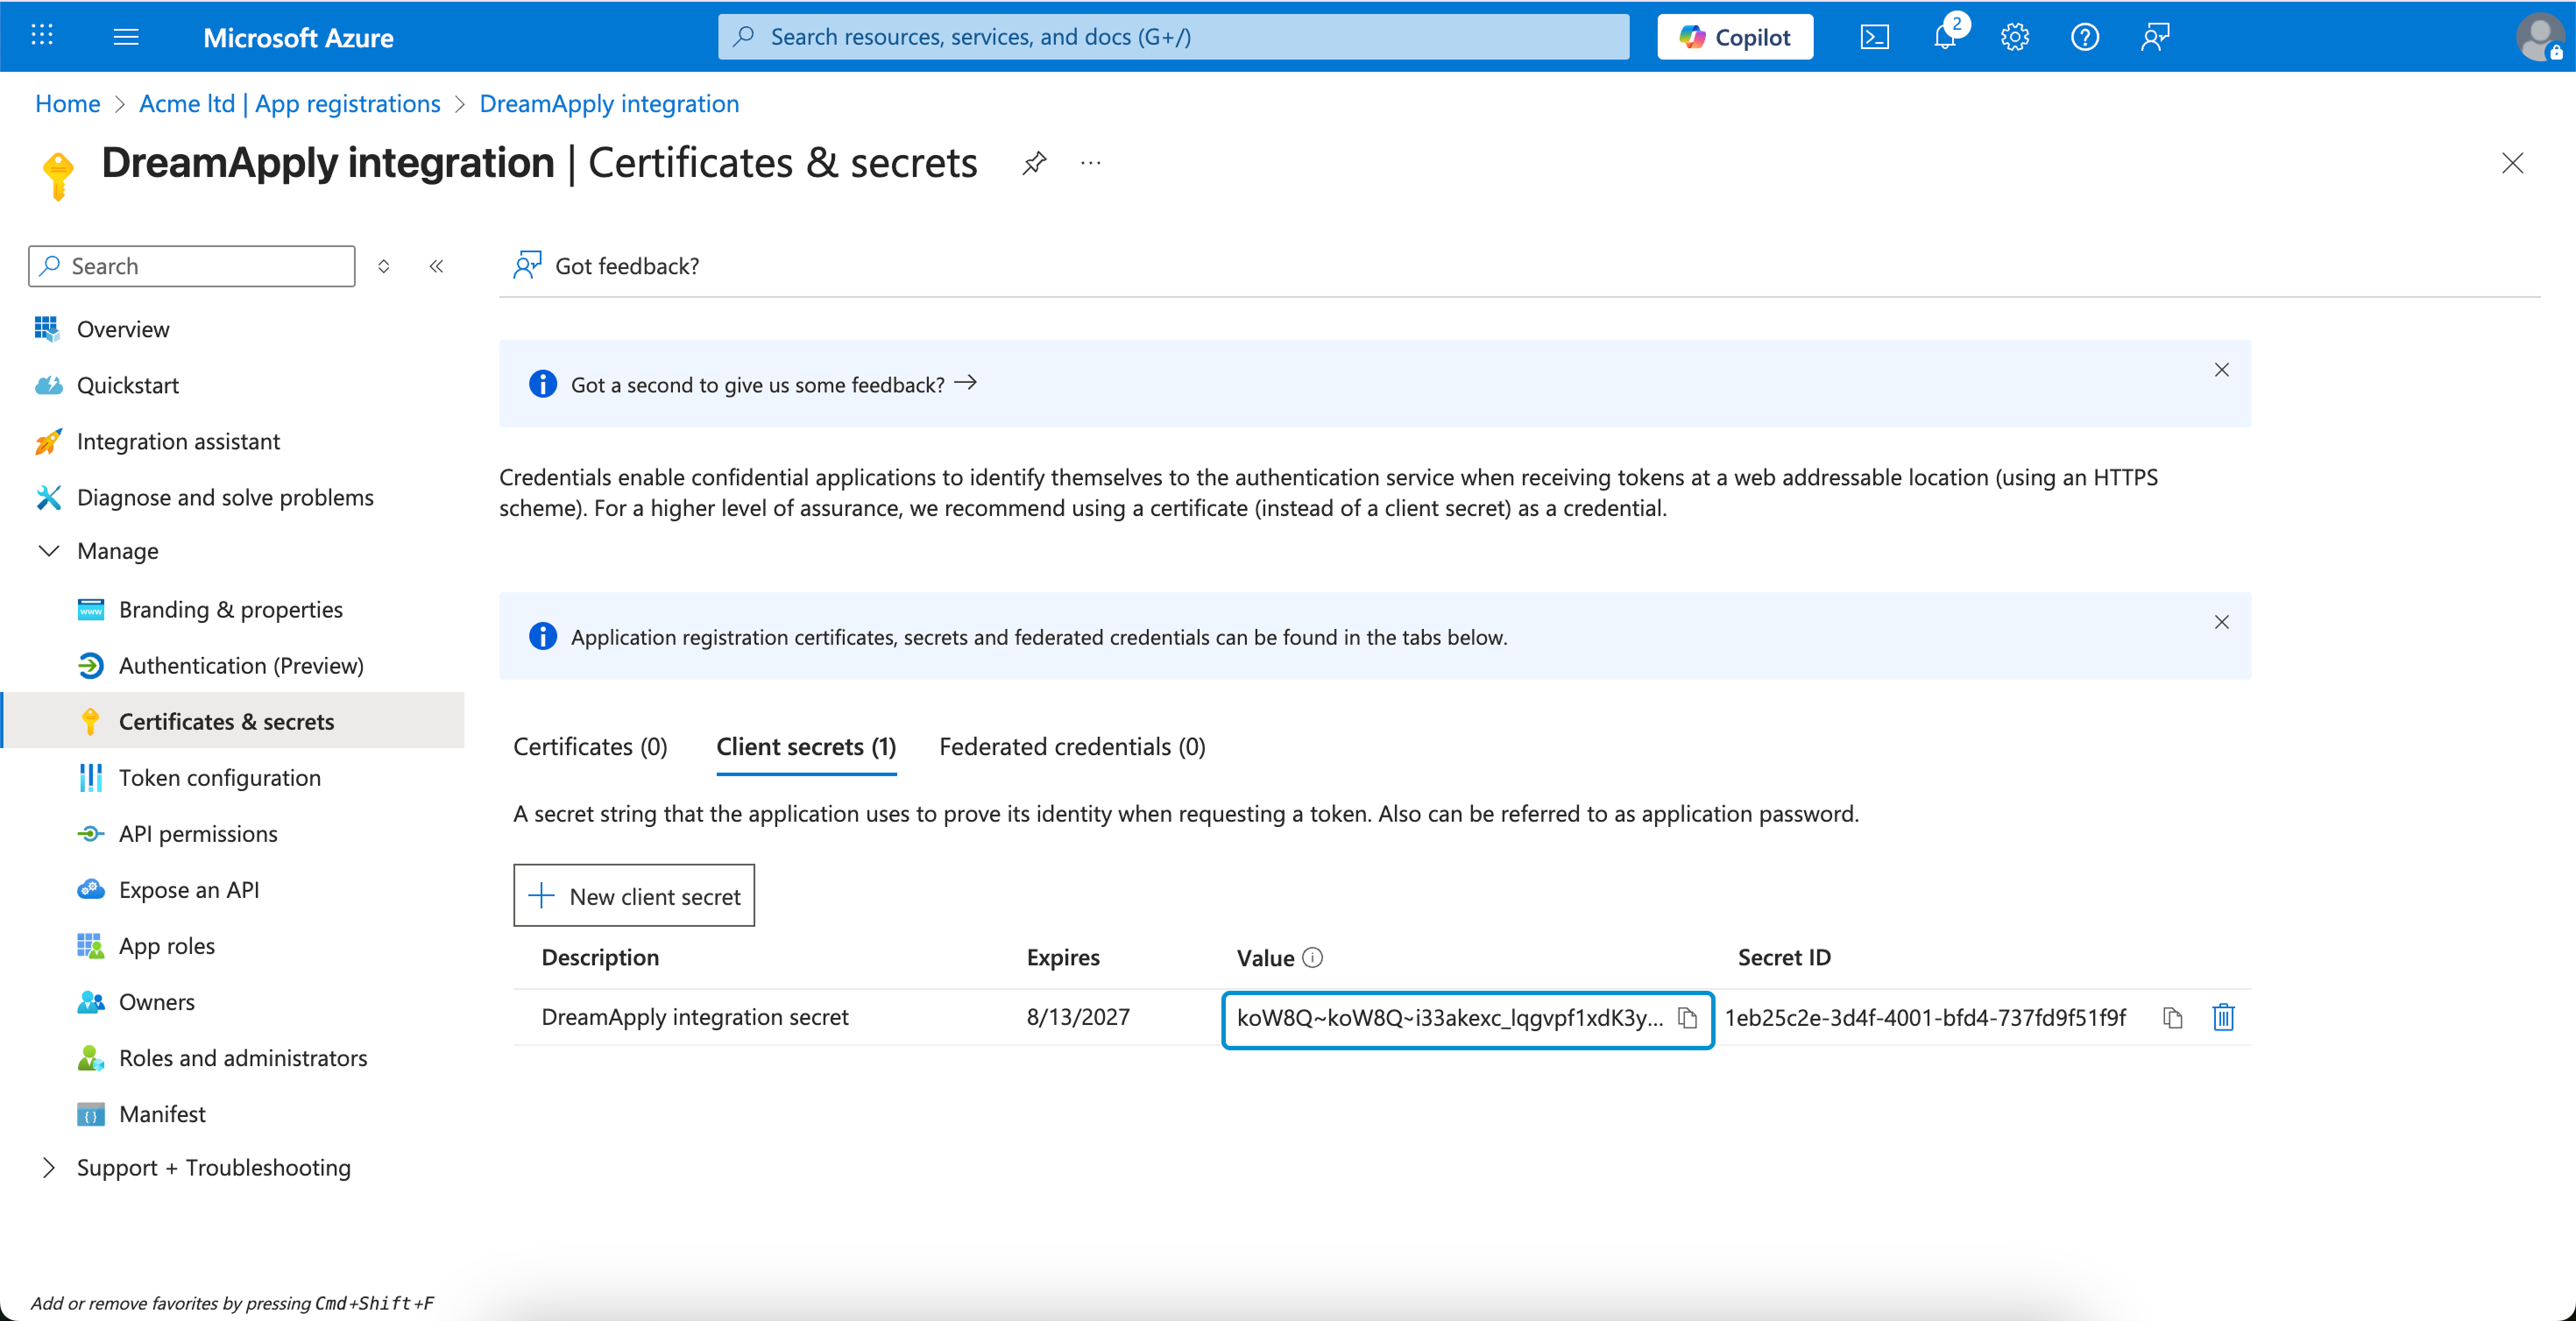
Under Manage, select Certificates and secrets.
On the Client secrets tab, click New client secret.
Specify the secret name, choose the longest expiration period and click Add.

Make note of and copy the client secret value.
Create an application user
You must create an application user in the Power Platform admin center. This user is linked to the Microsoft Entry ID app you registered at the previous step and is required to enable secure communication between Microsoft Dynamics 365 and DreamApply.
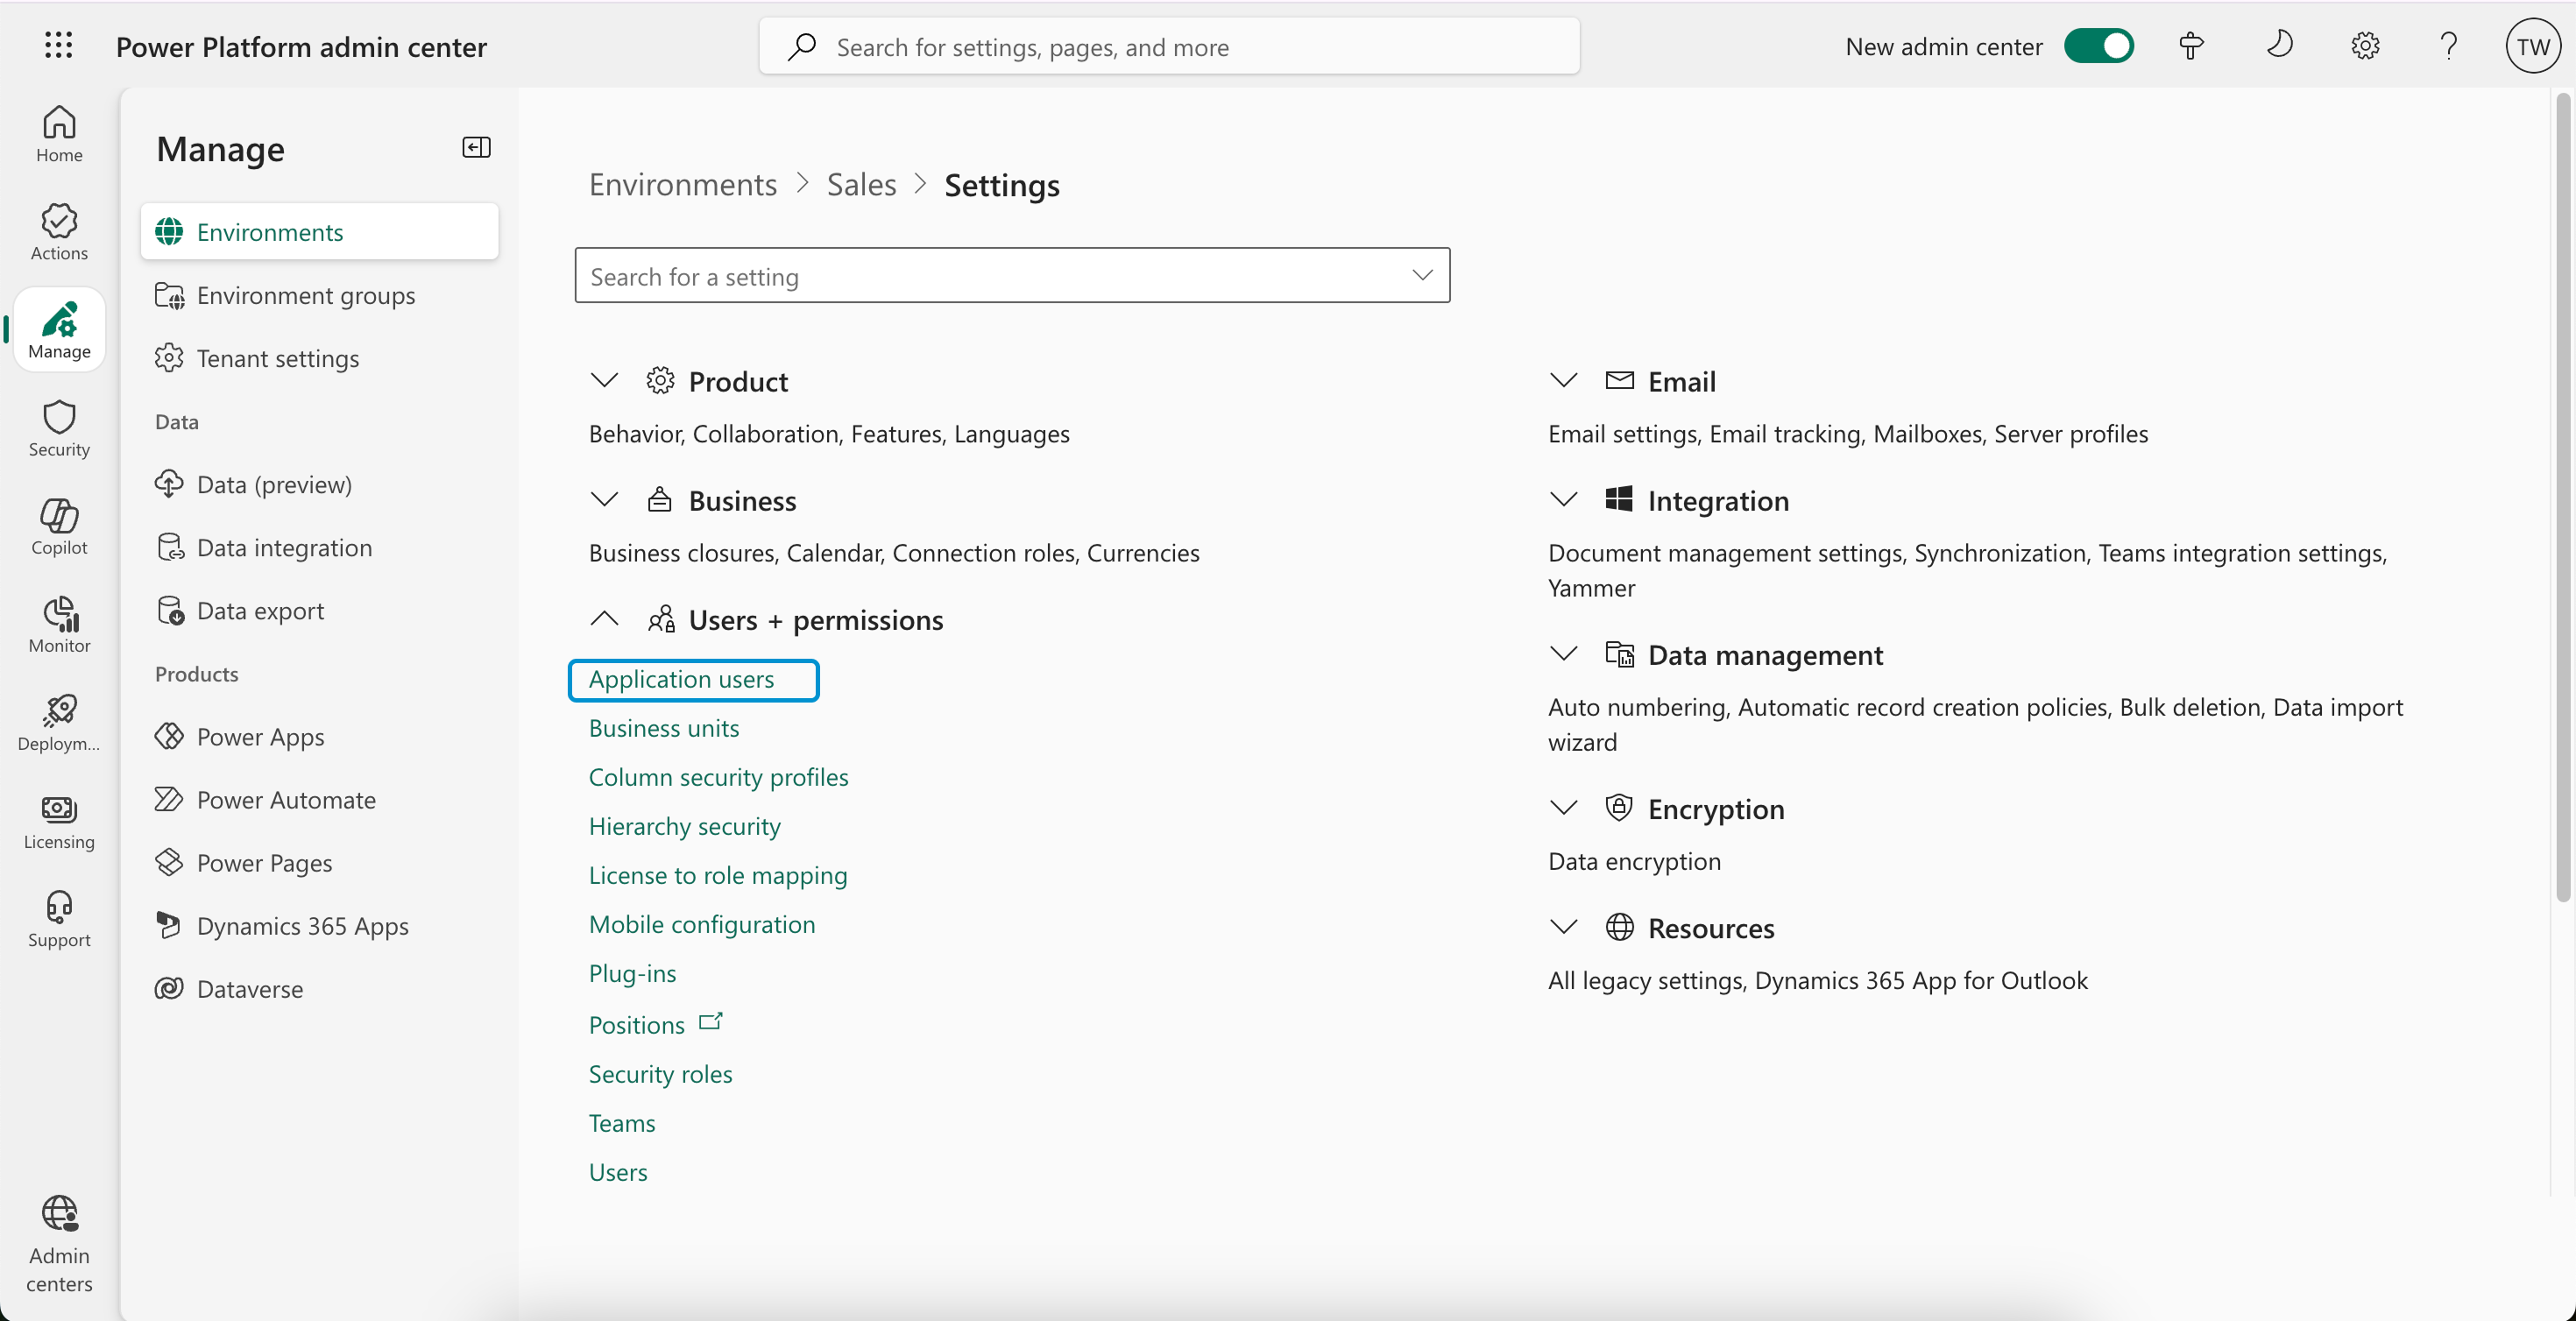
In the left menu of the Power Platform admin center, select Manage > Environments and choose the environment that contains your Microsoft Dynamics 365 instance.
At the top of the view, select Settings > Users + permissions > Application users.
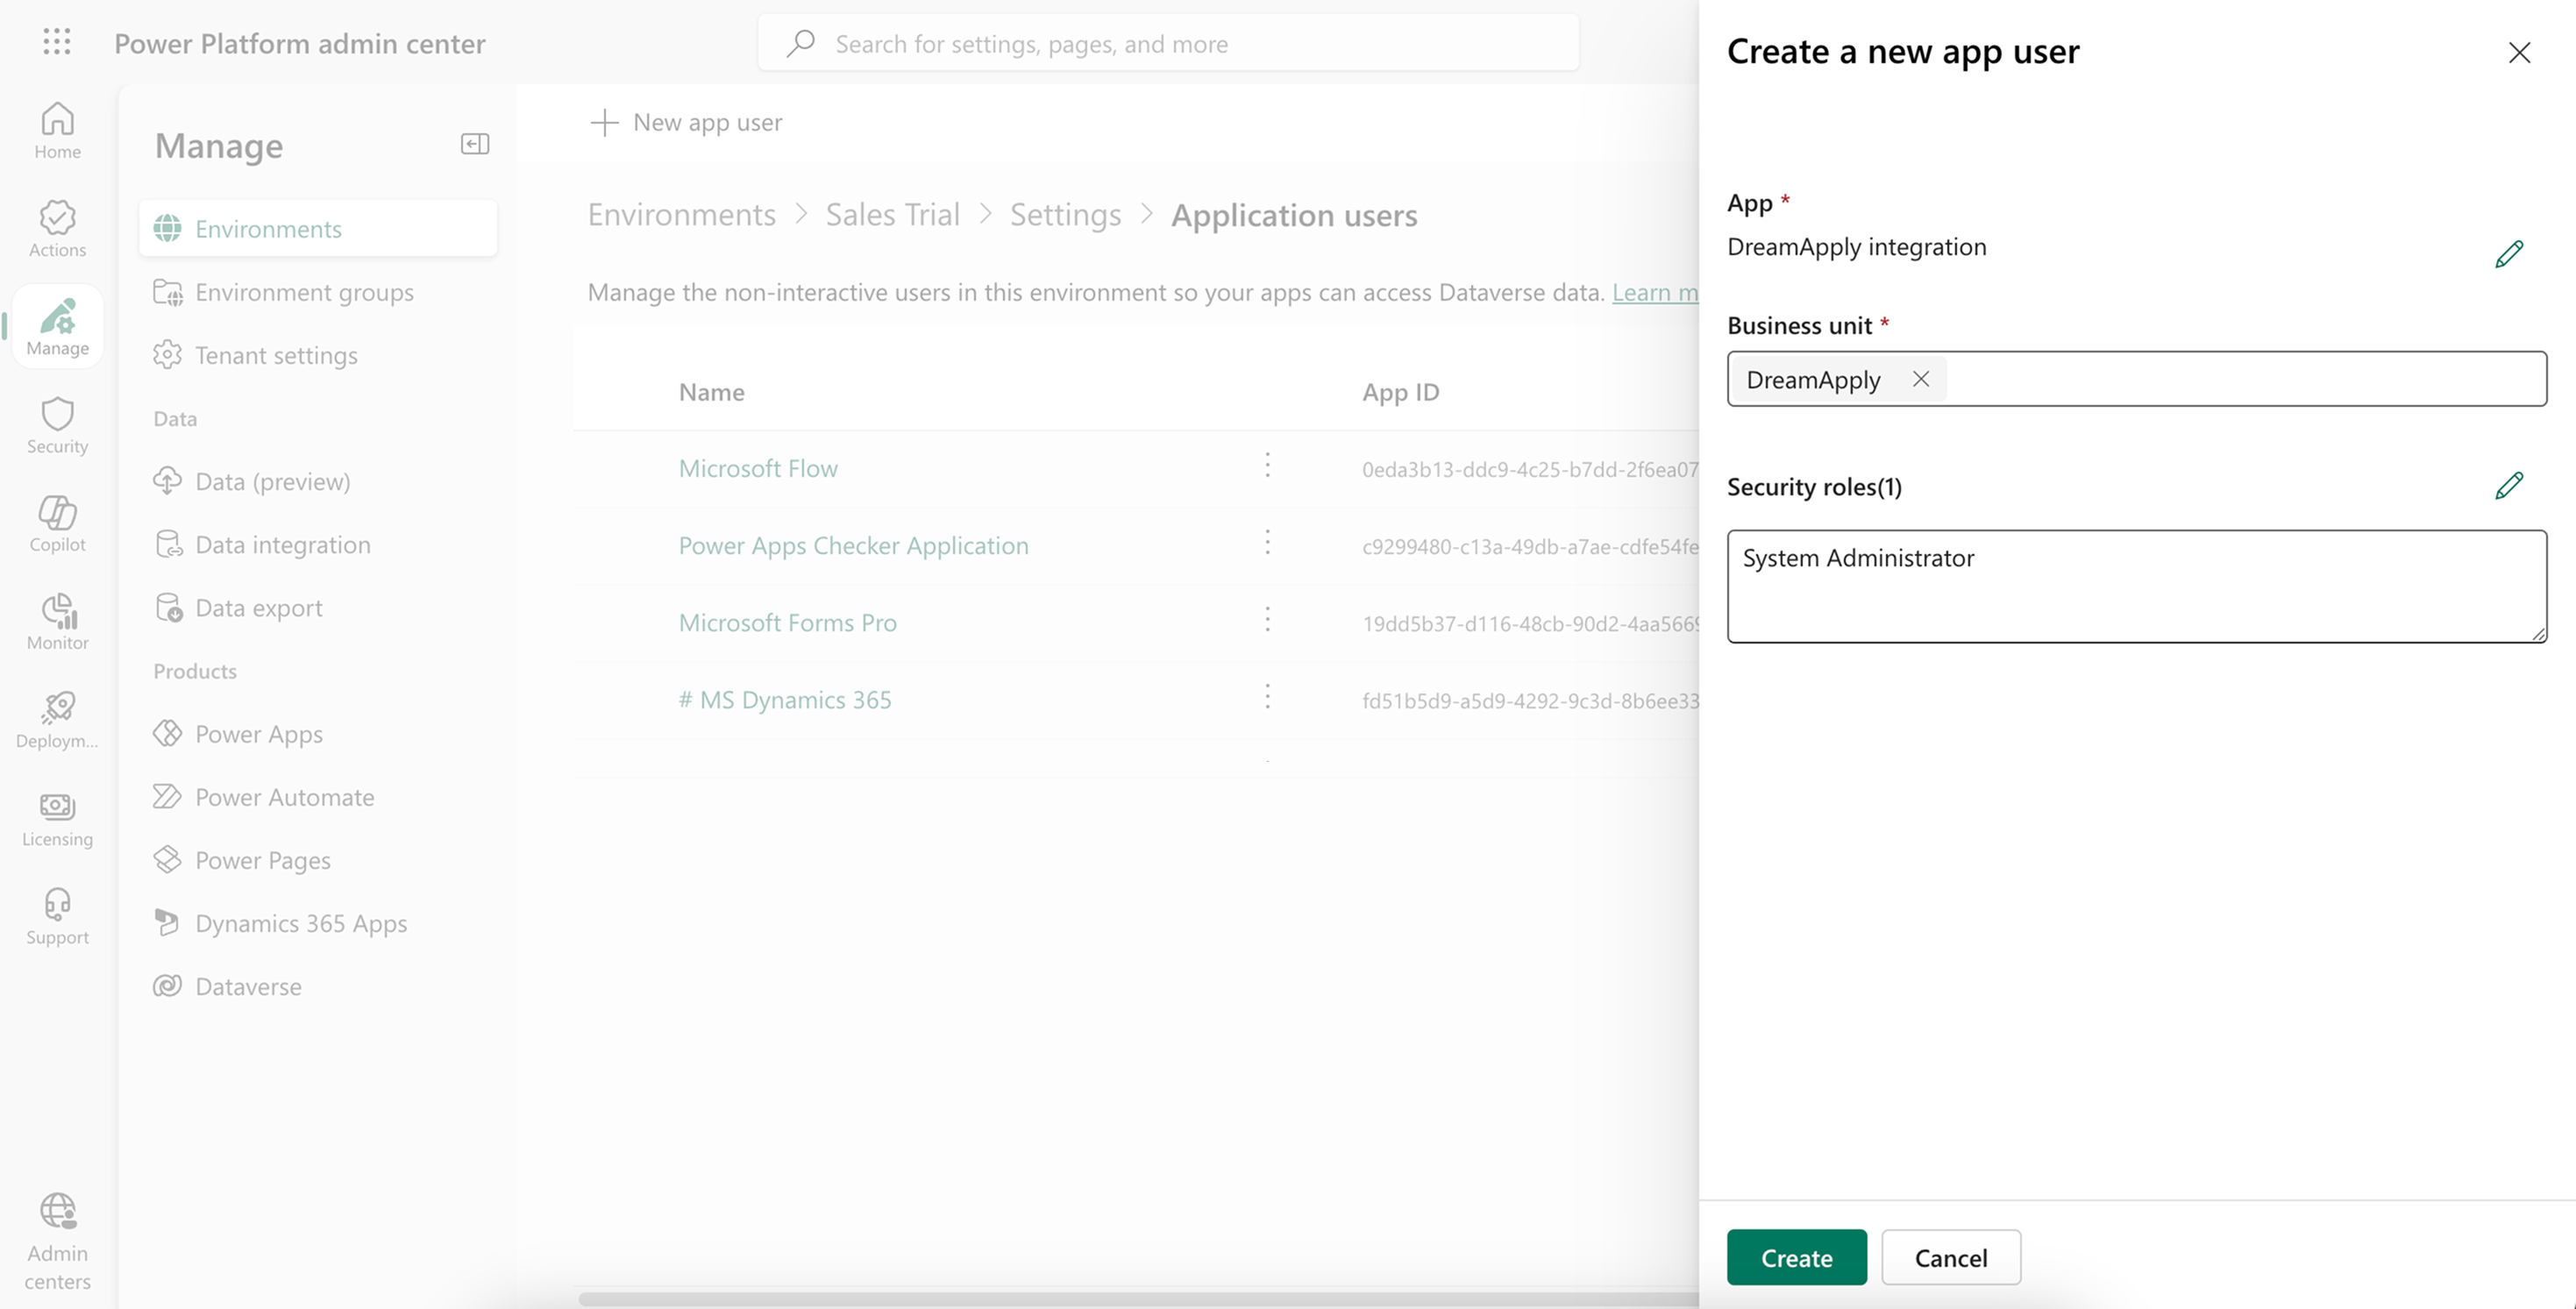
Click New app user.
In the App field, choose the application you registered in Microsoft Entra ID.
Specify the business unit for the user.
In the Security roles field, specify System administrator or set up a custom security role with the following permissions:
Area Sub-Area Permissions Actions Core Records Lead Read Fetch Dynamics 365 leads Customization Entity Read Retrieve metadata about mappable fields Field Relationship Click Create.
Configure integration settings
To connect to Microsoft Dynamics 365 in DreamApply:
In the main menu, under Marketing, select Integrations.
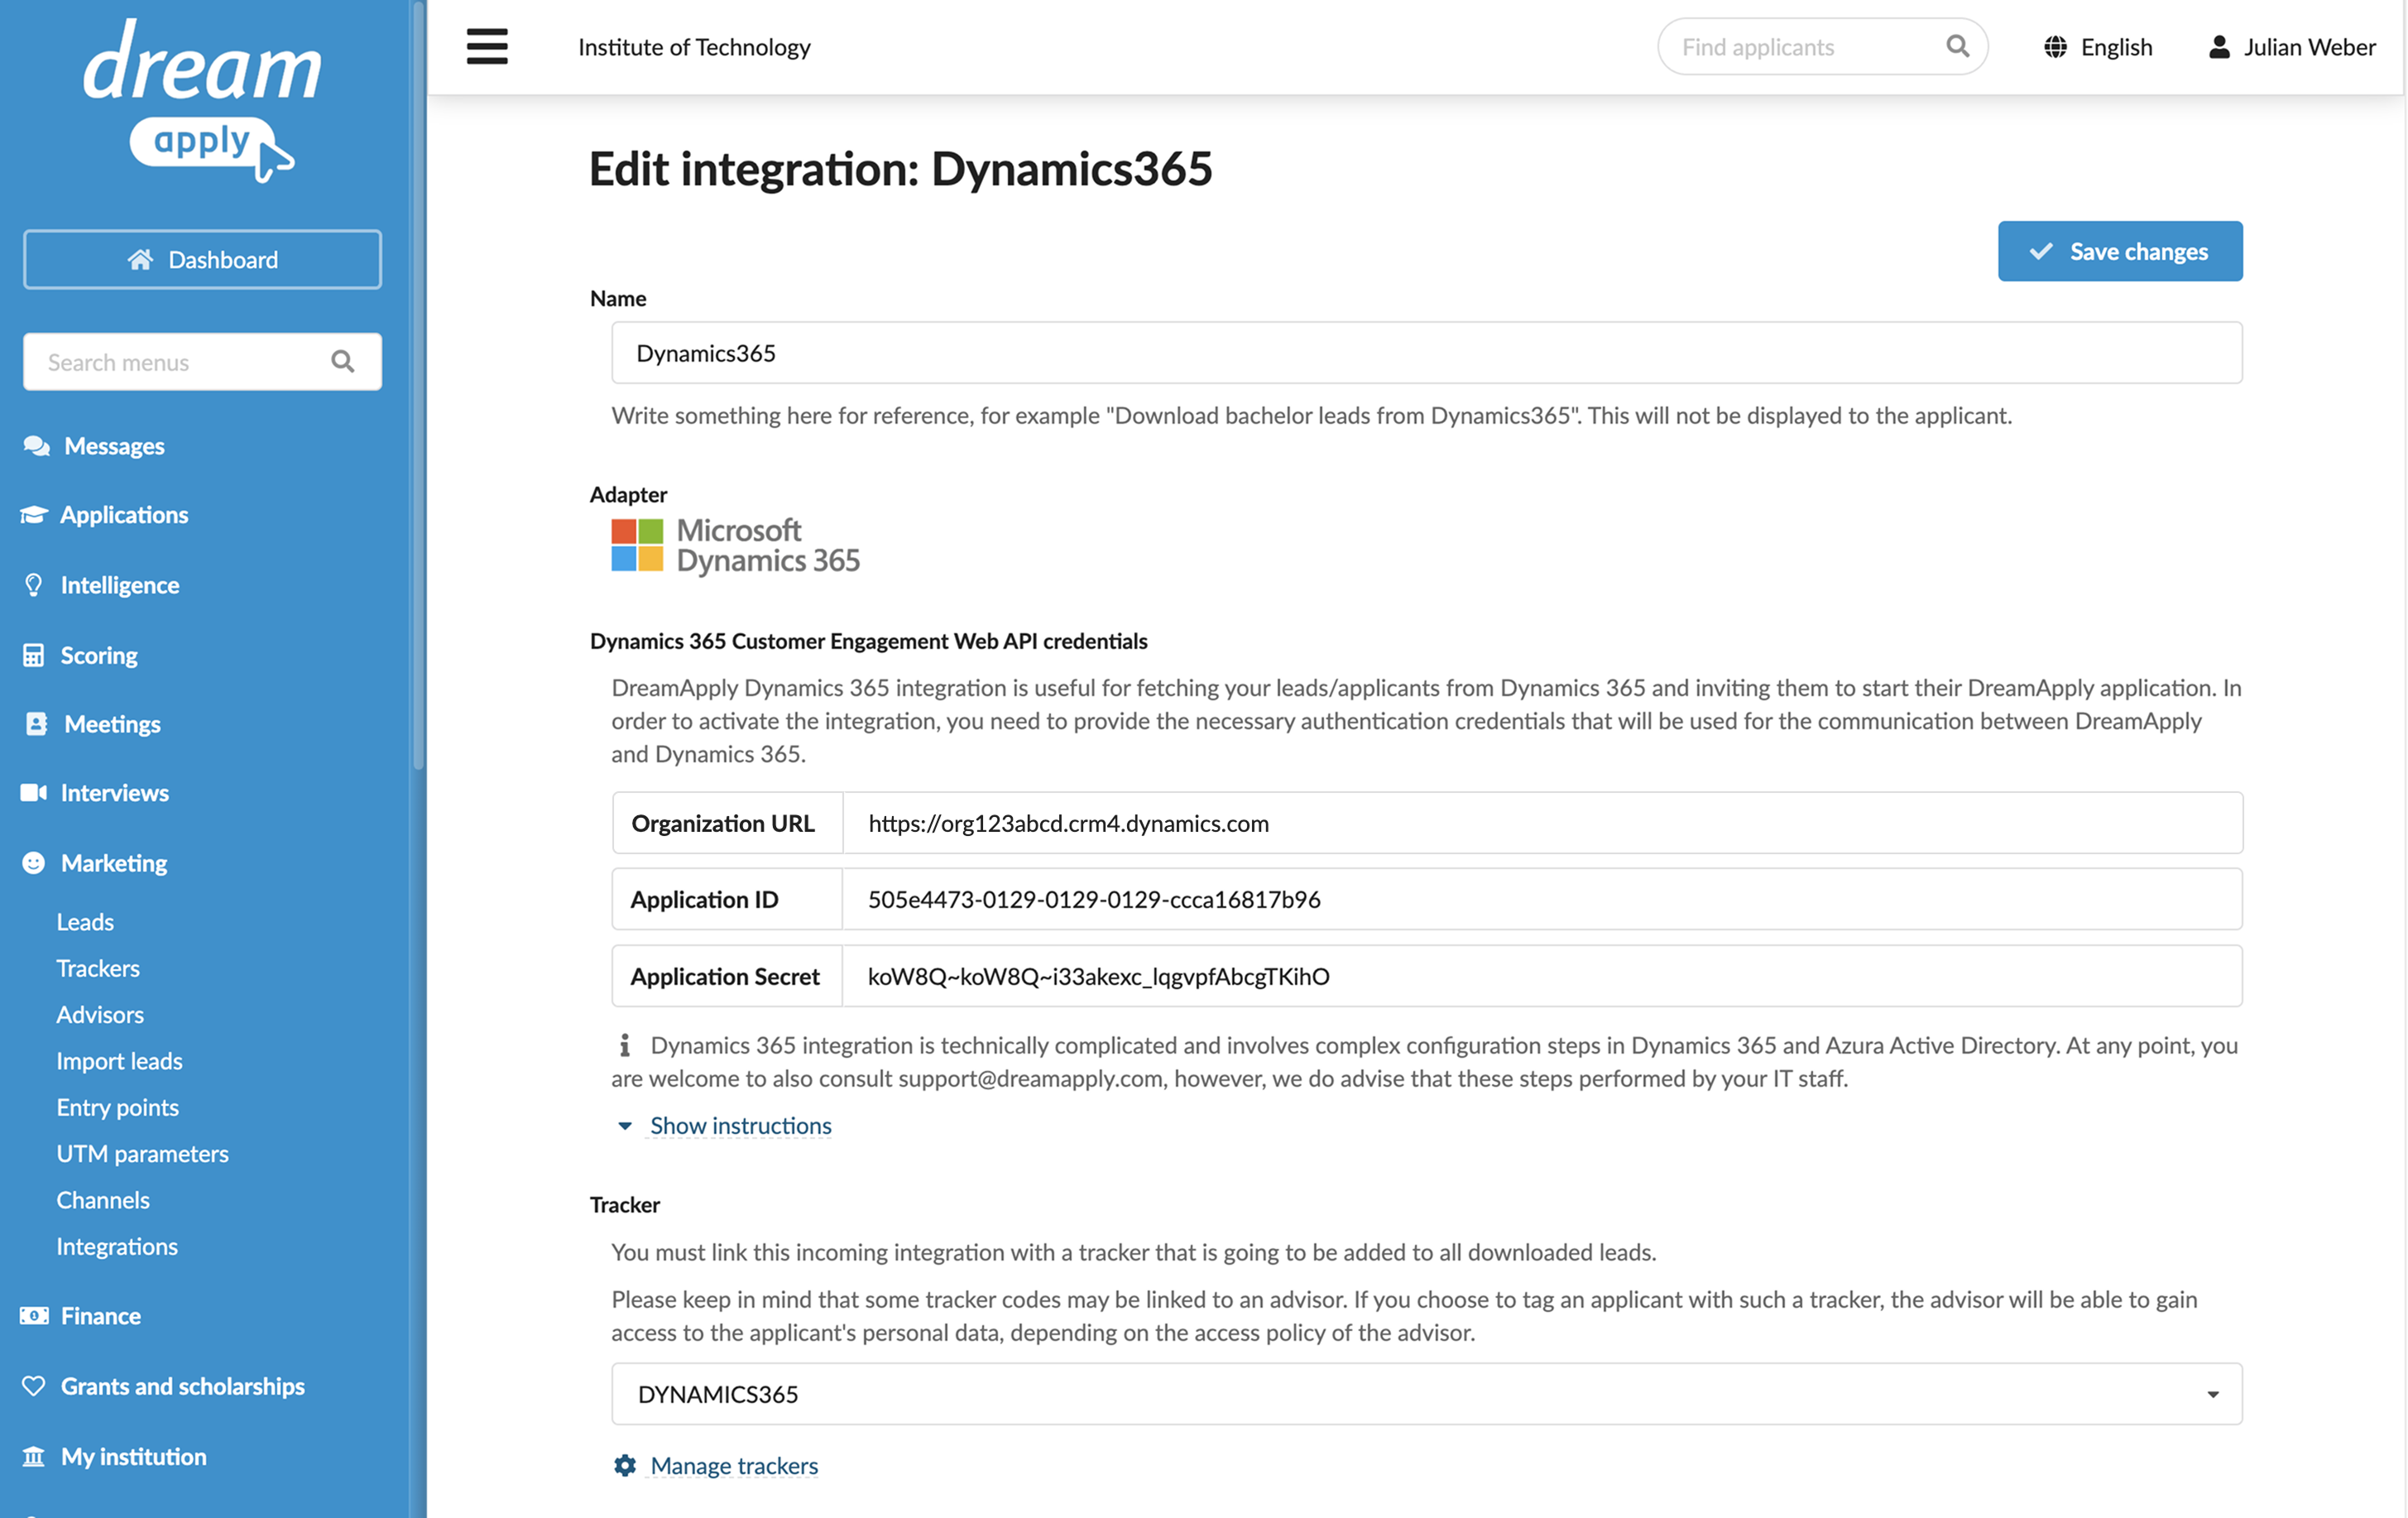
Select Incoming integrations > Microsoft Dynamics 365.
Specify the details to connect to your Microsoft Dynamics 365 instance:
- Organization URL: The URL where your instance is hosted, for example:
https://org123abcd.crm4.dynamics.com - Application ID: The application (client) ID you copied earlier
- Application Secret: The application secret value you copied earlier
- Organization URL: The URL where your instance is hosted, for example:
From the Tracker list, select the tracker to assign to imported leads.
Set the start date for the lead import. DreamApply will only fetch records created on or after this date.
If necessary, edit the welcome email template.
In the Technical contact field, specify an email address for technical support. DreamApply will send error descriptions to this address if any integration issues occur.
At the top of the form, click Save changes.
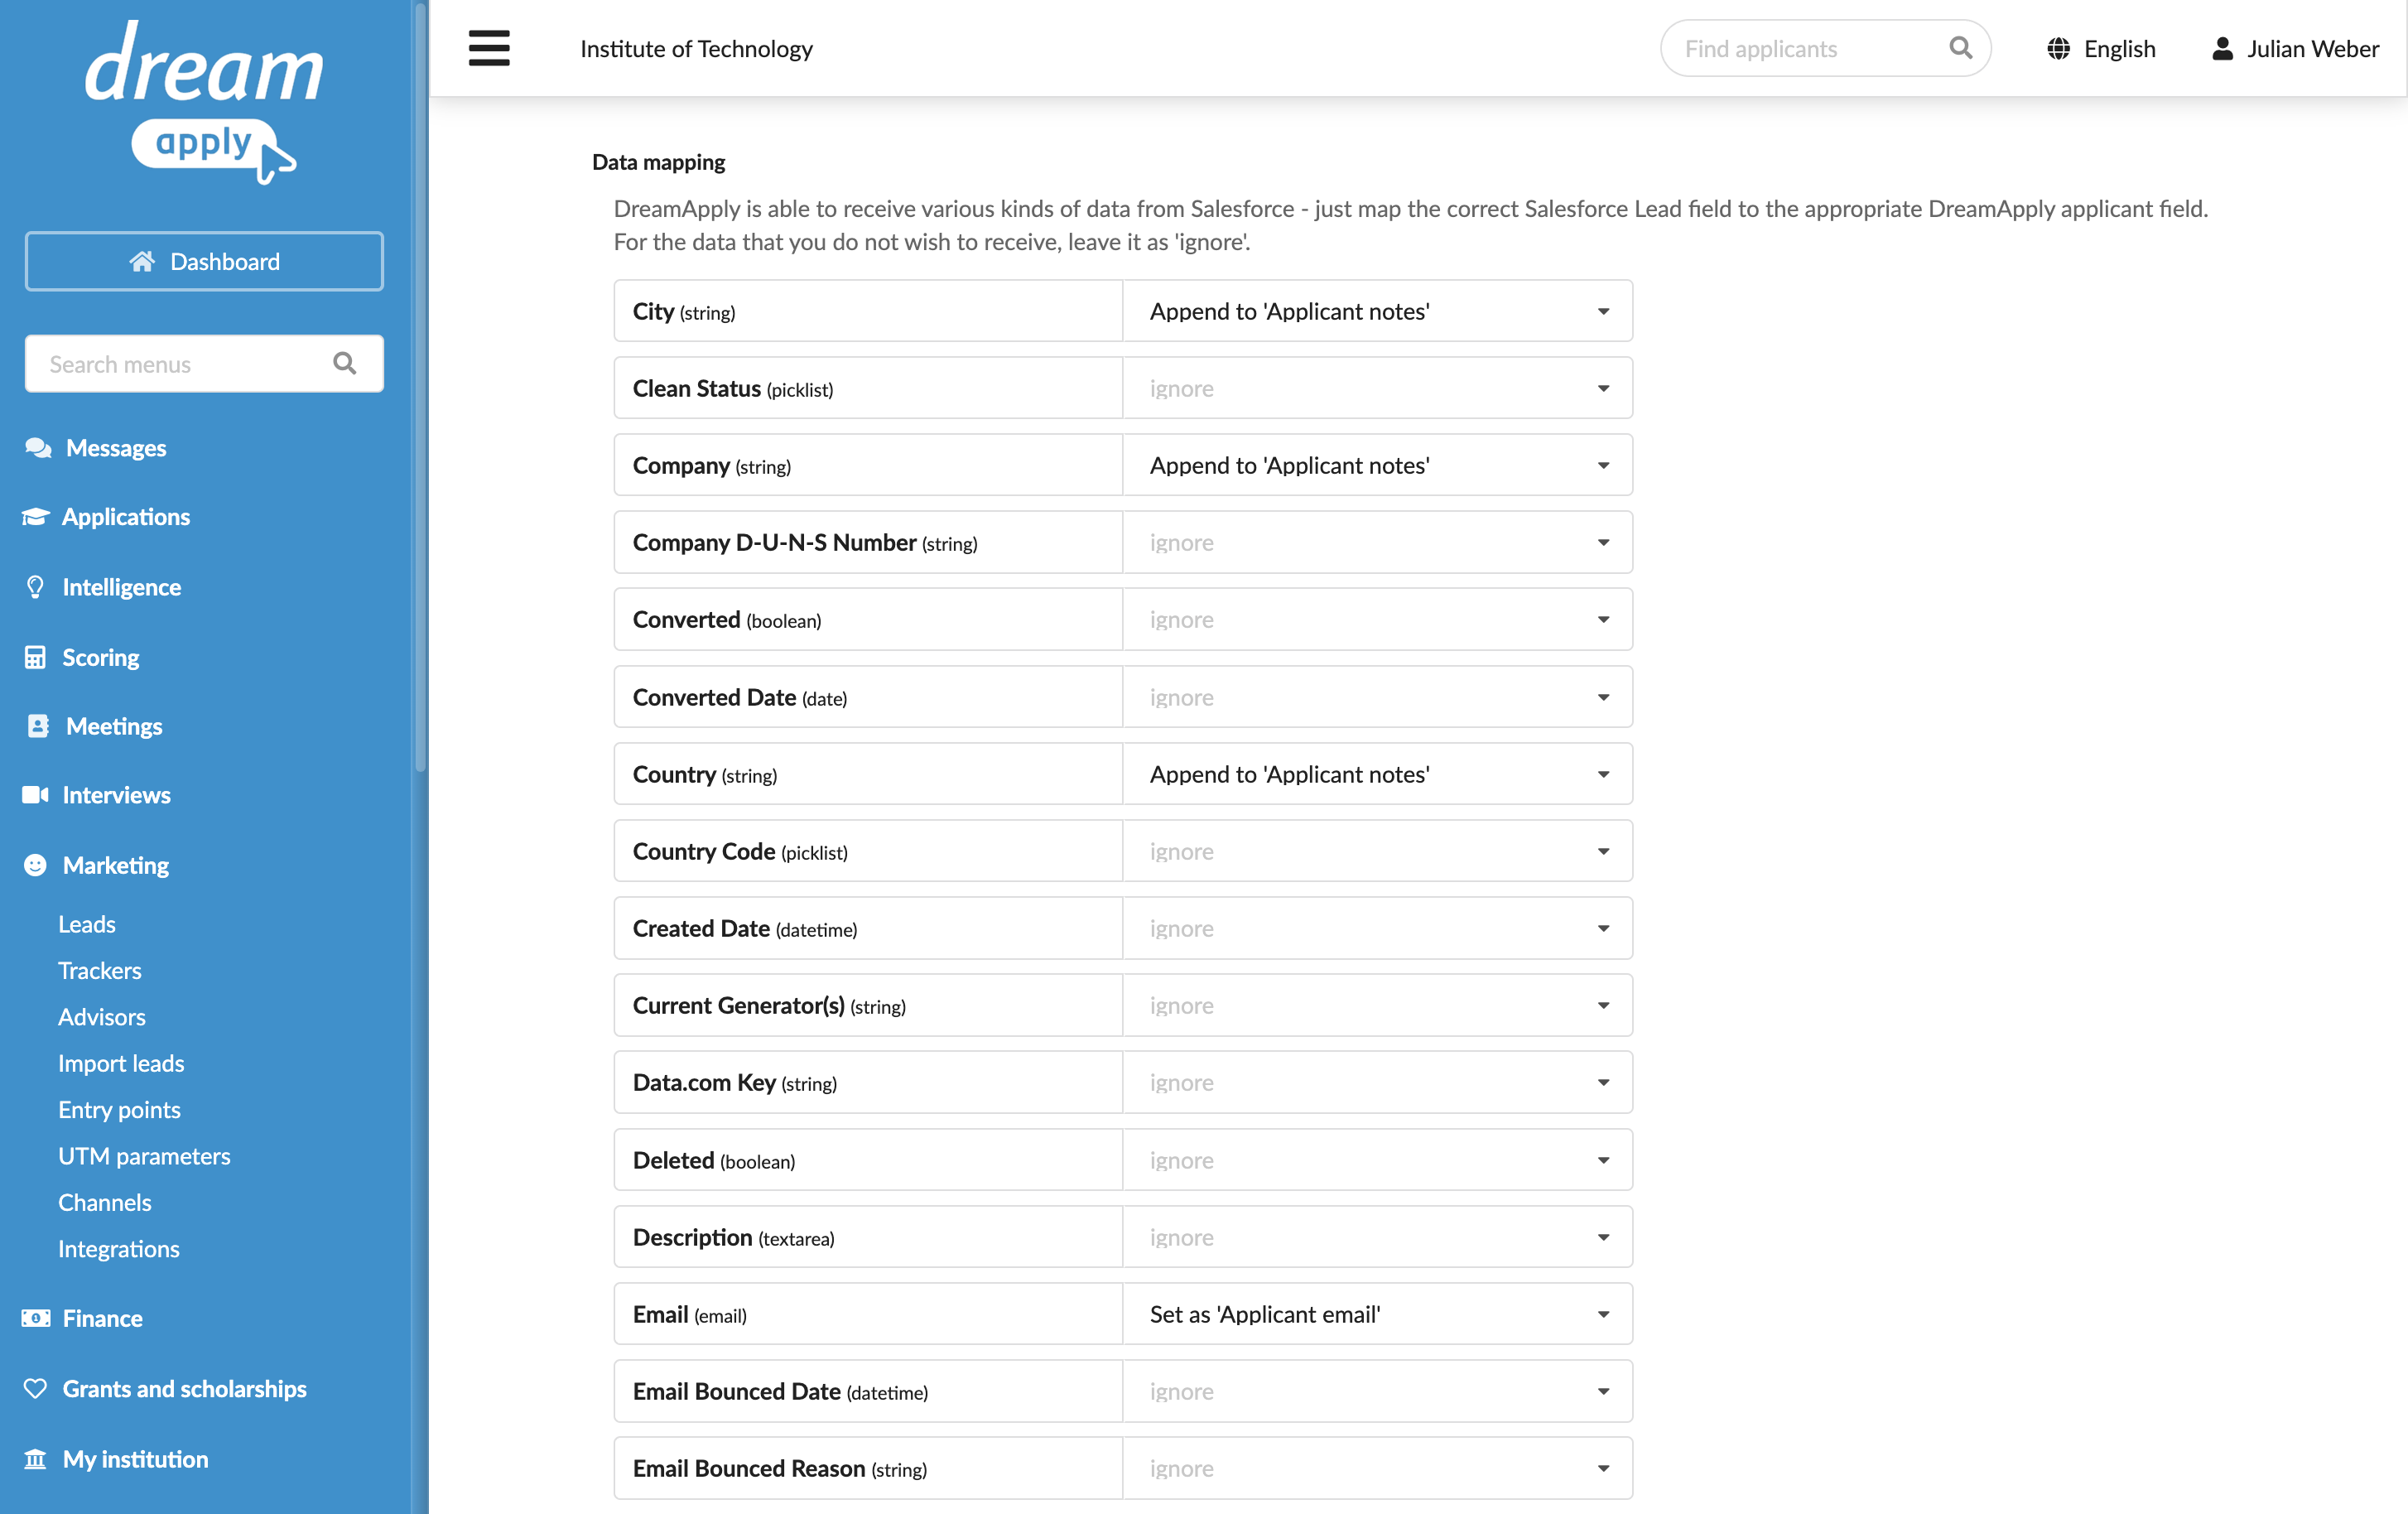
In the Data mapping section, specify how Microsoft Dynamics 365 lead fields must map to DreamApply applicant data. You can use a specific field, like a company name, as an additional tracker and append some lead data to notes.
At the top of the form, click Save changes.
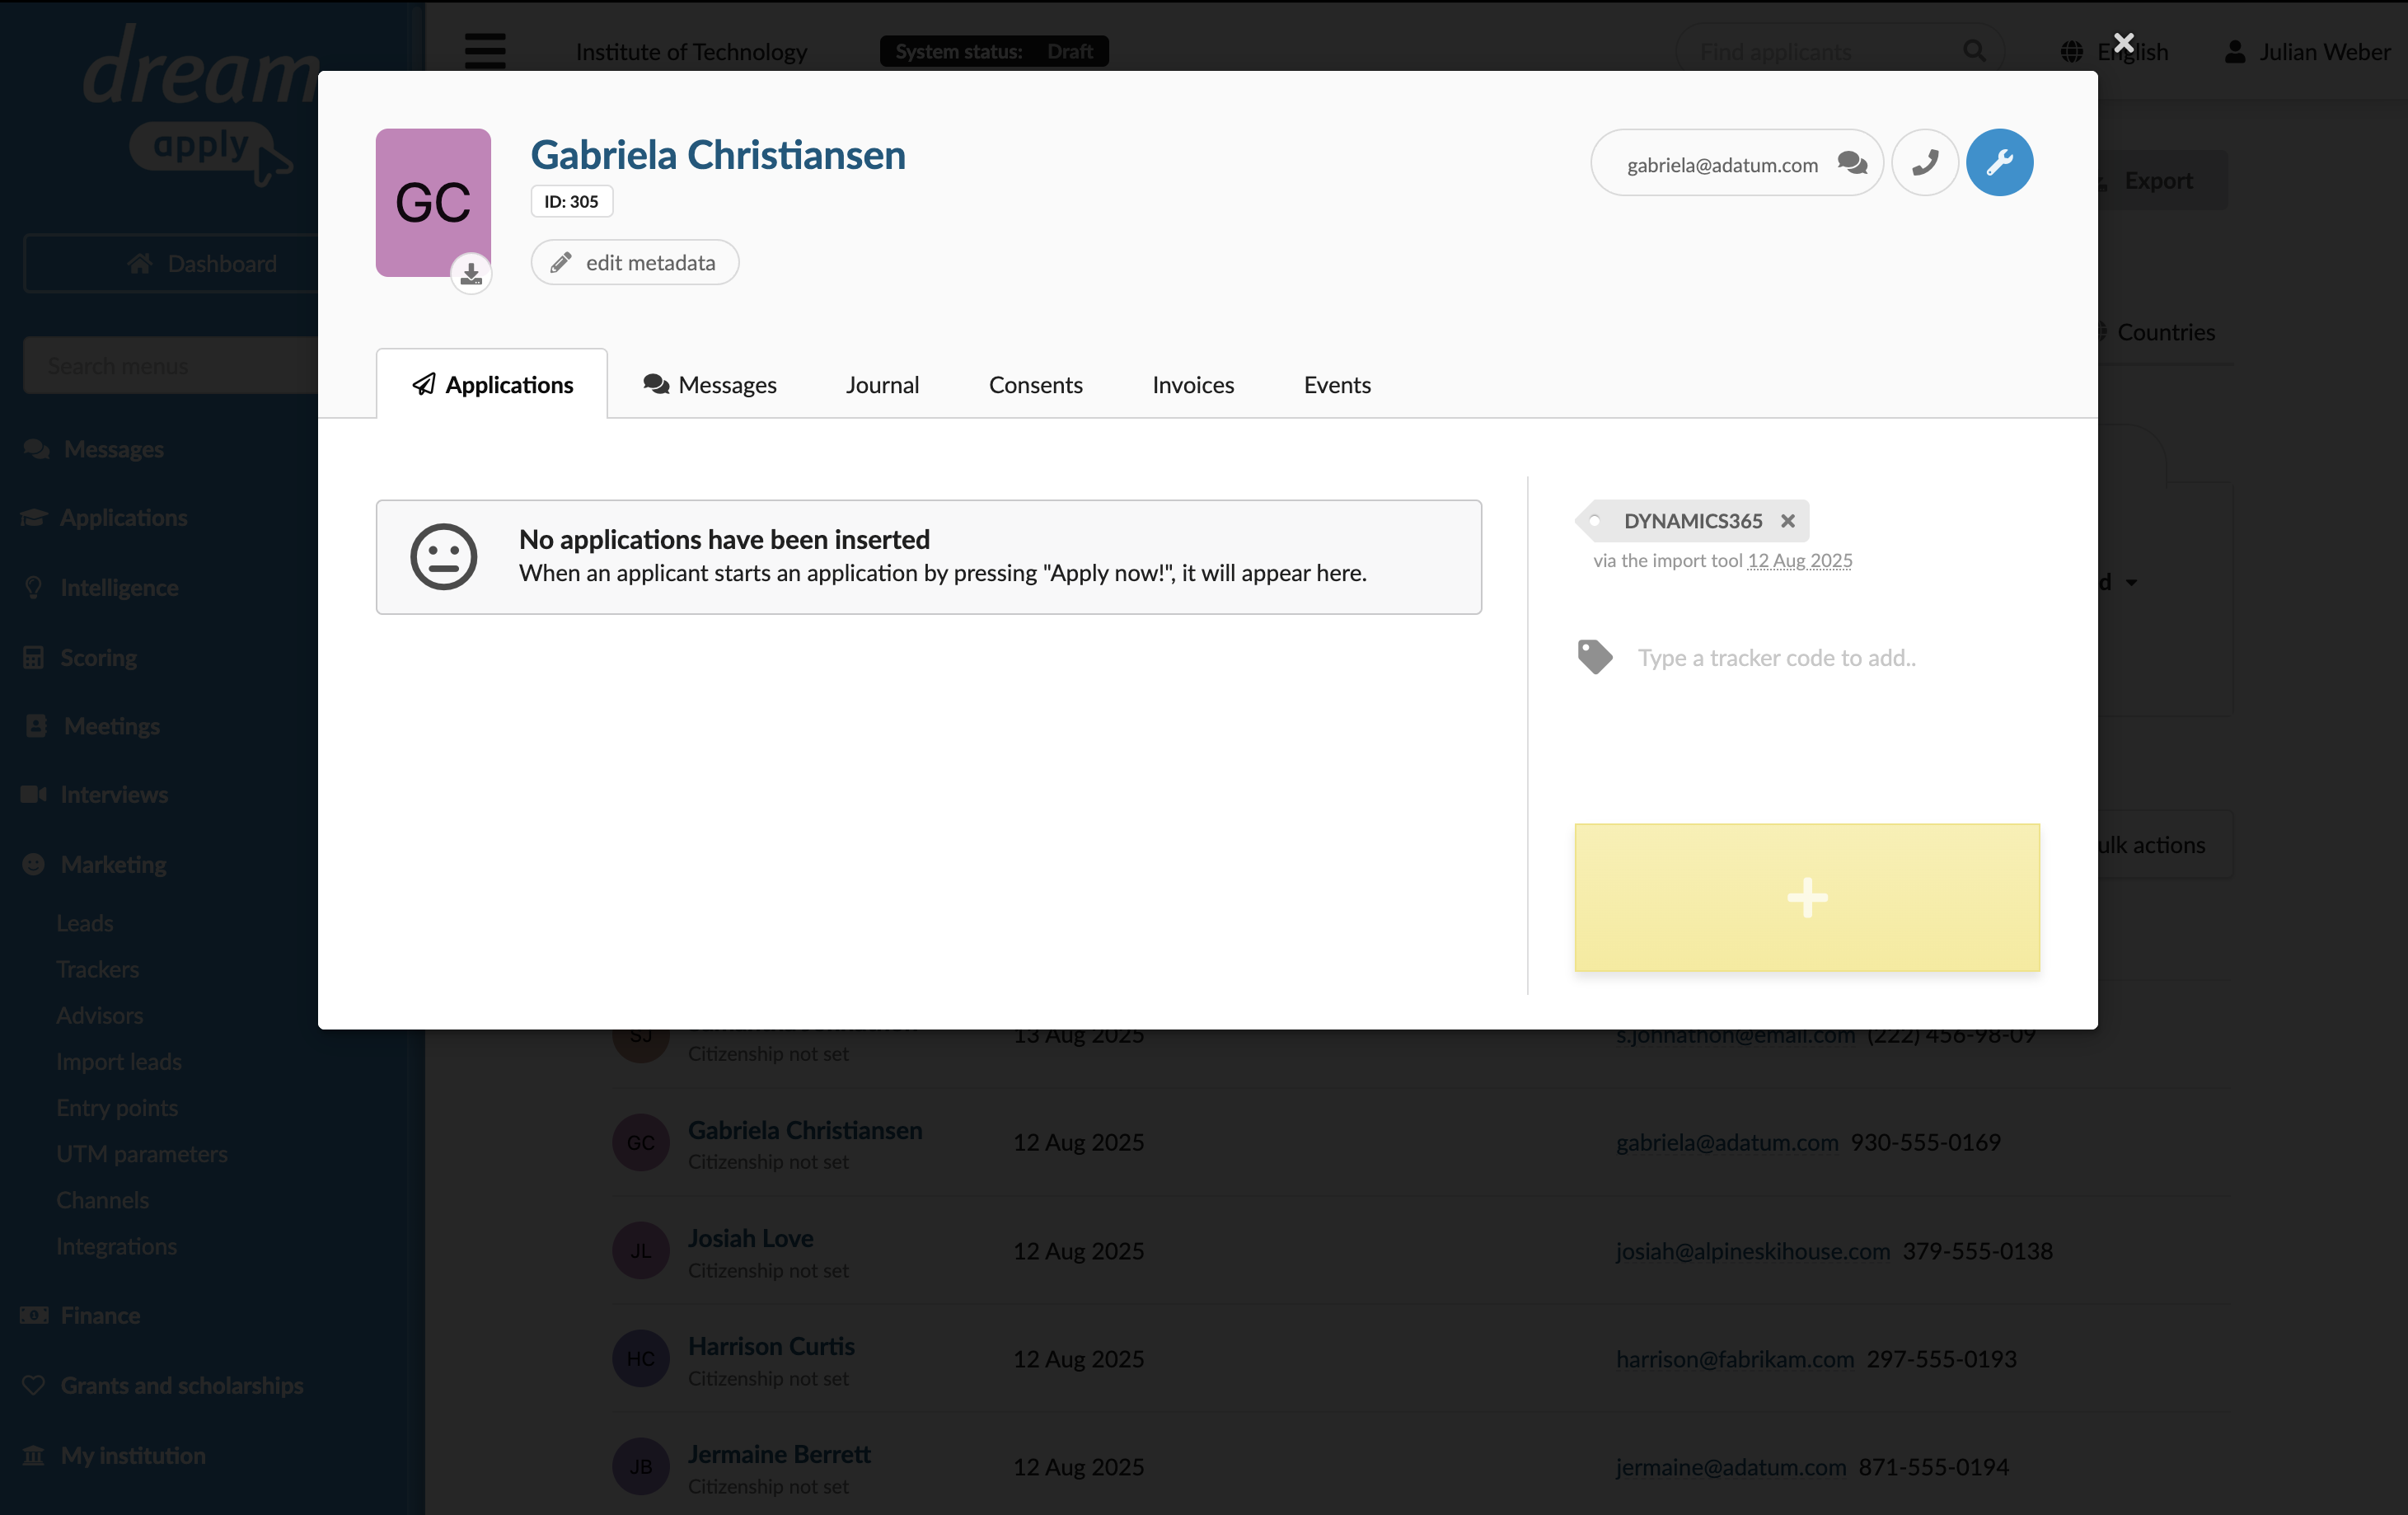
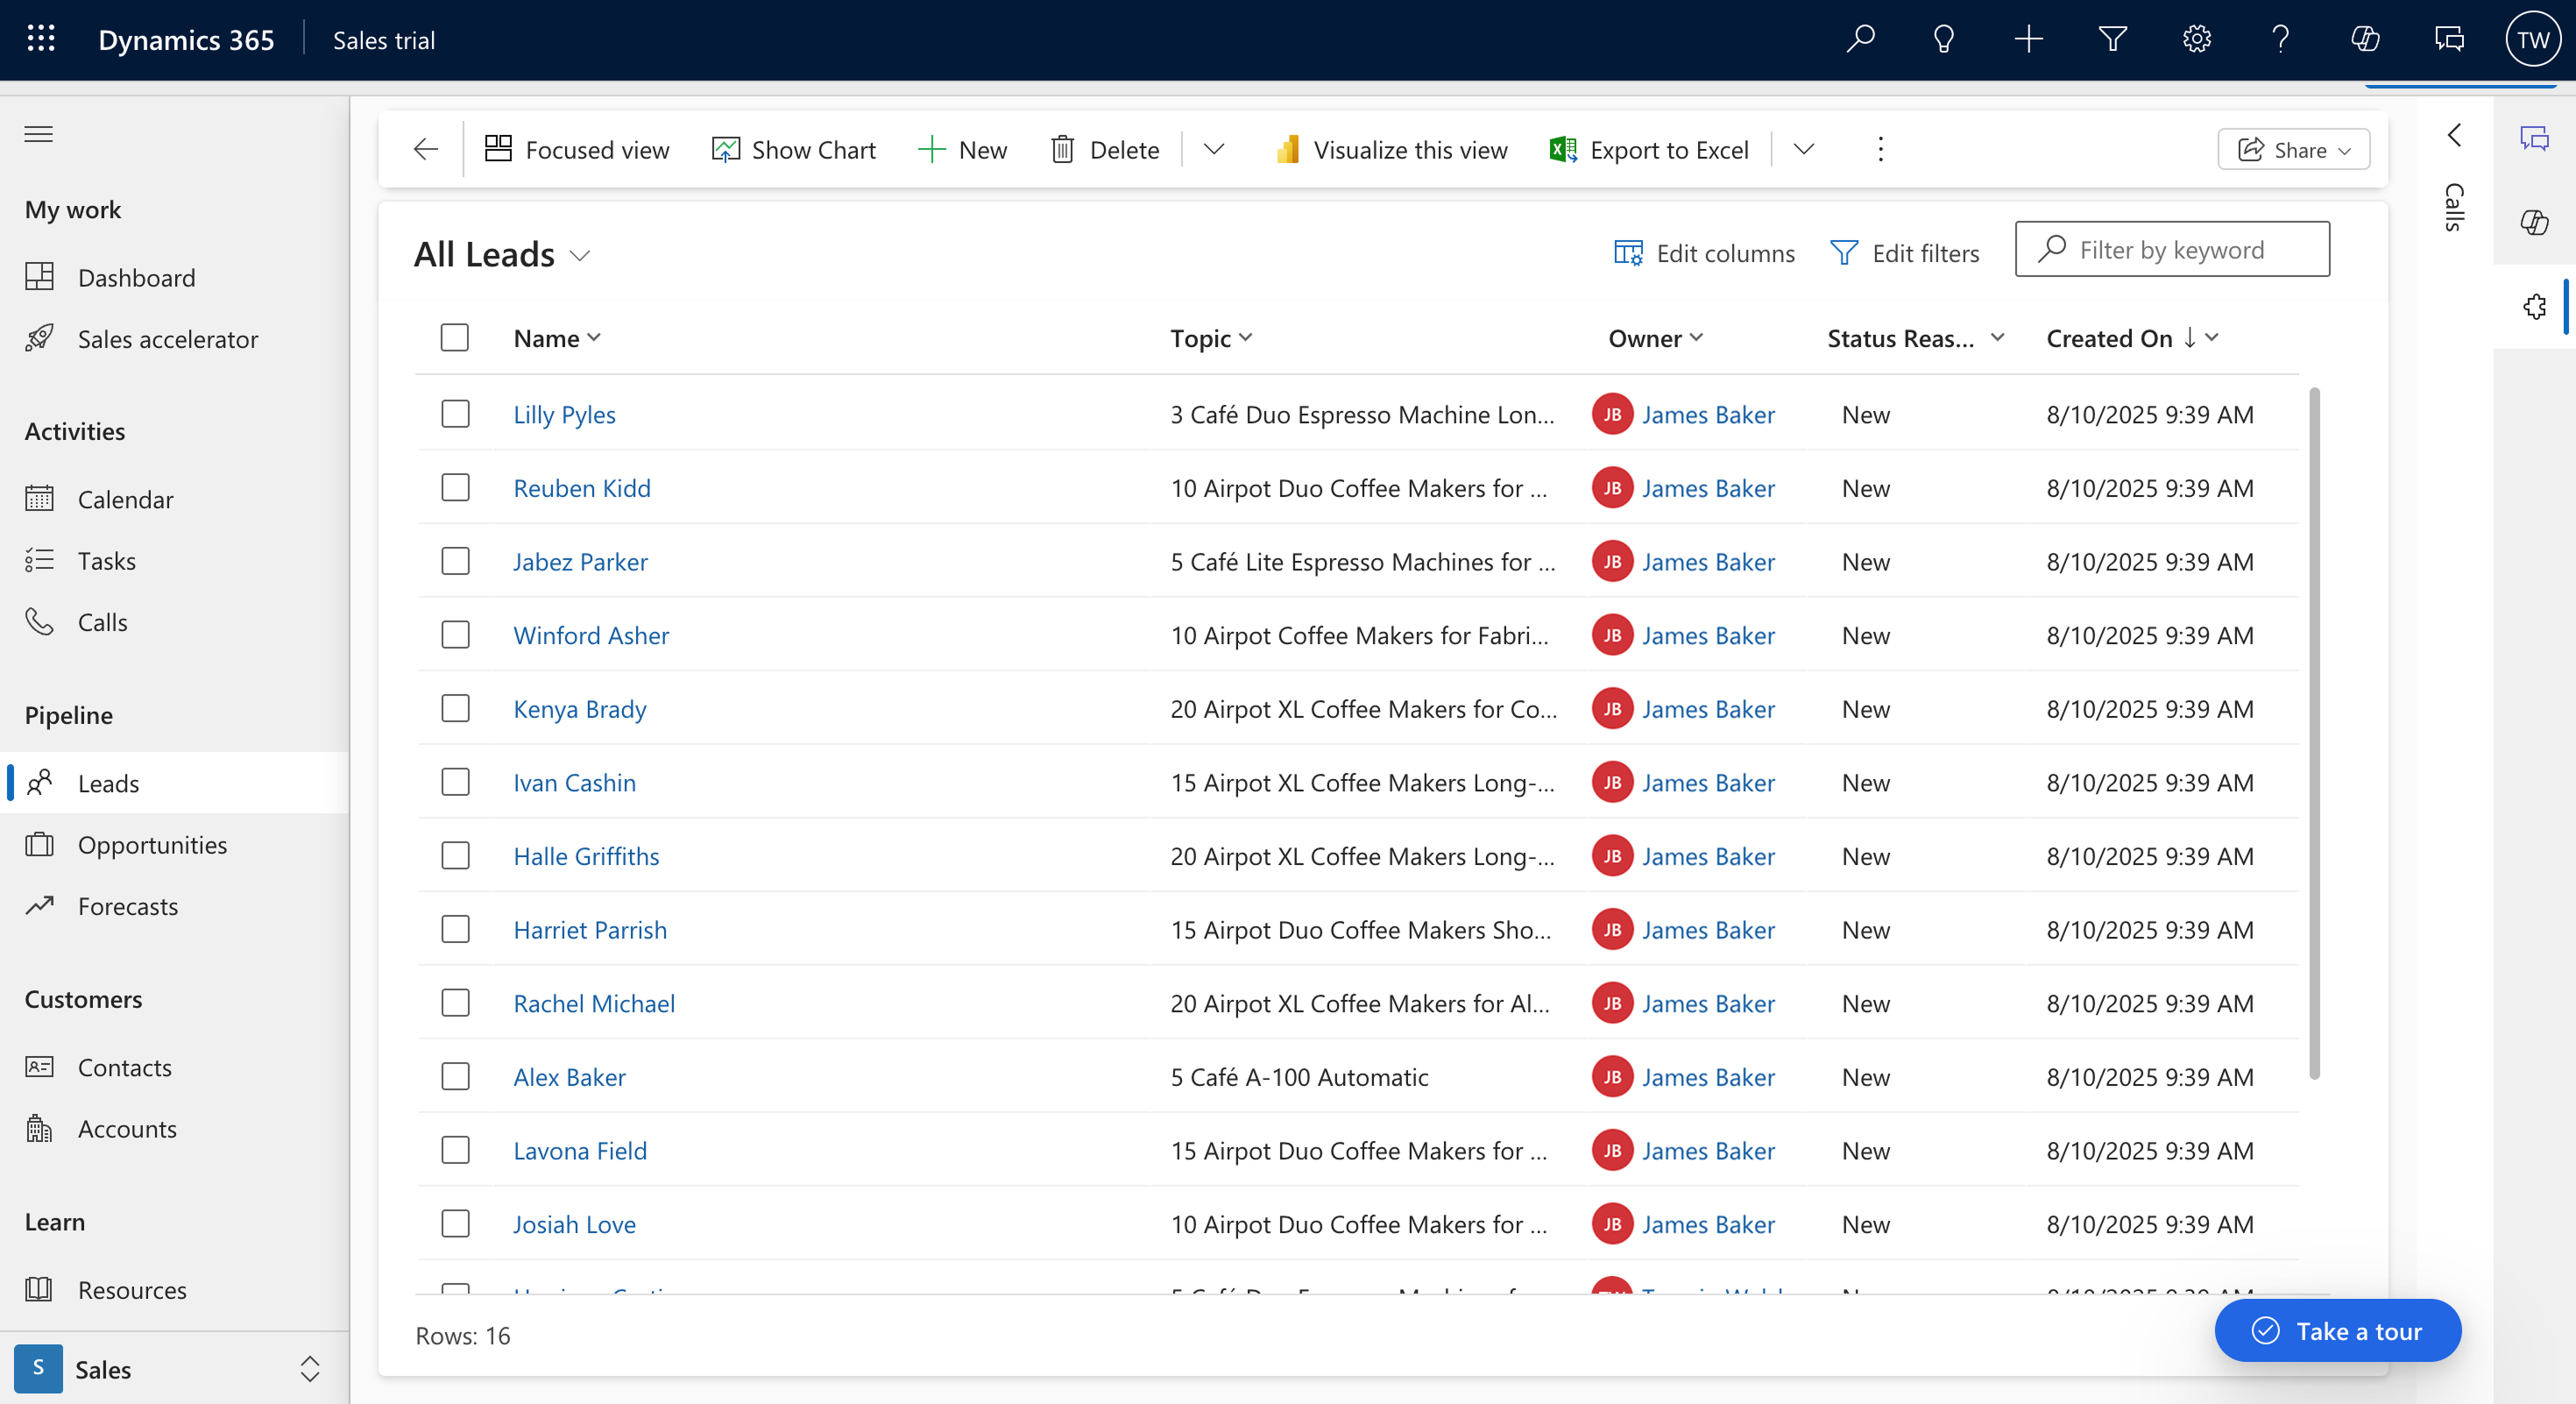
View imported leads
Once the integration is set up, DreamApply will begin fetching new and updated lead data. You can view all imported leads in the Leads view under Marketing.
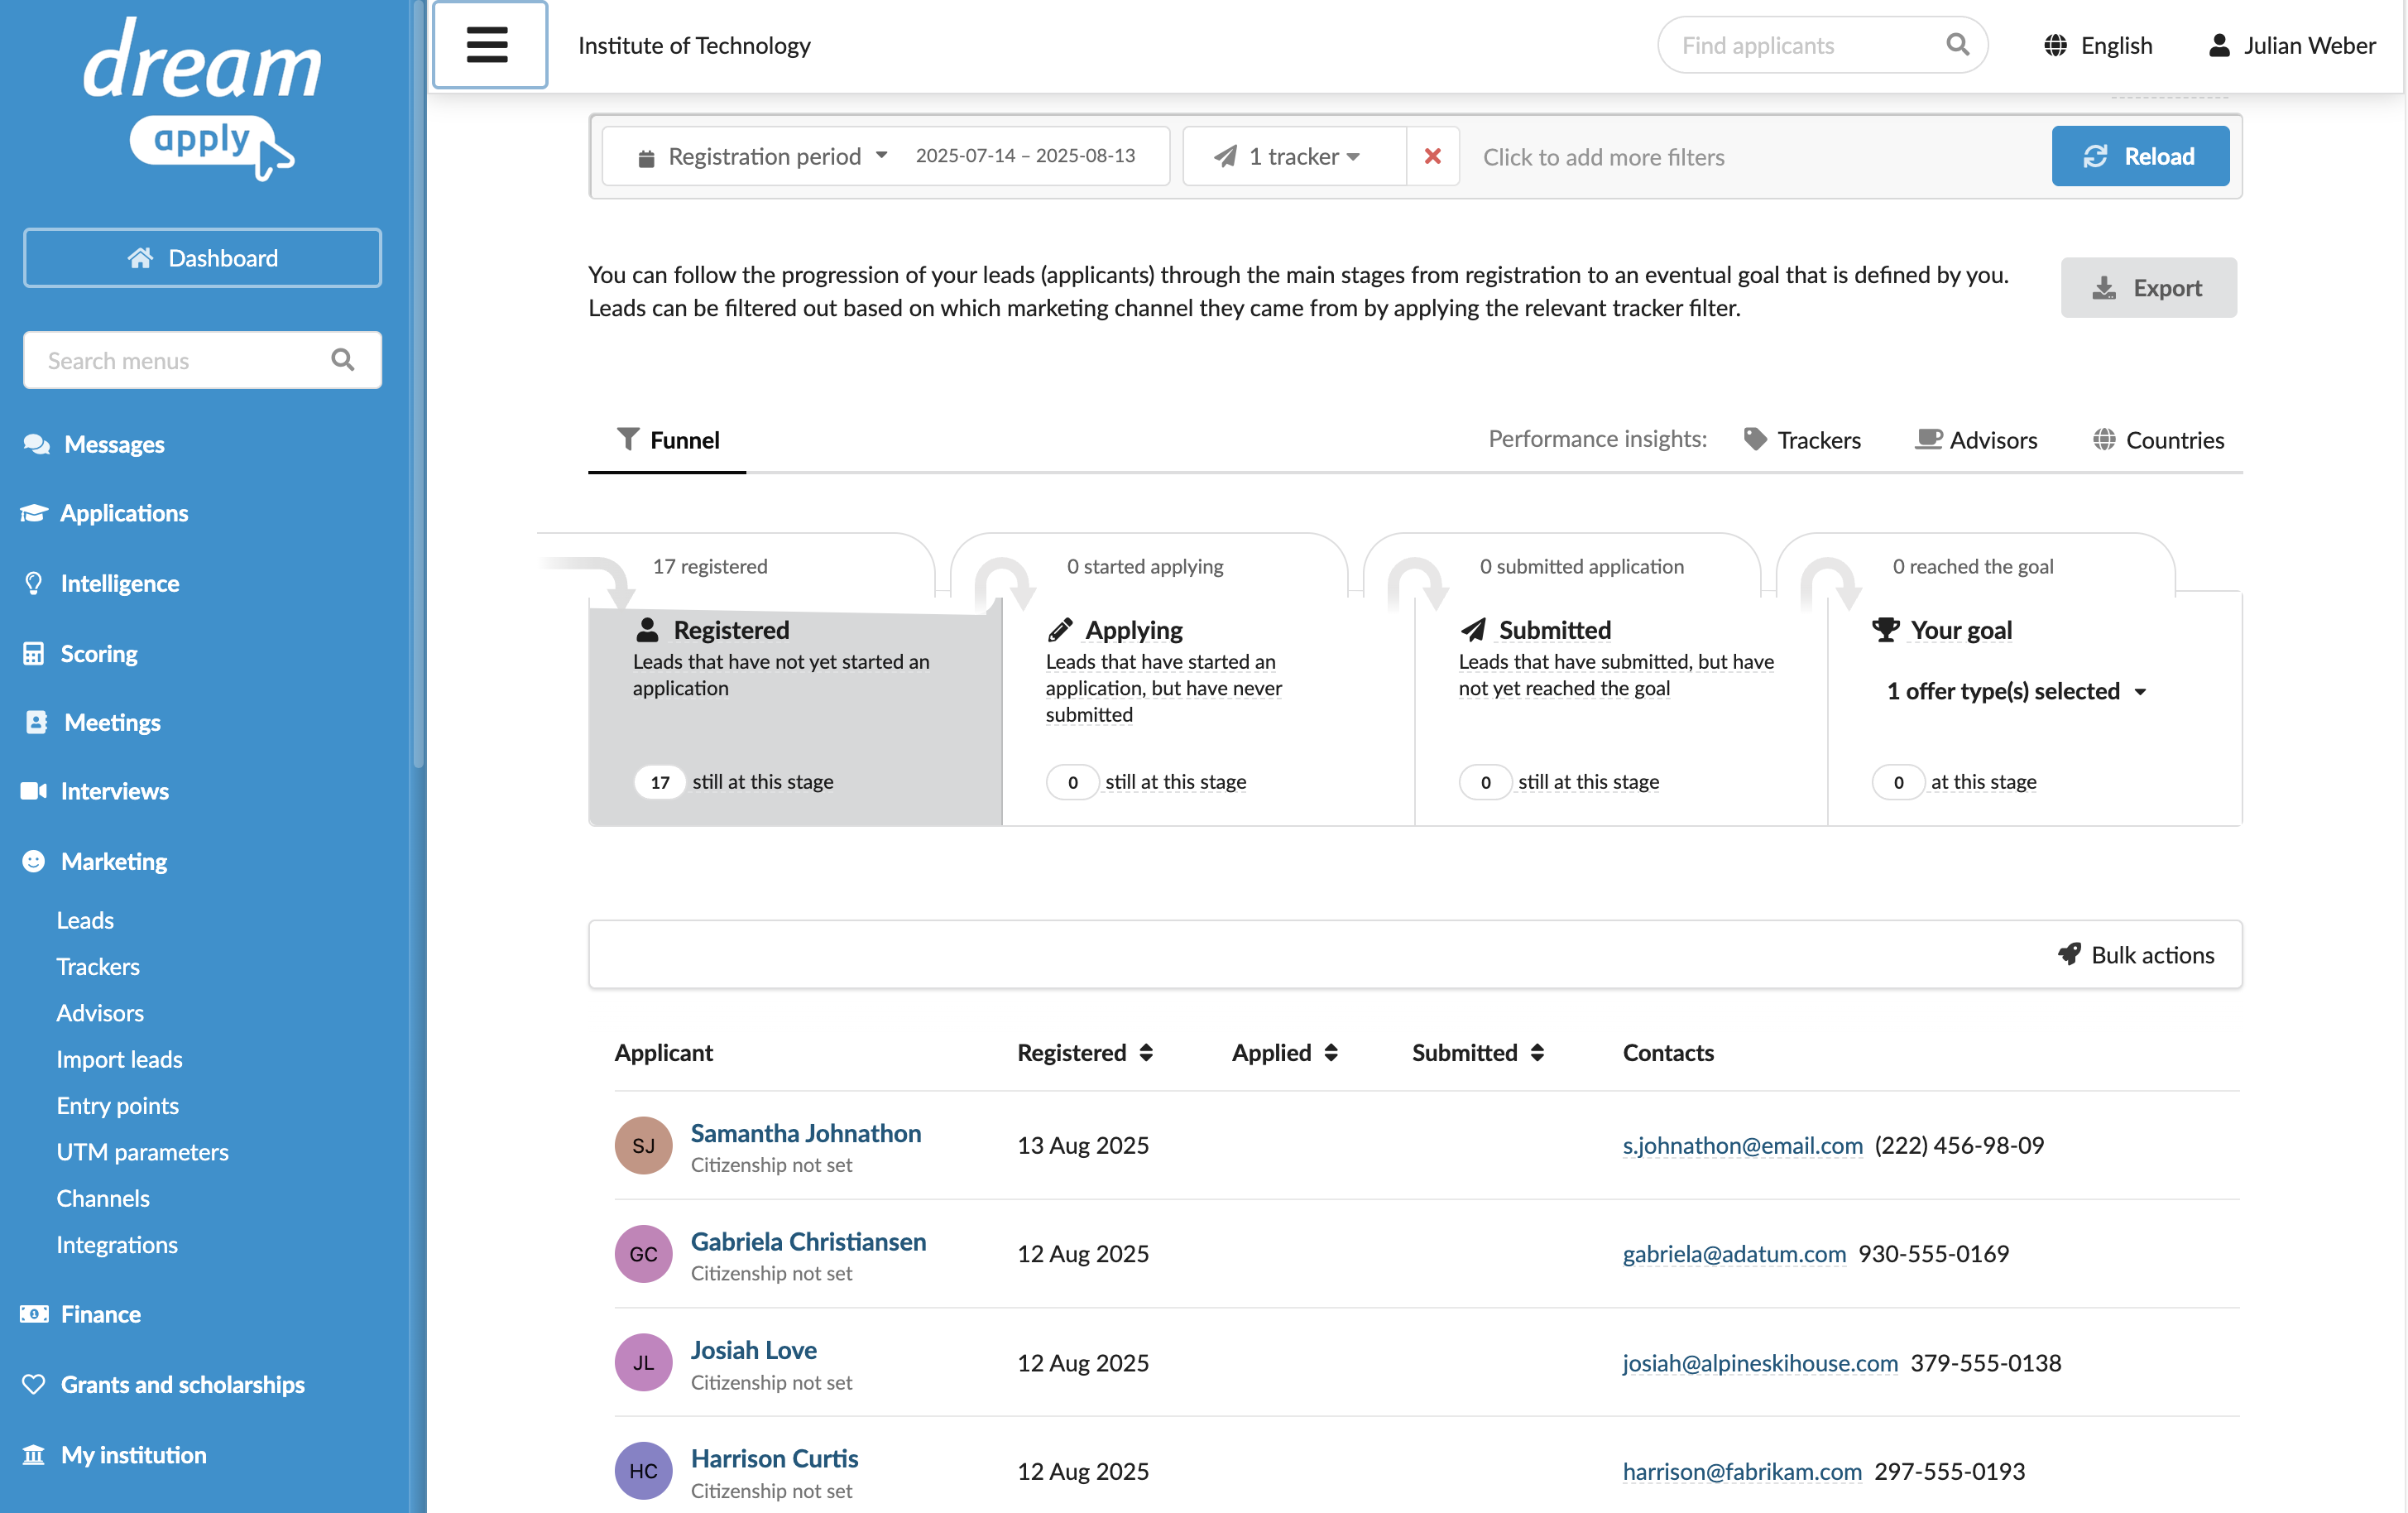
Each imported lead gets a tracker assigned to it at import.