Integrate with Cobra CRM
Roles
These roles reflect the default DreamApply setup.
You can define custom roles based on your
institution's needs. Learn more →:
You can define custom roles based on your
institution's needs. Learn more →
You can integrate DreamApply with Cobra CRM to export applicant data and create new contact records.
DreamApply can send the following data:
- Applicant data: ID, name, first name, last name, email, phone, registration date, citizenship
- Lead data: Lead stage and stage change date
- Offer data: ID, date, priority, name, programme ID, programme code, programme name, institution ID, institution name and abbreviation
- Academic term data: Name, year, type and start date
- Dates: Dates and UTC dates values
To export applicant data, perform the following tasks:
Before you begin
To integrate with DreamApply, your account must have the Superuser role or the integrations permission.
Obtain the Cobra CRM endpoint details
To enable the integration with DreamApply, you need to obtain details for your Cobra CRM instance:
- Instance URL and port, for example,
https://cobra.your-uni.eu:<PORT> - Username and password
- API key
Additionally, you need to contact your Cobra CRM administrator to create a table that will receive writes from DreamApply and create an endpoint with the necessary permissions.
If your Corba CRM instance is deployed behind the firewall, contact the DreamApply team for additional instructions.
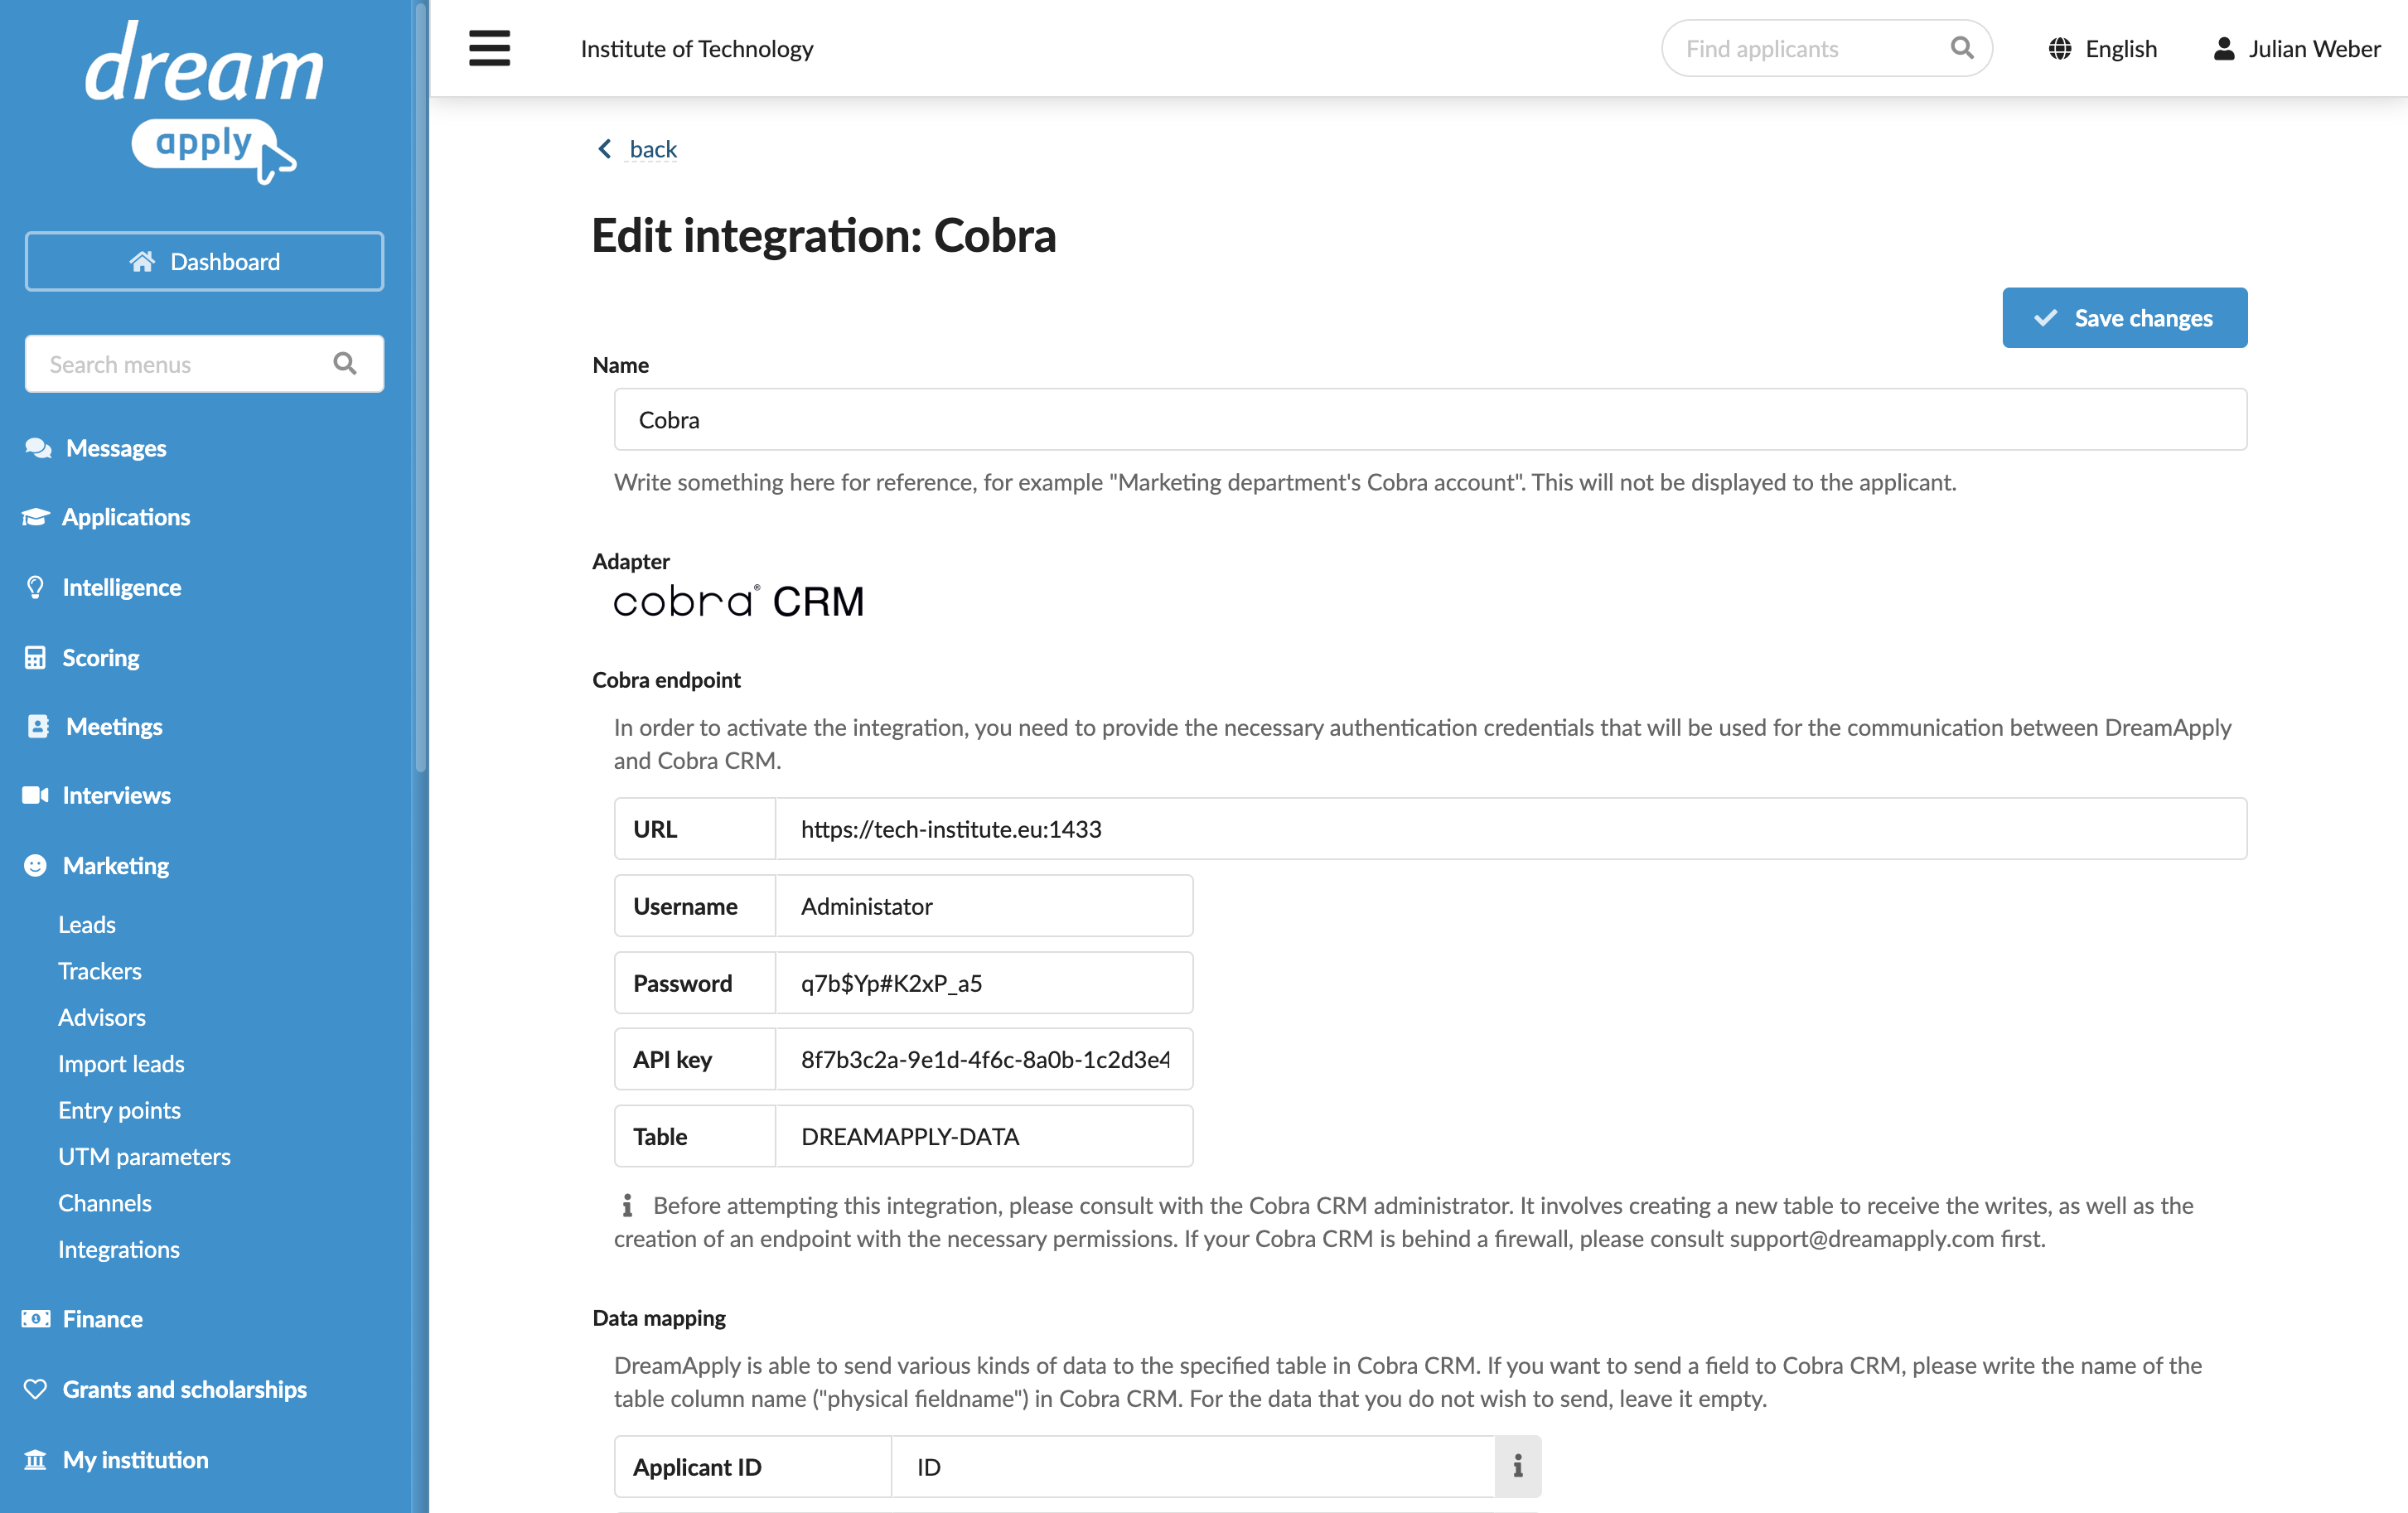
Configure integration settings
To connect to Cobra CRM in DreamApply:
In the main menu, under Marketing, select Integrations.
Select Outgoing integrations > Cobra CRM.
Specify the connection details you obtained earlier:
- Instance URL and port
- Username and password
- API key
- Table name
In the Data mapping section, specify how DreamApply applicant data must map to Cobra CRM fields. Next to each field you want to send, enter the physical fieldname in Cobra CRM.
In the Consent section, specify if applicant consent is required to send data to Cobra CRM.
In the Send by default section, select the Send all new applicants automatically check box to enable continuous integration between DreamApply and Cobra CRM. If you do not enable this option, you will need to set up rules or send applicant data manually. For details, see Send applicant data.
In the Automatic updates section, select the Update applicant records automatically check box to keep contact records in sync with the DreamApply system. For details, see Send applicant data.
In the Technical contact field, specify an email address for technical support. DreamApply will send error descriptions to this address if any integration issues occur.
At the top of the form, click Save changes.