Integrate with Mailchimp
Roles
These roles reflect the default DreamApply setup.
You can define custom roles based on your
institution's needs. Learn more →:
You can define custom roles based on your
institution's needs. Learn more →
You can integrate DreamApply with Mailchimp to export applicant data. DreamApply sends the following data:
- Email address
- Full name
- Location/citizenship
- Trackers as Mailchimp tags
The exported data is registered as contact records in Mailchimp and placed into the selected audience.

To export applicant data, perform the following tasks:
Before you begin
To integrate with DreamApply, your account must have the Superuser role or the integrations permission.
Verify the Mailchimp audience settings
Before you integrate with DreamApply, review the audience settings in Mailchimp:
- Audience vs. segment: DreamApply adds contact records to a selected audience, not a specific segment. To categorize contacts within the audience, you can configure segments in Mailchimp after the data has been imported.
- Pricing limitations: Depending on your Mailchimp pricing plan, the number of audiences you can create may be limited. Verify that you have sufficient audience capacity.
- Required fields: Mailchimp will only create a contact record if all required fields are provided. Verify that your audience configuration matches the data that DreamApply sends. For more details, see the Mailchimp documentation.
Obtain an API key
To enable the integration with DreamApply, you need to create an API key in your Mailchimp portal.
- In the top right corner of the Mailchimp portal, click your profile icon and select Profile.
- At the top of the view, select Extras > API keys.
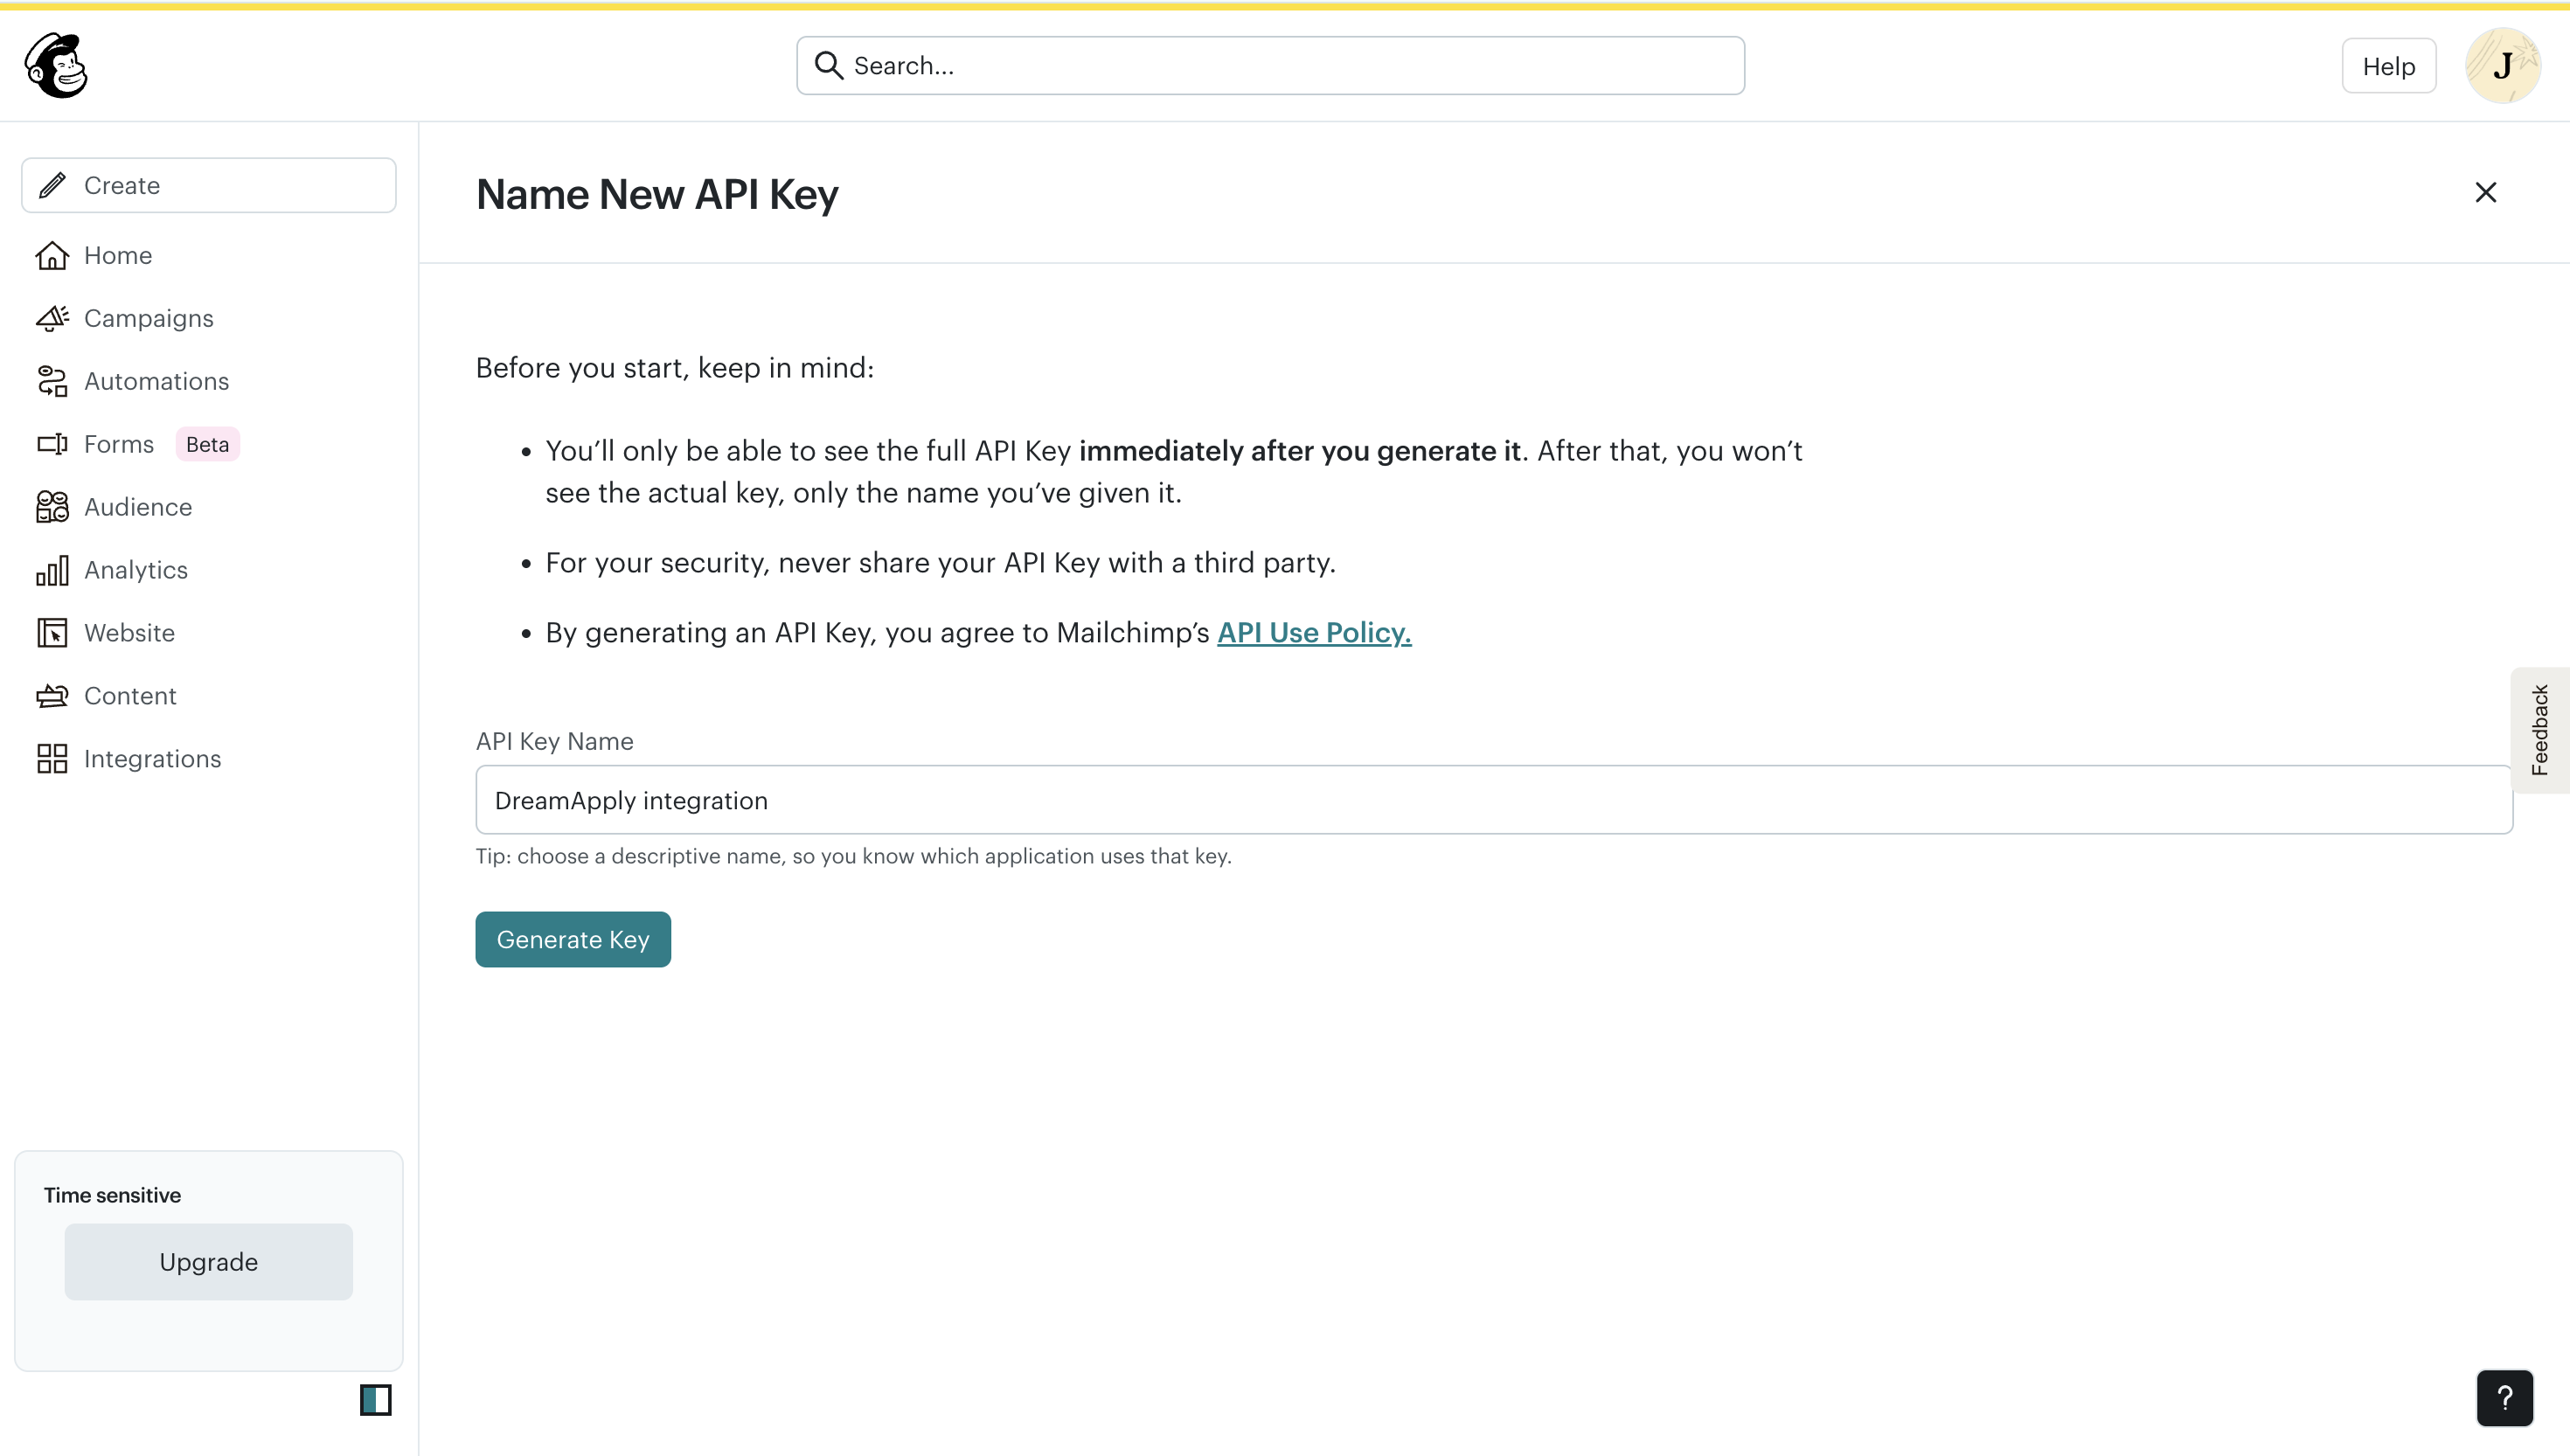
- In the Your API keys section, click Create a Key.
- Specify the API key name and click Generate Key. Make note of and copy the displayed API key.
Configure integration settings
To connect to Mailchimp in DreamApply:
In the main menu, under Marketing, select Integrations.
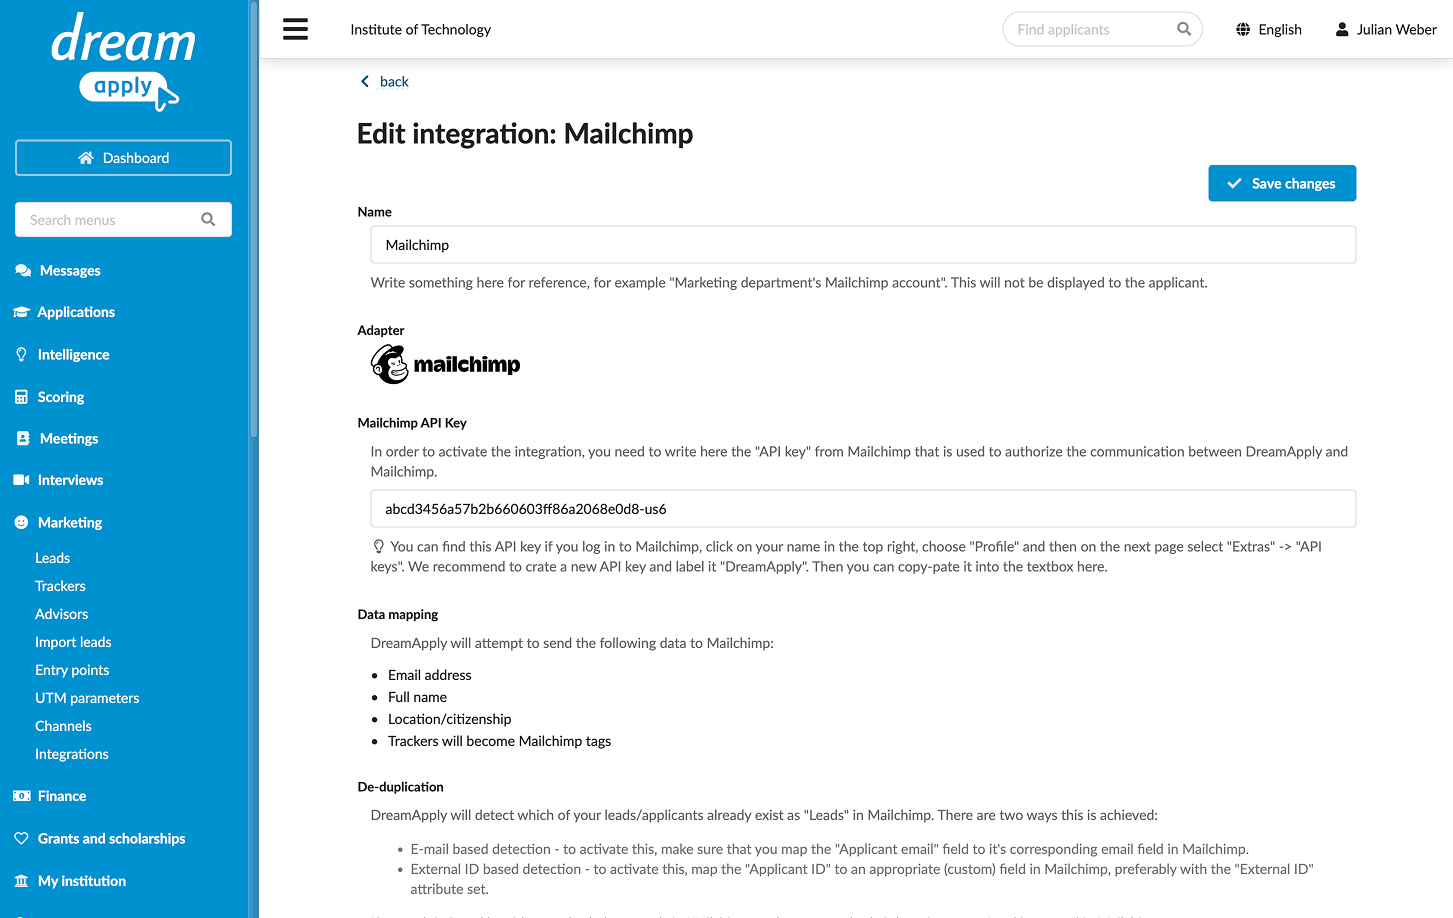
Select Outgoing integrations > Mailchimp.
In the Mailchimp API Key field, specify the API key you copied earlier.
At the top of the form, click Save changes.
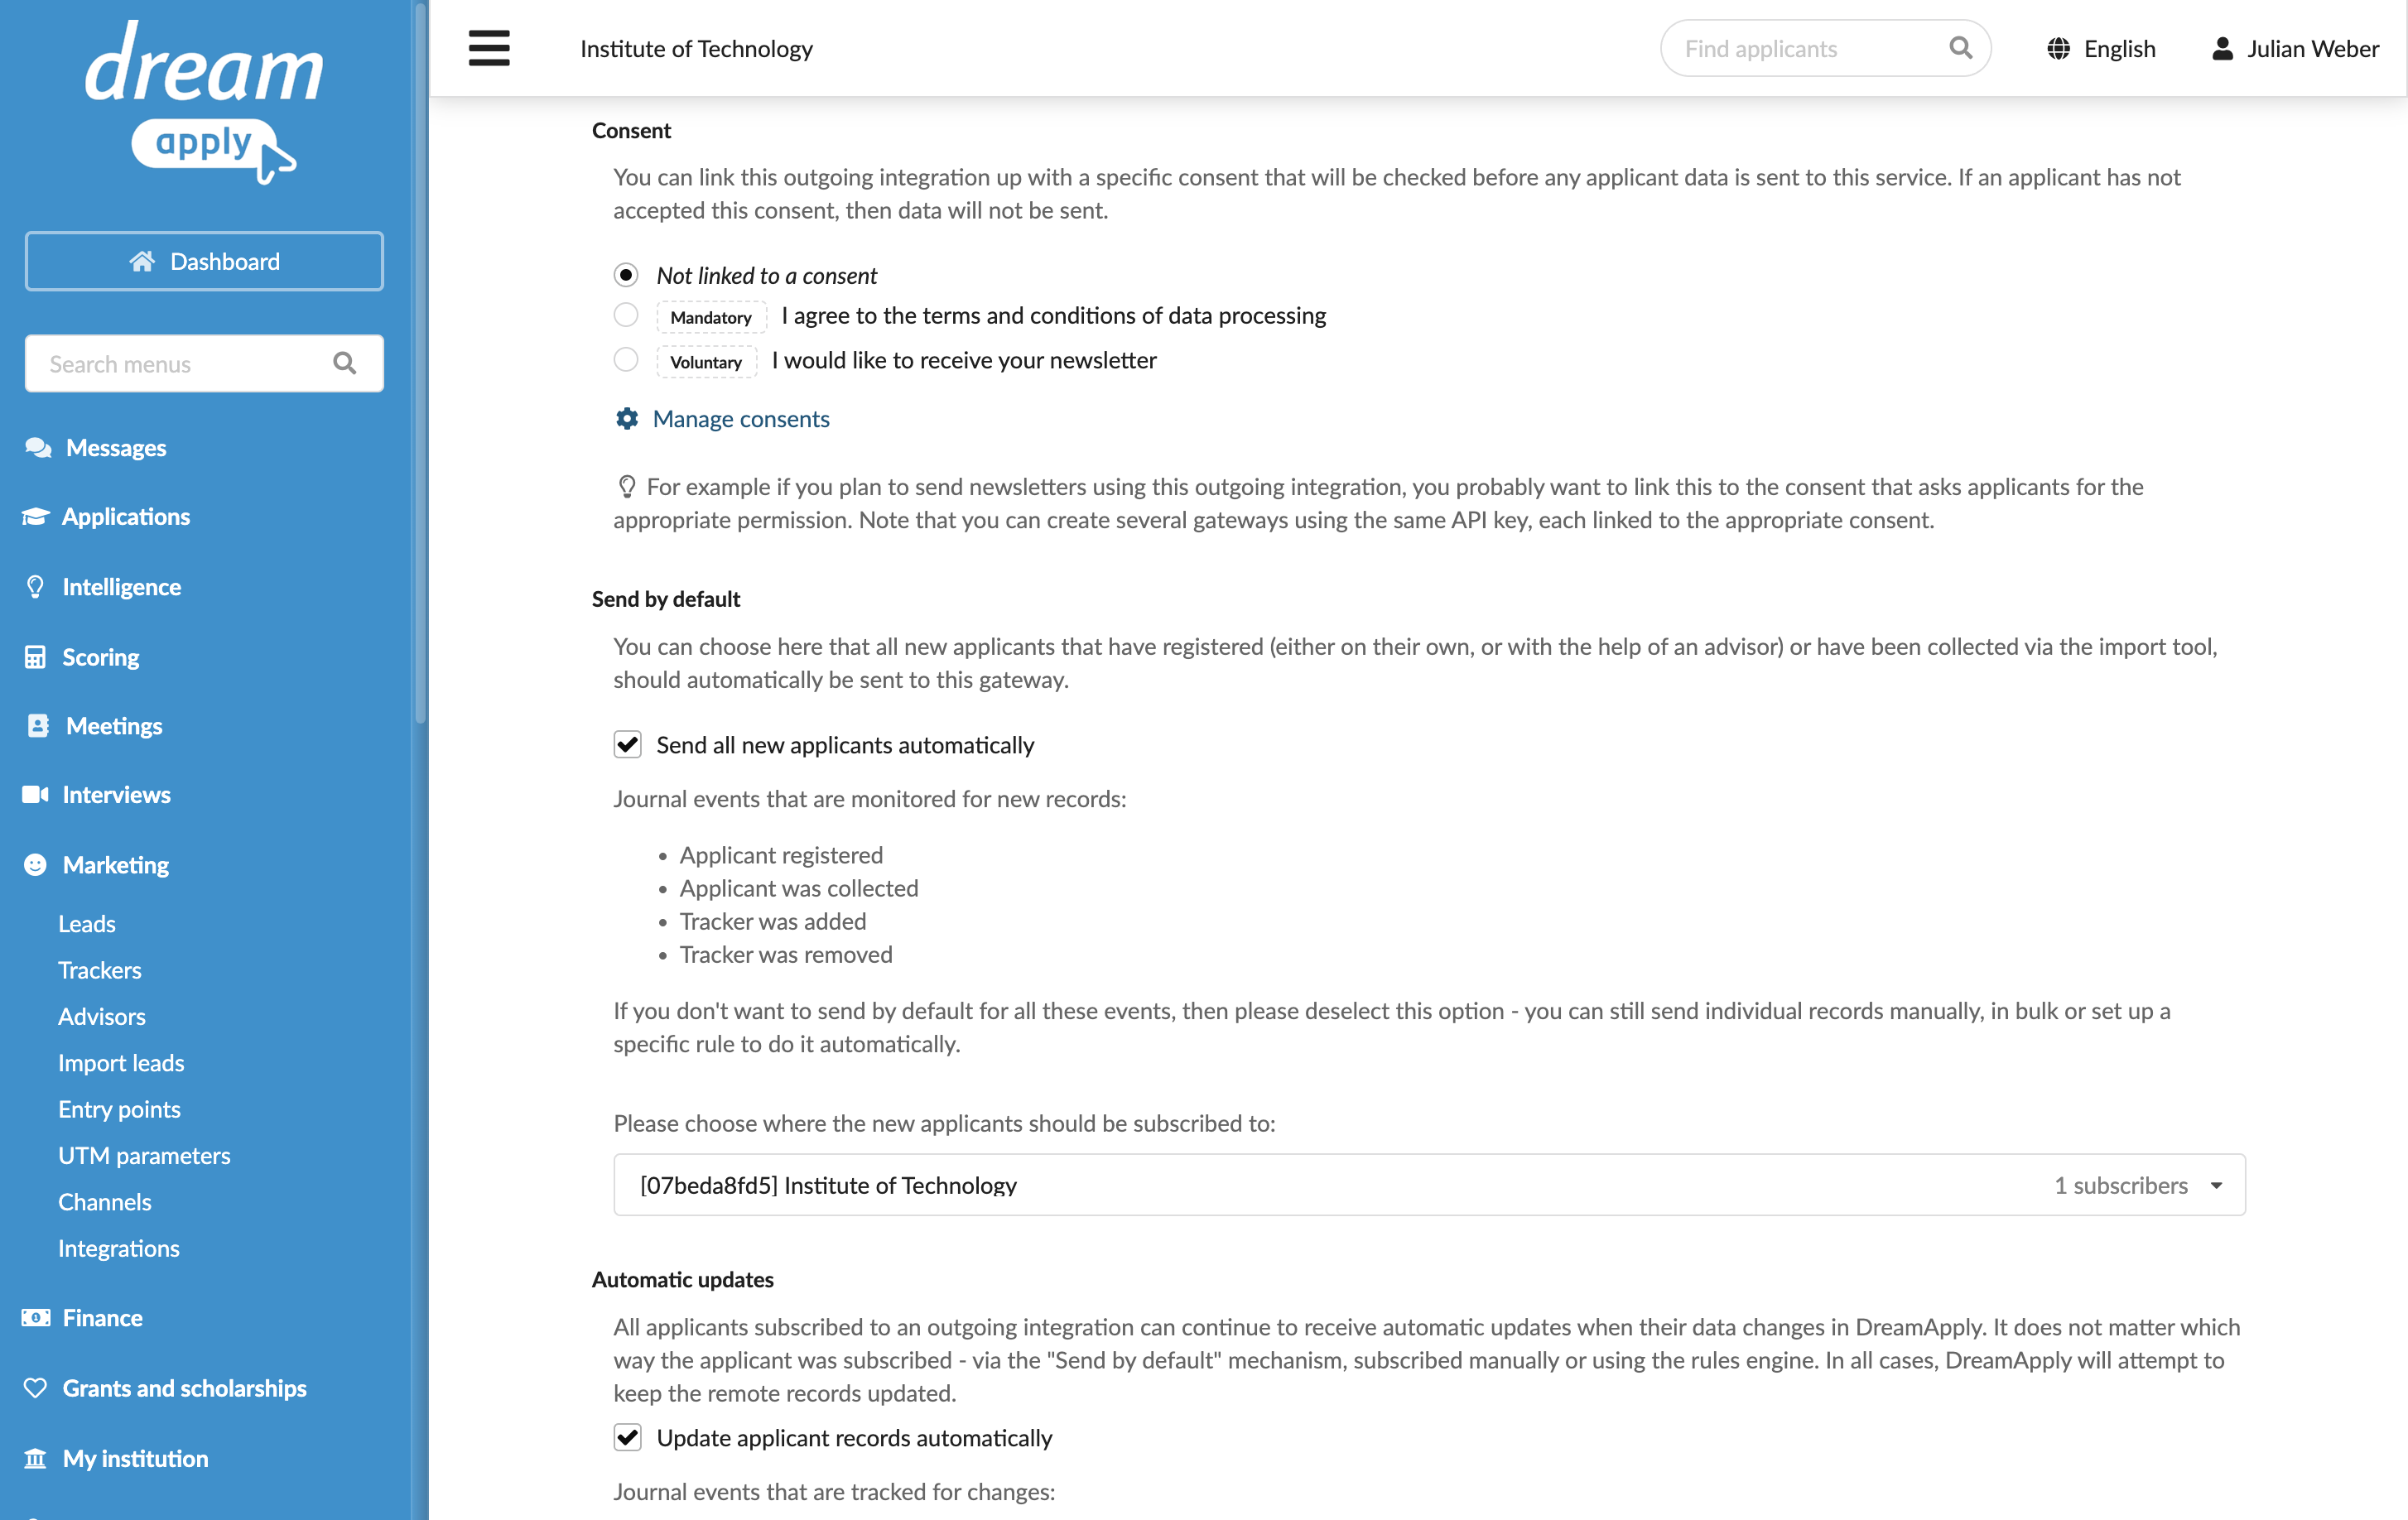
In the Consent section, specify if applicant consent is required to send data to Mailchimp.
In the Send by default section, select the Send all new applicants automatically check box to enable continuous integration between DreamApply and Mailchimp. If you do not enable this option, you will need to set up rules or send applicant data manually. For details, see Send applicant data.
From the list below, select the audience into which created lead records must be placed.
In the Automatic updates section, select the Update applicant records automatically check box to keep contact records in sync with the DreamApply system. For details, see Send applicant data.
In the Technical contact field, specify an email address for technical support. DreamApply will send error descriptions to this address if any integration issues occur.
At the top of the form, click Save changes.