Integrate with Salesforce
Roles
These roles reflect the default DreamApply setup.
You can define custom roles based on your
institution's needs. Learn more →:
You can define custom roles based on your
institution's needs. Learn more →
DreamApply utilizes the Connected apps framework to integrate with Salesforce. This framework allows external systems to securely connect and access Salesforce data using standard authentication and authorization methods.
During the export process, DreamApply can send the following data:
- Applicant data: ID, name, first name, last name, email, phone, registration date, citizenship, reference and matriculation
- Lead data: Lead stage and stage change date
- Programme data: Programme IDs
- Academic term data: Name, year, type and start date
- Dates: Dates and UTC dates values
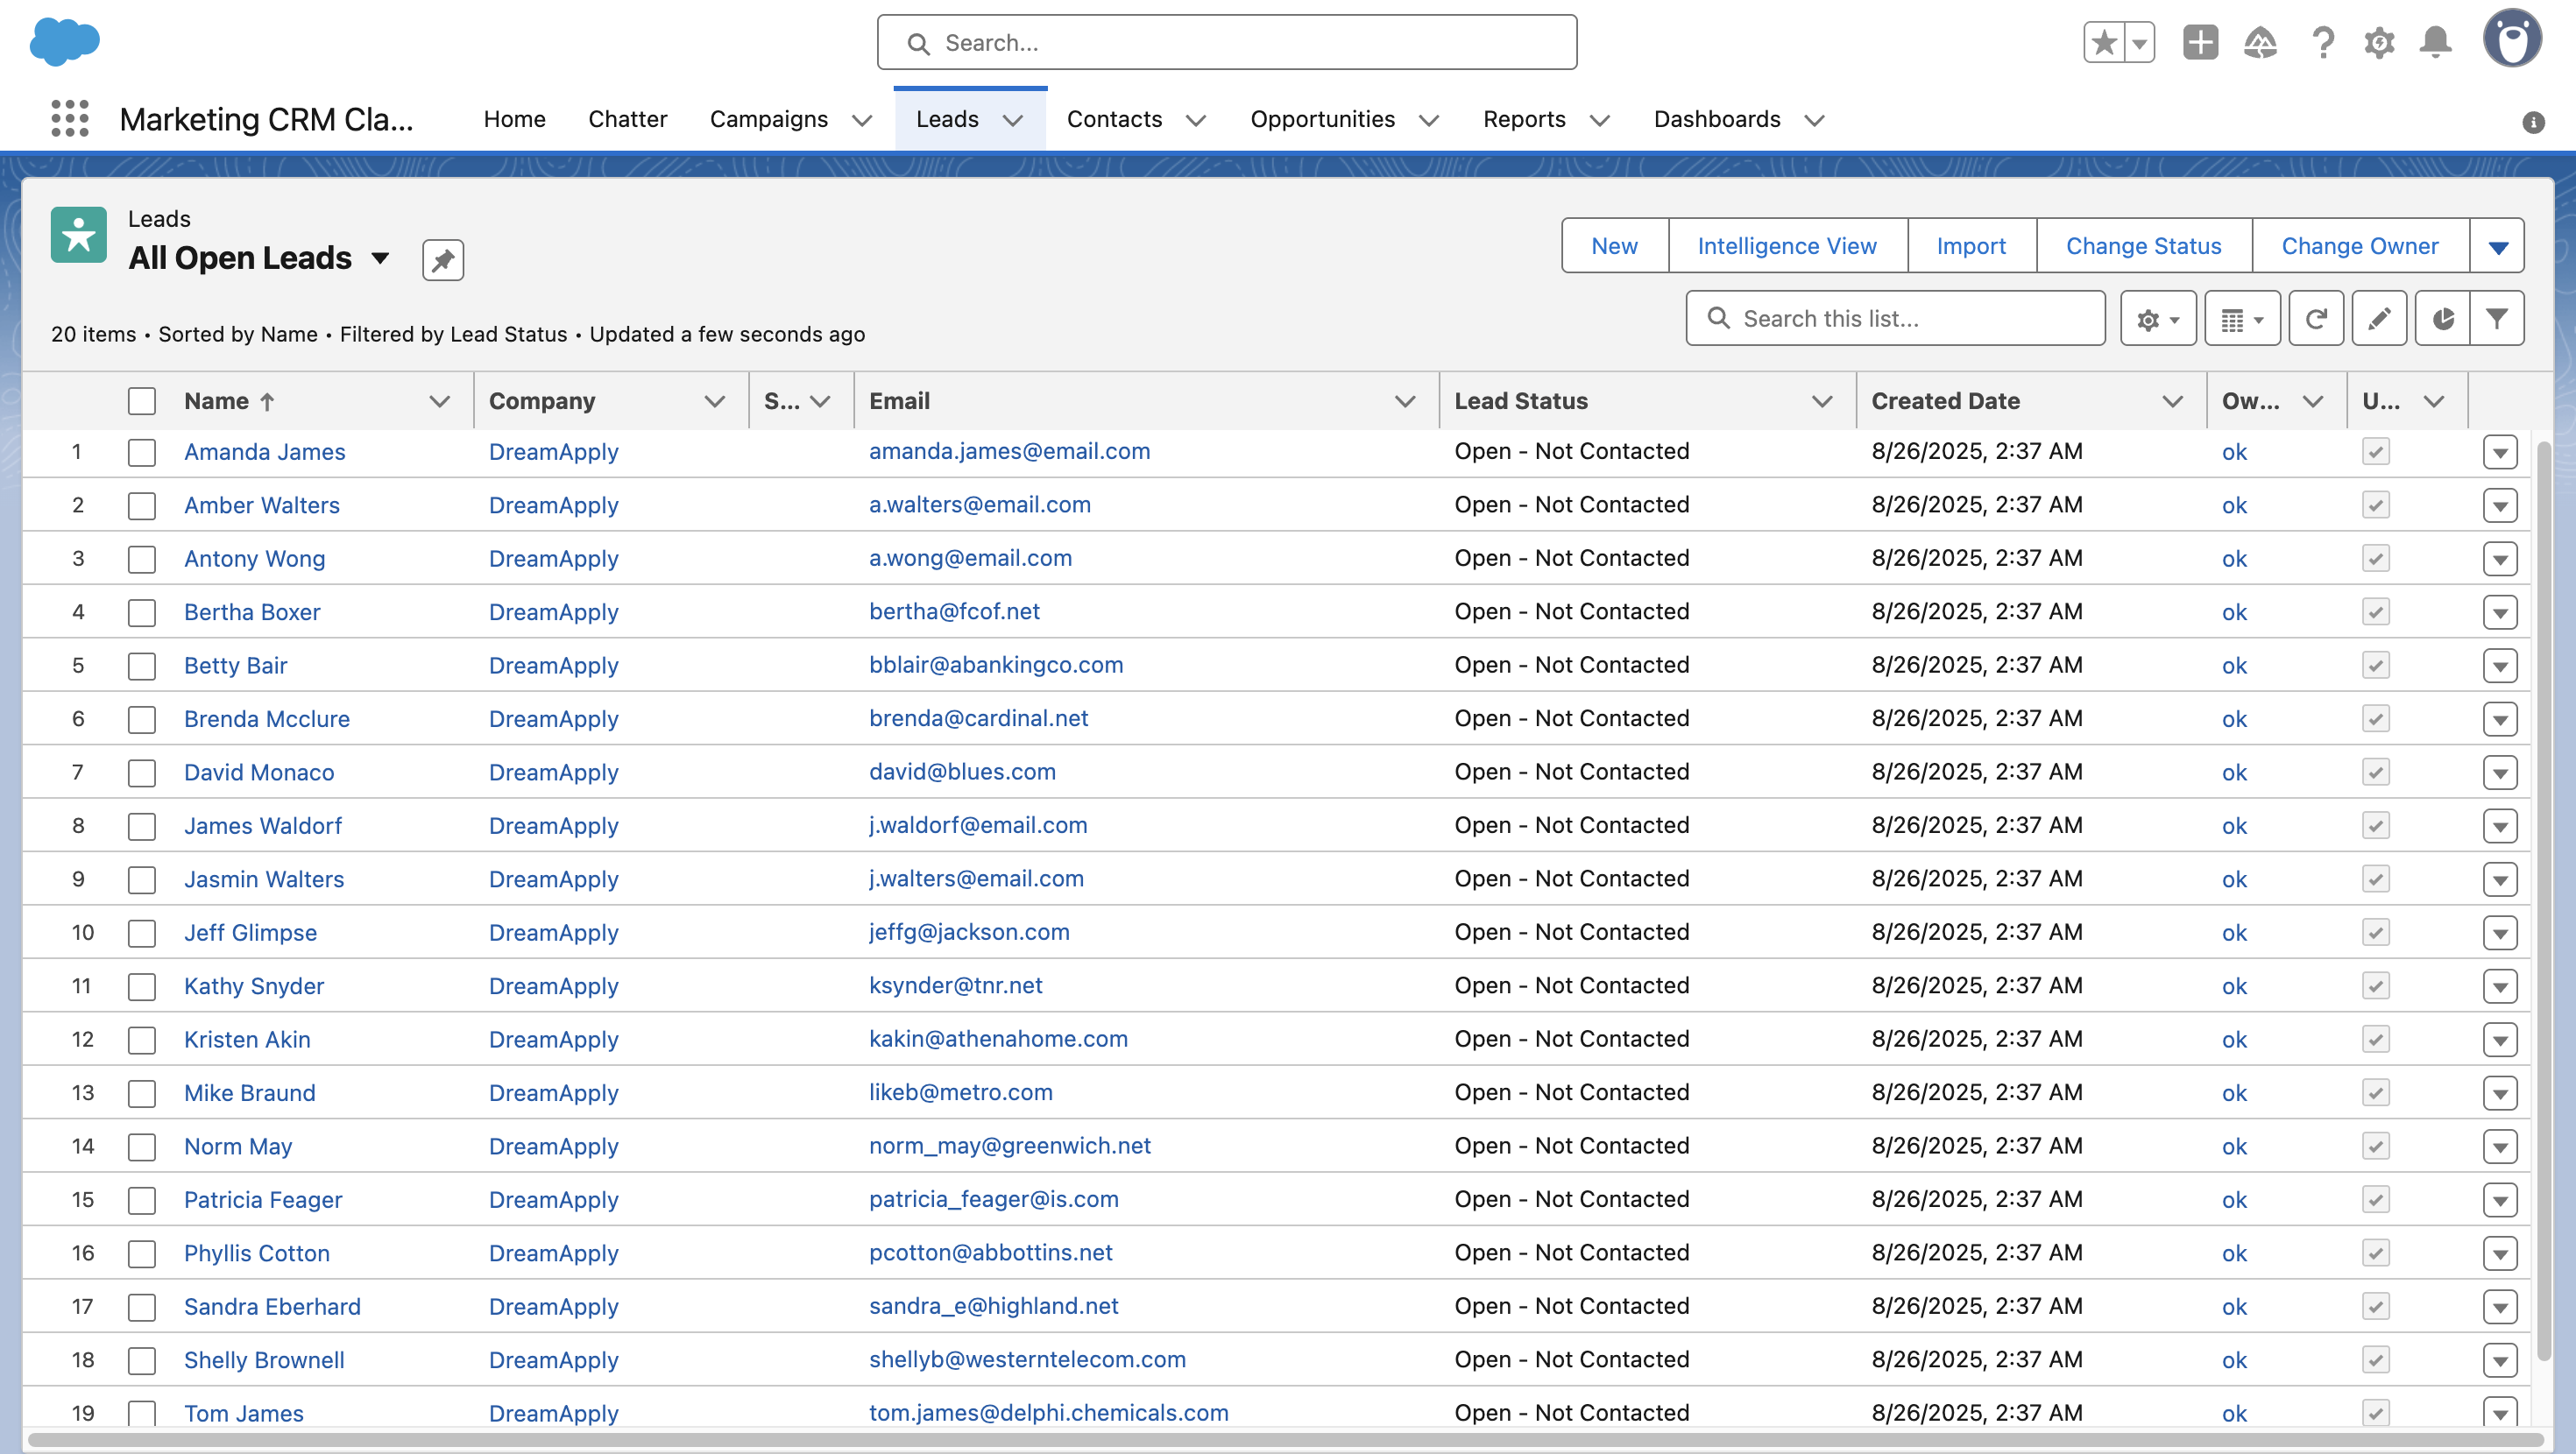
The exported data is registered as lead records in Salesforce and linked to a specific contact owner. You can map DreamApply applicant fields to corresponding fields of Salesforce records.
DreamApply can export the following field types to Salesforce: string, textarea, double, int, picklist, date, datetime, phone and email.
To import lead data to DreamApply, perform the following tasks:
- Obtain a DreamApply certificate
- Create a new connected app
- Obtain the Salesforce instance details
- Configure integration settings
Before you begin
To integrate with DreamApply, your account must have the Superuser role or the integrations permission.
Obtain a DreamApply certificate
DreamApply uses a digital certificate for certificate-based authentication with Salesforce. The certificate ensures that only trusted systems can retrieve data from Salesforce.
Download a certificate using the following link: https://<your-dreamapply-instance>/admin/instance/certificate and save it on your computer.
Create a new connected app
To enable integration between DreamApply and Salesforce, you must create a connected app in your Salesforce account. The connected app provides the credentials and authentication settings that allows DreamApply to securely access your Salesforce data.
Log in to your Salesforce account.
In the top right corner of the Salesforce portal, click the gear icon and select Setup.
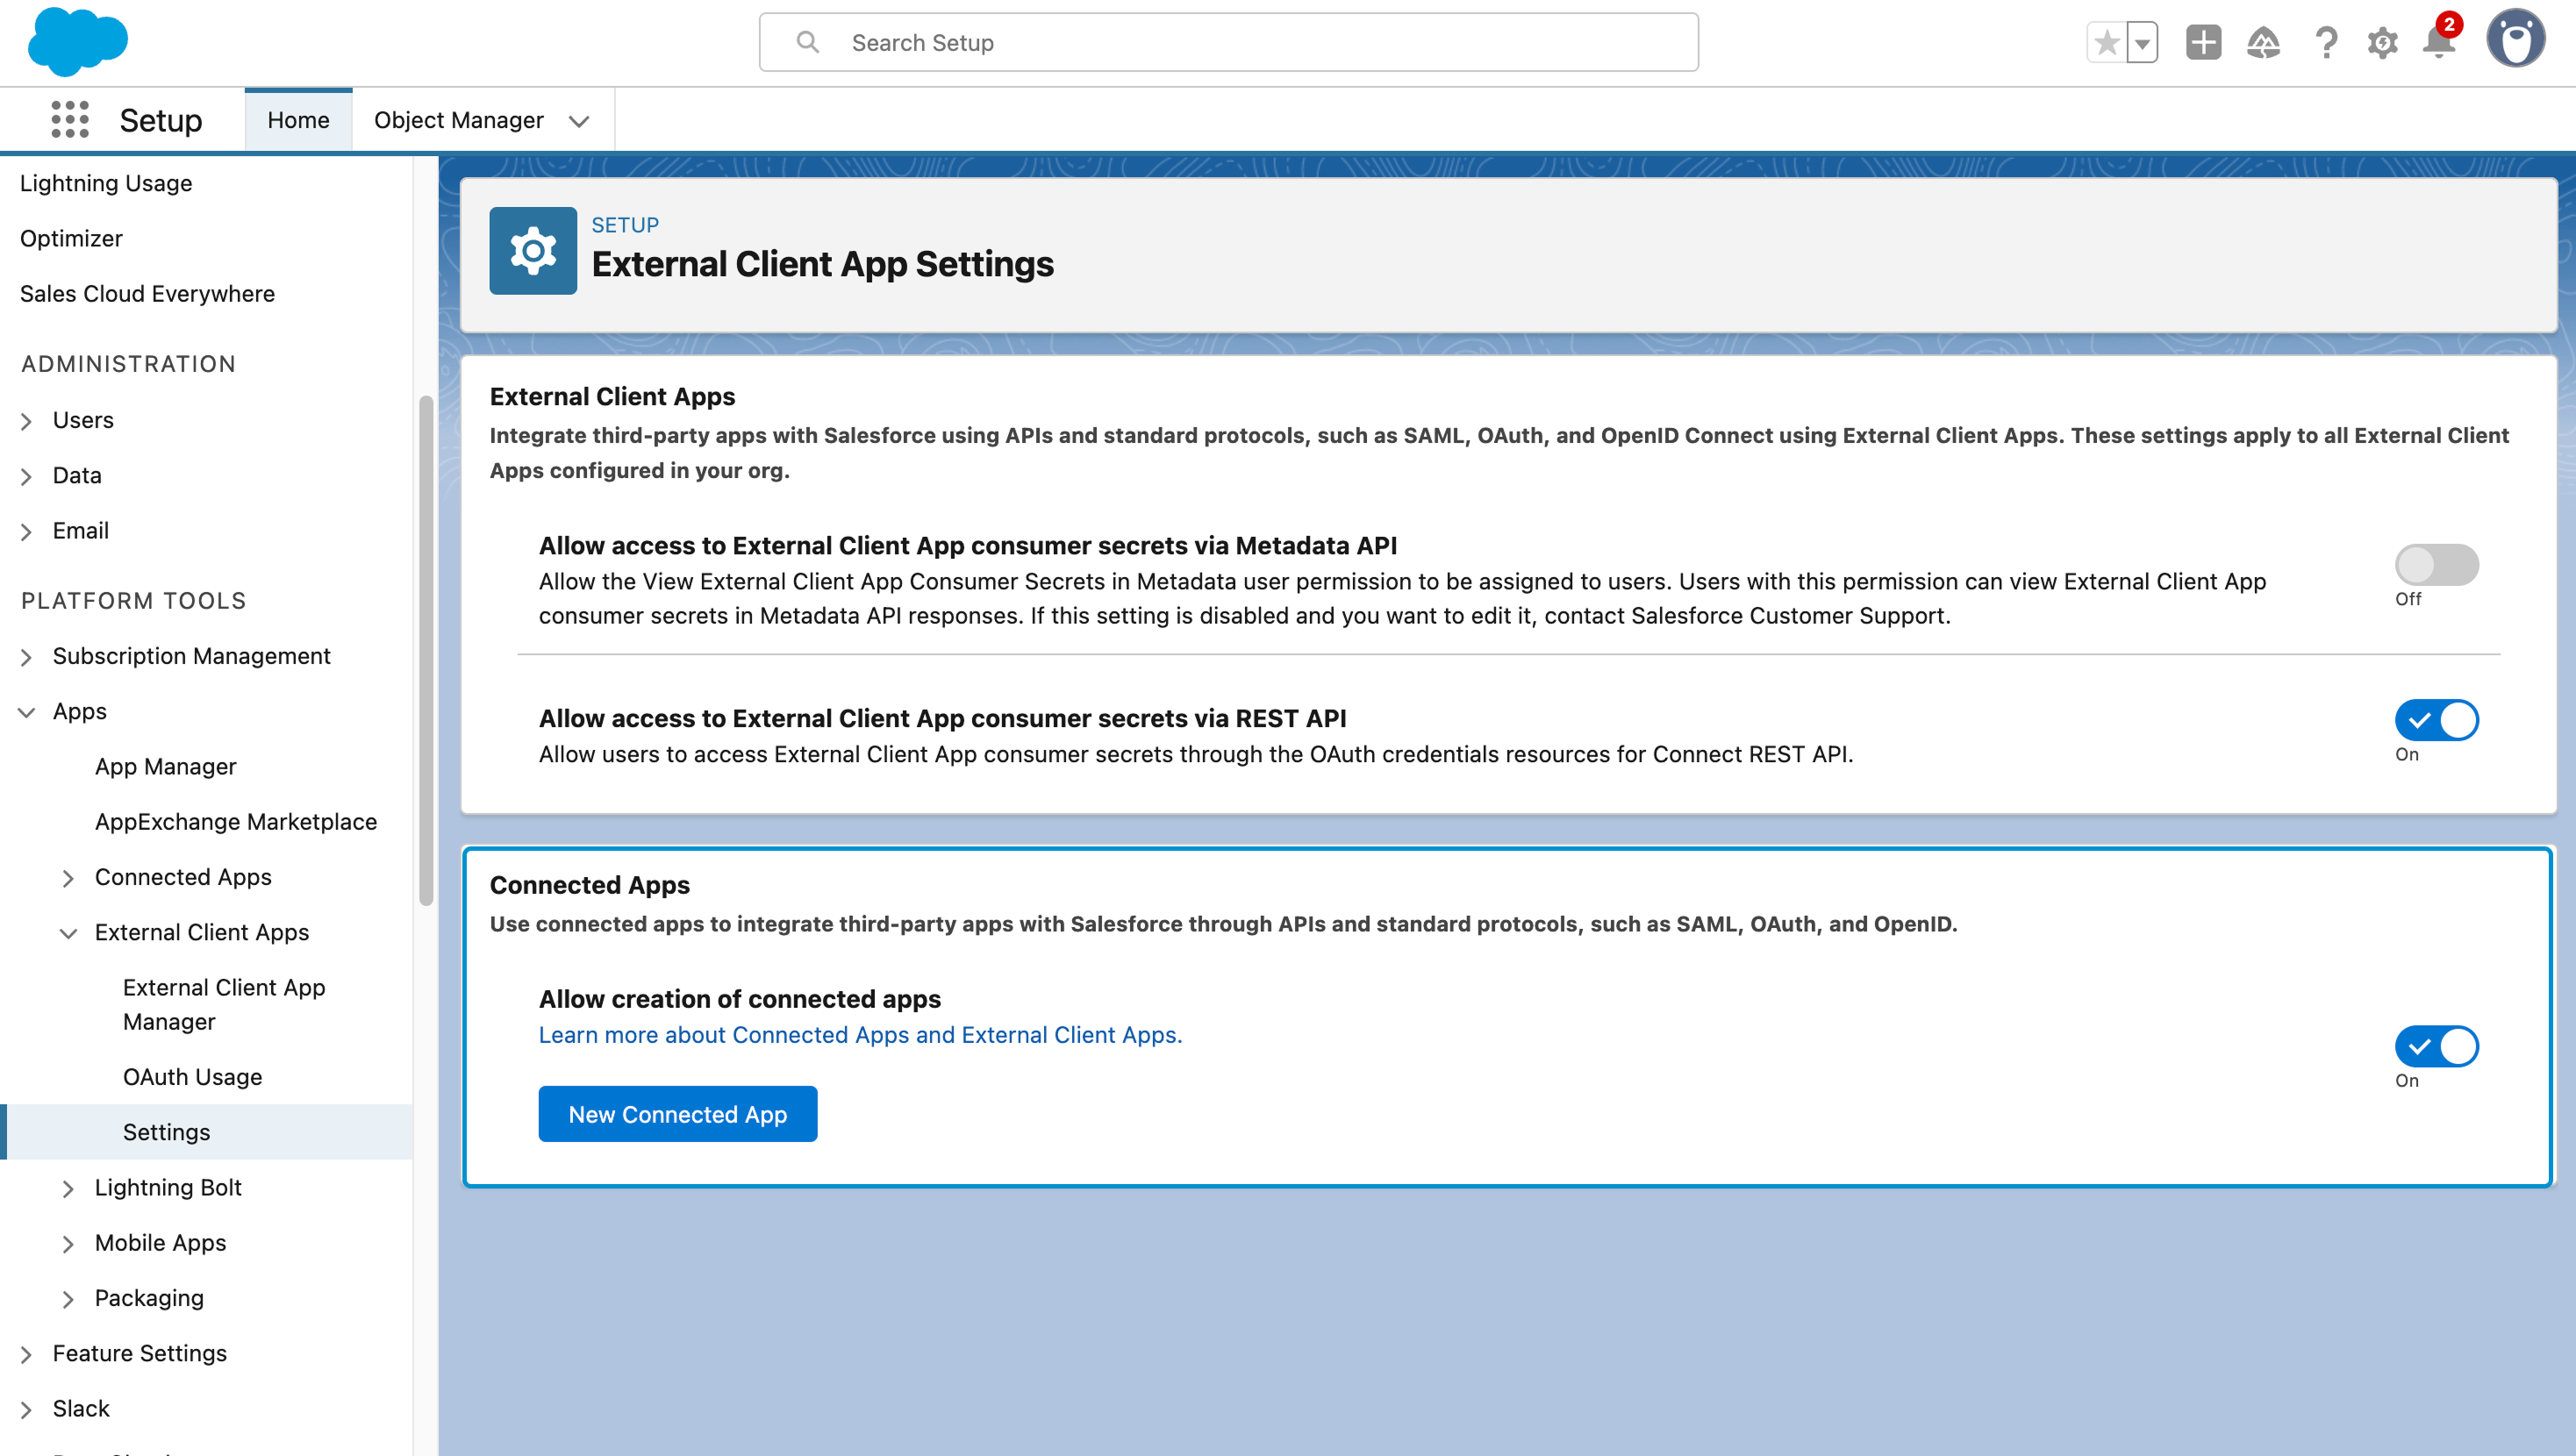
In the left pane, under Platform Tools > External Client Apps, select Settings.
In the Connected Apps section, make sure the Allow creation of connected apps option is enabled and click New Connected App.
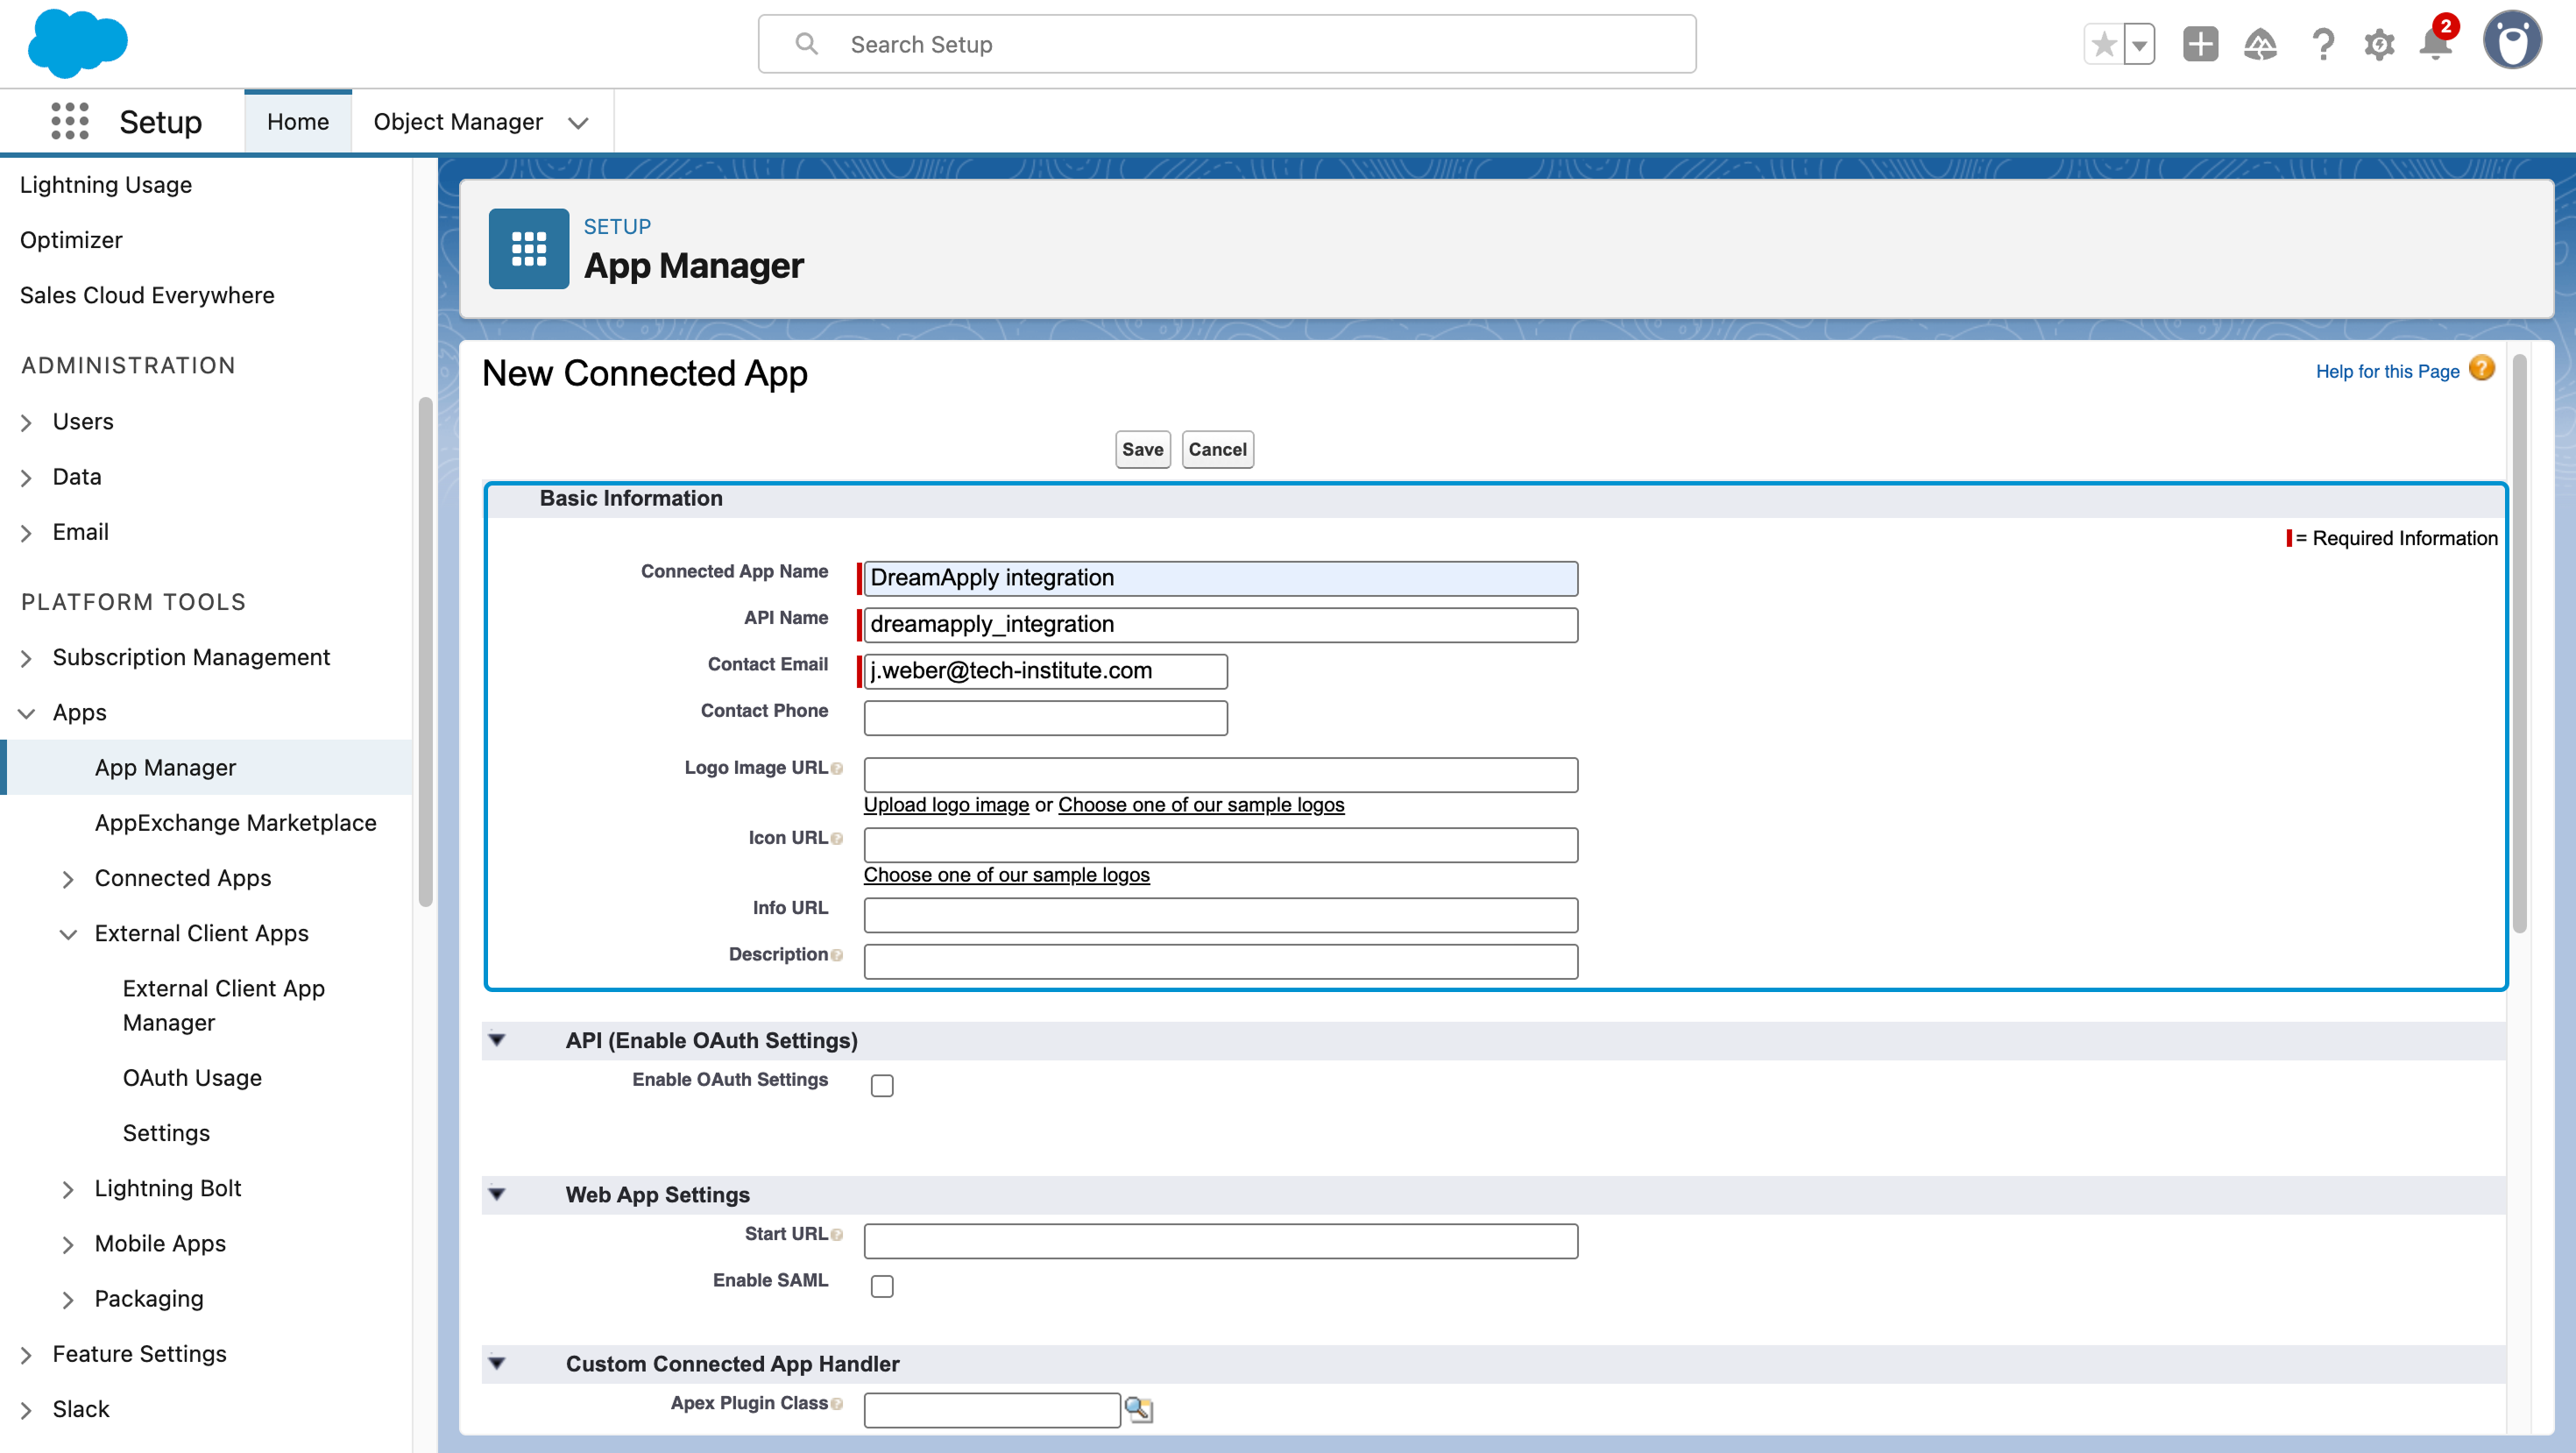
In the Basic information section, specify the connected app name, API name and contact email for the connected app.
Select the Use digital signatures check box and upload the DreamApply certificate you downloaded earlier.
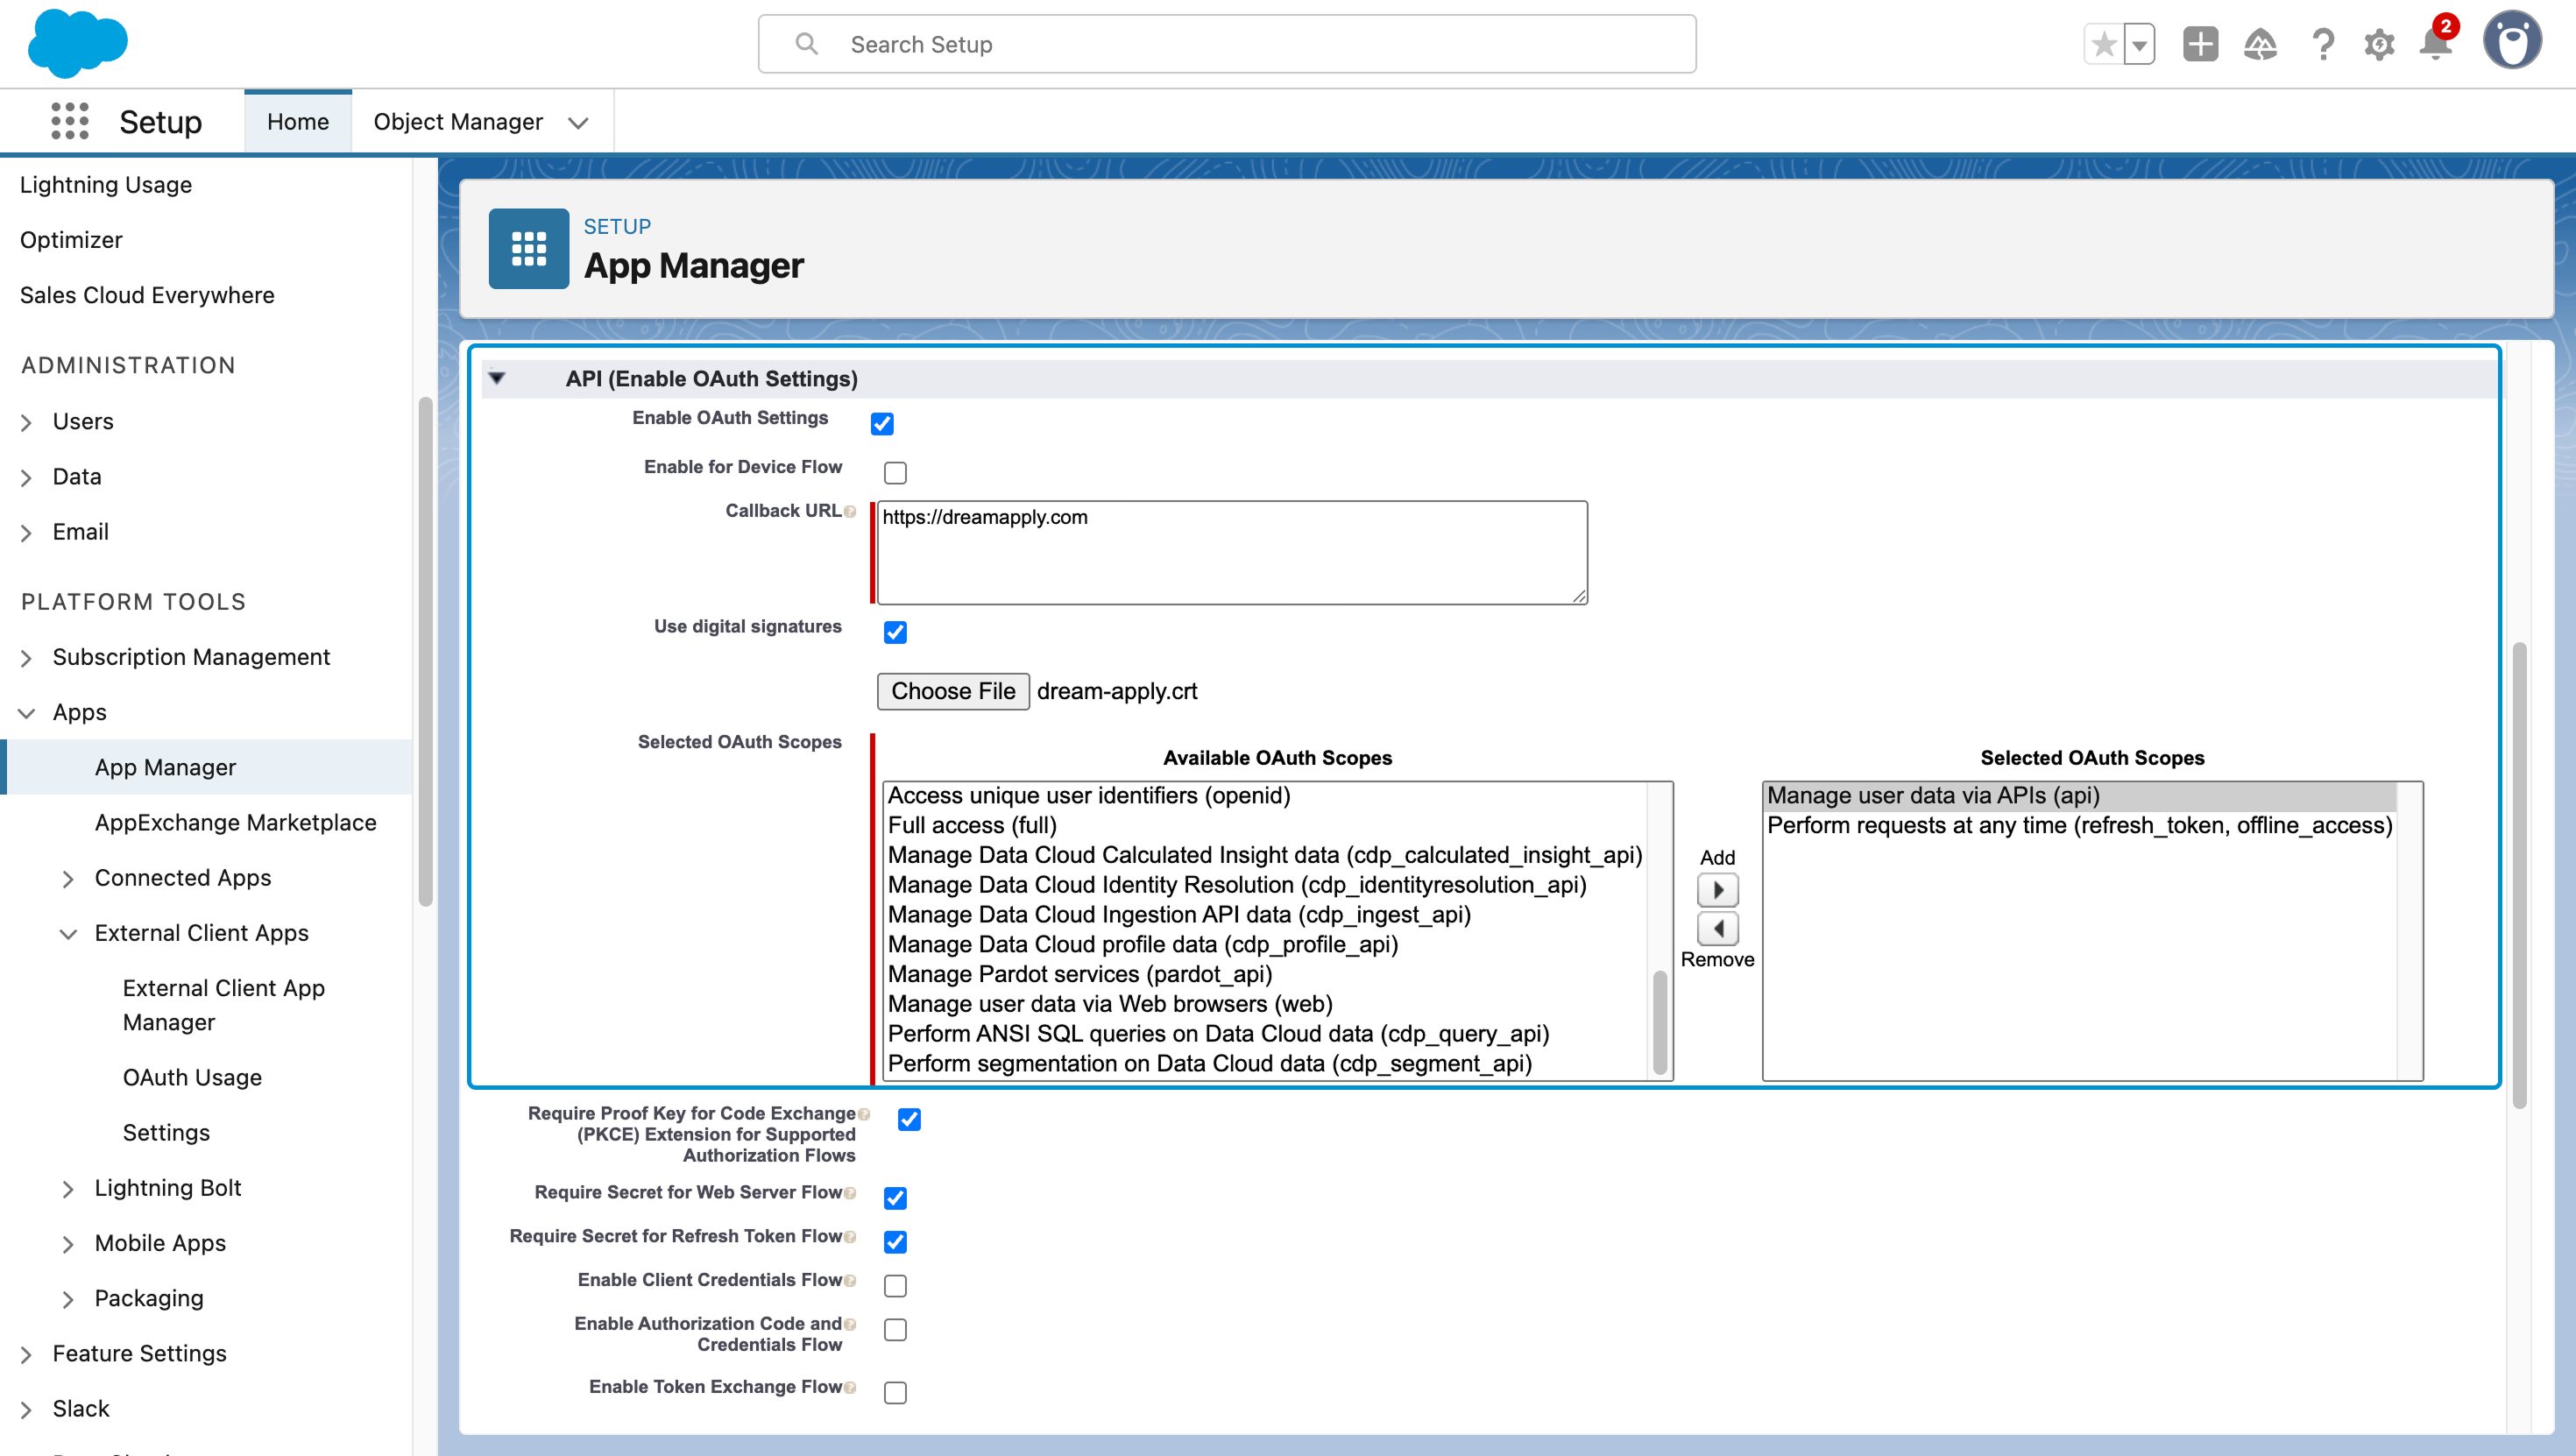
In the API (Enable OAuth Settings) section:
Select the Enable OAuth Settings check box.
In the Callback URL field, specify
https://dreamapply.com. This field is required by Salesforce but will not be actually used for integration.In the Selected OAuth Scopes, choose the following scopes:
Manage user data via APIs (api)Perform requests at any time (refresh token, offline access)
Save the settings.
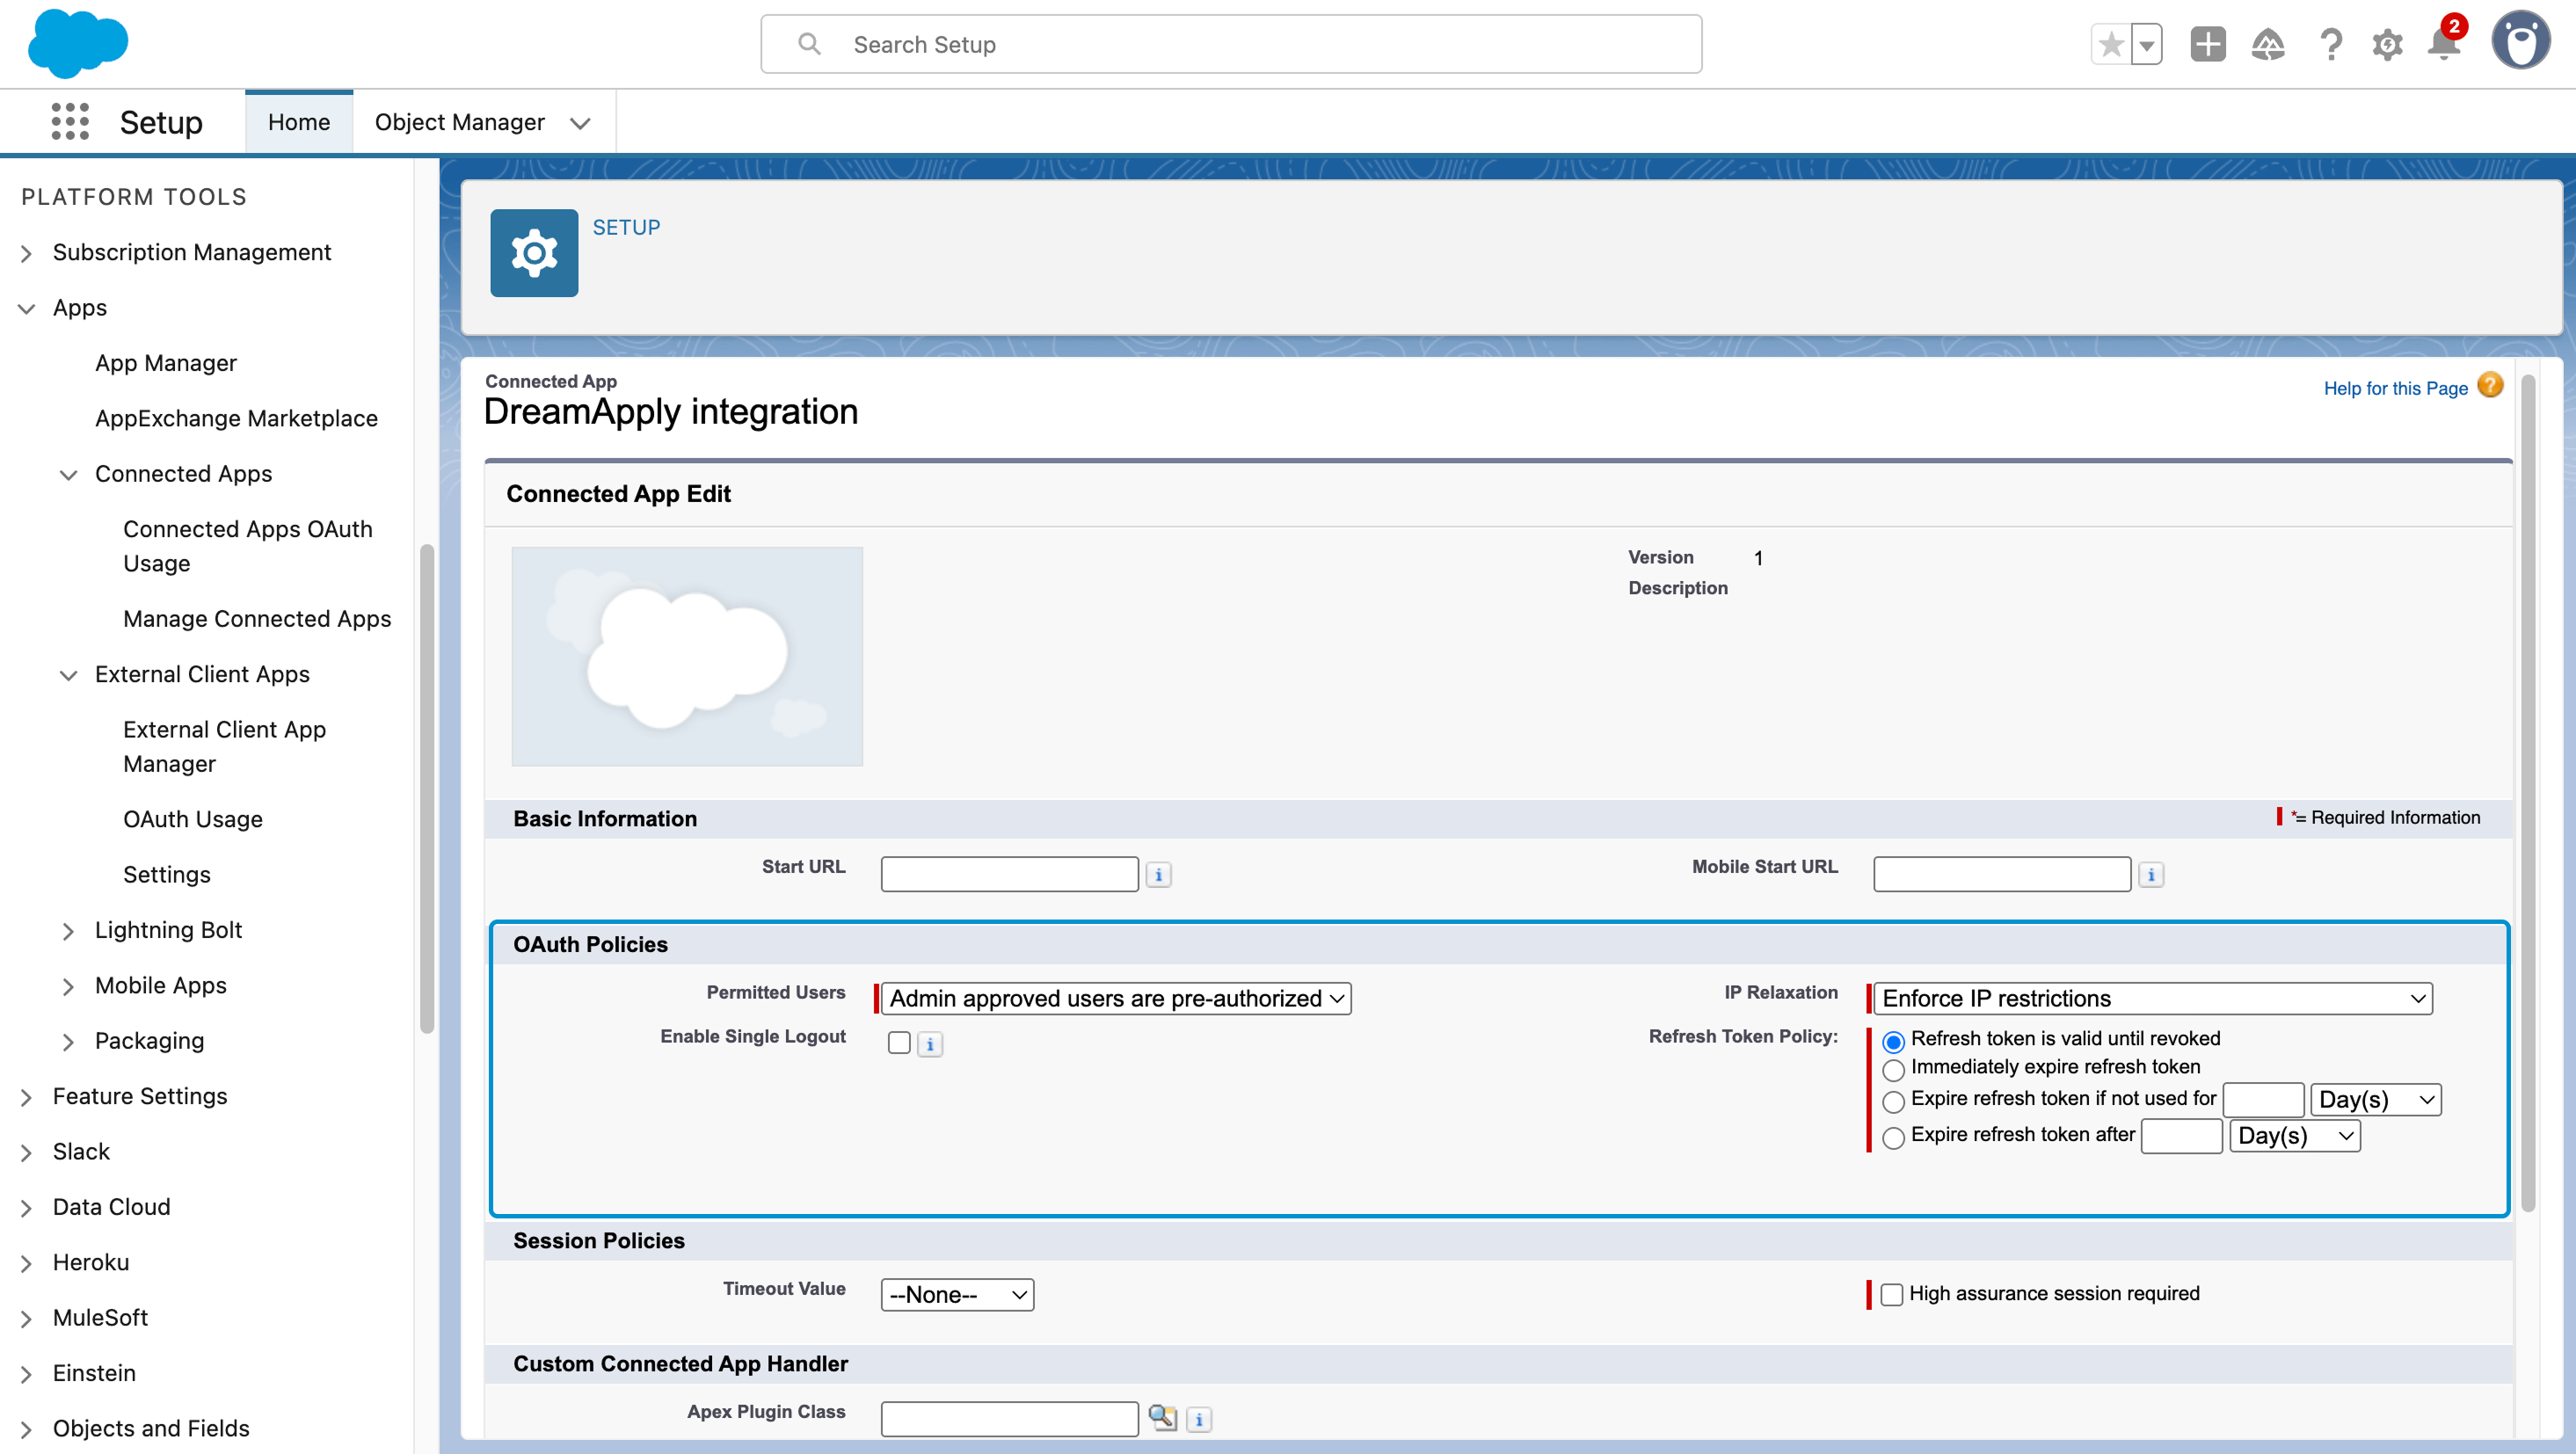
In the displayed view, click Manage and then Edit policies.
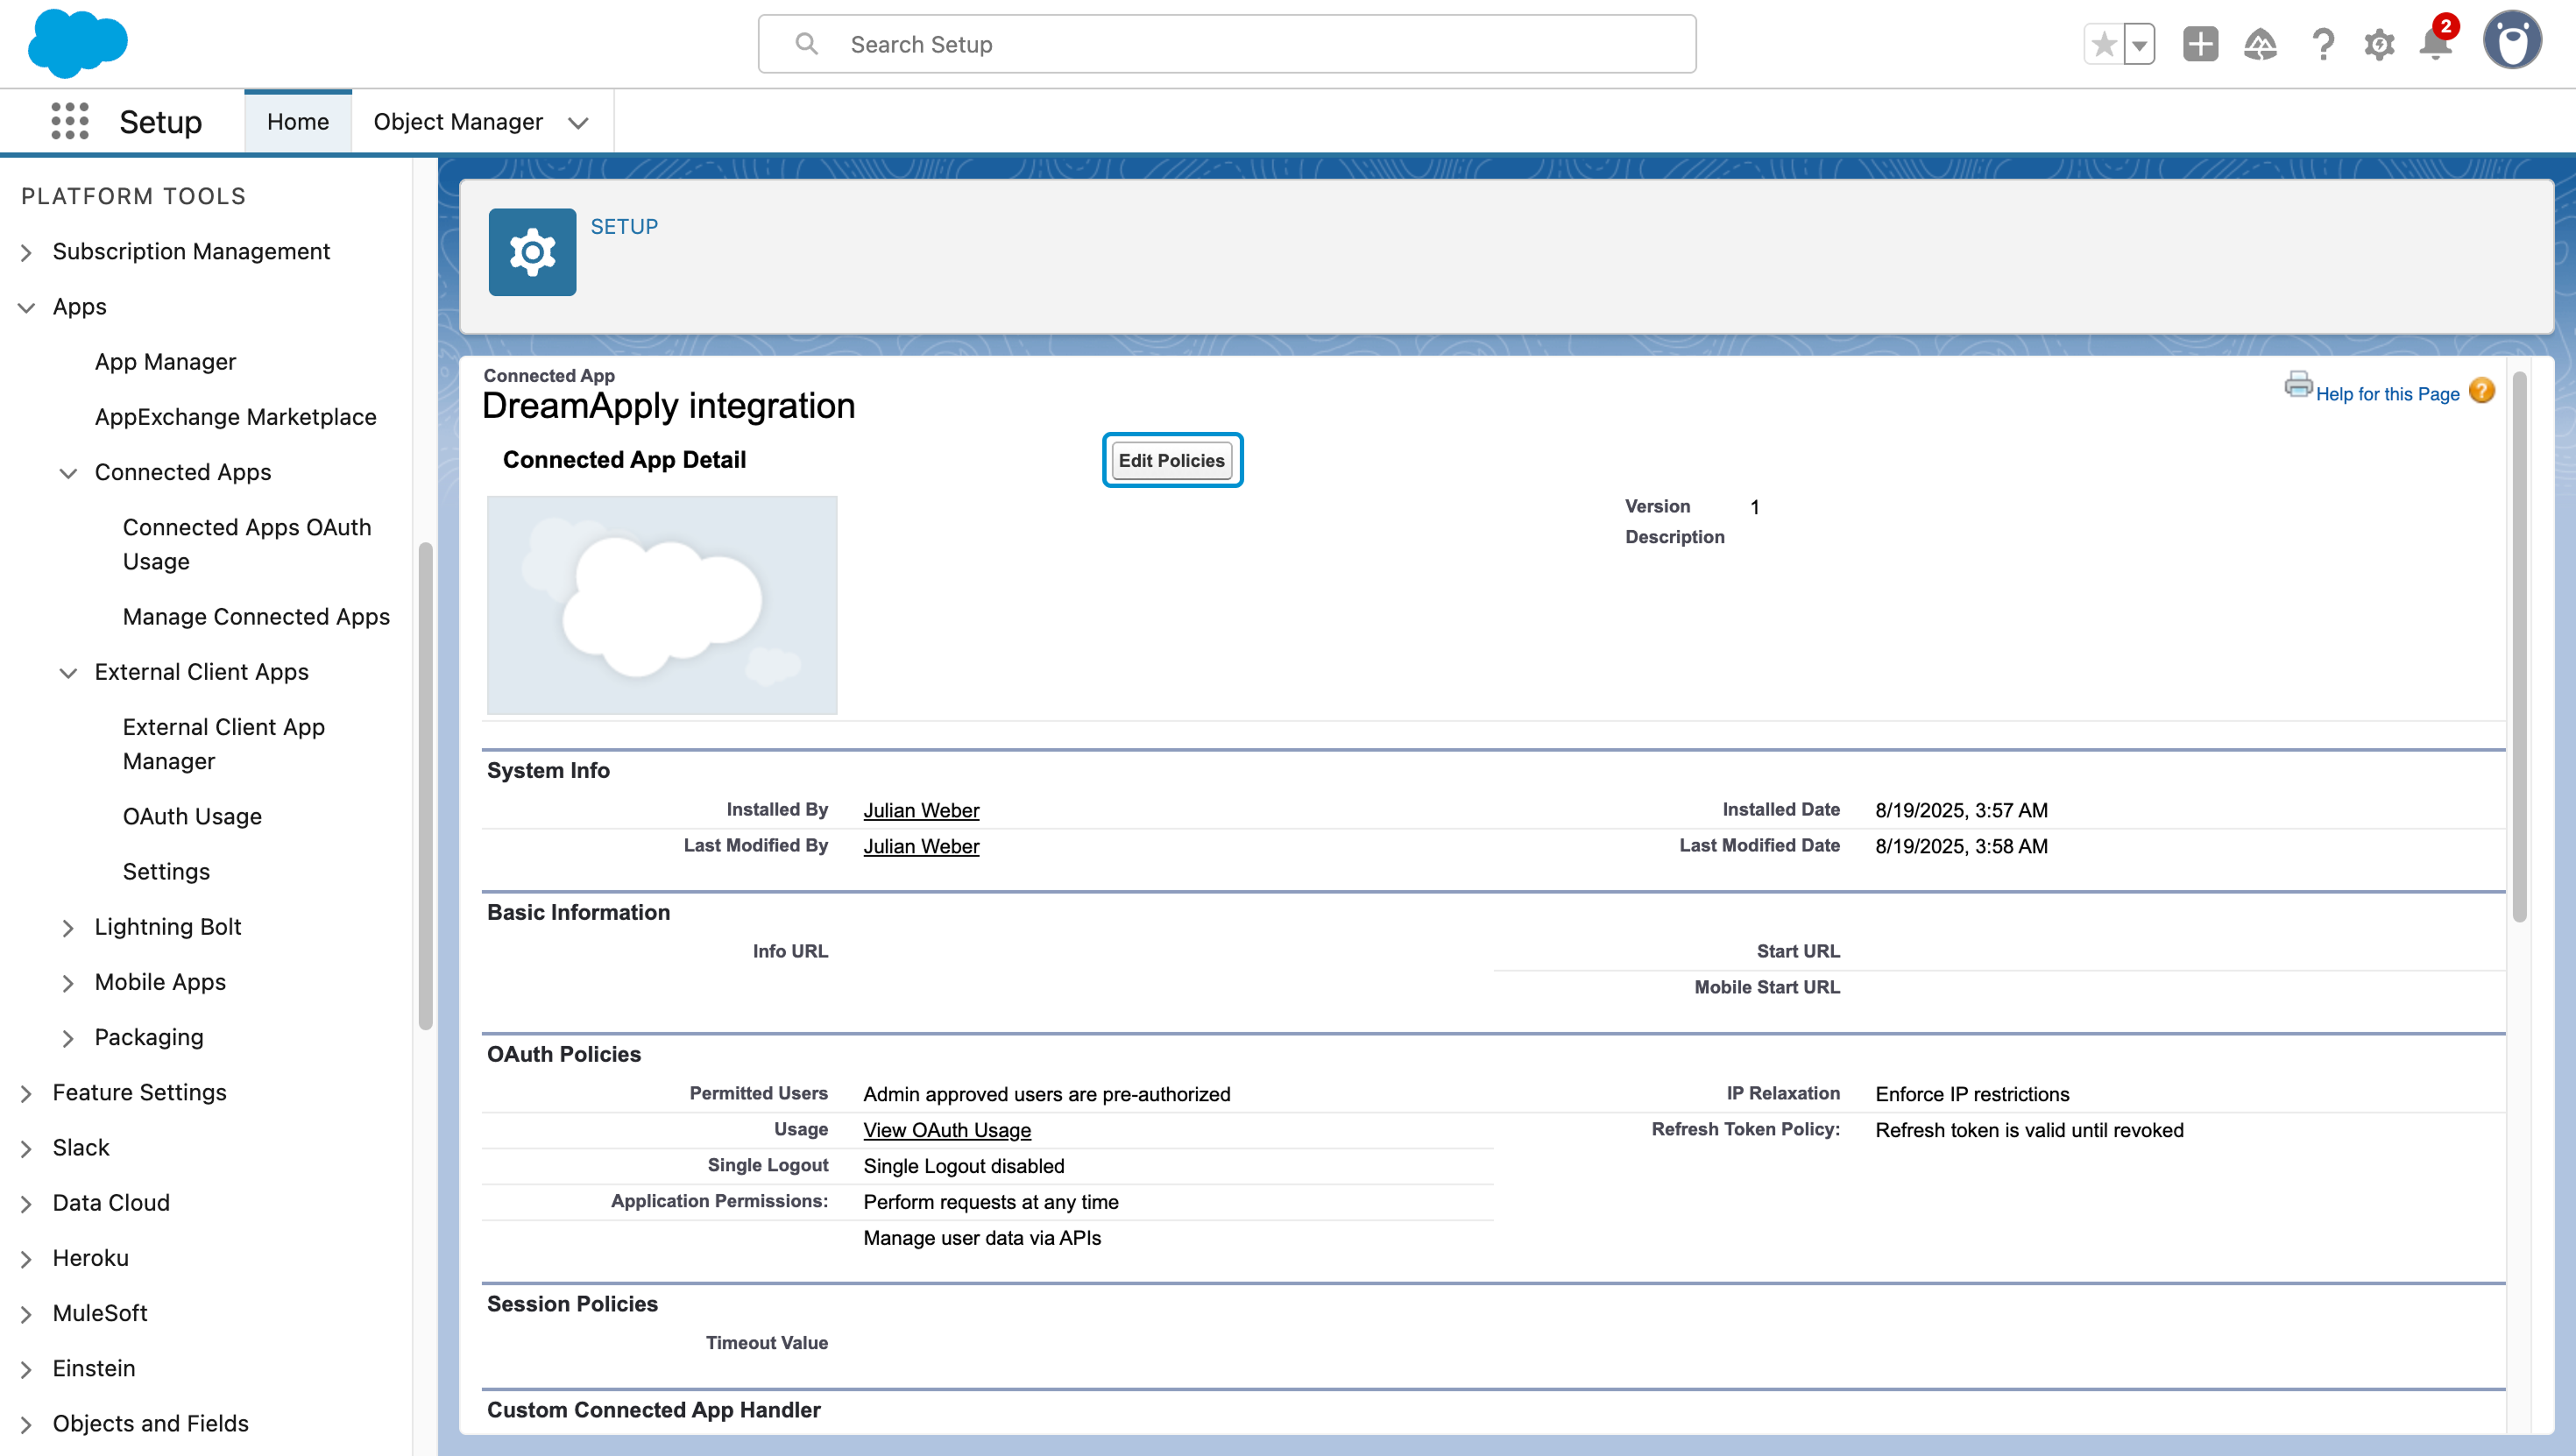
In the OAuth Policies section, from the Permitted Users list, select Admin approved users are pre-authorized.
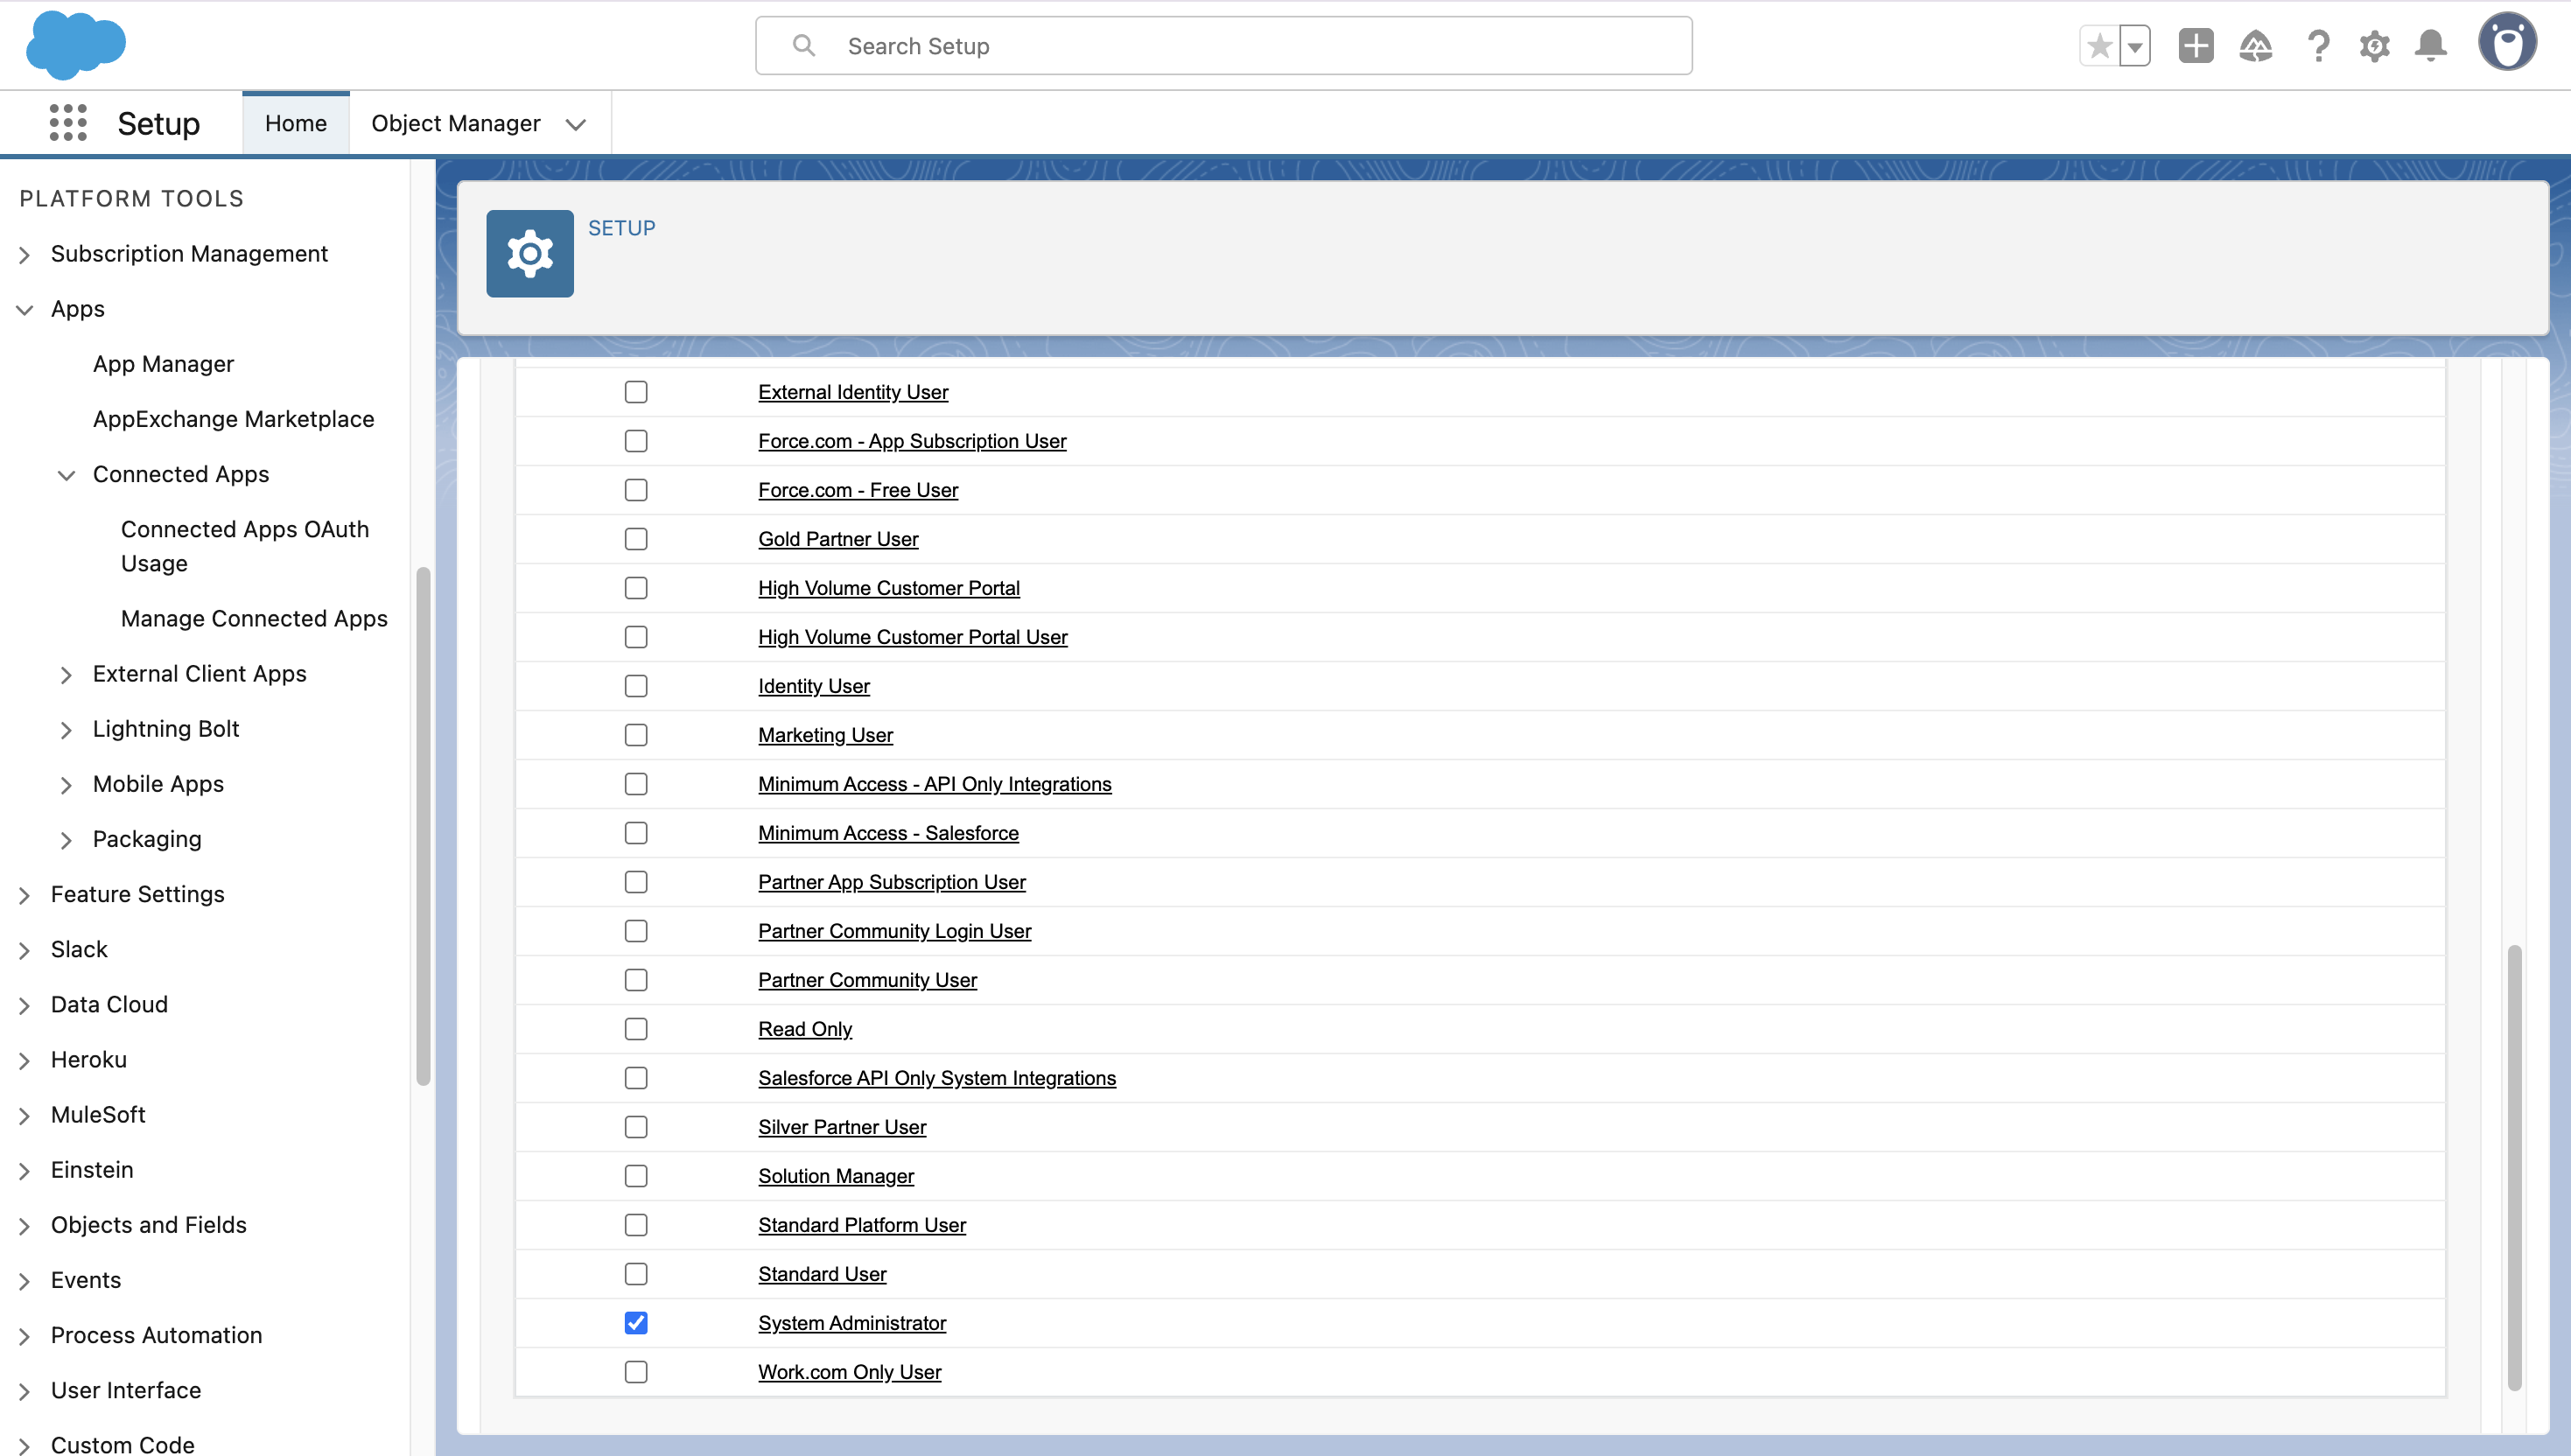
In the connected app details view, in the Profiles section, click Manage Profiles.
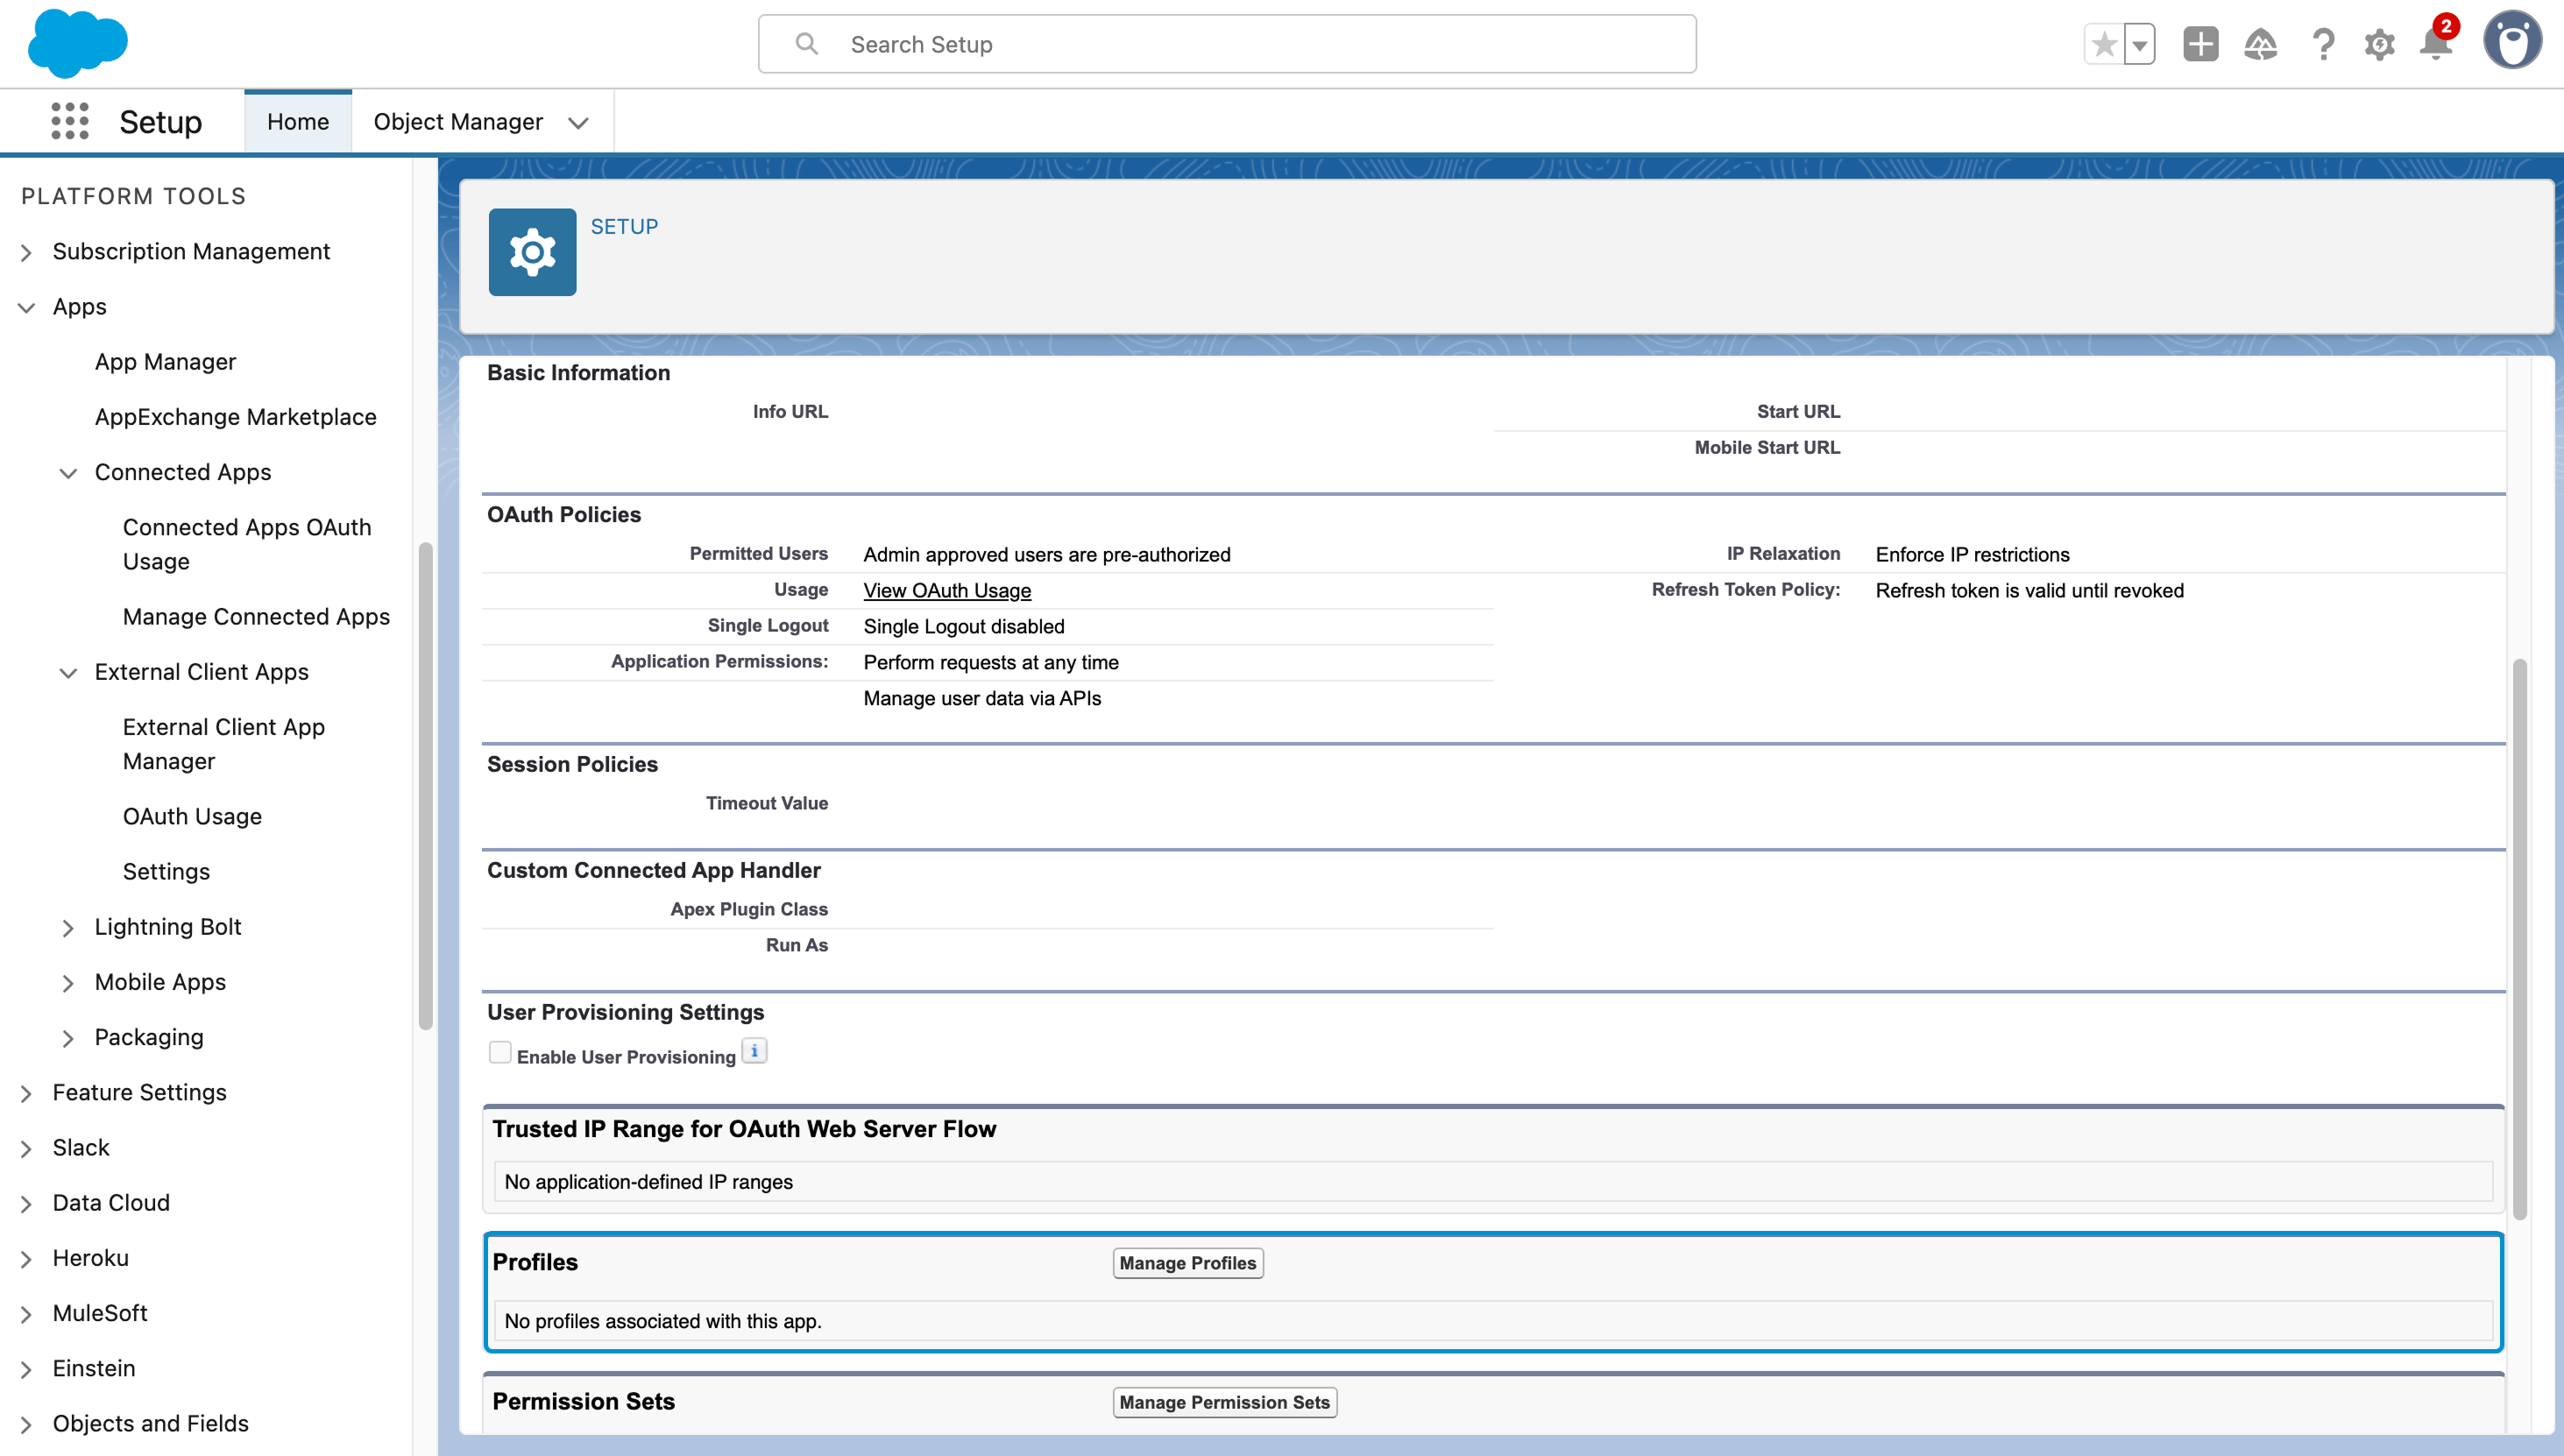
In the Application Profile Assignment view, select a profile that represents a user account DreamApply will use to connect to Salesforce. You can use the System Administrator profile that has full access or create a dedicated integration profile with a more restricted permission set. For details, see Create or Clone Profiles in the Salesforce documentation.
Save the settings.
Obtain the Salesforce instance details
You need to obtain the following details to connect DreamApply to your Salesforce instance:
- Instance URL
- Consumer Key
- Username
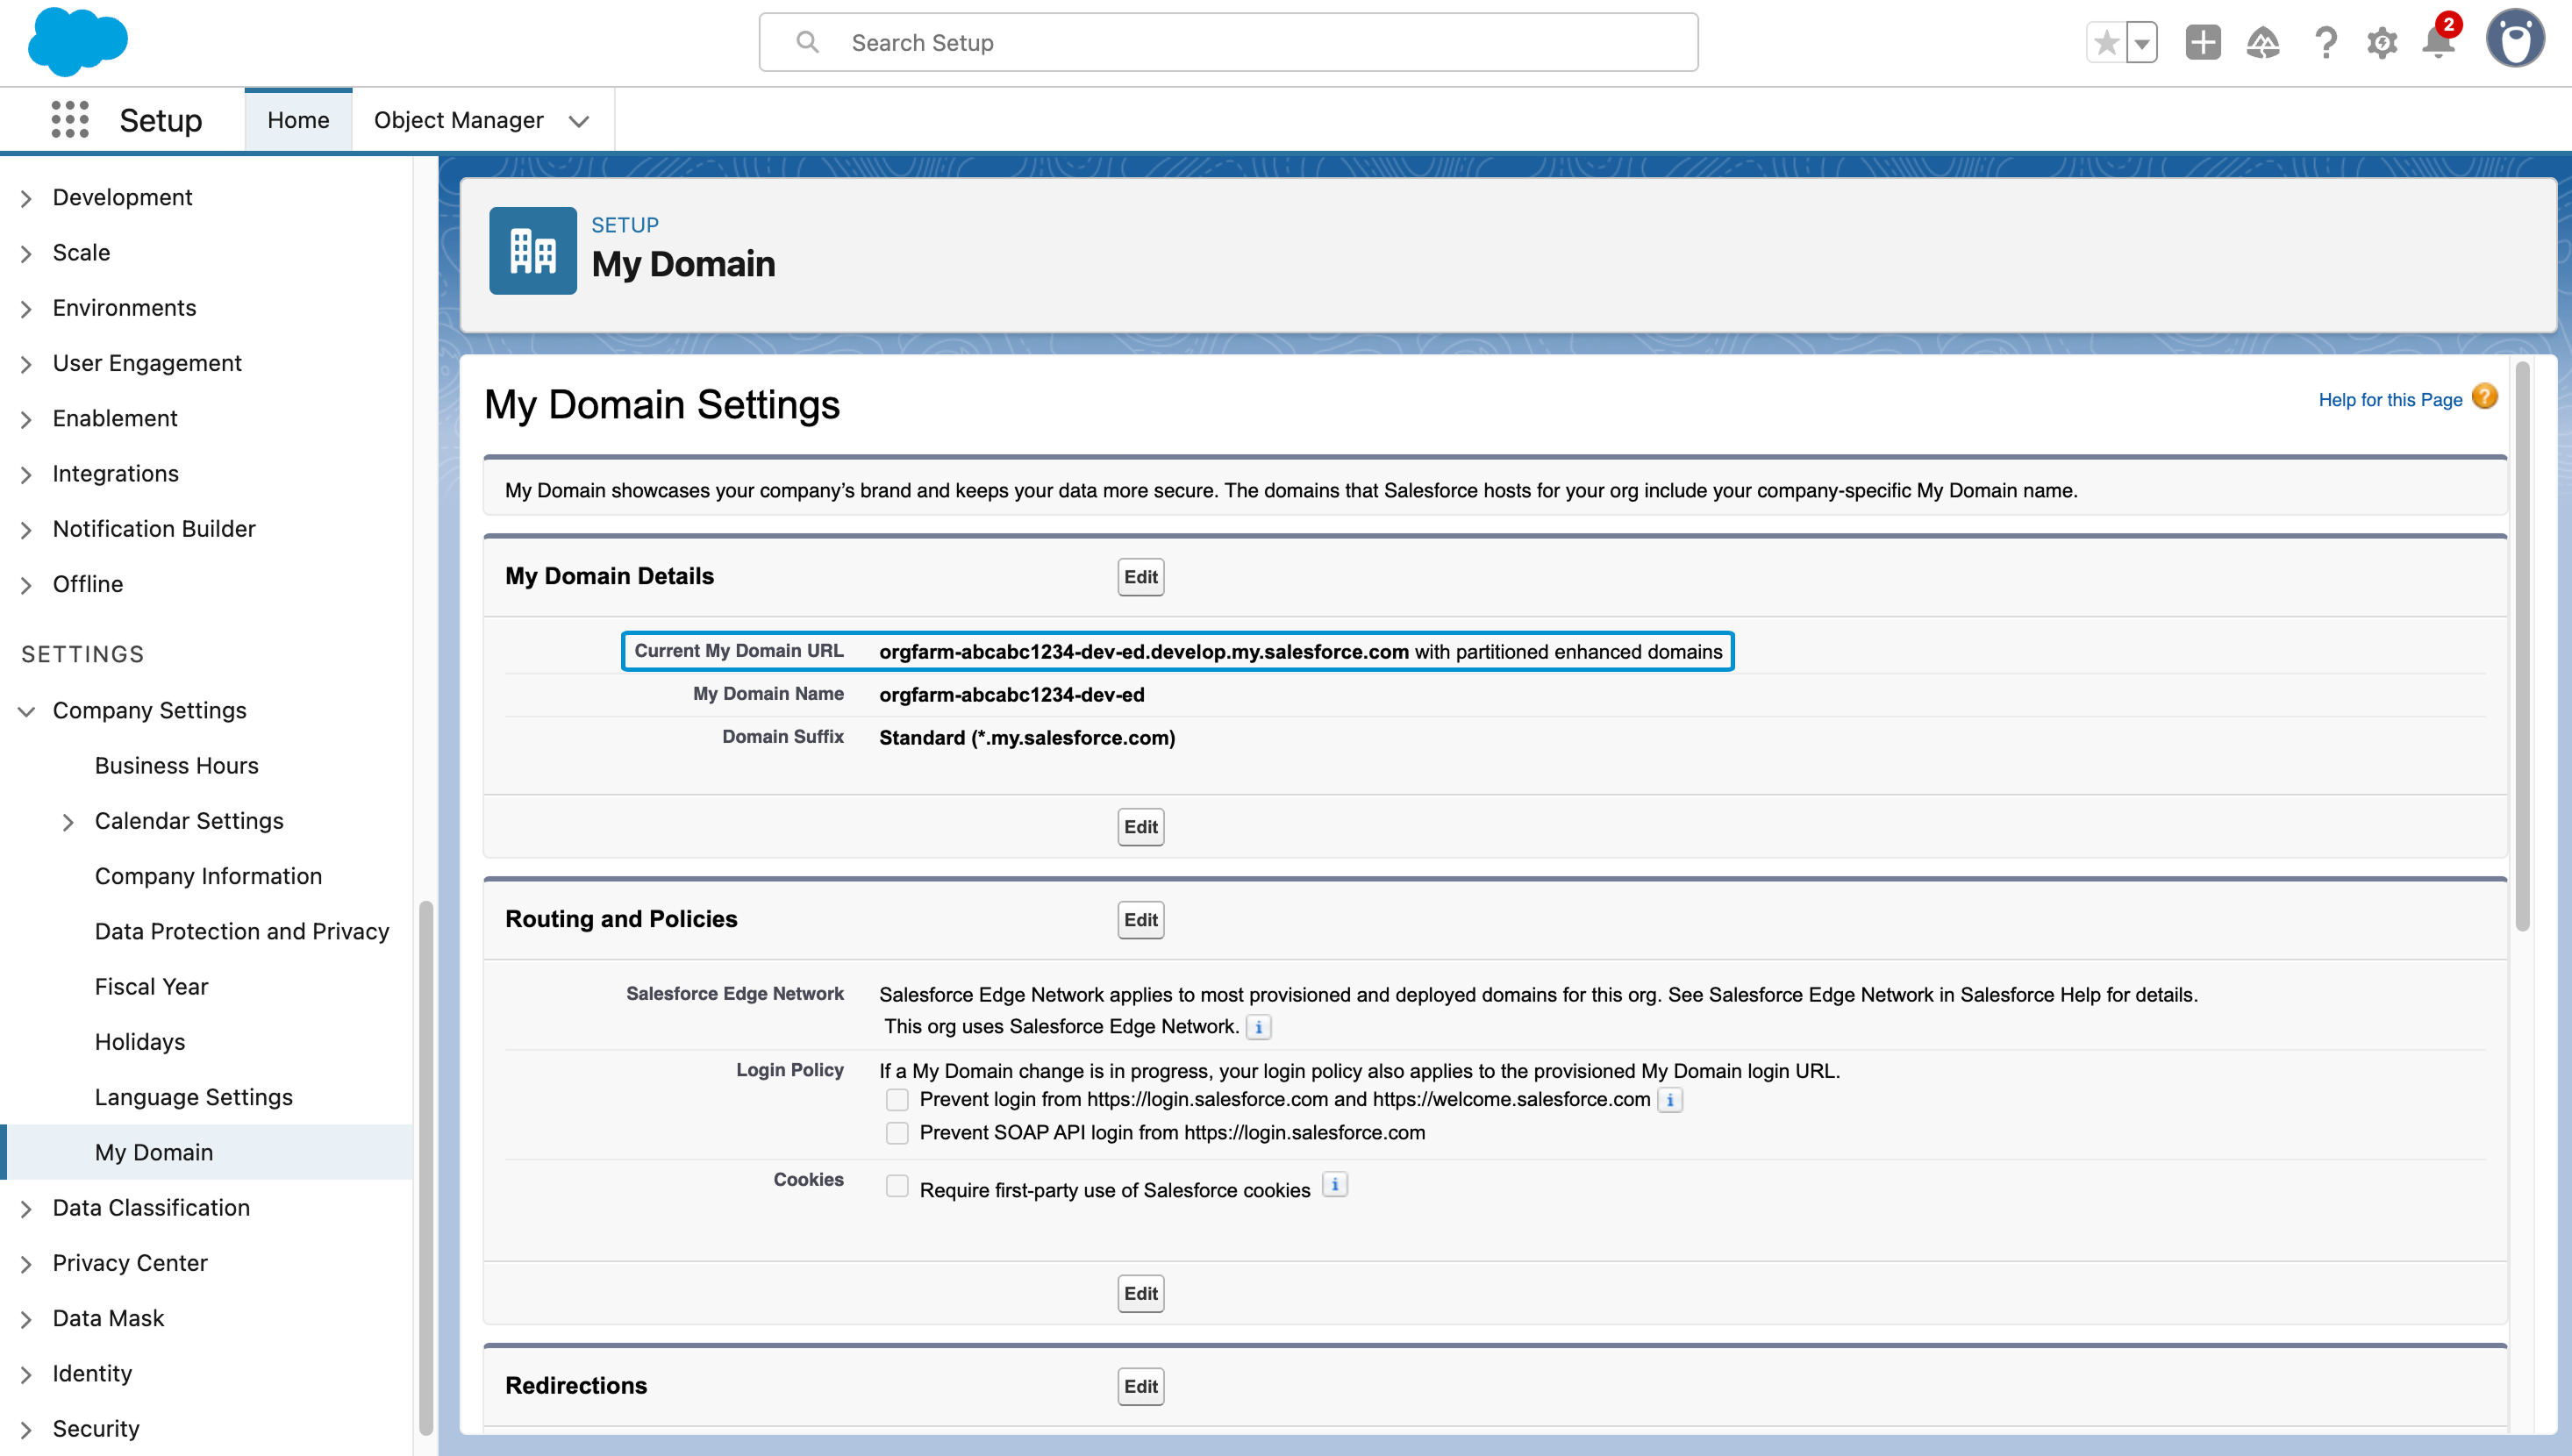
Get the instance URL
To get the instance URL:
- In the left menu, select Settings > Company Settings > My Domain.
- Make note of and copy the My Domain URL value.
Get the Consumer key
To get the Consumer key for your connected app:
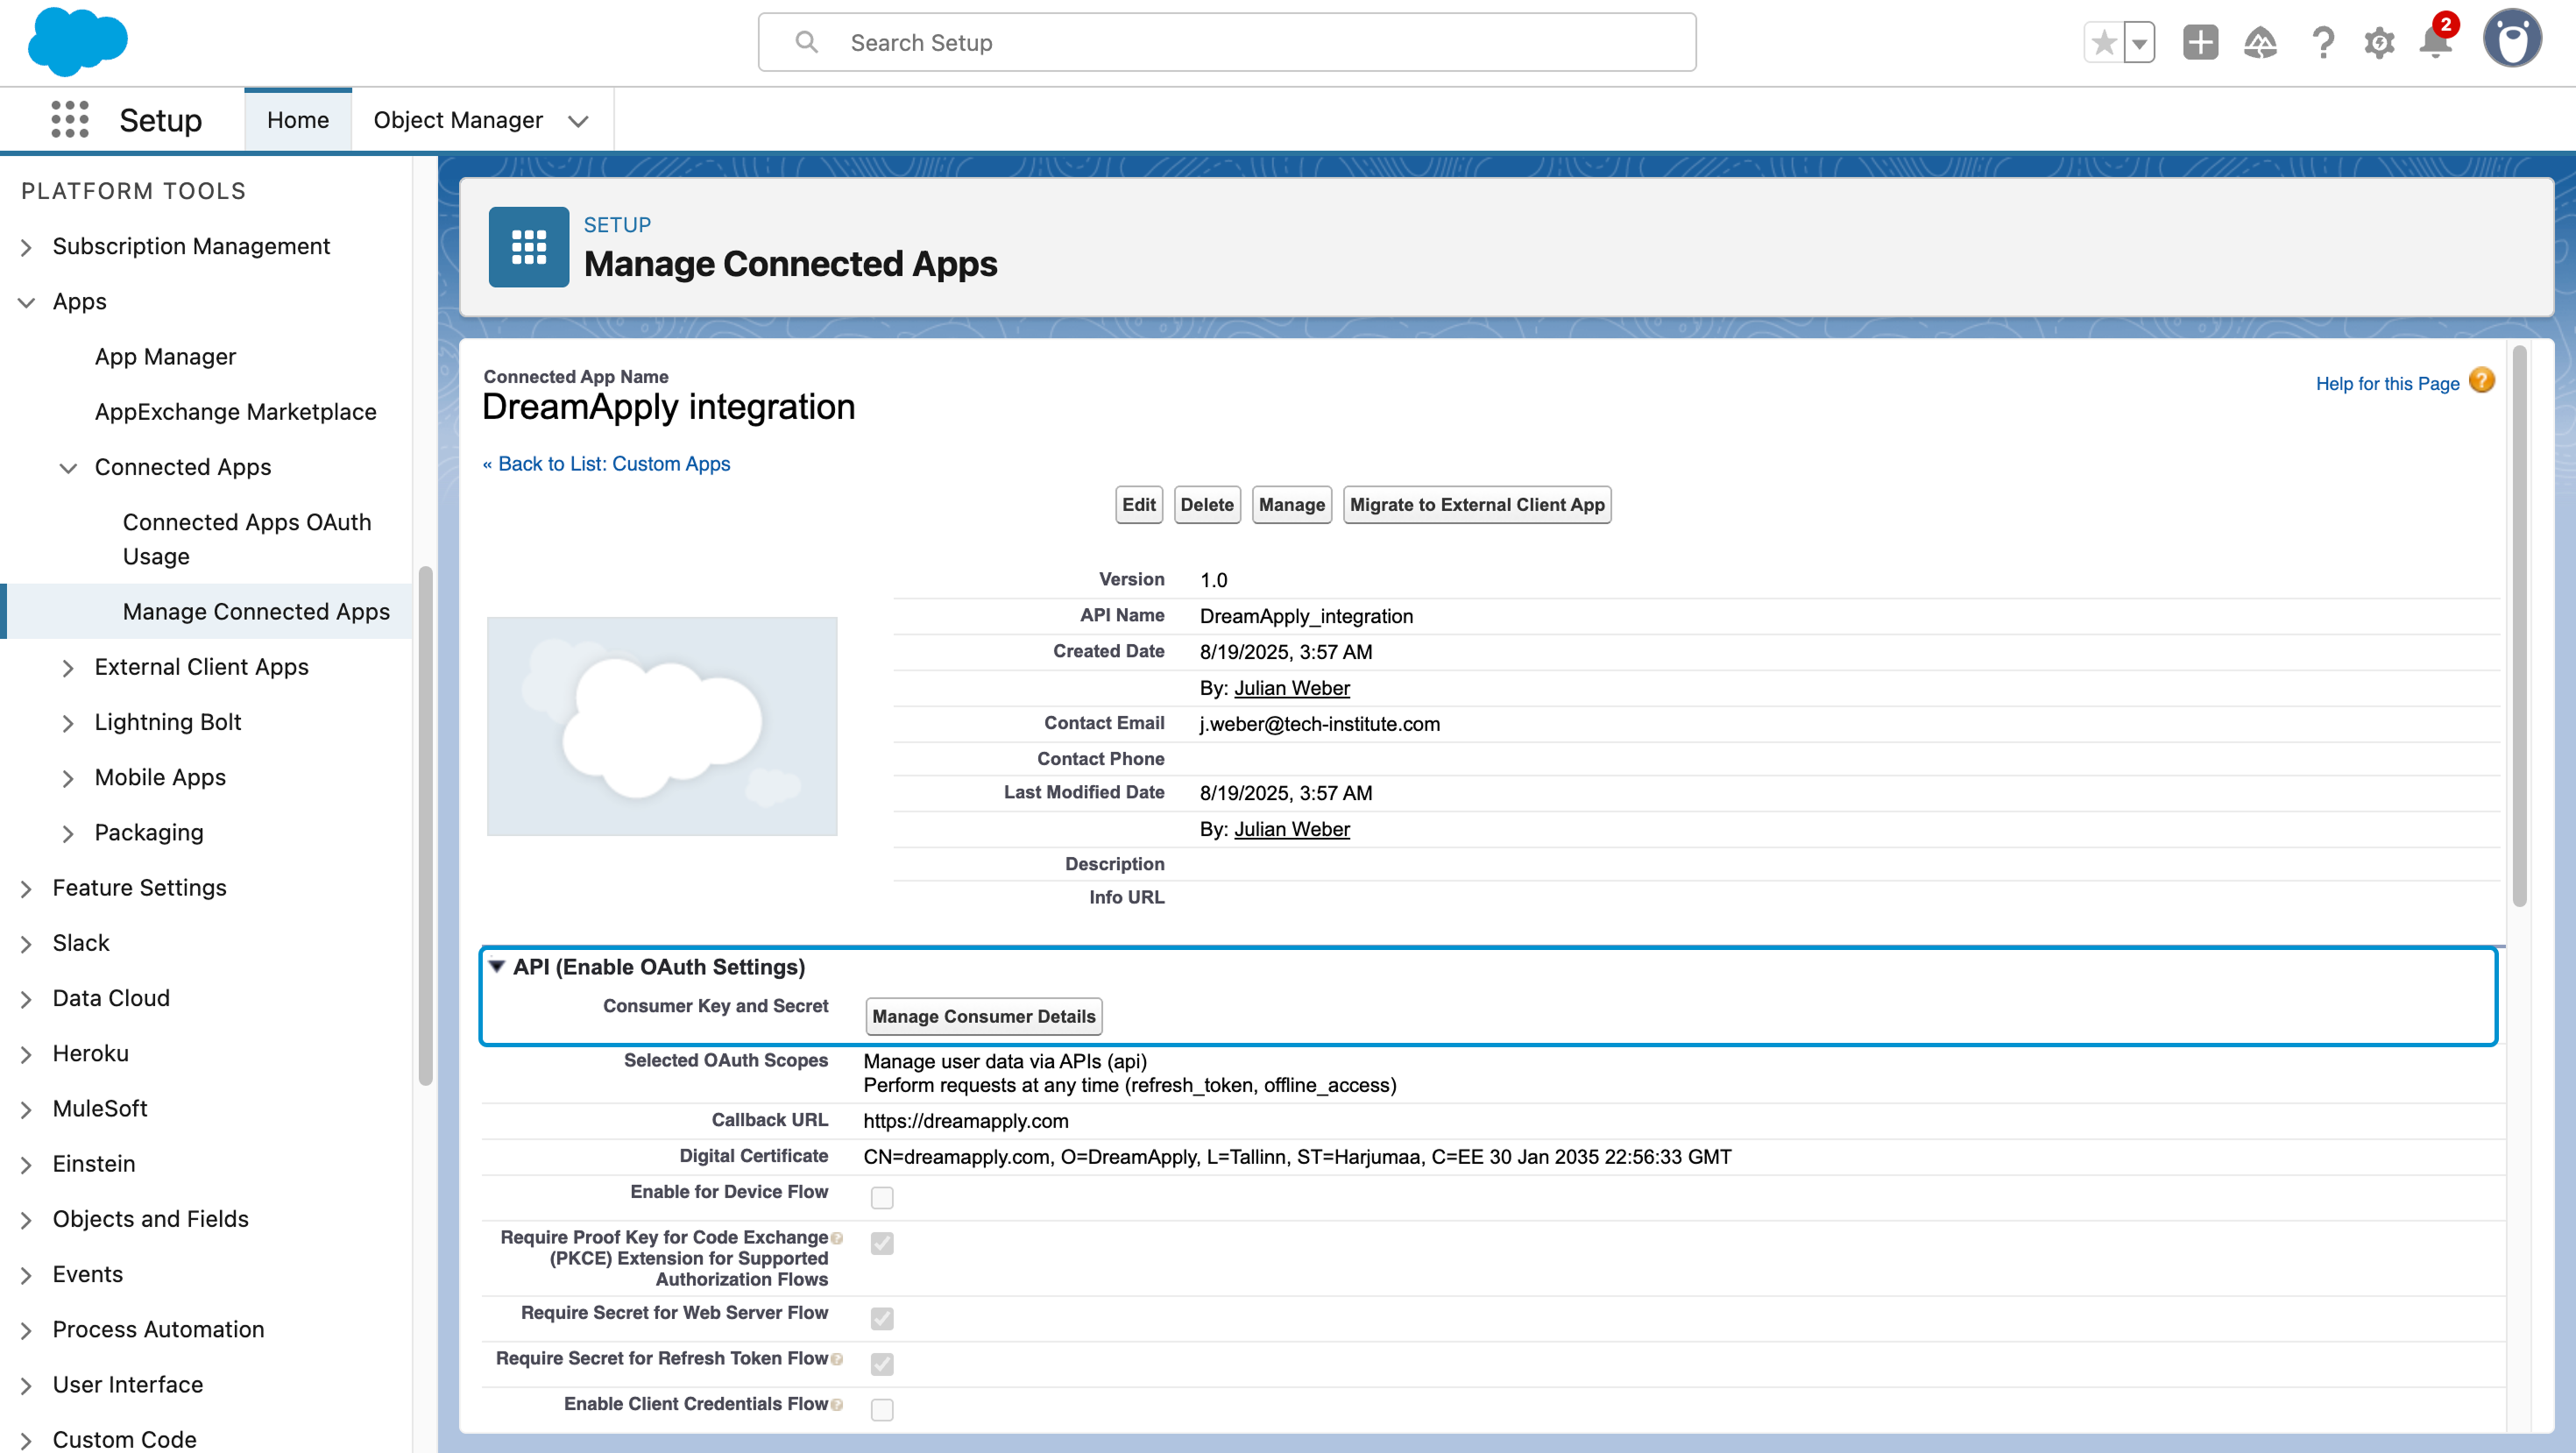
In the left menu, select Apps > App manager.
To the right of the created connected app, click the arrow icon and select View.
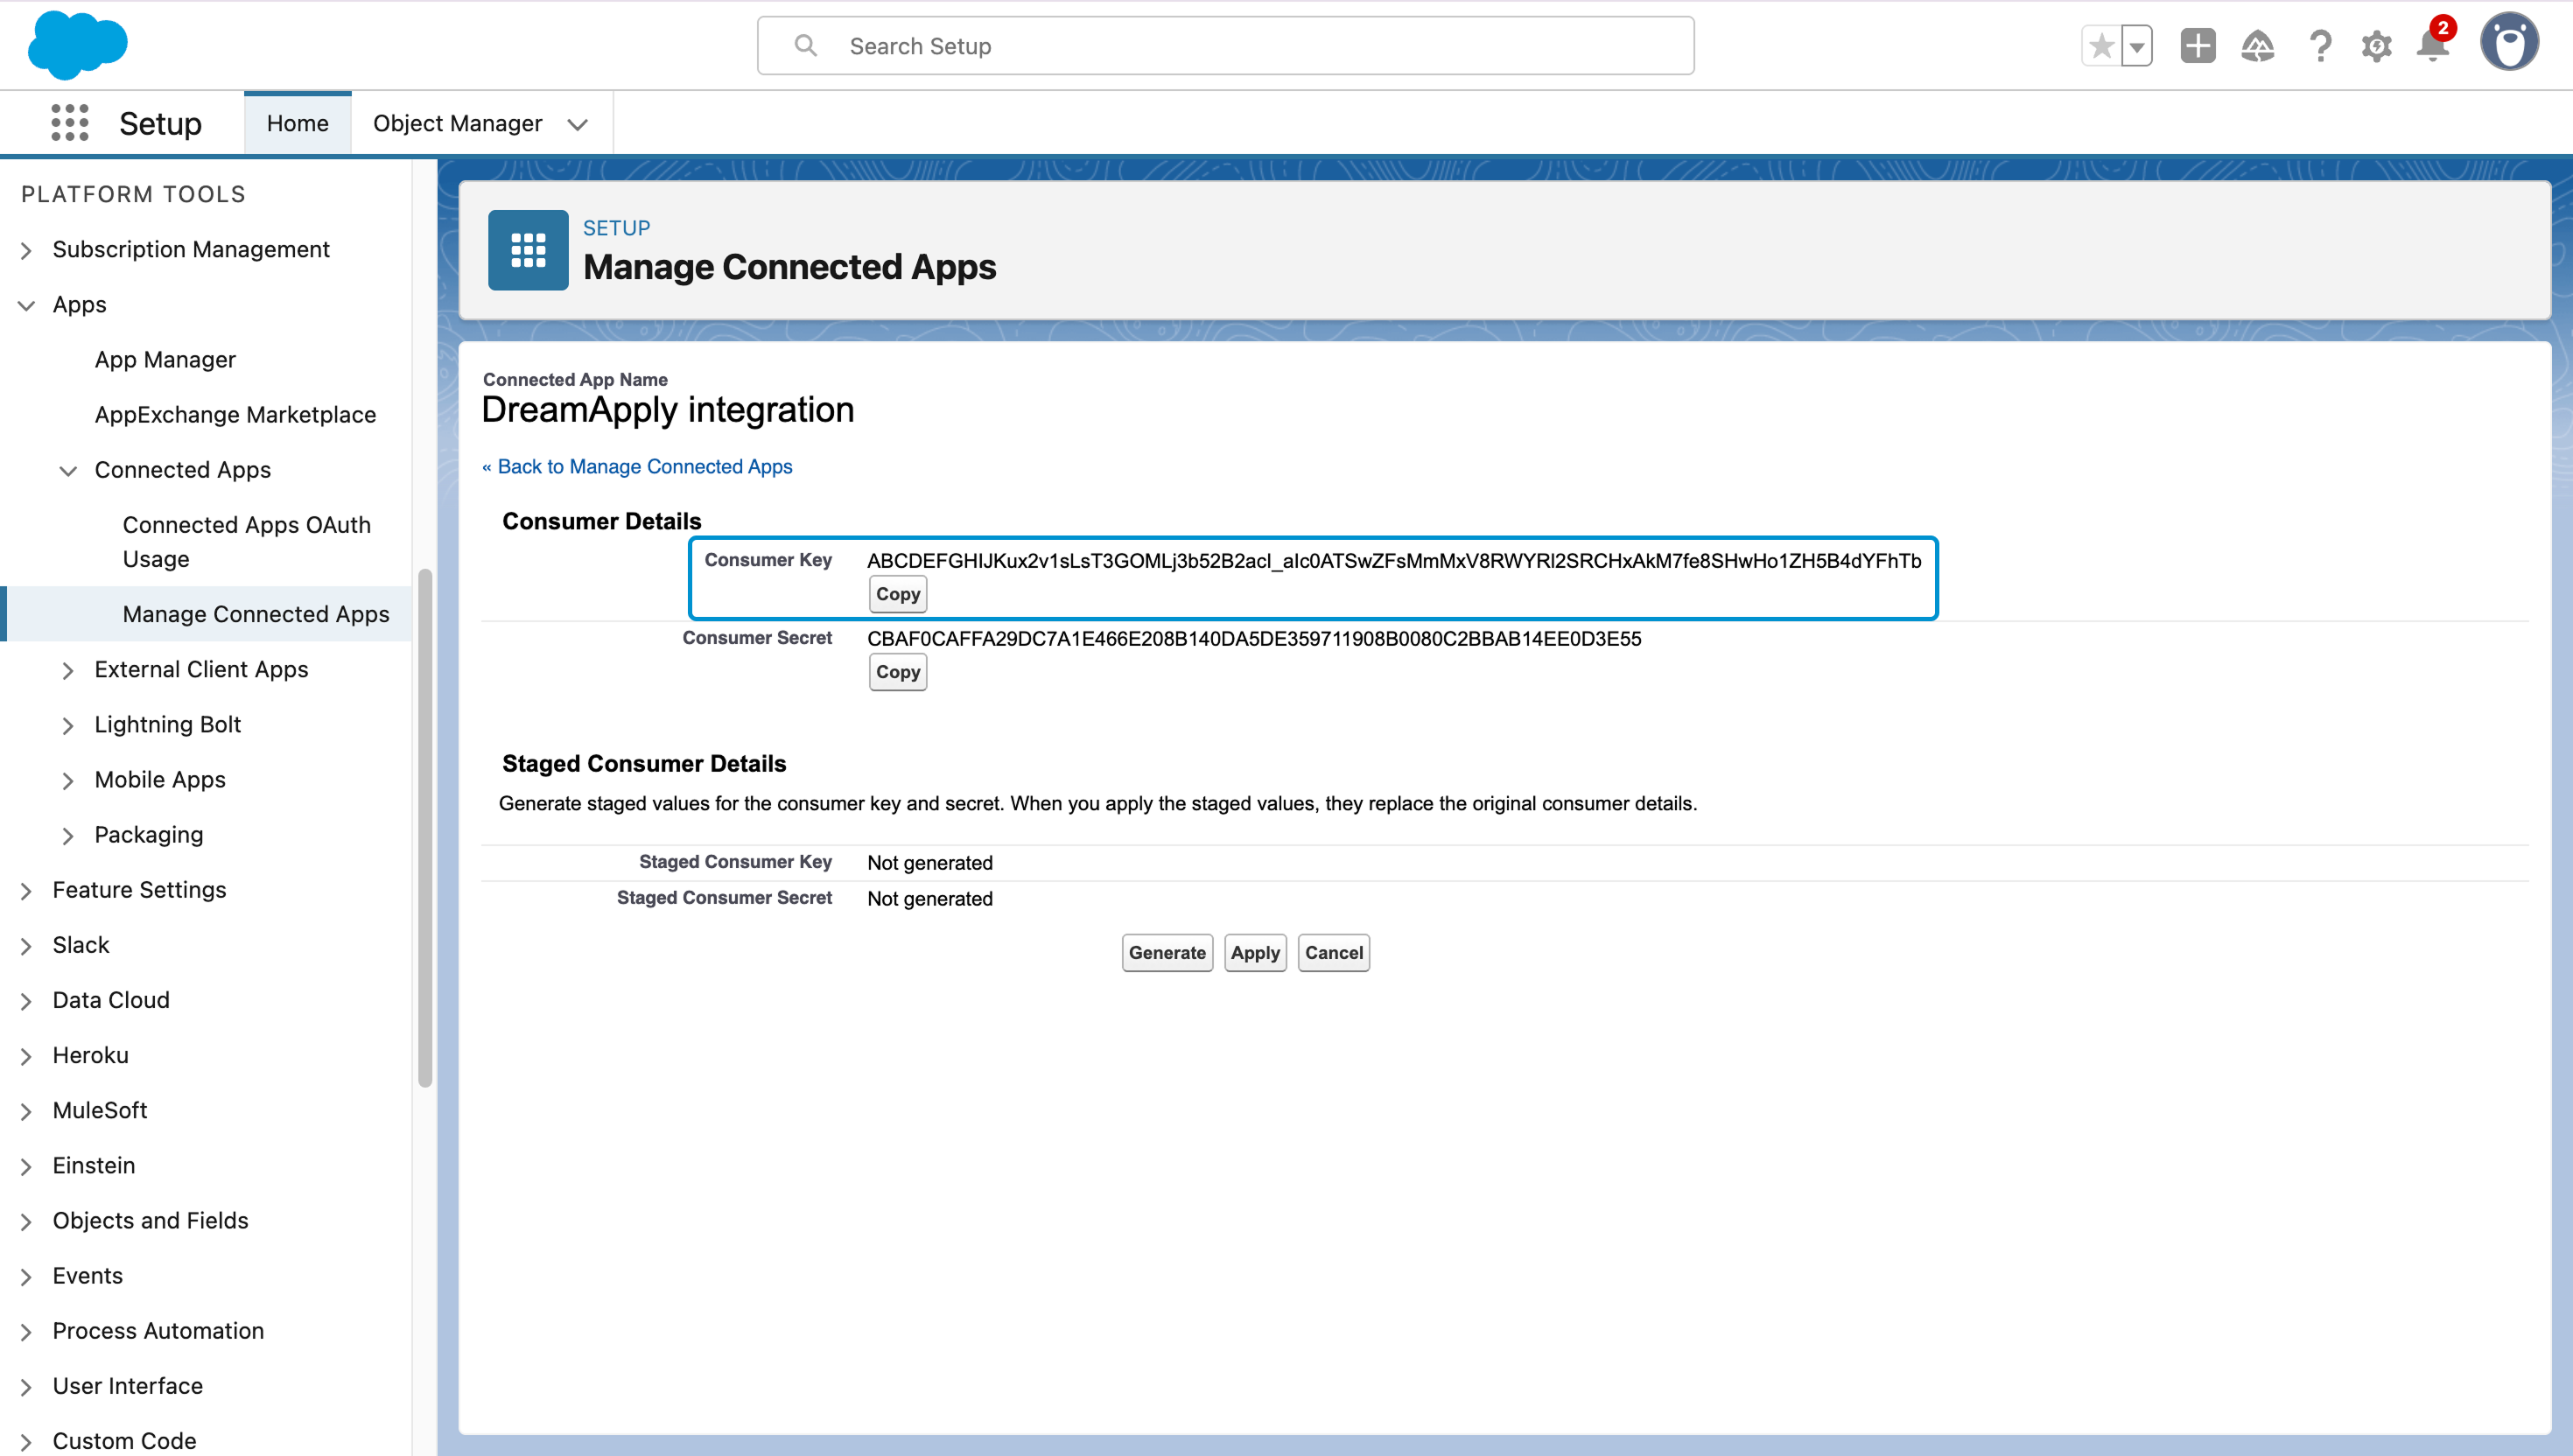
In the API (Enable OAuth Settings) section, click Manage Consumer Details.
Make note of and copy the Consumer Key value for the connected app.
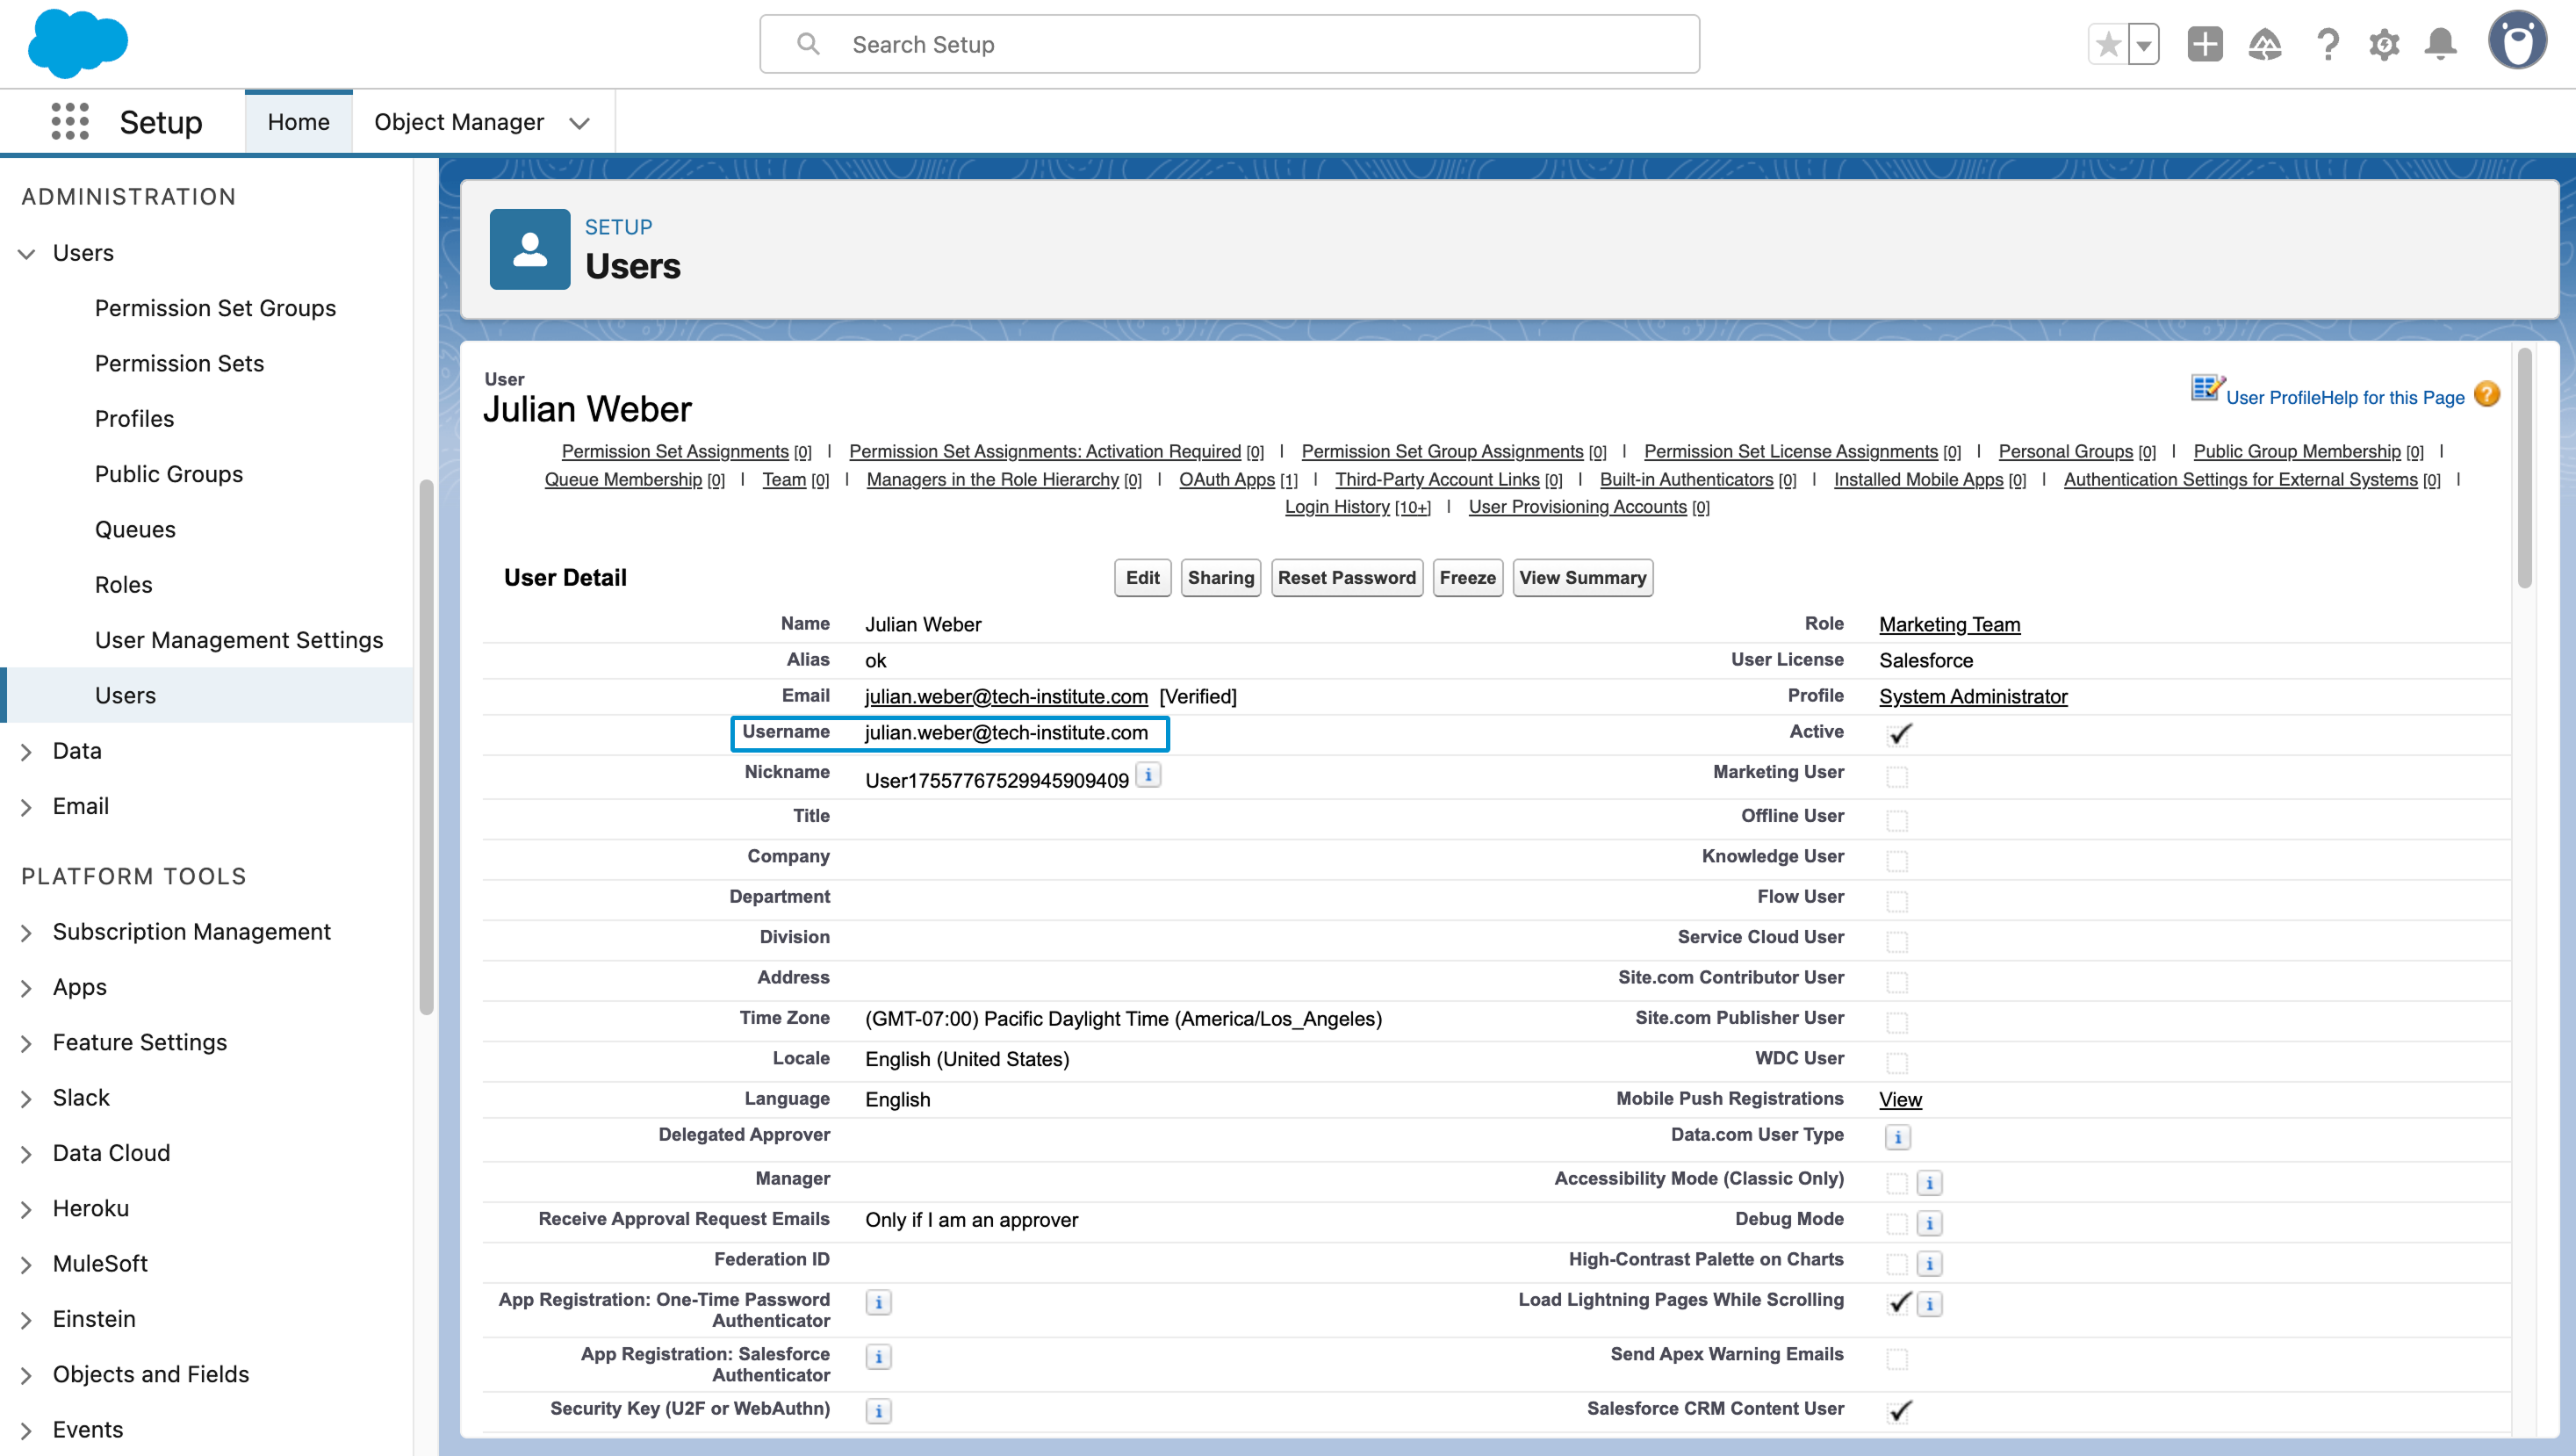
Get a Salesforce username
You need to get a Salesforce username of the account that DreamApply will use to connect to Salesforce. This username must be tied to the profile assigned to the connected app — the System Administrator or a dedicated integration profile with a more restricted permission set.
To get a Salesforce user name:
- In the left menu, select Administration > Users > Users.
- Select to view the necessary user account.
- Make note of and copy the Username value.
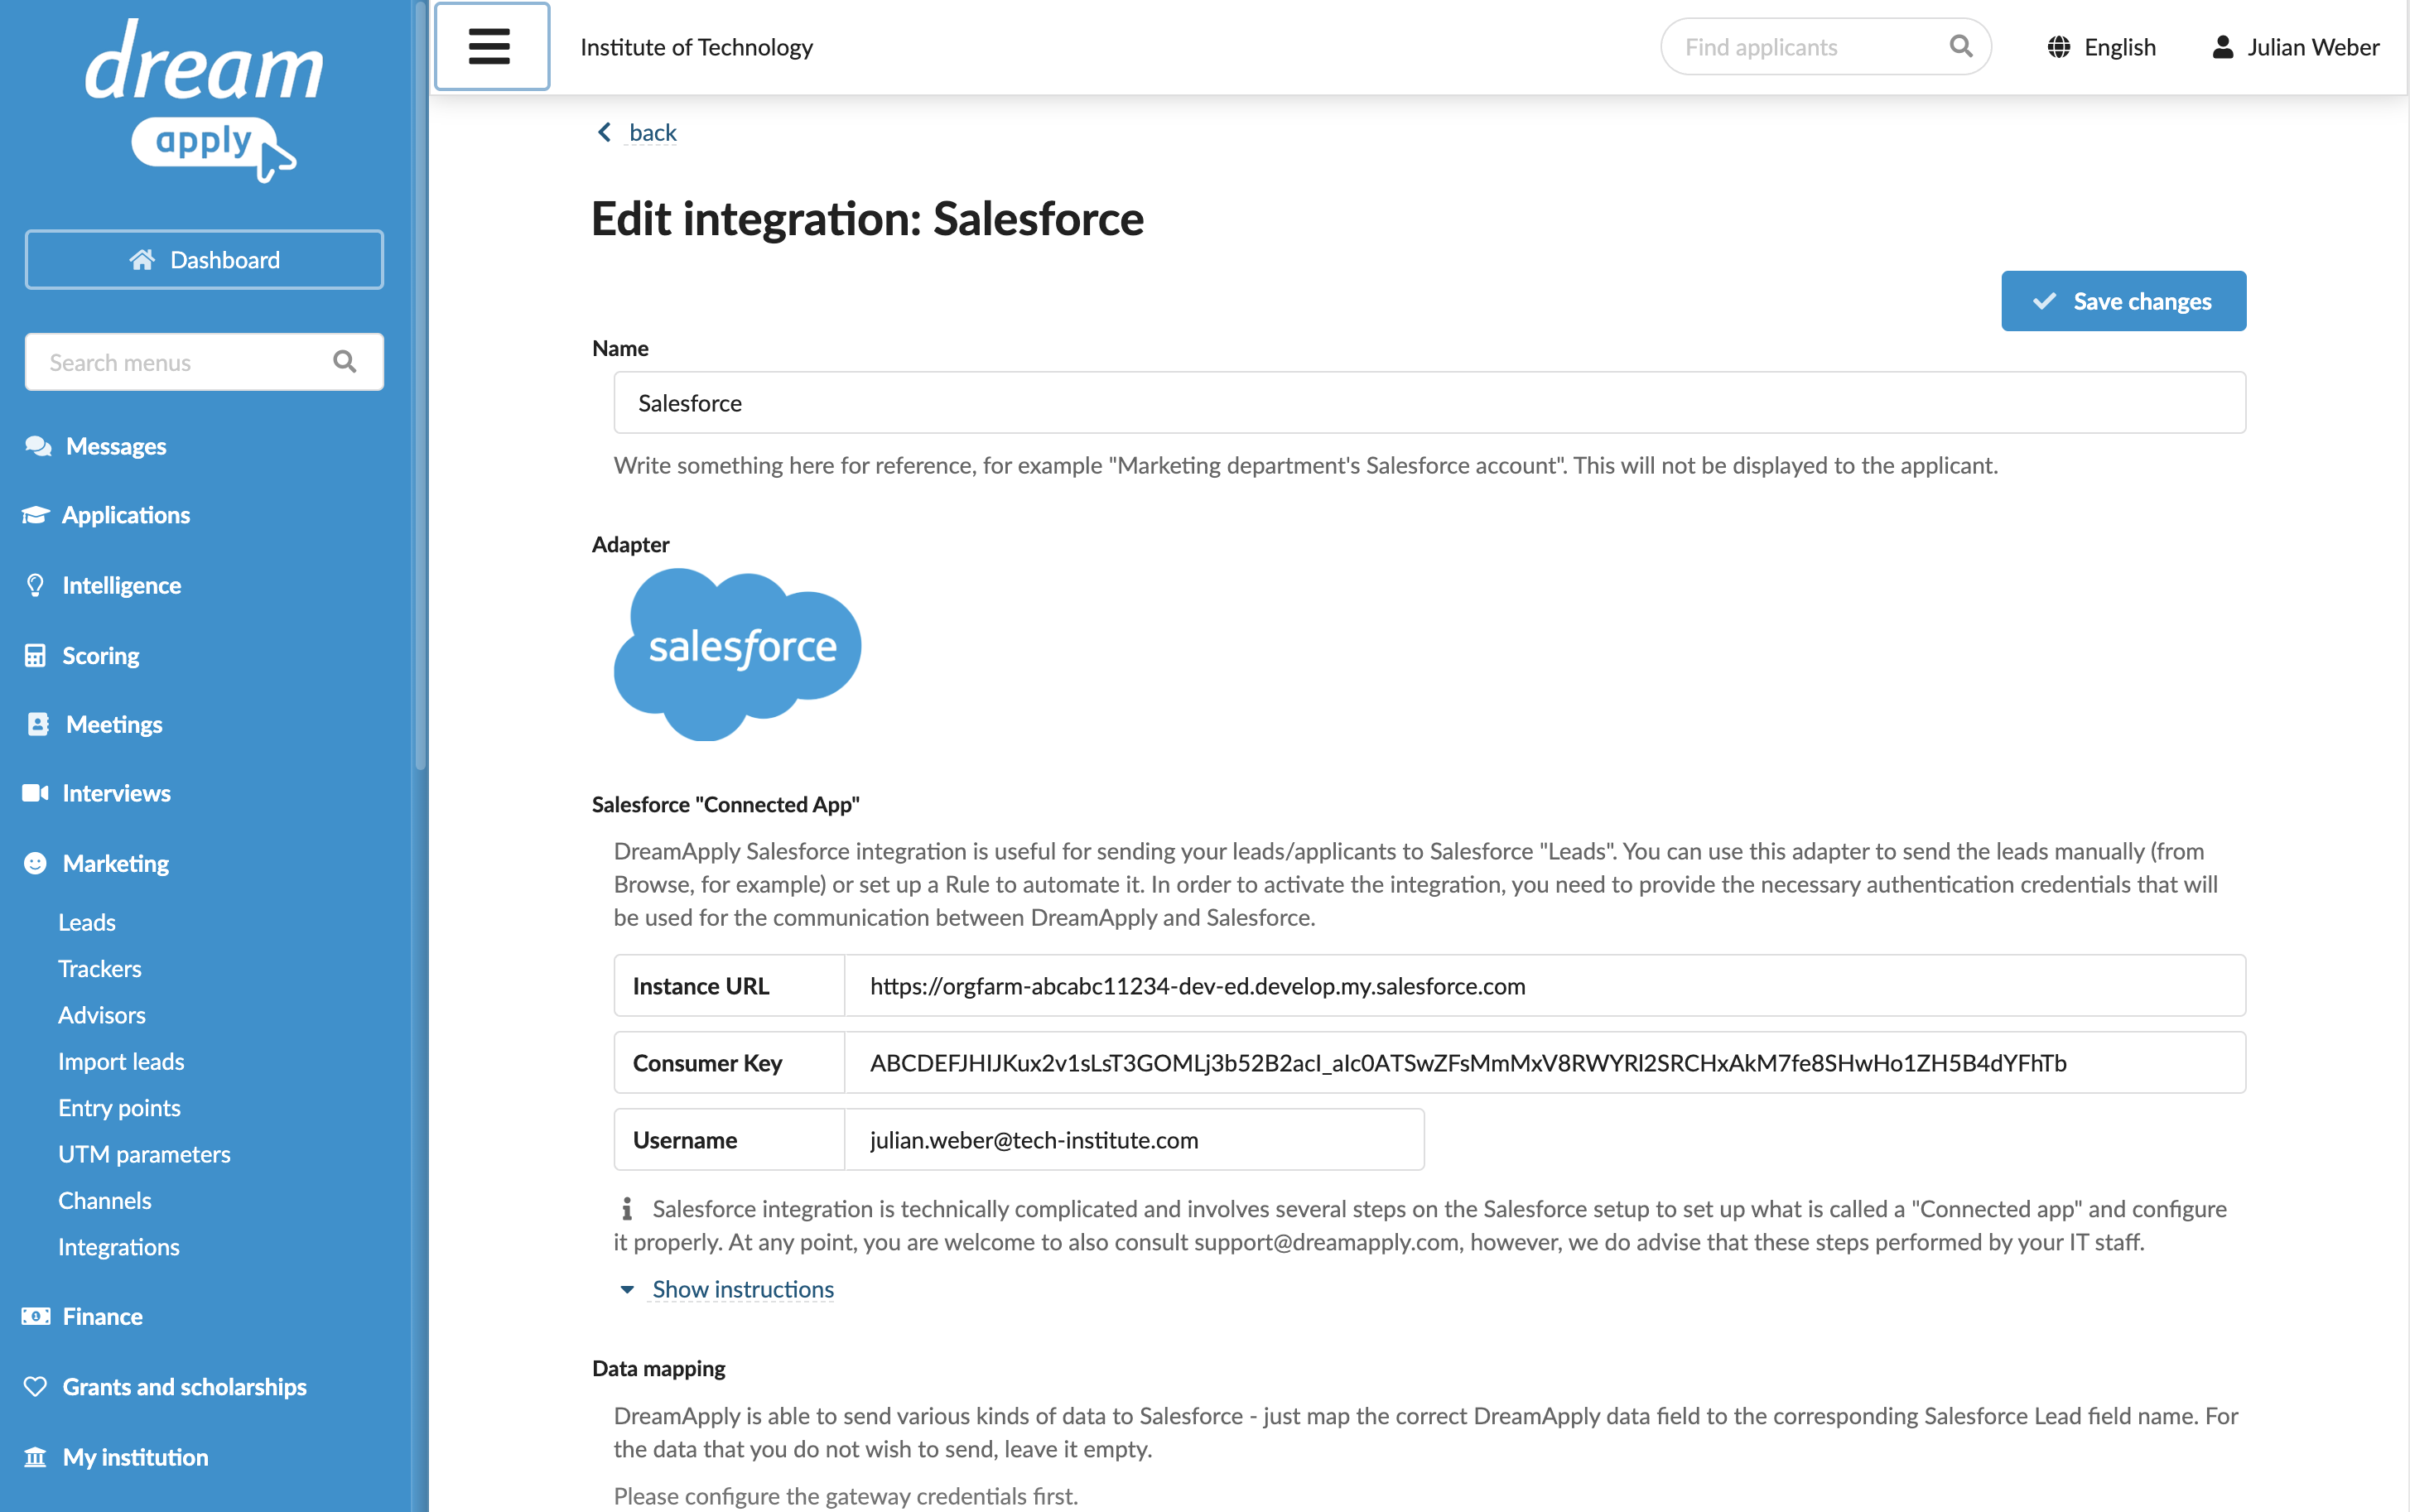
Configure integration settings
To connect to Salesforce in DreamApply:
In the main menu, under Marketing, select Integrations.
Select Outgoing integrations > Salesforce.
Specify the connection details you obtained earlier:
- Instance URL, for example,
https://orgfarm-abcabc11234-dev-ed.develop.my.salesforce.com - Consumer Key
- Username
- Instance URL, for example,
At the top of the form, click Save changes.
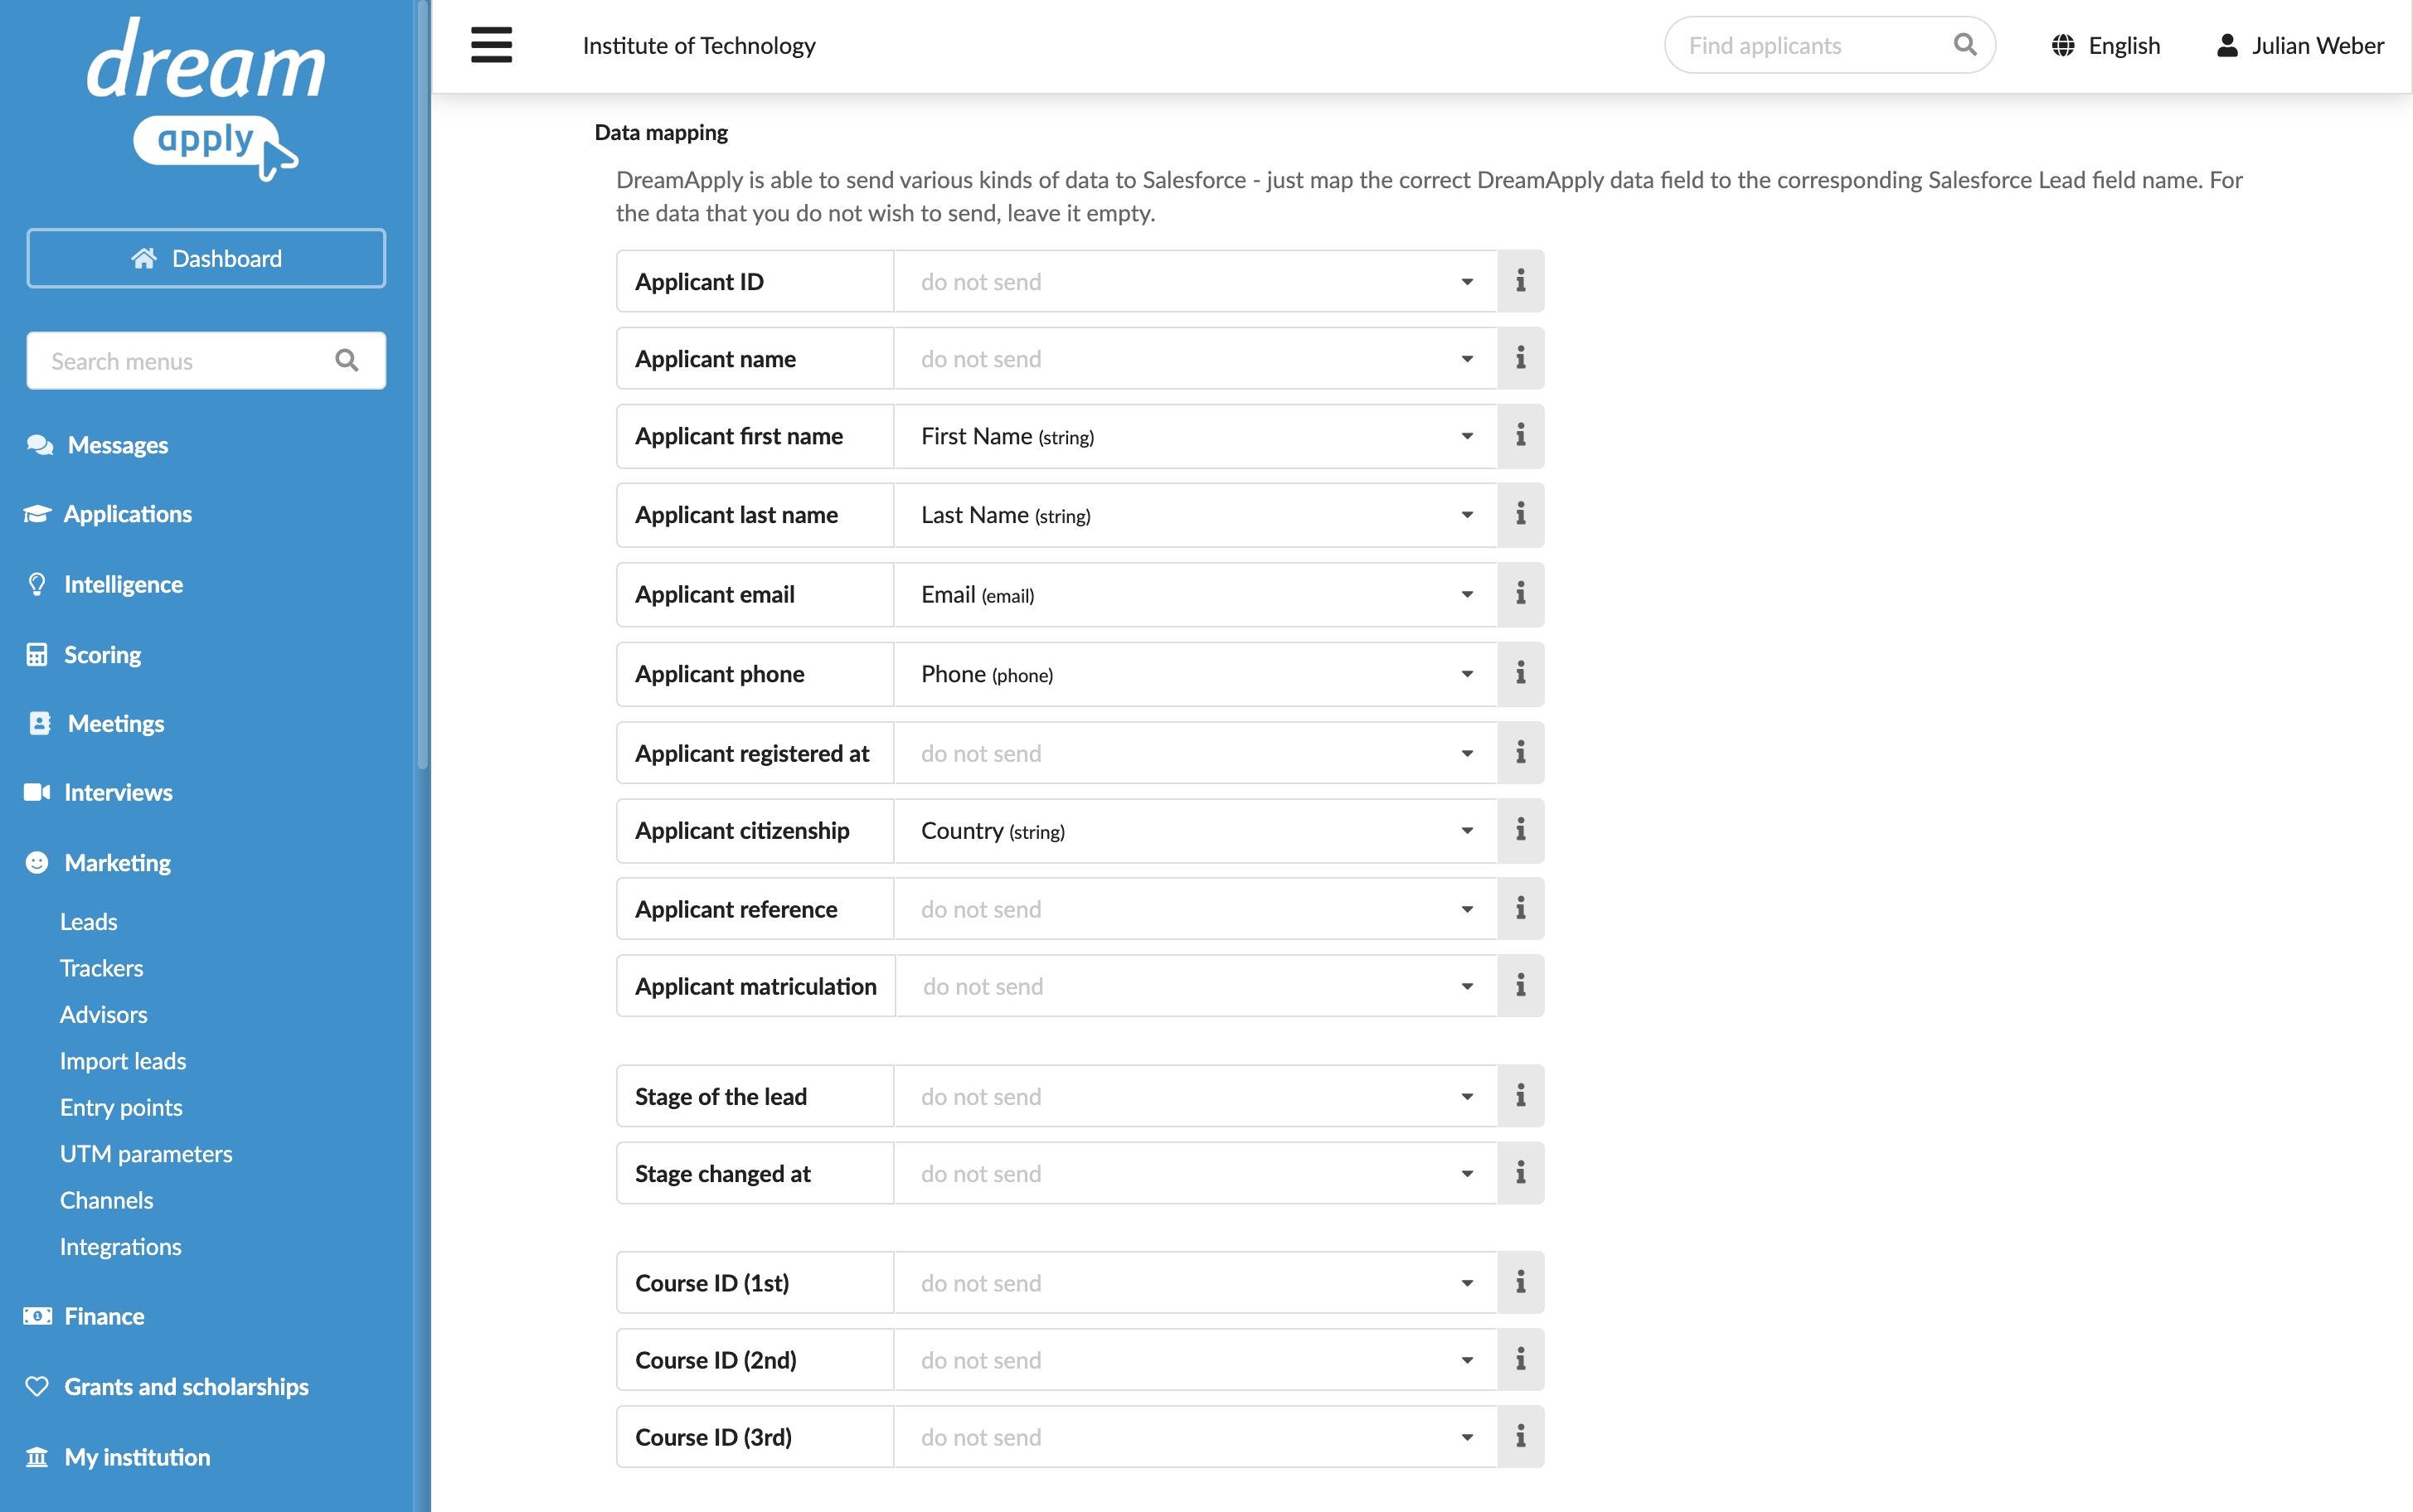
In the Data mapping section, specify how DreamApply applicant data must map to Salesforce lead fields.
Salesforce requires the Last Name and Company fields for a lead record. Other required fields depend on your organization setup.In the Consent section, specify if applicant consent is required to send data to Salesforce.
In the Send by default section, select the Send all new applicants automatically check box to enable continuous integration between DreamApply and Salesforce. If you do not enable this option, you will need to set up rules or send applicant data manually. For details, see Send applicant data.
From the list below, select a contact owner to which created lead records must be linked.
In the Automatic updates section, select the Update applicant records automatically check box to keep lead records in sync with the DreamApply system. For details, see Send applicant data.
In the Technical contact field, specify an email address for technical support. DreamApply will send error descriptions to this address if any integration issues occur.
At the top of the form, click Save changes.