Integrate with a custom payment gateway
Roles
These roles reflect the default DreamApply setup.
You can define custom roles based on your
institution's needs. Learn more →:
You can define custom roles based on your
institution's needs. Learn more →
Custom payment gateways are intended for in-house payment solutions. You can use them if you want to initiate the payment process in DreamApply and use your own platform to manage the entire payment flow.
How custom gateways work
DreamApply performs payment processing over a custom gateway in the following way:
The institution sets up a custom payment gateway in DreamApply. During setup, they provide a URL where applicants are redirected when they click the payment button on financial documents. The URL must include a token variable —
token=$token— to pass payment details to the gateway.The institution generates an asymmetric key pair in DreamApply employing the JWT RS256 algorithm. These keys are used to digitally sign payment details for integrity and authenticity. The private key remains secure in DreamApply, while the public key is made available for public use.
When an applicant clicks the payment button, DreamApply generates a JSON Web Token (JWT) containing the payment details and replaces the
$tokenvariable with it. The JWT contains the following information:{ "jti": "f5303daa-b23e-4697-9f07-b208a9008a96", // A unique nonce for each token. Should be stored in a revocation list to refuse the same token twice. "aud": "edu-pay.com", // The hostname part of the URL provided above. "iss": "dream-apply.shard0001", // Fixed value that identifies the issuer of the token. "iat": 1758019790, // The timestamp of when the token was issued. "exp": 1758019795, // This value is normally "iat" + 5 seconds. Care must be taken to not accept the token after expiry. "sub": "302", "invoice-id": 1, // Identifies the invoice in question. The expected use case is to create a transaction at the end of the process. "applicant-id": 100, // Identifies the applicant in question. "application-id": 200, // Identifies the application in question. You can use this to query additional data from the DreamApply API. This field may be null. "payable-amount": "20.00", // Payable amount of the invoice, a decimal string. "currency": "EUR", // Currency of the invoice, an ISO 4217 code. "invoice-nr": "AF-84160925", // Invoice number. "invoice-date": "2025-09-16", // Invoice issue date. "invoice-deadline": "2025-09-30", // Invoice deadline date. "applicant-name": "John Smith", // Applicant's name. "applicant-email": "j.smith@email.com" // Applicant's email. }DreamApply digitally signs the JWT using the private key.
The applicant is redirected to the custom gateway URL with the JWT. The gateway extracts the JWT from the URL and verifies it using the public key provided by DreamApply. Once verified, it can use the passed payment details to proceed with the payment process on the institution’s platform.
After a payment is successfully processed, the custom gateway must use the DreamApply API to mark the payment as collected. This step is critical for keeping payment records synchronized and updating the invoice status in DreamApply.
Before you begin
To integrate with DreamApply, your account must have the Superuser role or the accounting-gateways permission.
Configure a custom payment gateway
To configure a custom gateway in DreamApply:
In the main menu, under Finance, select Payment gateways.
In the gateway list, select Custom.
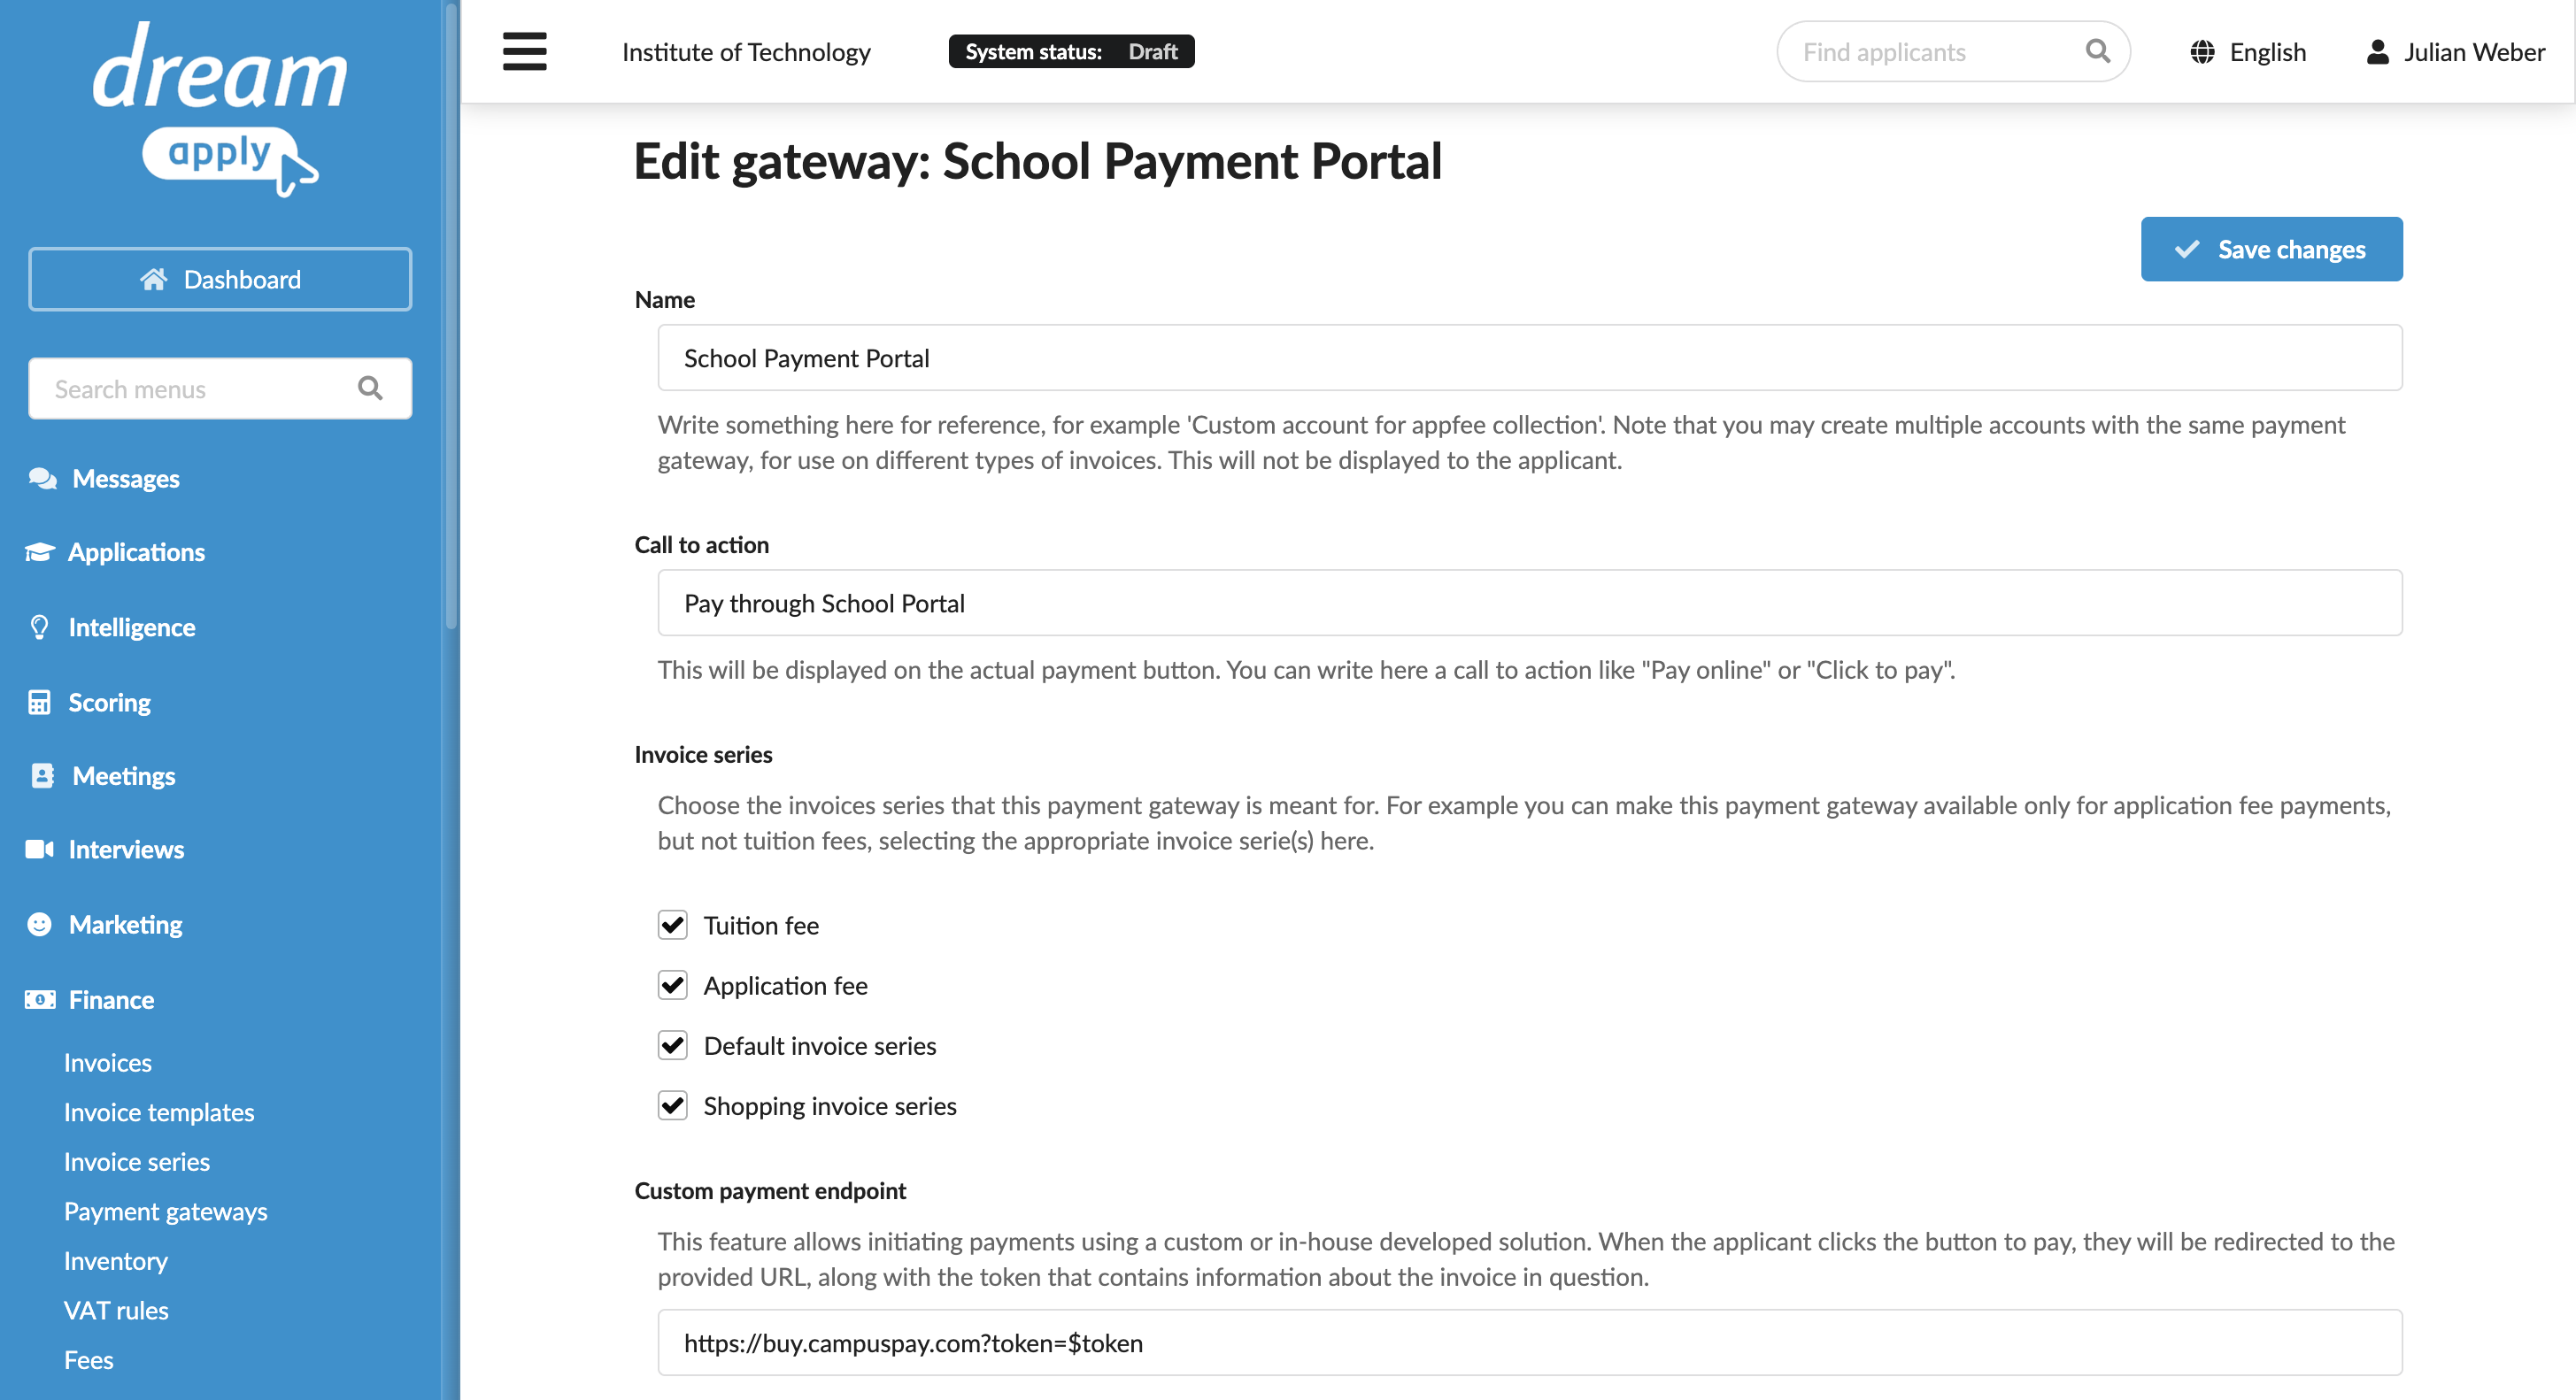
Specify the gateway settings:
In the Name field, specify the gateway name. This name will be used for internal reference only and will not be displayed to applicants.
In the Call to action field, specify the text to display on the payment button on financial documents, for example, Pay now.
In the Invoice series section, select check boxes next to the invoice series that must be processed through the custom gateway. If a specific series is not selected, DreamApply will not display the payment button on documents that use this series.
You can link the same invoice series to several payment gateways to allow applicants to choose their preferred payment option.
In the Partial payments section, select the Allow making partial payments check box to enable partial payments through the gateway.
In the Custom payment endpoint field, specify the URL to which applicants must be redirected when they click the payment button. To pass payment details to the gateway, append
?token=$tokento the URL, for example:https://pay.my-institution.com?token=$token.Use the field below to generate a new asymmetric key pair. Copy and save the public key, as you will need it to verify the DreamApply JWTs.
At the top of the form, click Save changes.
Collect payments
Once a custom gateway completes a payment, we highly recommend creating a transaction for the processed invoice using the DreamApply API. This action records the payment and updates the invoice status in DreamApply.
If you do not perform this step, DreamApply will not receive any payment status from the payment gateway, and the applicant invoices will appear unpaid even after they have completed payments in your system.
To create a transaction using the DreamApply API, send a POST /api/invoices/ID/transactions request.