Integrate with pagoPA
Roles
These roles reflect the default DreamApply setup.
You can define custom roles based on your
institution's needs. Learn more →:
You can define custom roles based on your
institution's needs. Learn more →
pagoPA is a public digital payment system designed to simplify electronic payments for Italian citizens and businesses. It is a standardized ecosystem governed by the Agency for Digital Italy, enabling seamless transactions between public administrations and various payment service providers (PSPs).
To integrate with pagoPA, DreamApply employs the pagoATENEI solution provided by Cineca to universities and research institutes.
To enable payments using pagoPA, perform the following tasks:
Before you begin
To integrate with DreamApply, your account must have the Superuser role or the accounting-gateways permission.
Obtain the pagoPA instance
Access to pagoPA is strictly regulated. Only institutions that have a formal partnership or agreement with pagoPA are eligible to use their services. Communicate directly with Cineca to request and activate your pagoPA instance and get the API credentials.
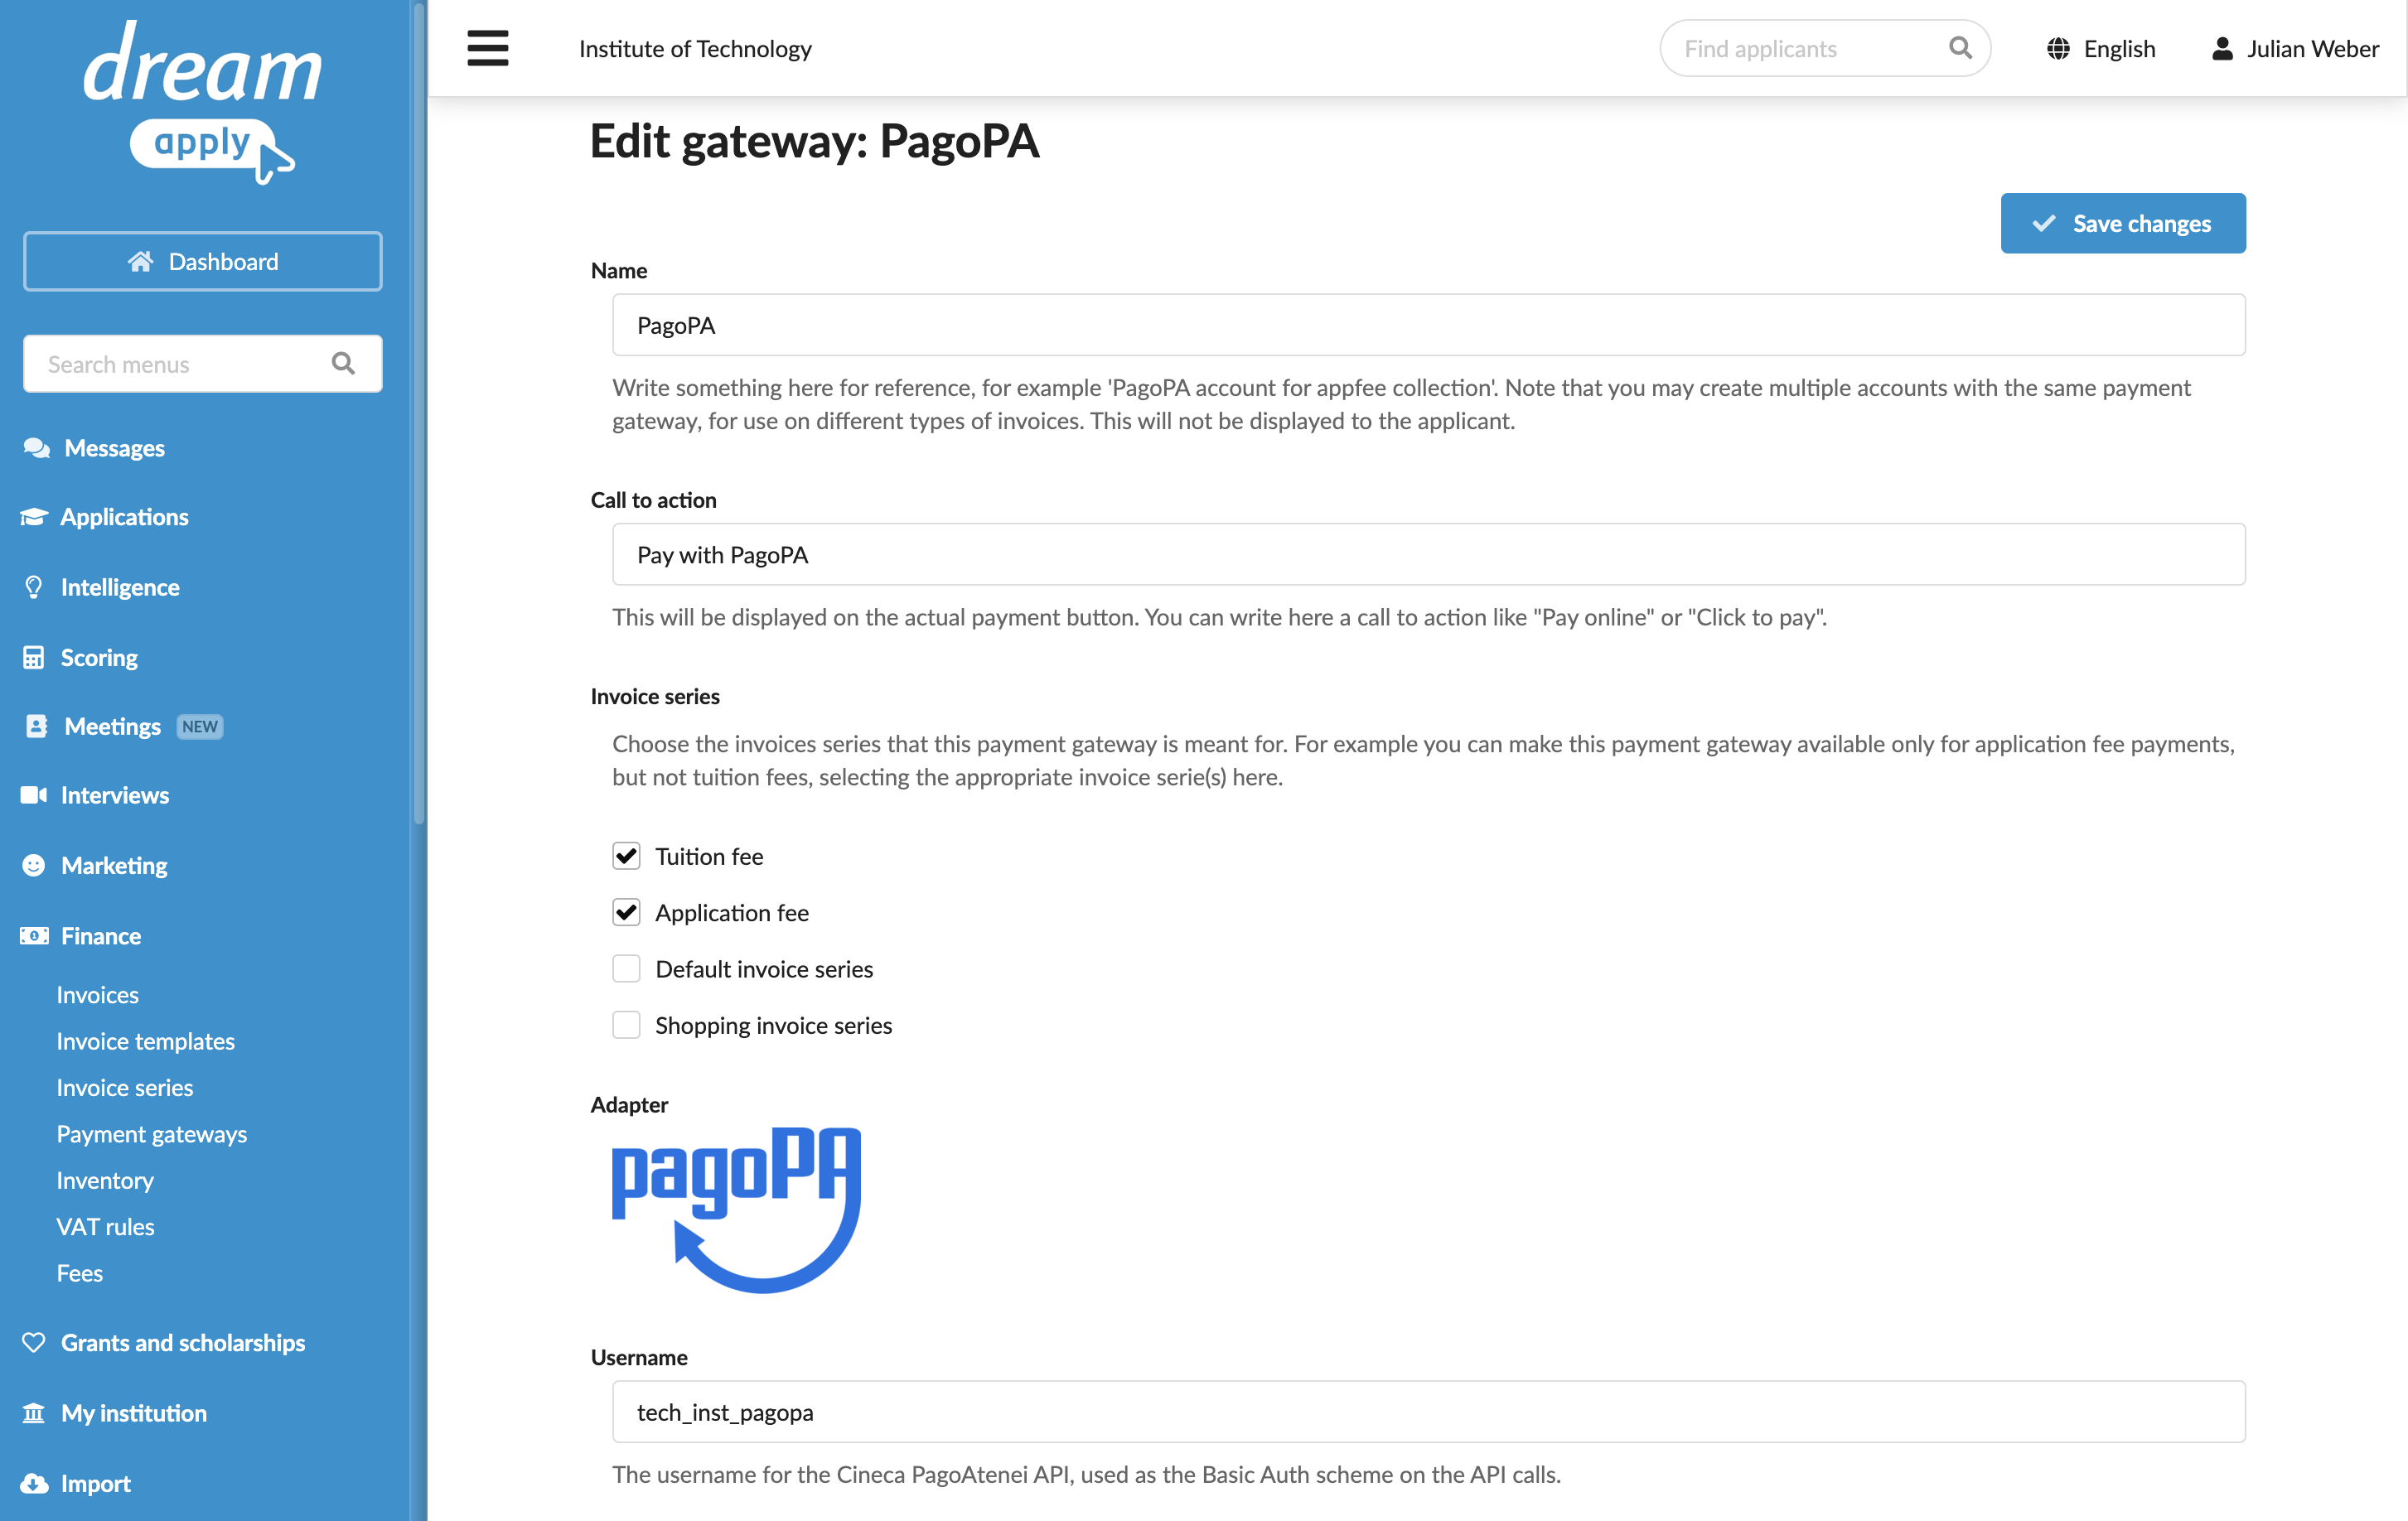
Configure the pagoPA gateway
To configure a pagoPA gateway in DreamApply:
In the main menu, under Finance, select Payment gateways.
In the gateway list, select pagoPA.
Specify the gateway settings:
In the Name field, specify the gateway name. This name will be used for internal reference only and will not be displayed to applicants.
In the Call to action field, specify the text to display on the payment button on financial documents, for example, Pay with pagoPA.
In the Invoice series section, select check boxes next to the invoice series that must be processed through the pagoPA gateway. If a specific series is not selected, DreamApply will not display the payment button on documents that use this series.
You can link the same invoice series to several payment gateways to allow applicants to choose their preferred payment option.
In the Partial payments section, select the Allow making partial payments check box to enable partial payments through the gateway.
In the Username field, enter the username for Basic Authentication to the Cineca pagoATENEI API.
In the Password field, enter the password for Basic Authentication to the Cineca pagoATENEI API.
In the Hostname field, enter the hostname for the Cineca pagoAtenei portal.
In the Certificate field, enter the client certificate and private key for certificate-based authentication to the Cineca pagoATENEI API.
In the Certificate password field, enter the certificate password for certificate-based authentication to the Cineca pagoATENEI API.
In the Application code field, enter the application code of the institution in pagoATENEI (codApplicazione).
In the Domain code field, enter the domain code of the institution in pagoATENEI (codDominio).
In the Account IBAN field, enter the account IBAN for payment processing (ibanAccredito).
In the Account code field, enter the account/taxation code for payment processing (codContabilita).
At the top of the form, click Save changes.
Select the payment method
Once DreamApply is integrated with pagoPA, applicants get a possibility to process their payments using pagoPA. When they receive an invoice, they can click the payment button in the DreamApply portal to proceed with the payment.
pagoPA offers two options to process payments:
- Online payments: Applicants can pay fees online through the websites of public administrations or authorized PSPs.
- Offline payments: Applicants can print the payment slip and pay at authorized points of sale such as post offices, banks or authorized retailers.

Payment processing
pagoPA can follow a synchronous or asynchronous payment processing model. The pagoPA behaior depends on the payment method used by applicants:
- Bank payments: If an applicant makes a payment at a bank, the transaction is typically processed synchronously and DreamApply updates the payment status as soon as it receives a confirmation.
- Authorized points of sale: If a payment is made through an authorized point of sale, the payment make take several minutes or days to be confirmed. DreamApply continues checking for the payment status and updates it in the system as soon as it receives a confirmation from pagoPA.
Payment status polling
To keep invoice statuses up to date, DreamApply uses an intelligent polling mechanism. Once a payment is initiated, DreamApply starts polling with a 90-second interval. If no confirmation is received, the interval gradually increases over time: the system polls with a 10-minute interval, then a 30-minute interval and so on. After 24 hours, the system switches to checking for updates every 3 hours, up to the payment deadline.
Payment deadlines
Each DreamApply invoice has an expiry deadline set as a specific day. To ensure payments are accepted throughout the day, DreamApply automatically adds 23:59:59 to the deadline date.
If a payment is initiated before the deadline but not yet confirmed, pagoPA may still process it afterwards. DreamApply keeps polling and updates the invoice status once a confirmation is received, even if it arrives after the deadline.