Integrate with Stripe
Roles
These roles reflect the default DreamApply setup.
You can define custom roles based on your
institution's needs. Learn more →:
You can define custom roles based on your
institution's needs. Learn more →
Stripe is a financial platform that allows businesses to accept payments and handle financial operations over the internet.
To enable payments using Stripe, perform the following tasks:
- Obtain a Stripe API key
- Subscribe to Stripe checkout events
- Configure the Stripe gateway
- Define payment methods
- Confirm event delivery
Before you begin
- To obtain a Stripe API key, sign up and create a Stripe account.
- To integrate with DreamApply, your account must have the
Superuserrole or theaccounting-gatewayspermission.
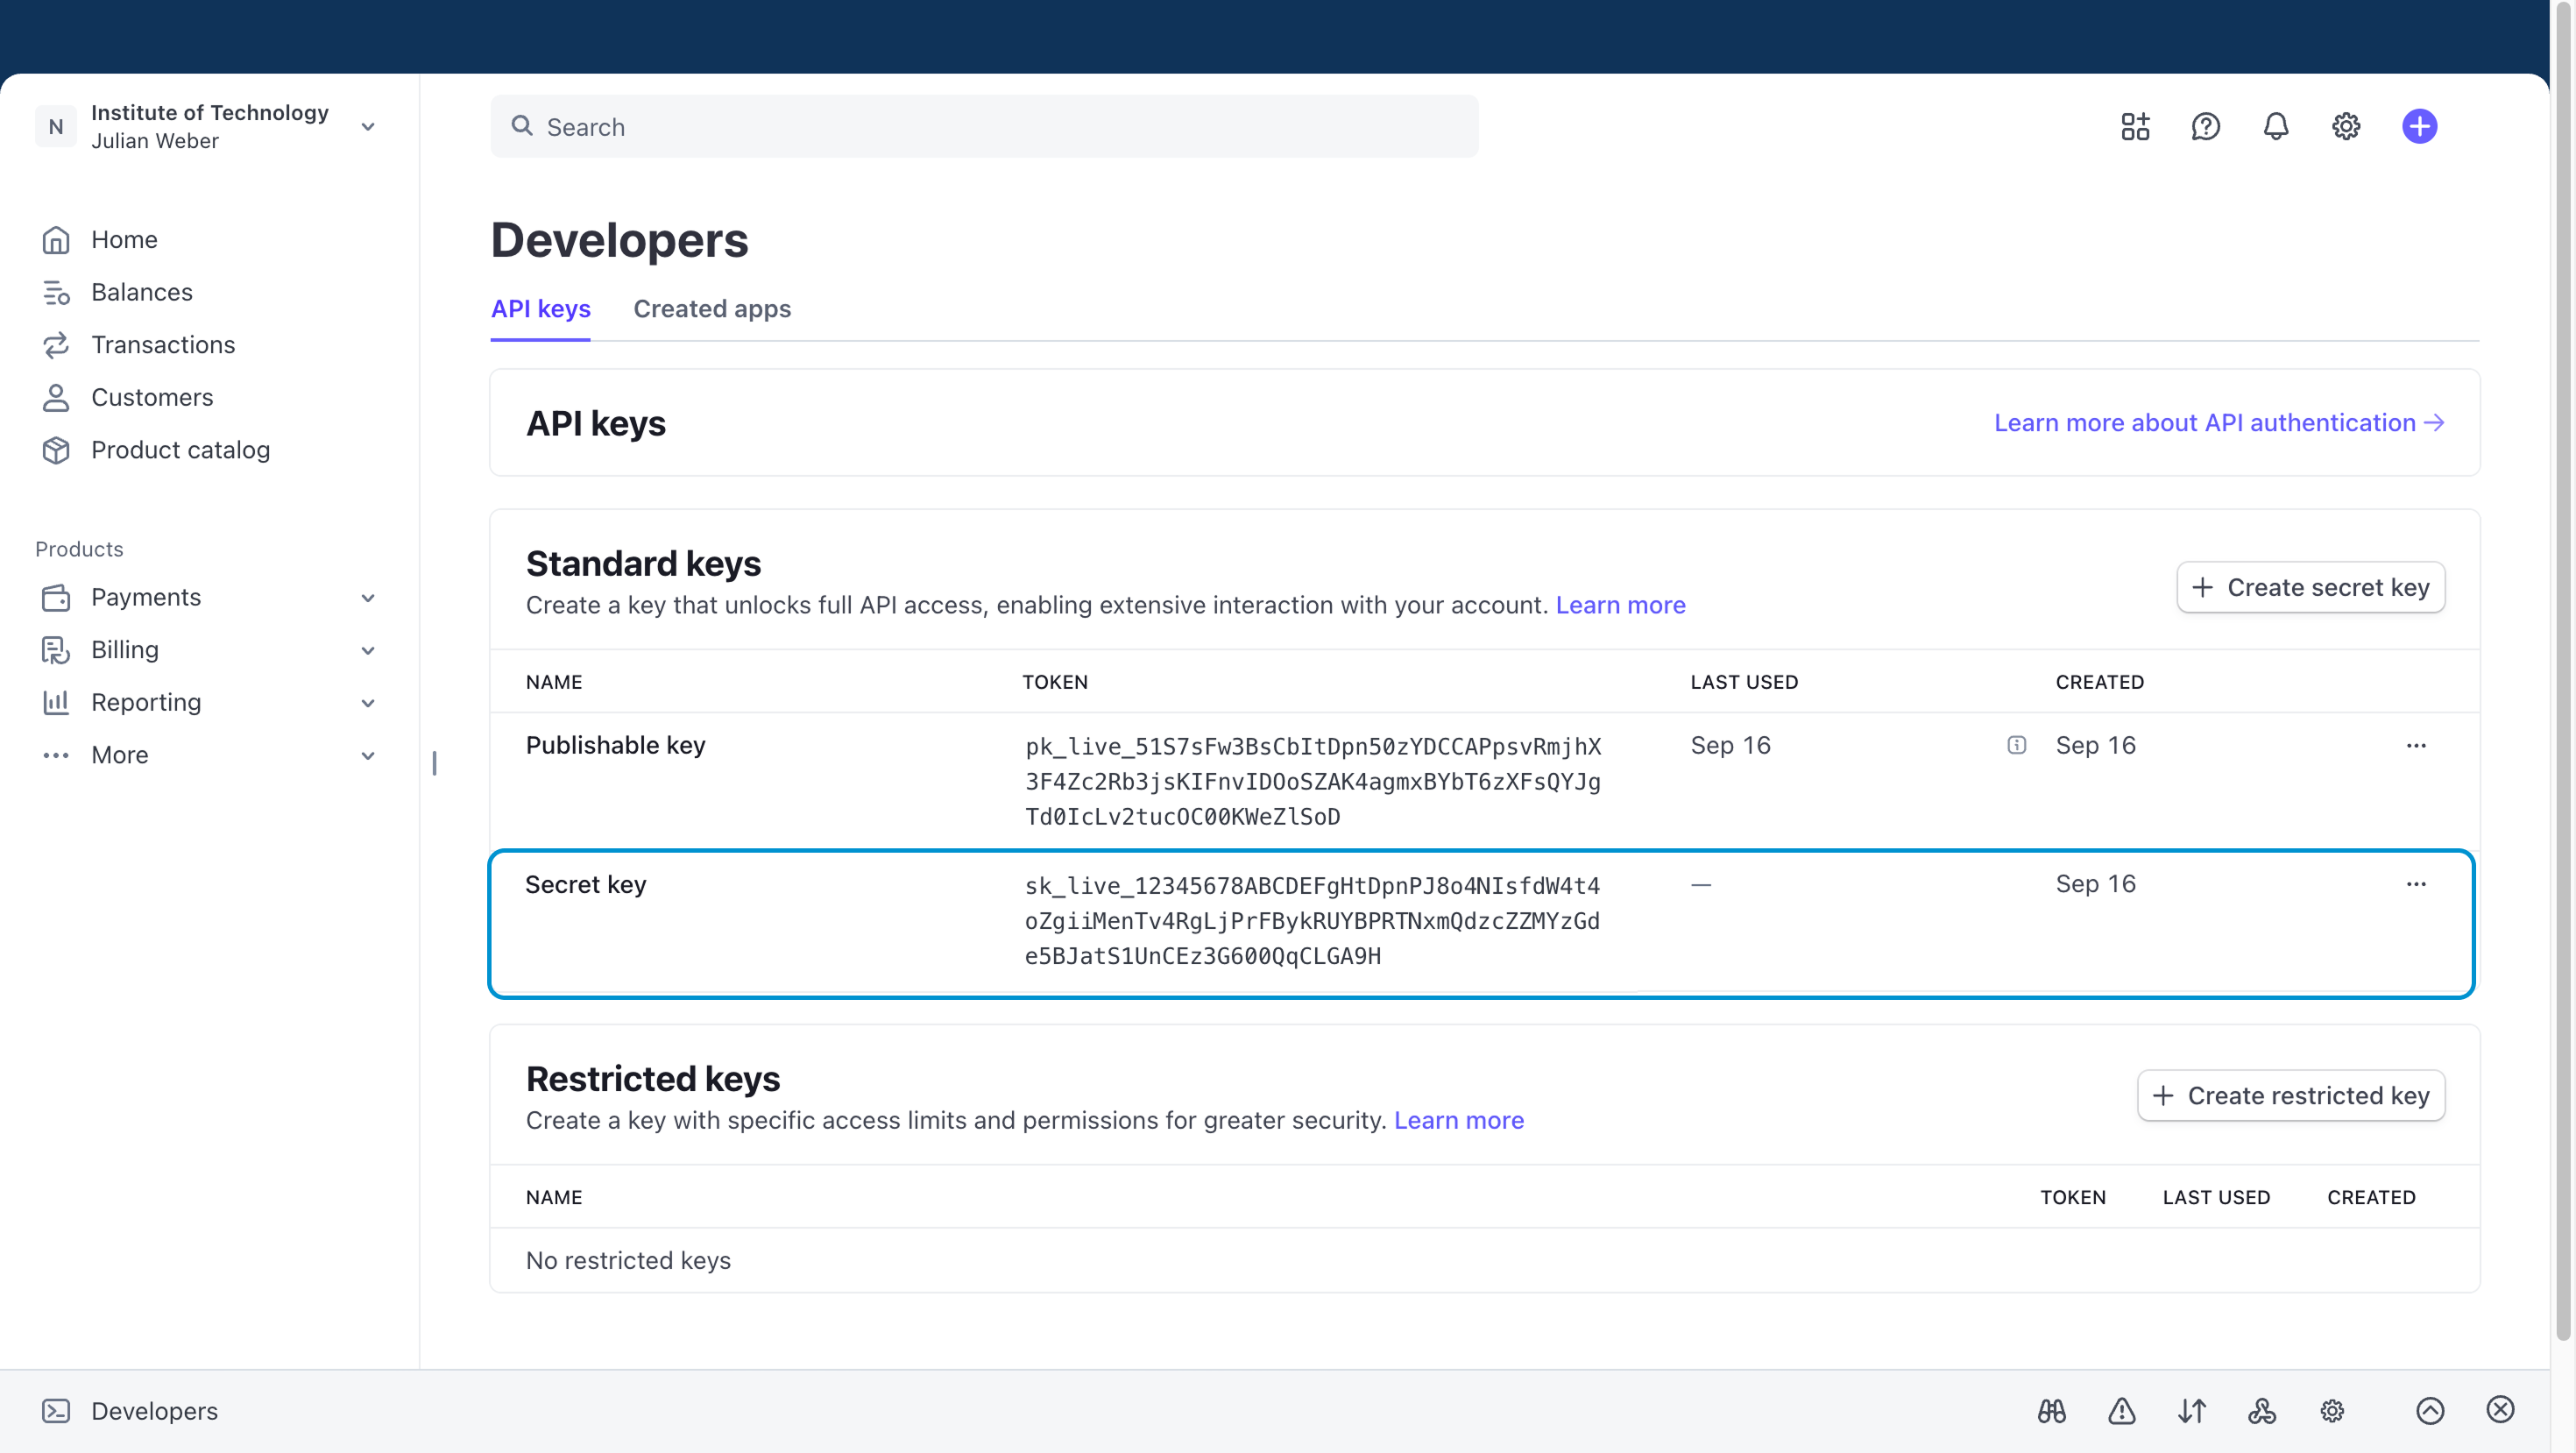
Obtain a Stripe API key
To connect DreamApply with Stripe, you need to create and copy a secret API key in your Stripe Dashboard. For detailed instructions, see the Stripe documentation.
Ensure the API key you create is for the production (live) environment. Sandbox (test) API keys cannot be used for live payment transactions in DreamApply.
Subscribe to Stripe checkout events
To ensure that Stripe successfully communicates payment results and synchronizes payment statuses with DreamApply, you must subscribe to checkout events in the Stripe Dashboard.
In the bottom left corner of the Stripe Dashboard, click Developers.
Under Workbench, select Webhooks.
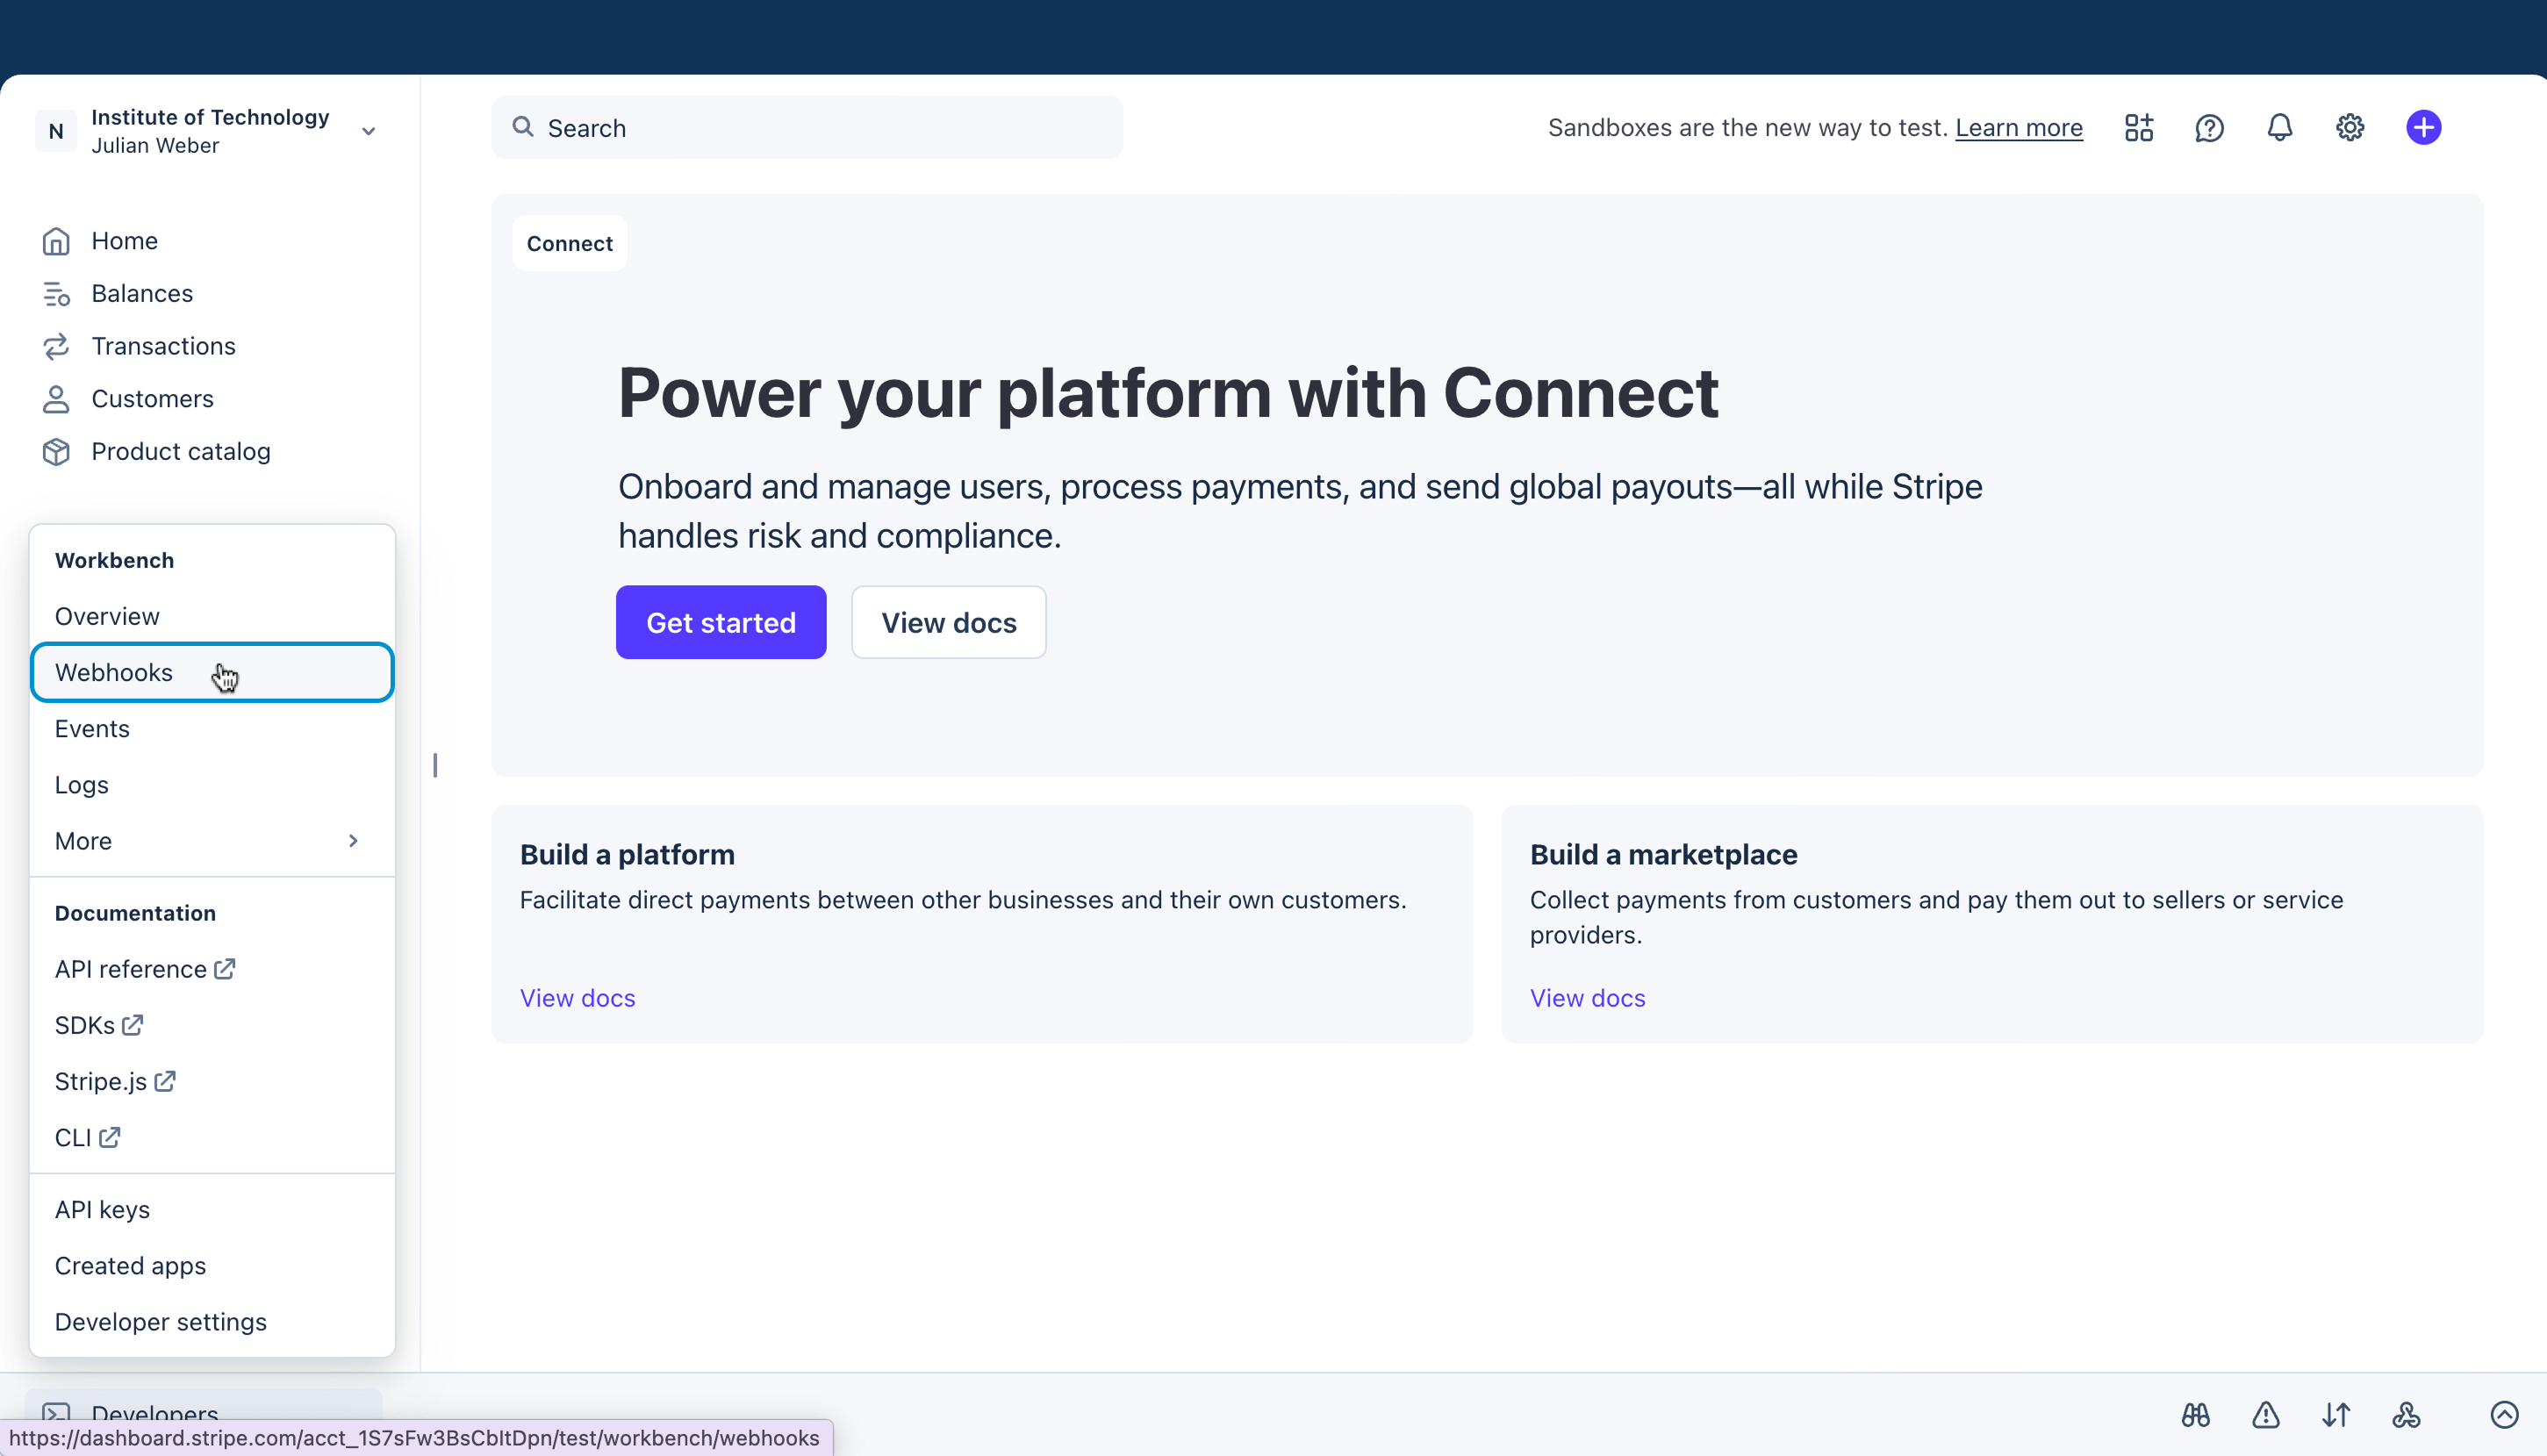
Under Trigger reactions in your integration with Stripe events, click Add destination.

In the Events from section, select Your account.
From the API version list, select the
basilorcloverversion.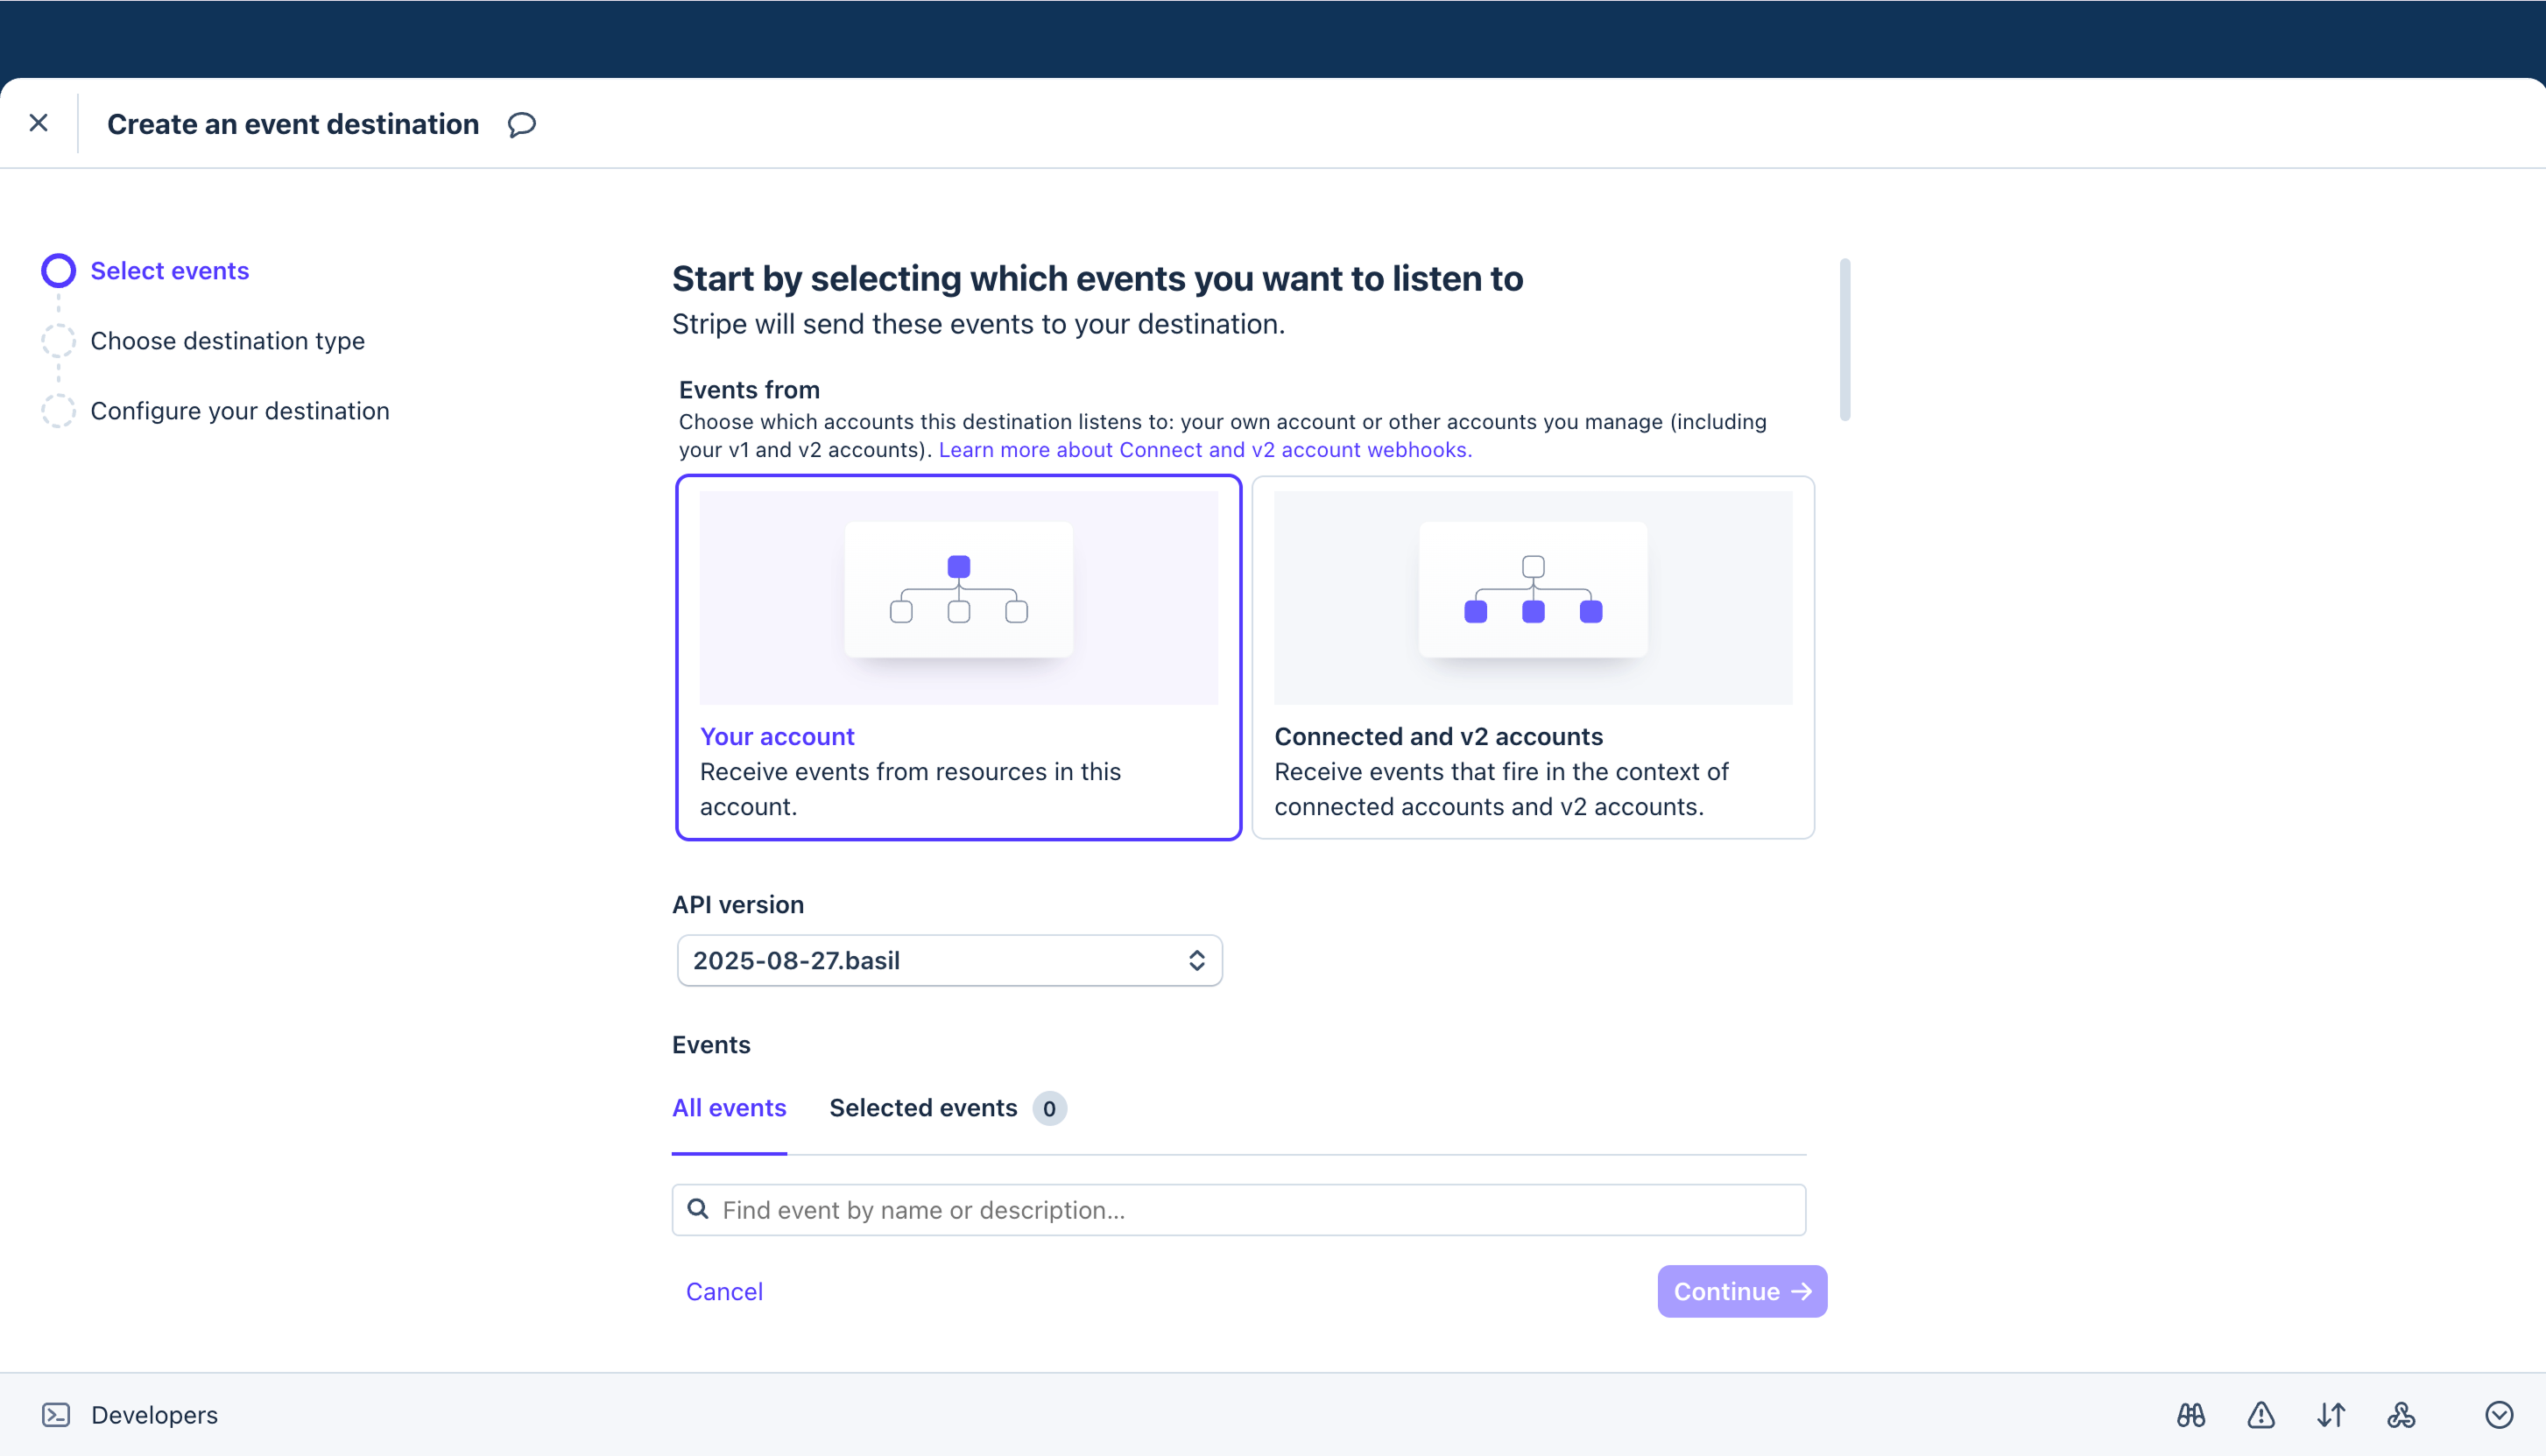
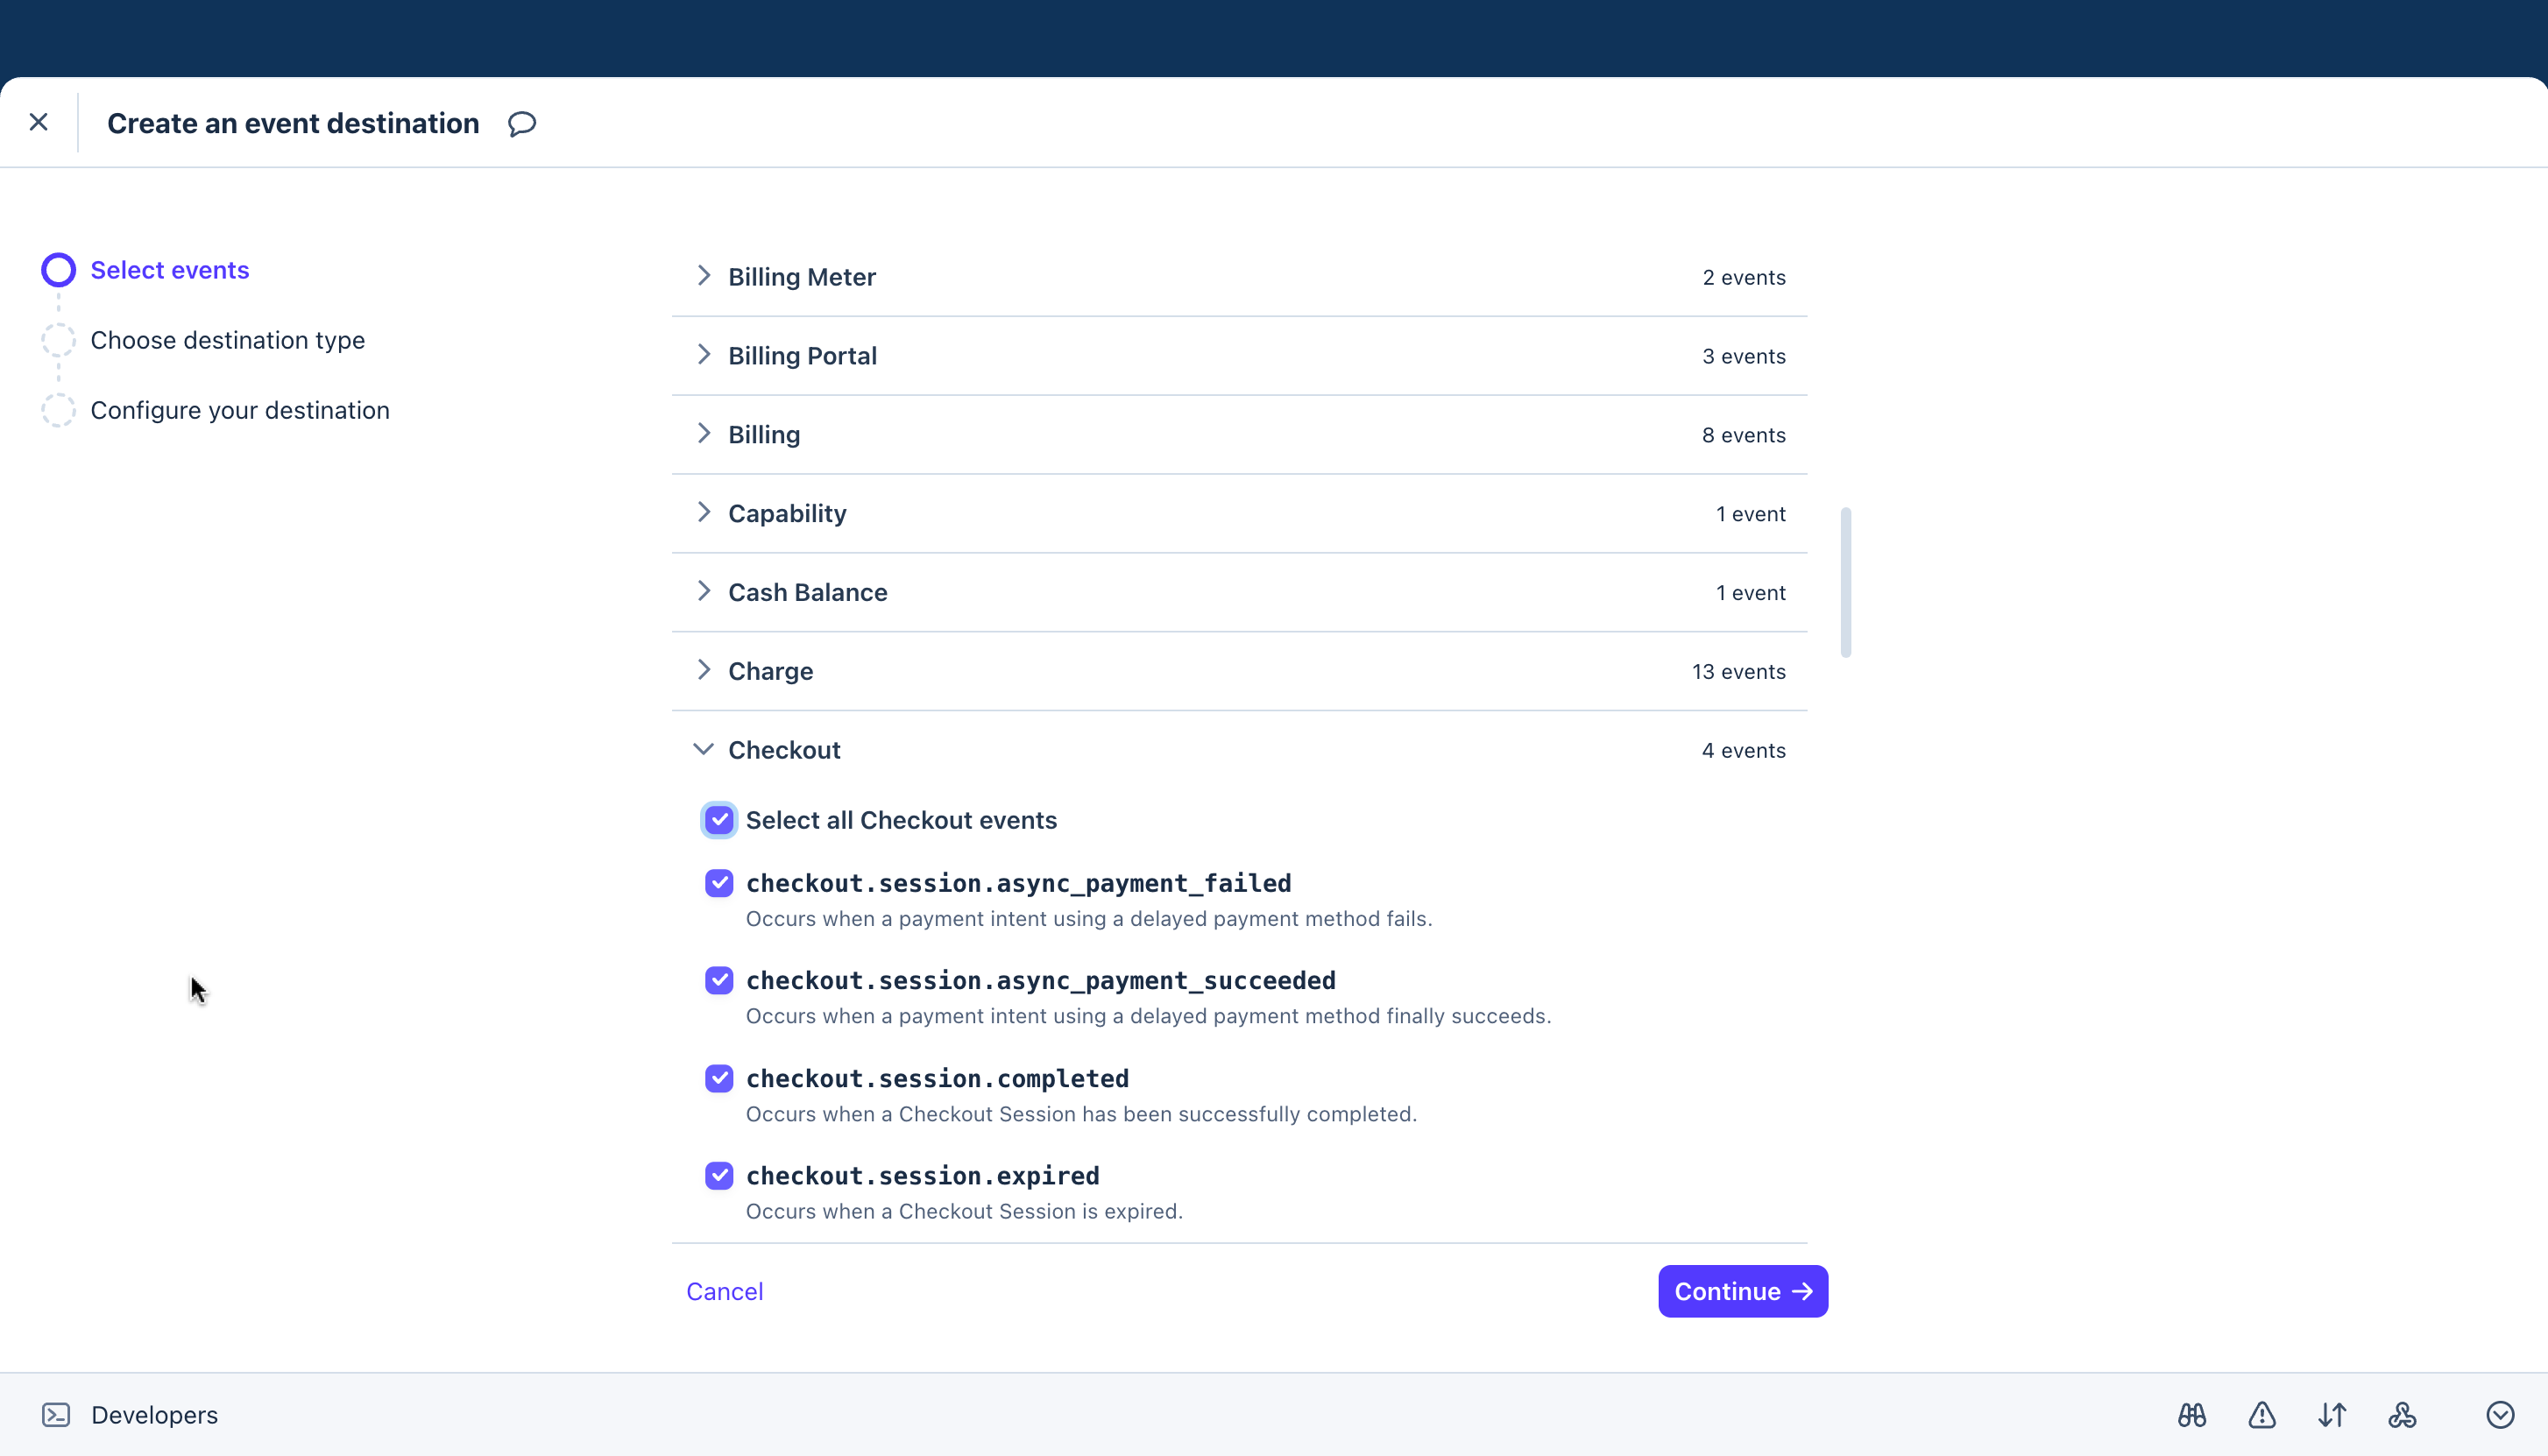
In the Events section, select to listen to all Checkout events:
checkout.session.async_payment_failedcheckout.session.async_payment_succeededcheckout.session.completedcheckout.session.expired
Click Continue.
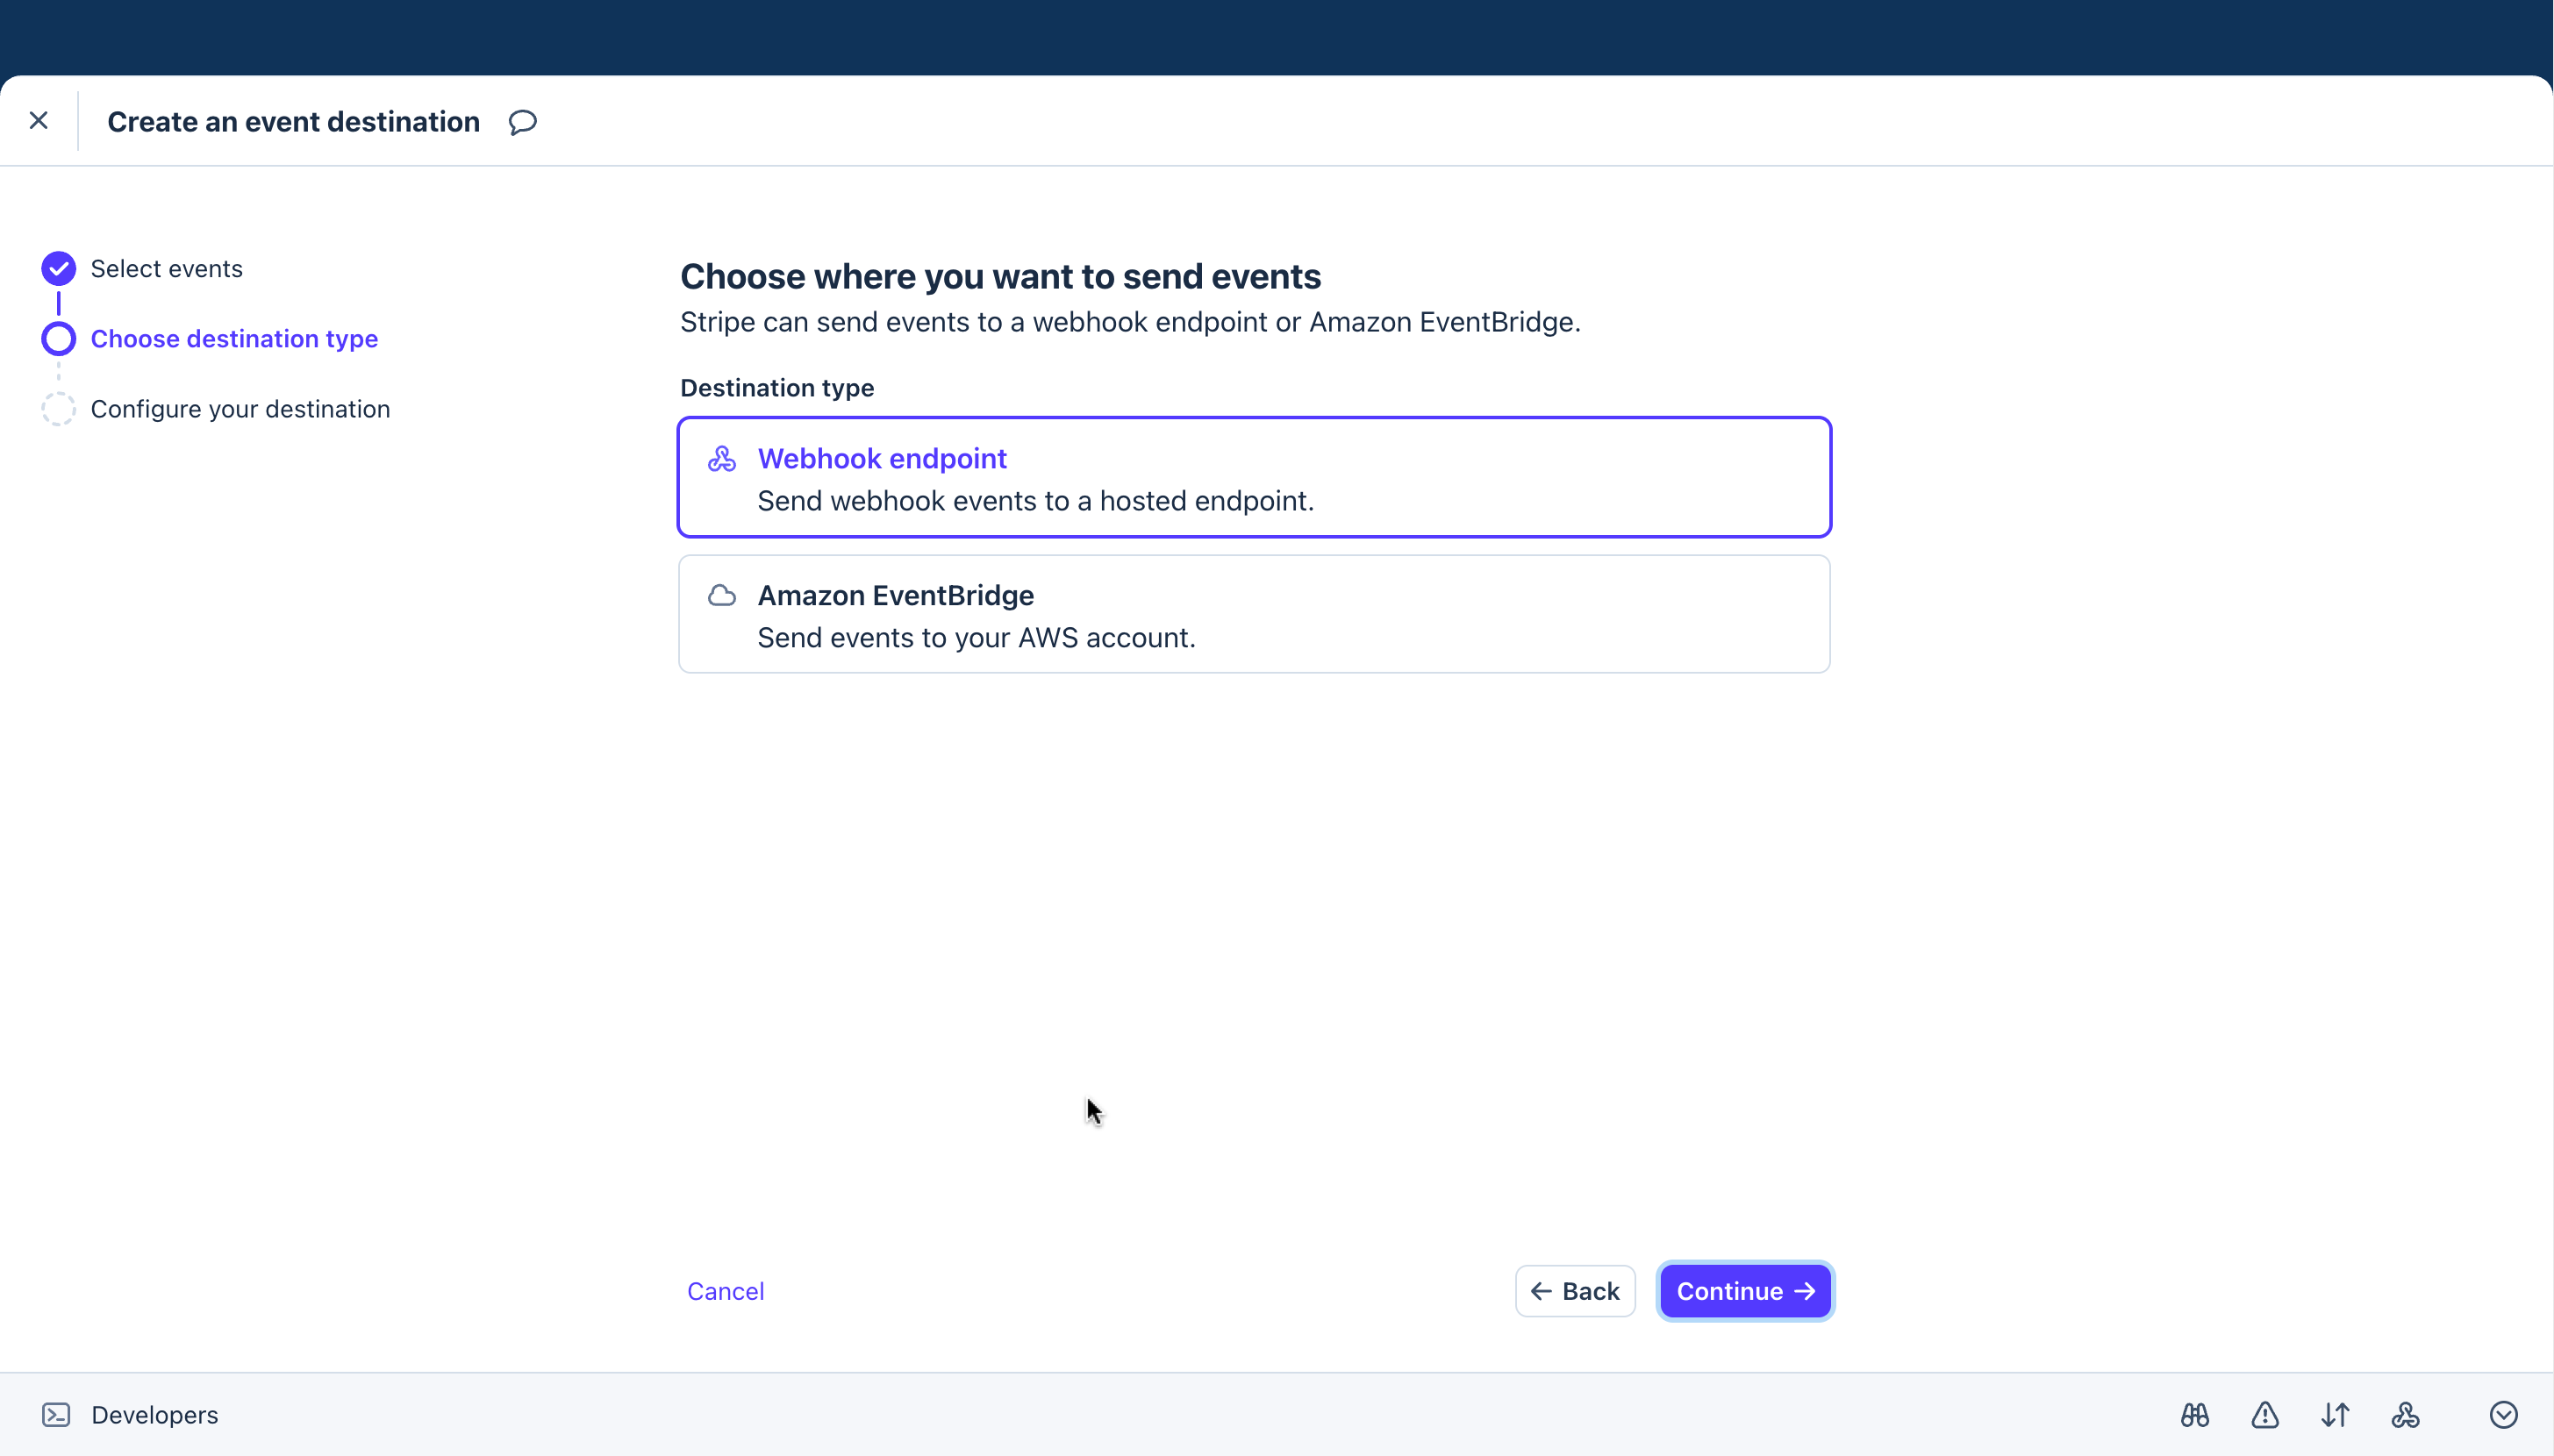
At the Choose where you want to send events step, select Webhook endpoint and click Continue.
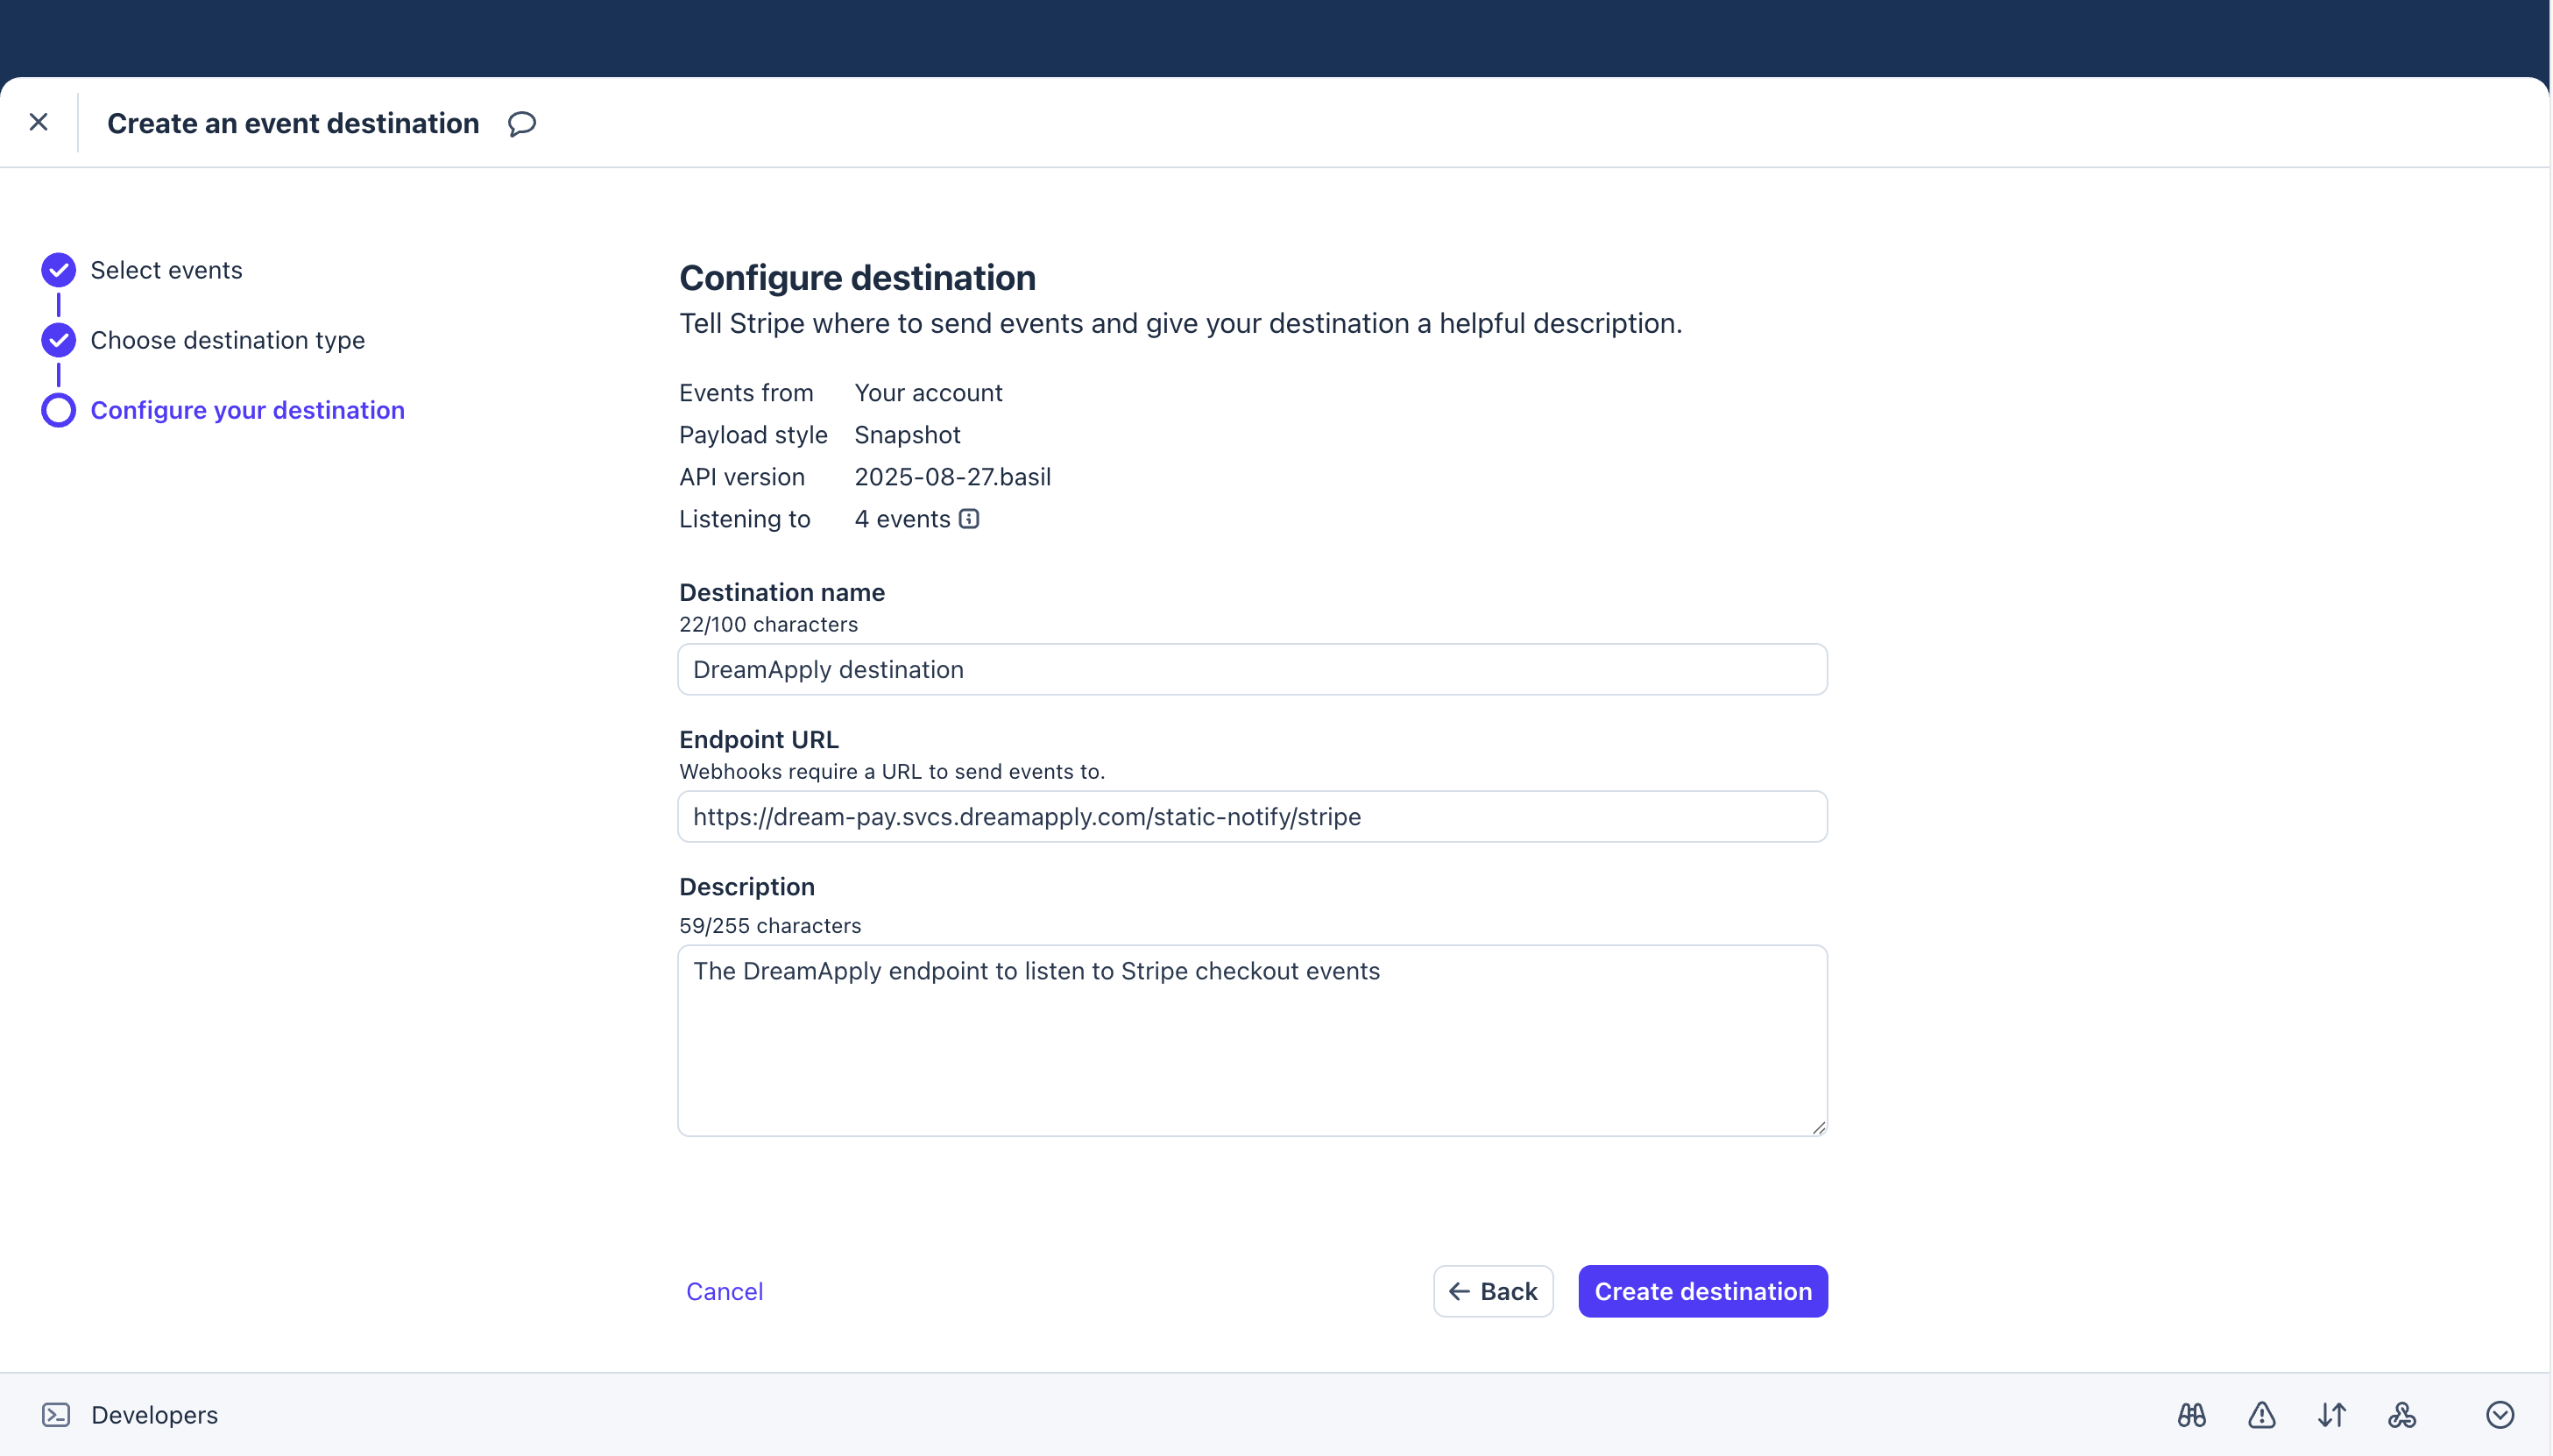
At the Configure destination step, define the following settings:
Destination name: Provide a name for the DreamApply destination
Endpoint URL: Specify the endpoint to which Stripe checkout events must be sent:
https://dream-pay.svcs.dreamapply.com/static-notify/stripeDescription: Provide the endpoint description
Click Create destination.
Configure the Stripe gateway
To configure a Stripe payment gateway in DreamApply:
In the main menu, under Finance, select Payment gateways.
In the gateway list, select Stripe.
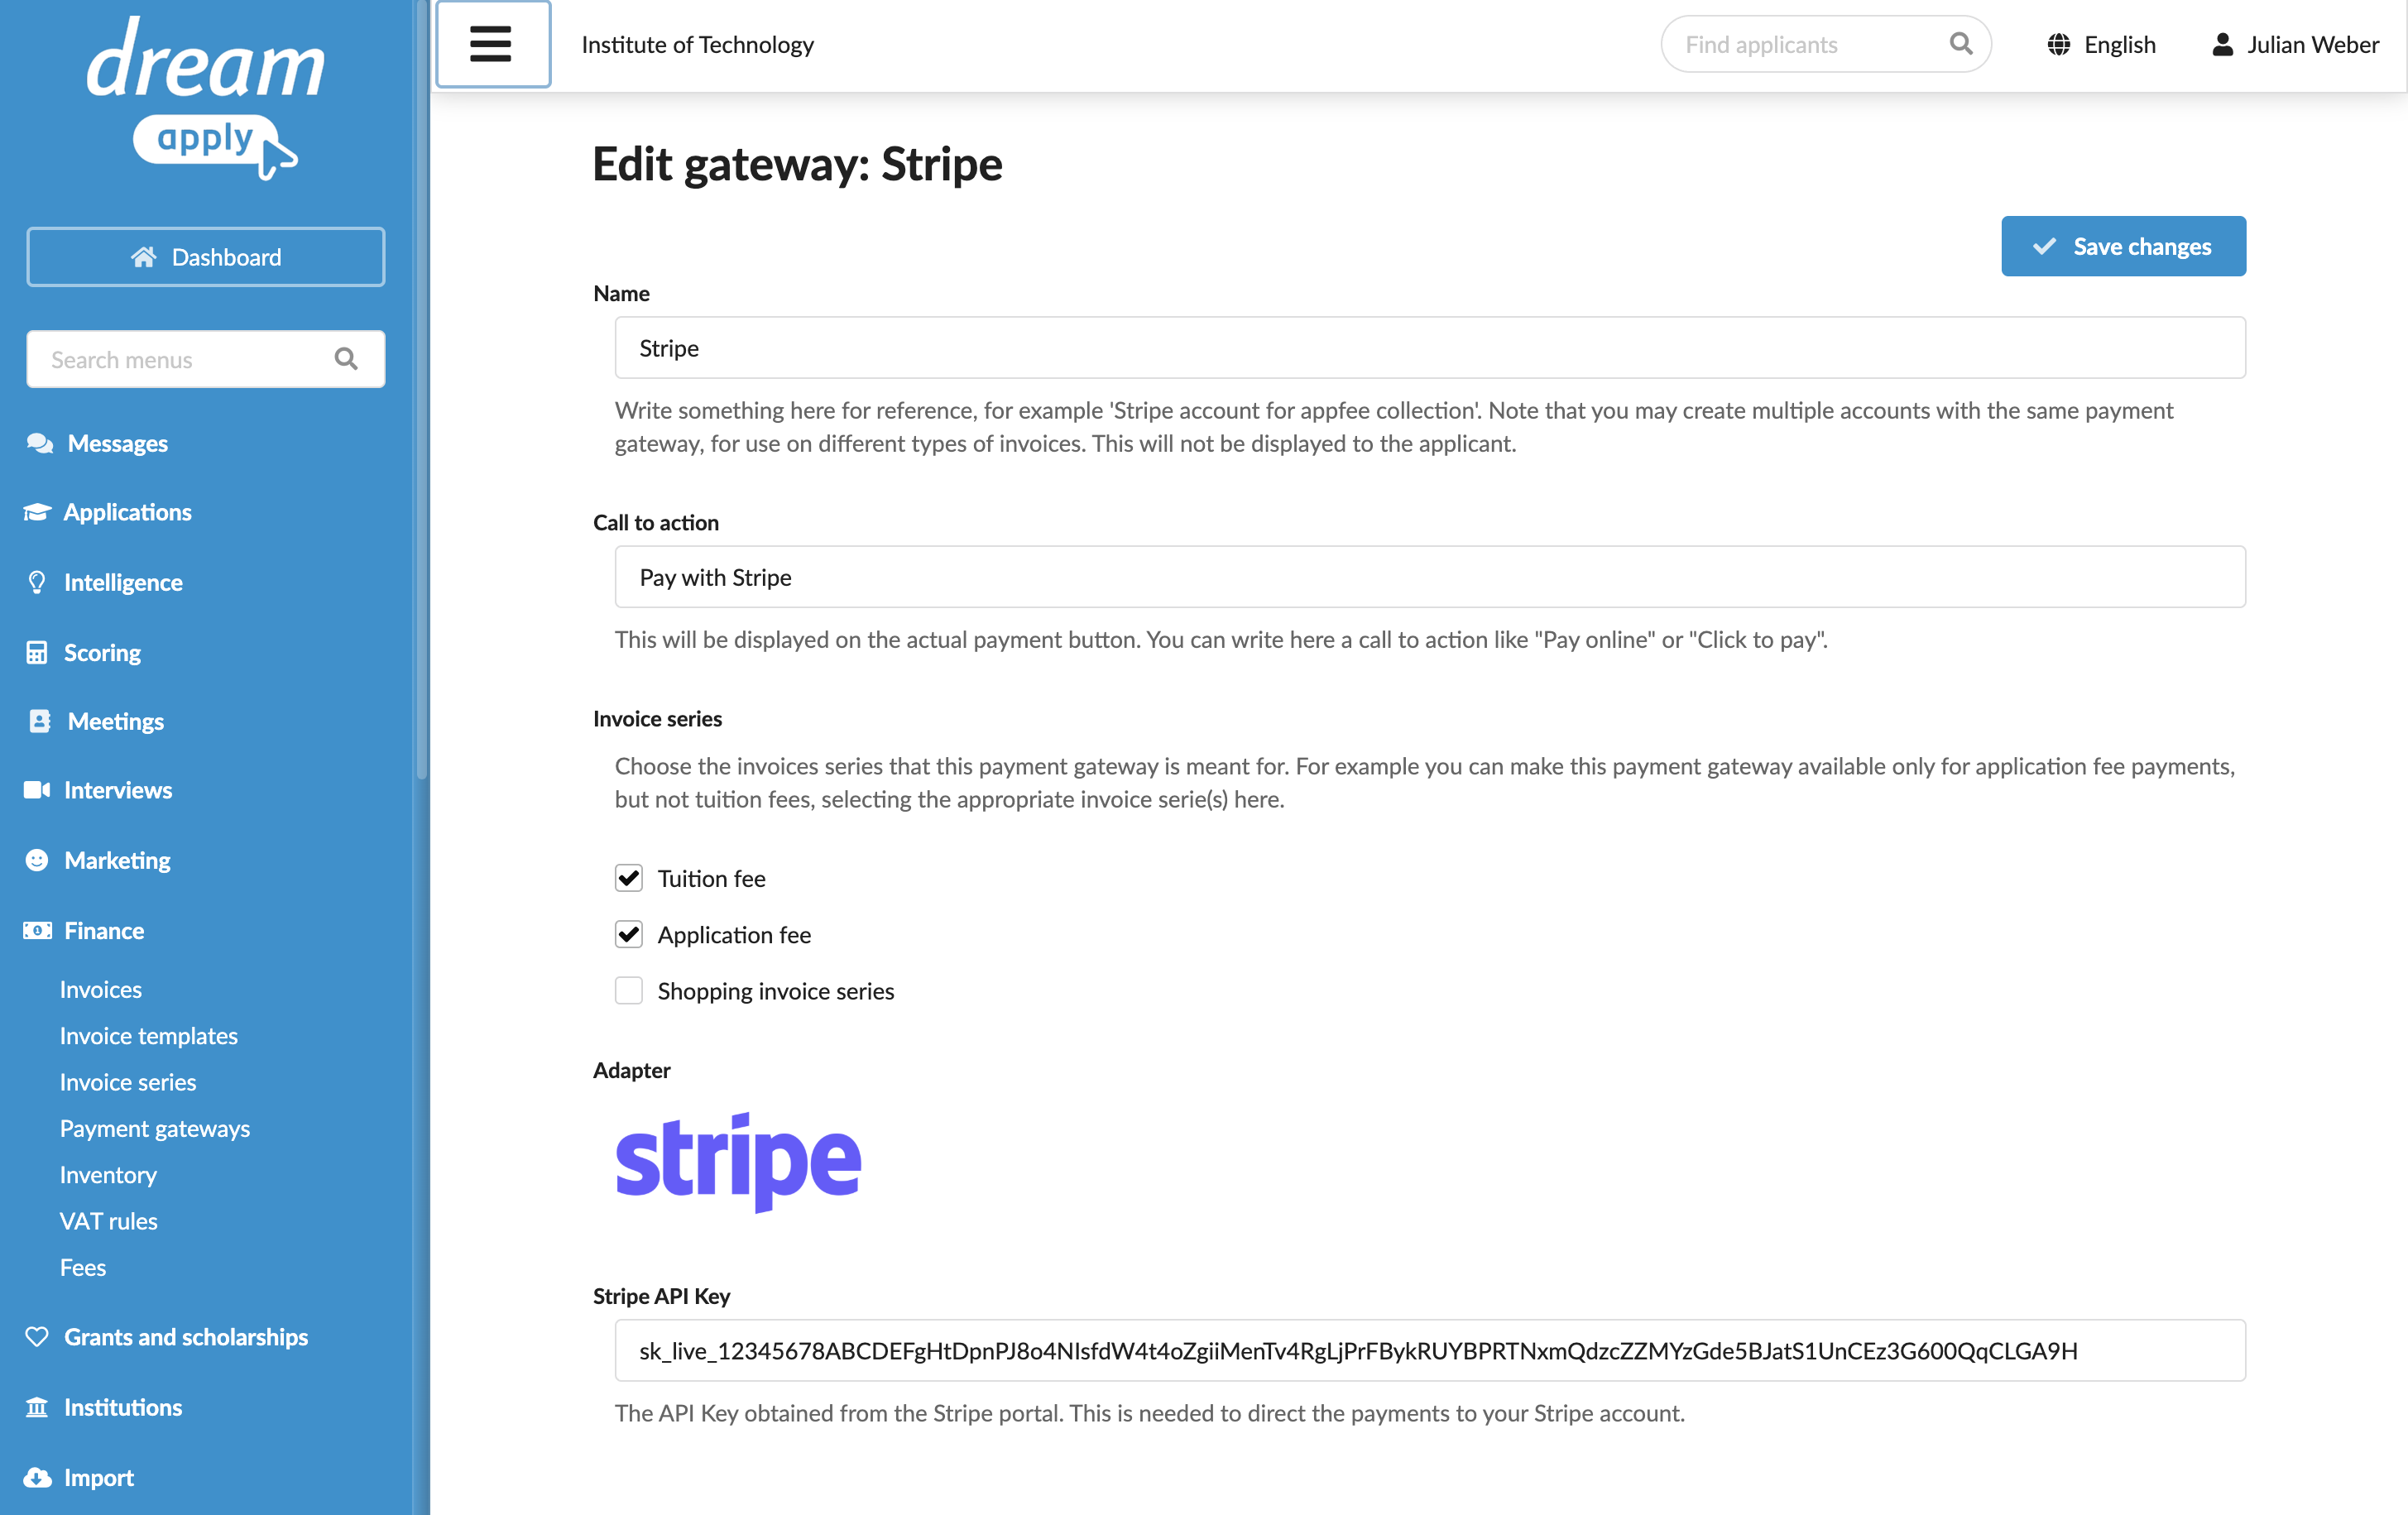
Specify the gateway settings:
In the Name field, specify the gateway name. This name will be used for internal reference only and will not be displayed to applicants.
In the Call to action field, specify the text to display on the payment button on financial documents, for example, Pay with Stripe.
In the Invoice series section, select check boxes next to the invoice series that must be processed through the Stripe gateway. If a specific series is not selected, DreamApply will not display the payment button on documents that use this series.
You can link the same invoice series to several payment gateways to allow applicants to choose their preferred payment option.
In the Partial payments section, select the Allow making partial payments check box to enable partial payments through the gateway.
In the Stripe API Key field, specify the secret API key you created in the Stripe Dashboard.
At the top of the form, click Save changes.
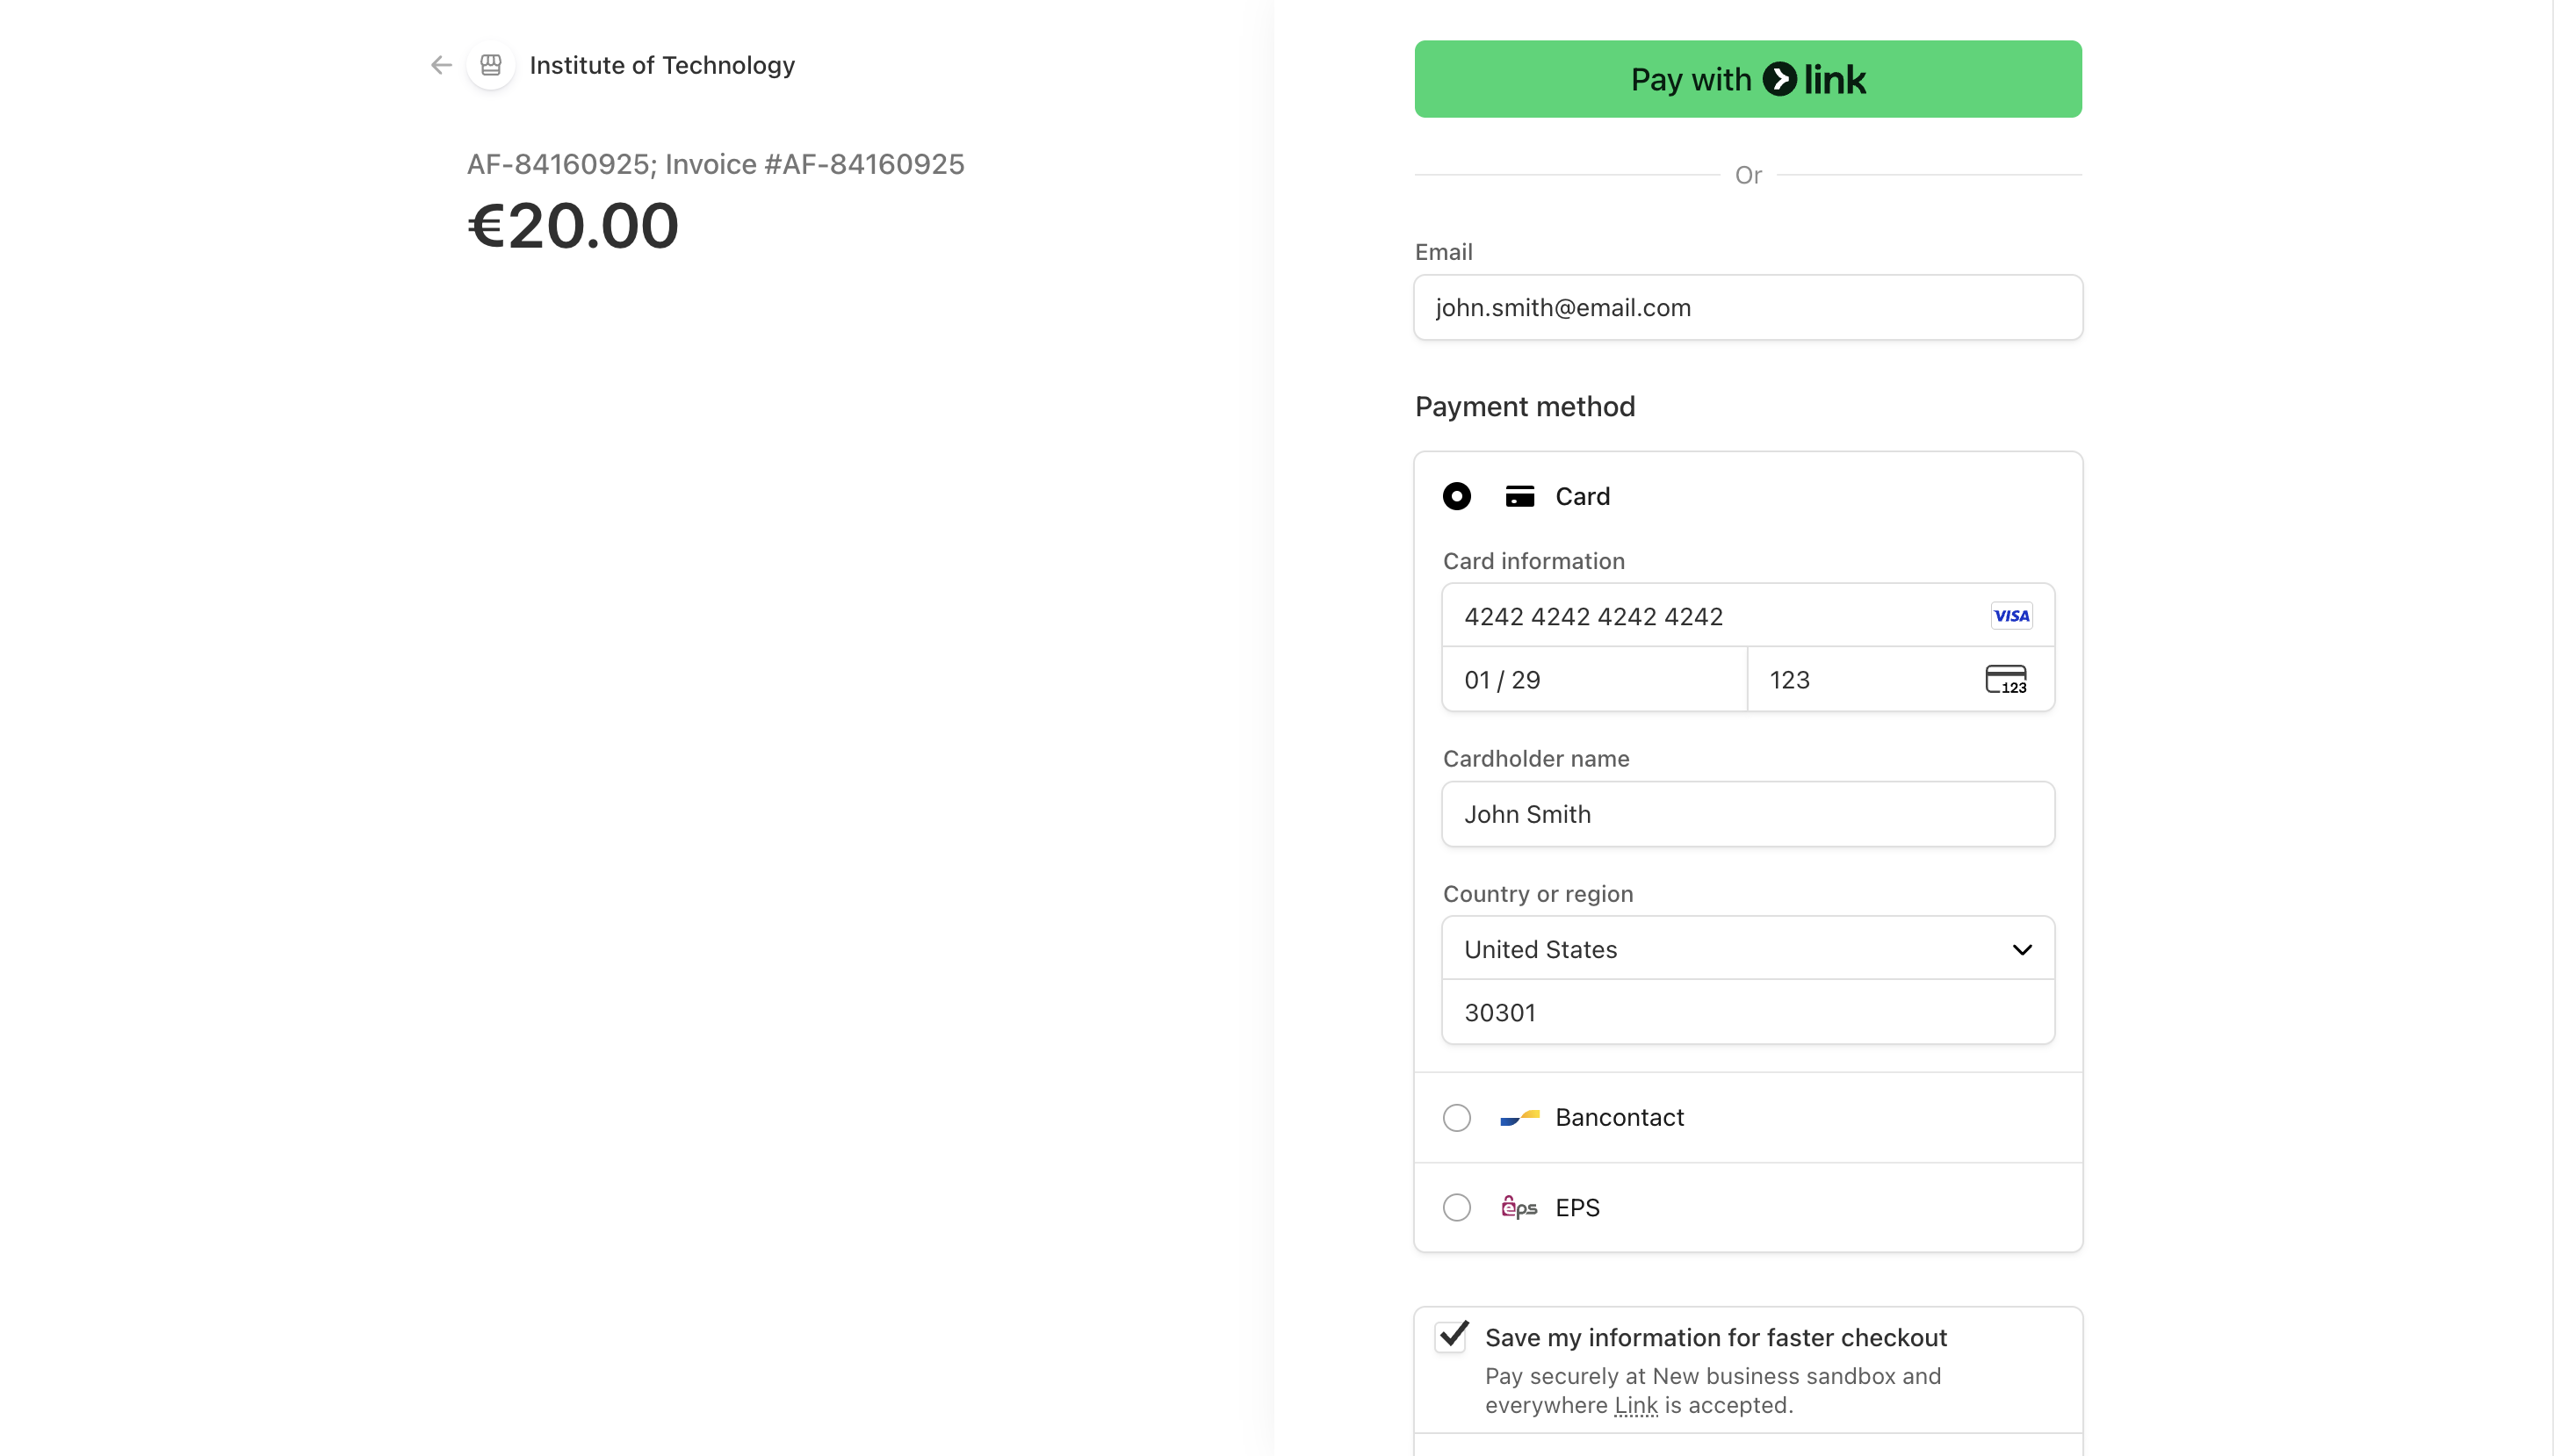
Define payment methods
To define which payment methods applicants can use when paying with Stripe, you must enable them in your Stripe Dashboard. DreamApply will display the methods you activated to applicants at checkout. For details, see the Stripe documentation.
Some payment methods are supported only in certain regions or currencies.
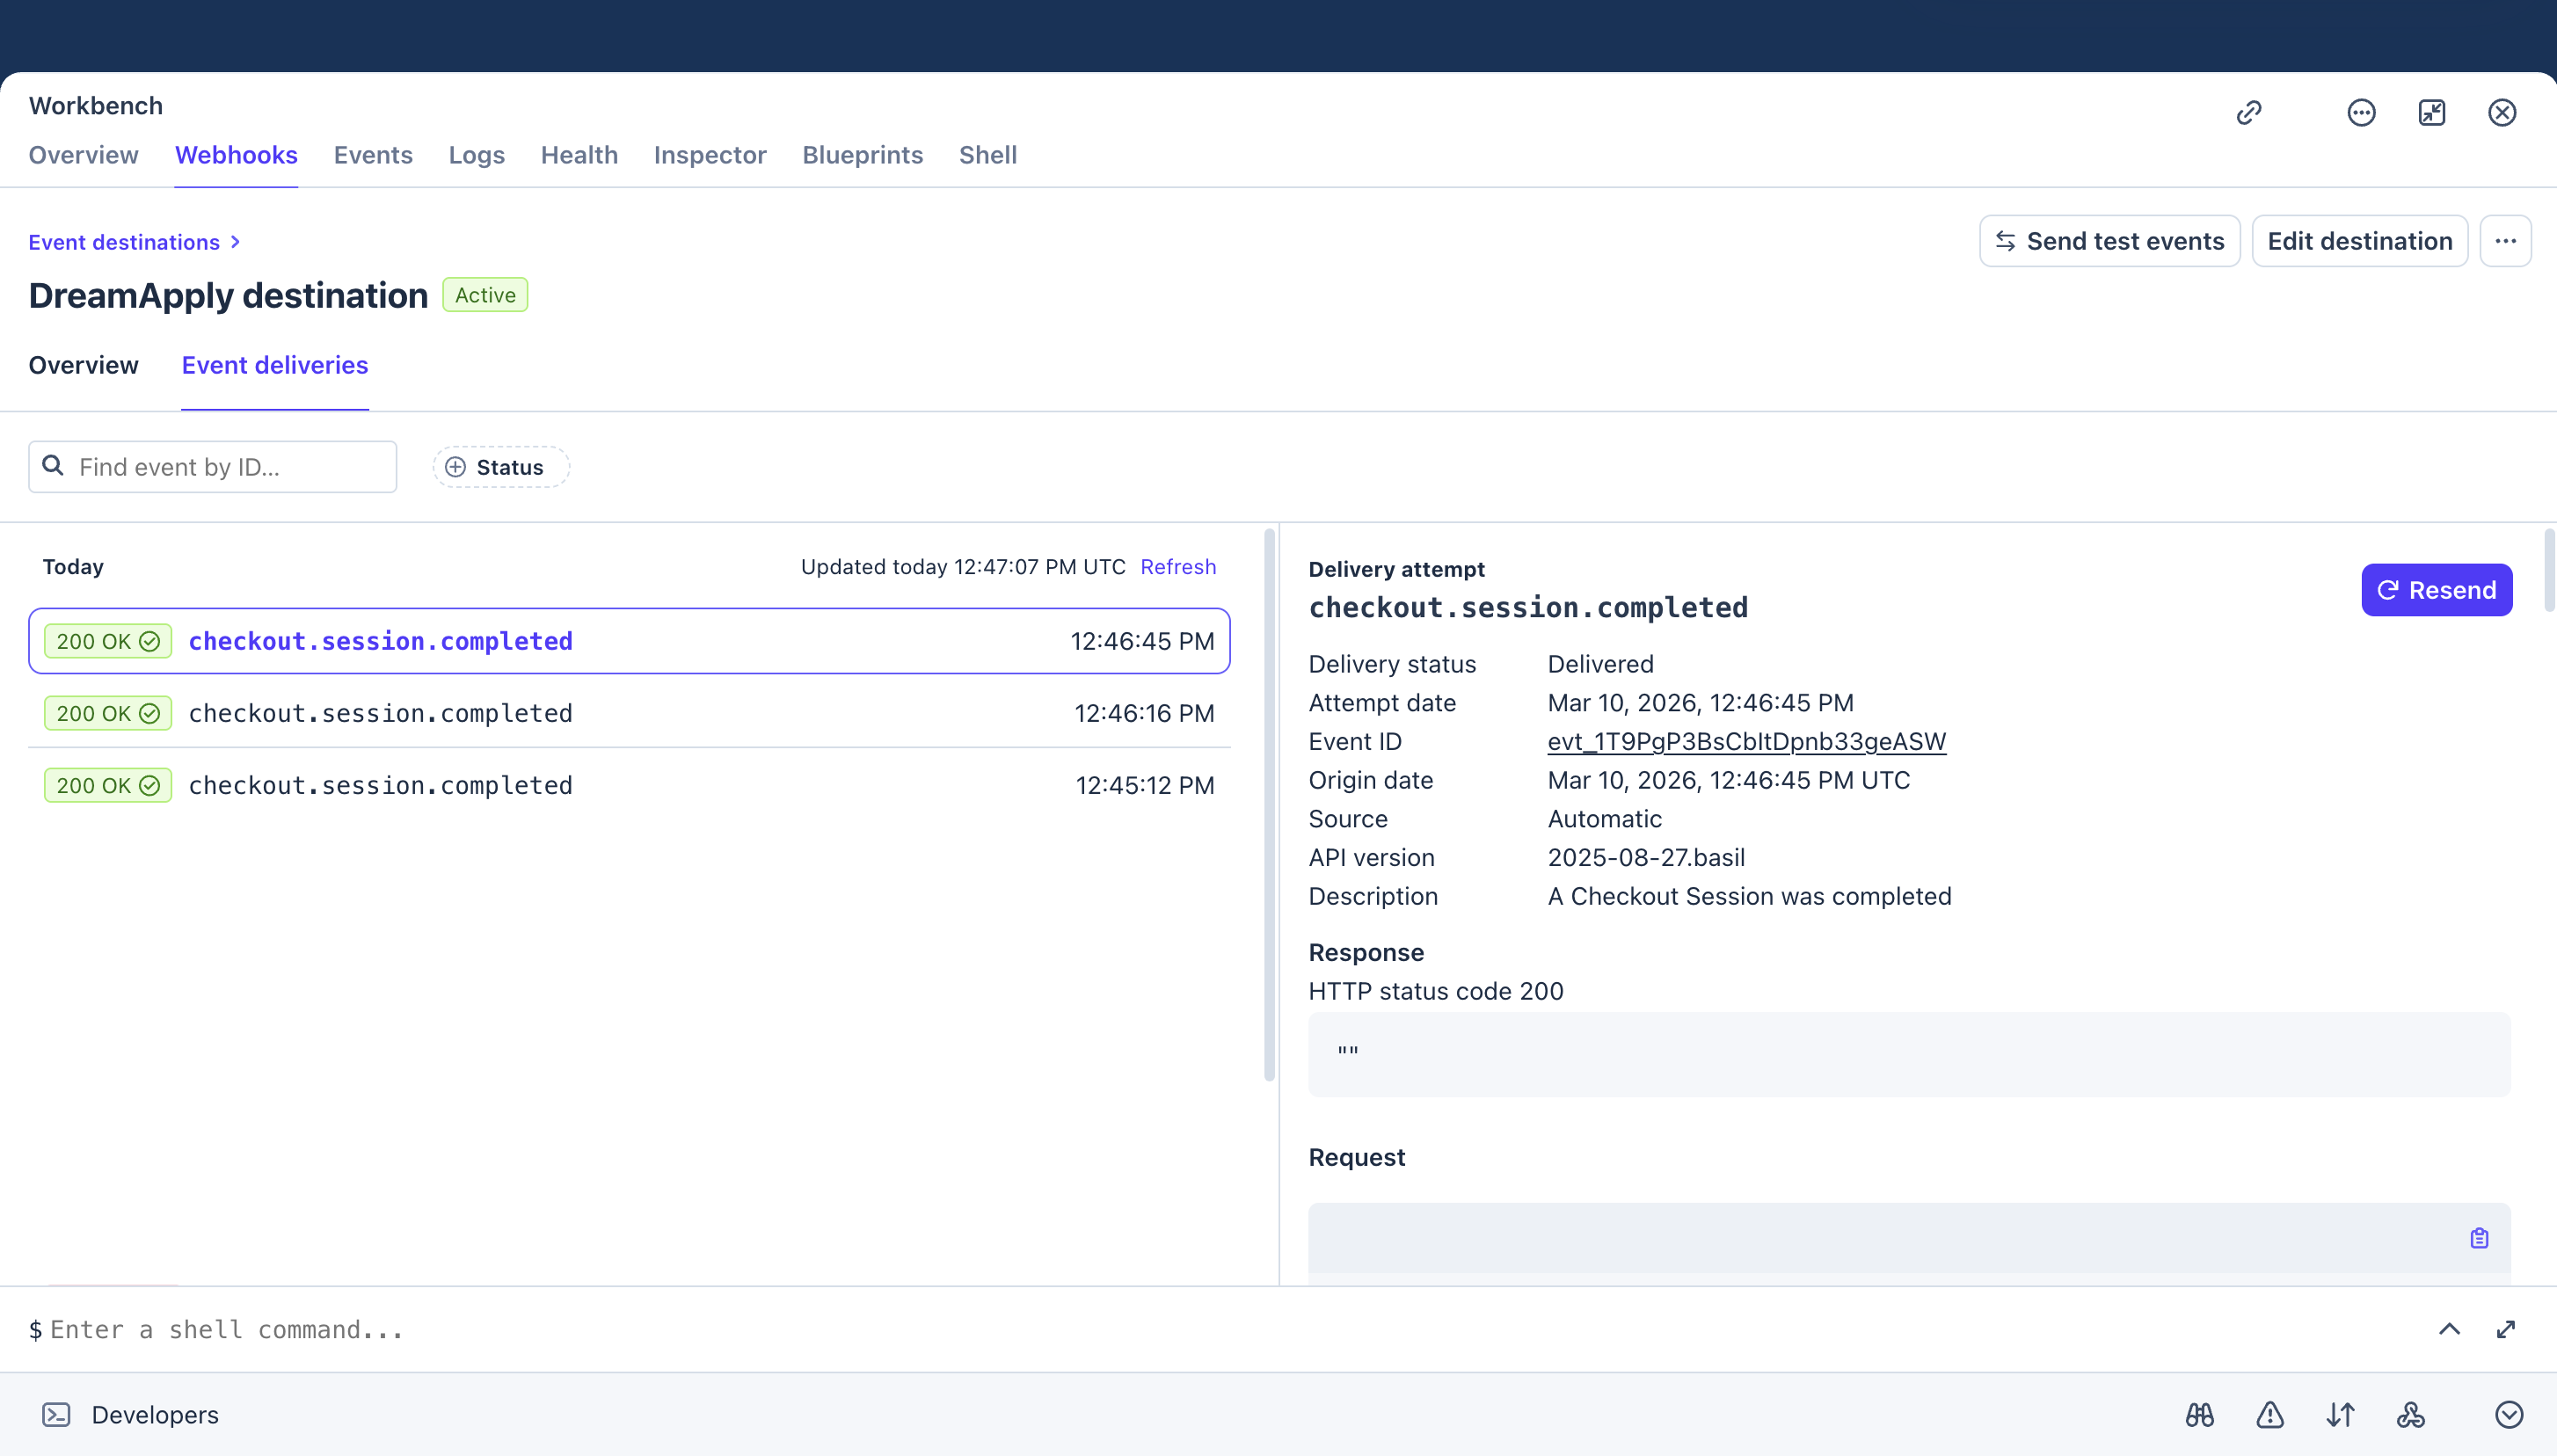
Confirm event delivery
After setting up the gateway, we recommend performing one or more test payments to verify that the integration works and DreamApply receives the checkout events.
- In the bottom left corner of the Stripe Dashboard, click Developers.
- Under Workbench, select Webhooks.
- Use the Overview and Event deliveries tabs to confirm that Stripe events are successfully delivered to DreamApply.
Payment processing
Stripe follows a synchronous payment processing model. When an applicant completes the payment, Stripe immediately sends a confirmation back to DreamApply, and DreamApply updates the payment status in real time.