Export data to a spreadsheet
Assume we want to automatically export applicant data to Google Sheets whenever a specific flag is assigned to an application in DreamApply. To do this, we will create a connection between DreamApply and Google Sheets through Zapier and configure a workflow that will automatically write applicant data to a spreadsheet.
Before you begin
- Make sure your account has the
Superuserrole. - Make sure you have a Zapier account.
- Make sure you have a Google account.
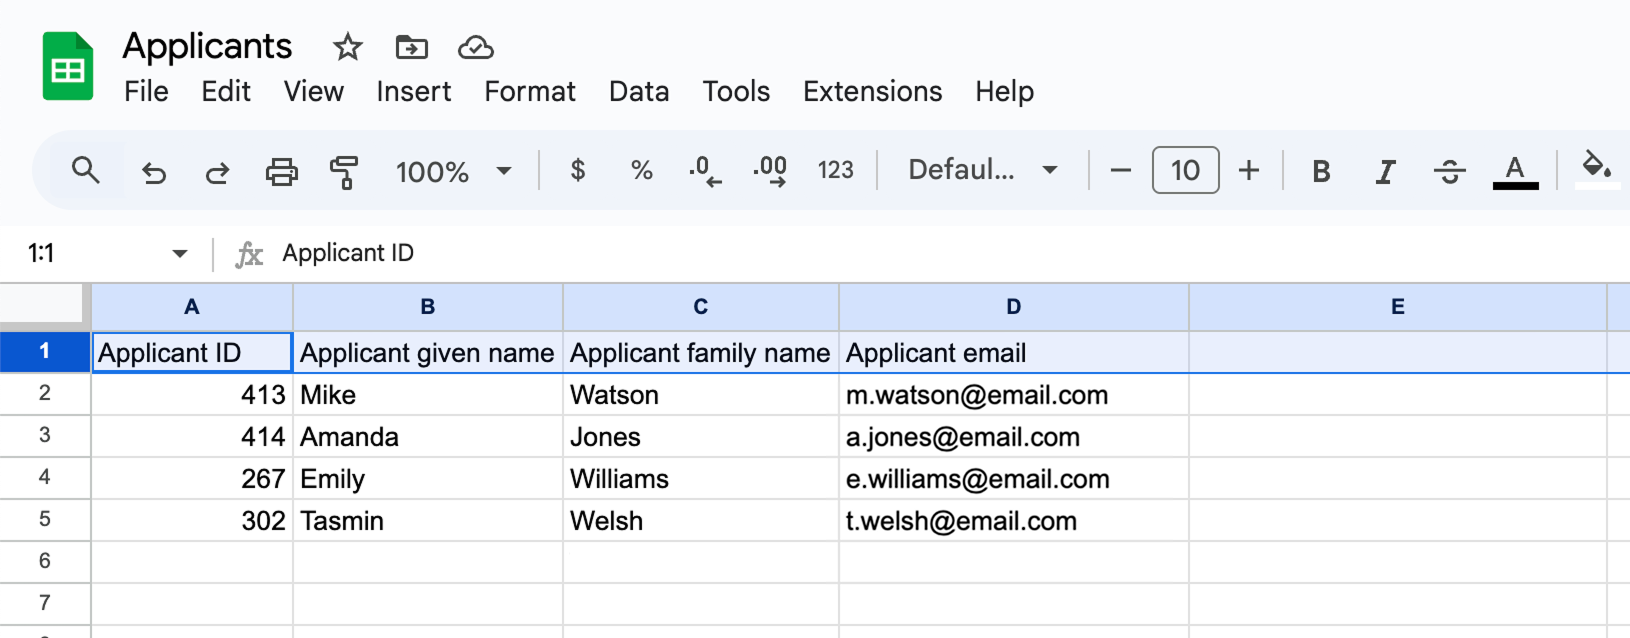
- Make sure you have created a spreadsheet in your Google Drive with the following columns:
Applicant ID,Applicant given name,Applicant family nameandApplicant email.
Step 1. Connect DreamApply to Zapier
First, we need to connect DreamApply to Zapier to be able to send event and application data.
In DreamApply, in the main menu, under System, select API.
Issue a new API key, copy and save it for later.
Make note of and copy your shard ID, for example,
1234, and save it for later.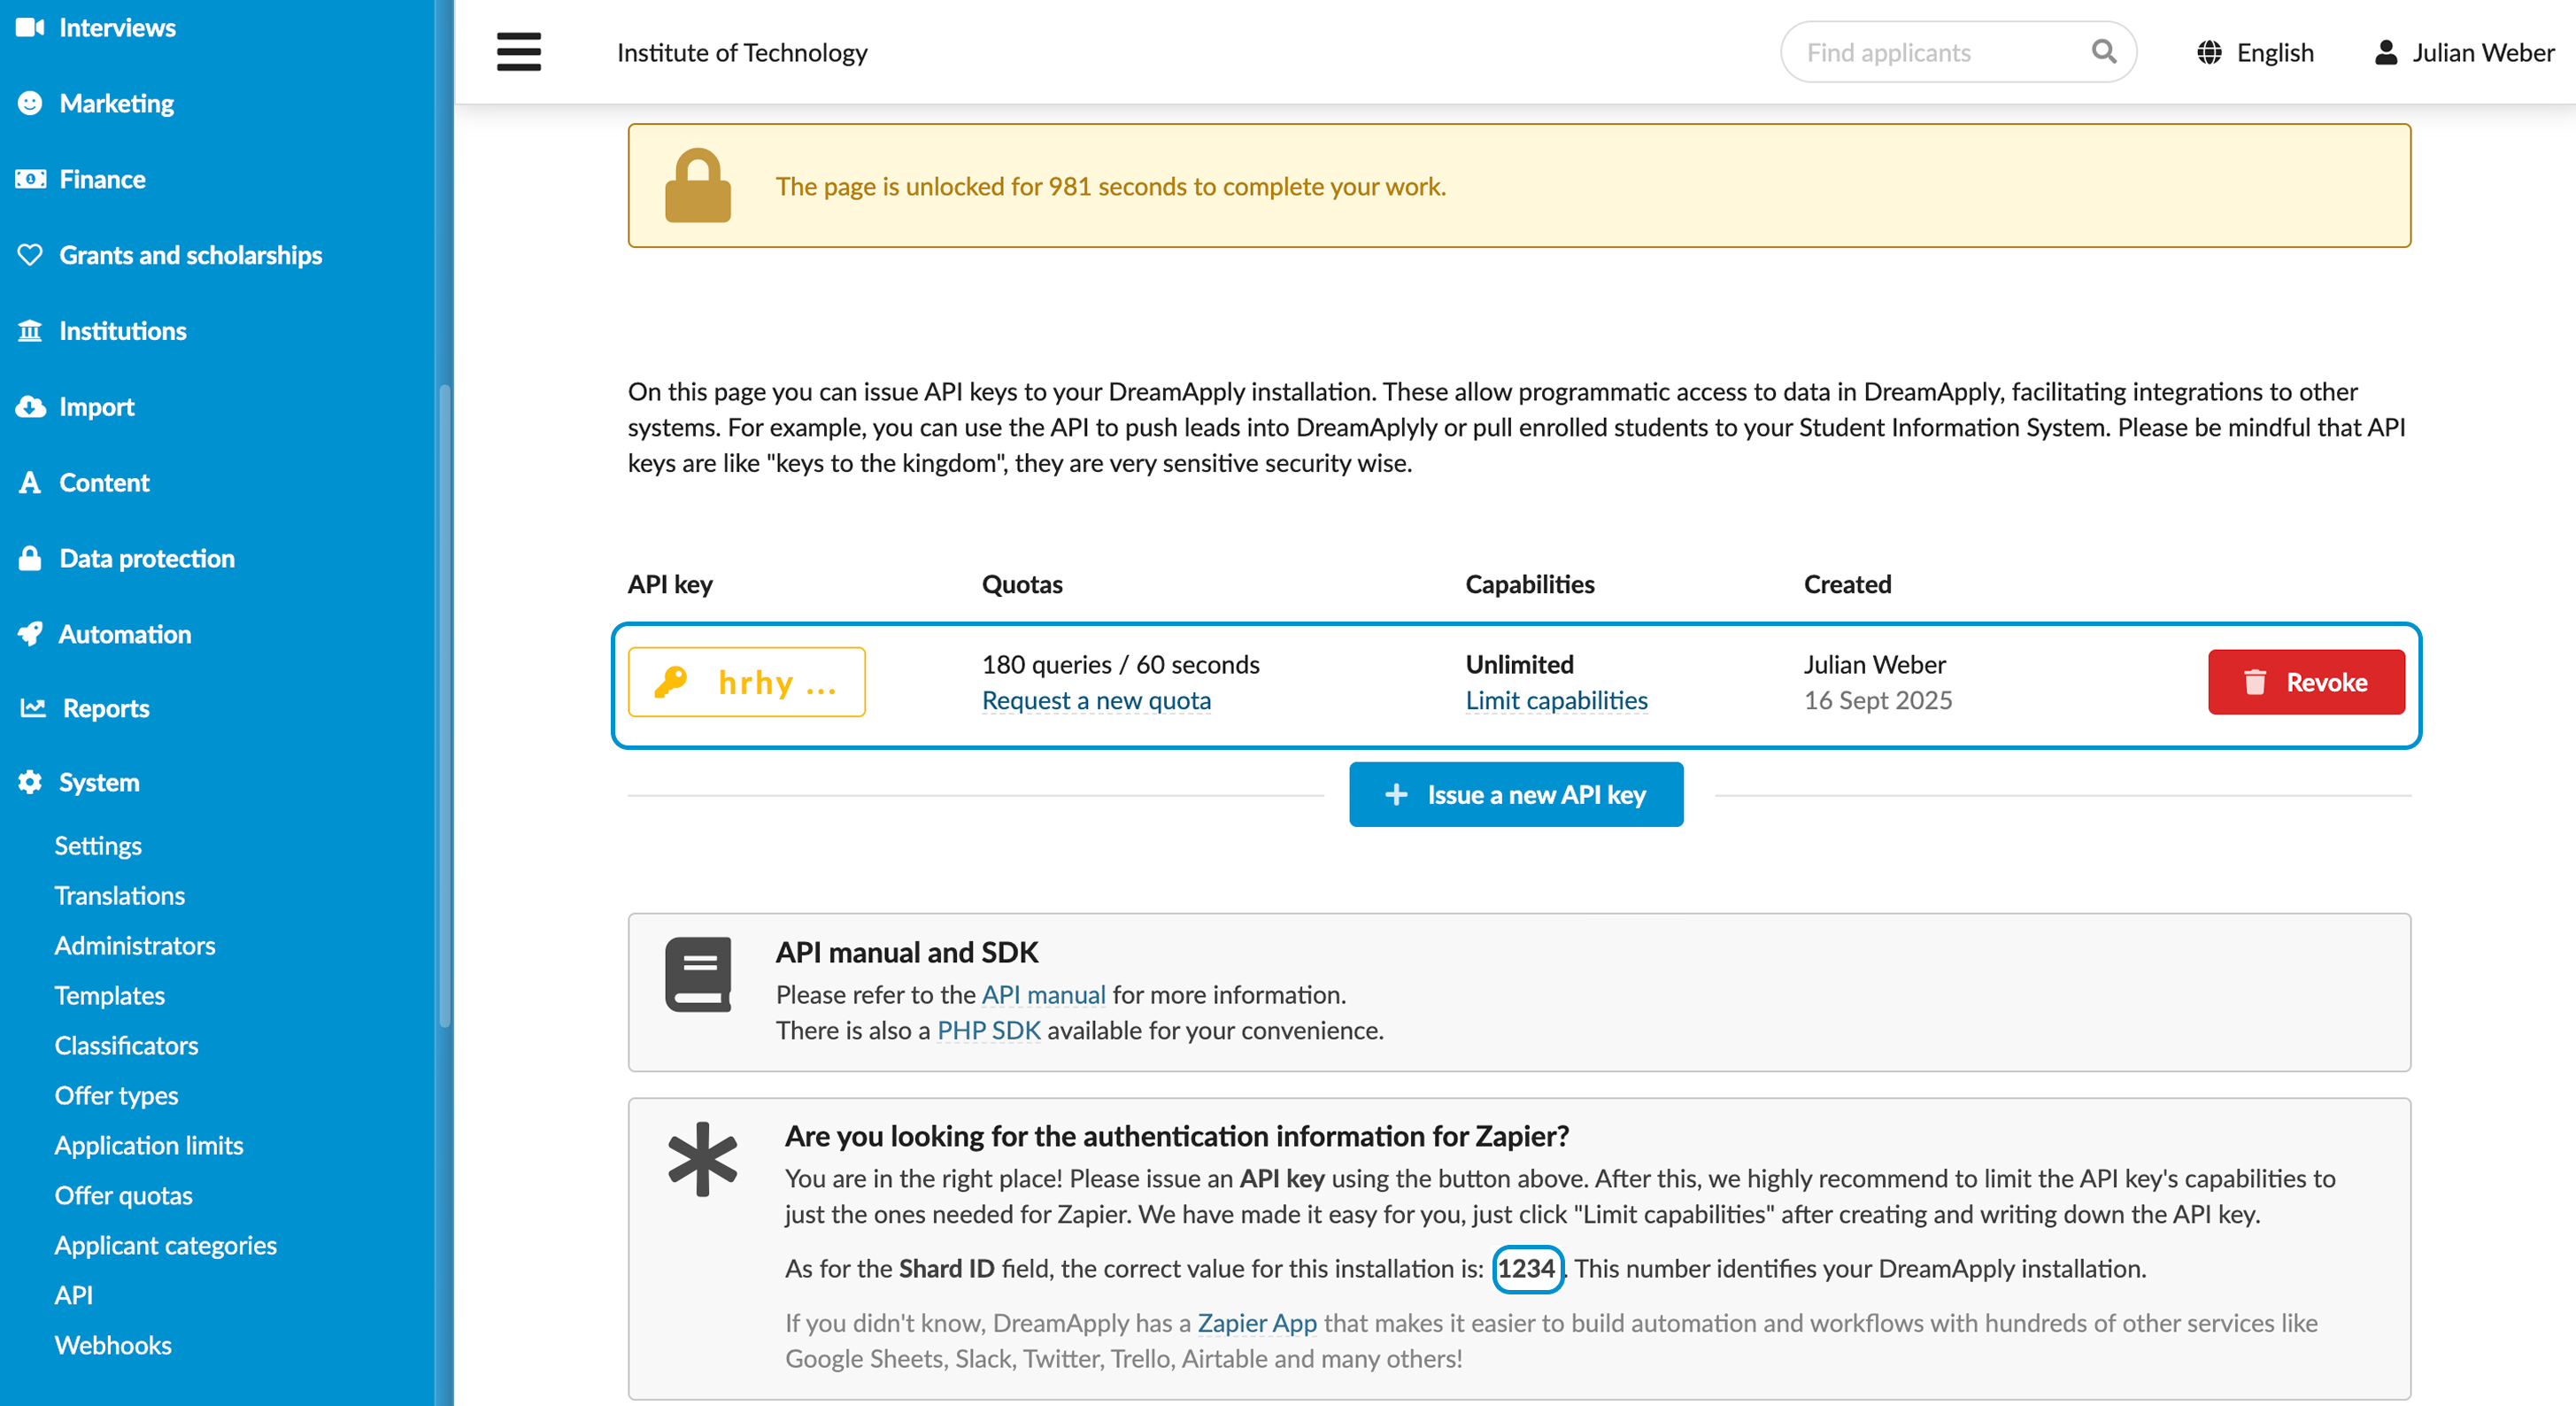
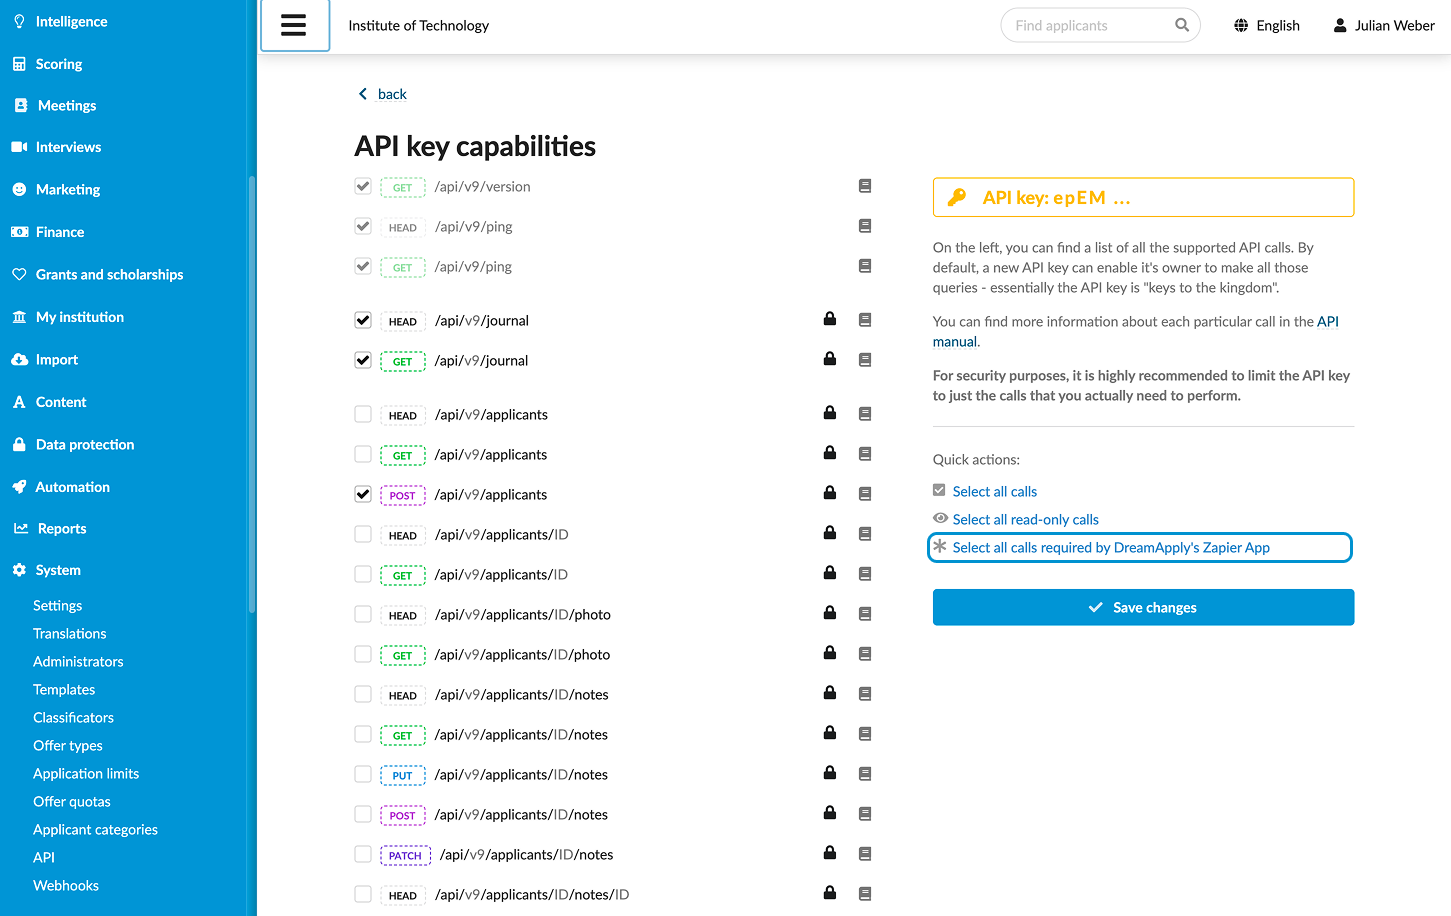
To improve security, limit the API key access:
- To the right of the created API key, click Limit capabilities.
- In the right pane, under Quick actions, click Select all calls required by DreamApply’s Zapier App and click Save changes.
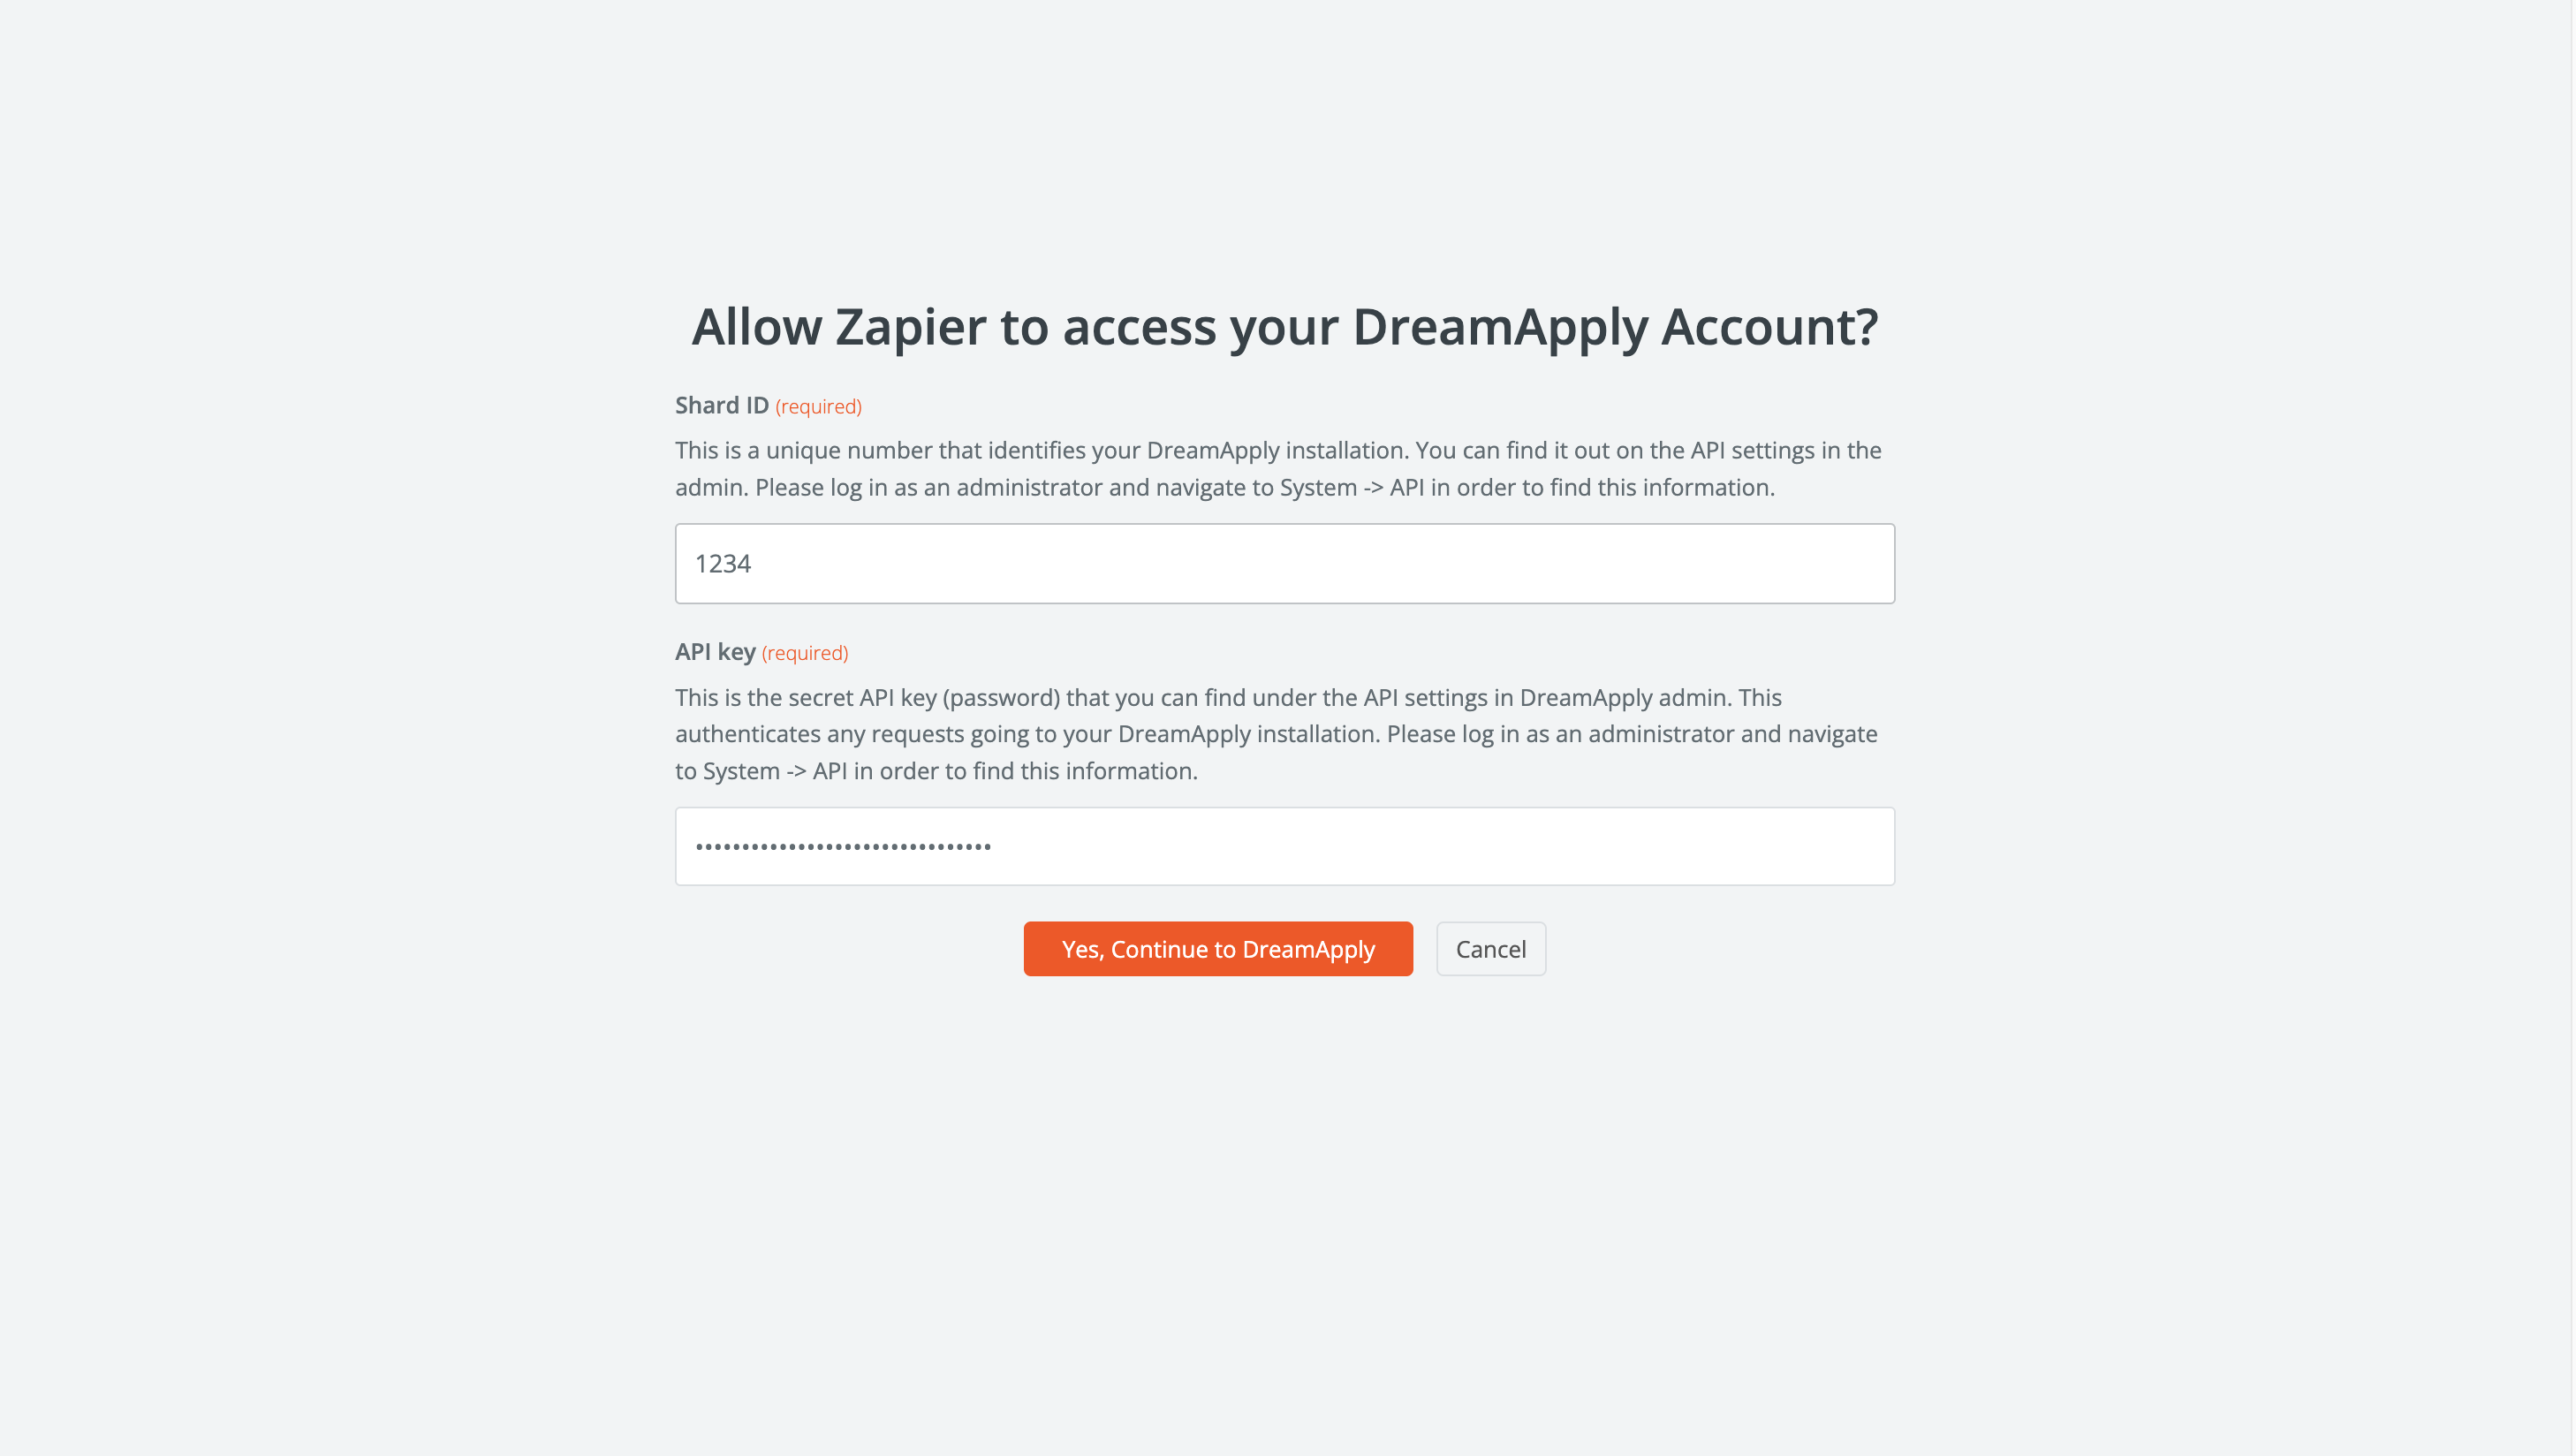
Log in to your Zapier account.
At the top of the main menu on the left, click Create and select Zaps.
Click the Trigger block and use search to find the DreamApply app.
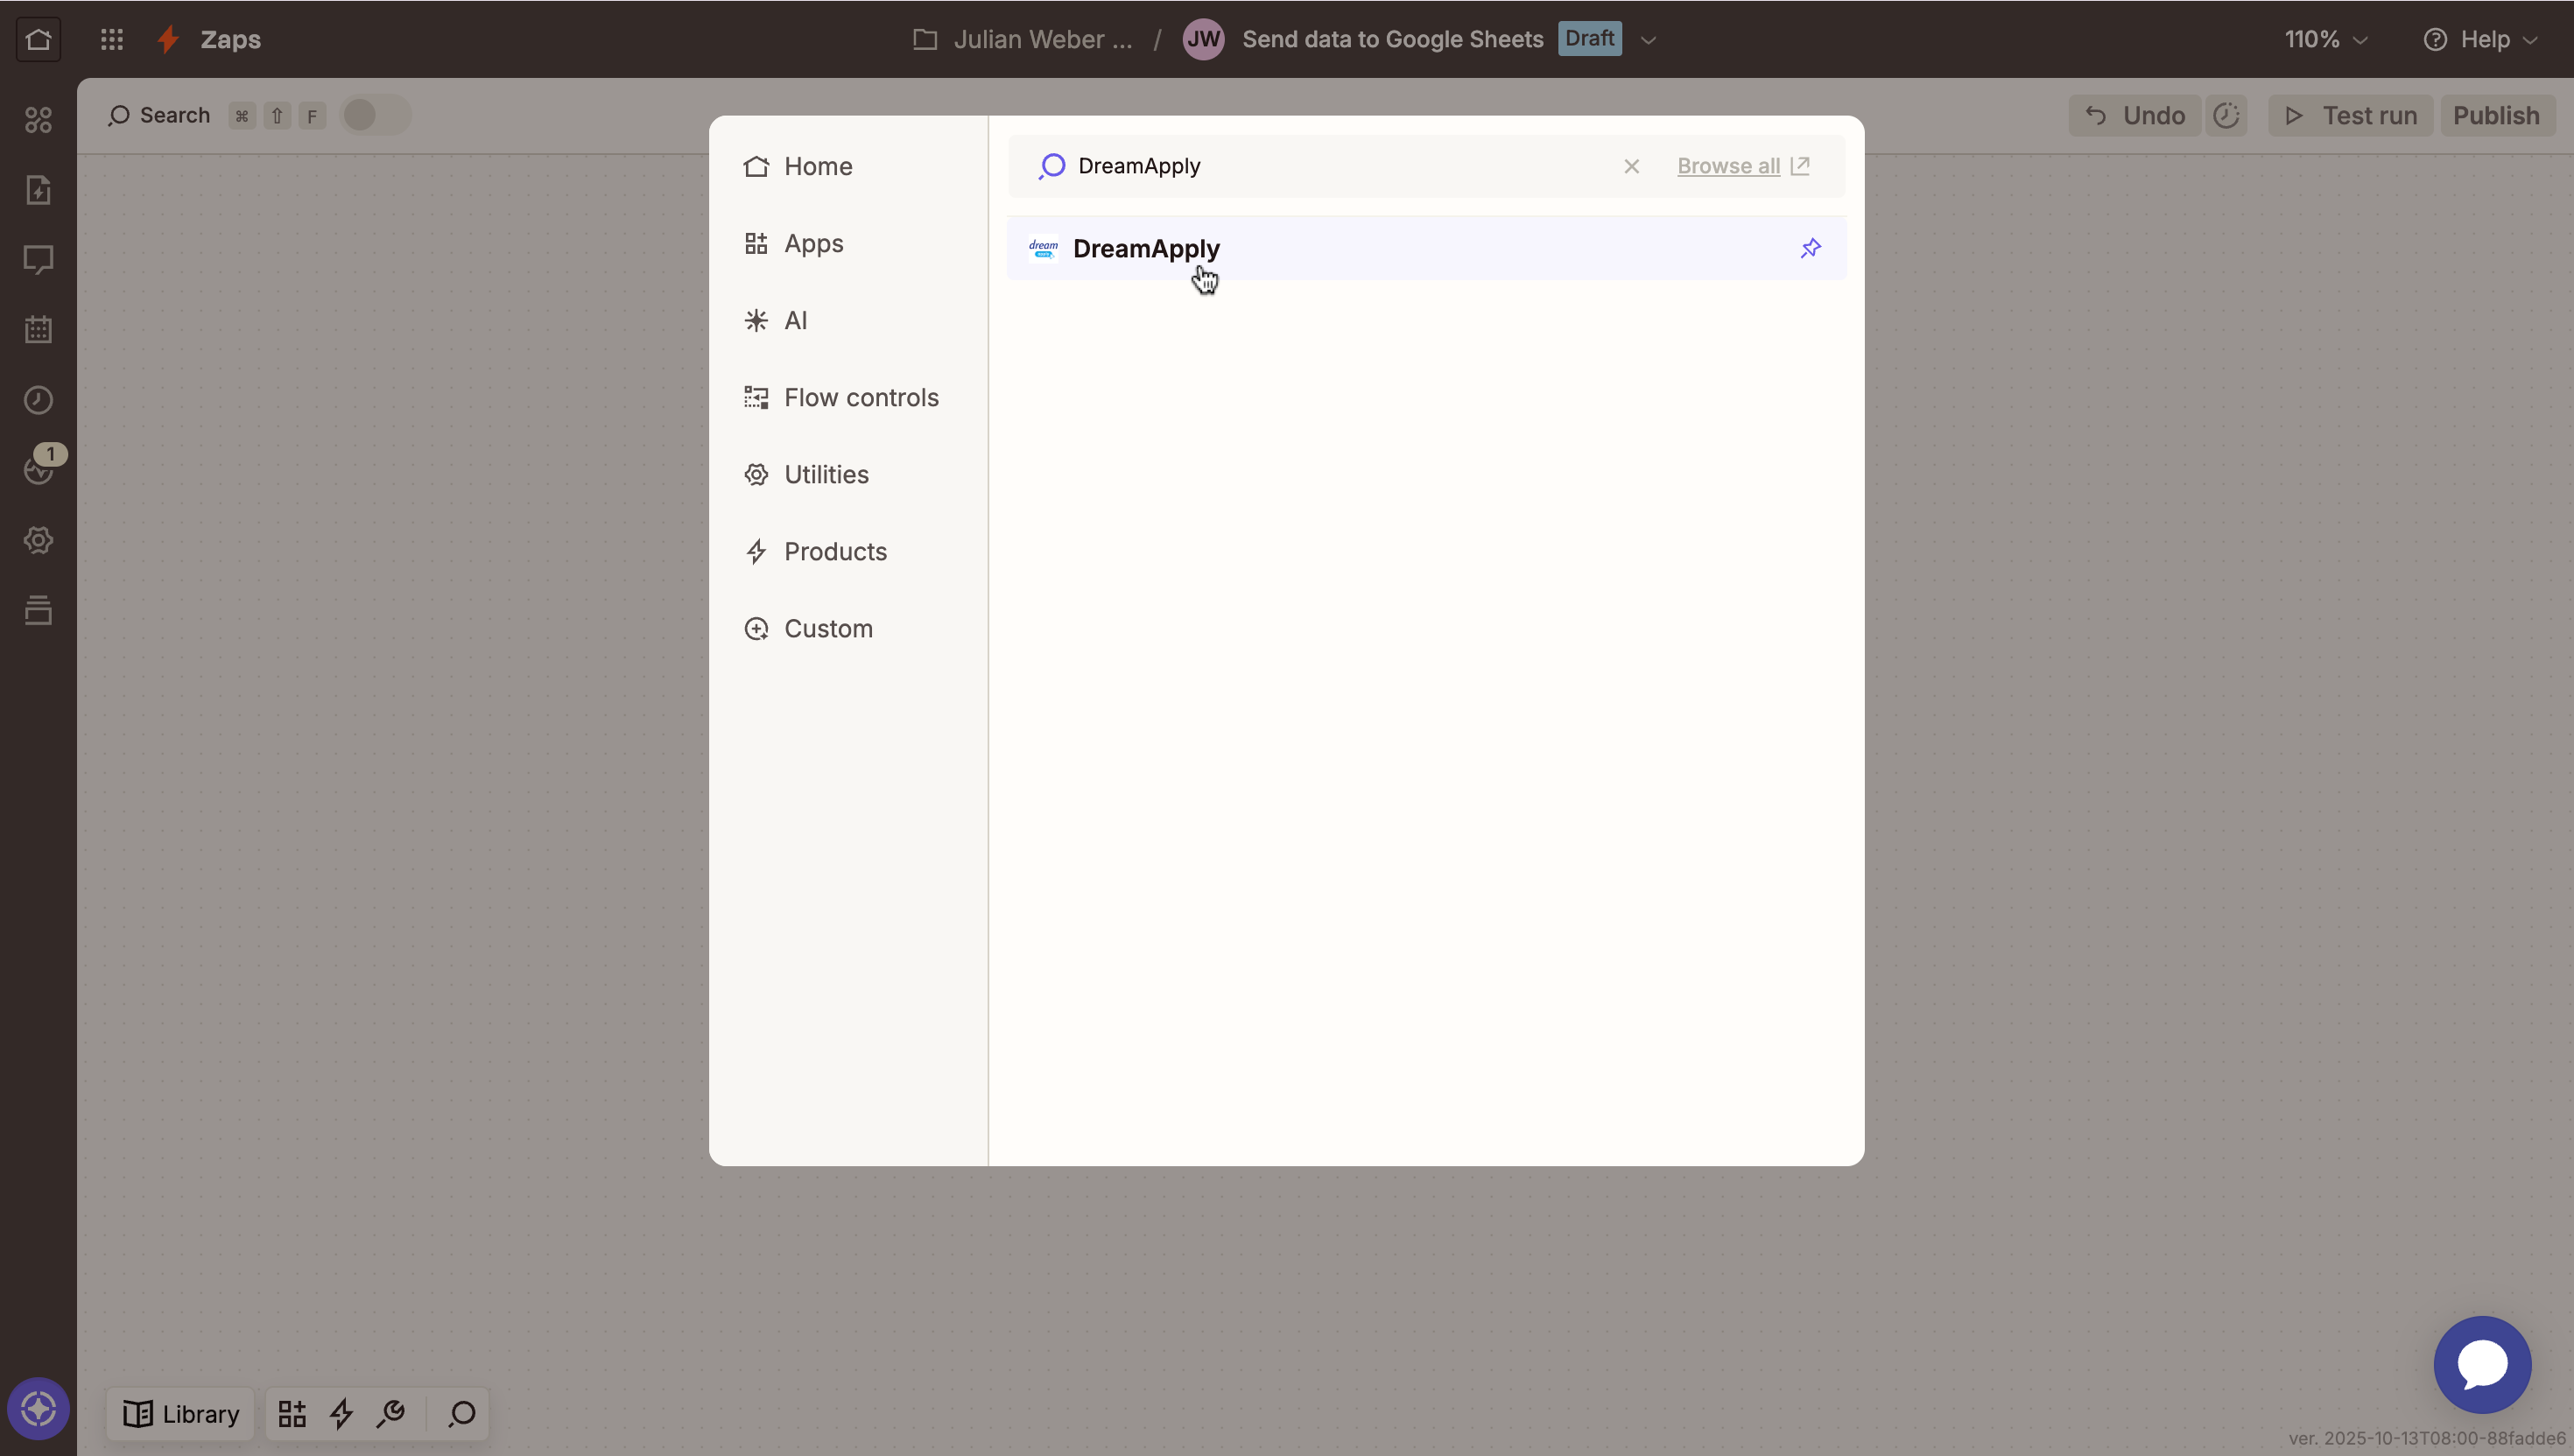
In the pane on the right, click Account and enter credentials to connect to your DreamApply instance: shard ID and API key.
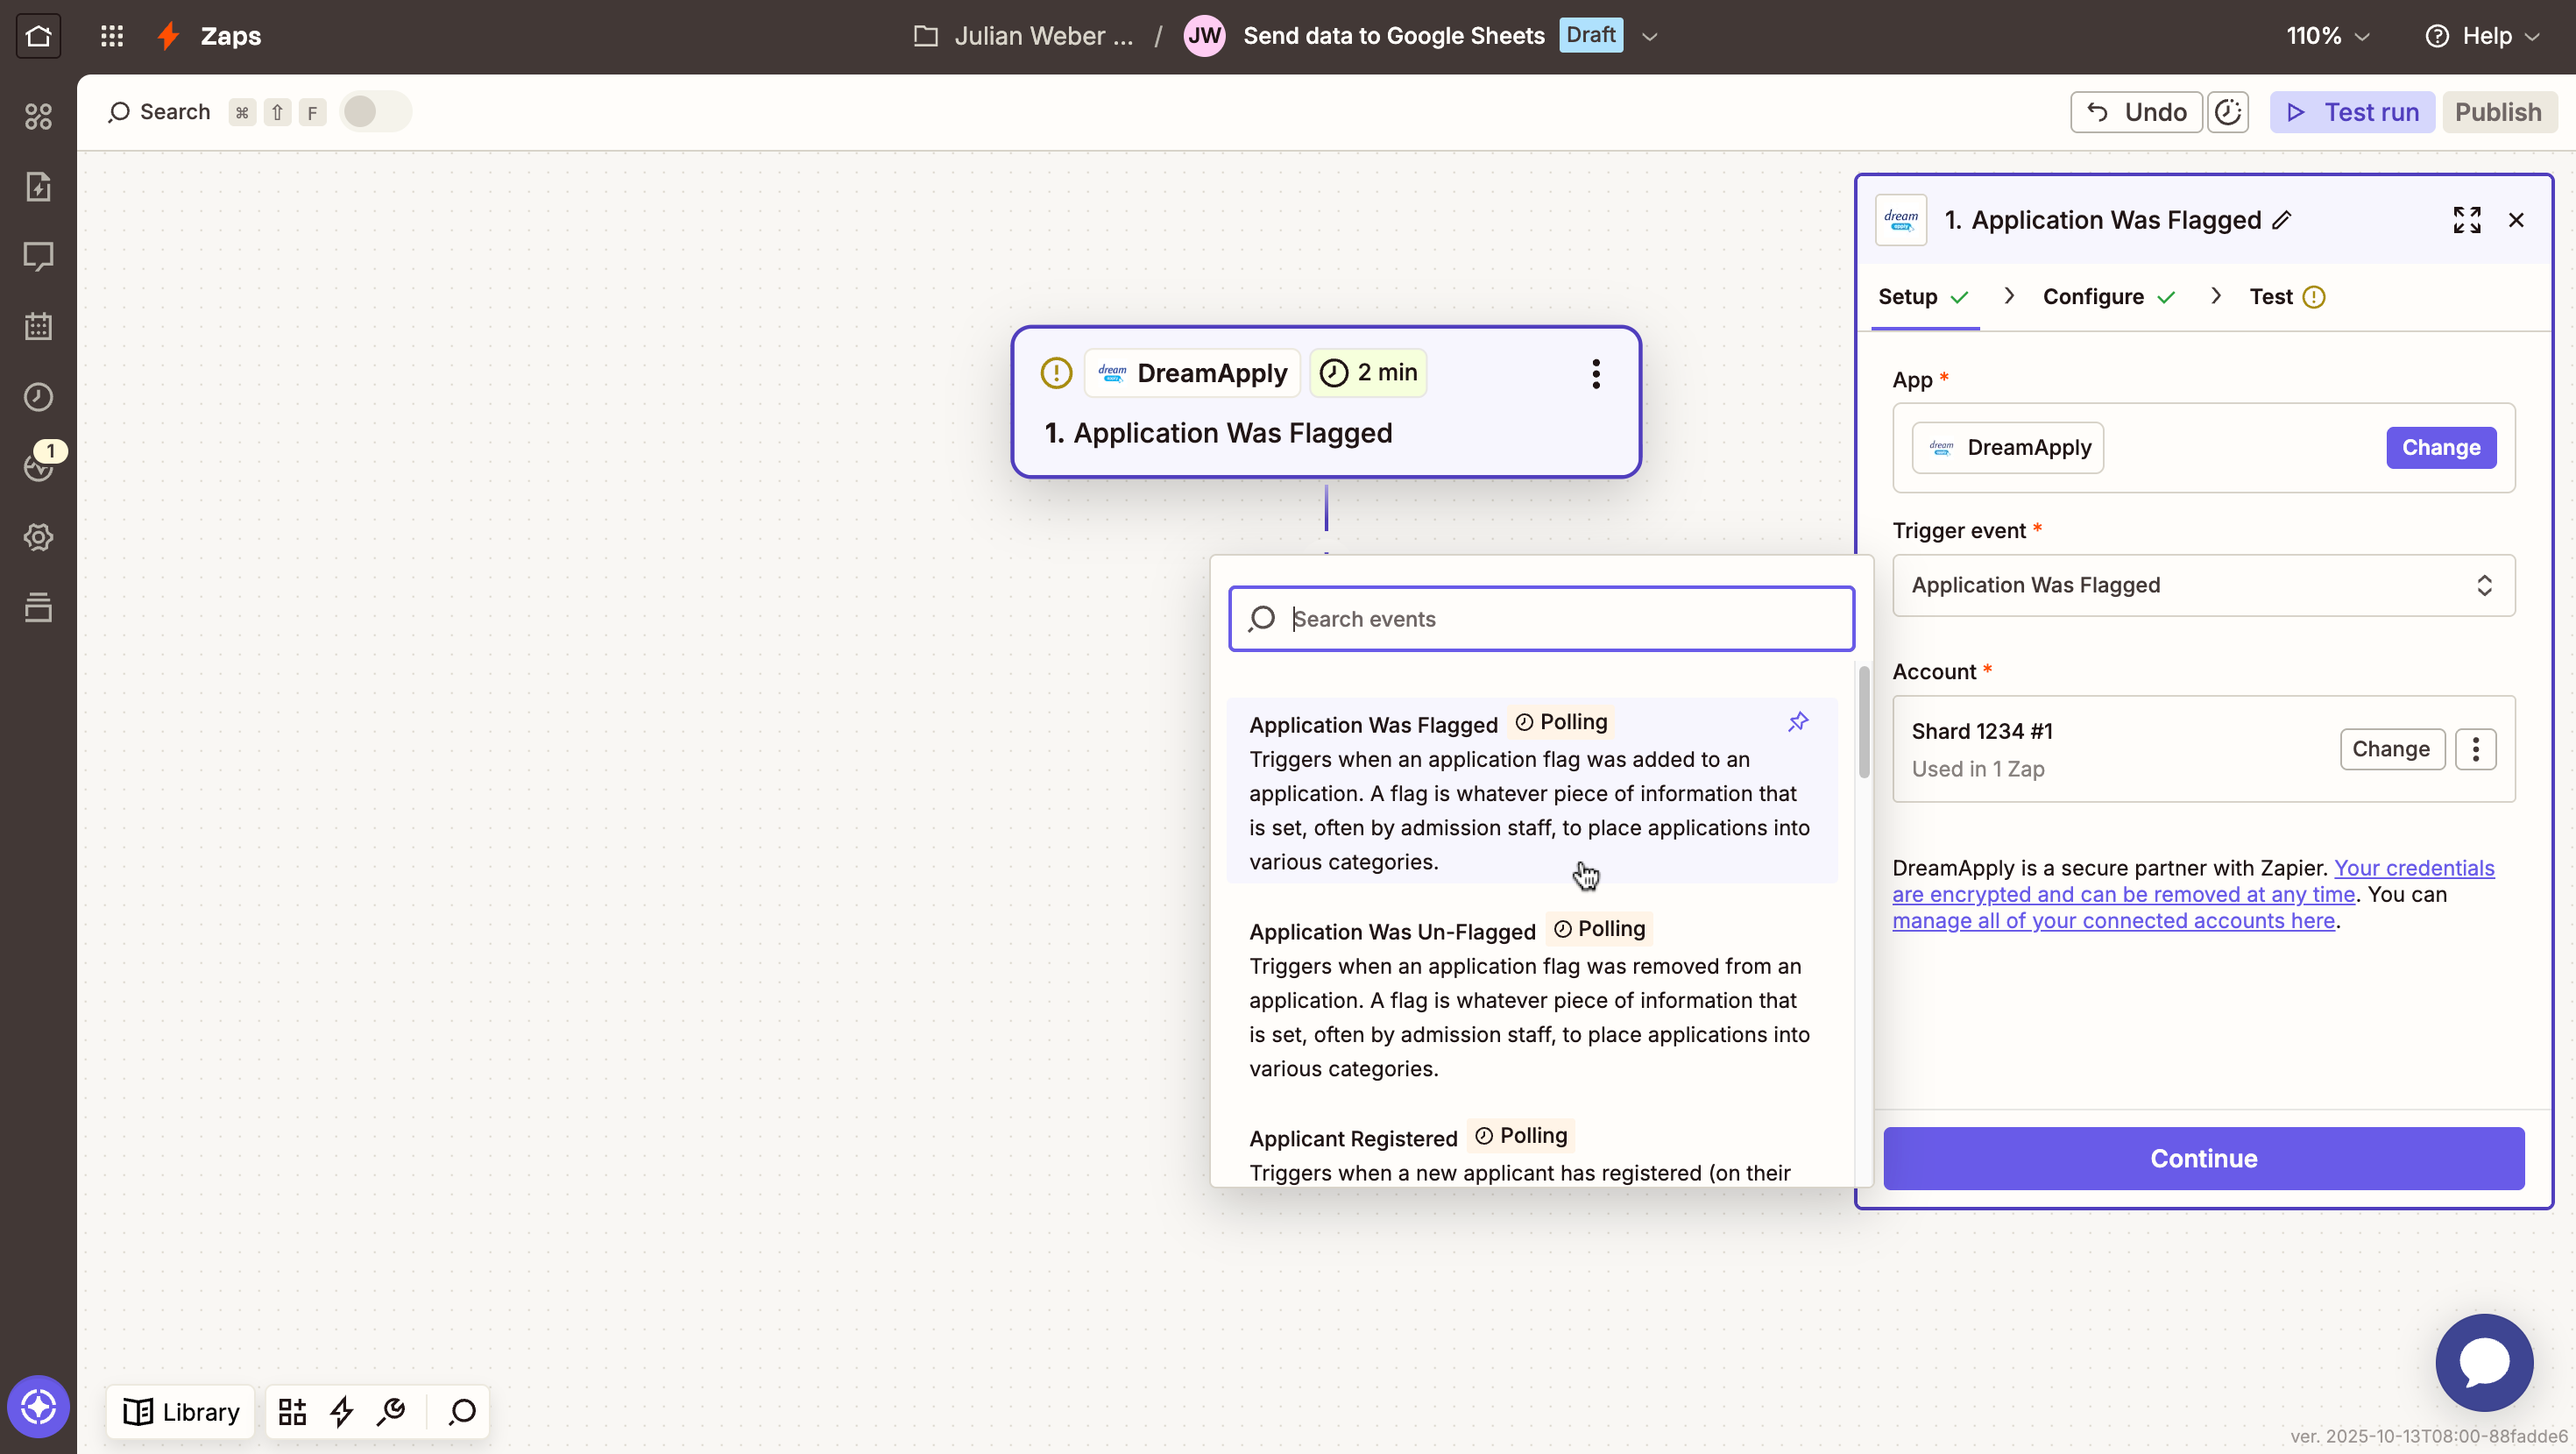
Step 2. Set up the trigger event
Next, we will choose a DreamApply event that must start the automated workflow.
In the pane on the right, from the Trigger event list, select Application Was Flagged and click Continue.
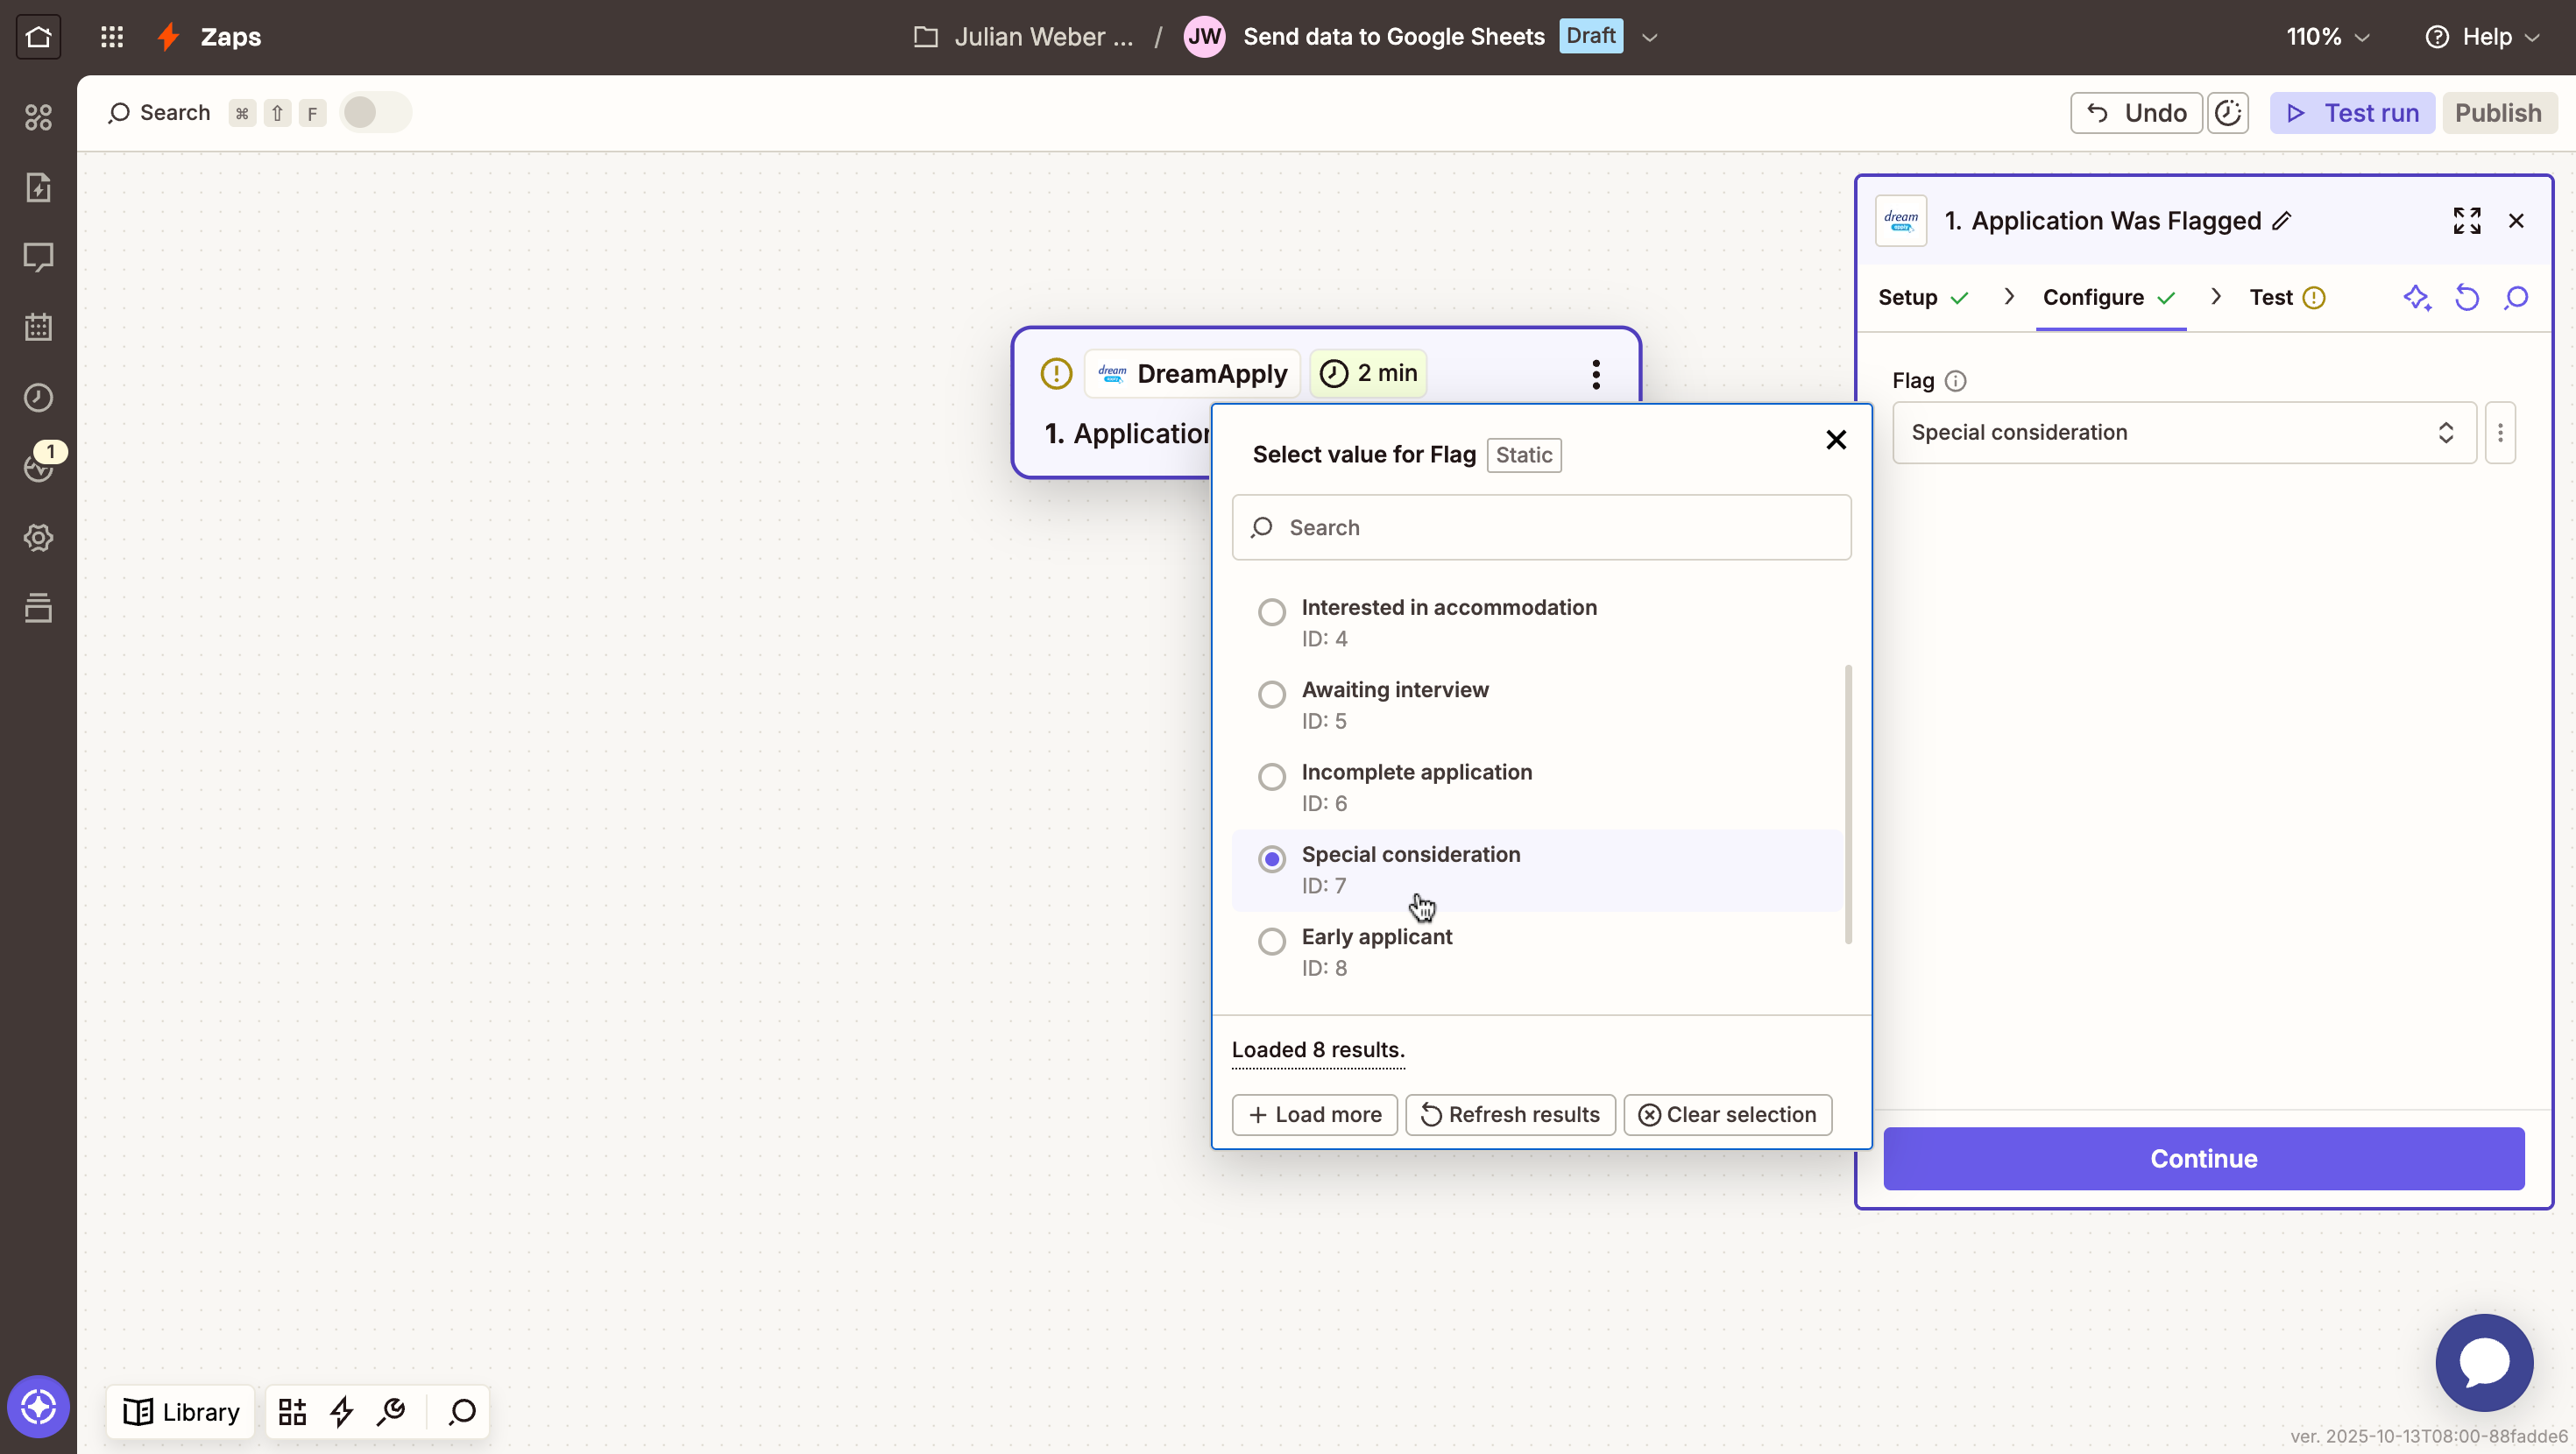
At the Configure step, select the flag to include in the trigger, for example, Special consideration.
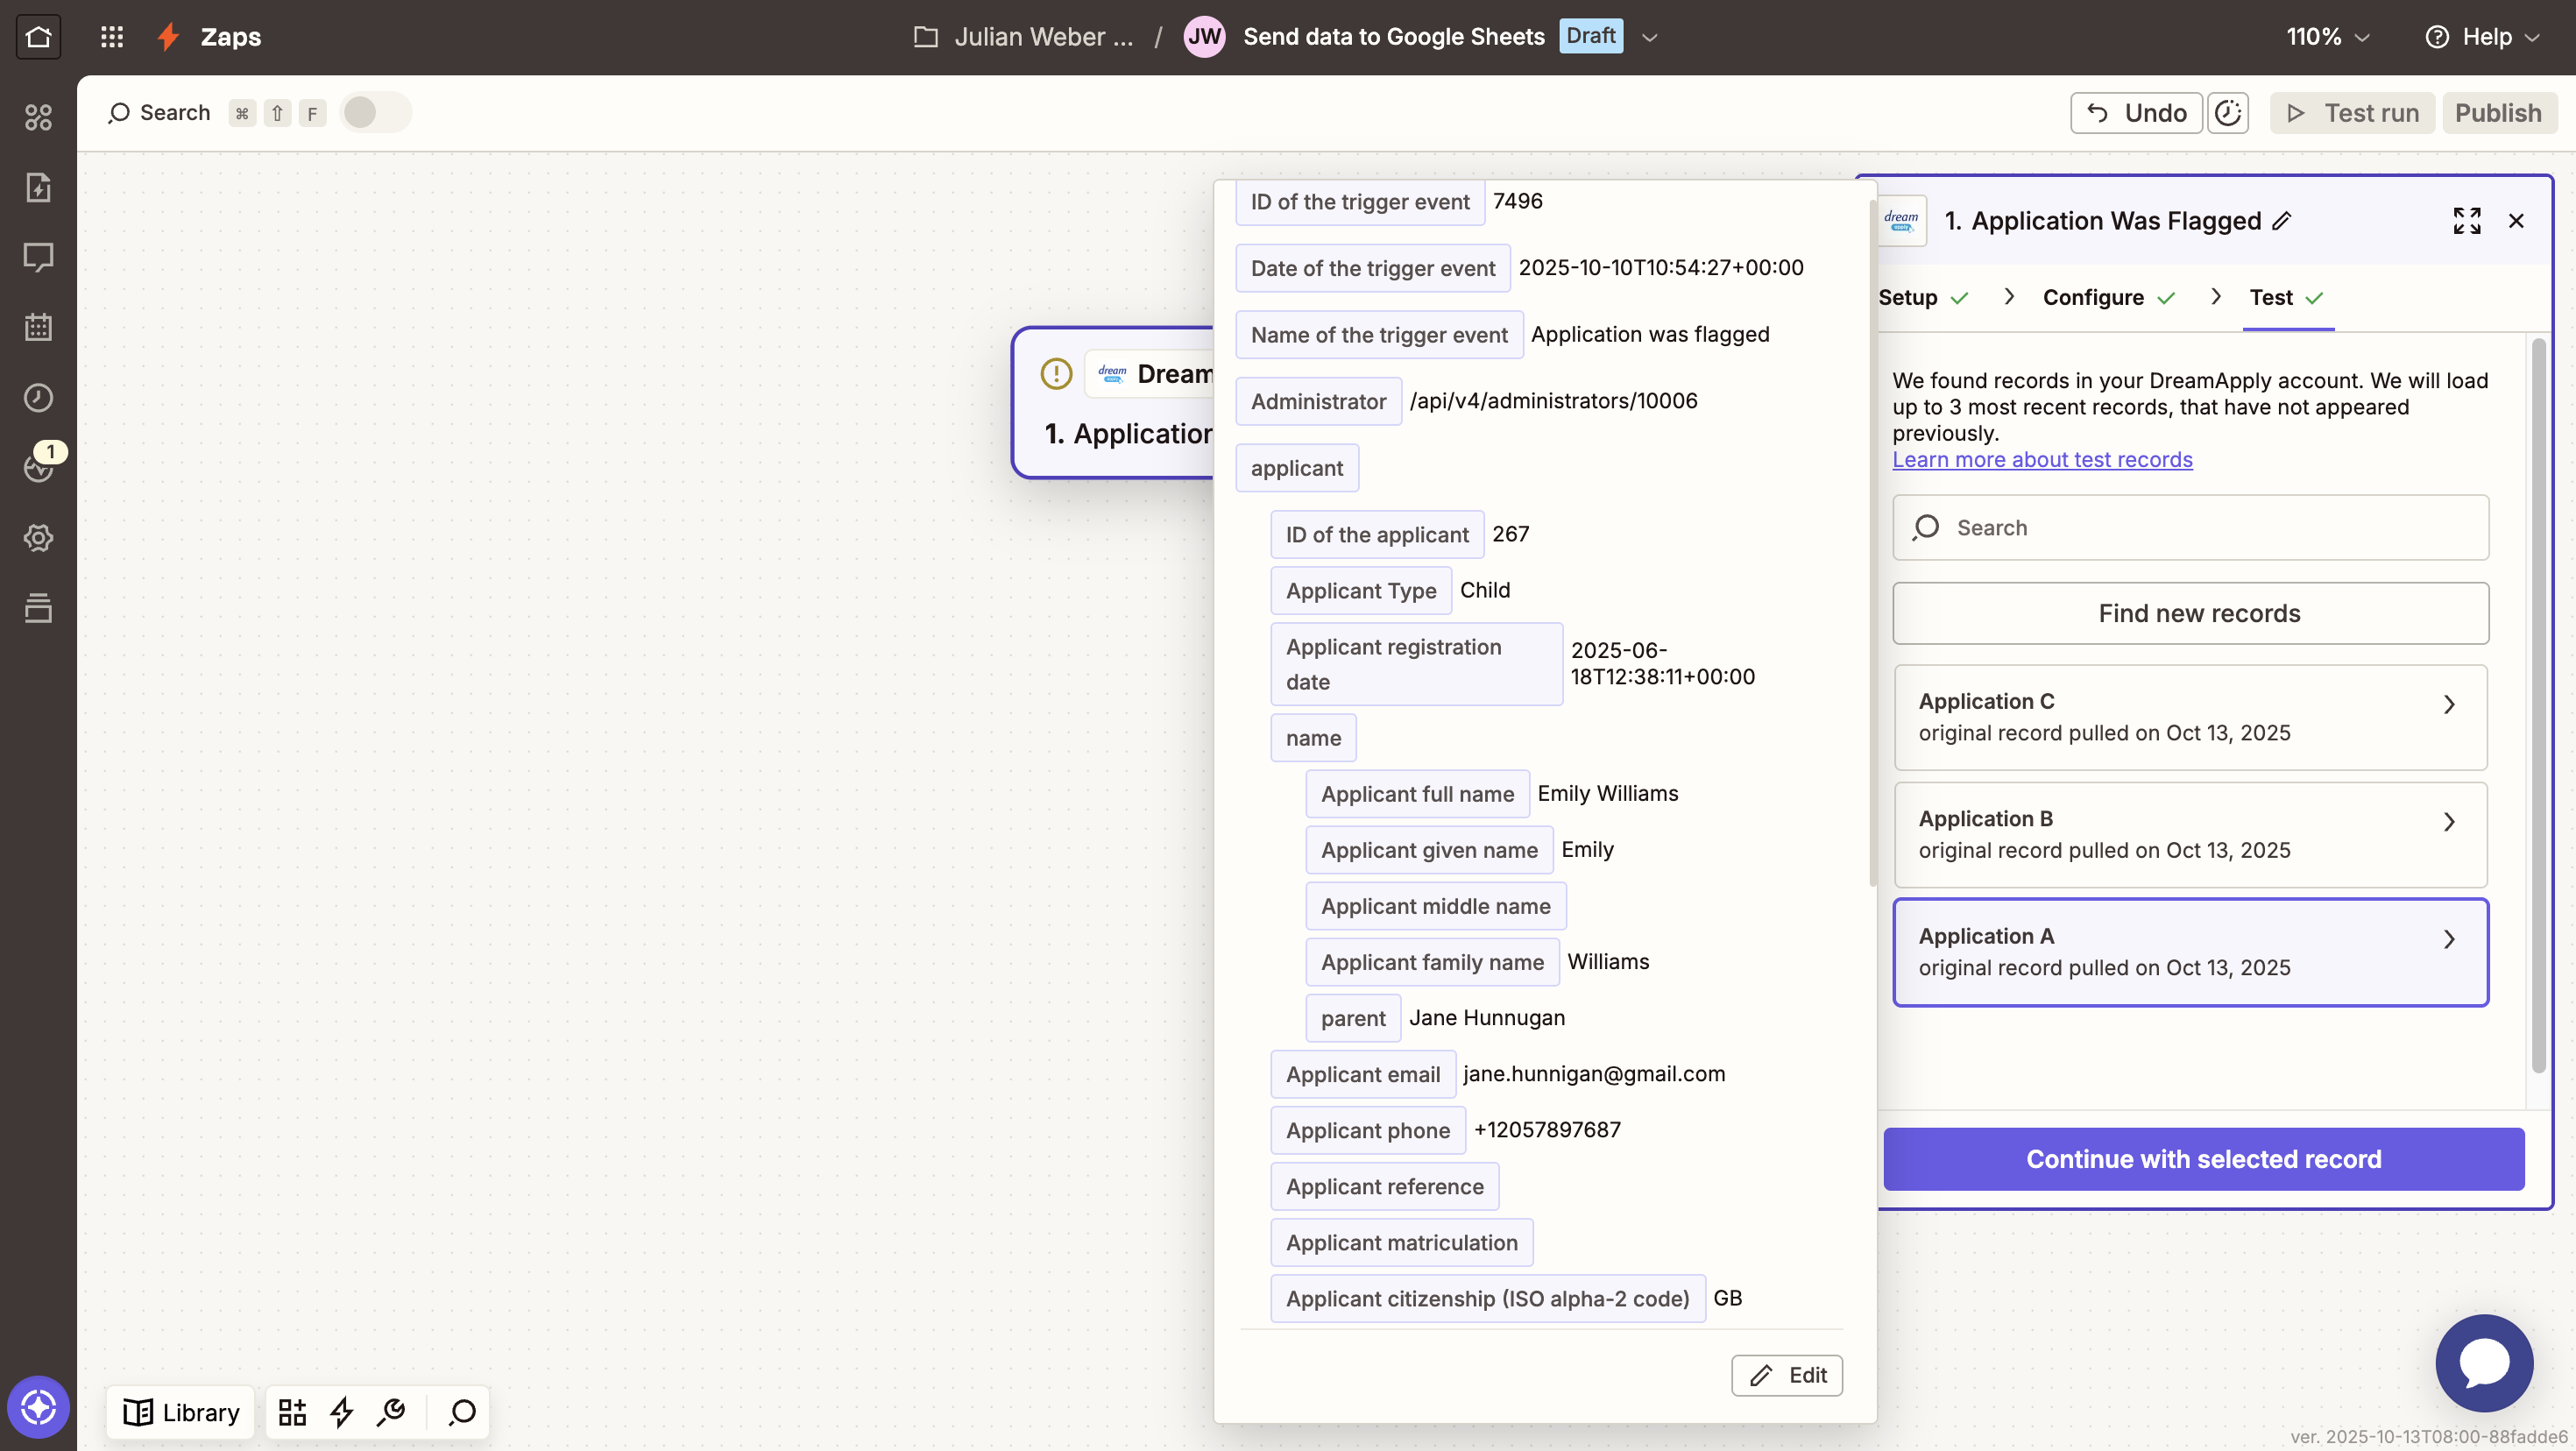
Test the trigger to make sure that DreamApply sends sample records to Zapier.
Step 3. Add the Google Sheets action
Next, we will define what must happen after the trigger fires — Zapier must add a row with applicant data to a spreadsheet.
In the main area, below the added trigger, click the plus icon to add an action.
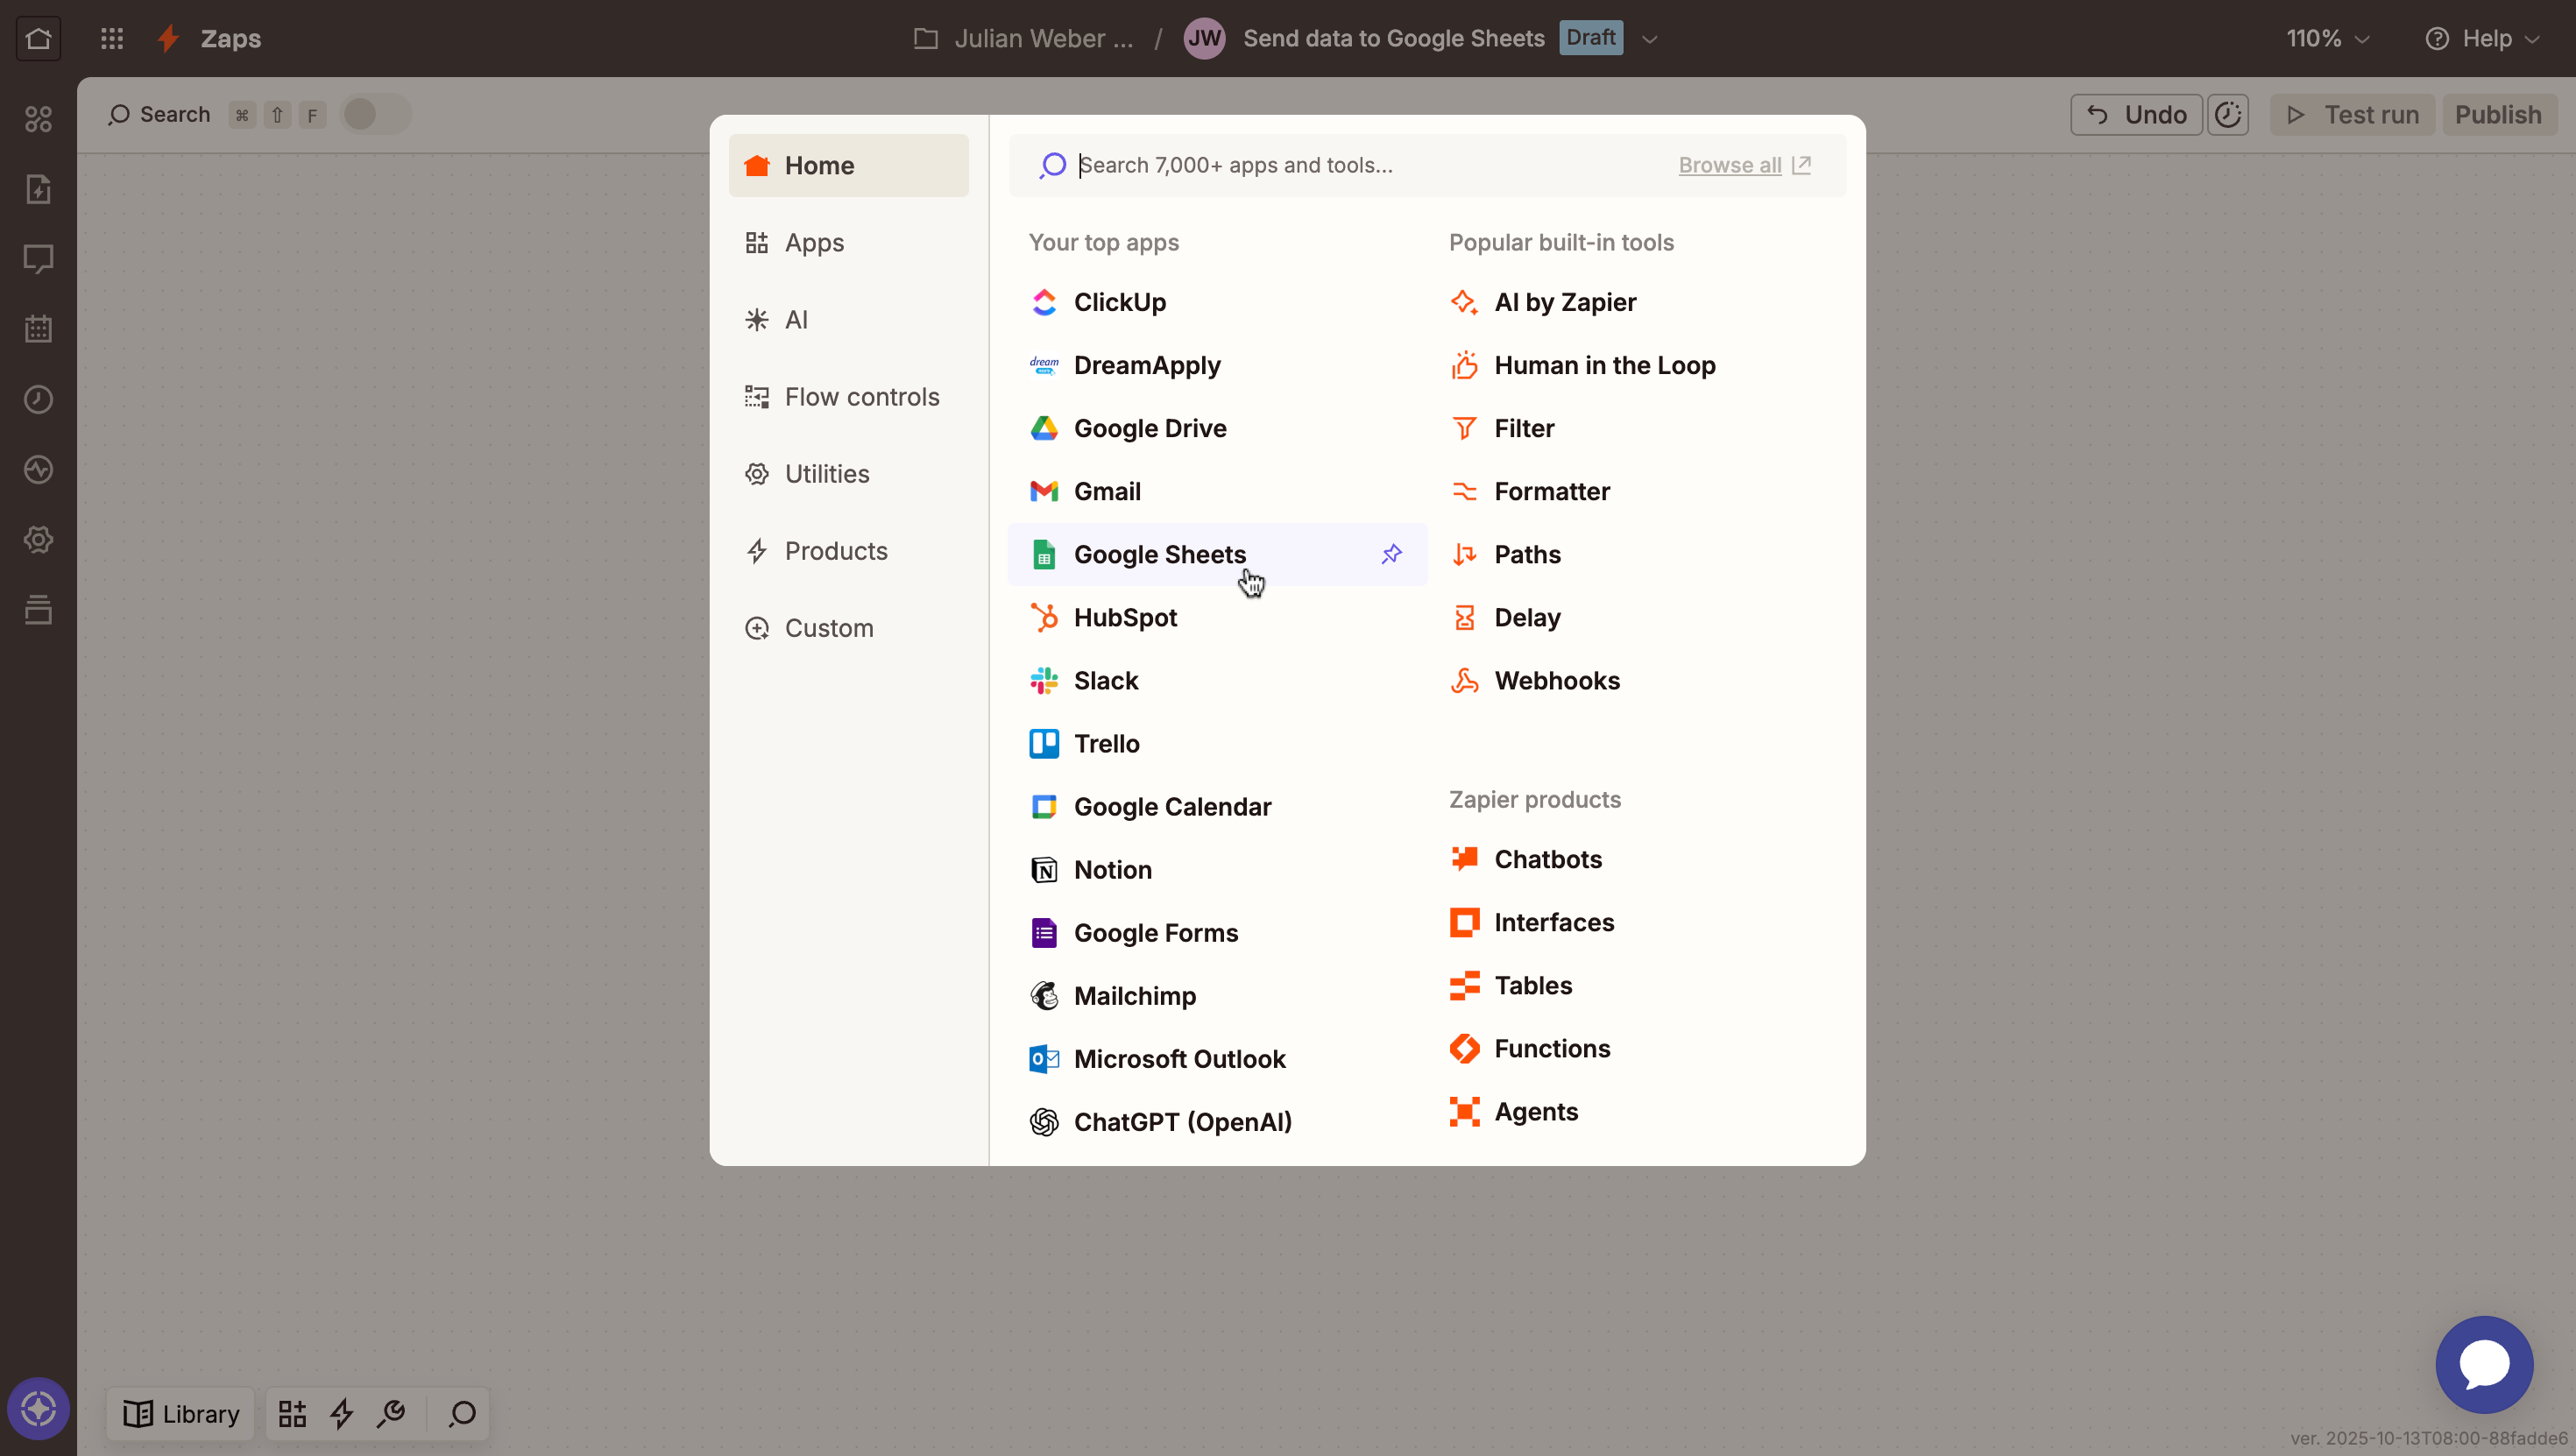
Search for and select Google Sheets.
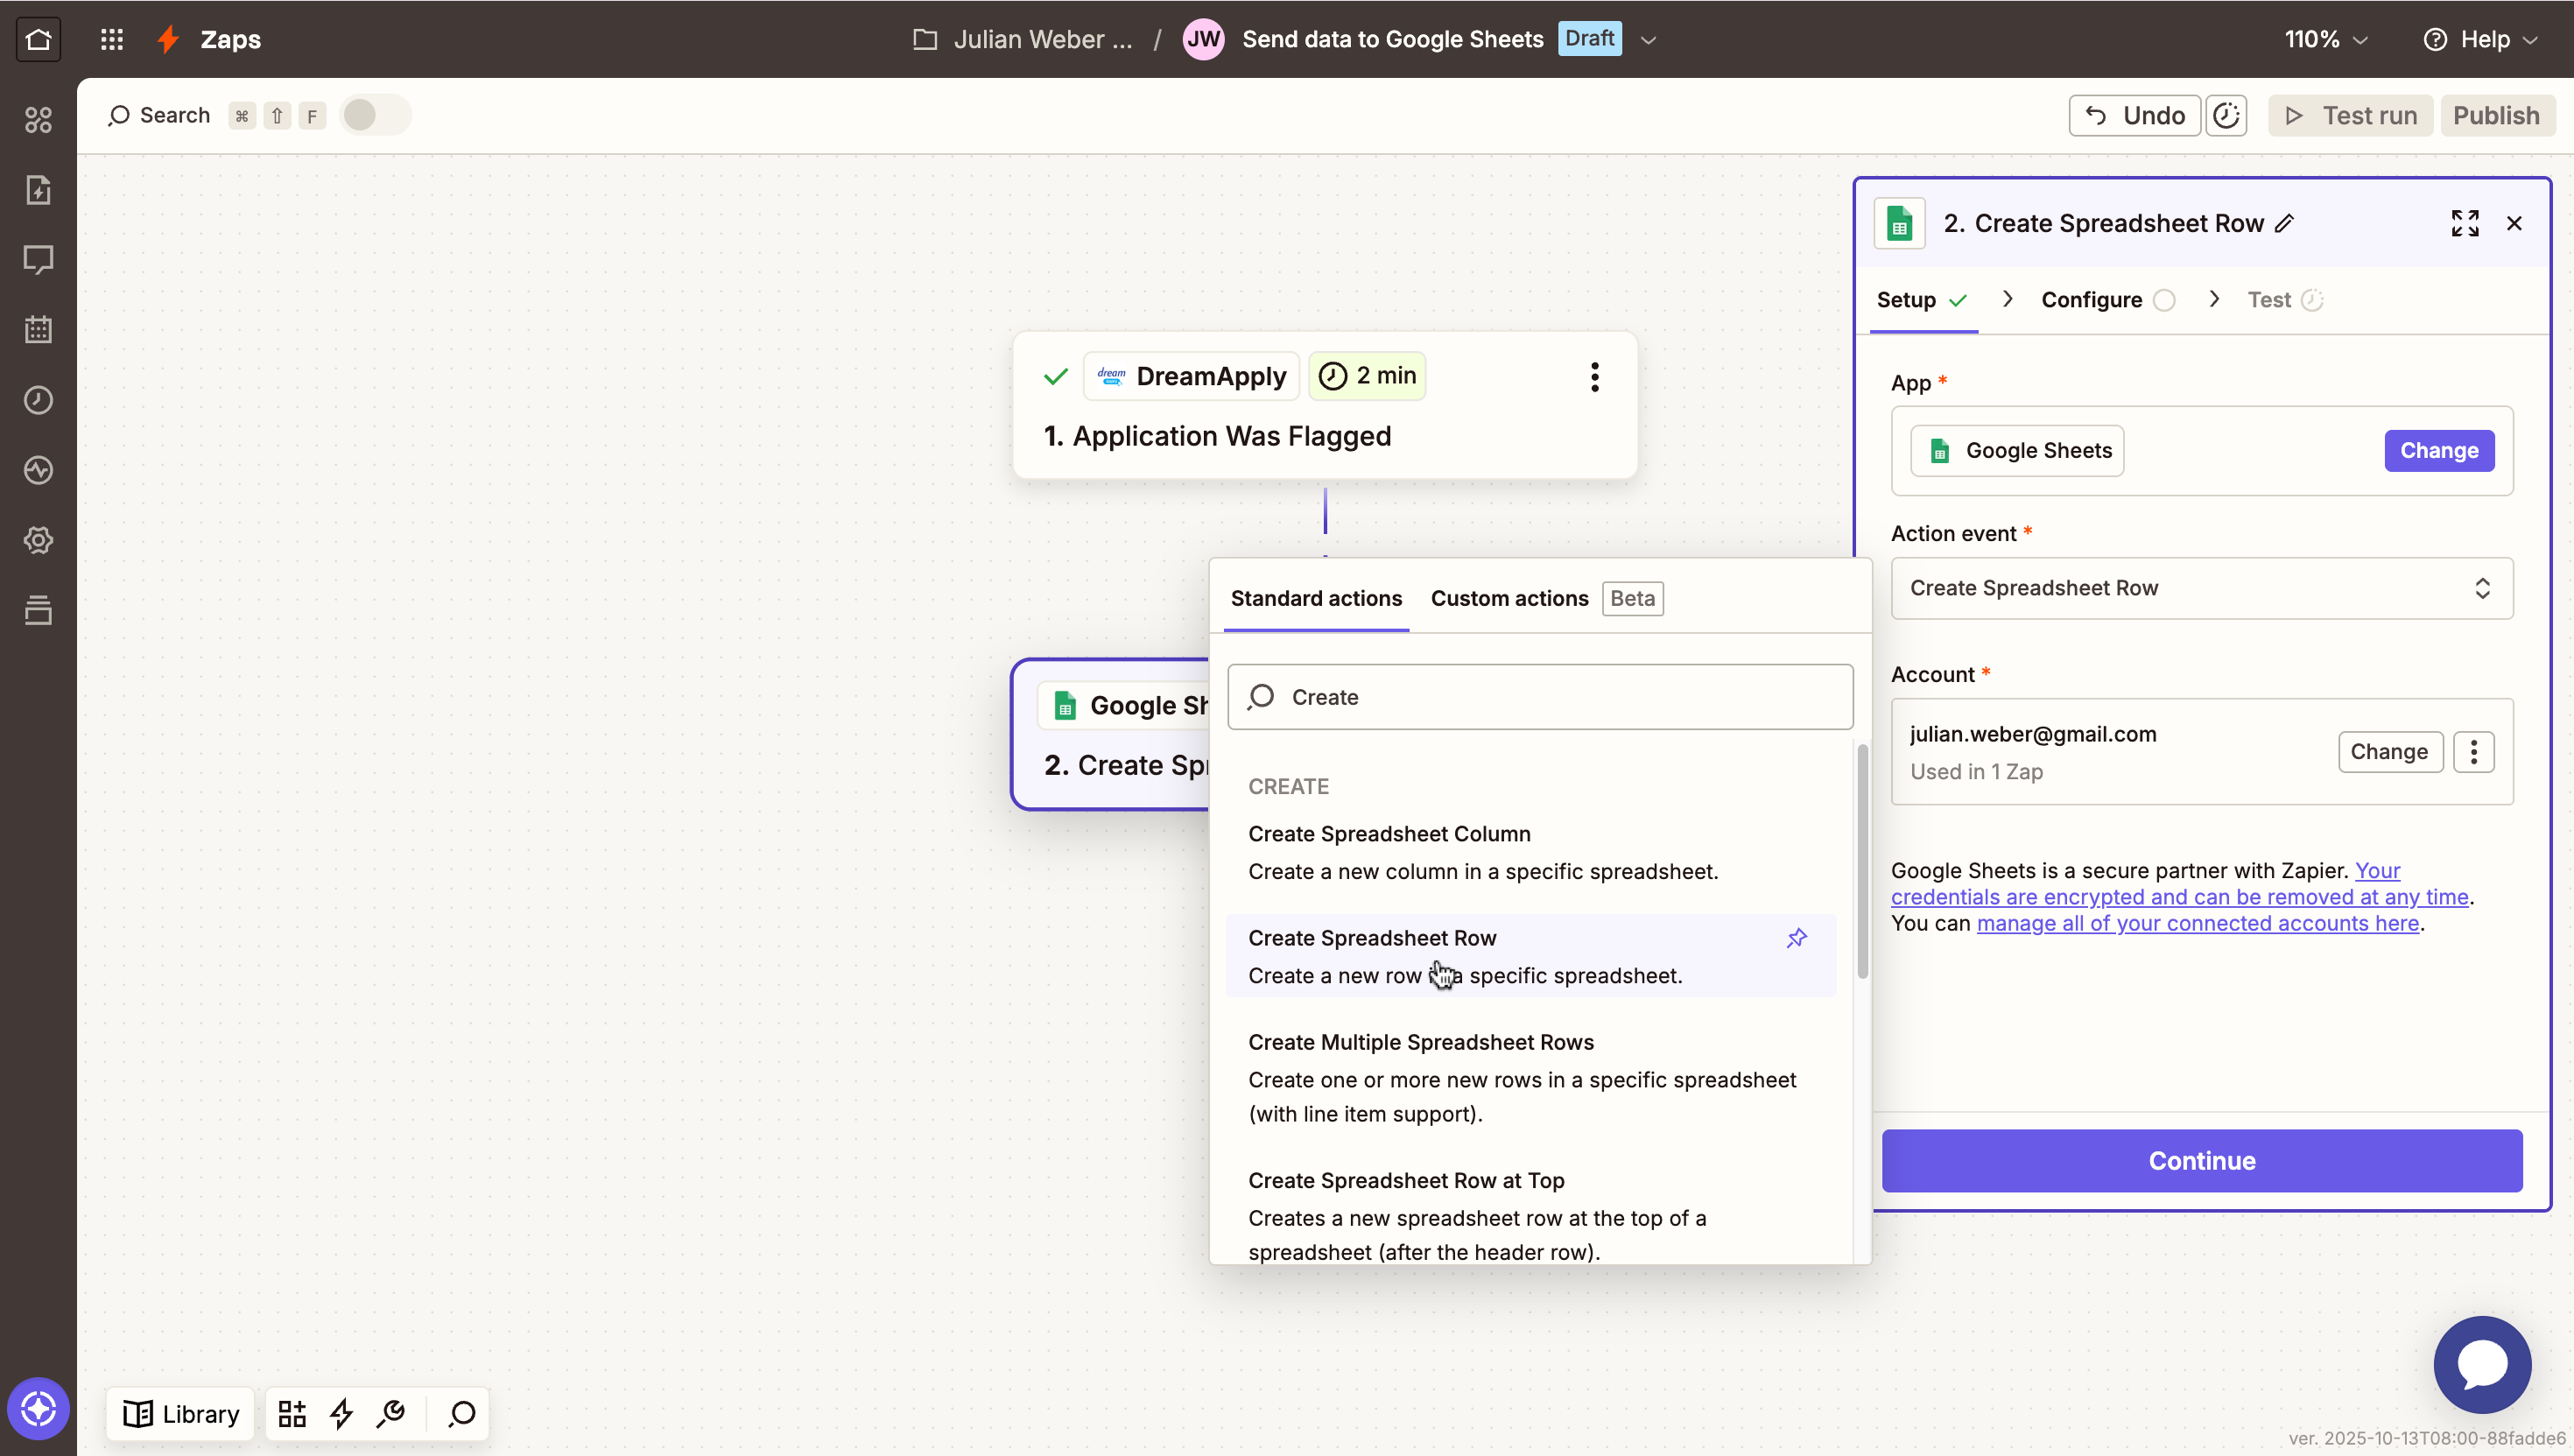
In the pane on the right, from the Action event list, select Create Spreadsheet Row or Create Spreadsheet Row at Top.
Use the field below to log in to your Google account and authorize access to Zapier. Then, click Continue.
Select the target drive, spreadsheet and worksheet where data must be added.
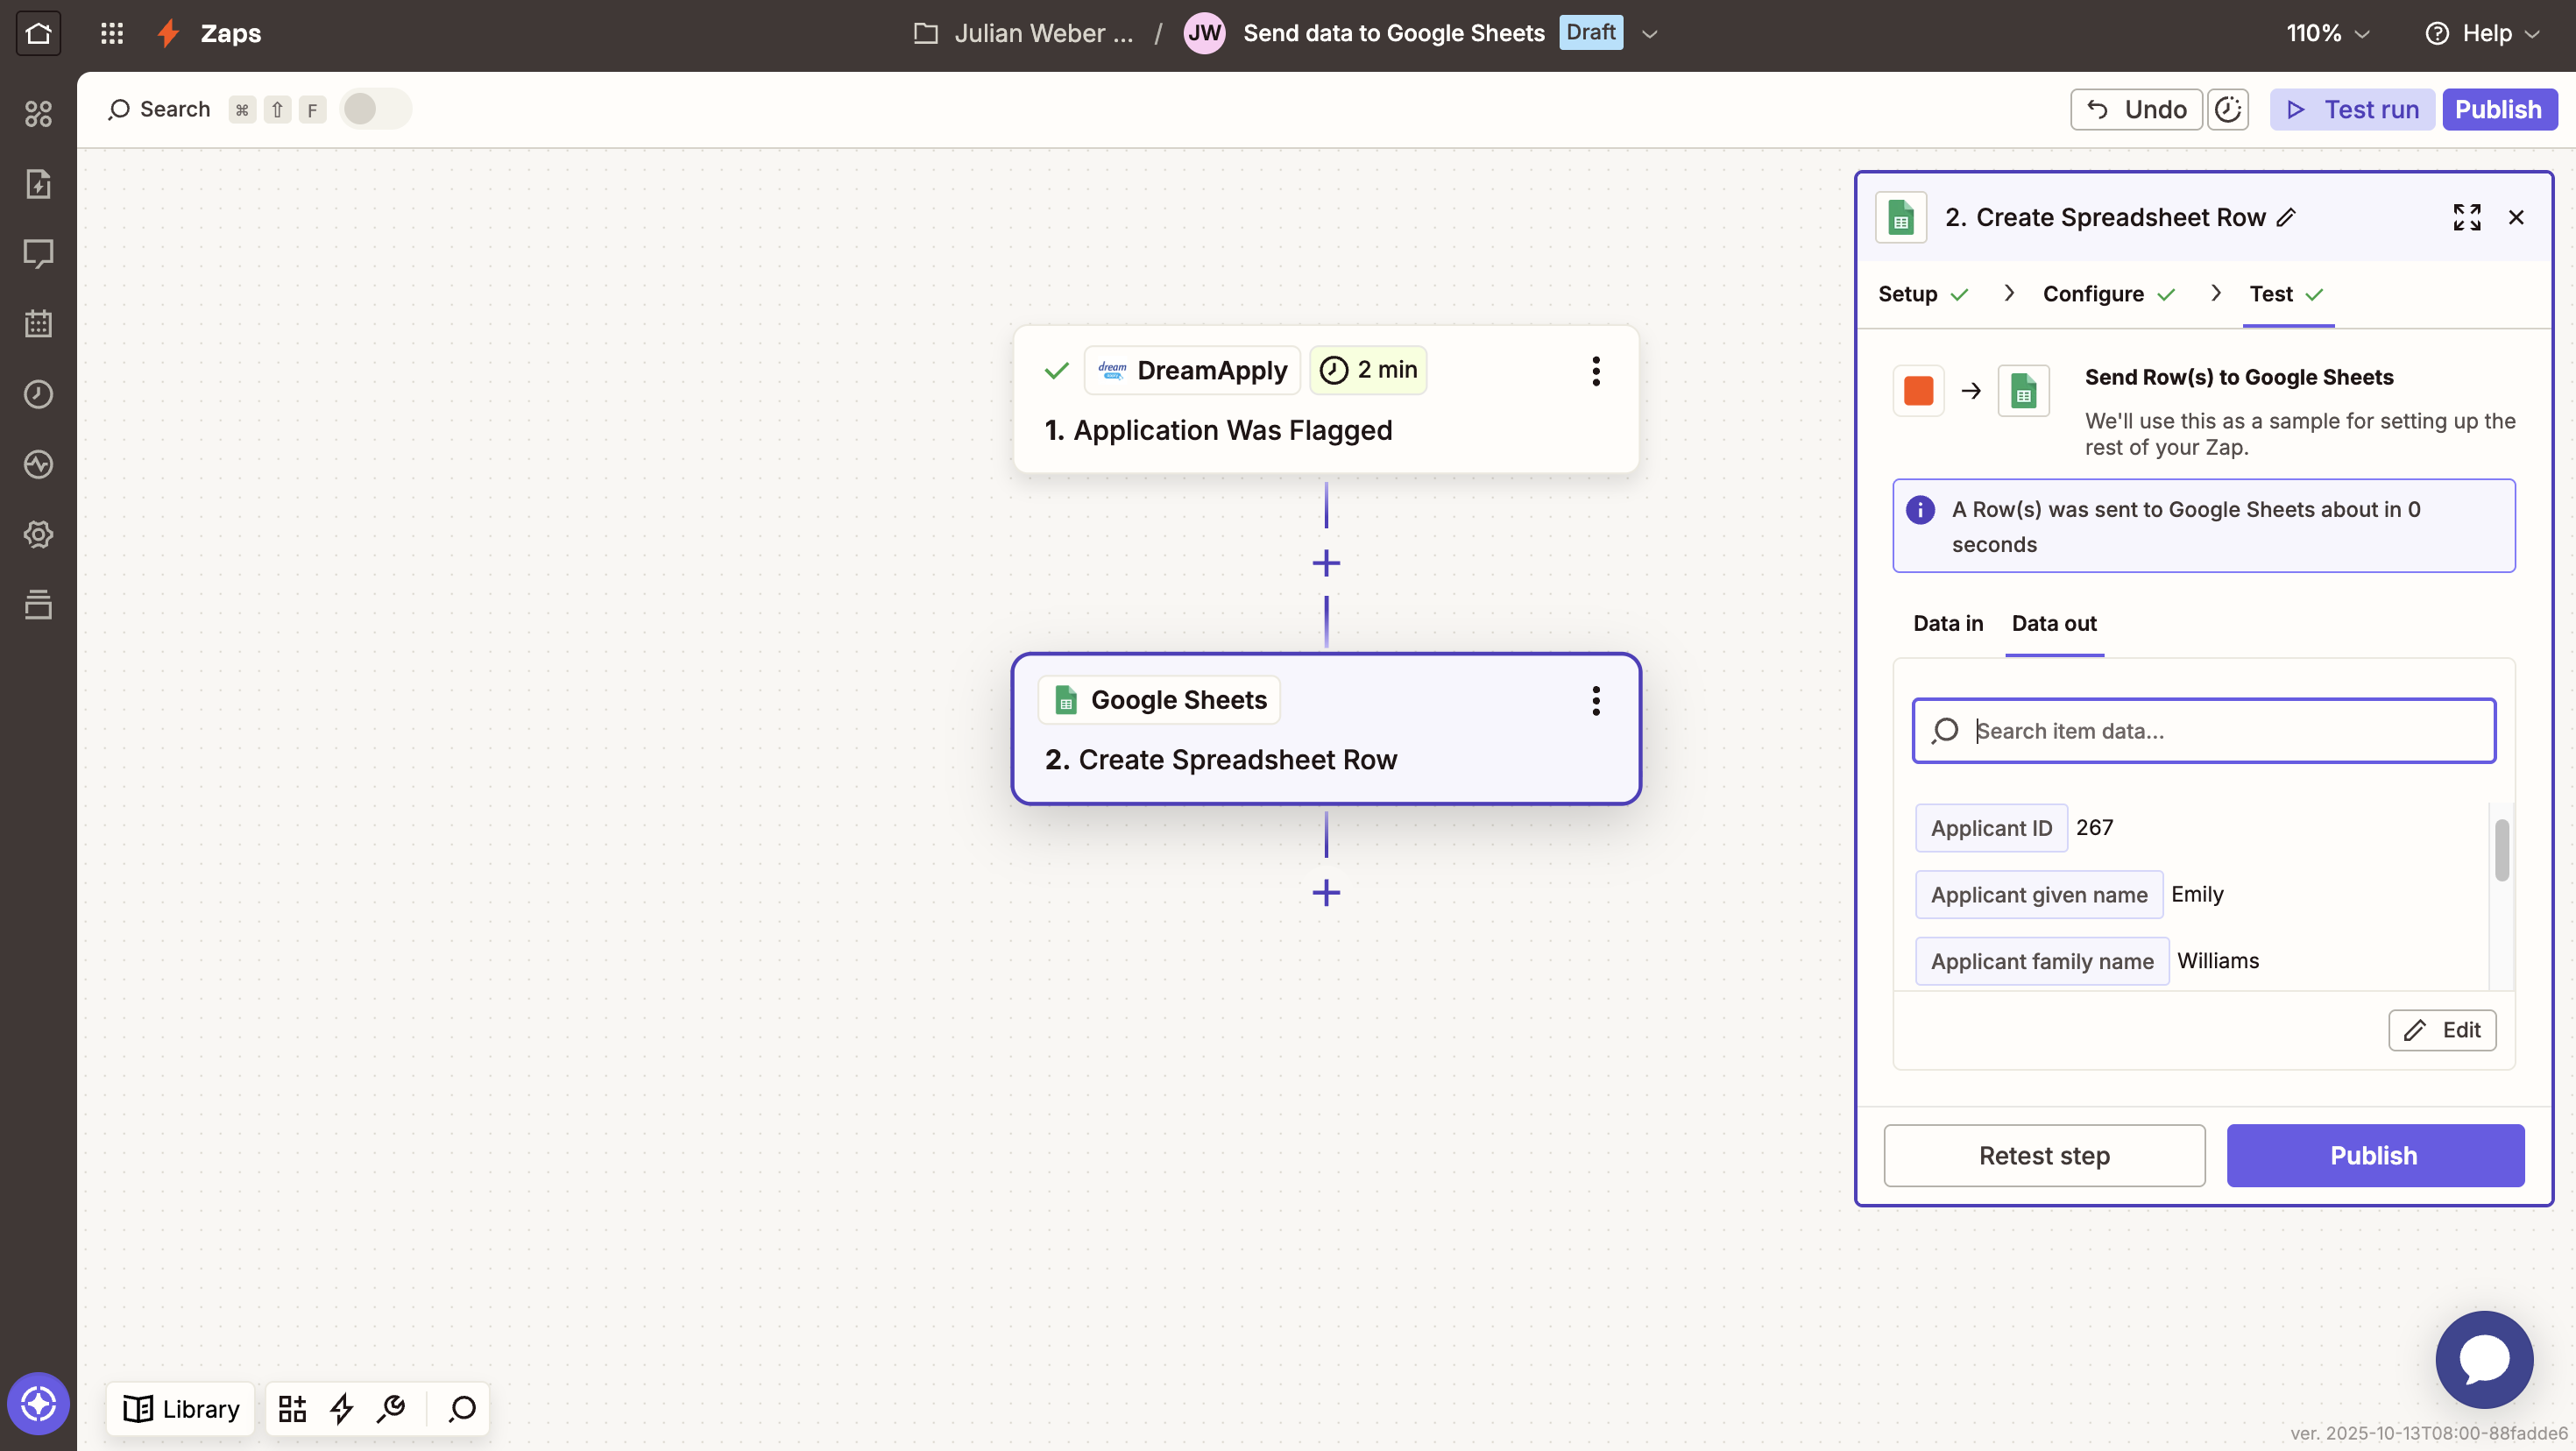
Map each data field from DreamApply to corresponding columns in the spreadsheet and click Continue.

Test the trigger to verify that Zapier sends applicant data to Google Sheets.
Step 4. Publish the Zap and verify data export
Finally, we will activate the created Zap and verify that the data transfer works correctly.
- In the top right corner of the Zapier portal, click Publish. Once activated, the automation workflow will run in real time whenever the flag is assigned in DreamApply.
- In DreamApply, assign the flag to any of the applications.
- Open the connected spreadsheet and make sure that exported data appear correctly.