Set up landing pages
Roles
These roles reflect the default DreamApply setup.
You can define custom roles based on your
institution's needs. Learn more →:
You can define custom roles based on your
institution's needs. Learn more →
When users click campaign links, you often need to send them to a different destination, for example:
- Programme catalog
- Programme description page
- External partner site
To capture clicks on these links and connect these clicks to registered applicants, you can set up landing pages in DreamApply.
How landing pages work
To set up a landing page, you need to create an entry point and configure the redirect behavior for it. The landing page acts as a tracker: it logs the user click, captures the entry point ID and then redirects the user to their final destination.
You can configure the redirect behavior in several ways:
- Redirect to a DreamApply page: Choose a page on the DreamApply portal.
- Redirect to a fixed page: Redirect users to a specific URL, either on the DreamApply portal or an external website.
- Set up a dynamic redirect: Use the entry point URL to construct campaign links that include the
redirectparameter, for example:https://apply.your-university.org/enter/4?redirect=https://your-uni.edu/programmes/msc/finance. This method is useful if you want to reuse the same entry point URL with different destinations and track them all with the same entry point.
Before you begin
To manage entry points, your account must have the Superuser or Marketing administrator role or the entry-points permission.
Create an entry point
To create a landing page:
In the main menu, under Marketing, select Entry points.
At the bottom of the entry point list, click Add a new entry point.
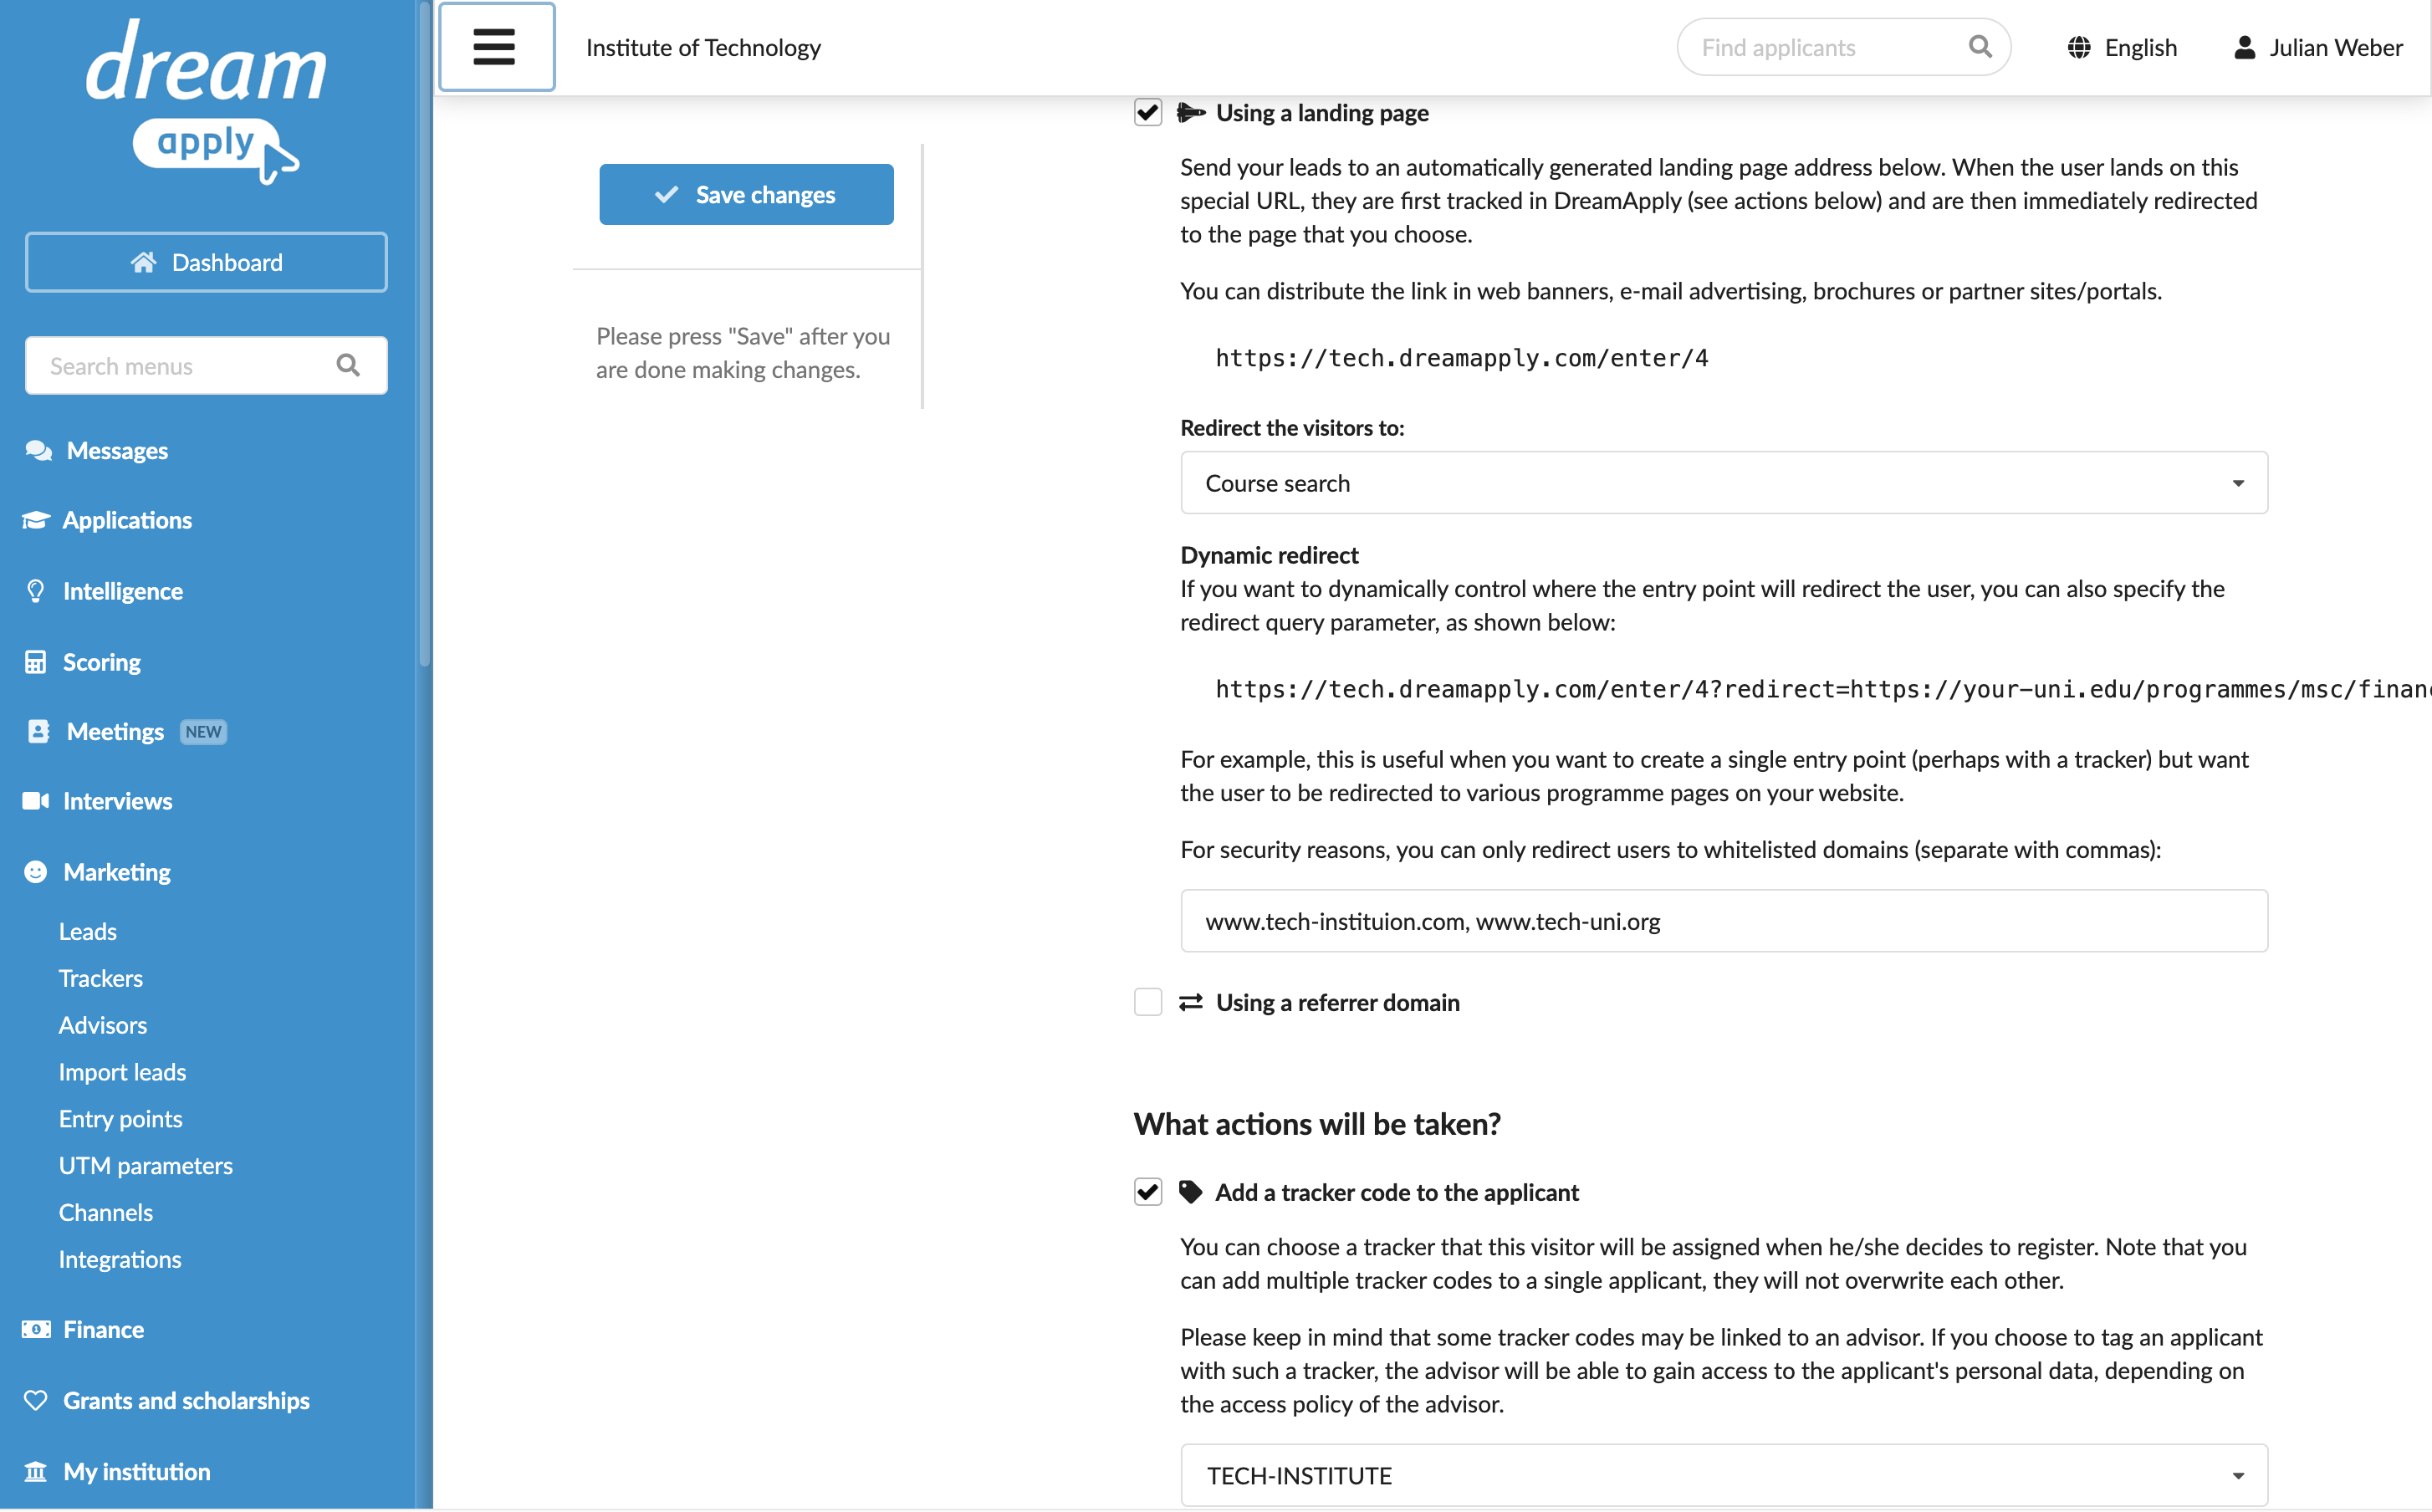
In the How is the visitor identified? section, select the Using a landing page check box.
- To redirect users to a page on the DreamApply portal, from the Redirect the visitors to list, select the page.
- To redirect users to a specific URL, from the Redirect the visitors to list, select Some other URL and specify an absolute or relative path to the page.
- To use the same entry point for dynamic redirects, make note of and copy the displayed entry point URL. You will use this URL to construct campaign links using the
redirectparameter.
To ensure dynamic redirects work correctly and prevent open redirect issues, use the field below to explicitly list all domains where your destinations are hosted. Otherwise, dynamic redirects will be blocked.In the What actions will be taken? section, select the tracker to assign to leads.
At the top of the form, click Save changes.
Publish the entry point URL
Once you create an entry point in DreamApply, you can place its URL in campaign materials such as online ads, emails, posts or banners. For example:
https://apply.your-university.org/enter/4for redirects to DreamApply pages and specific URLshttps://apply.your-university.org/enter/4?redirect=https://your-uni.edu/programmes/msc/financeor
https://apply.your-university.org/enter/4?redirect=https://your-uni.edu/programmes/msc/bankingfor dynamic redirects
As a result, DreamApply will route traffic through this entry point and capture the tracking data before users reach their final destination.