Use tracking templates
Roles
These roles reflect the default DreamApply setup.
You can define custom roles based on your
institution's needs. Learn more →:
You can define custom roles based on your
institution's needs. Learn more →
If your institution uses Google Ads to promote campaigns, you can set up tracking templates in DreamApply. Tracking templates allow you to measure how effective your ads are, even if these ads direct users to external websites.
How tracking templates work
A tracking template is a URL structure used in advertising platforms to monitor how users interact with ads. Tracking templates are set up in DreamApply and have the following format:
https://apply.your-university.org/enter/9-06017631?redirect={lpurl},
where:
https://apply.your-university.org/enter/9-06017631is a DreamApply entry point that logs the tracking data when a user visits the URL.redirect={lpurl}is a part that redirects the user to their final destination. At click time, Google dynamically replaces{lpurl}with the actual URL of the intended webpage specified in Google Ads settings.
Tracking templates are set up and used in the following way:
The marketing team creates a new entry point in DreamApply, selects it to use the Google Ads tracking and defines a tracker for this entry point.
DreamApply generates and displays a unique tracking template URL for this entry point.
The marketing team sets up Google Ads to use the tracking template and defines the following settings:
- Tracking template: The URL provided by DreamApply, for example,
https://apply.your-university.org/enter/9-06017631?redirect={lpurl} - Final URL: The actual page where users must land after clicking the ad, for example,
https://your-university.org/admission-campaign - UTM parameters: Optional UTM values for campaign tracking
- Tracking template: The URL provided by DreamApply, for example,
When a user clicks the ad, Google dynamically replaces parameters in the tracking template with real campaign values and creates a complete URL, for example:
https://apply.your-university.org/enter/9-06017631?redirect=https://your-university.org/admission-campaign&utm_source=googleads.The user is first directed to the DreamApply entry point:
https://apply.your-university.org/enter/9-06017631, which logs the tracking data and records the click event.After logging, DreamApply immediately redirects the user to their final destination:
https://your-university.org/admission-campaign.The user may continue browsing the website. If they later return to DreamApply and register, DreamApply retrieves the previously logged data and assigns the tracker associated with that entry point to the lead.
Finally, the marketing team can use DreamApply to analyze the captured data and see which campaigns are generating clicks, return visits and registrations.
Before you begin
- To manage entry points, your account must have the
SuperuserorMarketing administratorrole or theentry-pointspermission. - To manage Google Ads, you must have an account in the Google Ads platform.
Create an entry point
To start using tracking templates, you must create an entry point in DreamApply and get a tracking template URL for your Google Ads campaigns.
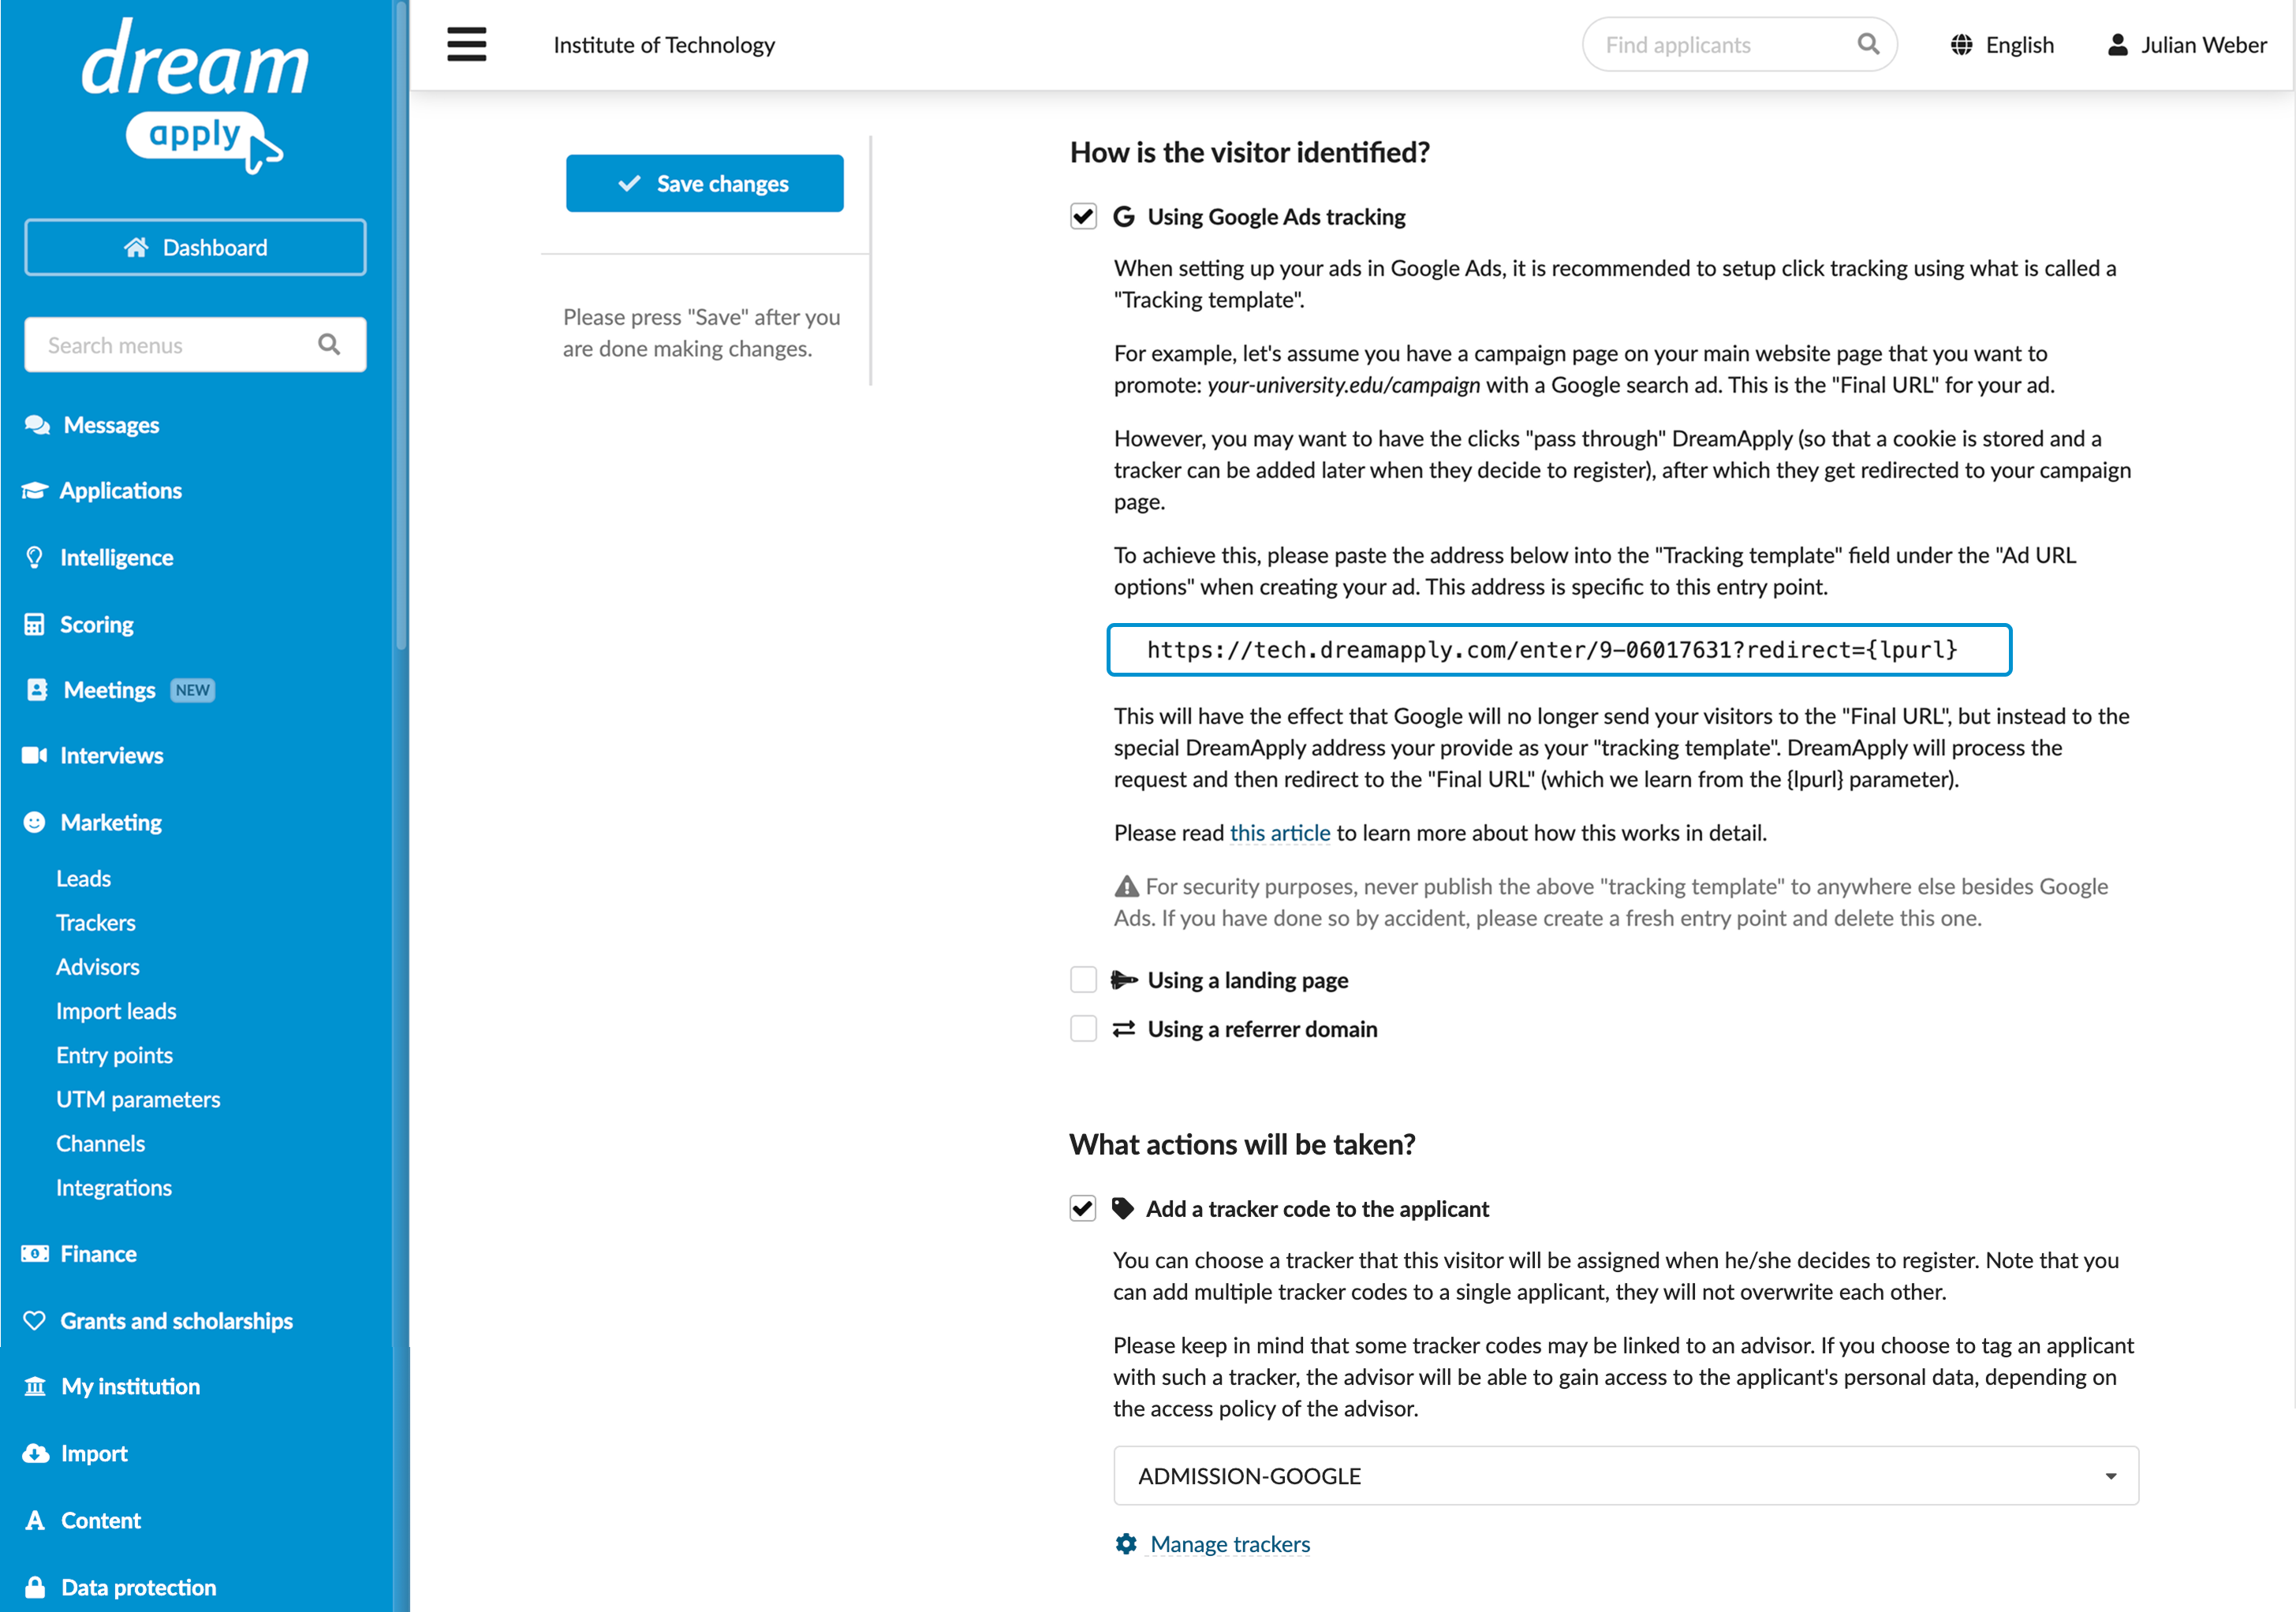
- In the main menu, under Marketing, select Entry points.
- At the bottom of the entry point list, click Add a new entry point.
- In the How is the visitor identified? section, select the Using Google Ads tracking check box. Make note of and copy the displayed URL. You will use it to set up your ads and campaigns in Google Ads.
- In the What actions will be taken? section, select the tracker to assign to leads.
- At the top of the form, click Save changes.
Set up the tracking template in Google Ads
You can set up tracking templates at different levels in Google Ads:
- Account
- Campaign
- Ad group
- Individual ads
This guide provides an example for setting up a tracking template at the account level. For detailed instructions on other levels, see the Google Ads documentation.
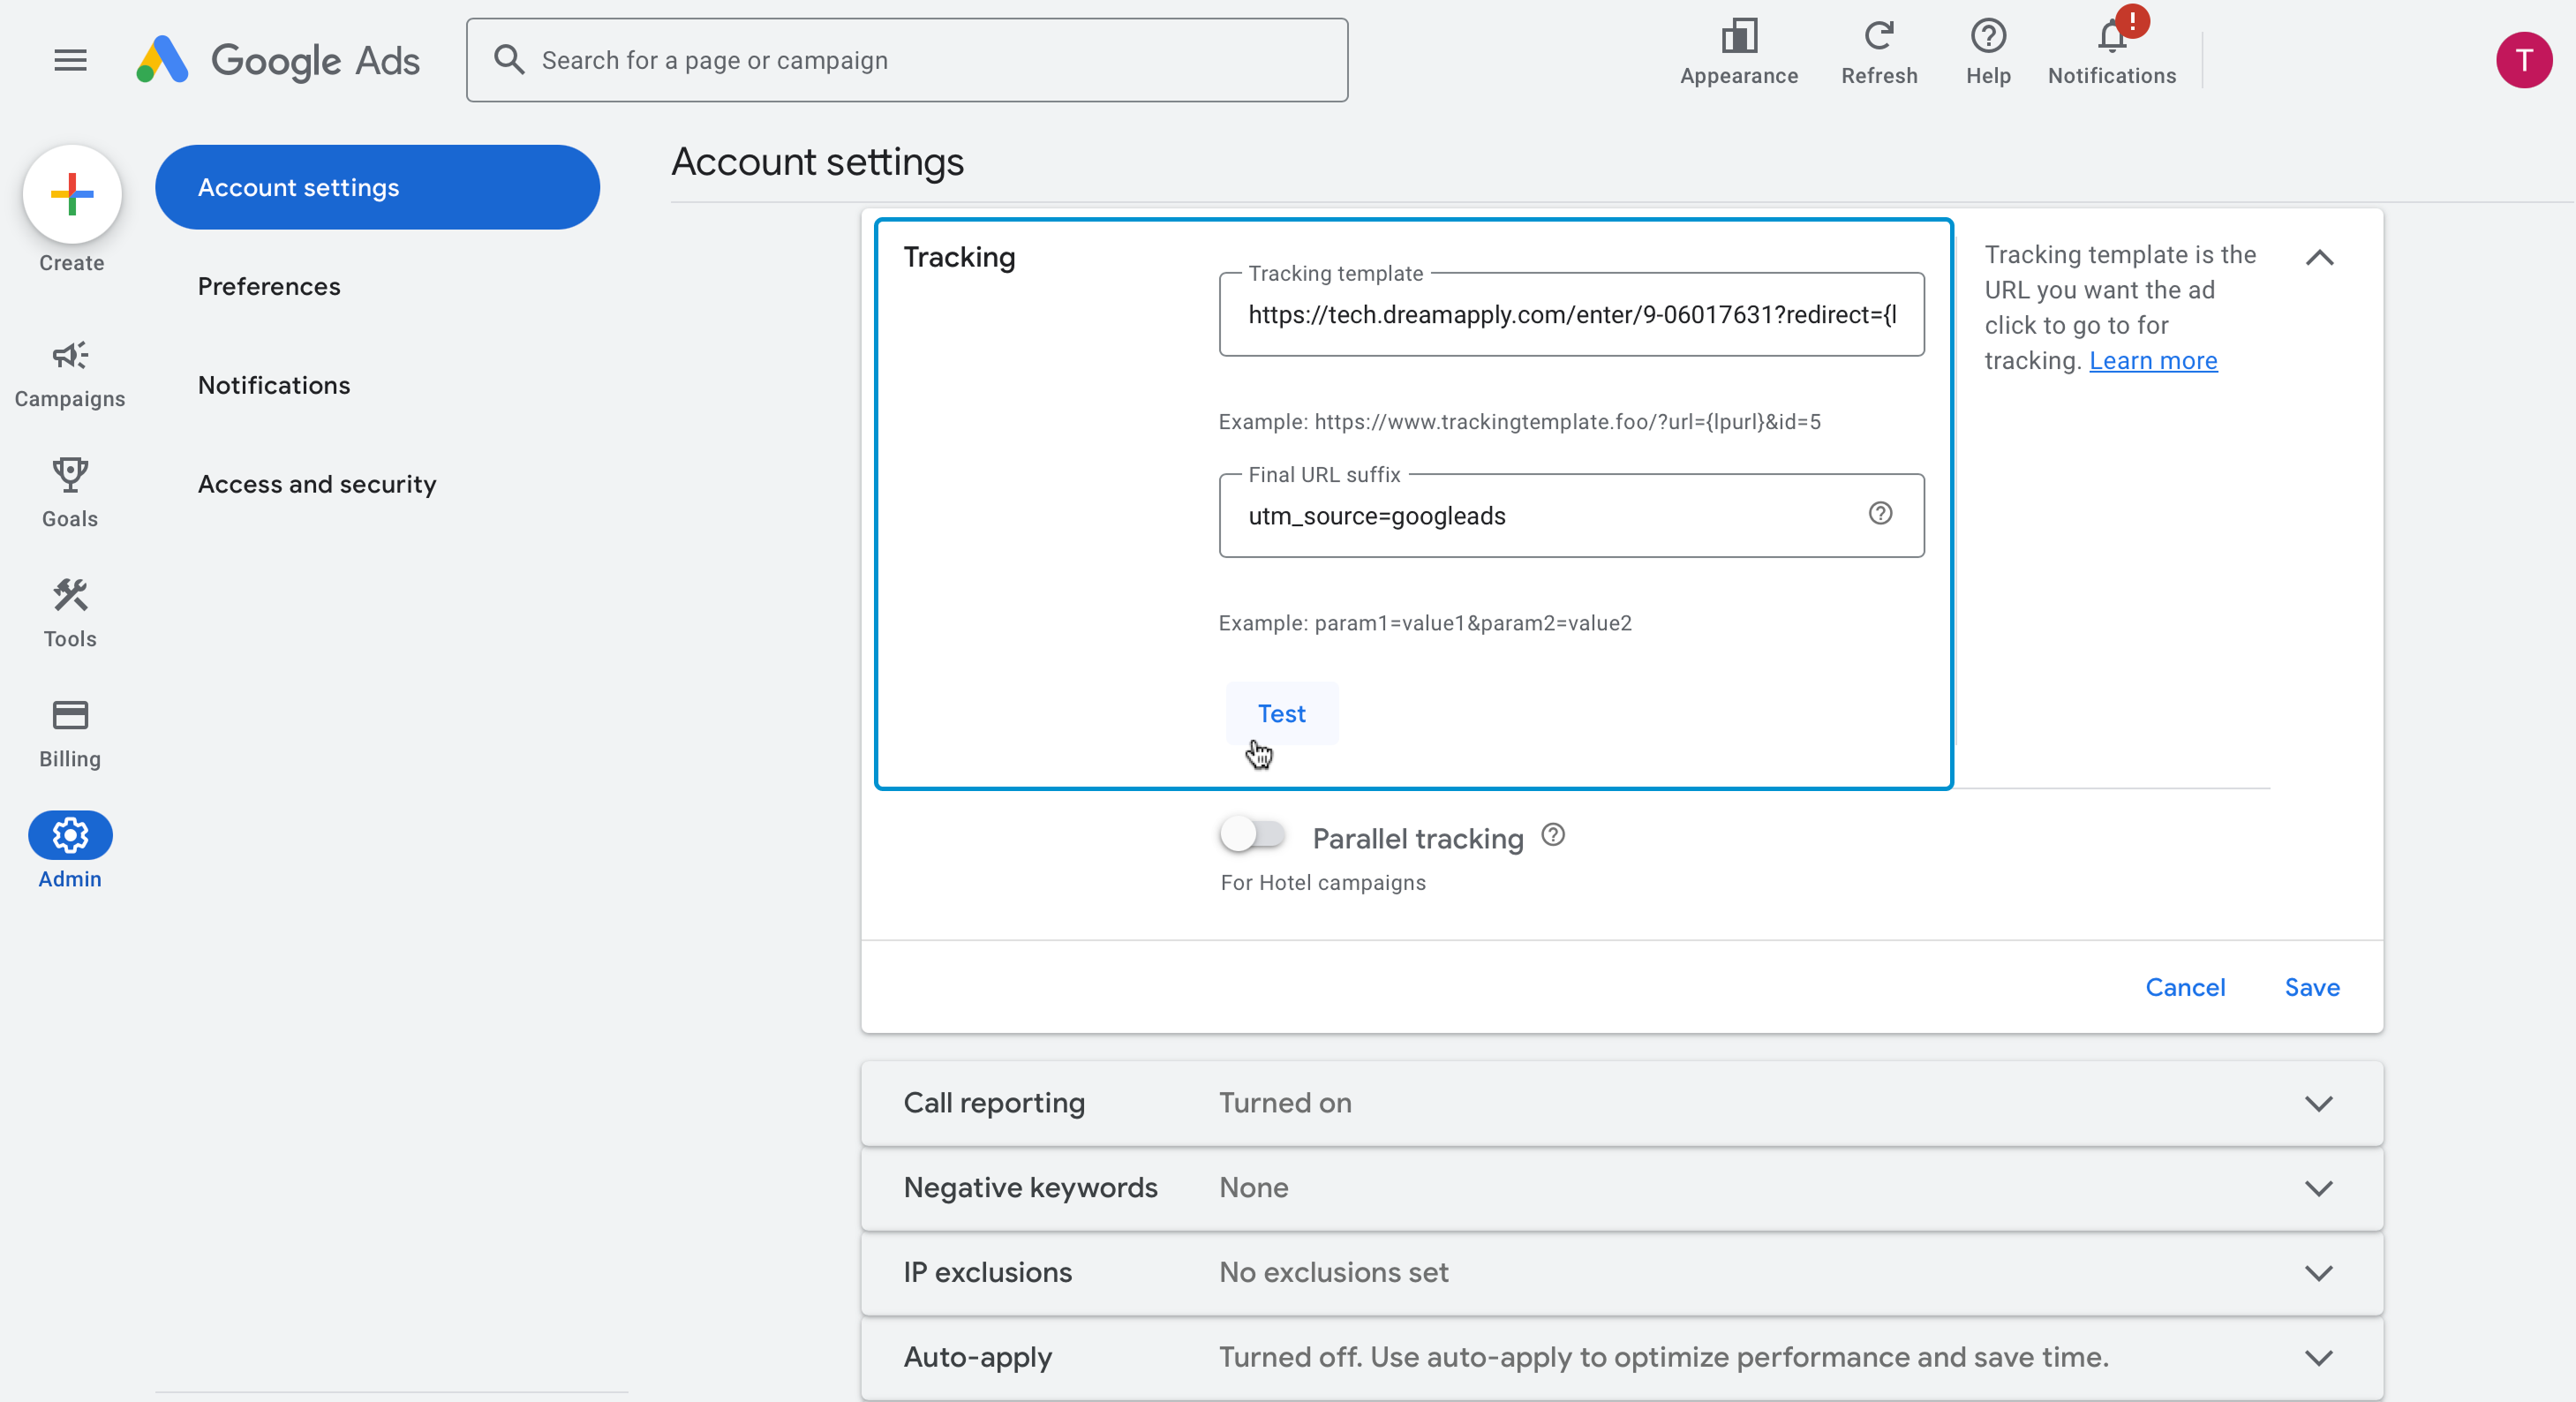
In the left pane of the Google Ads console, select Admin.
Expand the Tracking section.
In the Tracking template field, paste the tracking template URL obtained from DreamApply.
(Optional) In the Final URL suffix field, specify the UTM parameters to be added to the URL.
DreamApply records standard UTM parameters:
utm_id,utm_source,utm_medium,utm_campaign,utm_termandutm_content. Custom UTM parameters are not supported.Click Test to test your tracking template.
Save the changes.