Calculate compensation
Assume your institution works with Advisors to help recruit applicants. You want to track which applicants they have brought and calculate their compensation based on results — such as how many applicants were enrolled.
To do this, we will set up an Advisor account with a dedicated tracker, register new users through the Advisor and generate reports showing their performance.
Before you begin
Make sure your account has the Superuser role. In a real case, roles can be configured differently.
Step 1. Create an Advisor account.
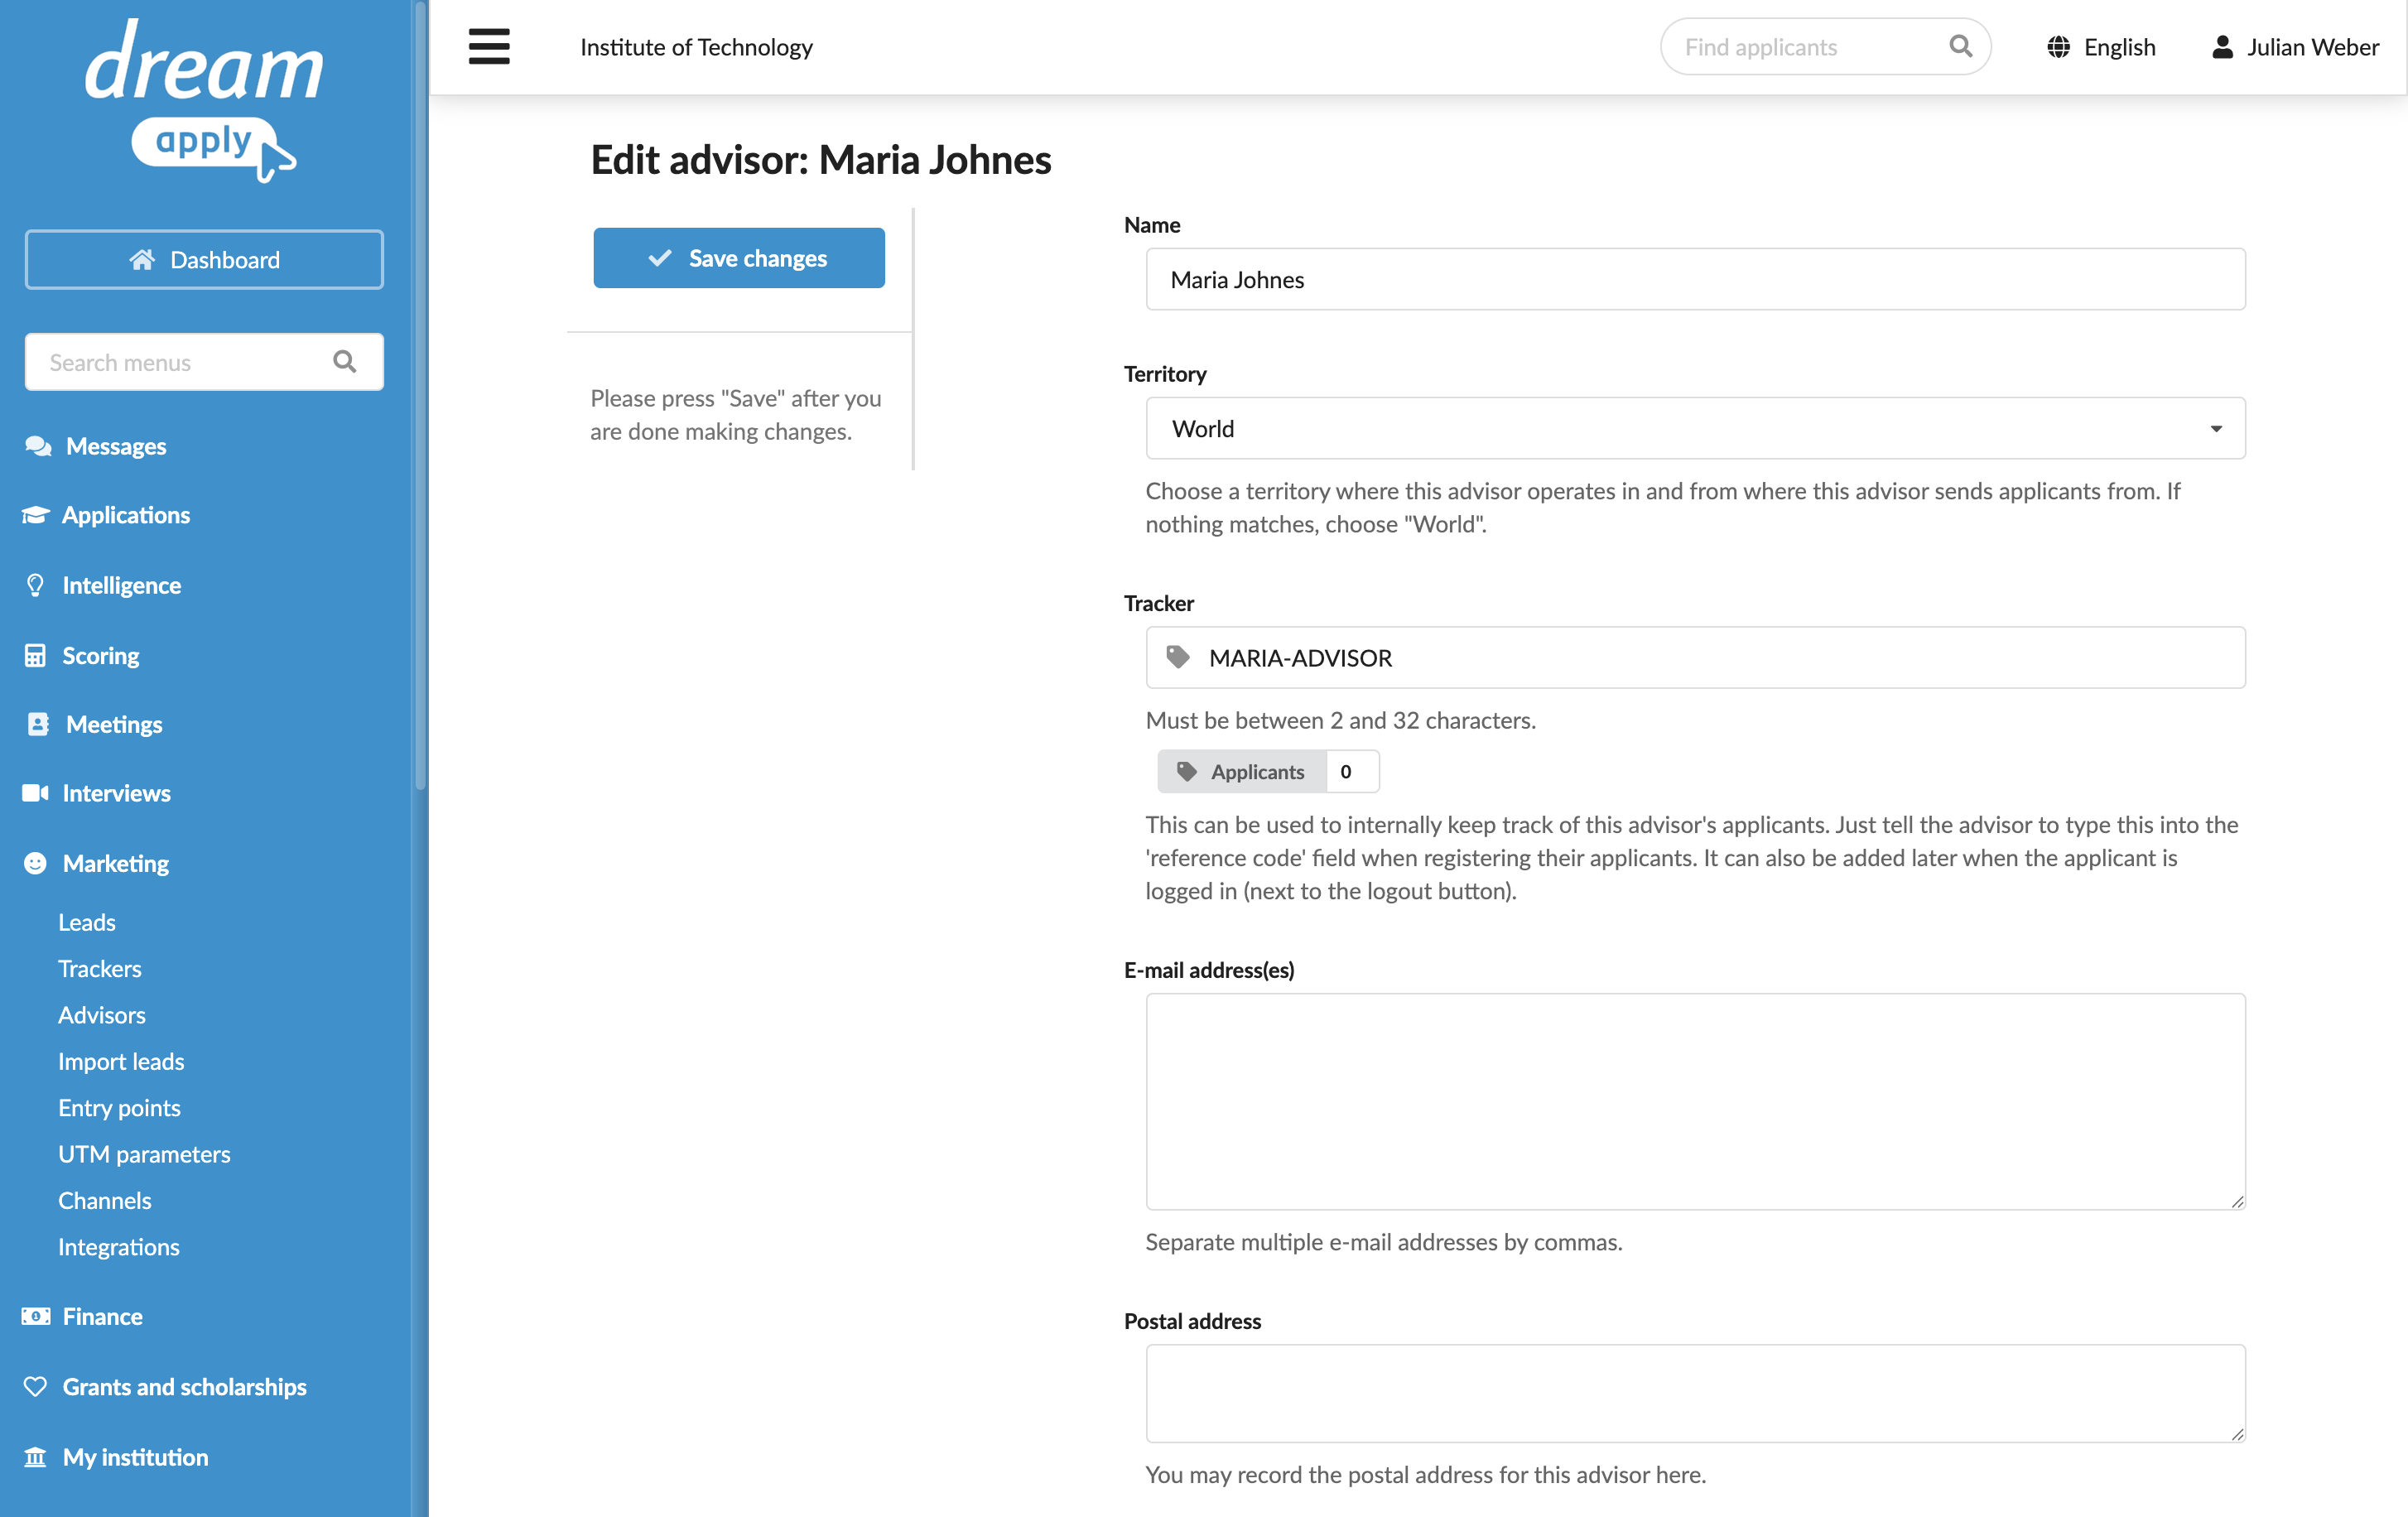
First, we need to set up an account for the Advisor in DreamApply.
- In the main menu, under Marketing, select Advisors.
- Click New advisor.
- Specify the name and tracker code for the Advisor.
- In the Self-service section, click Enable self-service, copy the displayed code and save it for later.
- Select the Ability to manage applications, offers, tasks option.
- Select the Allowed to register new applicants check box.
- Leave the default settings in other sections and save the changes.
Step 2. Specify the cost for the tracker code
Next, we need to update the tracker settings to include the compensation cost associated with this Advisor. This cost value will appear in the reports you generate for compensation.
- In the main menu, under Marketing, select Trackers.
- Select to edit the tracker associated with the Advisor.
- In the Costs field, specify the compensation amount for the Advisor.
- Save the changes.
Step 3. Log in as Advisor and register applicants
Next, let’s bring some leads to DreamApply.
Open a new browser window using Incognito mode.
At the bottom of the main menu, click Advisor login and paste the copied Advisor code.
In the main menu, click Register a new applicant, fill in their personal details and click Register your applicant.
Repeat the process for one or more applicants.
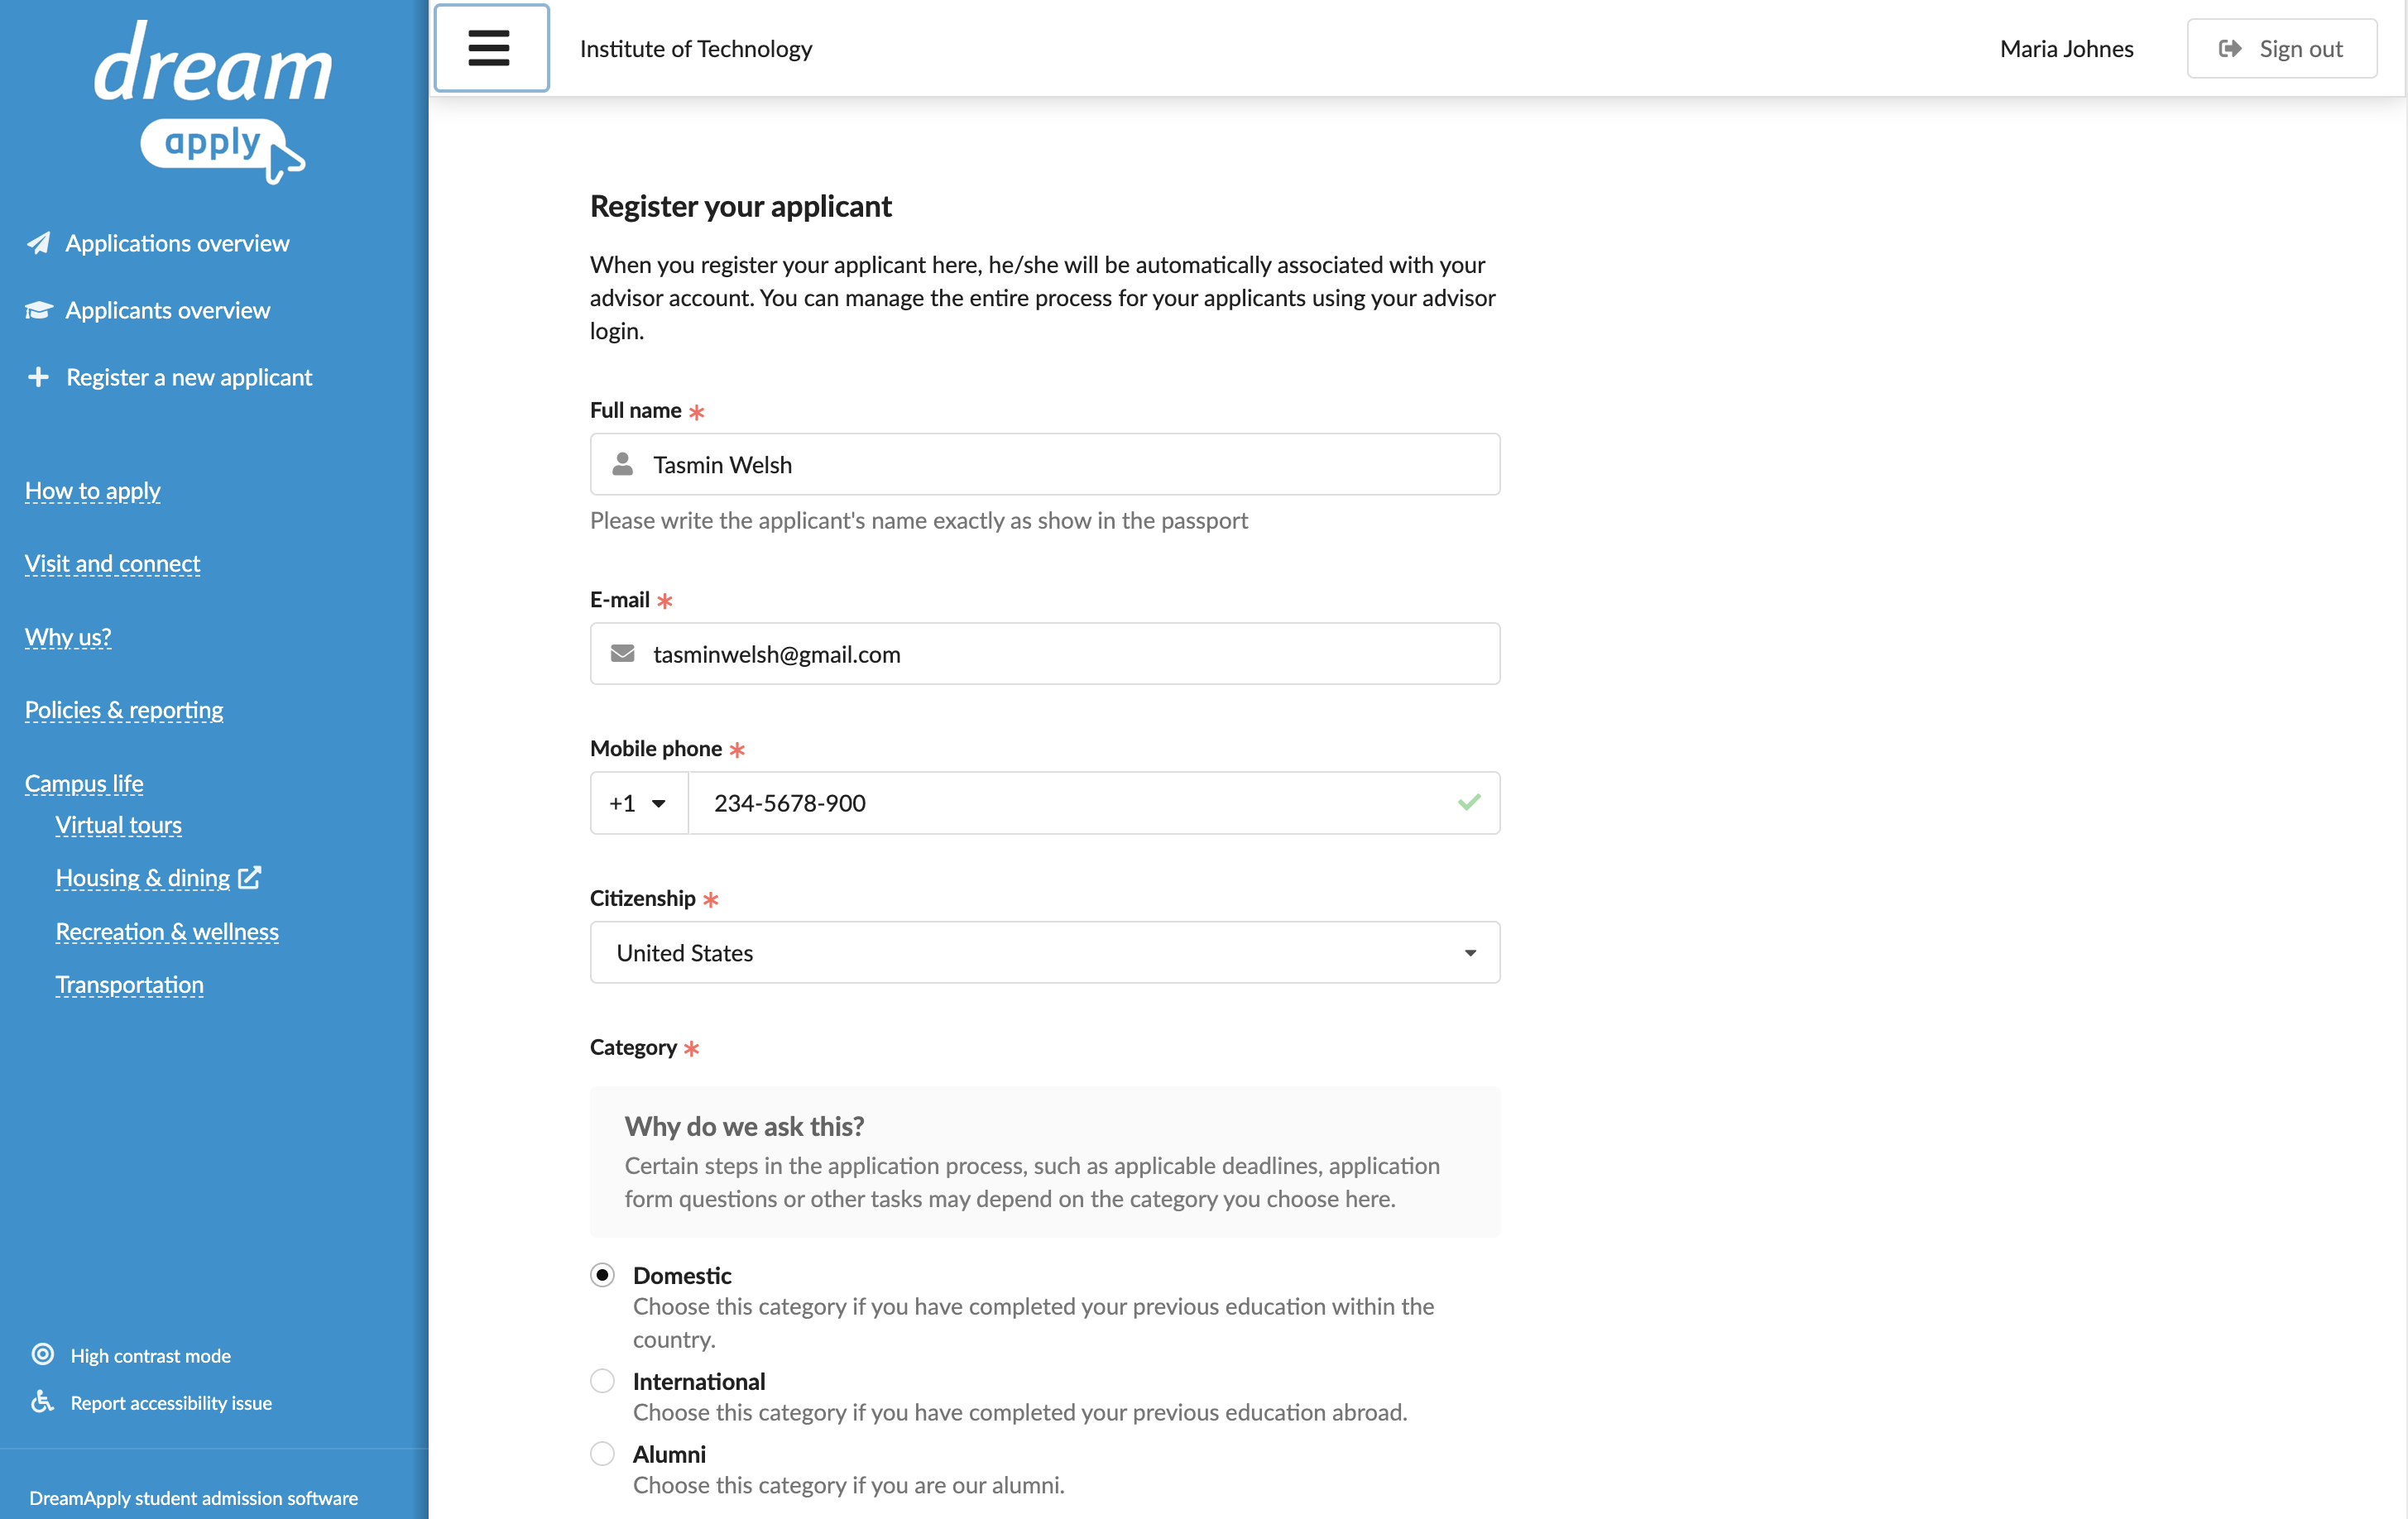
Apply to one or more programmes on behalf of these applicants.
Step 4. Check the results
Next, we will check the created applicant records in DreamApply.
- In the main menu, under Marketing, select Leads.
- Click the Your goal tile to see a list of applicants who have submitted applications.
- Click the applicant’s name and check the right pane of the applicant card to see the assigned tracker.
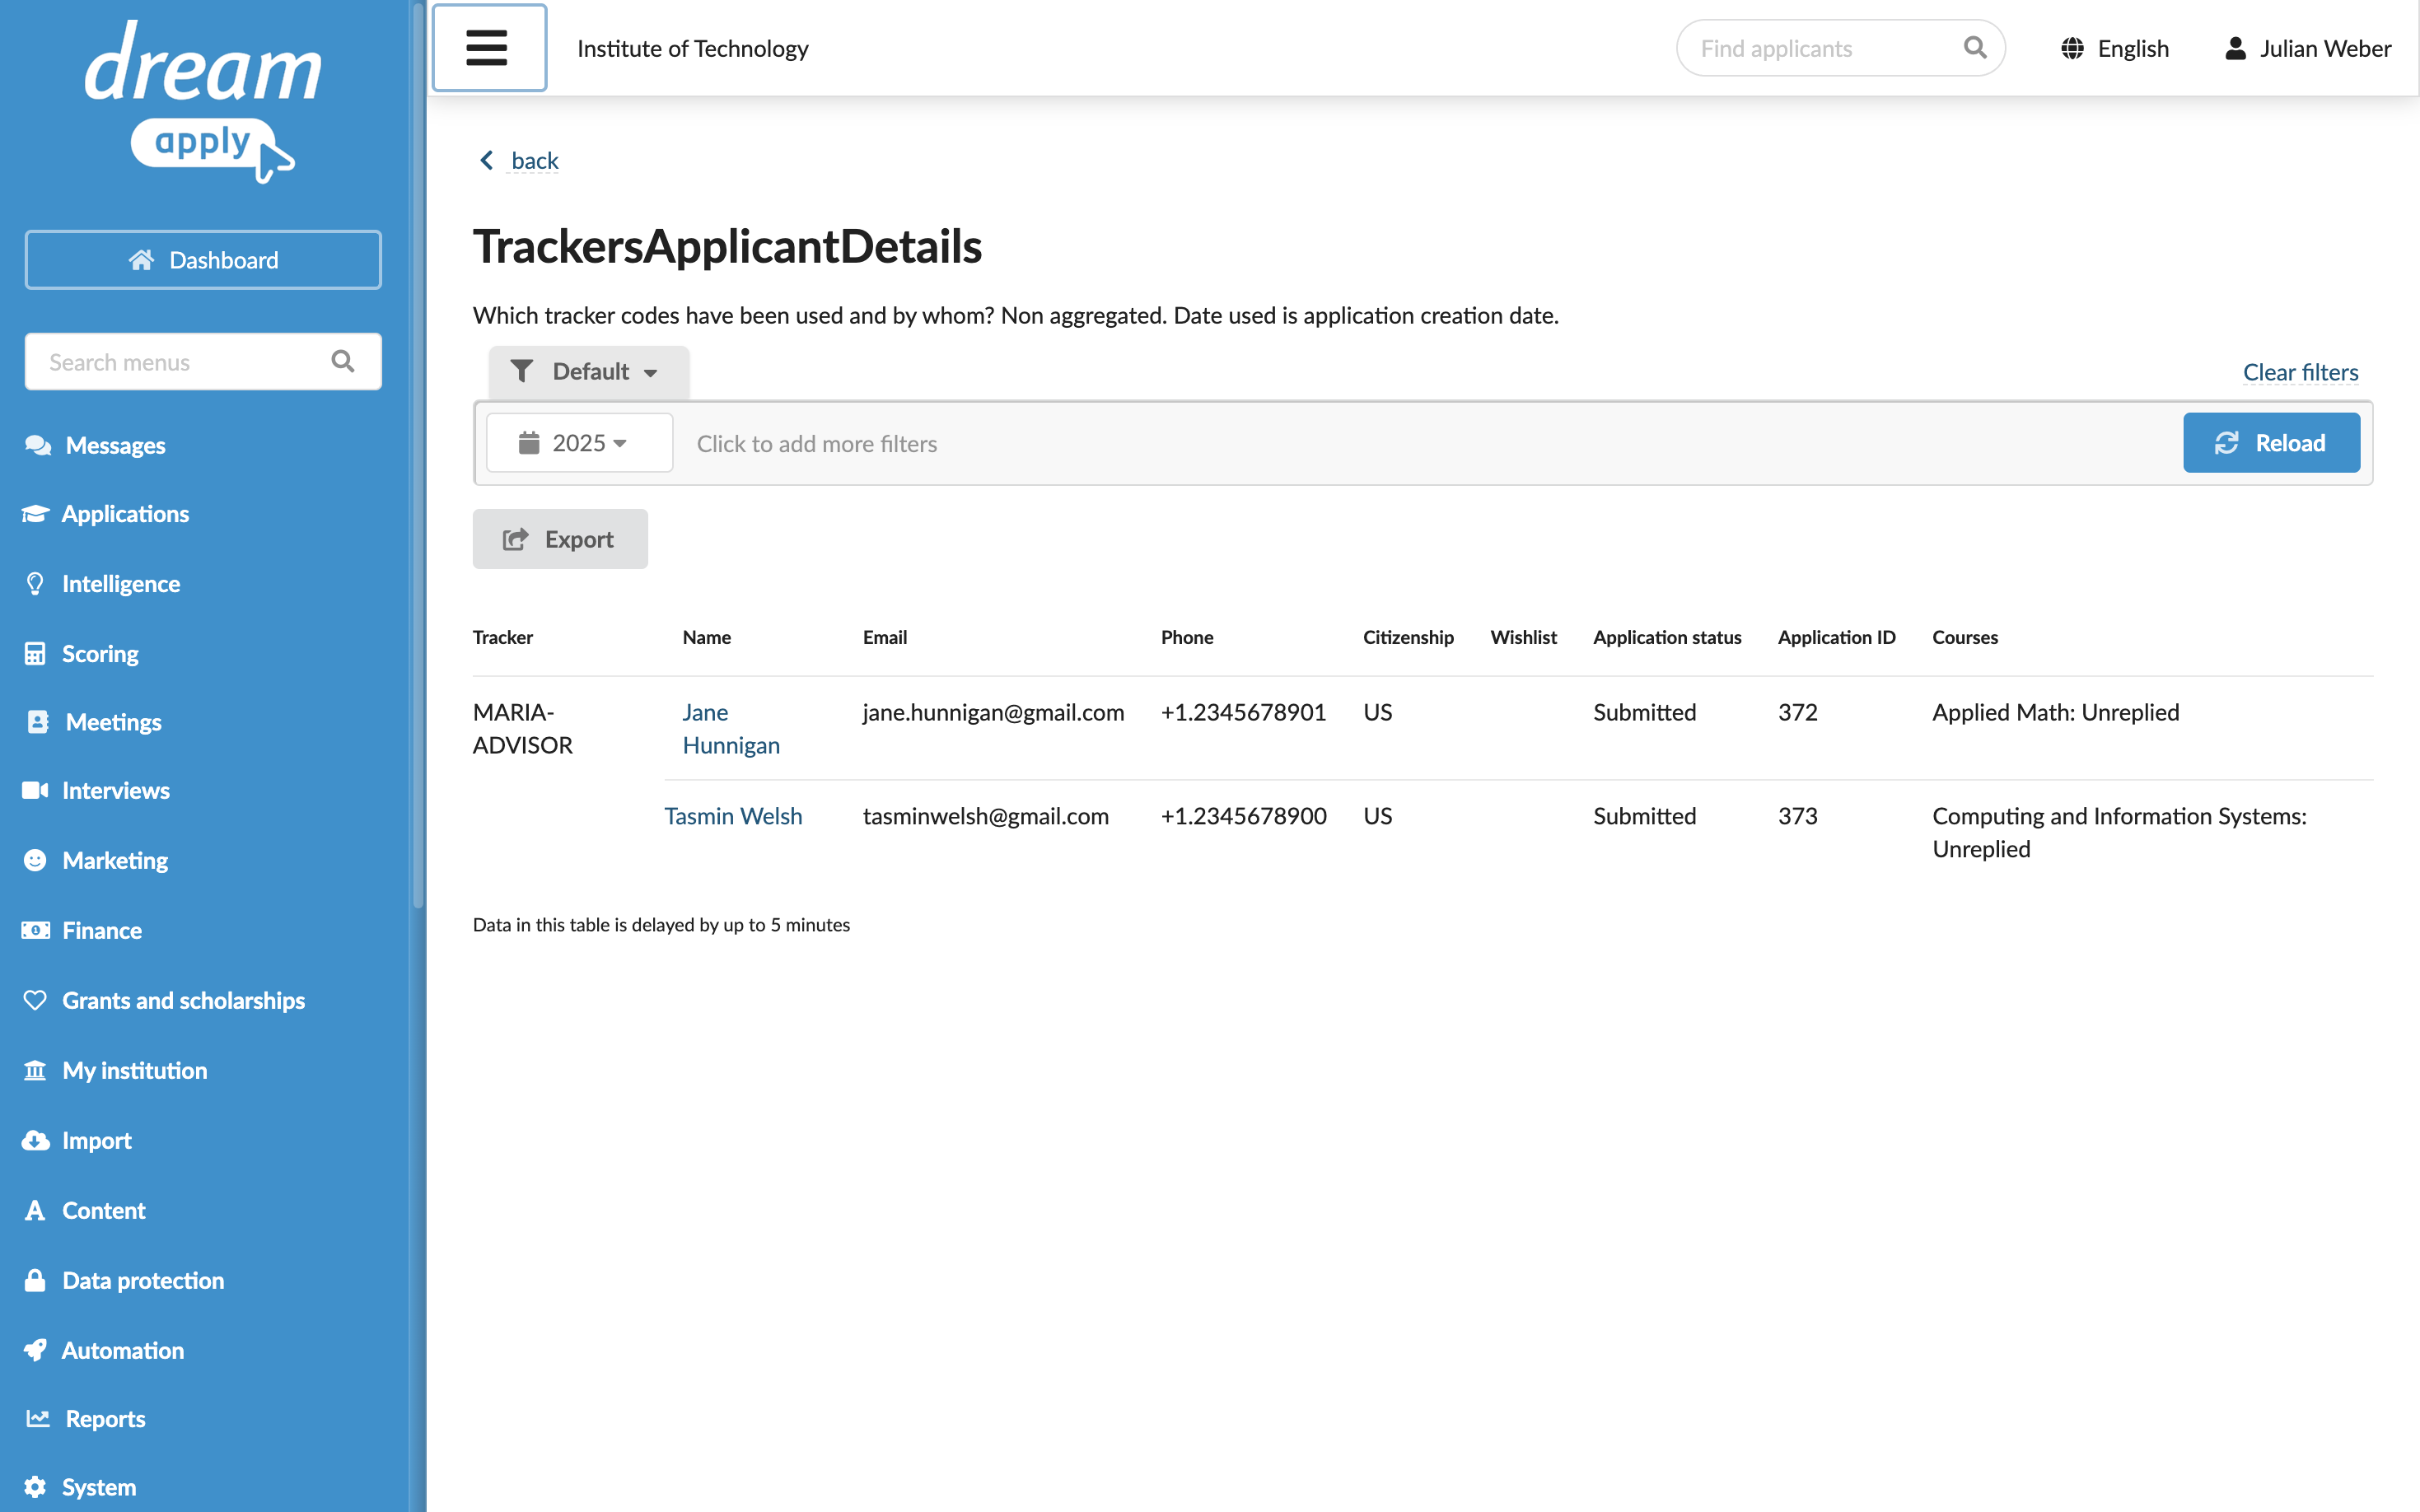
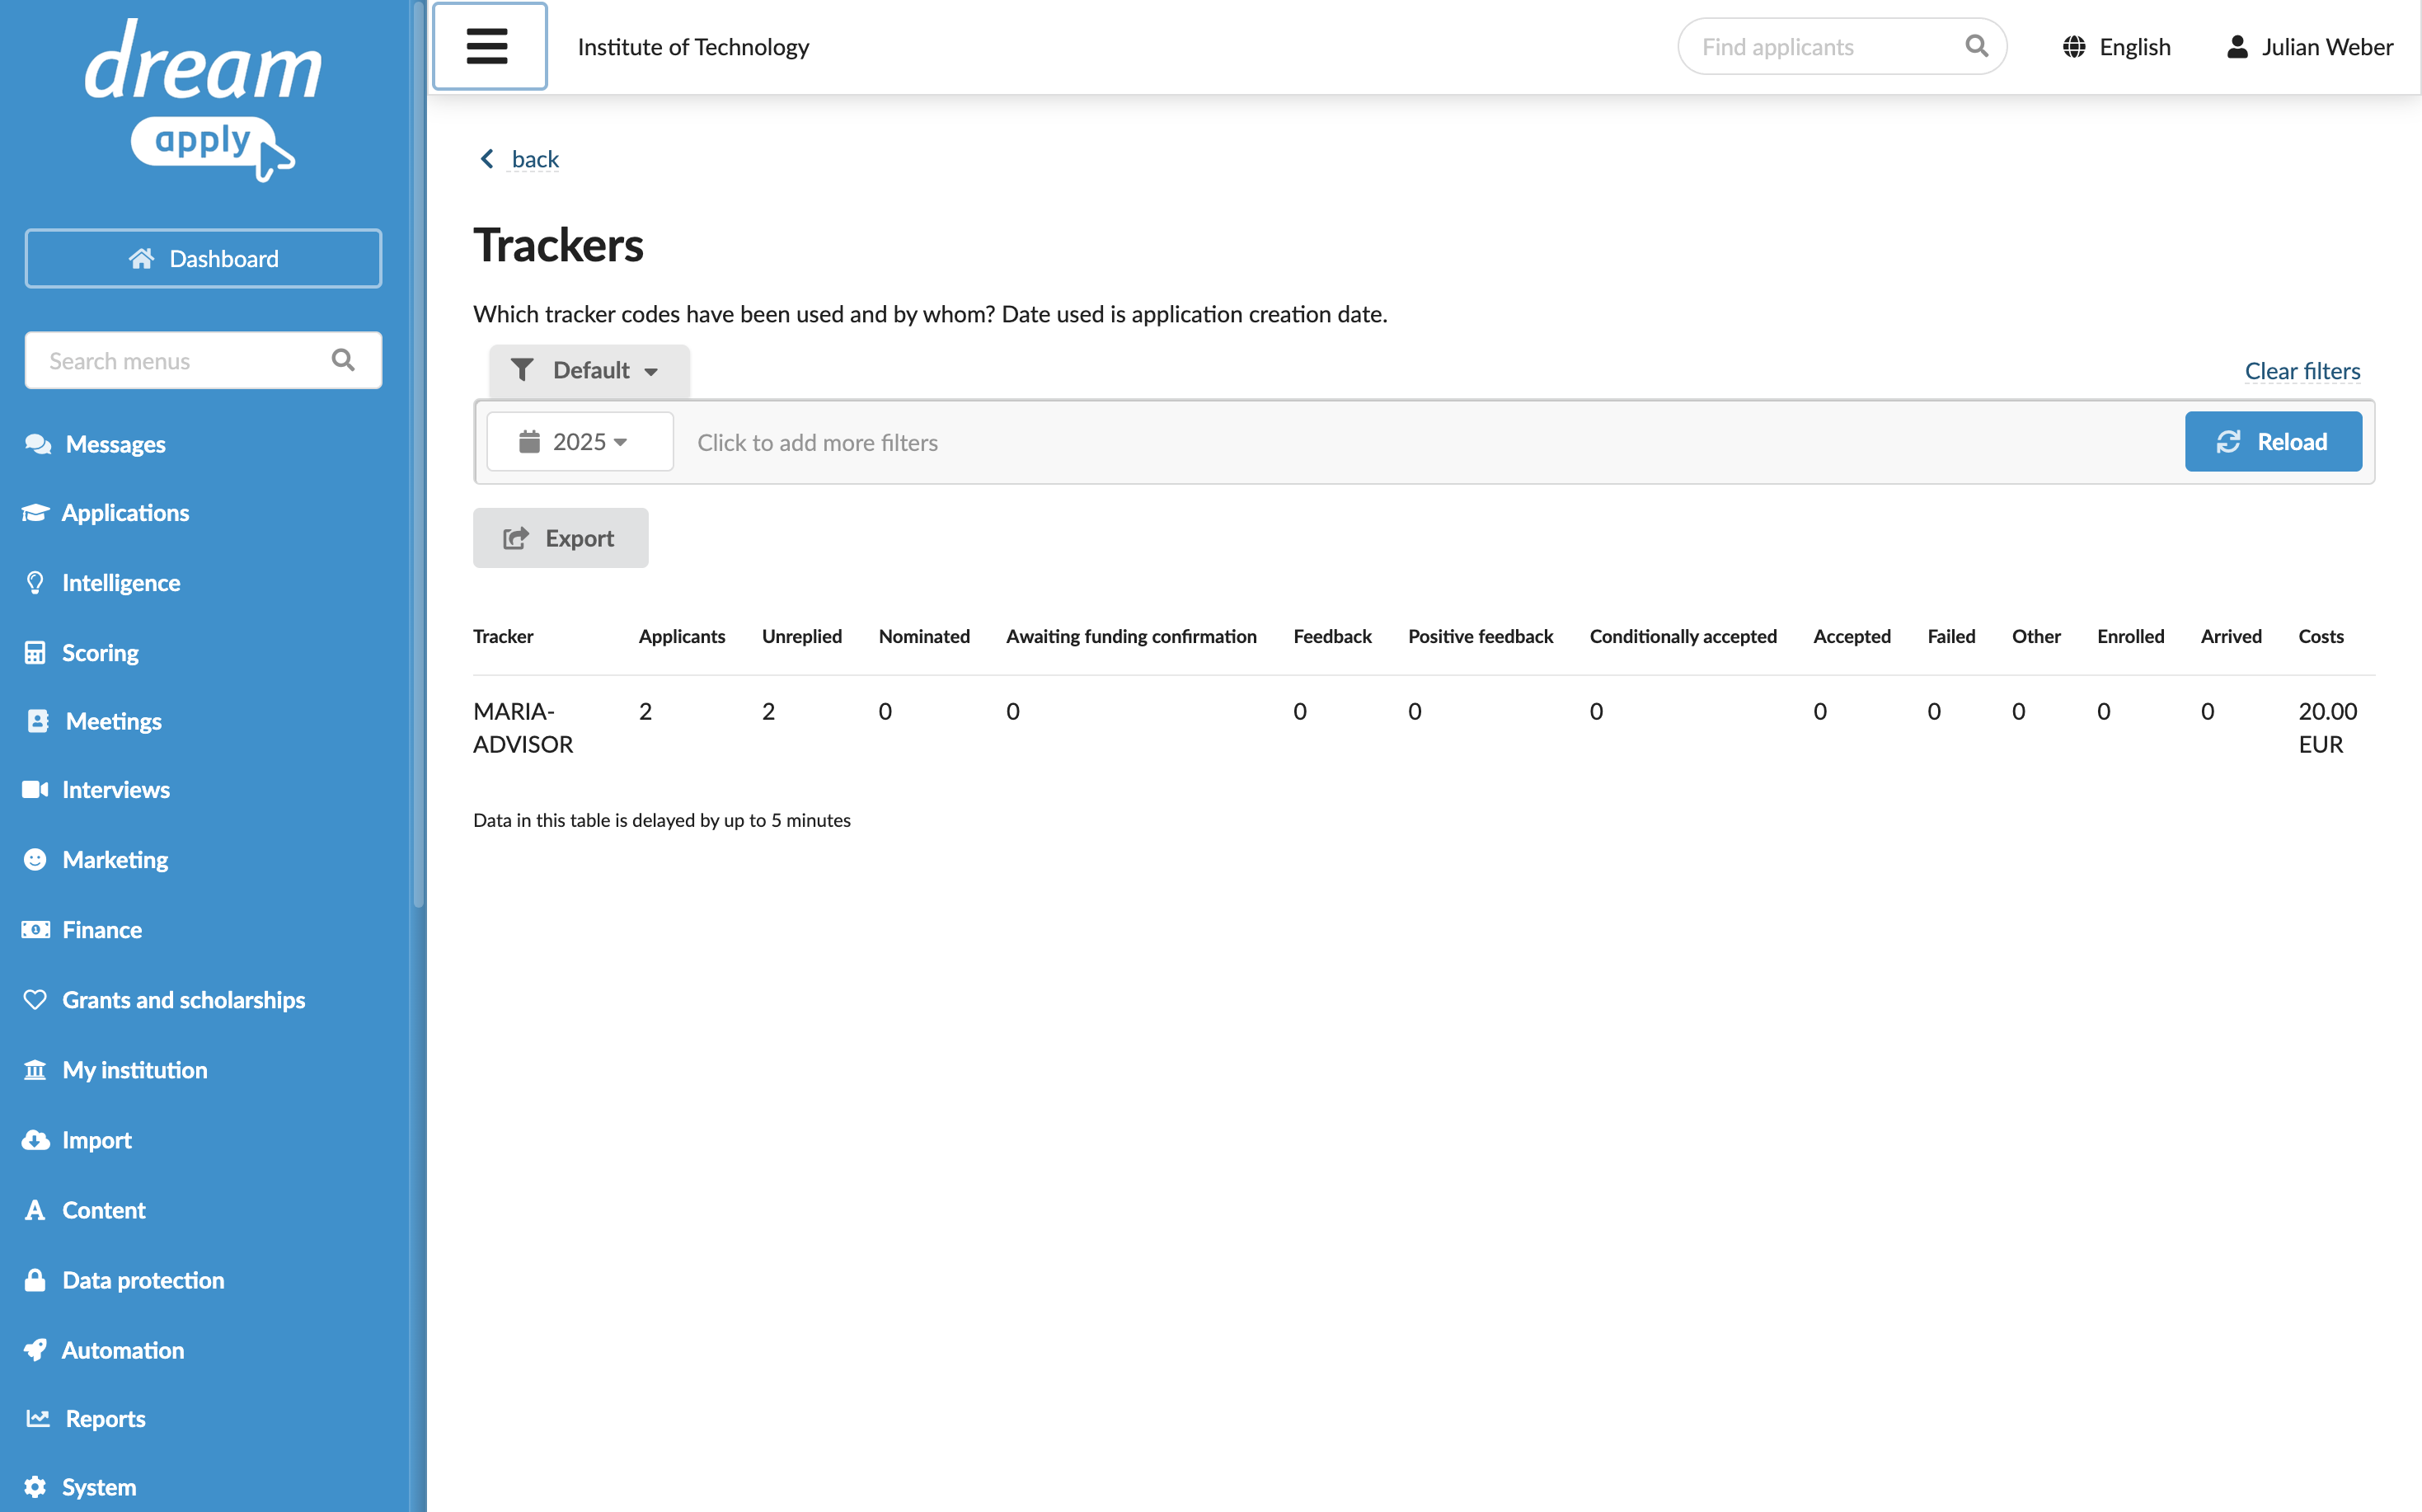
Step 5. Generate reports on trackers
DreamApply allows you to use the Trackers filter in the Leads view to see a list of all applicants registered by a specific Advisor. Alternatively, you can generate and export reports if needed.
In the main menu, select Reports.
Run the Trackers report to see all applicants registered by the Advisor, their admission stage and the set costs.
Run the TrackersApplicantDetails report to view detailed information about the applicants.