Prepare and publish programmes
Roles
These roles reflect the default DreamApply setup.
You can define custom roles based on your
institution's needs. Learn more →:
You can define custom roles based on your
institution's needs. Learn more →
Institutions must create, regularly review and update their catalog in DreamApply. This helps applicants make informed decisions and ensures a smooth admission process.
We recommend programme cloning as a primary method of catalog setup. First, create a few base programmes. Then duplicate them and adjust programme-specific fields such as title, department, appforms, fees and intakes.
Before you begin
To set up the programme catalog, your account must have the Superuser or Courses administrator role or the courses-view and courses-edit permissions.
Select the preferred term
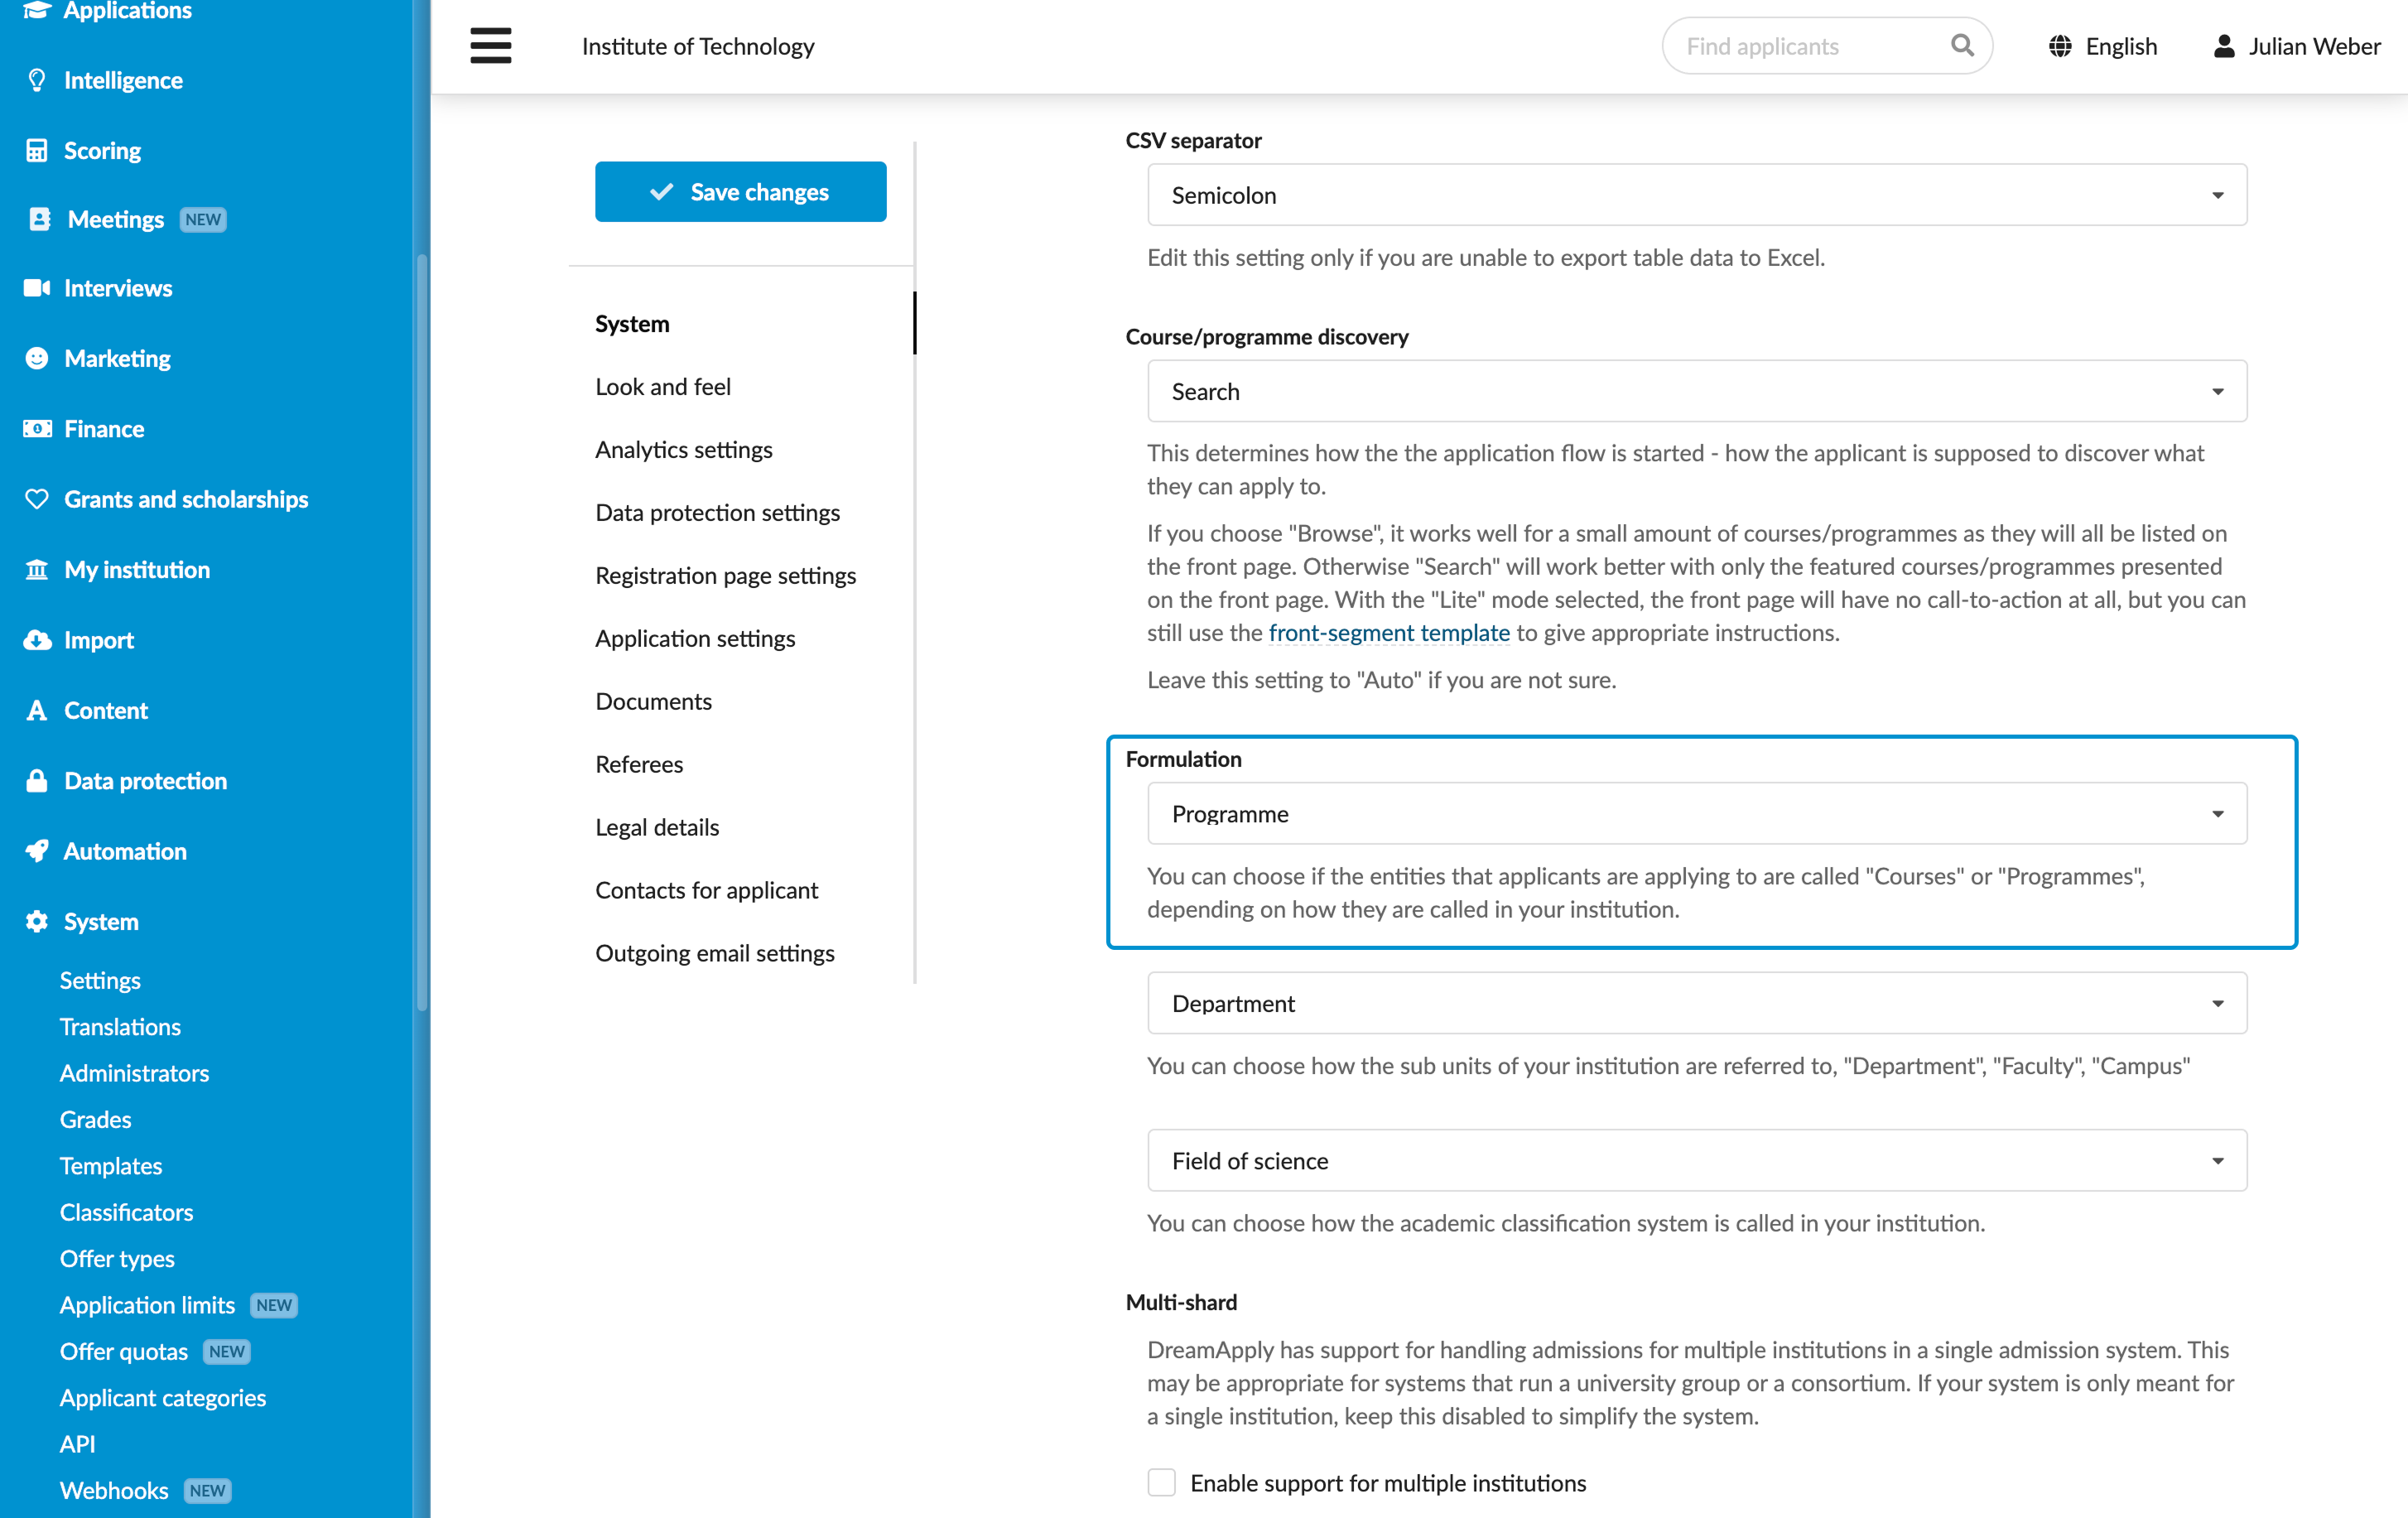
In DreamApply, the terms Programme and Course represent the same concept and can be used interchangeably. You can choose which term to use to align with the standards and preferences of your institution.
- In the main menu, under System, select Settings.
- In the left pane, select System.
- In the Formulation section, select the necessary term: Programme or Course .
- At the top of the form, click Save changes.
Configure field of science settings
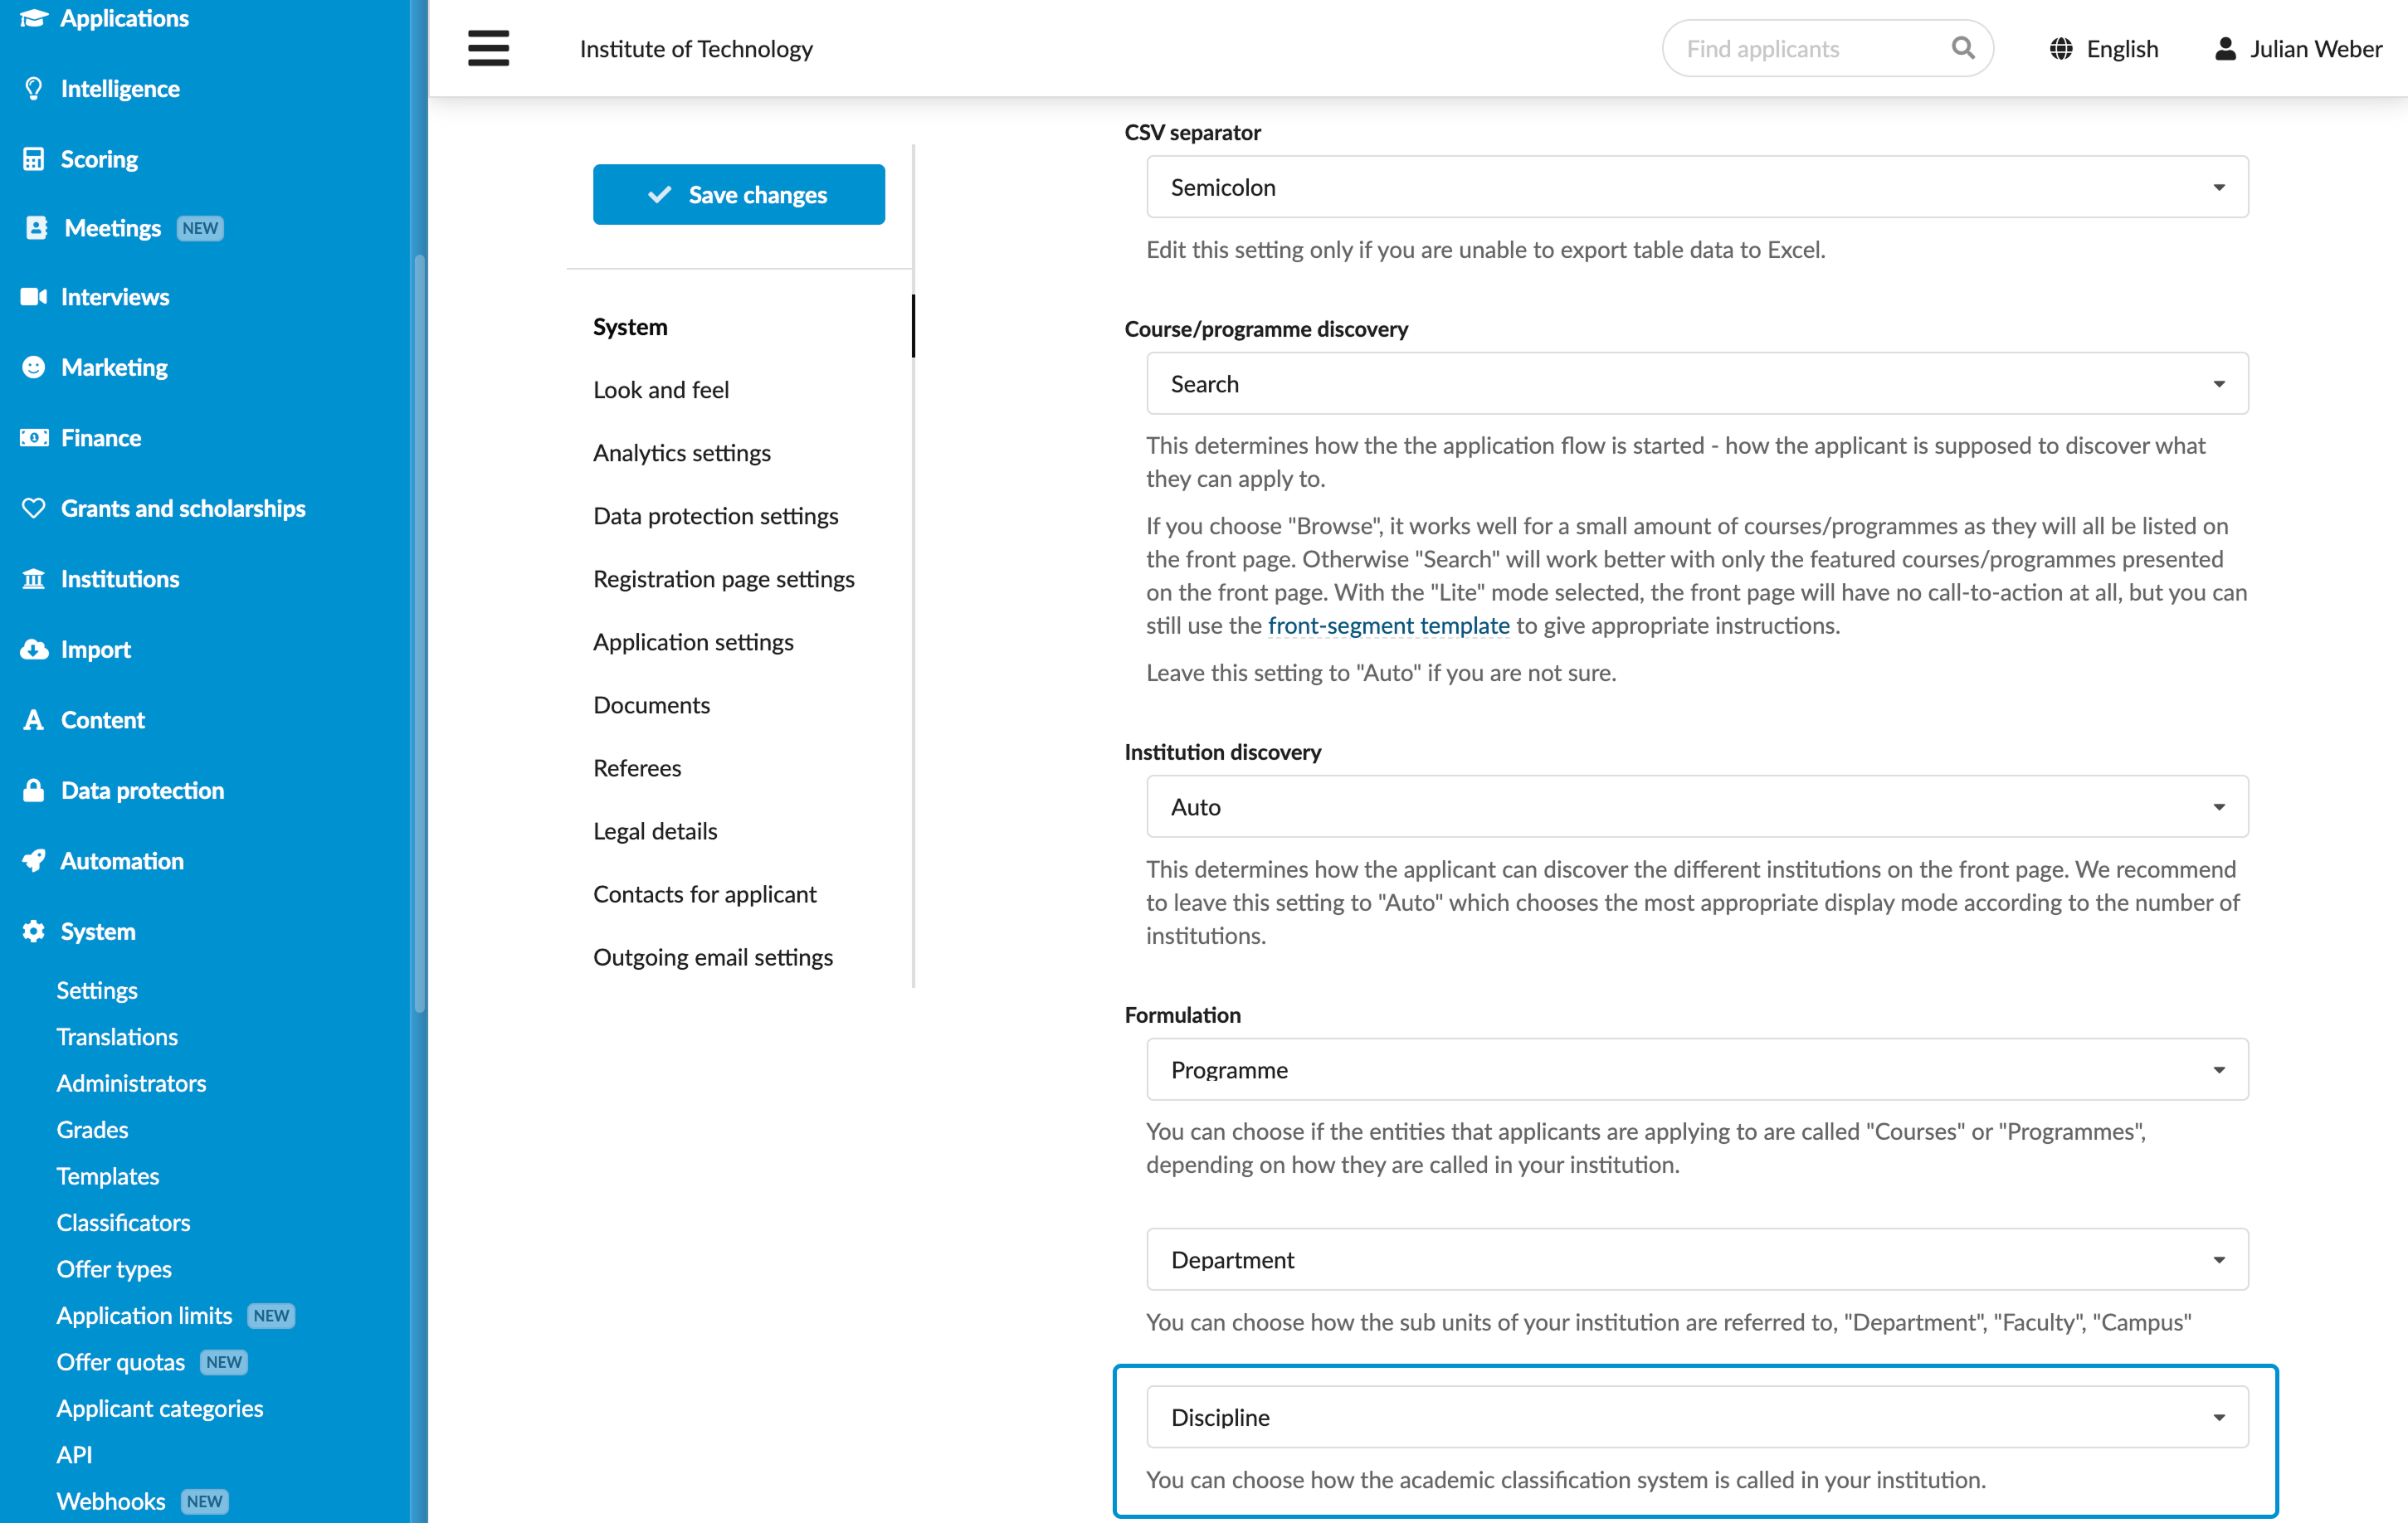
If your institution uses a custom classification and you want to reflect it in the system, you can select the preferred classification term and set up classification categories in DreamApply.
In the main menu, under System, select Settings.
In the System section, under Formulation, select the term for your classification system, for example, Field of science, Field of education or Discipline.
At the top of the form, click Save changes.
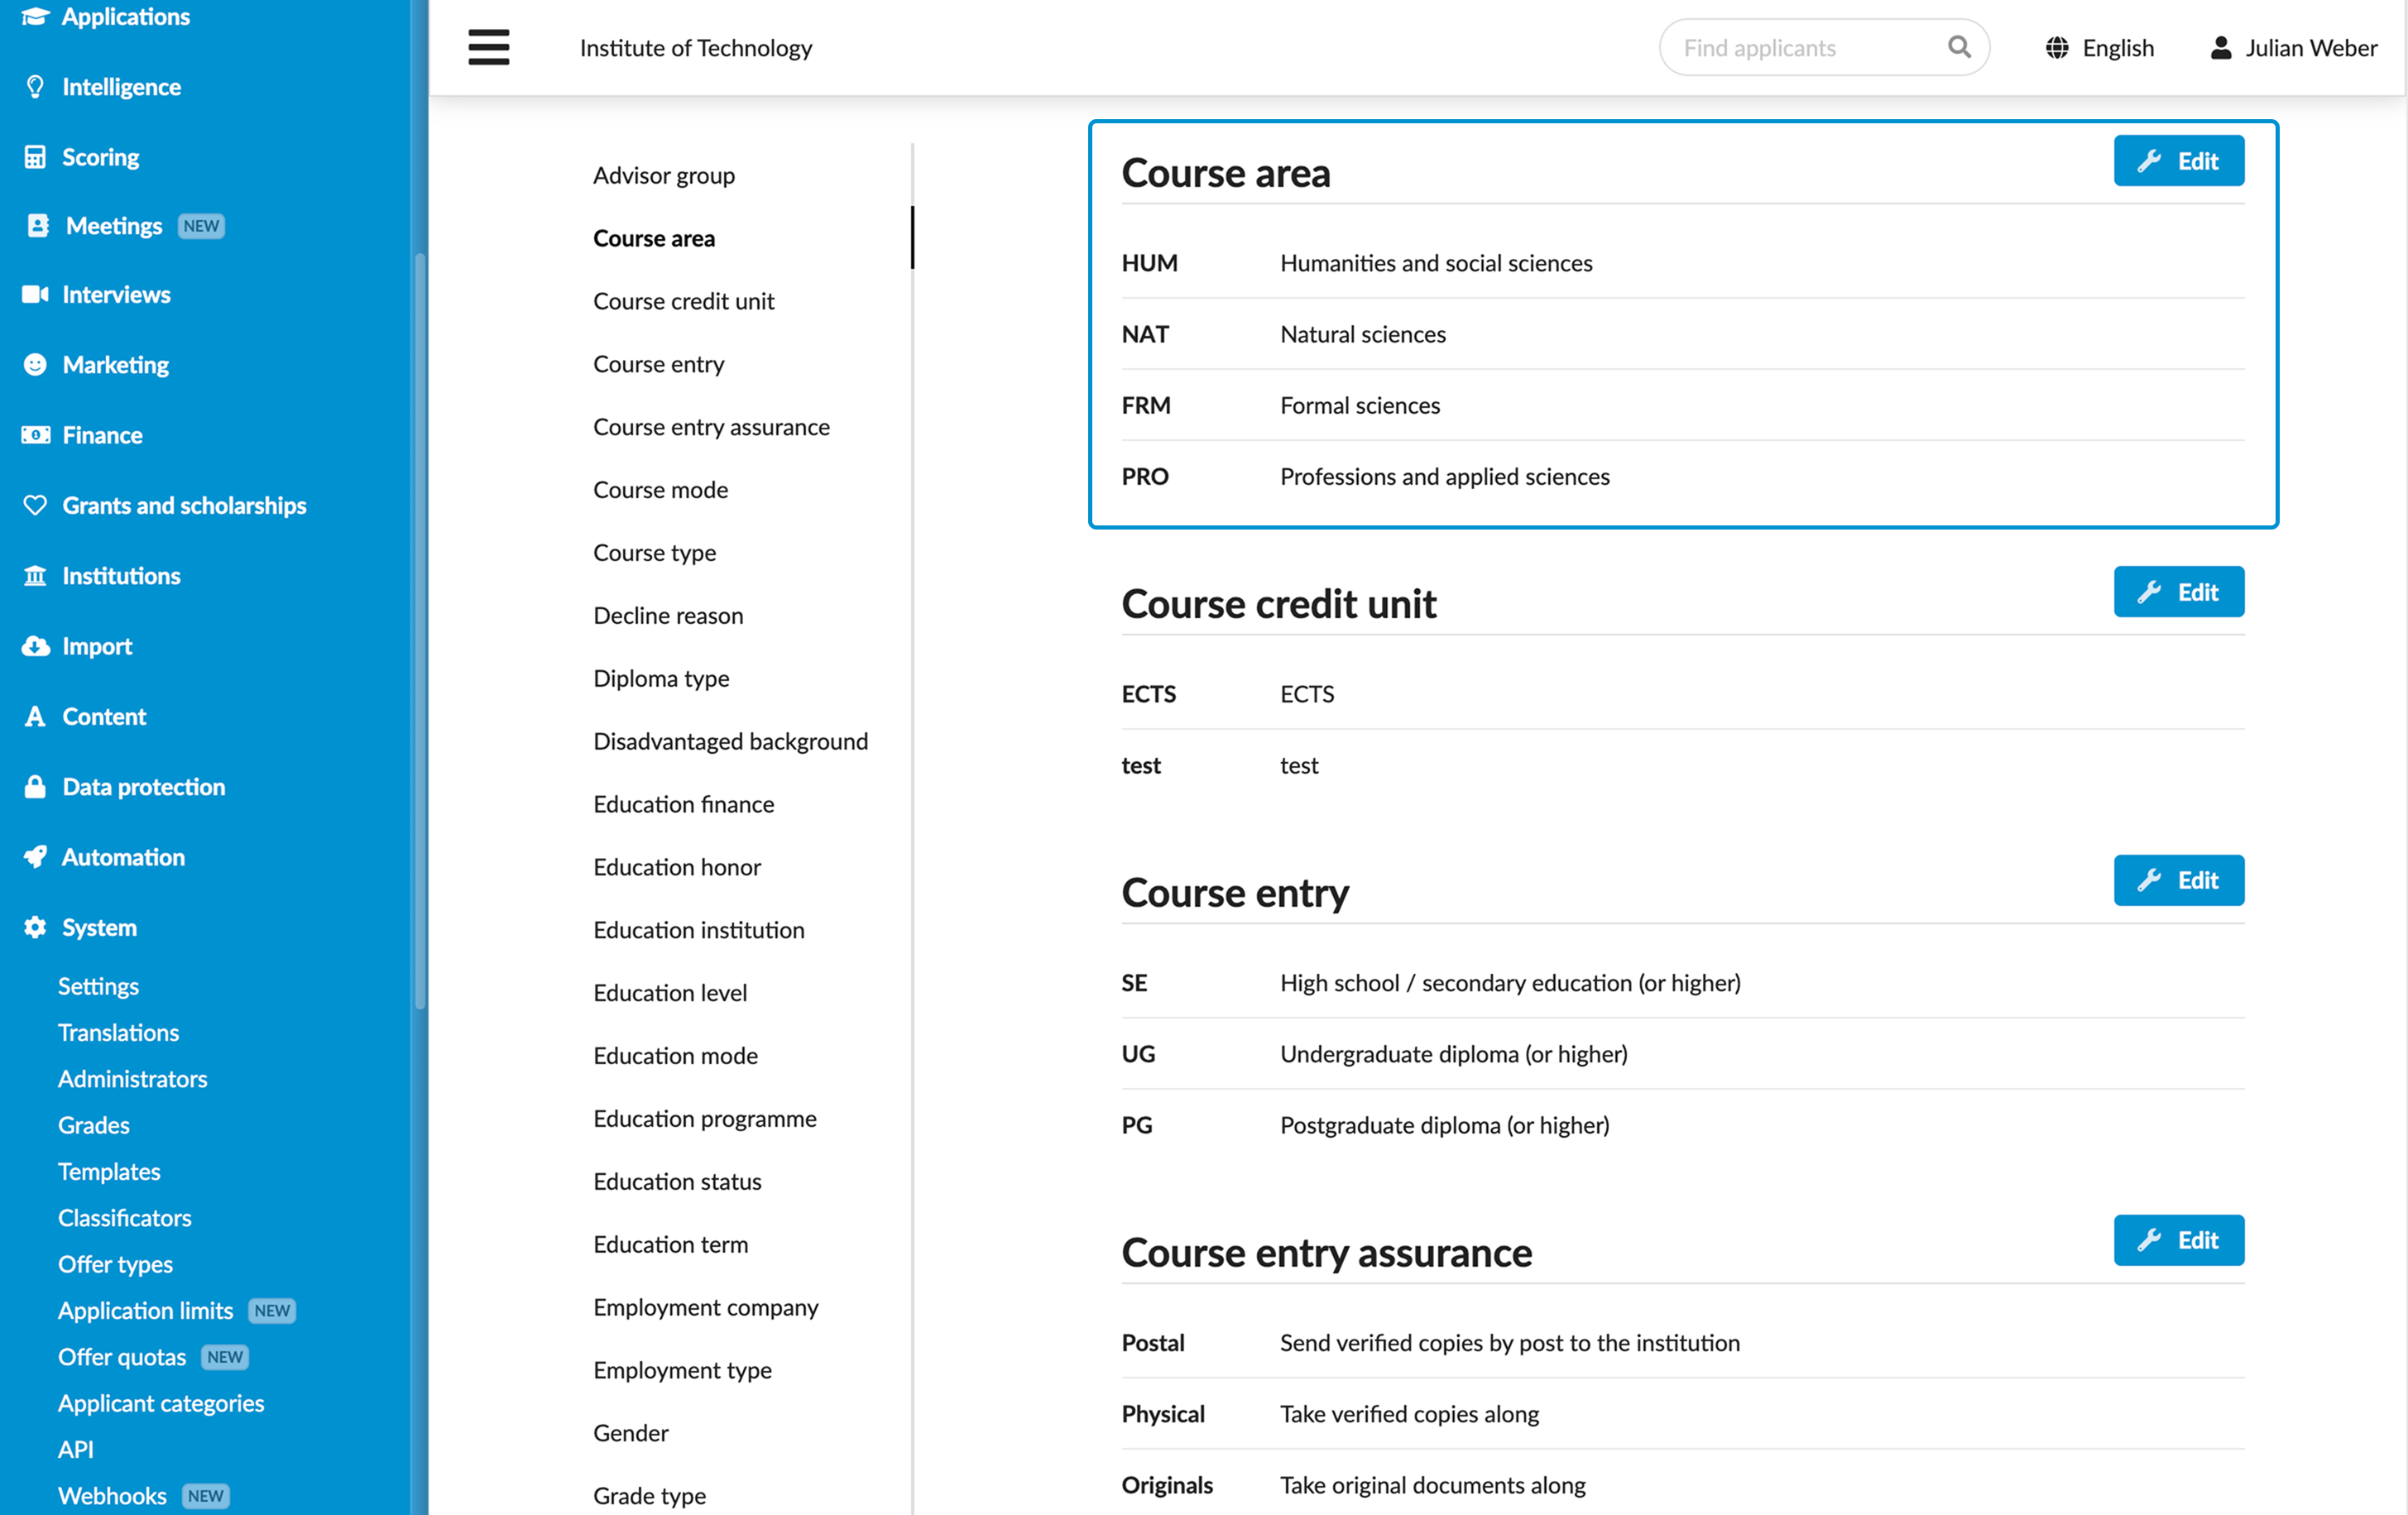
In the main menu, under System, select Classificators.
In the Course area section, set up a list of categories to be used.
Now, you can categorize programmes added to the catalog using your custom classification.
Set up programme classificators
To accurately describe your academic offerings, you can configure classification types for the programme catalog. Programme classifications help consistently organize the catalog and align it with your academic structure and terminology.
To configure programme classificators:
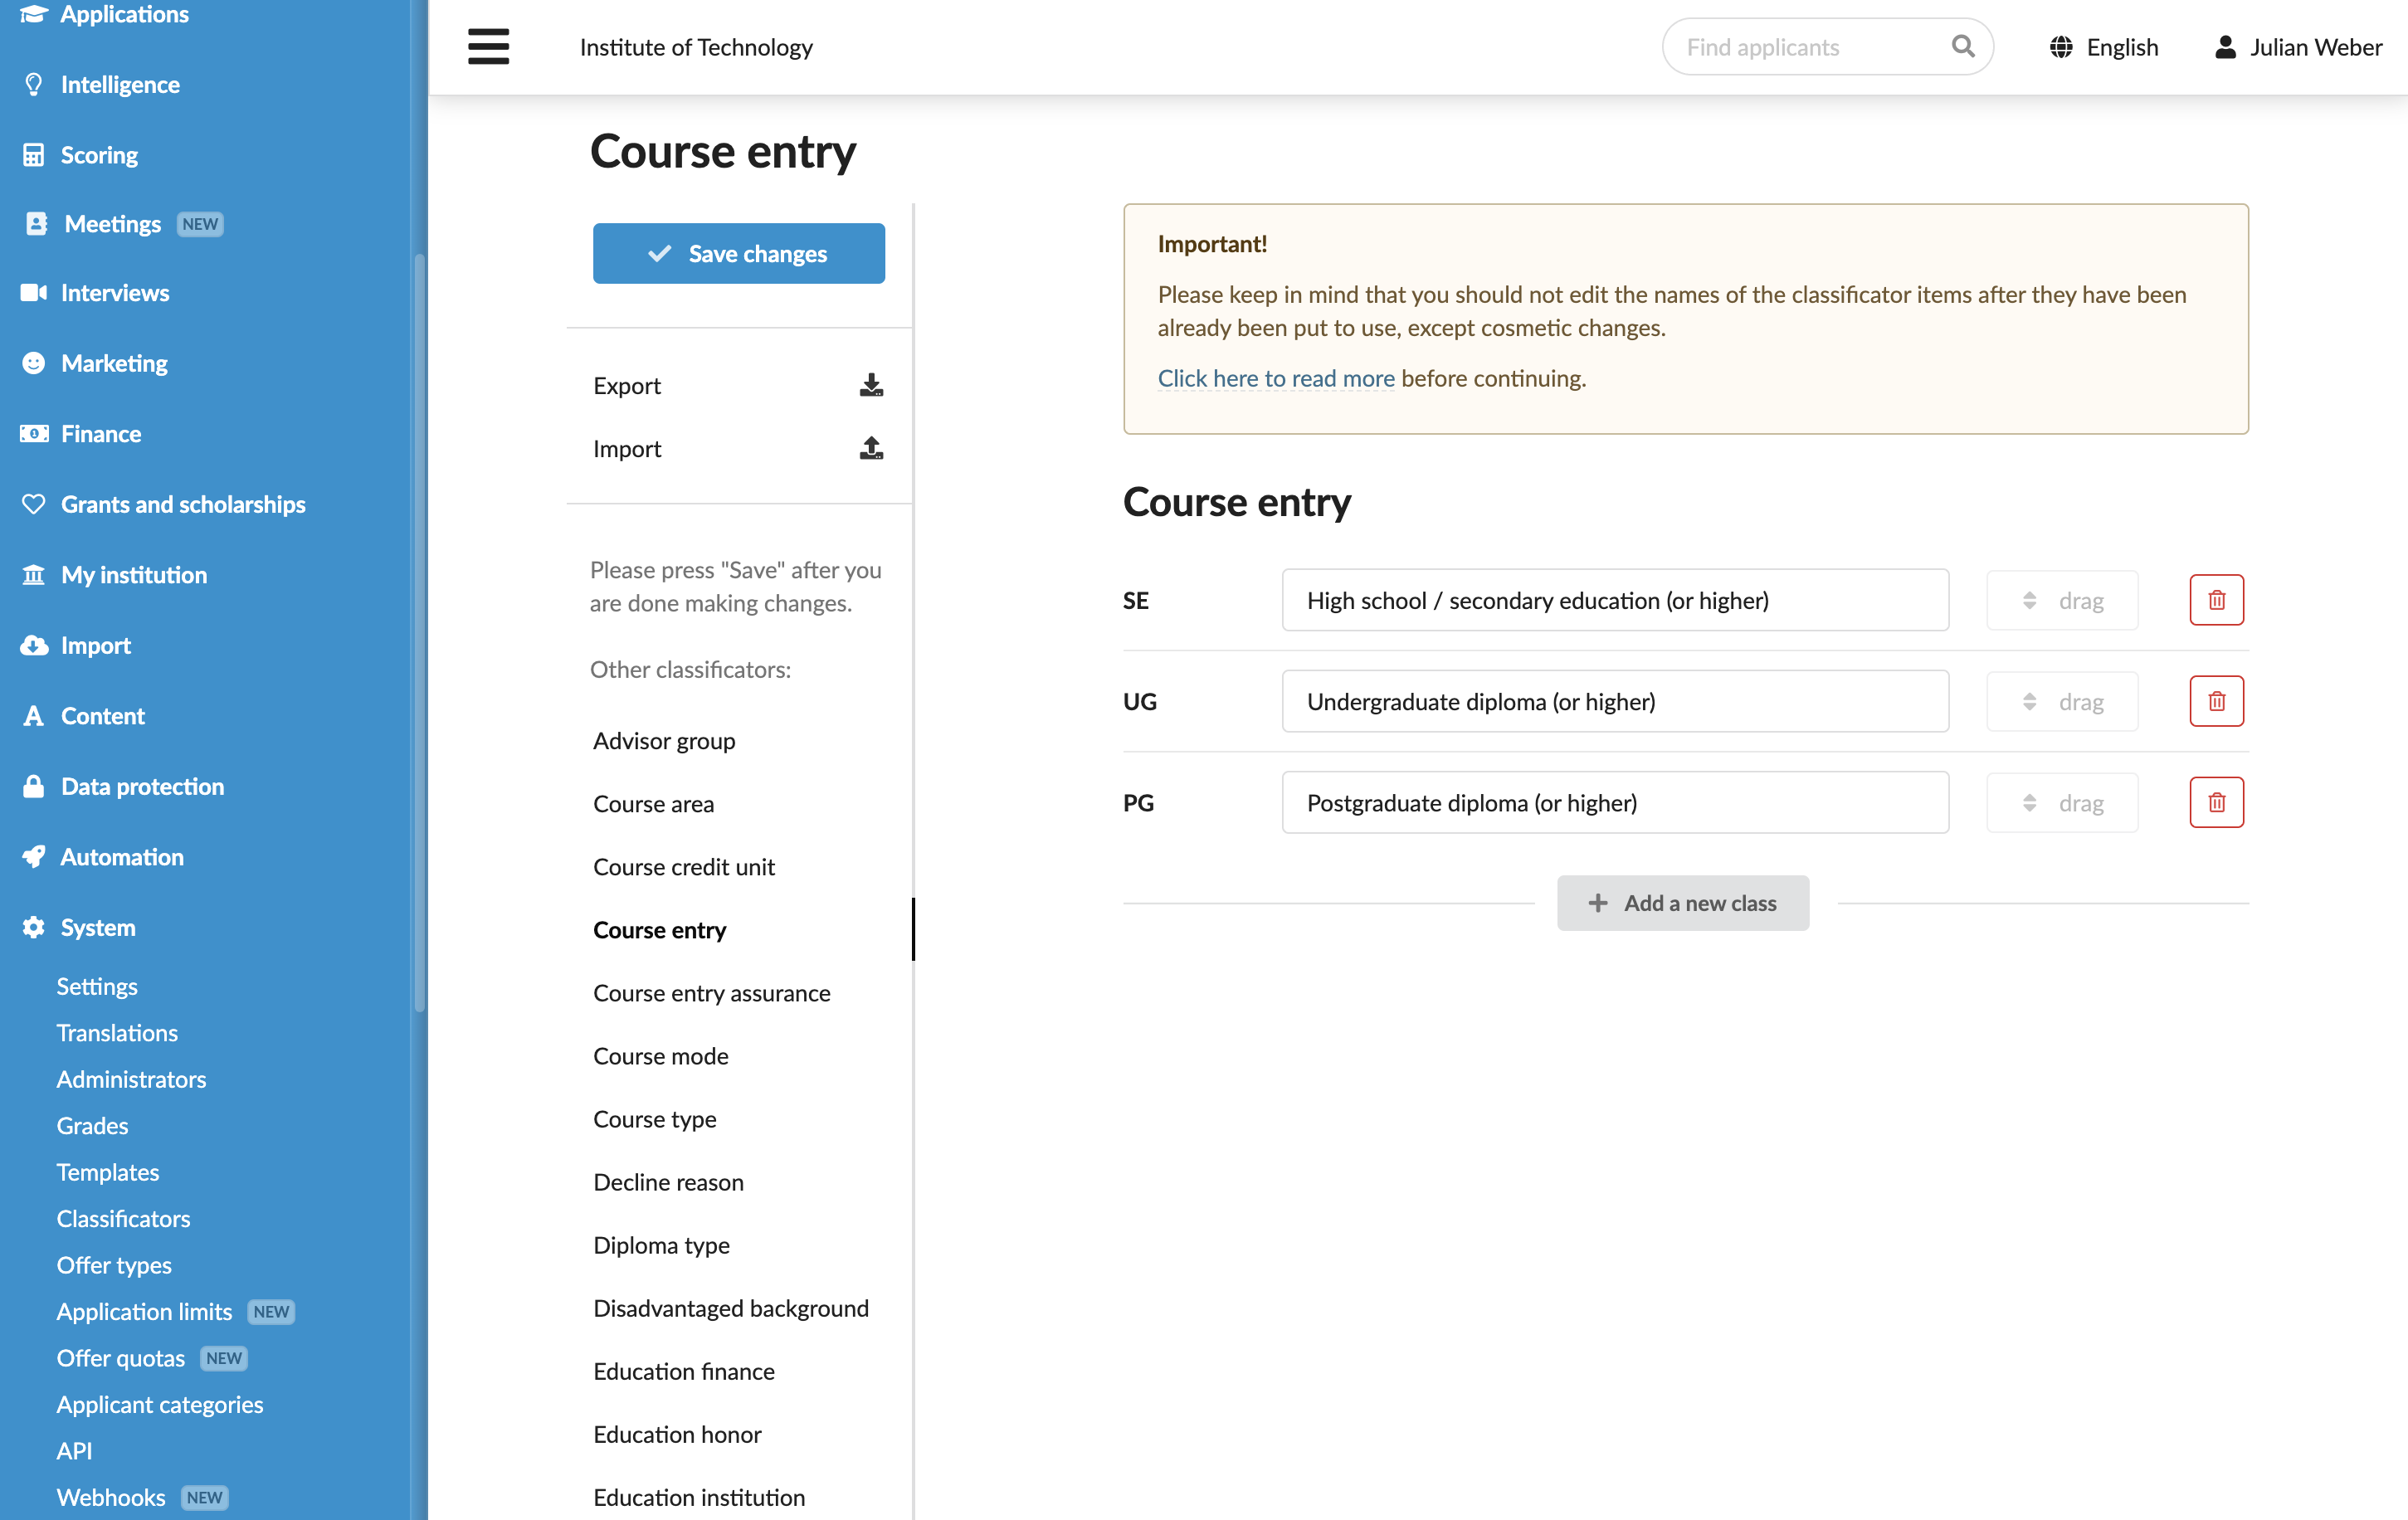
- In the main menu, under System, select Classificators.
- Set up categories for the following classificators:
| Classificator Name | Classificator Description | Where Used in Programme Settings |
|---|---|---|
| Course area | Categorizes programmes by field of science. For details, see Configure fields of science settings. | General > Field of science |
| Course credit unit | Specifies the credit value assigned to the programme. | General > Mode and duration > Credits |
| Course entry | Categorizes programmes by entry qualification, for example, High school, Undergraduate. | Admission > Entry qualification |
| Course entry assurance | Defines methods for verifying entry qualifications, for example, Send verified copies by post to the institution, Take verified copies along. | Admission > Documentation formalities > Documentation verification rules |
| Course mode | Categorizes programmes by study mode, for example, full-time, part-time. | General > Mode and duration |
| Course type | Categorizes programmes by type, for example, Undergraduate, Graduate. | General > Name and type |
Add programmes to the catalog
To add a programme to the catalog:
In the main menu, under Institutions/My institution, select Programmes.
At the bottom of the programme list, click New programme.
In the Add a new blank programme window, specify the academic structure:
- For a single-institution setup: To link the programme to a department, select a department from the list and click Add a blank programme. To link the programme directly to the institution, leave the department list empty and click Add a blank programme.
- For a multi-institution setup: Select an institution to which the programme belongs and click Add a blank programme.
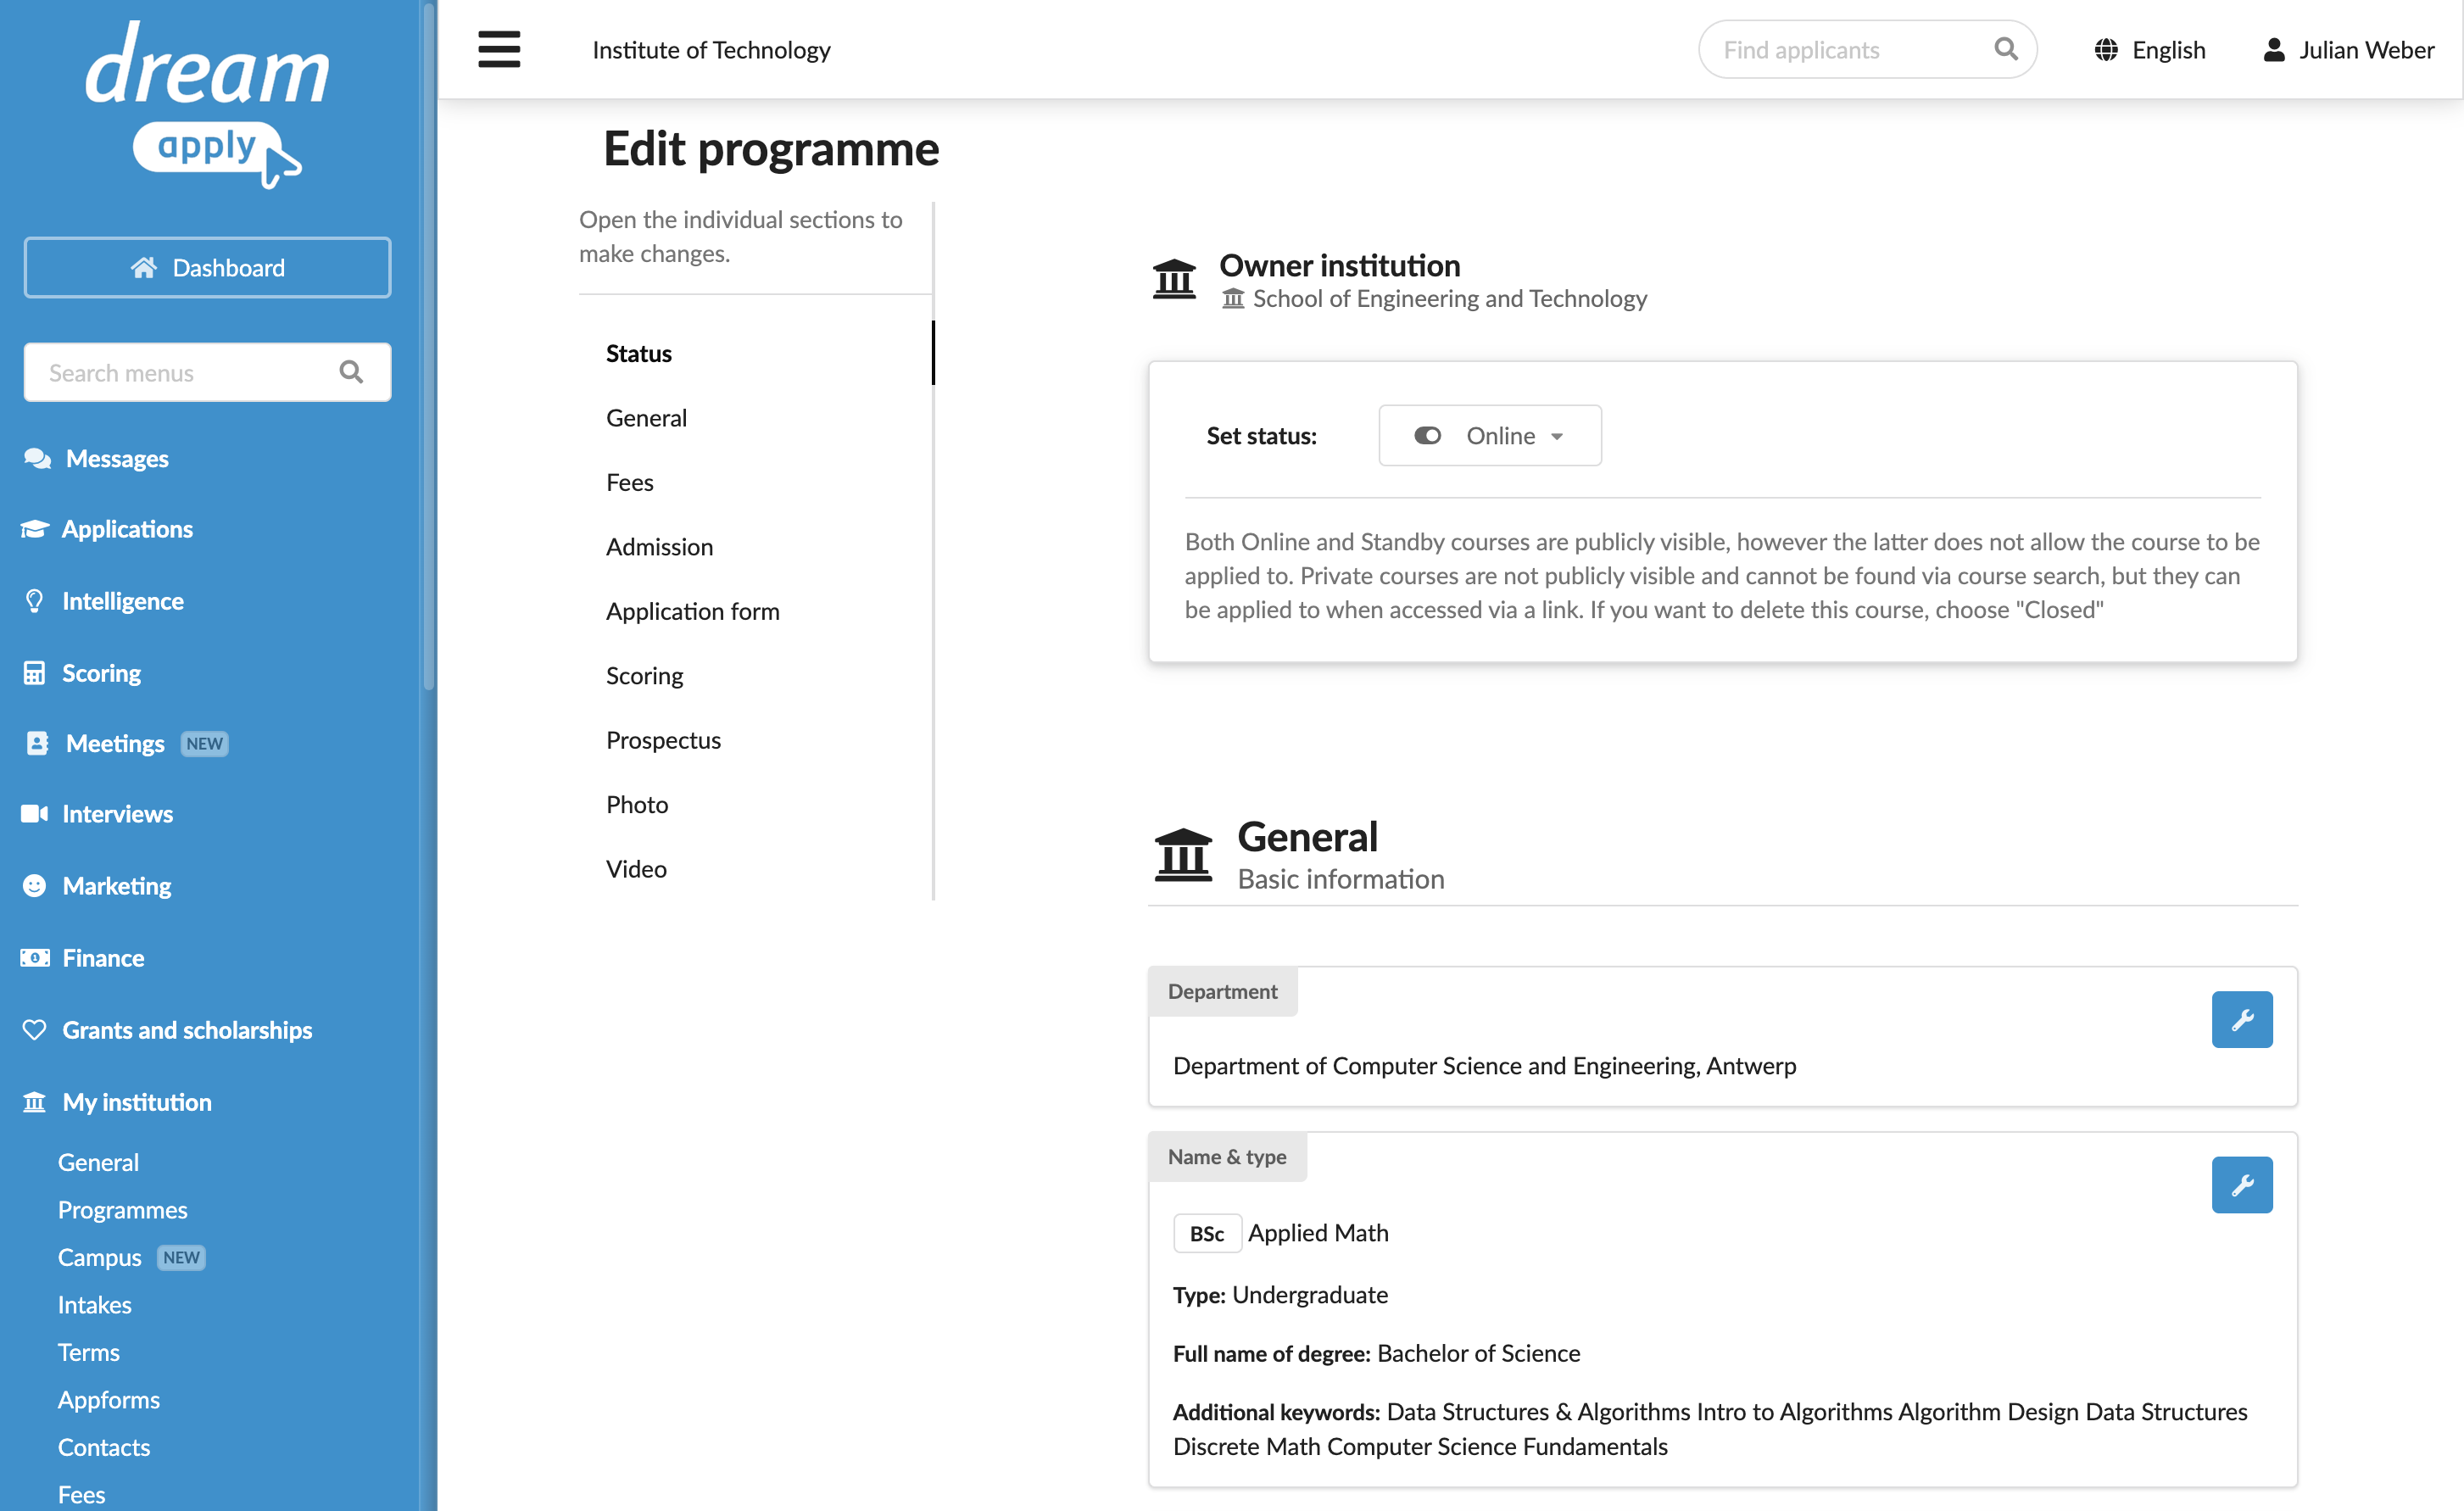
Specify the programme settings:
General: Specify general programme information such as title, intakes, academic field, mode, duration and study language. To define the area of science, use one of the following fields: custom Field of science, ISCED or JACS. For details, see Configure field of science settings.
The general programme information is displayed to applicants on the programme page and programme tile on the catalog search page.
Fees: Link the programme to one or more fees to be enforced. The fee information is displayed to applicants in the fees section on the programme page.
Admission: Specify the admission requirements for the programme. The admission requirements information is displayed in the Entry qualification, Language requirements and Other requirements sections on the programme page.
In the Territory requirements section, set up a list of territories from which applicants must or must not be accepted into the programme. For details, see Define territory requirements.
Application form: Select the appform for the programme and specify programme-specific settings for the appform.
Scoring: Select an evaluation criterion to be used for the programme.
Prospectus: Specify a programme description such as overview, schedule and career opportunities. The prospectus data is displayed to applicants on the programme page, below the admission requirements.
Photo: Add an image to illustrate the programme. The programme image is displayed to applicants as a banner at the top of the programme page.
Video: Add a link to a video for the programme. The video is displayed to applicants on the programme page, below the admission requirements.
At the top of the form, set the programme status.
Clone programmes
To streamline catalog setup, you can add new programmes to the catalog through cloning.
To display and focus on relevant programme data, use filters at the top and the Choose what to display option in the programme list.
To clone a programme:
- In the main menu, under Institutions/My institution, select Programmes.
- To the right of a base programme, click the wrench icon and select Make a clone.
- Edit the cloned programme settings as required.
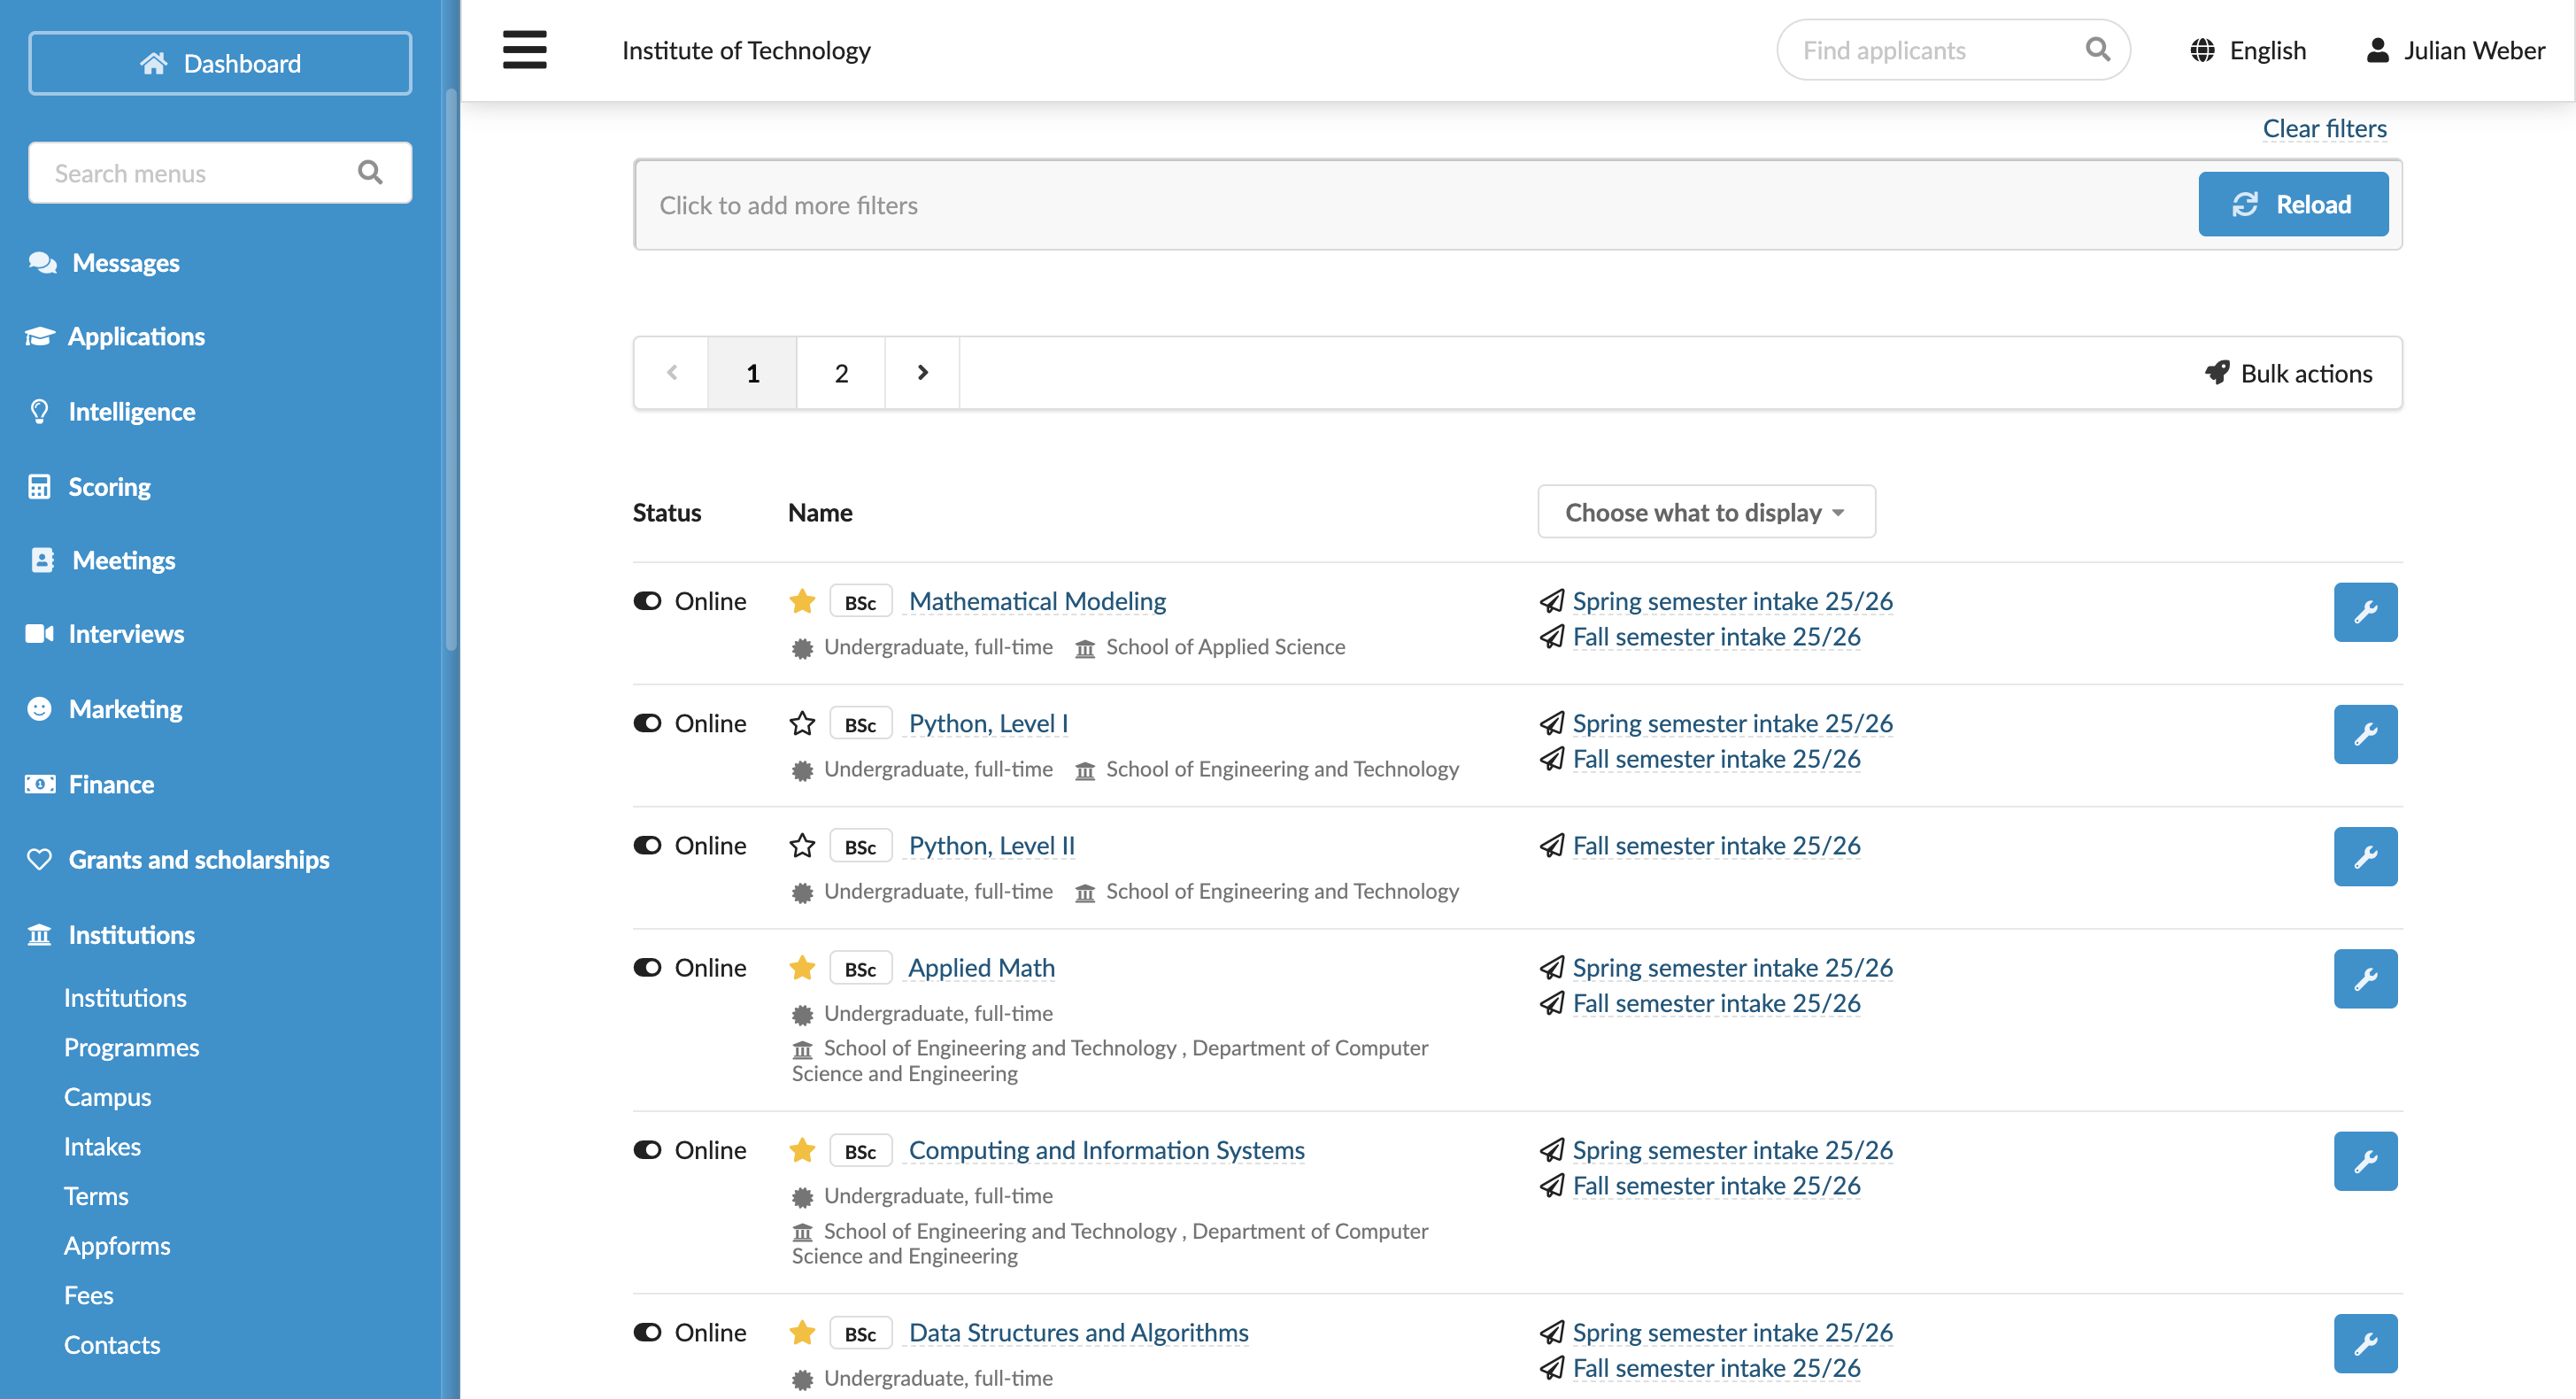
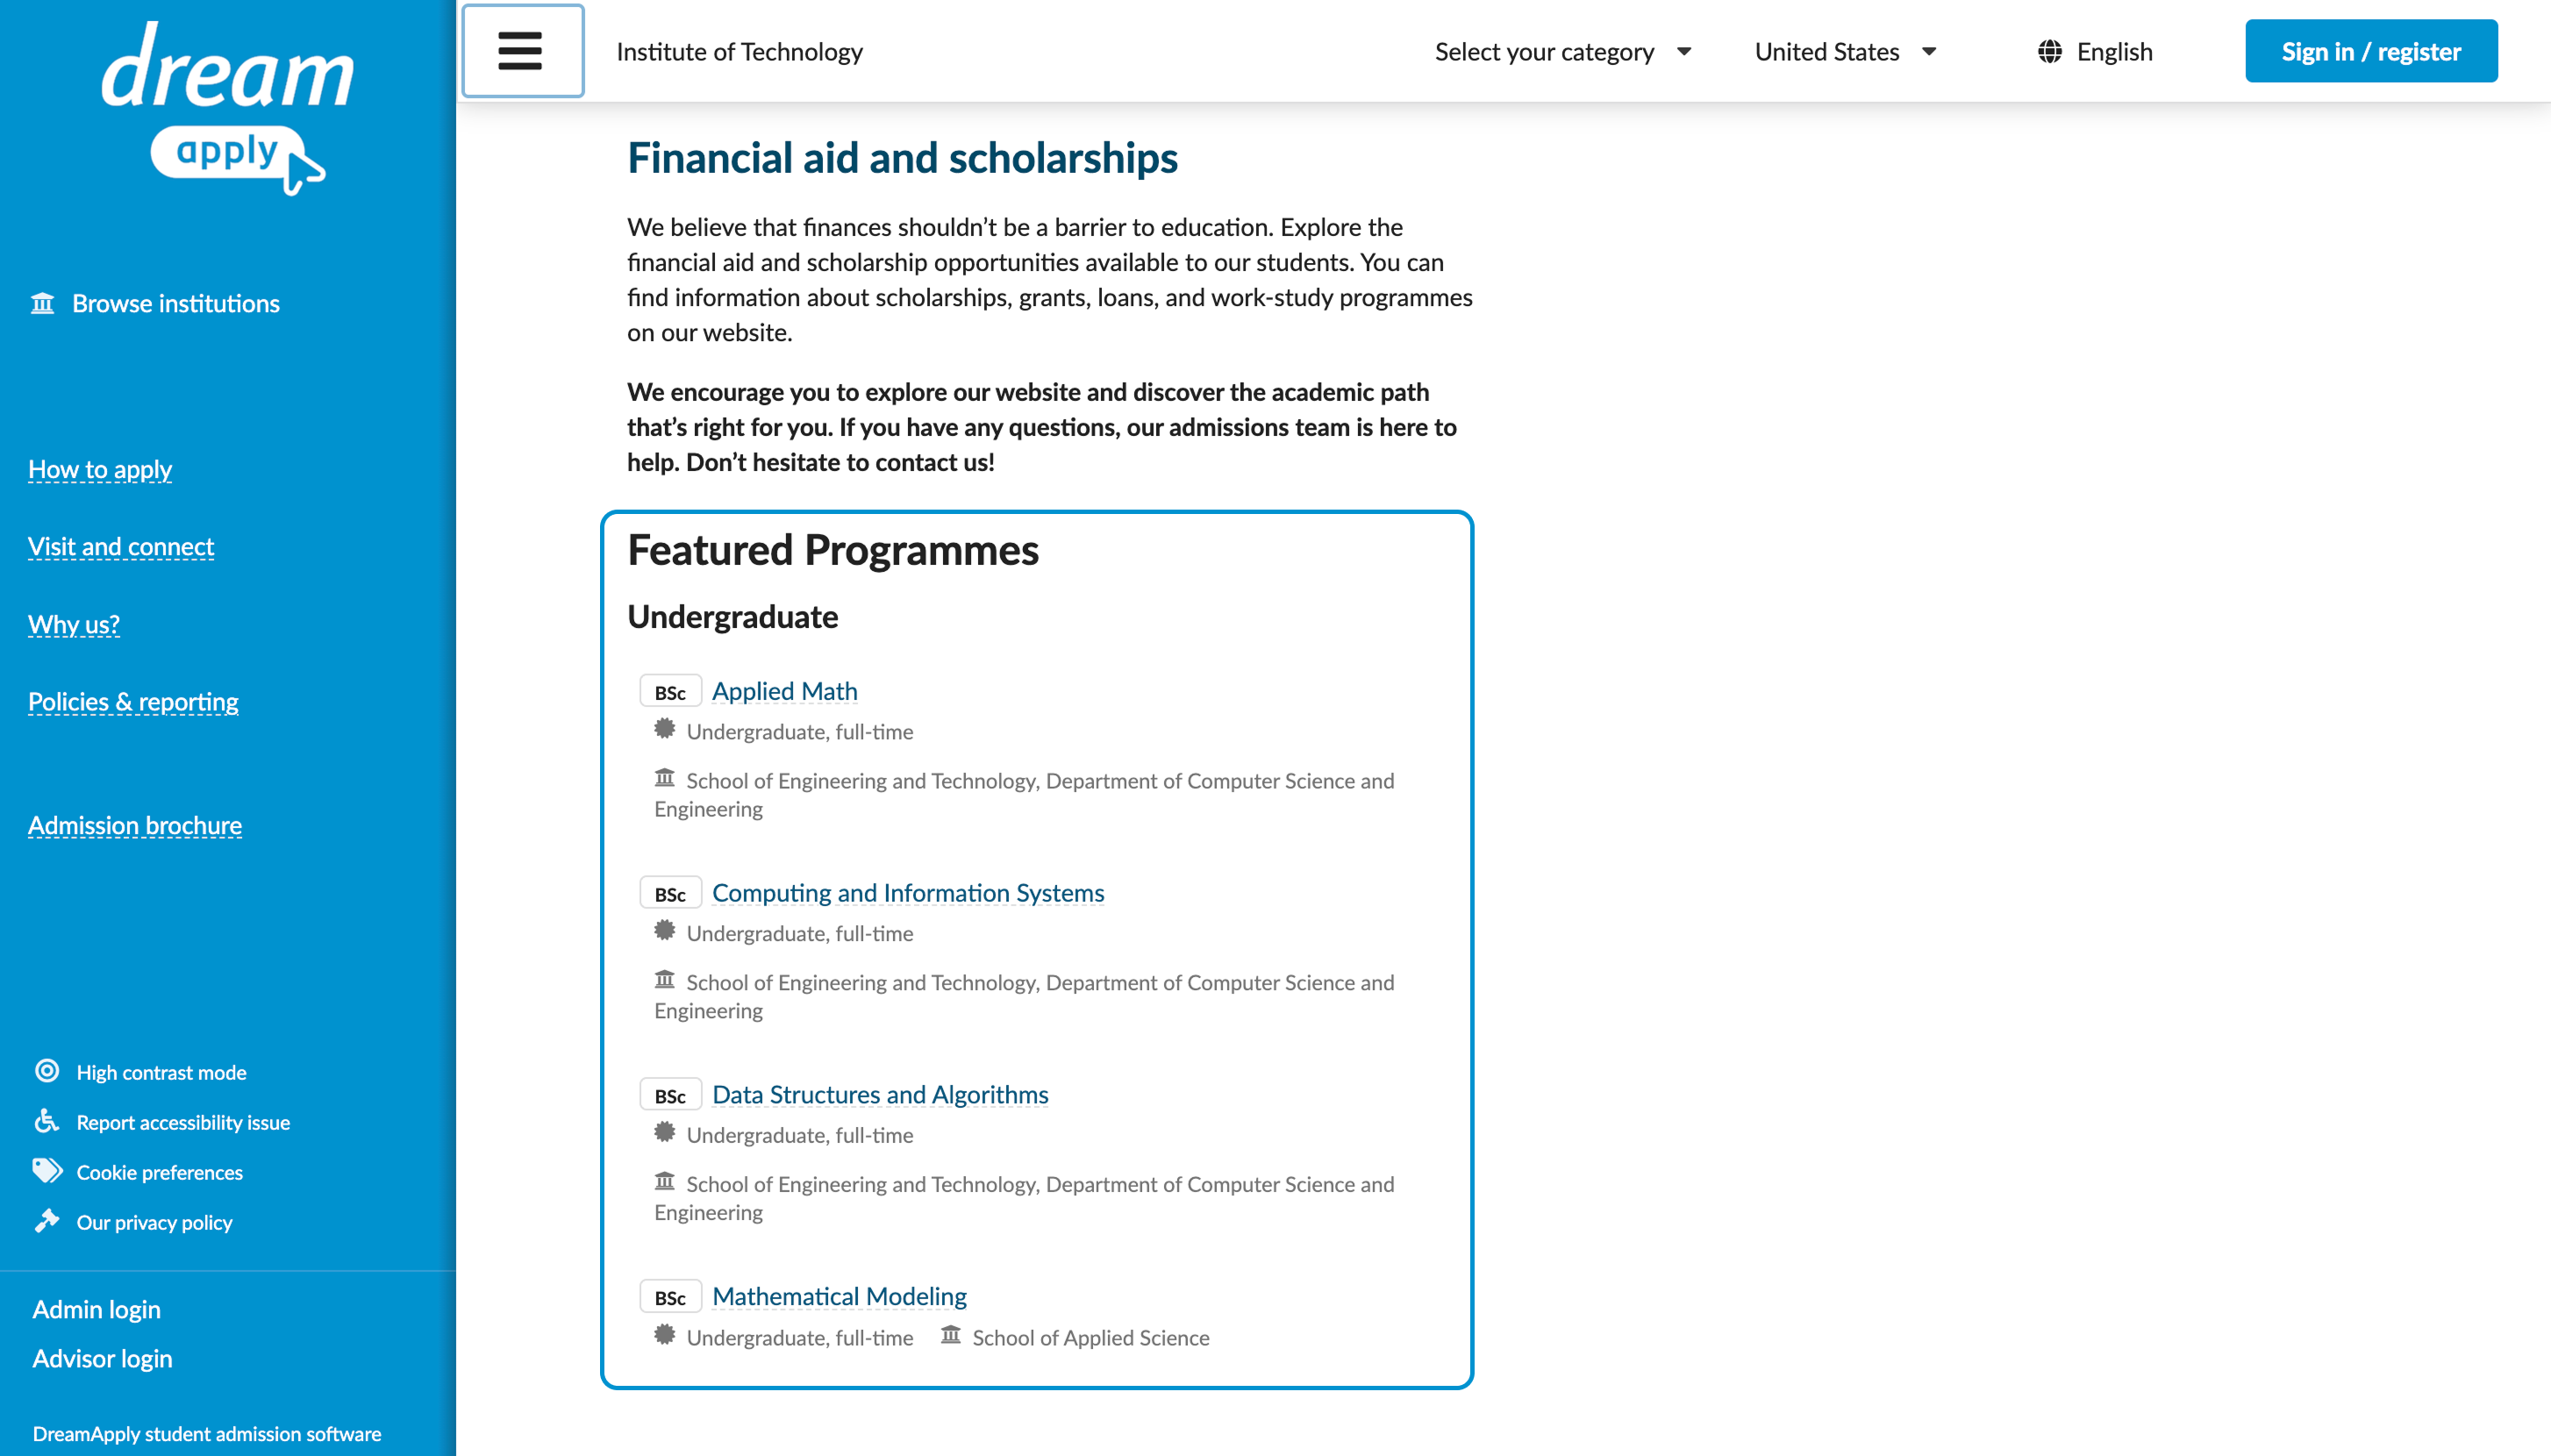
Promote programmes
To promote high-priority programmes and direct applicants to specific offerings, you can star programmes in DreamApply. When a programme is starred, it appears in the Featured Programmes list on the front page of the DreamApply portal.
Promoted programmes are displayed in alphabelical order in the list.
DreamApply displays the Featured Programmes list only if you select the Search or Lite programme discovery mode for the portal. For details, see Select the programme discovery mode.
To promote a programme:
- In the main menu, under Institutions/My institution, select Programmes.
- Click the star icon next to the programmes to promote.